My Creative Blog:
Home

  • Risky Business…

    Risky Business…

    So, I'm not a huge risk taker in most areas of my life. I'm not into extreme sports, I don't buy high risk stocks, don't go wild with my clothing or my haircuts. My husband is a bit more of a risk taker and his annual cliff-jumping trip at the Adirondacks proves that…

    (I pray a lot during this annual trip!) One area I am brave enough to take a risk in is my decorating. I was inspired by The Nester to share my thoughts on being willing to take a little risk in your home.

    She wrote,"We don’t risk because it’s easy or normal or natural, we risk because of hope." So often when I want to try something new or different, I find myself thinking,"I sure hope this works out!" and sometimes it does, and sometimes it doesn't. It really isn't about it always working out perfectly, but it is about being willing to try something that would make you happy if it works out! Now, don't go knocking down walls right away, but maybe a new color paint (you'd only be out about $30 and two hours if you don't like it) or rearranging the furniture in a room (you simply move it back if you're just not feelin' it), or maybe attempt a fun DIY project you've seen on a blog. Here are a few tips that The Nester shared:

    TIPS FOR TAKING RISKS IN YOUR HOME:

    • start small and pick a project that won’t take much time
    • don’t invest too much money
    • don’t force perfection
    • be open to changes and new ideas during the process
    • don't be afraid to put a nail hole in the wall (I added this one, but so many people are afraid of hanging art. I promise, it's no biggie! If it goes poorly I'll buy you some quick dry spackle!)
    Here are a few of my recent, minor risks… Outdated bottom half of my hutch…

    Meet awesome orange paint

    Fingers crossed as I was painting (sorry for the non-glamorous painting scene). I'll share the end results soon and let you know if this risk worked or not.

    This was a little bigger risk because Eric really liked this mirror. It was fairly expensive when I bought it for our old house, but I didn't have any place for it in the new home. I liked the size for this playroom, but I wanted it to have some color! I finally decided to take the plunge and paint it!

    Here's a risk I actually wouldn't recommend, wearing your favorite jeans and sneakers while painting. I'm not sure if I was just feeling really risky or lazy!
    ( Thankfully no shoes or jeans were harmed in the making of the awesome mirror re-do)

    I chose a really cool mustard yellow paint and was just a wee bit disappointed when the paint wasn't taking and it looked canary yellow at first!

    But, after 4 coats, I finally had a finished product that I really love. I can't wait to show it to you in the room.

    So, what risks have you taken? What risks are you going to finally try? Let us know, we'd love to see what Risky Business you're up to!

  • How to Paint Cabinets White

    How to Paint Cabinets White

    Ok, let's be real here. You know how when we write a tutorial and most of the time we say something like,"It couldn't be easier!" or, "Anyone can do it"? You won't hear that from me today. Painting kitchen cabinets really isn't hard, but it's time-consuming, monotonous and boring. It took us a full 10 days (working on weekday evenings- it could take less time if you have a big chunk of time to devote to it!) from start to finish. That being said, for the amount of money you put into it- really only the cost of paint- you won't find anything that makes as big of a difference. So, if you think you're ready to tackle this project- go for it! You won't regret the time spent in agony. Ha! Just kidding. But seriously, you will absolutely love the results.

    1. Take off all of the doors and pull out all drawers. Take off all hardware and store in a safe place! We had a bag labeled with what went where. And if you're anything like me, clean out your cabinets because that's just gross.

    2. Sand away! A lot of people will tell you that sanding is unnecessary. However, if you want a really seamless, smooth look, or if you have very glossy cabinets, I recommend a light sanding. I used my palm sander with 80 grit sandpaper (the higher the number, the finer the grit. For heavy duty sanding, use a lower grit sandpaper!)

    3. Wipe down the cabinets to remove all dust and choose your supplies. We used a 2-inch high density foam roller that is meant to be used on cabinets. We found that they didn't hold paint well, which meant we needed to do lots of coats, but the paint went on so smoothly! We also used a 2 1/2 inch angled paint brush (Purdy is the best!) to get the corners and hard to reach places.

    4. Prime and Paint. We started off priming everything, but quickly realized that to get good coverage we'd have to do way too many coats of paint. So we used Olympic ONE Paint + Primer in pure white that coordinates with our moulding in the kitchen and entryway. We didn't feel the need to use an oil-based paint as long as we used an enamel paint (enamel = paint that dries hard, is usually glossy, and is easily washable). Also, the higher the gloss of the paint, the harder it dries. I wanted a glossy look, so this works for me.

    Because our cabinets were previously stained (by us!) a dark walnut, it took several coats of paint. I would say that each door got 4 coats of paint. You could sand the cabinets in between each coat for an even smoother finish, but honestly, that would have taken us 4 extra years, so we decided to skip that step. They still look amazing.

    We did both the outside and inside of the cabinets, so that no dark wood peeks out when you open the doors. Here's a super great tip that I wish I had heard of before we started: use push pins in the back of the cabinets to lift them off the ground. No more sticking to the dropcloth!

    5. Seal with a water-based polyurethane (we used Sherwin Williams Wood Classics) for extra protection and even more washability (is that even a word?) Again, we went with water-based because oil-based polyurethane can yellow over time and that's not the look we're going for!

    Wood Classics® Waterborne Polyurethane Varnish

    6. Wait and wait and wait some more for the paint to cure. You don't want to nick up your beautiful white cabinets, so make sure you wait the appropriate amount of time written on your paint can before putting them back together.
    7. Put all the hardware back on the cabinets and drawers.

    8. Time to put the kitchen back together! This step couldn't have come sooner in my book, and I was literally, dancing for joy. We hung the upper cabinets first, and made sure to caulk along the side of the cabinet to make sure it look seamless.

    9. Step back and admire your beautiful cabinets! All that hard work was worth it, for sure!

    I hope I answered all of your questions about how to paint cabinets. If not, be sure to leave a comment with your question!
    I LOVE my new cabinets! What do you think? Worth the effort, or just way too much work?

    jess
  • Creating Custom Artwork

    Creating Custom Artwork

    I recognize that DIY art projects are not for everyone. My love for custom art was born out of necessity (read: lack of funds). Creating my own artwork works for me, and I've found out why:
    1. I don't worry about ruining something I already have. With the exception of a few things, everything I own was bought second-hand or for a low price. I don't fear repurposing things, because the originals cost me almost nothing!
    2. I am not afraid of change. Actually, I crave it.

    3. I am not a perfectionist. Little imperfections in my art/craft projects are endearing to me. They say"I was handmade, and therefore may be flawed, but a lot of thought and care went into making me". I'm not saying perfectionists can't create art (because I'm sure most real artists are perfectionists), it's just easier for me to say this picture is"good enough", than someone who wants everything to be perfect.
    Ok, that's that. Recently I bought a yard of fabric for a project (stay tuned for more on that!) that I fell in love with. I ended up having some extra fabric left over that I wanted to use somewhere- anywhere!- in my house. I was feeling inspired by a gift bag in which my husband had wrapped my birthday present. I decided to combine my fabulous fabric, the cute bird, old frames, and some patterned scrapbooking paper into one art project!

    First, I started with the bird stencil (the bag had a 3D bird on it, so I just ripped it off to use as a stencil). I laid it onto the back of the fabric in the opposite direction I wanted it to face, and then traced it. After that, I carefully cut along the line, flipped it over, and then mounted it to the scrapbook paper, using regular, old tape!

    My husband insisted that this poor bird needed legs, so I drew two legs freehand and cut them out of the fabric, as well. Then I put the whole thing together and…

    Voila!

    I used the same method with my second art piece, but used the fabric as the background and the scrapbooking paper as the bird. I didn't have a smaller stencil, so I again, I freehanded the bird.

    Then I had Kevin hang them on an empty wall in our living room. (I promise that these two pictures are level, it's just a wierd angle)

    I love the way the pictures look as I enter the living room, and that I can see them from my kitchen table. Makes that room feel one step closer to completion, or until I'm ready to redo the entire room again for the third time.: ) I may not keep these pictures forever, but for now, they are a cheap solution. Below are some images from a few other bloggers of artwork they created using what they had on hand, or a few inexpensive items they purchased. Click on link under the image for specific instructions on how they made these beautiful pieces of art.

    The Nester
    The Nester simply scoured her home for items that would look good grouped together in a frame. This could easily be done finding stuff on a hike out in the woods, or on a trip to the beach.

    Martha Stewart
    These prints were made using memorabilia from trips (like tickets, maps, postcards etc) that were blown up and then framed.

    Ashley Ann Photography This is not everyone's style, but these two canvas prints were made for a nursery, and were created using a canvas, scrapbook paper, mod podge (amazing stuff!), and a little paint. Adorable and easy!

    Isabella & Max
    This look is much more sophisticated and elegant. This piece of art hung above the couch was made using a canvas, paint and a few different paint brushes, and nail heads. My sister who regularly tells us that she is not creative, painted three canvases in varying shades of colors that now hang above her fireplace, that are similar to this one.

  • Kitchen Renovation {Putting it Back Together}

    Kitchen Renovation {Putting it Back Together}

    New here? You can check out our kitchen demolition here.

    Imagine with me for a minute…See this soffit?

    Imagine with me that that soffit is no longer there. There would be no interruption from the countertops to the ceiling, and as a result, the ceiling would seem so much higher. Nice, right? It would be so open and clean.

    I could hang the cabinets from the ceiling, which would increase the space between them and the countertop. You with me? Are you seeing what I'm seeing? Ok, good. Because here goes:

    First we removed all the upper cabinets (and by"we", I most definitely mean my hubs). We were amazed at what we found behind those cabinets- apparently the homeowners before us did their own DIY with painted tiles, framed by a sharpie marker! Plus, there's a vent that was hooked up to the microwave that we realized we need to take care of, as well.

    I did loads of research on removing soffits, since this is our first big demo/remodel, and everyone said the same thing: make a small hole in the drywall and check to see if there is any wiring or pipes behind the soffit. In a lot of cases, soffits have no real structural function, but are there so you could hang cabinets from them. If you notice, new construction homes almost never have soffits in the kitchen. Luckily for us, there is a recessed light in our soffit, so we were able to remove it and get a good view into the interior of the soffit.

    Since it's a pretty small hole, we stuck our small digital camera up in the soffit and took a few pictures in each direction to make sure all was clear. It worked like a charm and I was thrilled to see that there wasn't anything there but insulation!

    Also, a bunch of people said that soffits aren't always made of drywall, but could also be plywood, which is why we weren't afraid when we saw this:

    So, we kept on ripping things out (while trying hard to ignore the mouse droppings- Eew!) Then, when we were all done, my hubs said he thought that maybe this big beam in the front might be load-bearing beam that runs along the entire length of the back of the house. Ahhhhh!!! Noooooo!!!!

    This is when we called in the experts, ie: my father-in-law and my parent's genius handyman, Robert. While we waited for them to come, I spent a few days trying to decide how I felt about have no upper cabinets.

    I decided that I really liked it, but after stewing over it, I also came to the conclusion that it wasn't really practical for us since I removed the upper cabinets on the other side of the kitchen. My new plan for this side of the kitchen is a combination of cabinets and open shelving that I'll share with you as we get closer to it. (Believe me, LOTS has to happen before that).My hubs also spackled the wall, and painted it the new gray/tan in anticipation of the next step.

    Well, you guessed it, we did find out that the beam was load-bearing like my hubs suspected and needed to stay in place. So, (and this is so sad, and yes, I know my hubs is a saint!) my hubs went to work drywalling the soffit back in, with the help of Mo's husband, Eric. Poor guy. But, we were able to remove the recessed lighting kit and install a pendant light kit. Woohoo! I can't wait to pick that baby out!

    Even though we had a really big I'll be trying to make it up to my hubs for a long time minor setback, we did make some progress elsewhere. When we moved the oven to the other side of the kitchen and slid the fridge in it's place, we were left with this small cabinet space to the left. It was not functional at all, and it really made that side look disjointed.

    We removed the counter from the wall, and then moved the whole thing over to the other side of the refridgerator, giving us more counter space to the right.

    There is, of course, a crack between the two countertops, that, we're told can easiliy be masked with some paint that matches the counter brushed on the crack and then wiped away. You'll still notice it, but it won't scream out at you, and we don't plan on keeping this countertop forever (hopefully not past this year!). Here's where we are right now:

    I have to admit that my 3 year old took this picture, but what can I say? She has a good eye!
    Ok, take a deep breath. That's all for now.: )

  • Journey to a Vertical Garden {The Home Depot #Digin}

    Journey to a Vertical Garden {The Home Depot #Digin}

    This is a sponsored post written by us on behalf of The Home Depot- We're so thrilled to have the chance to partner with one of our CWTS sponsors! I'll keep it real right from the start… as much as I try, I don't have a super green thumb. I did last week when I was painting my piano green, but that's not quite the same I suppose. When our friends at The Home Depot asked if we'd like to try our hand at creating a vertical garden, I jumped at the opportunity! Last month, I talked about how I joined the The Home Depot Garden Club and saw so many cool projects and ideas. If you missed the post, you can check it out here- they also have a $5.00 coupon-Score! So, after combing through the site, and looking on The Garden Club board on Pinterest I decided to make a vertical garden. I think they look super cool and I've never tried using my carpentry skills with my lack of gardening skills. Here's what I'm hoping to make… Of course with my own fun twist!

    Woman setting up a beautiful vertical garden

    (Hover over the image below… it's like magic!)

    Vertical gardens are all the rage this season! I've seen so many cool ones made out of everything from shoe organizers to soda bottles. Here are some of the awesome ones I've seen on Pinterest… Apartment Therapy

    Ediblewall_rect540

    Pallet Vertical Garden

    Pallet Wall Garden

    Boundless

    Finished planter!

    I'm headed to The Home Depot this week to get all of my materials, but I have to decide a few things beforehand.
    1- What flowers do you think I should add to my vertical garden?
    2- What color scheme should I go for?
    3- How should I add my own fun spin to the style?

    I'd love to hear your input! Next week I'll share my building plans and materials- you can build one right along with me. It'll be like a DIY long distance relationship!

    Monica

    It’s home improvement time, and The Home Depot has everything you need to #DigIn for Spring. No matter what projects you want to tackle, they have great values on all you need. They’re ready to help you with renovation ideas and expert advice too! Get over $300 in email exclusive savings each year, sneak peeks on new products, monthly lawn & garden ideas for your region and access to The Home Depot’s gardening experts.

  • Get Organized!

    Get Organized!

    I'm so happy to introduce you to Robin Harisis. She was roomates with my older sister at Messiah College, so I sort of know her by association. She is the founder of Room Service Personal Organizing, LLC and a member of the National Association of Professional Organizers and Faithful Organizers. Robin believes that everyone can learn to be organized and she finds satisfaction in teaching organizational skills to others. In the summer of 2010, Robin became a Certified Family Manager Coach. Family Manager Coaches help families learn to work together to achieve organizing goals and live more fulfilling lives by modeling proven business practices. Robin lives in Ontario, New York with her husband, her son and daughter, and two crazy dogs. She enjoys the outdoors, reading, gardening, and of course, organizing. You better believe that I had ulterior motives when I asked her to be a guest blogger- I need these organizing tips more than anyone!
    Top Three Organizing Tips

    Define a Starting Point
    The question that is most often asked of me is “Where do I start an organizing project?” Sometimes the project is so overwhelming or habitual it is hard to define a true starting point. I equate it to asking a child to pick up his toys in a room scattered with his belongings. Most of the time, the child will stand there, staring at the mess, arms at his side, still as can be. The child cannot do what he is asked because it is too overwhelming. He cannot identify a starting point.

    We can be just like the child when we are staring at an organizing project. Here are some ways to help define a starting point:

    • Deal with the project that would make the most meaningful change in the shortest amount of time
      • Set up a bill payment system as the first step to a paper management system
      • Organize the foyer or entryway as a start to organizing your home
    • Cup your hands around your eyes and pan the room. This limits your view of the project, allowing you to see it in smaller portions and giving the project some definition. Choose a section and begin your project.
    • Determine a main or final goal for your organizing project. Break the project into steps working backward from your goal. This will not only help you find a starting point, but will give you a plan to follow until your project is complete.

    Buy Containers Once You Know What to Contain

    Many times, we buy containers BEFORE we start an organizing project. But why would we buy containers if we don’t know what has to go in them? How do we know it’s the right size or will function correctly? Buy containers after you have sorted your items, you know what has to go in them, and where the container will be stored. This will give you a much better chance of choosing the appropriate container for the job.

    Sort and Label According to You


    Organizing is a very personal activity. Organizing systems work best when they are created specifically for the person or people using them. Here are two ways to customize your organizing system:

    • Sort like with like
      • If a pile of seemly random objects were dumped on a table in front of a group of people, each person might sort them differently. One person may sort by color, another by shape, and yet another by use. Each way is correct, showing the difference in how people view “like with like.” Sort your items according to what like with like means to you
    • Label according to you
      • Labeling can be straight-forward. For example, a box of Christmas decorations are labeled “Christmas.” However, there are times creative labels can be helpful in classifying items. “Financial Documents” may not mean anything to you, rendering the papers hard to find. But when the same papers are labeled in a file called “Papers that make me money,” they are located in a snap. Label items according to what makes sense to you and forgo the traditional titles, if need be.
    If you want to get a hold of Robin, or have her help you organize your life, here's her info: Robin Harisis Room Service Personal Organizing, LLC Office Phone: 315.524.7151 Cell: 585.727.2005 E-mail: robinharisis@organizingcompanion.com Website: www.organizingcompanion.com
    Thank you so much, Robin! Now, ladies, get to work!: )


  • Bucks County Designer House & Gardens

    Bucks County Designer House & Gardens

    We were absolutely thrilled when we were contacted by the Village Improvement Association of Doylestown- the team that plans the amazing Bucks County Designer House & Gardens. My mom and I have been huge fans for a long time, and {before kids} made a point to visit the home every year. I mean, what's better than being told that you're allowed to snoop in someone else's house?! The BCDHG is a fundraiser to support the Doylestown Hospital that combines gorgeous, old homes in Bucks County and fabulous designers from the area. Designers submit ideas for the rooms they'd like to design in a specially chosen Bucks County home, and the best ones are chosen by the committee. This year's home is unbelieveably gorgeous, with loads of character and charm.

    Isn't it beautiful? And this doesn't even showcase the grounds! Love it. Anyway, the lovely ladies on the committee asked Monica and me to run two seminars, and of course, we agreed! We're so excited to be doing one seminar on Upcycling (duh! What else?) and the other on Accessorizing like a Pro. The seminars are included in the price of admission, so there's no excuse for all you design enthusiasts!We'd LOVE to flood the Designer House with as many RHBC fans as possible, so be sure to check out the calendar of events for more information and details. Plus, there's nothing more fun than meetingour readers in real life, so you'd be making us really happy.; )
    Will YOU be coming out to support us?

    jess

    >

  • Photobooks

    Photobooks

    This guest blogger just so happens to be my personal favorite… I'm allowed to be a little biased because I think he has a crush on me, and I think he's kinda cute too. Make sure you leave a comment and like the post on Facebook because I need lots of positive feedback for this blogger!

    This is Eric, husband of the oh-so-talented

    Monica. I got word that Jess and

    Monica would be having"guest bloggers" and I jokingly asked why I can't be a guest blogger. Well, she called my bluff and told me to put together a post.
    Now the conundrum, I am not housewife and as my WHOLE family can vouch for, I am NOT crafty. So what can I post on?
    Ah-ha… probably the most important thing (not living) in my whole house would be our photo books! And this is one quasi-crafty thing that I am totally in charge of. So here goes.
    If all of you crazy blog-stalkers with kids are anything like my wife, you take thousands (if not millions) of pictures of your kids, your house, your family and really just your whole life. These pictures sit on your camera or computer, occasionally they get dropped into a blog or facebook, but for all intents and purposes, they sit – lost and wasted.
    In 2007, I got tired of seeing

    Monica take so many awesome pictures without ever doing anything with them. That's when we discovered Blurb. Ever heard of it? The beauty of Blurb is that they offer"book-store quality printing and binding" at incredibly reasonable prices.
    Everyone I've talked to seems to get overwhelmed with idea of doing a photo book. But trust me, it's not hard. The longest, hardest, most time-consuming part is just sorting through the tens of thousands of pictures stored on your camera and computer and organizing a years worth of pictures. But… and this is a big but… it's so rewarding going through a full year, seeing all that you've done, re-living all the fun events, seeing how your family has grown over the course of a year.
    Ok, so what I do, (and this is just preference), is I go month-by-month, sorting pictures mainly by events. I drop all pictures into folders on my desktop with a name of the even. For example, I'll have folders such as"snow fun,""baking with mommy,""bath-time,""field trip to the farm,""fun with playdough,""Kenzie's soccer," etc., and then I always have a folder for each kid with all the best pictures that we have for them. Then when it's time to actually put the book together, it really just flies!
    The great thing about doing a photo book like this versus just printing photos and putting them in an album is that you get to tell stories, explain the events, and actually add personality to your photos. It's a great place to remember some of the crazy things your kids have said or done. With the craziness of moving over this summer, I got way behind on putting these books together. I sat down to do a book for the 2nd half of 2009 a couple weeks ago and I was amazed at how much I forgot! I saw all these pictures and couldn't quite place where we were, or what we were doing, or some of the fun stories behind the pictures. My goal is to do 2 books per year as soon as that year is finished. There are so many types of books that you can do –

    Monica scanned all of Kenzie's art work from a full year of school and made an art book, she made several small books documenting things such as birthday parties or Christmas. We've even given a book to my parents after a week on vacation with them (yes, these books make great presents for the grandparents!)
    Enough talk. Here is what Blurb actually looks like (screen shot from our ancient desktop). You log in and all the Blurb books you've created are listed.

    Once the book is created, I import all the pictures that I have from a given folder on my desktop (i.e. beach with the Motts). There are dozens of picture/text layouts to choose from and all you have to do is drag-and-drop your pictures wherever you want them and then add the text. The view below is during the editing process.

    You can also preview your book to see how it will actually look once published.

    I mentioned in the beginning that it's"book-store quality printing and binding" at incredibly reasonable prices. For a 200 page book, with a hard-bound cover, it's only $48.95. A 200 page book can easily hold 600-800 pictures. I know Blurb is not the only company doing this – it just happens to be the one we use. I searched for photo-book reviews and this website seems pretty accurate. It rated Blurb as 4 starts (out of 4) for quality, but lower scores for features and ease of use. Other sites have higher scores for ease of use/features but slightly lower scores for quality. I'm not looking for anything too crazy, so I'll sacrifice a little on the crazy layouts and customizability for quality.
    That's it. Now if only I could find a way to do something similar to the hours upon hours of home-videos we have, I'd be all set! Any suggestions?
    -Eric (Monica & Jess)
    Linked Up to: The Stories of A2Z

  • Chevron

    Chevron

    
    House of Smiths DIY Chevron Rug

    If you read home blogs at all, you will not be able to avoid the very popular trend of using chevron in decorating. What is chevron, you ask? Chevron is a zig-zag line pattern, sort of like a simplified herringbone. It is absolutely popping up everywhere- from curtains to rugs, to desktops and backspashes! It's a very bold choice and makes a big statement in design.

    Jens kitchen nook modern dining room

    modern dining room design by other metros media and blogs Made By Girl

    Bethesda Renovation Kitchen 2 traditional kitchen

    traditional kitchen design by dc metro interior designer Paula Grace Designs, Inc.
    Notice the chevron pattern in the backsplash?

    Blount Design eclectic dining room

    eclectic dining room design by atlanta architect Blount Architectual and Interior Design

    Even my absolute favorite home decor store, Pottery Barn, has jumped on the chevron bandwagon!

    DIY Chevron Art

    I, for one (and I may be the ONLY one), am not a fan of chevron. {Gulp} I confess that you will not find many geometric, modern patterns in my home. Mostly you'll see paisley or stripes- a little bit more classic in my humble opinion. But if you are digging the chevron, there is no shortage of DIY projects out there in blogland!

    What's your opinion?
    Are you a Chevron Lover or Hater like me?

  • Green Thumb or All Thumbs?

    Green Thumb or All Thumbs?

    Today, those of us in PA enjoyed an early taste of summer! So, in honor of the beautiful weather, we're going to talk gardening! Ok, don't tune out on me yet… there are some cool things about gardening even if you're not"into it"…

    Longwood Gardens My mother in law has an amazing green thumb, so anything I've learned is from her. I don't have extensive knowledge, but I've found plants that work for me and that I can manage… all that translates to "plants that are very hard to kill and can deal with being ignored!" Before I share some of my favorites and some recommendations, we need a little primer on plants. Annuals are plants that don't come back year after year… you have to buy them annually. Perennials come back year after year (AKA plants that Eric thinks are nice and practical!) Yes, that seems a little basic, but come on, most people confuse the two all the time!
    Now for my favorites… Grasses- these perennials are wonderful as space fillers. They're inexpensive, indestructible, and grow like crazy. My favorite type is Maidenhair Grass (Miscanthus). They come in a variety of sizes and are nice and green all spring and summer.

    In the fall they get these pretty wispy thingies (again, not very exact with my names!)

    They also come in a variety of colors. I've bought this deep red before and it looks great in the fall.

    Vinca- These annuals are my #1 favorite flower and my go-to flower for most beds and here's why… These flowers don't need a thing from me! They love full-sun, and thrive during a drought and heat wave. That's essential for me because, I spend full-sun, heatwave days by the pool, not watering my flowers!

    They totally spread and fill out an area so nicely. Vinca = instant garden!

    They're awesome for hanging baskets and again need little to no water. I rarely, if ever, water ones in the ground, but might water my baskets weekly or every ten days.

    Now most people use Impatiens (which btw I thought were impatience until about 2 minutes ago!) but, the reason I prefer vinca is that impatiens need TLC. They need a lot of water throughout a drought and can stand the heat, but only with care. The two look so similar, that the easy peasy flower gets my vote for sure! These are impatiens- can you tell much of a difference?

    Sunflowers- who doesn't love a sunflower? We go a little crazy with our sunflowers and try out tons of different varieties. My kiddos' favorite is the Mammoth Sunflower because it's enormous! Look at this random, adorable couple and their sunflower. They really do get this big!

    Sunflowers don't have a super long bloom time, but if you stager your planting- plant a handful in the same area each week- you'll have a longer bloom season. This was the border of our backyard at the old house prior to full bloom.

    Did you know they come in oodles of colors and so many of them have awesome fall tones? They bloom towards the end of the summer and get me all excited for my favorite season! This little fella was from our 2009 gardening.

    Final note on sunflowers- they're super easy to plant and a great one to have the kids help you with! Can't mess it up!
    New Favorite: Wildflowers- Thanks to Laura from Piggy Toes Photography in Norton, MA I'm hooked on wildflowers. I'm more of a clean lines, symetrical decorator and gardener, but was totally inspired by some of her pictures to enter the world of wildflowers. Who wouldn't want this amazing backdrop for photos right in their own yard! It was this picture of her son Atticus that made me contact her and find out more about these awesome flowers. Seriously Adorable!

    These are super cute and will be making an appearance in our new yard. The company Laura suggested was American Meadows and I've already ordered three bags to plant in the next few weeks.

    Although I'm partial to the cutie in the diaper, they're also great for more formal shots like this one from an engagement session. If you're in the MA area, make sure you check out Laura's website for great photography at excellent prices.

    I can't wait to share pics of my kiddos in our wildflowers this summer!
    Cosmos- While cosmos kind of fall under the"wildflowers" category, I've been using them for years. They're a bit more"wild" looking and unrully than I'd prefer, but they're awesome for cutting and really are pretty.

    They come in so many colors and they also come in a variety of heights (learned the hard way when I had mammoth plants that all needed to be staked and still looked a bit sad.)

    They're just so pretty and make beautiful arrangements that last for a while.

    If you think you recognize them from somewhere… it could be from the AC Expressway in New Jersey. They're planted for miles between the highway and they're so pretty all summer on our drives to the beach!

    So, I don't have any really amazing gardening tips for you, other than to find something that works for you and that you actually enjoy. If I planted things that needed daily attention it wouldn't be fun for me and they'd all end up dead!
    So in honor of spring weather, and of the fact my husband sent me to Lowes tonight to buy this (my first ever John Deer purchase- I was a fish out of water) enjoy the warm weather and start thinking about what you might create outside this year.

  • Playhouse Loft Bed {Little Girl's Room}

    Playhouse Loft Bed {Little Girl's Room}

    My daughter turned four a few weeks ago, and as her gift, we promised that Daddy would build her a new playhouse loft bed, and then Mommy would decorate it. We love our girl and were more than thrilled with how excited she was about her new bed. Every day of the week we built it, she would ask us if it was done and could she sleep in the loft? My hubs could not be more proud of the work he did (he did a seriously amazing job!), and I'm so excited to share it with you today! Playhouse Loft Bed

    This is not a tutorial, because we basically followed Ana White's plans word for word, although we did make some minor adjustments to the bars at the top of the bed. Check out her plans here for more information.

    We cleared the bed out of Campbell's room in preparation for the building process. Because of the size of this bed, my hubs had to build it in pieces and assemble it right in the room because it wouldn't fit through the door.

    Poor girl slept in a sleeping bag the entire week! (Find out more about the family tree mural here).

    I can honestly say that I have the best in-laws ever. They willingly help out whenver they can and we so appreciate them! My hubs called in my father-in-law for reinforcements, and we were thankful for his expertise!

    The biggest expense is obviously all the wood you need to build it. Since my hubs has such a limited amount of free time (he works 6 days a week!), we decided to have Home Depot make all the cuts for us to save some time. It worked perfectly- in about an hour, the really helpful Home Depot guy had all the cuts done, whereas we would have had to set up a work area, do all the measurements, make the cuts and clean-up which would have taken loads more time. They didn't charge us for any cuts since we bought so much wood (about $250 worth), so it was totally worth it.

    Ana's plans are pretty extensive, but my hubs and father-in-law quickly threw them around on the floor in a haphazard manner. I'm not really sure how much they actually followed the directions, now that I think of it…

    But after a few nights of building, a few more of painting and decorating, we had this:

    Pretty adorable, right? One of my favorite parts of the house is the faux"siding" (which is pretty hard to see in pictures). We saved a bit of money on a couple sheets of plywood since we already had them on hand, so I splurged on two sheets of faux wood panelling ($24 each) that we hung horizontally on the outside walls. The guys used wood glue and clamps to hold it in place until it was secure. It adds such a cute touch and I'm so happy we decided to go for it.

    The inside walls are painted an in-your-face pink that made it ridiculously hard to get a good picture. Note to self: 1) Turn off Christmas lights before taking pictures next time, 2) Straighten picture frames after the kids attack that area, 3) Don't try and take pictures with the kids around because they immediately mess things up. Ah well…life with kids!
    I wanted a place for Campbell to play dress-up and also a spot to corral all her jewelry and makeup, so I created a little vanity area with a simple mirror from Walmart ($4) that I spray-painted and a shelf that was already in her room that I spray-painted white. The two little patterened boxes are from Walmart, as well, and were only $.99 cents each. Score!

    I found the super-cute flower hook at Joann's on clearance for $2.00 and used two Ikea hooks I had on hand to create a place to hang her princess dresses. The flower hook was already blue, but I spraypainted the other guys a similar blue for a cohesive look.

    My wonderful mom bought fabric from Joann's and whipped up some curtains for the windows and door. I still need to make some tiebacks, but I love the polka dots and sweet flower prints!

    Our original plan was to build stairs, but we didn't have enough space, so Kevin built a ladder, which she actually loves. She did fall all the way down once, on her very first try, but she's gotten used to them, by now!

    All in all, this playhouse loft bed made one little girl very happy, and that's just what we wanted. Woohoo!

    Did you have an awesome play area when you were little? What was it like?

    jess
  • Swag Bag {Ladies Home Journal}

    Swag Bag {Ladies Home Journal}

    This is NOT a sponsored post. I just want to share with you some of my favorite things!

    You may remember that a few weeks ago (or was it months? I can't remember anymore!) we mentioned that we attended the new Ladies Home Journal launch in NYC. We got the chance to chat with the amazing women who are in charge of making the magazine fabulous, and had a great time brainstorming about how we can begin contributing to the magazine. But, I just have to say that one of the best parts of the day was walking away with a swag bag filled with amazing stuff! I've taken my time and used most of the products, and wanted to give you a rundown of my absolute favorites out of all the goodies. Trust me, once you try them (or try them on, in some cases), you'll be hooked too!
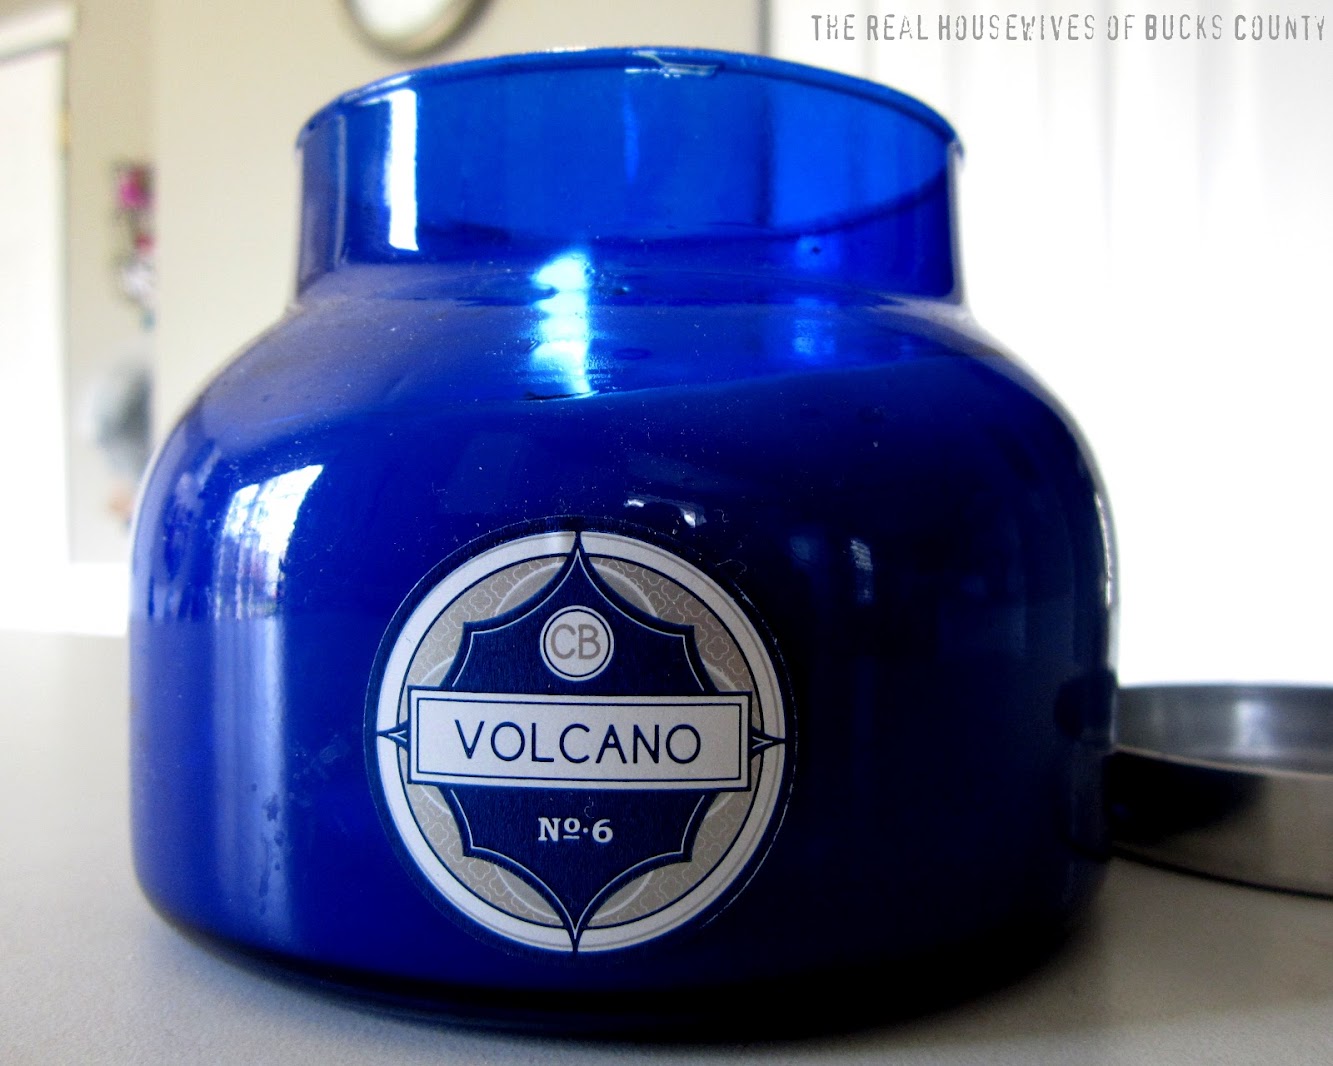
    Capri Blue by Aspen Bay Candles

    This candle is like heaven on earth for me. I absolutely adore it. There are several different scents in the Capri Blue line, all of which sound amazing, but ours is the Volcano scent. It's a mix of tropical fruits and sugared citrus. It's a super fresh and clean smell that I'm loving with the spring weather we've been having.
    Gorjana Leather Wrap Bracelet
    

    This bracelet is sweet and tough all at the same time. And I don't think you can tell in the picture, but it's a really pretty, metallic pale pink color. Of course it comes in loads of other colors, as well. Gorgeous.
    LeighElena Wide Jigsaw Bracelet

    This bracelet is a show-stopper. No joke- every time I wear it someone asks me about it, or tells me how awesome it is. It is so cool. Obviously, I'm at a loss for words because it's just that awesome. It's a bit pricey at about $110, but man, it's money well spent (or would be, had I bought it.)
    Maybelline Illegal Length Mascara

    Monica and I both agree that this mascara is the best. I have seriously short eyelashes, and because of this mascara, my eyelashes have never been so long (Maybelline claims this mascara actually extends the length of your eyelashes up to 4 mm, and I think I agree). And just because I do crazy things I'd never thought I'd EVER do as a result of this blog, here's the living proof:

    Ack. I'm checking off"go out in public au natural" off of my bucket list, since I just exposed my naked eyes to all of blogland. Yikes. (No, that is not really an item on my bucket list, people) But, with mascara = so much better, right?!

    And, if for some crazy reason these pictures of me didn't didn't convince you (what's wrong with you?!), go out and buy it yourself. You'll see.
    Boots No.7 Protect & Perfect Beauty Serum & Organix Morroccan Argan Oil Shampoo

    Ok, I'll be honest. I haven't tried either of these, but after seeing those closeup pictures of myself it's clear that I need to start using the Protect & Perfect serum (find it at Target) that claims my skin will look younger after use. Monica did give it a try, and said it made her skin feel so smooth. And with all the abuse my hair takes (why can't I settle on just one hair color?!), I'm sure it wouldn't complain if I used the Moroccan oil shampoo every once in a while.
    Have you ever received a Swag Bag? If so, did you fall in love with anything you got? If not, what items would be a MUST in your Swag Bag?

    jess

    >Only following on the blog? You're missing out. Use the buttons below to join in on all the fun!

  • The Evolving House: Dining Room Table Conundrum

    The Evolving House: Dining Room Table Conundrum

    I've mentioned it before… we love to have people over. One thing we loved about our new house from the start, was the large dining room. However, we soon realized that to buy a BIG table you need a BIG budget. We shopped and shopped and eventually settled on a table with all the style we wanted, a decent price tag, but we compromised on the size.

    About a week after getting the table I had buyer's regret and tried to return it. No, soup… 7 day return policy. We kept it another month or so and finally I decided to call it a loss and sell it on Craig's list. Today we sold it to an awesome family and I'm left with this… back to square one…

    Here are a few tables that I love, sans the pricetags…

    Pottery Barn

    Pottery Barn

    Restoration Hardware

    Restoration Hardware Although, these tables still aren't long enough for me. I think I need to give the Duggars a call, because I want something like this… (okay, maybe not that long!)

    The next idea was to purchase a conference table. Yup, you read it correctly. A super modern approach with an awesome price.

    While is option is still"on the table" (sorry,couldn't resist!) I'm not totally sold. So, here's my most recent plan… I'm making a Dining Room Table!
    Thanks to Ana White's blog post I really think I might be able to pull this off! This is a table that another reader made herself and it was her first woodworking project as well. She blogged about it here, and the best part is that the total cost was under $200! Amazing!

    These plans look simple enough right???

    Thankfully, I have some talented people in my life that I will definitely be talking to for advice and instruction along the way. I am so excited to get started and plan on starting it this weekend! I also think I might go with these chairs from Better Homes and Gardens because they're only $39.99 each and I want about 14 of them!

    So, am I crazy? Have you ever attempted something totally outside of your comfort zone?

  • Kitchen Envy

    Kitchen Envy

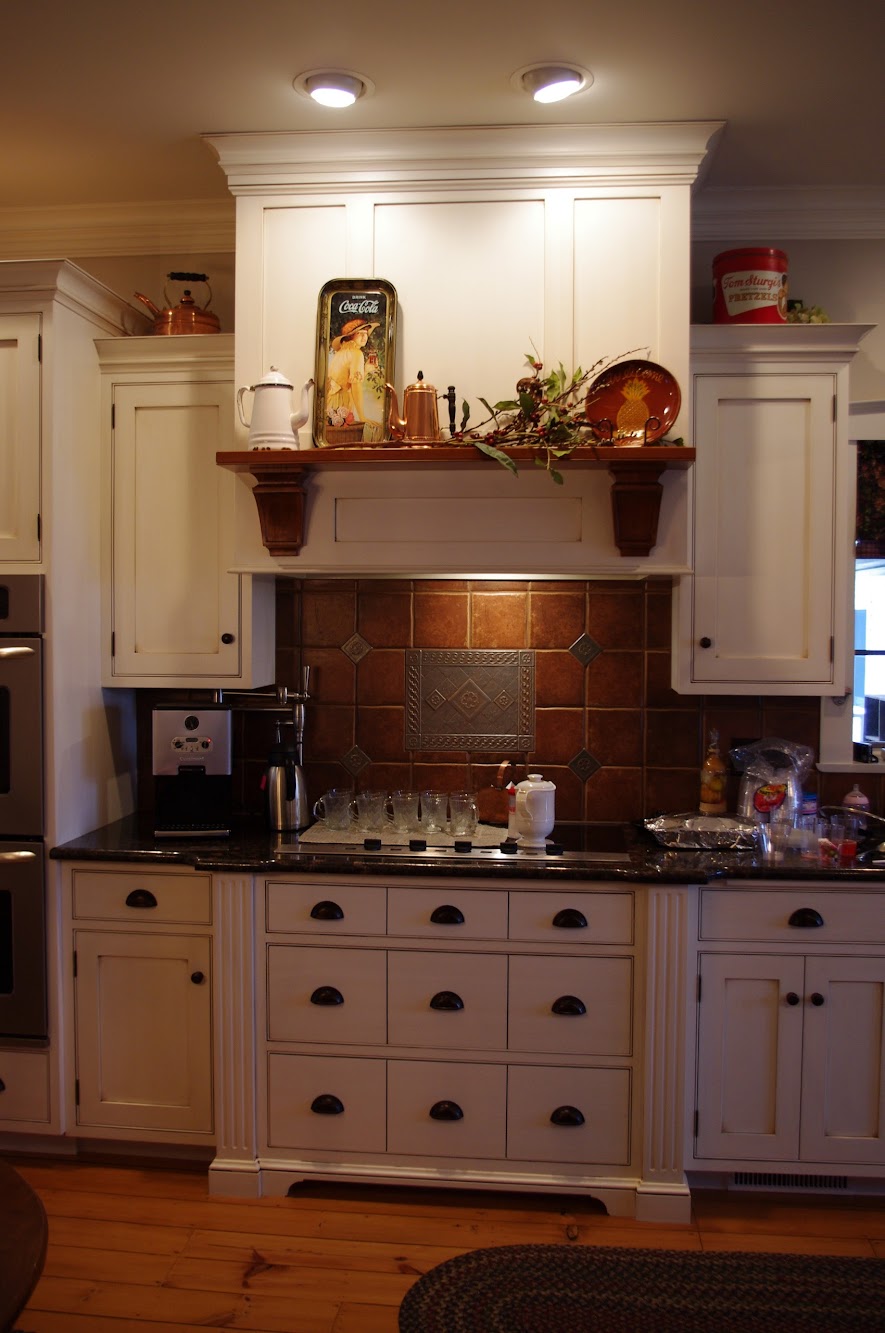
    This past Sunday I attended a baby shower for my older sister at her mother-in-law's house in Lititz, PA. If you don't know where Lititz is, it's right in beautiful Lancaster County. Honestly, if I had to move out of Bucks County, you could find me in Lancaster. I really love the charm and old-world feel. Anyway, Mrs. W. (the mom-in-law) has lived in the same house her entire life, with the exception of only six years. It's a lovely old farmhouse that has undergone several renovations. One such renovation occurred in the seventies, and transformed the house into one with wood paneling and shag carpet. In the nineties, however, the W's started making some changes to update the look, while trying to preserve the good bones of the farmhouse. This wasn't easy, since the previous renovation had gotten rid of the great deep-silled windows and some of the other important historical pieces. That brings us to three years ago, when Mrs. W. decided she had enough with the small, enclosed rooms and decided she would knock down some walls to form what is now her gorgeous kitchen. This is where my kitchen envy comes in. Just take a look for yourselves:

    The house has high ceilings- I don't know, maybe 10 feet high- which just adds to the spaciousness of the kitchen. I couldn't get enough of the stove area, the hood above it and the mantle/shelf mounted to the hood. And the backsplash is beautiful as well.

    There are soooo many cabinets, so there's plenty of room to store all your dinnerware, your neighbor's dinnerware, their friend's china and a small child. Also, check out the double wall ovens! {Swoon} I have no need for double ovens since I try my hardest to never have to bake anything, but it's still swoon-worthy as far as nice kitchens go.

    On the opposite wall of the work area and across the kitchen, there are these gorgeous built-ins. They honesetly look like big, beautiful pieces of furniture.

    Here's a glimpse of the entire length of the kitchen, including the 10 foot-ish island in the middle.

    You may wonder why I would take a picture of the sink, but did you happen to notice that it's copper??!! So cool!

    The entry has a copper-paneling ceiling which was fabulous, as well. I had to stop taking pictures because I feared that the W family might think I was crazy and I didn't want to be the cause of any issues between my sister and their in-laws. That would not be good.

    On a side note, check out these adorable cupcakes that my sister's sister-in-law made for the baby shower. She made chocolate cupcakes with peanut butter icing and vanilla cupcakes with white chocolate icing, both of which were delicious. The cupcake toppers came from here and were the perfect addition since they were going with a safari-theme.

    Too cute!

    Have you ever wanted to take pictures of other people's houses, or am I the only strange one?

  • In the Market for a Basket

    In the Market for a Basket

    I want a basket. A big basket. There is a big gaping hole in my living room, in my opinion, that needs to be filled with a beautiful, handwoven basket that can hold a few throws or blankets. But did you know that there are a million basket options? It's overwhelming.

    Here's the space that needs to be dressed up:

    I did some browsing, and found some really lovely possibilities.

    A Beach Cottage traditional porch

    traditional porch design by sydney media and blogsA Beach Cottage
    I was definitely thinking that I wanted a basket, but this wooden box really got me thinking. But what I'm really hooked on is that beachy, coastal, cottagey look this picture has. Take all those things, throw in a bedroom and a kitchen, and you have my dream house.

    The Old Painted Cottage traditional kitchen

    traditional kitchen design by los angeles showroomThe Old Painted Cottage I hadn't considered a round basket, but the shape might really work in the space I have.

    Pottery Barn This is definitely my favorite basket from Pottery Barn, but I can not justify paying $189 for one. Or maybe I could save my pennies, and buy one in five years.

    Another simple, basket that would easily fit the bill.

    These restoration hardware baskets are super cool, and I love the dark color, which is the direction I'd like to head in my living room.
    How can I ever choose?


  • Spring Things { How to Clean Windows like a Pro}

    Spring Things { How to Clean Windows like a Pro}

    With the return of Spring comes the dreaded Spring Cleaning (at least, it's dreaded for me)! One of the most satisfying cleaning habits for me is window cleaning! There is nothing like a window that's smeared with dog drool, kids fingerprints, snow residue and all sorts of other things being cleaned to reveal the sunshine and the beautiful outdoors. Today, I'm sharing three tips from a professional window cleaner that will make cleaning windows so much easier and a whole lot more satisfying!

    Most of you don't know this, but my hubs owns a company called Jackson Home Services that specializes in residential and commercial window cleaning. He cleaned windows professionally for 4 years before taking another job (darn that the economy tanked!), and now runs his window cleaning business on the weekends. He has generously offered to share his"insider" secrets with all of you, just so you don't dread the process any more.: )
    Tip #1: Invest in a Squeegee.

    Honestly, this one makes all the difference in a window with streaks and without streaks. You can find these at Lowes or Home Depot for cheap, and you won't regret it. My hubs does a tricky"S" move with his squeegee, but for your purposes, after getting the window wet, running the squeegee across the window from one side to the next will work.

    Tip #2: Don't use Windex!

    It's silly to spend all that money on window cleaning solutions when the pros just use an ounce of Joy Dish Soap (or any other dish soap, but my hubs prefers Joy) in a bucket half-full of warm water. Dip a towel/cloth in the water and wipe it all over the window and then use the squeegee to clean it off.
    Tip #3: Use a Lint-free Cloth & Steel Wool to finish it off!

    After using the squeegee, take the lint-free or microfiber cloth, and wipe around the corners and base of the windows to dry any remaining water. If you encounter a stubborn spot on the glass, like a paint splatter, screen residue etc, rub it with a piece of steel wool to remove. Make sure your window is wet when you do this! Don't worry, this won't damage or scratch your glass, but will easily remove the spot. Then, start over with the squeegee.
    Tip #4: Hire a Professional to make your life REALLY easy! (Bonus tip from ME!: )) If you're in the Bucks, Montgomery or Chester county areas, consider hiring Jackson Home Services to completely eliminate the windown cleaning hassle. My hubs is super resposible, courteous, honest and polite. (And I'm not biased at all!) He does a great job, can give you references, and is offering 20% off for all RHBC readers. To schedule a cleaning, email Kevin Jackson at jacksonhomeservices@gmail.com with RHBC20 in the title.

    Happy Spring Cleaning!

    jess
  • A Favorite

    A Favorite

    This picture is an absolute favorite of mine, for several reasons. First, it perfectly captures the way Kevin feels about C1 and the love he has for her. It also clearly shows how much C1 enjoys being with him. Secondly, it brings back such great memories of the boating trip we went on last year on our family vacation; the weather was perfect, the scenery was idyllic (we saw dolphins!), the kids were well-behaved, and we were getting to spend quality time with my family. It's just priceless to me!

    I want to do something with this picture, but I haven't felt any particular inspiration as to what, yet. Here are two possibilities: Modern Bird Studios- Sleek and Modern Modern Bird Studios creates personalized, modern art from your photographs. Each work is a one-of-a-kind, original studio piece created with a combination of digital, hand, and painting processes on an Oak composite, or, for the extreme modern enthusiasts, on acrylic mounted to Oak.

    These prints are really fun, and would be a great addition to our basement game room/play area.
    Canvas People- Traditional and Timeless

    I do love the simplicity and beauty of a wrap-around canvas.
    That's as far as I've gotten. Maybe you can help me. Suggestions, please!
    Do you have a favorite photo? What is it and why do you love it so much? *When you comment, if you are able, add a link to a location where we can see your favorite picture (facebook, blog etc.) We'd love to see them!

  • Alphabet Print

    Alphabet Print

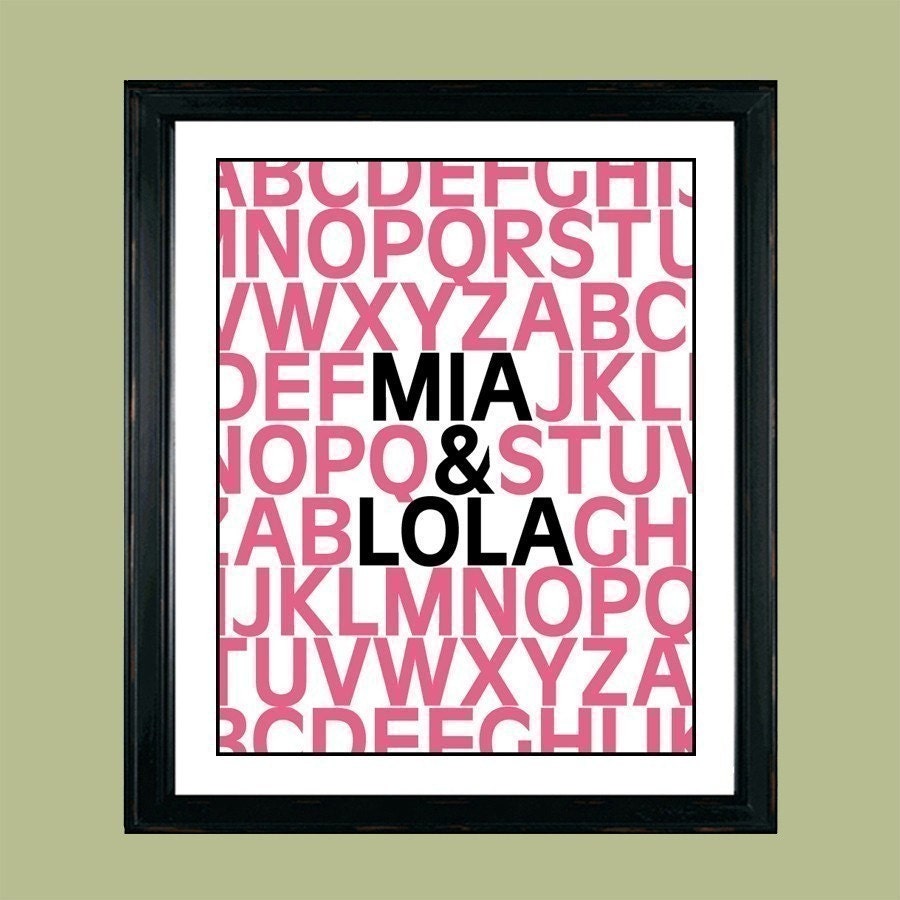
    After C2 was born, I was looking for something to put on a shelf in his bedroom. I came across this awesome print below on Etsy.

    Childrens Art Alphabet Poster Make It Personal Custom Wall Art

    The Paper Tray

    I loved the idea of having one of these made for C2 that I could frame and put in his room, but it cost $23.00. That's not outrageous by any means, but I knew that if I put a little effort into it, I could make something similar. I had the frame and mat already (both from Ikea), and I used regular old printer paper, and here's what I came up with:

    I painted the mat a green color that I already owned to match the colors of his room.

    He likes it!

    Obviously, it's not exactly like the original print, because I changed the font to one I thought was a little more fun, and the spacing of the letters is a bit different, but it works! Wouldn't this be a great gift for a couple getting married? Or someone having a baby? Or even to put your kids names on to hang in a playroom? Unlimited possibilities!

    Sometimes all it takes is a little time, confidence in your abilities, and a tiny bit of creativity to save a few bucks and create something you love!

    Have a great Monday!

  • White Cabinet Reveal! {Kitchen Update}

    White Cabinet Reveal! {Kitchen Update}

    Before you get your hopes up, this is not a total room reveal. (I can already hear the booing and hissing.) We still have loads of final details to finish up, but I wanted to give you a peek at our freshly-painted cabinets, which I am head over heels in love with. You may remember that our goal was to lighten and brighten our kitchen by painting the cabinets white, adding a neutral color to the walls, and taking down some unused cabinets. We then added open shelving, a fabulous stenciled wall and a beautiful new pendant light with custom shade. Today I'm just sharing the take-your-breath away cabinet transformation, so I'll give you the nitty-gritty details of our painting process in a post next week. You may remember that this is how we started out:

    And here's where we are today:

    I know, right? It doesn't even look like the same room! It's such a calming space, and is ten times brighter. Plus, because the cabinets are white, the space seems so much more open and a lot bigger.

    My hubs finished off the half-wall and added a ledge made of a 1x12 piece of pine. He painted it, sanded the edges until they were rounded, and then trimmed it out with moulding.

    Well, fickle, little me decided I didn't like the black brackets used to hold up my shelves, so we took them all down and are in the process of painting them white. My poor husband.

    Painting the cabinets has made me want to change the countertops out ASAP, but we're being patient and are waiting until it fits in the budget. We took a trip to Ikea and were told that, based on our measurements, unfinished butcher block counters would cost us around $300. Not bad at all, but that's just not going to happen any time soon. Don't tell my hubs, but I'm hoping that Fall will be ther right time.; )

    Yes, in case you were wondering, I have decided to take back my brown Ikea curtains and replace them with navy panels. Thanks for all of your input!

    The next phase will be installing two shelves to the right of the refrigerator. The bottom shelf will house the microwave, so that we can have a bit more counter-space. You can get a good idea by my rough (and I mean really rough) drawing below:

    Before that happens, though we have to take care of this little problem behind the fridge:

    We moved our oven across the room to the other side of the kitchen, but the problem is that we originally had a gas oven, and so there is a pretty substantial gas valve sticking out from the wall. As a result, the fridge doesn't sit flush against the wall. We're pretty sure we can cap off the valve, but we're going to consult an expert because the last thing we want is our house to set on fire after all the hard work we've put into it!

    I really am starting to love our kitchen and can't wait to start adding some color back into it with accessories and linens (dish towels etc.)!

    Now, when you walk in the front door, the house feels clean, fresh and bright! Hallelujah!
    What are your feelings about white kitchens? Beautiful or boring?

    jess
  • Urban Outfitters

    Urban Outfitters

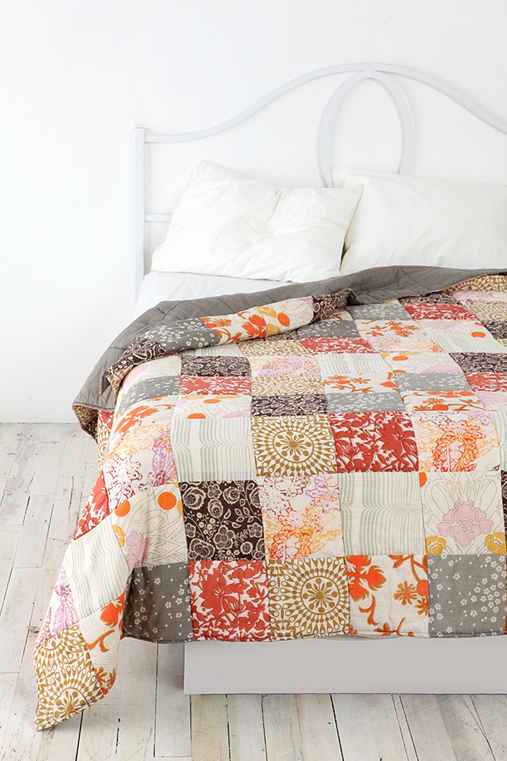
    One of my favorite bloggers, Emily at Jones Design Company, just tipped me off to the fantastic home decor at Urban Outfitters. I had no idea they sold furniture, wall decor and more! Not everything is my style, but here are a few of my top picks:

    Jones Patchwork Quilt

    Olivia Headboard Wall Decal

    Olivia Headboard Wall Decal
    This is such a cheap solution for a headboard- only $55! Perfect for a first apartment or college dorm, or even a teenager's bedroom! Oh, who am I kidding? I would LOVE to have one of these.: )

    Lulu Chair — Tweed

    Lulu Chair in Tweed I adore tweed. Enough said.

    Slope Chair — Batik Ink

    Slope Chair-Batik Ink
    Definitely an interesting accent chair…sure to be a conversation starter!

    Tree Shower Curtain
    Why not bring nature indoors? It'll be just like you're showering out in the wild. Wait, that doesn't sound so appealing to me. Forget I said that.

    Owl Tree ToothBrush Holder
    The perfect accompaniment to the tree shower curtain. My daughter would be thrilled to have this in her bathroom.

    Tonal Wave Ruffle Shower Curtain

    Around the World Letters
    I saved my favorite for last. Travel and maps posted on architectural wall letters? Yes, please. I'll take all 26 letters of the alphabet.

    Go browse and be inspired!

  1. Sewing Projects - how to recycle socks
  2. Transfer Paints Creative Day
  3. Block Printing Workshop
  4. Textile Art Recycling
  5. Tori Praver: Marie Claire US | Mode: Fashion
  6. Eva Mendes: Marie Claire US | Mode: Fashion
  7. Kristen Stewart | Mode: Fashion
  8. Nimue Smit: L’Officiel Netherlands | Mode: Fashion
  9. ZARA: TRF | Mode: Fashion