My Creative Blog [Search results for Home

  • Journey to a Vertical Garden Part 2 {Home Depot #Dig In}

    Journey to a Vertical Garden Part 2 {Home Depot #Dig In}

    This is a sponsored post brought to you by The Home Depot! We love them for sponsoring CWTS and challenging us with this awesome project! --------------------------------------------------------------------------------------------------- A few weeks ago, I introduced you to the vertical garden project I'm working on (if you missed it, check it out here). I'm super excited about the challenge of pulling off such a cool look with a pretty simple DIY! Today it's all about the shopping!! Woot woot!

    I wear a lot of hats… mom, teacher, blogger, wife, and now TV host (still sounds crazy!!), but that means that sometimes project shopping trips look like this… 4 kiddos ready to shop till we drop at Home Depot!

    Yes, we get a lot of strange looks from people- I wish I took an after pic of the full cart with all the kids on it! Crazy town I tell ya! Thankfully, my kids are pretty awesome and were excited to be" on a special project for The Home Depot!"

    Here's a funny story… while we were shopping, we were approached about five times by helpful Home Depot employees offering to help us. One thing I love about Home Depot is that they'll make cuts for you! This plywood never would have fit in my car and cutting it down to the exact size I need, will save me a step at home! Sweet!

    Okay, so back to the story… after the nice fella helped us cut the wood the kids decided that The Home Depot must know we're here on a special project for them, because they're being so helpful and nice! Ha! I promised them they had no idea who we are and they're always just nice. The kids totally didn't buy it, and they walked with a little extra spring in their step thinking they were kinda famous at HD! (Even Kira's very dirty Teddy was proud to be Home Depot famous!)

    If you're planning on building your own vertical garden along with me, here are the exact directions and material list I'm following. The Home Depot's huge library of how-to-videos and project planning tools are super helpful for actually getting you to do the projects you've been thinking of! It's updated often, so there's never a lack of awesome ideas!

    Now let's talk flowers… I'll be 100% honest- I picked my flowers almost completely based on looks! I wanted a mainly orange-yellow combo, but then the purple-ish blue petunias added such a fun pop in the mix! But, I didn't want all my work to result in a bunch of dead-as-a-doornail flowers in a few weeks! So, of course I visited The Home Depot Garden Club website and checked to make sure they were all okay for my zone. So I knew I was good there, but here on the East Coast there's always a"you can't plant until after Mother's Day" rumor… Rather than risk it, I checked out the Home Depot Garden Forums and posted a question… Boom! Got my answer- the green light to #Digin and start planting!

    Aren't the colors awesome? I still have some work to do on my garden, so stay tuned next week and I'll walk you through my build. So far it's been pretty simple- can't wait until it's finished and hung!

    Monica

    It’s home improvement time, and The Home Depot has everything you need to #DigIn for Spring. No matter what projects you want to tackle, they have great values on all you need. They’re ready to help you with renovation ideas and expert advice, too. Get over $300 in email exclusive savings each year, sneak peeks on new products, monthly lawn & garden ideas for your region and access to The Home Depot’s gardening experts. Click here to join the world’s largest garden community today! Or go to http://gardenclub.homedepot.com/ to see some of the many benefits of membership. This is a sponsored post written by me on behalf of The Home Depot. ------------------------------------------------------------------------------------------------------------
    Did you hear our BIG NEWS?

    Click here for our announcement post with all the fun details!!
    We can't wait for July 7th!!

  • Spring is FINALLY here! {The Home Depot Gardening Club}

    Spring is FINALLY here! {The Home Depot Gardening Club}

    Holy Cannoli Batman… could Spring have taken any longer to come this year? Finally, we're getting some warmth up in here!

    I really love spring (once it gets here)… it means flowers, outdoor projects, and flip-flops (do you remember those days in college, when you'd have a warm-ish spring day, so you'd put on flip-flops, a tank, shorts, and act like it was 100 degrees out? Yup, that was me!)
    This Spring, I have a ton of projects I want to work on in our yard. Last summer we finished up our huge patio project, but we didn't have much time or budget left to tackle the landscaping and some other fun projects to make the space complete!

    Landscaping around the patio and building a shed are our first two orders of business! I've successfully taken over 3/4s of our huge garage with all my DIY projects and materials, so the hubs has decided it's time for a shed for our mower, yard tools, etc.

    User-added image

    Since these are two pretty hefty sized projects, I need all the help and advice I can get. I visited the Garden Club on The Home Depot's website to get some expert advice, inspiration, and I got an awesome coupon just for signing up as part of the community. SCORE!

    Check out who else is part of the Garden Club Community…

    I mean if Martha is doing it… I'm so there!

    I was browsing the site looking for landscaping ideas, but got completely distracted by all the awesome project inspiration ideas! Have you heard of Envirotile? If I had an old, cement slab patio, I would do this in an instant… I found an awesome step-by-step guide that seemed so simple!

    One of the other things I loved once I became a member of the Garden Club community, was their Monthly to-do lists! Once I click on where I live on the map, it provides me with a list of what I should be doing when, based on my zone!

    Especially with how cool this spring has been, it's easy to forget about some of the outdoor things I need to be taking care of now! I printed out my list for March and it's right on the fridge for the hubs and me to tackle! (Actually, he's outside working in the yard, as I'm writing this!)

    We love the Home Depot (and not just because they're one of our CWTS sponsors!!), and I'm so glad I checked out their site and became a member of the Garden Club

    To join yourself & get your coupon (c'mon, all the cool kids are doing it)- click HERE

    Happy Spring and Happy Gardening!!

    ---------------------------------------------------------------------------------------------

    It's home improvement time, and The Home Depot has everything you need for spring. No matter what projects you want to tackle, The Home Depot has you covered and can help you #DigIn to spring.

    Spring is the perfect time for all your outdoor home renovations. Shop The Home Depot for terrific values on new patio furniture, landscape supplies such as fertilizer and potting soil and outdoor grills. Keep your lawn and garden looking great, too, with the huge selection of lawn mowers, edgers and trimmers, and garden tools.

    Visit The Home Depot Garden Club for product ideas from kick-starting your Spring with seed starter kits to building a window birdfeeder.

    This is a sponsored post written by me on behalf of The Home Depot.

    Monica
  • Journey to a Vertical Garden Part 4 {Home Depot #DigIn}

    Journey to a Vertical Garden Part 4 {Home Depot #DigIn}

    This is a sponsored post brought to you by The Home Depot! We love them for sponsoring CWTS and challenging us with this awesome project! --------------------------------------------------------------------------------------------------- A few weeks ago, I introduced you to my vertical garden project — you can check out part 1 and 2 and 3 here, here, and here!

    Today it's time to show you this bad boy!!

    Home Depot made it super simple with their written instructions and you can get all my tips and what I learned along the way in this post.

    I love how unique this planter is! I've planted in containers for years now, but this is definitely the coolest one yet!

    We have a lot of land, so space isn't an issue, but I could totally see this being perfect for a small yard or even in an urban home or apartment!

    My final plan is to hang it on a tree near the front of our property that hurricane Sandy took down this past fall- right now, it's just a 10 foot tree stump, but I want to let the roots get stronger (about 3 weeks) before I mount it vertically.

    My favorite part of the project is the irrigation system- it was such an easy thing to add, but now it's going to make sure that my don't die on me!

    I loved taking on this challenge from The Home Depot and I hope it inspires you to think creatively this spring as your planting and making your yard look awesome!

    I was all about planting, so last weekend Eric and I planted our very first garden too!! Can't wait to see if it all grows!! Fingers Crossed!!

    Monica

    It’s home improvement time, and The Home Depot has everything you need to #DigIn for Spring. No matter what projects you want to tackle, they have great values on all you need. They’re ready to help you with renovation ideas and expert advice, too. Get over $300 in email exclusive savings each year, sneak peeks on new products, monthly lawn & garden ideas for your region and access to The Home Depot’s gardening experts. Click here to join the world’s largest garden community today! Or go to http://gardenclub.homedepot.com/ to see some of the many benefits of membership. This is a sponsored post written by me on behalf of The Home Depot.

  • Journey to a Vertical Garden Part 3 {Home Depot #DigIn}

    Journey to a Vertical Garden Part 3 {Home Depot #DigIn}

    This is a sponsored post brought to you by The Home Depot! We love them for sponsoring CWTS and challenging us with this awesome project! --------------------------------------------------------------------------------------------------- A few weeks ago, I introduced you to my vertical garden project — you can check out part 1 and 2 here and here.
    Today I finally get to show you HOW I made my vertical garden, and guess what? It was pretty simple!!

    Since Home Depot has done a great job with providing both a video and written instructions for this project, I'm not going to give you every step, but I will share some tips I learned along the way!

    You definitely don't need a nail gun for this project, but it would have made it so much faster!! Ours was on set for Knock It Off, so I did it the old fashioned way!

    I went with a variety of colors for this project- I usually avoid marigolds, but I liked the orange and yellow contrasted with the blue/purple of the petunias!

    When I was working on the holes for my irrigation tubes (which is just simple PVC that lets water get down deep in the planter) I found that if I drilled my hole in one direction and then once the tip of the bit was through, flipped it over and came in from the other side, it helped me not have any of my wood splinter or crack.

    This is one step I added on my own… I spray painted my lattice- Shocker right?!? I know eventually it will be covered by plants, but in the meantime, I wanted it to look fun and colorful!

    Once my box and frame were built, I gave them a coat of indoor/outdoor paint as well!

    I love this color from Rust-Oleum (Blue Lagoon)- it's the same one we used on Jess' huge family artwork frame.

    Once that was dry it was time to start planting!

    I had an Oh Snap moment, when a realized that I forgot to buy the thin black meshing so all the dirt wouldn't fall out of my planter… thank goodness for the Home Depot Garden Community forums- I found out I could use some old material and it would work just fine! Phew!

    Even before I added my flowers, I knew I was in love! The fun colors totally sold me!!

    Here's just a taste of the awesomeness that the flowers brought to this project!

    Tomorrow's my final day of this journey and I'll show you the finished product and where I hung it!

    Monica

    It’s home improvement time, and The Home Depot has everything you need to #DigIn for Spring. No matter what projects you want to tackle, they have great values on all you need. They’re ready to help you with renovation ideas and expert advice, too. Get over $300 in email exclusive savings each year, sneak peeks on new products, monthly lawn & garden ideas for your region and access to The Home Depot’s gardening experts. Click here to join the world’s largest garden community today! Or go to http://gardenclub.homedepot.com/ to see some of the many benefits of membership. This is a sponsored post written by me on behalf of The Home Depot.

  • Journey to a Vertical Garden {The Home Depot #Digin}

    Journey to a Vertical Garden {The Home Depot #Digin}

    This is a sponsored post written by us on behalf of The Home Depot- We're so thrilled to have the chance to partner with one of our CWTS sponsors! I'll keep it real right from the start… as much as I try, I don't have a super green thumb. I did last week when I was painting my piano green, but that's not quite the same I suppose. When our friends at The Home Depot asked if we'd like to try our hand at creating a vertical garden, I jumped at the opportunity! Last month, I talked about how I joined the The Home Depot Garden Club and saw so many cool projects and ideas. If you missed the post, you can check it out here- they also have a $5.00 coupon-Score! So, after combing through the site, and looking on The Garden Club board on Pinterest I decided to make a vertical garden. I think they look super cool and I've never tried using my carpentry skills with my lack of gardening skills. Here's what I'm hoping to make… Of course with my own fun twist!

    Woman setting up a beautiful vertical garden

    (Hover over the image below… it's like magic!)

    Vertical gardens are all the rage this season! I've seen so many cool ones made out of everything from shoe organizers to soda bottles. Here are some of the awesome ones I've seen on Pinterest… Apartment Therapy

    Ediblewall_rect540

    Pallet Vertical Garden

    Pallet Wall Garden

    Boundless

    Finished planter!

    I'm headed to The Home Depot this week to get all of my materials, but I have to decide a few things beforehand.
    1- What flowers do you think I should add to my vertical garden?
    2- What color scheme should I go for?
    3- How should I add my own fun spin to the style?

    I'd love to hear your input! Next week I'll share my building plans and materials- you can build one right along with me. It'll be like a DIY long distance relationship!

    Monica

    It’s home improvement time, and The Home Depot has everything you need to #DigIn for Spring. No matter what projects you want to tackle, they have great values on all you need. They’re ready to help you with renovation ideas and expert advice too! Get over $300 in email exclusive savings each year, sneak peeks on new products, monthly lawn & garden ideas for your region and access to The Home Depot’s gardening experts.

  • The Painted Home {Guest Post}

    The Painted Home {Guest Post}

    We are so excited to introduce you to Denise from The Painted Home. She has enormous talent and is super creative (as you'll see below), plus she has a dining room table that is absolutely to die for. If you haven't been over to her awesome blog yet, you'll definitely want to after you see this! So without further ado, here she is!
    Hi, I'm Denise, and I'm the owner and founder of The Painted Home I'm a professional trash picker and flea market frequenter. Do I really need to tell you that I was thrilled when Jess and Monica asked me if I wanted to guest post on their blog? Over the moon I was. Today I'll help you rid your husband of that nasty look on his face when he sees you come home with a car full of junk.
    I'll share with you ideas for what you can do with those flea market finds you'll fall in love with, bring it home, and don't know what to do with. {plus that weird look from your husband}
    Recently I came across a red wagon. {Who doesn't love a little red wagon?}The wheels were badly damaged and the axle was bent. After a little surgery, I removed the wheels and was left with this…

    A totally original, catch all shelf for all your other junk. The shelves are made from scraps of a shipping pallet. {because, you always should have a shipping palette — or 2 — sitting around for occasions just like these.}

    Next up, the vintage suitcase. They're everywhere.

    surprise!

    it's a bar!

    I even used a flea market find inside the flea market find. The soda bottle box fits nicely inside the suitcase to coral all the bottles and keep everything nice and neat. {'cause even junk needs to look neat}

    It works very well inside my flea market dining room.

    So get out there and pick some trash, walk the flea market, don't be afraid to go to an auction. If you love it — bring it home! You'll figure out what to do with it. Please stop by for a visit sometime at The Painted Home

    and for extra tips, treats and giveaways LIKE me on Facebook https://www.facebook.com/thepaintedhome

    Thanks for having me Monica & Jess!
    It was our pleasure, Denise.: ) Head on over and give Denise some Real Housewives love. And have a great day while you're at it.

  • Coming Home...

    Coming Home...

    When we purchased our home I already knew this was my husbands old pediatricians home, my husband grew up down the road from here, talk about going full circle. His pediatricians name was Margaret Reynolds and she had moved up here from New York City just like my husband and I did but she moved up here to retire. Since there wasn't a children's doctor around these parts some of the townsfolk got together and talked her into going back into practice. I know this story from some of the townspeople who knew her. Margaret lived in this great big old house alone for over forty years and after passing her ashes were buried in our backyard on our raised tier where she still resides.

    Margaret loved this house from the stories people told me and never wanted to leave, probably why she wanted her ashes to rest here. One day about a year after mister man and I moved in we were in another town antiquing. We stopped at a small run down shop out of curiosity, the place was a mess with box after box of old papers and whatnot piled on top of each other with barely room to walk. Turns out this shop owner was the one who cleaned out Margaret's home after she passed and sold most everything and that's when mister man started hitting me in the arm. There, laying on top of a bunch of old papers in a box was of all things'. Margaret's Medical license issued in 1948. The gentleman, after hearing our story, was kind enough to just give us the license. We brought it home where it hangs in my husbands' office today.
    Isn't it amazing that after being removed from our home and it was gone for over fifteen years, it's now back? And in the same room that was Margaret's office. And the one person who had a connection to Margaret is the one who found a piece of her life? I hope she somehow knows that her license made it home.

  • Creating with the Stars Round 3 Voting

    Creating with the Stars Round 3 Voting

    Ok, guys, we are in the last two weeks of competition with Creating with the Stars and to say that the contestants exceeded our expectations would be the understatement of the century. We have six competitors still fighting for a spot in the final 3 and no one is going down without a major fight. If you missed the first two weeks of projects, check them out below: Round 1 Projects & Winners Round 2 Projects & Winners

    This week some amazing prizes are at stake. The semi-finals winner will take home…
    $500 Gift Card to Home Depot (Contestant & Blog Star!!) $100 worth of Martha Stewart supplies from Plaid Crafts $125 Gift Card to Lucent Lampworks Project featured by HomeTalk

    -------------------------------------------------------------------------------------------------------------------

    Now, we know you're all dying to see what amazing projects our contestants have come up with this week with paint! Let's go!
    1. Painted Couch Featuring a Handmade Horse Stamp

    We have all seen these couches before in someone's grandma's house. This vintage couch is not the good kind of vintage, but I may have some of you convinced that this traditional style can be made more modern. I painted the couch white, carved out a horse, and stamped the living daylights out of it with black paint from Home Depot. Enjoy!

    2. Painted Map Coffee Table Painting! I'm not going to lie, I was pretty stoked about this week… and amazed I made it here. Painting is one of the easiest and cheapest ways to transform almost anything. And my table was in need of some transforming- big time. I picked it up at a flea market type place for $40… peeling, chipping, splinters, dirt and all.

    I sanded and scraped (forever) until no more paint chips fell off when you walked by. Then I gave the entire table a coat of latex paint from Home Depot (mixed with a little plaster to make chalk paint), leaving some of the peeling paint texture on the legs. After that was dry, I taped off a large"X" pattern on the smaller shelf and added a painted stripe detail to IKEA storage boxes for the bottom.

    On the top, I made my own basic map stencil by cutting away the continents on a large world map I printed out. I stuck the map to the table with painter's tape, then painted over top with blues and greens. Once that was"roughed in", I removed the paper map and spattered the rest of the painted detail free hand using mostly a plastic spoon and really watered down paint. The last step was to give the entire table a coat of protective finishing wax.

    I kind of think the end result is out of this world… hehe, get it?

    3. Painted Desk and Accent Wall Using Custom Stencils

    I love paint! It sets the mood of a space and has the power to completely transform a piece. I found this large bookcase at Goodwill and loved the detail on the doors, arch at the top, and the drop panel but didn't like choppy layout, worn finish, and heavy bottom. Luckily, all of my dislikes were easy to fix with a little paint and reconfiguration of the layout.

    With a little help from the Home Depot, I was well on my way to getting started. Thanks Chris!

    Fix #1 — I moved the drop panel down to 30" so that it can now be used as a secretary desk. Goodbye choppy bookcase, hello new desk!
    Fix #2- Paint! The finish was worn and it had a few areas that needed to be filled with wood filler so painting was the perfect solution! I chose a classic ivory and paired it with a deep turquoise stenciled background. I created the stencil based on one of my favorite Farrow and Ball wallpapers.
    Fix #3-the thick base and doors made this piece look bottom heavy. To fix this, I added small feet to lift it off the ground and create a little visual space at the base.
    I also created a large stencil based on one of my favorite rugs. The large scale and contrast provides a lot of visual impact and adds variety from the small scale stencil used on the back.

    With the help of paint and a few power tools, this bookcase has been given a new life and I love the way it looks in my new space! 4. Painted Chalkboard with Map and Games
    This week's theme was my favorite so far…I love the many many ways that paint can be used to make an instant change and impact on a space or an object. I also love chalkboard paint. This week's project is dedicated to my kiddos who surprise, surprise…love to get that their craft on too!; )

    In designing the chalkboard wall, we decided to have a map of the U.S.A…I love the way it looks and it will be fun to track the different states we go to as a family. After coloring in the states my kids have been to, they commented"well that's not very many", so I let them each choose a state they would like to go to someday…which explains why Hawaii and Alaska are colored.: )
    Lately my oldest child has loved playing tic-tac-toe, so I thought a large, interactive wall version would be super-fun! I also included many"frames" for the kiddos to draw their masterpieces in. I picked the step-stools up at IKEA and painted them in fun colors, and the animal hooks holding our chalk and erasers came from Anthropologie.
    It was a blast picking out all the fun paint colors at Home Depot! Because I was using so many colors and didn't need a gallon of each color…Home Depot made my day when they told me that they can mix any color in a small, 7.5 oz jar…perfect!!!

    And after a super-busy week painting…I'll go to bed tonight and dream about being on a beach in…

    ;)

    5. Aztec Wonder Painted Rug I have been in love with the Aztec inspired rugs that I have been seeing in catalogs and online lately. The drool kind of love. But alas, rugs can be expensive. They are not something I can change an a whim. So, when the paint round came about I decided that it was time for me to get my hands on my latest crush and do it in a budget-friendly way. In DIY style, of course.

    Isn’t she beautiful?! This rug was a labor of love. And a lot and lot of sponges cut into stamps…applied one by one. Fabulous colors, a gentle application of paint from Home Depot, and lots of patience made this rug come together into something lovely.

    My rug is more then happy living with me. And, I am so pleased to have my own version of this latest craze. And… you know what? I’m glad we’ve moved on from Chevron to Aztec. I’ve got my Aztec rug and I’m ready to go!

    6. Painted Wall Mural and Dresser
    I have a thing for maps right now — doesn't everyone? So, when it came time for the"paint" challenge, I was pretty excited to hop right in and paint a giant world map on my wall. Because who doesn't need one of those?!

    I used a projector to hand-paint the whole thing, and then for a bit of contrast (and fun!) I added an old Ikea sideboard we had laying around that I painted Sunny Side Up by Behr from Home Depot. For a couple more little touches, I added bicycle drawer pulls (because, why not?) and numbers to the door fronts — you can barely see them from straight on, but if you look at it from a different angle, they suddenly show up. It's a subtle touch, but I didn't want anything to compete with the map above it!

    I love how the black and yellow work together, and I'm pretty excited to finally achieve my dream of covering a wall with the entire world. And, really, I find it hard to believe that this bright and sunny sideboard was once a plain, boring black Ikea piece — don't you love how big of a transformation paint can make?!


    It's time to vote! You guys have a ridiculously hard job- we don't envy you a bit! You can only vote one time, but you can vote for your favorite 3 projects. **The voting glitch for Round 3 has been corrected and voting will be adjusted accordingly. Thanks!
    In order to vote, please LIKE EC2 on Facebook.

    jess
    Monica
  • Our Home Goals for 2013

    Our Home Goals for 2013

    Ok, folks. Yesterday we shared our BLOG goals with you and today's the day we publicly lay out our plans for our homes in the hopes that putting it down in writing for the whole world to see will motivate us to actually geterdone. These goals include our big plans for the year, but we'll be sharing lots of little projects and ideas along the way.
    So, here goes:

    1. Finish the dining room, goshdarnit. I'm the worst at putting the finishing touches on a room (ugh, the details!), but that's all I have left to do. Look for the full reveal later this month!

    2. Update the Living Room. This room is attached to the dining room, so it looks a bit drab compared to the new cottagey/coastal dining room. The stenciled fireplace is just waiting for the rest of the room to catch up!

    3. Tackle the Master Bedroom. Oh, this room. It's dark, dingy and in dire need of some love. I'm ready to paint, add an accent wall, change out the bedding, refinish the furniture, and make some art that speaks to my hubs and me. This will be the last room on the main level that gets done! (Oh wait, there's the master bath too…)

    4. Create an organized (but beautiful!) desk area under the stairs in our finished basement. We need a place to keep our files (instead of my husband's underwear drawer. I kid you not!) and house our computer. I'm not entirely sure what I want to do there, but I know it will include this fabulous antique door. We planned to use it in our Guest Room Makeover, but we went with shutters instead.

    5. My baby turns 3 this year and it's time for a big boy room! I'm so torn about the direction I want to go in for Charlie's room: preppy and nautical or vintage baseball. I know he'd go nuts for baseball, but I'd go nuts for nautical! Who will win?!

    Pottery Barn Kids & Source Unknown
    6. Be content to just live in and enjoy our home without constantly scrutinizing it for problem areas. I'll be honest. Sometimes being in the home blogging world feels like everyone has the perfect house. I don't and that's ok. I'm going to try to read a book in my ugly bedroom every once in a while and just enjoy it, instead of wishing it were someone else's gorgeous retreat. You know why? Because I am blessed…ugly rooms and all.

    Pinned Image

    1. Eliminate Wasted Space. Almost everyone has that one room (usually the formal living room) that is just totally wasted space. Either, it looks pretty, but no one uses it or it's kind of an unfinished eyesore… Mine is the later. When you walk into our foyer you see our bold wallpaper, fun word art wall, and then BAM it hits you… to the right is a completely unfinished jumble of a room. I was going to make it a completely predictable formal living room, but I'd never really use it. Jess, the hubs, and I have been brainstorming and I think we just might have a plan!
    (this is part of the current jumbled up mess- don't worry I'll just be relocating this area, because the kids do use the crafting area all the time)

    2. Compromise in the Bedroom No! It's not what you think (geesh you guys!)… Eric and I recently discovered (okay, he knew, but I was oblivious to the fact) that we both have really different styles. He would love a bedroom that's warm and I believe he used the word"Lodgey" (like a ski lodge). If you look at my home for even a second, you will notice that nothing about it fits that bill. So, we're making it a 2013 goal to finally design a bedroom that we both love (Honestly, I'm okay with me loving and him liking… just keepin' it real) and I'm thinking it will be sort of Rustic-Industrial.
    So, as embarrassing as it is to show you… welcome to my current master bedroom.

    3. Details. Details. Details. I am not good at the little details of designing a room. I am a big-picture, big-ideas kind of gal. Once the walls are painted, a few pieces of furniture are in, I tend to walk away and never bring it all together with accessories etc. It's my goal this year to work through each room and make sure it feels finished. So you'll be seeing a lot of thrifted accessory upcycles, fabulous accent pillows, and who knows what else.

    4. Kenzie's Room (Heaven Help Us All!) Man, if you could meet one of my kids, I'd want it to be Kenzie. She's a trip (and I sounds 98 yrs old for saying that)! She's funny, spunky, sassy, and adores animals like no one I've ever met.

    Anyhow, she has been promised a room makeover this year and it's going to push my design skills to the limit. Have you ever seen this guy?

    He's the"TurtleMan" and he has a reality show where he rescues"critters" and it's by far Kenzie's favorite show (sometimes I feel like I live in the Twilight Zone). Anyhow, she would like a combination Turtleman and Equestrian room. I have a strong feeling that will be a first on Pinterest! Ha! So far, her only specific request is a pallet wall ceiling. This project is going to be a challenge to say the least.

    So, there you have it. Our home goals for 2013! We know there will be about 2 million other projects we tackle this year, but hopefully all of these will make the list too!
    Now…who wants to keep us accountable?!!
    What are YOUR home goals this year?

  • Philadelphia Home Show

    Philadelphia Home Show

    When Denise emailed and asked us if we'd like to come visit her at the Philadelphia Home Show, we immediately said,"Um, yeah. That would be awesome." And it totally was. Denise from The Painted Home guest-posted for us (and we did for her, too!) a while ago, and we've been emailing back and forth for awhile, but haven't ever connected face-to-face. Until now. She was asked to design a bedroom/office for Greg Murphy, and did an amazing job. Head on over to her blog for all the behind-the-scenes stuff, but here's a glimpse of her great work:

    I know, right? You could look and look and look and still not see all the clever things she did!

    Monica and I both loved the dresser with those pieces of old luggage. Denise has a knack for including vintage and salvaged items in her designs!

    You know that we love pallets, so Denise's pallet wall treatment was a huge hit with us!

    Still liking the old grain sack trend…

    This is Denise.Isn't she cute? And we know how crazy it can be working in within time constraints, (thanks to our old buddy Nate Berkus), but she did such a good job! And you better believe that Monica was eying up that gold, framed mirror in the back there. I was pretty sure she was going to ask me to distract Denise while she stuffed it under her sweatshirt.

    Denise worked with Philadelphia Salvage who allowed her to use some amazing old doors for her giant headboard. They were gorgeous, and sadly, already purchased by the time we got there. All of these reclaimed materials made me weak in the knees. Seriously. I swoon over them.

    We were so not prepared to have our pictures taken, and we might have accidentally made it onto the Home Show facebook page. Ha! Check out Monica's ski cap. Love it. ------------------------------------------------------------------------------------------------------------- The Home Show is really a unique experience. It's filled with so many creative ideas that you can use to improve your homes. We were definitely intrigued by The Smart Masker, which claims it significantly cuts prep time for taping before painting. Has anyone ever tried it? With the amount of painting we do between our two households, it might be worth getting one!

    And, oh my goodness, the best part of the entire show was called Clover Market. It was in a section of it's own and was full of handmade jewelry, skincare, clothing and my favorite, reclaimed materials from NYC. We found out that it's an upscale vintage outdoor market located in Ardmore, which isn't too far from us, and has tons more vendors during the spring. We can't wait to go there when it reopens on April 15th!

    Yes, those are skeleton key necklaces in what might be the cutest display ever by Charms City Company. {Love} We had a great time with two of our girlfriends (heck- any time out with your girlfriends is a good time! Especially when it includes lunch at the famous Reading Terminal Market) Thanks so much for inviting us, Denise! ------------------------------------------------------------------------------------------------------------- We'll be doing some fun stuff today for The Nate Show. Stay tuned for more details on all we have planned!

  • Creating with the Stars on EC2!

    Creating with the Stars on EC2!

    **Update: Submissions are NOW open! Click here to enter! You'd better be sitting down ladies and gents, because we're thrilled to announce that we are hosting the BEST, MOST AWESOME contest in all of blogland!! Remember that contest we won last year? Crafting with the Stars? Well, not only did we win it, but we also bought it! Tam, from Sew Dang Cute, took a leave from blogging and we jumped at the chance to run the contest that helped jump-start our blogging careers. We're hoping that we can help one of YOU jump start or boost your blogging career, too! Welcome to the new home of Creating with the Stars! ------------------------------------------------------------------------------------------------------------ We're super excited because it's bigger, badder and better than it has ever been. In case you didn't notice, we've renamed it Creating with the Stars, which means no limits to the incredible stuff you can create. It's not just crafts anymore, people.

    What the heck is Creating with the Stars, you ask? CWTS is the ultimate creative DIY competition that pairs 12 contestants with 12 of blogland's biggest stars to duke it out over 4 weeks. Only one team will make it to the end to claim the Grand Prize. The best part? You, the readers, choose the winners!
    Here's a peek into our projects from the 2012 season…

    One of our favorite parts of this competition is that contestants are paired with a super famous, awesome Blog Star! We've rounded up the best of the best and we know you all would LOVE a chance to work 1:1 with any of these bloggers!

    Introducing the 2013 Creating with the Stars Blog Stars!

    1- Sherry from Young House Love
    2- Whitney & Ashley from Shanty 2 Chic
    3- Brooke from All Things Thrifty
    4- Jane from Tatertots and Jello
    5- Sarah from Thrifty Decor Chick
    6- Beckie from Infarrantly Creative
    7- Mandi from Vintage Revivials
    8- Jamielyn from I Heart Naptime
    9- Shaunna from Perfectly Imperfect
    10- Beth from Home Stories A to Z
    11- Kari from U Create
    12- Brittany from Pretty Handy Girl
    That's some serious talent all in one place! And let me tell you, some of these bloggers are in it to win it-they're all about the competition!! Wouldn't it be so awesome to be paired up with one of them?!?

    We also have some ridiculously awesome sponsors, who are chomping at the bit to give you some great prizes!
    The 2013 CWTS Prize packages Total over $4100!!
    A special thanks to Homes.com, HomeGoods, and Home Depot for their generous sponsorship of CWTS! We're so honored to have them!
    The Grand Prize Winners (Contestant and Blog Star) will each receive:
    $500 from Homes.Com
    $500 Gift Card to HomeGoods
    Project featured by HomeTalk

    All contestants that make it to Week 4 will be given a $100 Giftcard to HomeGoods to use during the week 4 home decor challenge!
    The Semi-Finals Winner will receive:
    $500 Gift Card to Home Depot (Contestant & Blog Star)
    $100 worth of Martha Stewart supplies from Plaid Crafts
    $125 Gift Card to Lucent Lampworks
    Project featured by HomeTalk

    The Week 2 Winner will receive:
    $100 Gift Card to Royal Design Studio
    A pair of $120 Robert Allen pillows from Chic Decor Pillows
    Project featured by HomeTalk

    The Week 1 Winner will receive:
    $50 worth of 31 Gifts products
    $60 worth of Twtsted Yarn products
    $70 of Henle Headbands products
    $100 Blog Re-design from 733 Design
    Project featured by HomeTalk

    Here's how it all works:
    Submit one project that shows everyone your best stuff into the linky party here on East Coast Creative that will begin on February 5th. Projects must have been made October 1, 2011 or laterand must be your own work. You have until February 21st to enter. From those entries, 12 of you will be chosen by the blog stars and us as contestants and will be randomly paired up to work one-on-one with a Blog Star, to duke it out in a four-week competition to see who's the most creative. The Star will give suggestions, ideas, encouragement, and help so you can come up with the best project possible. Each round will have a theme and the bottom three will be eliminated based on reader votes. Once the contest is started, weekly projects are anonymous, so big blogger or rookie, everyone's on the same, even playing field! Find your favorite project to link up and be prepared to put your best foot forward if you want to survive!

    What to do Now!
    Submissions are NOW open! Click here to enter!
    Be sure to Like East Coast Creative on Facebook. We're going to be messaging reminders, sneak peeks, and lots of contest info via Facebook, so you don't want to miss out! Also, start deciding what one project you want to submit for your chance to be a contestant! The sky is the limit and we're so excited to see all the amazing project submissions! Anytime you tweet about the contest, make sure you use #cwts2013 to stay in the loop and see what everyone else is saying about the contest!

    If you have any questions about the contest, please email us at
    CWTScontest{at}gmail.com

    We're so excited about our 1st season hosting CWTS and we hope you are too!! Spread the word, because it's going to be one awesome ride!

  • Design it How you Like it {EC2 House Tour Update}

    Design it How you Like it {EC2 House Tour Update}

    I've been so excited to share this project with you, but I promised myself I'd hold off until our Fall Kickoff! Way back in May, I shared my foyer with you… This might jog your memory.

    Bigfoot Rug

    Then, I asked for some help to come up with a solution for this space…

    Foyer Ideas

    I was leaning towards something like this, but you guys gave me some amazing ideas! Seriously, I was wishing I had like 5 foyers, to try out a ton of different ideas!

    Creative Foyer Ideas

    Well, in the end, I did go with something graphic, and something with letters, but something that is so much more my personality than just"Hello"…

    There you have it…"Shut the Front Door" Seriously, I chuckle to myself every time I walk upstairs. I have a weird sense of humor and this is just so me. Honestly, what I love the most is when people say,"Oh do your kids always forget to close the door?" I just go,"Oh, yup! Those rascals" Ha! The double meaning just kills me and I love that I have a 4x6 foot little joke in my house.
    Now here's my soapbox about designing your home how YOU like it… I totally could have just gone with a"Hello" or a"Welcome Friends", or even worse"Home is Where the Heart Is," but honestly I think I'd break out in hives if I had to see that every day. My home is a reflection of who I am, and like it or not, I'm sorta sassy and I think cheeky jokes are funny. So forget what other people will think and embrace your own personality. What would your walls say?
    How to Add Personality with Wooden Letters: I was super lucky that Janenifer from The Finest Kind contacted me about my foyer. She was just opening her shop and suggested I try wooden letters to add more depth than just vinyl or paint would. After seeing what she created for her own home, I was sold!

    Isn't that awesome? (Her prints were made using the Good Old Staples Print Trick!)
    Jennifer's business is 163 Design Company…

    You definitely need to check out their store. Your options are endless and they have awesomely reasonable pricing. I loved that I could choose my font (Chunk Five) and Janenifer was so awesome to work with while I planned out my words. She didn't even judge me when I told her what I wanted to write on the wall! LOL.
    I used 3M Command Strips to hang each letter- they're not heavy at all. The letters are made from Eucalyptus wood, which let's be honest. just sounds plain cool.

    I planned my general layout…

    Applied my Command Strips, Did a little measuring…

    And then had the hubs help me hang them. He went up and I did lots of"A little to the left, no right, now down, back up…" You get the idea. He loved it! We did use a chalk like to get straight lines to work from. I definitely recommend doing that!

    We painted our letters white, but left the sides the dark color they turned from the laser cutting. I really like the effect it has.

    There you have it… my new foyer!

    Seriously, I'm chuckling now, even as I type this…

    This is the view I see from my kitchen and I think it's awesome! (We had our kiddos' artwork displayed all summer, but it's been relocated now. More on that fun project coming soon!)

    163 Design Company is offering East Coast Creative Readers 15% off their order for the next two weeks! You might not be ready to make such a huge statement like I did, but I totally encourage you to add some of YOU to your home somewhere! Use the Code ECC15 and get 15% off your order, now through September 30th. Click HERE to go to their online store.

    So tell me… What do you think of my foyer update? And, what would you put on your walls? Linking up to: Tutorials & Tips

  • Don't Try this at Home, but Do Try this…

    Don't Try this at Home, but Do Try this…

    Don't Try This at Home This mother's day weekend, I had a DIY happy mother's day to me project planned. I bought two inexpensive Adirondack chairs and planned to make them fabulous.

    I was all geared up for a perfect DIY, camera in hand

    I planned to use this cute paper on the back of the chair and then seal it with mod podge.

    However, I forgot that I am a lefty, living in a right-handed world. I stink at cutting! I went through five pairs of scissors before I realized this was NOT working out.

    I actually texted Jess a picture of the blister I got from using these dreadful scissors!

    Oh, but look how cute this could look. What you can't tell from this picture is that it took me nearly an hour and a half to do that one strip and I had 11 more to do! (I might have been a little OCD and trying to get it perfect!)

    I did two more strips and then decided this was a DIY not to try! I quit and peeled off all the paper. Blah!
    Do Try This at Home! We're in the middle of the Design Challeng{ed} contest, and we want your pictures! Use the menu tab above to get all the details. Take a picture that shows your challenge room and you could win a professional design consultation by ME! What? What has this lady ever designed? Good question, and one we thought we should answer for you!
    Although, I now only do design work on the side, I loved the years I spent making staging and design my occupation. The majority of the homes that I worked in were vacant or semi-vacant. I used a combination of the homeowner's belongings and rental furniture. Having a staged room makes a big impact on a potential buyer. Another home looking Empty and Blah

    Simple Staging and ready for buyers!

    The tricky part to staging is that you're not designing the room based on your preferences, (or even mine as the designer) we worked off of the demographics of potential buyers and the feel of the space.

    This room isn't my personal style, but it was the right look for this high-end condo on the Main Line.

    We're really excited to work with our Design Challeng{ed} winner. We hope that this mini portfolio peek gets you excited to think about a room makeover in your home!
    So, my advice is to pass on the Adirondack DIY, and instead to use your time taking pictures and entering the Design Challeng{ed} contest so we can work together designing the perfect space for you! Good Luck!

    P.S. Don't forget that you can enter the Design Challeng{ed} contest even if you're not in Bucks County! Virtual design is all the rage and this"cyber teacher" has all the right technology to make it happen for you!

    Linked up to: The Stories of A to Z, Tip Junkie

  • Cosy Home & Cottage

    Cosy Home & Cottage

    Home & Cottage
    Home & Cottage
    Home & Cottage

    Source: Home & Cottage

  • Zinc: Irresistible Blue/Gray

    Zinc: Irresistible Blue/Gray

    New England Home magazine, Home of Design Duo Lee Bierly & Christopher Drake
    Zinc, zinc, zinc, everywhere you look there's zinc! Don't you just love zinc? I know I do. I was just outside putting the finishing touches on a couple of boxwood shrubs that I planted up in my new Restoration Hardware planters. Which by the way are on sale now Here! It got me thinking about how wonderful the color is, that soft gray/blue.

    Restoration Hardware zinc footed planters

    It has become a design stable blending beautifully with today's neutral interiors.

    New England Home magazine, Home of Design Duo Lee Bierly & Christopher Drake See the zinc table behind that stunning burlap and linen chair, love those pillows!
    Gray is a true neutral color because of this, gray can be very restful and works with any palette.

    This zinc nightstand comes open, one drawer and the bottom open or closed as pictured above from Restoration Hardware Here

    French Zinc and Iron Table from Laurin Copen Antiques Here Love the zinc on the table legs! The pillows pick up the zinc color beautifully

    Monumental Neoclassical style Zinc Bookcase from Sarlo Here Look at that fabulous cartouche, I'd love to have this in my home!

    A Pair of Large Scaled Zinc Urn Lamps from G. Sergeant Antiques Here Now these make a statement!

    Did you know Europeans even used zinc for their roofs? It's even being used here in the US for roofs'I did not know this. The zinc will last for 80 — 100years and can withstand harsh weather conditions. Zinc sheets are laid over wood and seamed.

    The New Eighteenth Century Style, Zinc oeil-de-boeuf and zinc finial

    Antique French Zinc Architectural Roof Finials from John J. Nelson Antiques Here
    Zinc is the 23rd most abundant element in the earth's crust. We need zinc in our diets to help boost our immune systems, it also helps to cut a cold short. Best of all zinc's patina will constantly renew itself as it weathers and ages and will 'heal over' scratches and imperfection. So when zinc can be poured and molded to make such wonderful furniture, decorative items and put a roof over our heads, I ask you, what's not to love about zinc?

    The New Eighteenth Century Style, zinc horse head above the door

  • Acquired Objects: The Whimsical Human Form

    Acquired Objects: The Whimsical Human Form

    Have you ever walked into someone's home and wondered about their objets d'art? Objet d'art is defined as something decorative, an object of some artistic value. Henry David Thoreau once said ' There is no value in life except what you choose to place upon it and no happiness in any place except what you bring to it yourself.' I wonder if he was envisioning my home, looking at my objets d'art when he said this?
    As I was sitting in my studio stitching away I briefly looked up and had to smile at a beloved treasure. I think we've all done that, purchased an item simply because they make us smile. Louis is such an object, he's a 17th century French wig last for making wigs. The top of the woodenhead is covered in layer upon layer of vellum paper for sizing a person's head. Big head more paper, you get the idea. Balanced upon coverless French book inserts Louis hangs about holding a beautiful antique French crown in regal splendor
    Perhaps it's because of the type of job I have, antique textile dealer that I'm around and see more antiques than my fair share. Mainly because my dealers deal in more than just textiles and are always showing me items that don't relate to my business in hopes of a sale. Being female this appeals to me greatly. Plus having an artistic side let alone not being able to help myself I end up with what I think are rather amazing things decorating my home.

    Meet Henri, he stands about like a sentry on duty presiding over my pillows. He's an 18th century child's clothing mannequin straight from France. His body is stuffed with horsehair and wrapped in burlap, I love the stitching up the front of him in French waxed string. Sometimes I dress him up in something old, do we ever grow tired of playing dress up?
    Objects add so much life to our rooms and antiques bring history, an artful intrigue. Imagine a room devoid of our decorative objects, a room with just furniture, it doesn't look finished. Our objects are what keep our eyes moving, what makes it interesting. As I sit here in my studio I notice I have several human form objects, what is it about the human form we try to bring into our rooms? My guess is the human form finishes off a room the same way living people do.

    Kay O'Toole has several mannequins, above and below, in the form of a Mexican Santos and garden statue enlivening her hall bringing it to life. Ms. O'Toole's shop is called 'Antiques and Eccentricities for all the weird things she's drawn to' but are they weird or comforting? Photo courtsey March, 2010Veranda magazine.

    Katie Stassi Here used a mannequin near a French daybed, her philosophy is her interiors are ' defined not designed'. So do our objects define a space as well as decorate?

    Alain and Brigitte Garnier incorporated a French mannequin artfully into their lives in their Belgium home. Photo courtesy of Cote de Texas Here
    Antiques, accessories, objects all tell a story whether about the room they inhabit or the people who purchase them, they bring a room to life. So whether you're using mannequins, Santos or statues for accessorizing your home incorporating a human form adds a touch of life and intrigue into a room. Or if you're like me you spend way too much time alone and have made inanimate objects your friends'.lol.

  • 5 FREE Home Decor Projects {Free Stylin' Beth)

    5 FREE Home Decor Projects {Free Stylin' Beth)

    We have another treat for you today! Meet Beth, from Free Stylin'. She is a girl after our own hearts, since she LOVES decorating with style on a budget, and is pretty darn good at it, too.: ) We had the priviledge of meeting her at Haven, and she is so sweet and bubbly! We're sure you'll love her-after reading her post today, and then head on over to her blog to check out the fun stuff she does in her neck of the woods!
    ---------------------------------------------------------------------------------------------------------------------

    Hey East Coast Creative Fans!! My name is Beth, and I blog over at Free Stylin'. You can find all kinds of posts about"living a stylish life without the expensive pricetag!" I've been big fans of Jess and Monica's since seeing them on The Nate Berkus Show. Those girls have some talent! It was such a blessing to meet them in person last month at Haven. (And yes, they are as sweet and friendly and beautiful in person!!)

    Haven Conference

    Me, Jess, Monica, and our cute friend Jamie

    I was so excited when they asked me to visit with y'all about something I love to talk about…Decorating for FREE!! I am all about using what you've already got to make your space beautiful. I'm also way into projects that I can do right now. (I love instant gratification.) So today I want to show you…

    5 FREE Home Decor Projects You Can Make TODAY!

    Would you like a little more glamour in your bedroom? New sheet sets and pillow cases can get expensive, and if you try to save a little in price, it could cost you in comfort. BUT!! You CAN make pretty bedding pieces out of the"underutilized"; ) lingerie in the back of your closet. Choose the items that have the most material and add the satin fabric to a pillow case you already own. Or make a throw pillow using pillow fill you aren't currently using. Learn how to make your own HERE.

    Trays are a decorating must-have, and they are as functional as they are decorative. A pretty tray can help complete a look, and you can make one for your home in about 15 minutes using an old cookie sheet and a piece of fabric. My tray, above, was made from a shirt I was about to give to the Goodwill. Instead I cut it up and glued it to the cookie sheet. Find out more about it HERE.

    Sometimes you just need to see something in a new way. Take a piece of artwork for example. I could no longer even look at the Monet painting on our mantel. So, I sprayed the frame another color and painted my own abstract art instead. You can paint directly to the back of your artwork or buy a poster board for just pennies. See how HERE.

    If you don't have paint, or can't because you rent, but you want a change today, try"wallpapering" a wall with maps or book pages or sheets of music. All you need is a stapler and some Mod Podge (or watered down glue) to seal the edges. The paper isn't permanent, but it makes a huge statement in your home. Check out how I papered my boys' bedroom HERE.

    Decorating with plates is such a fun and interesting way to bring in color and shapes into a room. And don't feel like you have to limit the plates to just a dining room! Hanging plates on any wall in your house is quick and free…just raid your own kitchen cabinets! You can hang your plates with hot glue and paperclips, too. No fancy plate hangers needed. Go HERE to see how I used plates in my own living room.
    I hope I've inspired you to try something new and FREE in your home today, using the items you've already got around you. It really does feel great to have a new look for nada lotta. Come stop by Free Stylin' for more tips and tricks like these.: ) Thanks SO much, Jess and Monica, for having me! Hope you're having a fun vacation!
    ---------------------------------------------------------------------------------------------------------------------

    So much amazing inspiration in one place! I don't know about you, but I'm totally loving that abstract art she DIYed. Add that to my ever-growing list of projects! Thanks for being here, Beth!

  • FOR SALE!

    FOR SALE!

    Source: strictlysimplestyle.blogspot.com via The Real Housewives on Pinterest
    No, I really don't have anything to sell, but I have sold two houses really quickly and helped hundreds of other people sell theirs. Okay, now before you tune out and think,"I'm not moving anytime soon… no need to read this post." give me a second! There's two reasons to keep reading… # 1- You probably know someone that's struggling to sell a home in this market #2- People love their homes right before they sell because it's in the best shape ever. You could follow a few of these tips and love your house even more! Ready? Here are my first 5 tips!
    Get it Sold… The Mangin Way! (Part 1) (these aren't new ideas…but done right, they really work)

    1.Declutter. Pack half of your stuff. Seriously, I actually mean half of everything. It's a pain, but you'll have to pack it anyway. This will make your house seem like it has sufficient storage and room to grow. It's tough to want to move into someone's home that seems jam packed! (FYI- don't do this if you're not selling… that would just be crazy!)

    2. Depersonalize. Your kids are adorable… I get it, but now get rid of their pics. We don't want potential buyers looking at your vacation pics and thinking they really need to get back to the Outer Banks and totally not noticing your recessed lighting. Now, don't get too crazy… we didn't get rid of 100% of our pics, but honestly we replaced a lot with generic art from Homegoods and Marshalls. The second part of depersonalization is STYLE. If you're reading a DIY and design blog you either have great style or are style challenged! LOL… make sure the style of your house would appeal to the masses. Not too modern, too country, too plain, too bold. Purple.Tone it down a bit.

    Source: yakal.net via Hannah on Pinterest
    3. Declutter. Wait, she already said that!! Lame post! Nope, I don't have short term memory loss… now we're talking Pantries, Closets, Garages, Storage areas. You need to keep feeding your family, but you also need to show off the space you have. Donate, eat, or toss HALF of what you have stored. You don't need six cans of cream of chicken soup. Keep two. (House of Smiths weren't selling, but man they have a rockin' pantry before and after)

    Same applies to closets… anything you won't wear in the next month should be packed up. If you're near a change of season, just box and store at your BFF's house. That's what friends are for! (We have about 20 boxes of friend's stuff in our basement right now because they're selling). Any place that you would usually hide your junk needs to be super neat and spacious. 4. Give it a Purpose. This is a simple stager's rule. Every room should have a purpose. You want a buyer to see a value in each space. If you have a toy/craft/tv/junk room but already have a playroom, and family room with tv… well what are they paying for the random room for? Choose a purpose. Make it a specific craft/sewing room etc. 5. Clean. I'm not talking lived in clean… I'm talking Martha Stewart clean. A clean house gives the impression of a well cared for, well maintained house. You don't want anything creeping out buyers. Maybe dirty baseboards are just a part of life, but they're not a part of a buyer's dream home. Seriously, who dreams of a kinda dirty, lived in dream house? Does Pottery Barn have gross toilet rings in the Bed & Bath issue? We've done it two ways… once we did an insane deep clean and for our second house we hired someone to do it. Either way is fine, just get it done and then maintain it. Make a little pre-showing, last minute cleaning list. It was a huge help to me!

    Source: marthastewart.com via The Real Housewives on Pinterest
    Ok, so 5 simple, totally FREE steps so far… Nothing too revolutionary, but things that really make a difference. Last spring we sold our home in less than 3 weeks… the market was struggling, we didn't know what to expect, but we believed it was the right time for our family and so we busted our tails to get the house ready. Now, you're armed with part one… either share the post with a friend that might find it helpful, or take a look at your own home. Part two is a little more design friendly and exciting, but first you've gotta get through the dirty work of steps 1-5.
    I'll be back Wednesday with more!

    P.S. I bought paint tonight for a super-fun family room project. I can't wait to share it with you!
    P.P.S. Did you know that we're only 3 people away from 100 followers? We know way more of you read the blog… let's make it official! Let's take our relationship to the next step? And if you're really into us, you could like us on Facebook too! Imagine that! It's like going steady!

  • How to Build a Custom Headboard with Arms {Sarah M.Dorsey Designs}

    How to Build a Custom Headboard with Arms {Sarah M.Dorsey Designs}

    If you missed all the amazing projects of our first annual Creating with the Stars, be sure to check them out below!

    Round 1 Projects & Winners Round 2 Projects & Winners Ro und 3 Projects & Winners Round 4 Projects & Winners -------------------------------------------------------------------------------------------------------------------------- Sarah is back today with another awesome tutorial from the home decor project that won her the grand prize in Creating with the Stars. I love the way she built this headboard and broke it down for us- it makes any custom headboard within the realm of possibility! Plus, it looks unbelievable with that grasscloth and nailhead accent wall!

    To complement the accent wall, we wanted to create a headboard that wouldn't compete yet wouldn't get lost against the nailhead and grasscloth.
    We made a plan and gathered our supplies.
    1/2" plywood (1 sheet cut to width of bed frame, ours was 62.5") 2x8" (x2) 1x8 (x2) 1x3 (x4) coral curtain panels from Target heat n' bond batting
    I drew a few diagrams for the basic construction and dimensions of the headboard. See below for some the specifics on the upholstery. Measurements are for a queen bed frame. Note: make sure to measure your bed frame first, in case yours is different! You want to make sure that the frame will fit inside of the arms.

    For the arms, we screwed a 1x8 and a 2x8 together, measured and drew the circle with a lid. We then followed the line with a jigsaw to cut it out (we did remove any screws that were in the way first!).

    For the foam, we cut a 3" camping pad in half and attached to the plywood with spray adhesive.
    Next we upholstered the back piece by wrapping in batting and then fabric. To make sure that the top was pulled evenly, we attached a thin strip of scrap wood and pulled tight. This made it much easier to get an even look!

    Next, we cut the fabric to wrap around the entire arm, starting at the inner part of the arm, we put a few staples in (on the inside so it stays in place while you attach the arm), we cut little holes in the fabric at the pilot holes (where arms attach to the frame). We then installed the arms with heavy duty screws (we used cabinet anchors) and attached it to the 1x3 frame.
    Then we finished upholstering! We pulled the fabric tight around the arm and stapled, leaving it loose at the top. We cut the angles, almost to the edge, but not close enough so that it frays to the side of the arm, pull tight and staple. It doesn't have to be pretty on the top because that will be covered next. We cut a band of fabric the total height of the arm (accounting for the bends) plus a few inches and the width (2.5") of the arm plus enough fabric to fold under (at least.5" on each side, so at least 3.5" total). We folded the raw edges under and pressed with a hot iron so that the edges were crisp and attached the band to the arm with no-sew adhesive (my preference is Heat n' Bond) and a hot iron, staple to secure the ends.
    That's it!

    I finished the bed off with a few DIY pillows. The euro pillow shams are made from a white table cloth and a scarf from World Market. Since the scarf was translucent, I doubled it up with the white table cloth. The throw pillows are white shams from Ikea, I then painted a border using painters tape and latex paint with fabric medium. The bolster pillow is a kitchen towel from World Market and the left over headboard fabric.

    I love how the grasscloth slightly shimmers depending on the lighting.

    The nightstand is from World Market, the sphere from TJ Maxx and I picked up little letters (to spell his and hers) from a local antique store. Books were wrapped in paper from the Paper Source.

    Hydrangeas and Ranunculus are two of my favorite flowers!

    This week was sponsored by Home Goods, and if you've read my blog, you probably know that I'm pretty obsessed with the Home Goods/TJ Maxx/Marshalls brand! I love the thrill of the hunt, designer names and the affordable prices!
    I picked up a cute accent chair, fluffy white rug (my puppy love it too!) and the white sphere!

    Finally, here's where we got everything!
    Headboard: Fabric Coral drapery panel from Target (x2), Batting,

    3" camping foam from Home Depot only $20!
    Feature Wall: Grasscloth wallpaper,

    Nailhead (we used about 2.25 boxes),

    Trim- I found 2.5"wide synthetic trim from Home Depot on clearance for $4/8ft board
    Accessories: Night stand (World Market — not on website), decorative sphere (TJ Maxx), His and Her letters (local antique shop), Throw pillow on chair, chair (TJ Maxx), lamp and lamp shade, duvet cover
    I'm crazy about our new transformation and I hope you love it too!

    We totally love it too! Well done, Sarah! We 're ready for you to make a trip to good ol' Bucks County to fix up our master bedrooms. Any time.: )

    jess
    Monica

    P.S Have you linked up yet?

  • Finding Treasures {Flea Market Hunt}

    Finding Treasures {Flea Market Hunt}

    Monica and I both went to the Dublin Fire Co. annual flea market last week (went the same day, but not together. Boo!) This was the first flea market I had been to where I was actually looking for items to repurpose. I had a couple of things in mind that I wanted, but also found a few other things that just begged to come home with me. I went with my mom, and she is a great person to go with because she, like me, can see potential in anything! (It's one of the perks of being an eternal optimist).

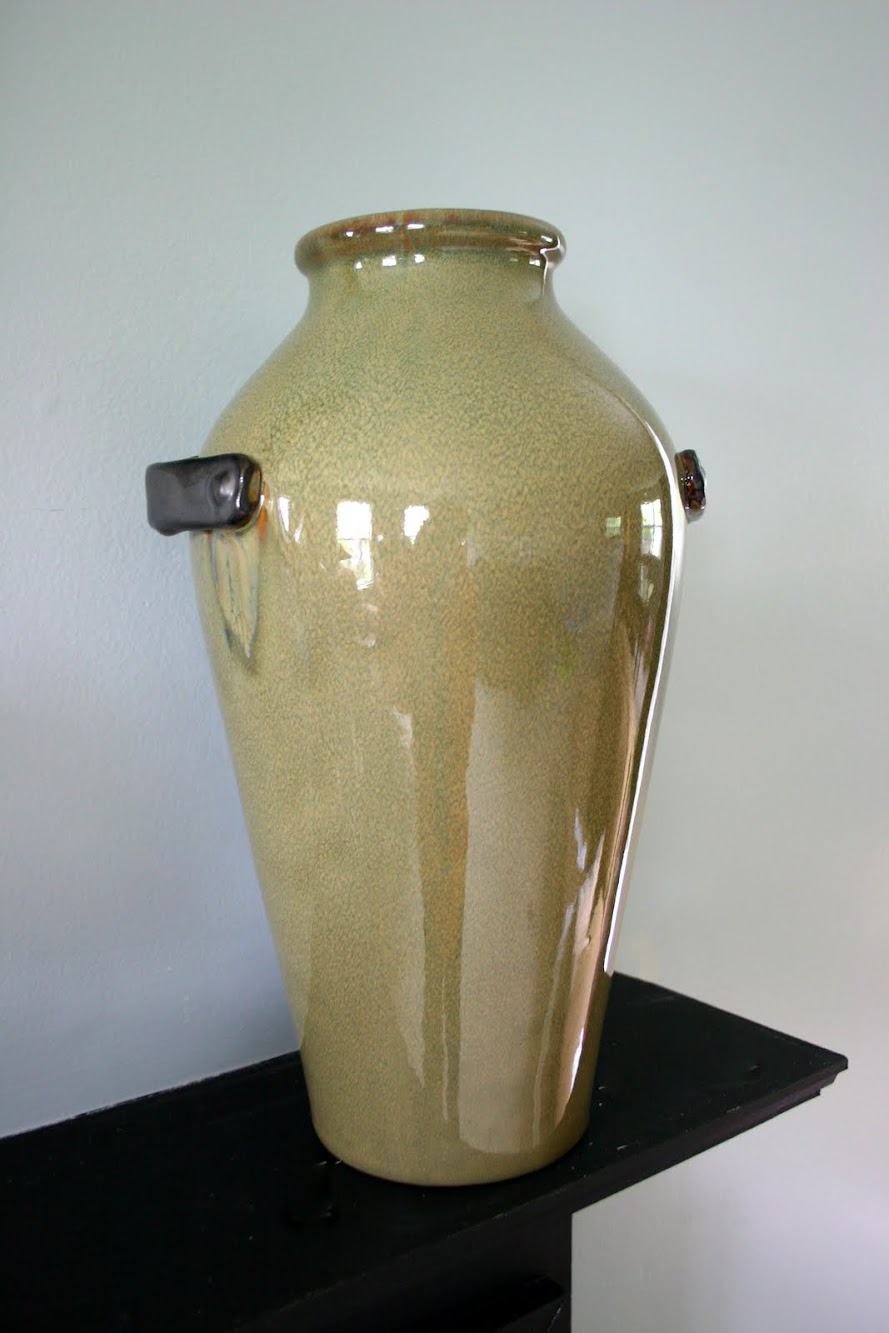
    I got this awesome Pier 1 vase/urn for $5 (regularly $30) and it now graces my mantel.

    One of the other things I purchased was an old workbench/sawhorse thingy. This was a little bit of a risk for me- I had an idea of where I would put it, but wasn't sure it would work out. But for $20, I knew I could use it somewhere!

    That little beauty fit perfectly in my entryway! I had been wanting something to make that space a little more welcoming (and I little less"go away"-like, as Monica says), and this fit the bill. I can't get enough of the color, either.

    Good, sturdy legs, huh?

    This large pitcher caught my eye on the first table I went to. It was very country-looking with it's red and white checker pattern (sorry, no before pictures, but trust me, it's much better this way), but a little Rustoleum Painter's Touch spray paint in glossy white took care of that. I filled it with pussy willows from a local garden center and now it looks like it was meant to sit on that bench all along, and I just led it home.

    Over on the other side I stacked a few books and an old lantern of my grandmothers. I love having a few of her things in my home as a way to remember her. That cute little plant is from Ikea and the mug was from a friend. (Thanks, Lindsey S. It's getting good use!)

    (The view from the hallway upstairs.) On a side note, the pictures have made me hate the color of paint on our walls in the entry even more than I already did. When we moved into this house, the walls were peach. Like literally peach. We said goodbye to those as soon as we could, but lo and behold, the color I picked to replace it has a pink undertone, as well. Definitely the color of swine. (Melissa, at the Inspired Room, dealt with an entire house of swine, and I realized that this is the PERFECT description of my color). Blech! It will be a nice, non-swine, beige soon. Add that to the never-ending to-do list for my hubs. Poor guy.

    Some of you may be wondering about the frame hanging above the new bench vignette. My hubs and I made this out of reclaimed barn wood (my father-in-law has a treasure trove of barn wood in his barn. Go figure.: ) Kevin cut the picture holes (is that the right word?) and then mounted another board to the back that I painted black, so that I could attach the pictures to it. I then painted the entire frame black, then painted it again in a brick red color with a thick bristle brush and minimal paint so that it looked a bit distressed. Finally, I added the phrase that I bought from Uppercase Living to it. I am so in love with this frame, it's not even funny.

    Speaking of reclaimed barn wood, I have two big pieces ready to be made into frames (one holds four pictures, and the other holds one picture). If you're interested in purchasing one, send me an email to let me know. You can totally customize the color and phrase. This piece never fails to get lots of"wows", so if you want one in your home, give a holla!

    What are some of your favorite flea market treasures?
    Happy Monday,