I recognize that DIY art projects are not for everyone. My love for custom art was born out of necessity (read: lack of funds). Creating my own artwork works for me, and I've found out why:
1. I don't worry about ruining something I already have. With the exception of a few things, everything I own was bought second-hand or for a low price. I don't fear repurposing things, because the originals cost me almost nothing!
2. I am not afraid of change. Actually, I crave it.
3. I am not a perfectionist. Little imperfections in my art/craft projects are endearing to me. They say"I was handmade, and therefore may be flawed, but a lot of thought and care went into making me". I'm not saying perfectionists can't create art (because I'm sure most real artists are perfectionists), it's just easier for me to say this picture is"good enough", than someone who wants everything to be perfect.
Ok, that's that. Recently I bought a yard of fabric for a project (stay tuned for more on that!) that I fell in love with. I ended up having some extra fabric left over that I wanted to use somewhere- anywhere!- in my house. I was feeling inspired by a gift bag in which my husband had wrapped my birthday present. I decided to combine my fabulous fabric, the cute bird, old frames, and some patterned scrapbooking paper into one art project!
First, I started with the bird stencil (the bag had a 3D bird on it, so I just ripped it off to use as a stencil). I laid it onto the back of the fabric in the opposite direction I wanted it to face, and then traced it. After that, I carefully cut along the line, flipped it over, and then mounted it to the scrapbook paper, using regular, old tape!

My husband insisted that this poor bird needed legs, so I drew two legs freehand and cut them out of the fabric, as well. Then I put the whole thing together and…

Voila!

I used the same method with my second art piece, but used the fabric as the background and the scrapbooking paper as the bird. I didn't have a smaller stencil, so I again, I freehanded the bird.

Then I had Kevin hang them on an empty wall in our living room. (I promise that these two pictures are level, it's just a wierd angle)

I love the way the pictures look as I enter the living room, and that I can see them from my kitchen table. Makes that room feel one step closer to completion, or until I'm ready to redo the entire room again for the third time.: ) I may not keep these pictures forever, but for now, they are a cheap solution. Below are some images from a few other bloggers of artwork they created using what they had on hand, or a few inexpensive items they purchased. Click on link under the image for specific instructions on how they made these beautiful pieces of art.
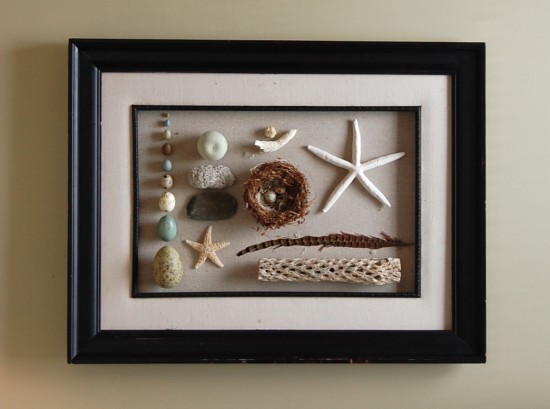
The Nester
The Nester simply scoured her home for items that would look good grouped together in a frame. This could easily be done finding stuff on a hike out in the woods, or on a trip to the beach.

Martha Stewart
These prints were made using memorabilia from trips (like tickets, maps, postcards etc) that were blown up and then framed.

Ashley Ann Photography This is not everyone's style, but these two canvas prints were made for a nursery, and were created using a canvas, scrapbook paper, mod podge (amazing stuff!), and a little paint. Adorable and easy!

Isabella & Max
This look is much more sophisticated and elegant. This piece of art hung above the couch was made using a canvas, paint and a few different paint brushes, and nail heads. My sister who regularly tells us that she is not creative, painted three canvases in varying shades of colors that now hang above her fireplace, that are similar to this one.