My Creative Blog:
Farmhouse Table

  • White, Silver and Wood

    White, Silver and Wood

    With Hubby out of town all week, I decided to paint our kitchen walls. But let me just say (in case I've implied otherwise), that I absolutely dread painting. I think by far the hardest part for me is just getting started.
    For example, I put on my calender "Paint Kitchen Tuesday." Wednesday came and about 5pm, I called my Mom and said, "ugh, I have to paint the kitchen today....at some point." It was 6pm before I started and almost midnight before I finished.

    I painted the walls Simply White (eggshell finish), which is the color we used on the cabinets, shelves and trim (in semi-gloss). With a fresh clean slate, I then experimented with creating a not so kitcheny kitchen!
    Jennifer over at The Newlywed Diaries inspired me with this post! As I began gathering up some not-so-kitcheny items, I started to gravitate towards all things white, silver and wood.

    I added a clock, some candlesticks, an alabaster bud vase that I put toothpicks in (to add some wood) and my sweet little owl figurine.

    I didn't spend very much time on arranging things — can you tell? I sort of began with the basics of all the whitewear dishes and drinking glasses we'd be using on a regular basis. To balance out those kitchen items, I added my Grandmother's old candelabra, her big silver tray and her old little lamb print....oh, and her old owl print that I reframed. xo
    I tried to break away from my previous tendency to create too much symmetry. I still tried to balance things out, but in a more irregular way.

    I like how the light reflects on the silver things.

    I also really love my owl figurine.

    And look, here we are....I think this will be Hubby's favorite not so kitcheny addition to our shelves. xoxo

  • Baked Goods

    Baked Goods

    I f there's a bakery in town, I'll find it. Bakeries — the smell of them, the feel of them....are just some of the coziest places on earth. I especially love the ones that use organic whole grains and other ingredients. But I'll admit, any case full of muffins, breads, cookies and pies melts my heart.
    I made these Banana Walnut muffins to quench a bakery craving. It was about midnight and we had just put the babies down to sleep. For some reason, I started to think muffins (then sleep). Two very ripe bananas spurred me on and before you knew it, the house smelled like goodness.

    This recipe comes from one of my new favorite baking books, " Gluten-Free Baking Classics " by Annalise Roberts. But this batch came from a gift tin that my friend Karen gave us at Christmas, so all I had to do was add the bananas, milk, eggs and oil. Made me think I should have these 'just add...' tins on hand at all times.
    Recipe:
    2 cups Brown Rice Flour Mix 2/3 cup granulated sugar 1 tablespoon baking powder 1 teaspoon baking soda 3/4 teaspoon xanthan gum 1/4 teaspoon salt 1 teaspoon cinnamon 1 packed cup very ripe banana 1/2 cup chopped walnuts 2 large eggs 1/2 cup milk 1/2 cup canola oil
    1. Preheat oven to 350 degrees Fahrenheit. 2. Mix flour, sugar, baking powder, baking soda, xanthan gum, salt and cinnamon in large mixing bowl. Add bananas and walnuts; stir to coat evenly. 3. Combine milk and oil in small bowl; remove 1 tablespoon of combined liquid and discard it. Beat in eggs. Add liquids to banana mixture and stir until just blended. 4. Fill muffin pans (makes a dozen). Bake 18-25 minutes until golden brown. Remove from pan and serve immediately or cool on rack.
    Here's the recipe for Huckleberry Muffins from the same book.

  • My Favorite Bread Board

    My Favorite Bread Board

    I received so many lovely comments on my collection of bread boards! The first thing I thought was that I hope the one with the pomegranate stain wasn't front and center! Also, that these are just our everyday bread boards — not even my old antique ones!
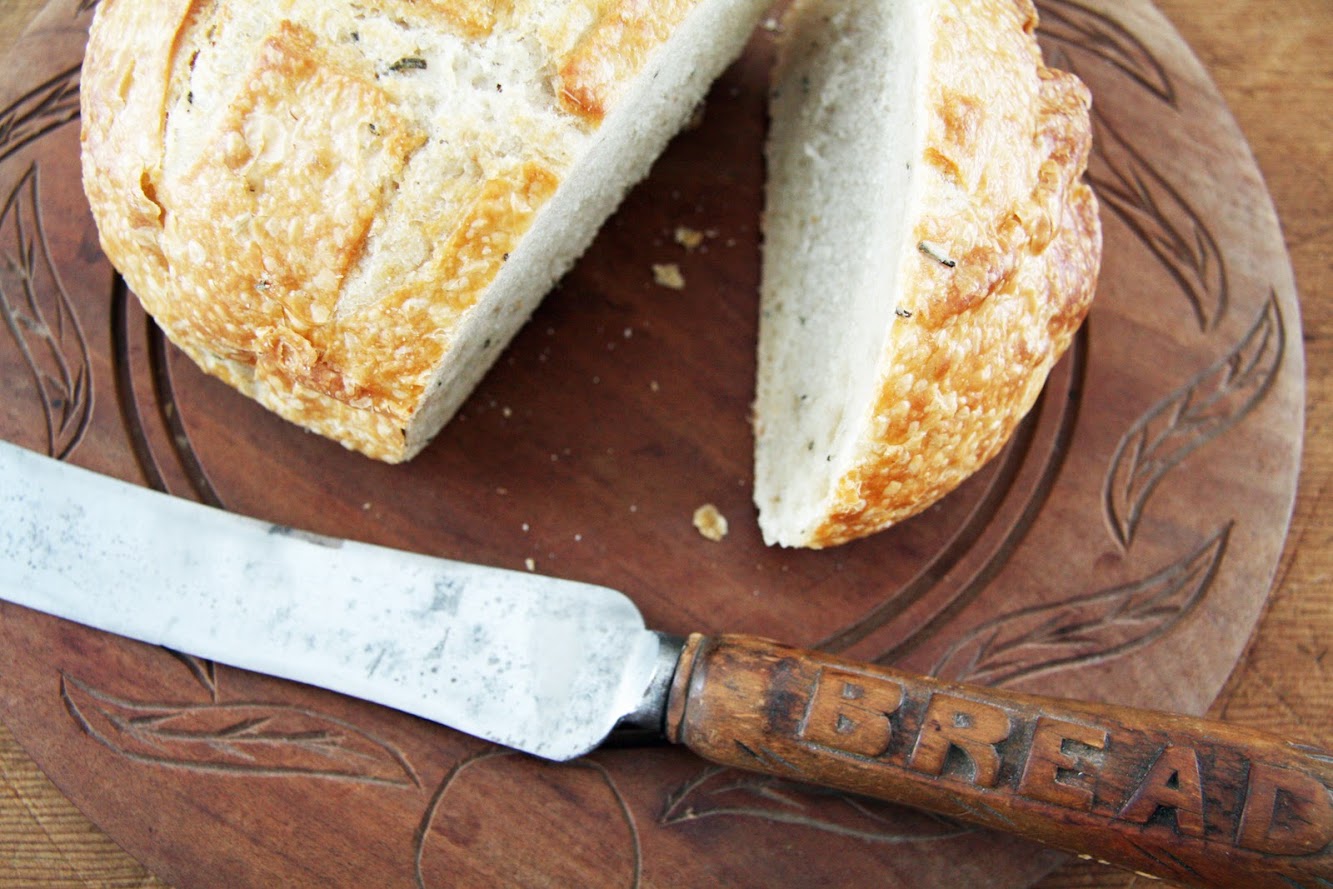
    So I thought I'd just share with you my most favorite bread board of all. And it is literally, a bread board. Just for bread.

    I found this in an antique store for just $20 — hand carved knife included. I was hysterically excited and remember coming home and putting it on the table in front of Hubby and asking him to just take a moment to absorb our good fortune.
    I have to say that one thing that drives me crazy about Hubby is that when I find a bargain and ask him to guess (why do I do it?) how much he thinks I got it for....he always guesses too low. So then suddenly my bargain price comes off (not to me, to him) as not such a bargain! Can anyone relate to this?
    I am in the full throes of working on the living room. I thought perhaps I could take some pictures today but it's looking very gray outside so there may not be enough light for picture taking.

  • French Toast & Pomegranate

    French Toast & Pomegranate

    We bought some pomegranates last night at the grocery store. We each set off with our designated list (pomegranates weren't on either) yet when we reconvened, we both had pomegranates in our carts.
    We agreed, "great minds think alike."
    We made French Toast this morning. Our favorite recipe is from, "The Joy of Cooking."
    The Recipe: 4 eggs 1/2 teaspoon salt 1 cup milk (we use original flavor oat milk) 1/2 teaspoon vanilla pinch of cinnamon pinch of cardamon (something we add for an extra hint of flavor)
    Usually we use Challah bread but this morning we just used our everyday whole grain bread we had on hand.
    It was delicious.
    I've been transitioning things from fall to winter around here....which of course always includes taking down the brown transfer ware and putting up the red. There's a sneak peek in the first picture — but I'll post more soon.
    I love the red accents in the kitchen this time of year! It gives the kitchen a nice cheery lift as the cold weather settles in and the sunshine becomes more scarce.
    P.S. We also set up the furniture this weekend but still so much to do! New sea grass rug (12x15)isn't scheduled to arrive until December 22 nd! For now, I've put down another new sea grass rug (9x12) that is set to go in the dining room. I'll post on things before the 22 nd though!

  • Concord Grapes

    Concord Grapes

    I waddled out to the grape vines with Hubby early this morning. I had to lean over quite a bit to find my boots in the beautiful autumn confetti.

    The grapes are finally ripe after several months of hot summer sunshine and crisp fall air.

    While Hubby searched through the curly vines for bright purple clusters, I documented our fall harvest tradition with photographs (which is another way of saying, I watched).

    We only picked a colander's worth because we plan on making smoothies with them in the blender. Our plan to make wine and jam....well, it will have to wait until next year. We're using all of our extra time to prepare for the babies.
    But the grapes freeze really well. I pluck them from their stems, wash and lay them out to dry. When dry, I put them in zip lock freezer bags and freeze them. They're easy to dip into for smoothies throughout the year.

  • Fall Gingerbread and Transferware

    Fall Gingerbread and Transferware

    O ne of my favorite fall breads is gingerbread. There's just something about ginger, cinnamon, cloves and rich molasses that make it so delicious.

    I love to pair fall foods with my brown transferware. I'm certain it makes everything taste better.
    I purchased the transferware several years ago when I came across them at Home Goods. I bought twelve bowls, salad plates, and dinner plates as I thought they would make wonderful Thanksgiving dinner ware.

    This is what the pattern looks like. I love the birds with the flower adornment.

    This is the mark on the back.

    This monogrammed 'B' silverplate was my Grandmother's everyday ware, but I keep it tucked away for special occasions. I actually found an entire set of this pattern at a flea market, but without the monogram. I wonder where one would bring silverware these days for monogramming ?
    Gingerbread Recipe:
    2 cups organic all-purpose flour 1 1/2 teaspoons ground ginger 1 1/2 teaspoons ground cinnamon 1 teaspoon baking powder 1 teaspoon baking soda 1/2 teaspoon salt 1/8 teaspoon ground cloves 3/4 cup low-fat organic buttermilk 1/2 cup organic sugar 1/2 cup organic molasses 1/4 cup organic low-fat milk 1/4 cup organic canola oil 2 large organic eggs
    Preheat oven to 350 degrees. Coat 9-inch square baking pan with cooking spray.
    Combine flour through cloves in a large bowl with whisk. In a separate bowl, combine buttermilk through eggs and stir with whisk. Pour into flour mixture, stirring until moist.
    Bake for 45 minutes or until done. Cool on wire rack for 10 minutes and then remove from pan. Enjoy.
    Happy last weekend of October to you! xo

  • Heirloom Tomatoes

    Heirloom Tomatoes

    T hanks to our recent warm Indian summer days, we're finally able to pick some of our heirloom tomatoes. The tomatoes have been drastically behind this year due to the cool early summer. But the autumn sun has helped nudge these voluptuous fruits to ripeness.

    The basil is done growing for the season. I made lots of pesto through the summer which we happily enjoyed with pasta, pizza (in place of tomato sauce), and sandwiches much like the one shown above. So in place of pesto, I've been using sliced avocado instead.
    The recipe includes: a crusty loaf of organic whole wheat bread, a sweet tomato, organic avocado and organic provolone cheese. I toast the bread first, then add avocado, tomato and cheese and bake it in the oven for a few minutes until cheese has melted.
    It's the perfect way to eat a fresh picked tomato on a beautiful fall day.

  • Pumpkin Walnut Bread

    Pumpkin Walnut Bread

    O f course I couldn't make pumpkin soup and pumpkin birthday cake without making some yummy pumpkin bread. The aroma of it baking in the oven elicited the warmest of warm fall fuzzies. I love the smell of cinnamon....it's the coziest spice of all.

    I used an Epicurious recipe ( found here ).
    I think this will be it for pumpkin recipes for awhile. But come November, I'll make pumpkin pies. Also, due to the abundance of pumpkins the garden produced this year (I counted twenty-five yesterday), I may make Pumpkin Walnut Bread to give as gifts over the holidays.
    Our pumpkin plant, on average, was supposed to produce four to five pumpkins....so not sure how ours exploded to five times that amount. Perhaps the pumpkins were trying to make up for the tomatoes that didn't fair so well.
    Happy pumpkin season to you! xo

  • Chanterelles Are Out!

    Chanterelles Are Out!

    Chanterelles are out! We had a nice rain over the weekend, prompting Hubby to set off into the woods in search of the beautiful Chanterelle mushroom.

    In just two hours of combing the wet fall forest, he collected nearly five pounds of fresh delectable fungi.
    The following book is the field guide that Hubby has been using for years. It's a wonderful book with lots of pictures and thorough descriptions that make mushrooming all the more safe and alluring.
    The Chanterelles are gorgeous and smell like fresh apricots! Our favorite recipe for the Chanterelles is homemade pizza, which we had for dinner last night (recipe here ). Tonight, we'll saute up the rest and add it to red quinoa with sauteed shallots and kale.
    Delicious.

  • Happy Birthday Pumpkin

    Happy Birthday Pumpkin

    H ubby (also known as Mike or Sweetie....or for this post, Pumpkin), has celebrated another birthday. He's forty (again). He's decided to stick with forty for another year....or so, and I couldn't help but oblige him.

    Here's the Birthday Boy.

    I made him a Pumpkin Spice birthday cake using pumpkins from the garden.

    It was really delicious....moist and rich.
    This is the recipe I used.
    Happy Birthday Sweetie!

  • Pumpkin Goodness

    Pumpkin Goodness

    T wo fresh pumpkins were plucked from the garden in order to make our pumpkin soup.

    They were cut in half and their pulp and seeds scooped out.

    I separated the seeds from the pulp, washed them thoroughly and roasted them. To do so, I spread them on a cookie sheet covered in Canola spray and sprinkled them with salt. After 10 minutes at 325 degrees, I stirred them again and baked them for an additional 10 minutes until nicely toasted.

    Roasted pumpkin seeds are delicious and some of the most nutritious seeds around. Ours didn't last long.
    To make the soup, I took the pumpkin halves and placed them face down in a dish to bake at 350 degrees for an hour. Once they cooled, I scooped out the pumpkin and pureed it until smooth.

    Here's the pumpkin soup recipe we used...
    3 cups organic pureed pumpkin 3 cups scalded organic milk 1 TB organic butter 1 TB organic flour 2 TB organic brown sugar 1 tsp salt 1/2 tsp cinnamon 1/4 tsp ginger
    Heat the above ingredients in a saucepan and serve.

    This was the easiest and healthiest pumpkin soup recipe I found (no heavy cream). It came from the Joy of Cooking, although I made some adjustments. Also, to make it all the more healthy, I used as many organic ingredients as possible.
    YUM.

  • Huckleberry Muffins

    Huckleberry Muffins

    I realize that I've been posting a lot on food recently. I would say it's because I'm pregnant and food is on my mind quite a bit but honestly, it has more to do with dragging my feet on other projects. Shall we say these have been the lazy days of late summer?
    Not too lazy to make my new favorite muffins though! These come from a Blueberry Muffin recipe from the fabulous gluten-free baking book called, " Gluten-Free Baking Classics," by Annalise G. Roberts. Go here to see the book.
    My friend Karen, who follows a strict gluten-free diet, recommended the book. We are not a gluten-free household but these recipes are delicious and I think having variety in your diet is always a good thing.

    Recipe:
    2 cups Brown Rice Flour Mix 2/3 cup granulated sugar 1 tablespoon baking powder 1 teaspoon baking soda 3/4 teaspoon xanthum gum 1/4 teaspoon salt 1/4-1/2 teaspoon nutmeg 1 1/2 cups unsweetened fresh dry blueberries 1/2 cup milk 1/2 cup canola oil 2 large eggs 1/2 teaspoon pure vanilla extract
    1. Preheat oven to 375 degrees. Grease muffin pan with cooking spray. 2. Mix flour, sugar, baking powder, baking soda, xantham gum, salt and nutmeg in a large mixing bowl. Add blueberries; stir to coat evenly. 3. Combine milk and oil in small bowl; remove 1 tablespoon of combined liquid and discard it. Beat in eggs and vanilla. Add to dry mixture and stir until just blended. 4. Fill muffin pan and sprinkle with cinnamon sugar.* 5. Bake 18-25 minutes and until light golden. Cool on rack.
    * Cinnamon sugar is 2 tablespoons sugar to 1/2 teaspoon cinnamon.
    We happened to have wild huckleberries on hand, so we used those in place of blueberries.
    I hope that everyone had a lovely long weekend. We, once again, spent our entire weekend working on the house. The upside is that we accomplished a lot and I'll have some after photos of the dining room in my next post!
    xoTrina

  • Pickles, continued...

    Pickles, continued...

    O ur garden is producing a bumper crop of pickling cucumbers! I now have two full crocks of refrigerator pickles, but not even a pickle craving pregnant woman nor a Midwestern pickle-consuming husband can keep up.
    So Hubby decided to dust off his old recipe to can some pickles. A delicious fact about my Hubby is that he loves to cook — french toast, big dinner meals, yummy cakes (he makes me a birthday cake from scratch), and pickles.
    The recipe he's used (which comes from an old friend's grandma, modified by Hubby's Mom) is pretty open to variation but the basics are as follows (for six quarts):
    Fresh cucumbers, washed
    Seasonings: Pickling dill in each jar Pickling spices (we found ours in the bulk section of our grocery store) Garlic cloves, two in each jar

    Brine: Organic vinegar (1 quart) Water (3 quarts) Pickling salt (3/4 cup)
    Sterilize jars in rolling boil in large pot. Pack cucumbers tight in sterilized jars with seasonings. Bring brine to rolling boil. Pour brine in jars. Let sit for 10-15 minutes, until cucumbers begin to turn olive.

    Pour brine back into pot and bring to second boil. Fill jars with brine again, to 1/4-1/2 inch from top. Secure sterilized lids on full jars, and allow to cool. After jars have cooled, check that lids have sealed. Let cure for three months.
    Our canned pickles won't be ready to sample until on towards the holidays. The Refrigerator Pickle recipe I blogged about a few weeks ago results in a much more mild flavor than these will have as there is no salt in the recipe. For some, the Refrigerator Pickles may be too mild (especially if you're used to really salty or sweet pickles), but I continue to use the recipe because as a swollen pregnant pickle consuming woman, the no salt and low sugar is a good idea for me. ; )

  • Sweet Blackberries

    Sweet Blackberries

    I love blackberries. They're my favorite berry to eat in the languid days of late summer. When I lived in Maine, my house had a long hedge of them, and I used to pick them like mad. Waiting for those berries to ripen was one of my annual pursuits. Enjoying their sun-warmed sweetness was one of the highlights of my summers there.

    We also bought a loaf of crusty wheat bread...

    ....to enjoy one of our favorite weekend breakfast treats — French Toast. Hubby makes these. He uses a recipe from Joy of Cooking, but then adds a few extra spices that make them extra special.
    Joy of Cooking recipe:
    4 eggs 1/2 teaspoon of salt 1 cup of milk 1/2 teaspoon vanilla
    Hubby's extra spices:
    1/2 teaspoon cinnamon 1/4 teaspoon cardamon 1/8 teaspoon nutmeg
    Combine all of the above ingredients in a square shallow dish. Dip bread slices in and grill until done.
    Top with fresh fruit and maple syrup.

  • Berry Crisp

    Berry Crisp

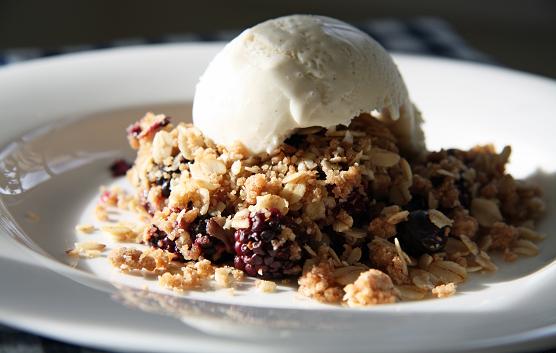
    Fruit crisps, fruit pies, fruit cobbler....any combination of warm baked fruit with a dollop of creamy vanilla ice cream is pretty much my favorite dessert.
    That said, it didn't take long for me to think of using some of our market berries for a yummy crisp. We also happen to have this wonderful organic vanilla ice cream in our freezer. So really, the crisp was half-made anyway.
    This is the recipe I use for my crisp toppings. I used this on an apple crisp I made when we had company last. I sprinkled a little sugar on the apples but with these berries, they're so sweet on their own, I didn't add anything.
    Crisp Topping
    4 tablespoons of butter
    1 teaspoon ground cinnamon
    1/4 teaspoon of salt
    1/3 cup of brown sugar
    1/2 cup flour
    1 cup of thick rolled oats
    In a Cuisinart, blend butter through flour. Then add oats and pulse a few times to blend. I put oats in at the end so that they stay as whole as possible. The topping will be enough for a nine inch pan.
    Bake at 350 for 45 minutes or until done. I wait until the top is golden and the fruit is bubbling.
    P.S. Hubby and I went on a date over the weekend and saw the movie Julie & Julia. It really inspired me to crack open that "Baking with Julia" cookbook I got ions ago and yet, have never used. Today I made it as far as opening it up and looking at all the pretty pictures. We'll see what follows...

  • Refrigerator Pickles

    Refrigerator Pickles

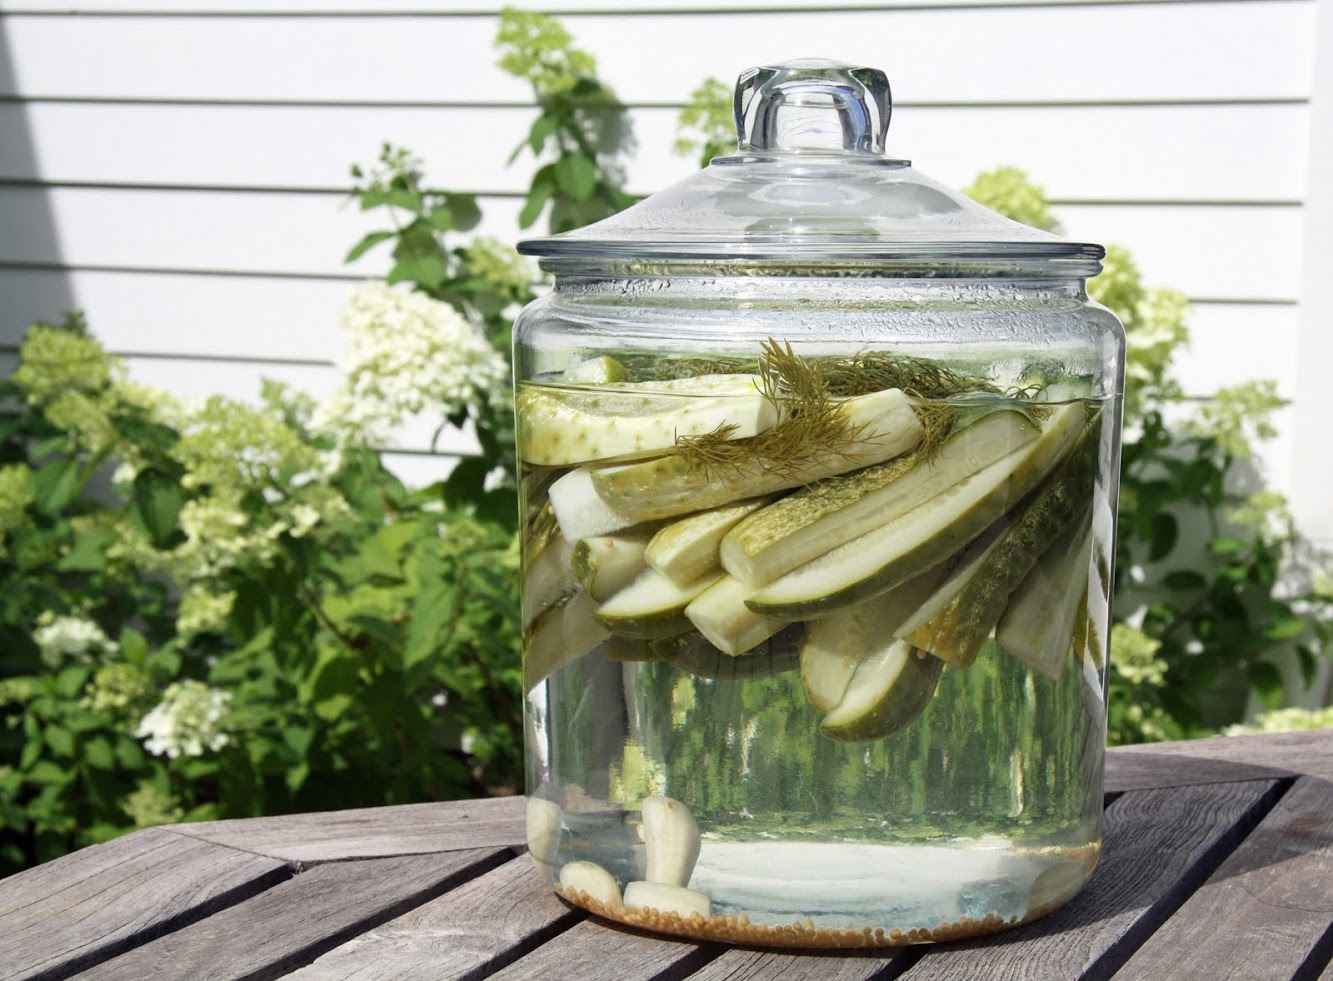
    I made our first batch of refrigerator pickles today. We planted a bunch of pickling cucumbers just so that we could enjoy this wonderful summer treat.

    It seems as if the cucumbers grew overnight! One day there were none, the next there were lots!

    This is the recipe I used:
    Wash fresh picked cucumbers and quarter into spears. Place in a large jar.
    In a saucepan, boil: 6 cups water 1/2 cup sugar 1 cup organic white vinegar
    Set aside to cool. Once cool, pour over cucumbers.
    Add:
    5 organic garlic cloves organic fresh dill 1 teaspoon mustard seeds
    Refrigerate. They should be ready to eat in about five days and will last refrigerated for several months (ours won't last that long).
    *I doubled the batch so that there was enough liquid to add more cucumbers along the way.

    Once the pickle jar is established, take your fresh picked cucumbers, quarter them into spears, and drop into jar. You'll be able to tell by color (darkest green), which cucumbers have been in the longest and which you'll want to eat first.
    Update: After a few rotations of pickles, I found that the flavor had waned so I made a fresh batch of the recipe to refresh the jar.

  • First Harvest

    First Harvest

    I t was a beautiful evening last night as we picked from our vegetable garden for the first time. It's been really quite wonderful to watch the garden grow and then to feast on its delectable wonders.

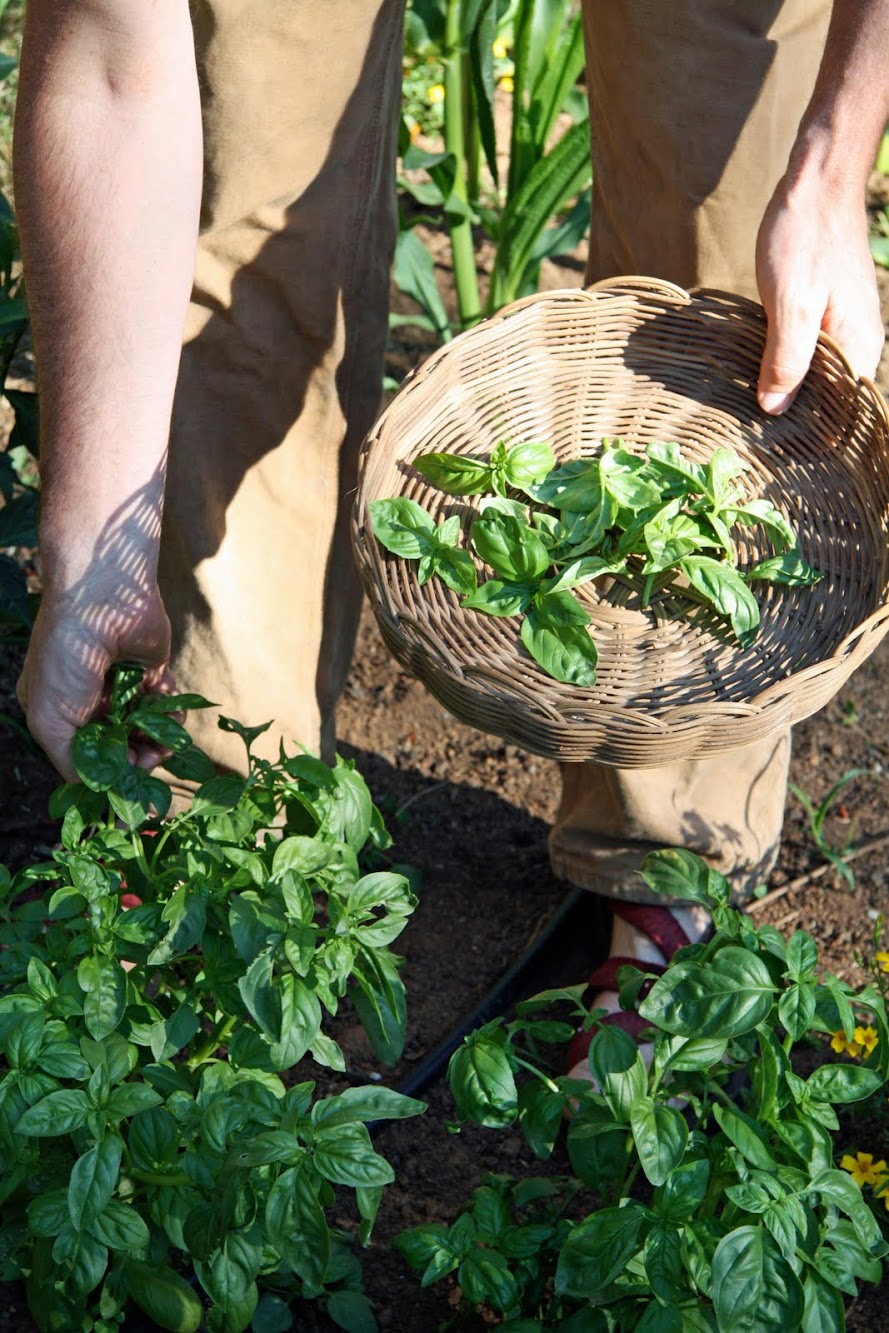
    I made fresh pesto with the first basil clippings — go here for the recipe.

    We also picked that first fresh tomato from the vine. She was warm from the sun and tasted as sweet as summer.

  • Cravings: Cherry Pie

    Cravings: Cherry Pie

    I t all began with these beautiful organic cherries. It's cherry season here in orchard country so there's lots of them. After snacking on them for a couple of weeks now, I decided that it was time to make ourselves (Hubby, me and babies included) a cherry pie.

    Pitting the cherries is something I really enjoy, pink fingers and all. Hubby bought me this cherry pitter last year — it pits four at once and is completely splatter proof. Good thing.
    Pie filling recipe:
    4 cups pitted cherries 4 tablespoons quick cooking tapioca 1 cup sugar 1/8 teaspoon of salt 1/4 teaspoon almond extract 1/2 teaspoon vanilla extract

    This is the pie before I put it in the oven. I use a pie crust recipe that I learned in a class at the town hall several years ago, taught by a blue ribbon winner at the county fair. Her secret....Martha Stewart's pie crust recipe and really, really good butter.
    Pie crust recipe:
    2 1/2 cups all-purpose flour 1 teaspoon salt 1 teaspoon sugar 1 cup butter
    Combine above (I use a food processor) until mixture has pea-sized pieces and coarse crumbs.
    Drizzle 1/3 cup cold water over flour mixture and work in until dough clings together in balls. Separate into two equal parts and roll out.
    Bake pie at 400 degrees for 50 minutes.

    Here's the cherry pie, fresh from the oven.
    I spent my first trimester in survival mode. I had to eat whatever I could that didn't make me feel woozy, and had a very strong aversion to sugar. But now that I'm in my second trimester, my dietary aversions are a little more manageable. I'm even beginning to sample a few sweet things...

  • Asparagus Pizza

    Asparagus Pizza

    I want to share with you the most delicious recipe that we've been enjoying lately. It is a recipe that came to us from Smitten Kitchen . If you haven't already taken in her mouth watering culinary skills, you most certainly should.
    Most of the time, I merely drool over her delectables....making mental notes of 'having to prepare that myself someday.' But my lack of follow-through changed a few weeks back when she sent a recipe for Asparagus Pizza.
    Go here for her delicious recipe.
    Below is my version, slightly modified for what I had on hand at the house.

    Ingredients:
    20 stalks of asparagus (about four cups shaved with vegetable peeler) olive oil two shallots (four bulbs) salt and pepper mix of shredded Italian cheese (I use Horizon's Organic Italian Blend)

    Saute sliced shallot in olive oil until cooked. Throw in shaved asparagus and cook until slightly tender. Add salt and pepper to taste.
    The pizza dough recipe is one I've used from the Moosewood Cookbook for eons. It never fails.
    Dough recipe:
    1 package yeast 1 tablespoon honey 1 1/2 teaspoons salt 1 cup wrist temperature water 3 cups or so of flour (use any flour you like) olive oil to drizzle on top
    Combine yeast, honey, salt and water in a large bowl. Add flour and knead into firm dough.

    Return to bowl and drizzle top with olive oil. Cover and let rise for at least an hour or until it doubles in size.

    The recipe makes two large pizzas. I roll out the dough on each pizza pan and then I bake the dough for a few minutes on 475 until it doesn't stick to the pan and is slightly golden (see above).
    I remove from oven, add toppings (cheese and asparagus) and then bake for several minutes longer until cheese is nicely melted and crust is nice and golden.

    Bon Appetit!
    It's a wonderful way to enjoy lots of yummy asparagus while it's in season! It's also a perfect preview to the fresh tastes of all of the summer produce to come.

  • The Grape Vines

    The Grape Vines

    W hen we bought our house, the old Concord grape vines were a bit overgrown like the rest of the property.

    It took a little of this (Hubby dusting off the weed whacker)...

    And a little of that (Hubby pushing the mower around).

    It took some good pruning..

    And finally, some summer sunshine.

    At the end of a hot summer day, it's a nice spot to sit back and watch the vines grow.

    Some of Hubby's pickings from last fall.

  1. Craft Holiday - Creative Textile Holiday
  2. Colouricious Creative Holidays - Fabric Books
  3. FREE Workshop, See You on Saturday 10th July!
  4. Art Retreat
  5. Come Celebrate Christmas with Colouricious!
  6. H&M: In Stores now | Mode: Fashion
  7. Tori Praver: Marie Claire US | Mode: Fashion
  8. Eva Mendes: Marie Claire US | Mode: Fashion
  9. Kristen Stewart | Mode: Fashion
  10. Nimue Smit: L’Officiel Netherlands | Mode: Fashion