Ok, let's be real here. You know how when we write a tutorial and most of the time we say something like,"It couldn't be easier!" or, "Anyone can do it"? You won't hear that from me today. Painting kitchen cabinets really isn't hard, but it's time-consuming, monotonous and boring. It took us a full 10 days (working on weekday evenings- it could take less time if you have a big chunk of time to devote to it!) from start to finish. That being said, for the amount of money you put into it- really only the cost of paint- you won't find anything that makes as big of a difference. So, if you think you're ready to tackle this project- go for it! You won't regret the time spent in agony. Ha! Just kidding. But seriously, you will absolutely love the results.
1. Take off all of the doors and pull out all drawers. Take off all hardware and store in a safe place! We had a bag labeled with what went where. And if you're anything like me, clean out your cabinets because that's just gross.
2. Sand away! A lot of people will tell you that sanding is unnecessary. However, if you want a really seamless, smooth look, or if you have very glossy cabinets, I recommend a light sanding. I used my palm sander with 80 grit sandpaper (the higher the number, the finer the grit. For heavy duty sanding, use a lower grit sandpaper!)
3. Wipe down the cabinets to remove all dust and choose your supplies. We used a 2-inch high density foam roller that is meant to be used on cabinets. We found that they didn't hold paint well, which meant we needed to do lots of coats, but the paint went on so smoothly! We also used a 2 1/2 inch angled paint brush (Purdy is the best!) to get the corners and hard to reach places.
4. Prime and Paint. We started off priming everything, but quickly realized that to get good coverage we'd have to do way too many coats of paint. So we used Olympic ONE Paint + Primer in pure white that coordinates with our moulding in the kitchen and entryway. We didn't feel the need to use an oil-based paint as long as we used an enamel paint (enamel = paint that dries hard, is usually glossy, and is easily washable). Also, the higher the gloss of the paint, the harder it dries. I wanted a glossy look, so this works for me.
Because our cabinets were previously stained (by us!) a dark walnut, it took several coats of paint. I would say that each door got 4 coats of paint. You could sand the cabinets in between each coat for an even smoother finish, but honestly, that would have taken us 4 extra years, so we decided to skip that step. They still look amazing.
We did both the outside and inside of the cabinets, so that no dark wood peeks out when you open the doors. Here's a super great tip that I wish I had heard of before we started: use push pins in the back of the cabinets to lift them off the ground. No more sticking to the dropcloth!
5. Seal with a water-based polyurethane (we used Sherwin Williams Wood Classics) for extra protection and even more washability (is that even a word?) Again, we went with water-based because oil-based polyurethane can yellow over time and that's not the look we're going for!
6. Wait and wait and wait some more for the paint to cure. You don't want to nick up your beautiful white cabinets, so make sure you wait the appropriate amount of time written on your paint can before putting them back together. 7. Put all the hardware back on the cabinets and drawers.
8. Time to put the kitchen back together! This step couldn't have come sooner in my book, and I was literally, dancing for joy. We hung the upper cabinets first, and made sure to caulk along the side of the cabinet to make sure it look seamless.
9. Step back and admire your beautiful cabinets! All that hard work was worth it, for sure!
I hope I answered all of your questions about how to paint cabinets. If not, be sure to leave a comment with your question! I LOVE my new cabinets! What do you think? Worth the effort, or just way too much work?
New here? You can check out our kitchen demolition here.
Imagine with me for a minute…See this soffit?
Imagine with me that that soffit is no longer there. There would be no interruption from the countertops to the ceiling, and as a result, the ceiling would seem so much higher. Nice, right? It would be so open and clean.
I could hang the cabinets from the ceiling, which would increase the space between them and the countertop. You with me? Are you seeing what I'm seeing? Ok, good. Because here goes:
First we removed all the upper cabinets (and by"we", I most definitely mean my hubs). We were amazed at what we found behind those cabinets- apparently the homeowners before us did their own DIY with painted tiles, framed by a sharpie marker! Plus, there's a vent that was hooked up to the microwave that we realized we need to take care of, as well.
I did loads of research on removing soffits, since this is our first big demo/remodel, and everyone said the same thing: make a small hole in the drywall and check to see if there is any wiring or pipes behind the soffit. In a lot of cases, soffits have no real structural function, but are there so you could hang cabinets from them. If you notice, new construction homes almost never have soffits in the kitchen. Luckily for us, there is a recessed light in our soffit, so we were able to remove it and get a good view into the interior of the soffit.
Since it's a pretty small hole, we stuck our small digital camera up in the soffit and took a few pictures in each direction to make sure all was clear. It worked like a charm and I was thrilled to see that there wasn't anything there but insulation!
Also, a bunch of people said that soffits aren't always made of drywall, but could also be plywood, which is why we weren't afraid when we saw this:
So, we kept on ripping things out (while trying hard to ignore the mouse droppings- Eew!) Then, when we were all done, my hubs said he thought that maybe this big beam in the front might be load-bearing beam that runs along the entire length of the back of the house. Ahhhhh!!! Noooooo!!!!
This is when we called in the experts, ie: my father-in-law and my parent's genius handyman, Robert. While we waited for them to come, I spent a few days trying to decide how I felt about have no upper cabinets.
I decided that I really liked it, but after stewing over it, I also came to the conclusion that it wasn't really practical for us since I removed the upper cabinets on the other side of the kitchen. My new plan for this side of the kitchen is a combination of cabinets and open shelving that I'll share with you as we get closer to it. (Believe me, LOTS has to happen before that).My hubs also spackled the wall, and painted it the new gray/tan in anticipation of the next step.
Well, you guessed it, we did find out that the beam was load-bearing like my hubs suspected and needed to stay in place. So, (and this is so sad, and yes, I know my hubs is a saint!) my hubs went to work drywalling the soffit back in, with the help of Mo's husband, Eric. Poor guy. But, we were able to remove the recessed lighting kit and install a pendant light kit. Woohoo! I can't wait to pick that baby out!
Even though we had a really big I'll be trying to make it up to my hubs for a long time minor setback, we did make some progress elsewhere. When we moved the oven to the other side of the kitchen and slid the fridge in it's place, we were left with this small cabinet space to the left. It was not functional at all, and it really made that side look disjointed.
We removed the counter from the wall, and then moved the whole thing over to the other side of the refridgerator, giving us more counter space to the right.
There is, of course, a crack between the two countertops, that, we're told can easiliy be masked with some paint that matches the counter brushed on the crack and then wiped away. You'll still notice it, but it won't scream out at you, and we don't plan on keeping this countertop forever (hopefully not past this year!). Here's where we are right now:
I have to admit that my 3 year old took this picture, but what can I say? She has a good eye! Ok, take a deep breath. That's all for now.: )
{If you didn't hear, The Real Housewives of Bucks County are now East Coast Creative (Get the story here). You'll still be getting all the DIY, Design, and Monica & Jess that you love, but change your favorites to www.eastcoastcreativeblog.com Thanks!}
You might remember that one of my 2012 goals was to make our family room reflect my style more this year. I still am convinced I don't really have a style… I more or less, just take lots of things I like and smush them all together, hoping it works out okay. Recently, I took one more step in the right direction for the room.
I was browsing on Etsy a few weeks back and came across a shop I loved! Project Type has so many graphic art prints that I immediately fell in love with. This one in particular caught my eye.
I had been toying around with the idea of vintage cameras in our family room and this picture was too cool to pass up. I contacted the artist to see if I could have a few custom tweaks made (it was vertical and I needed horizontal) and she said YES! I was so stinkin' excited when she agreed! I ordered two prints and honestly even the packaging they came in was super cool! Now, you might remember what was on the wall already. My ginormous family picture with the smaller frame…
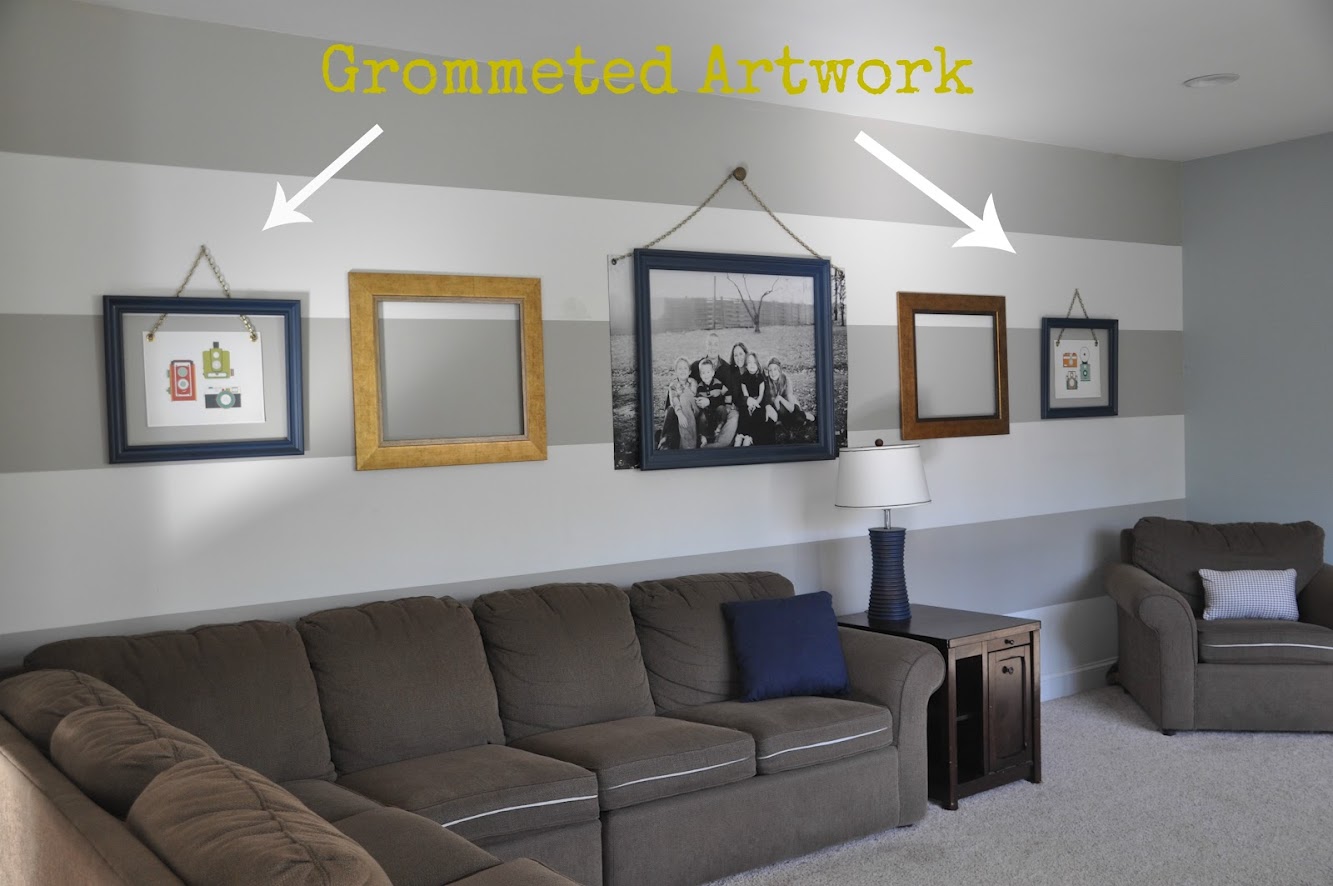
Well this time, I was going for the reverse. Tricky aren't I? Bigger frame smaller picture. Once again I used my prized possession, AKA grommeter from Nate. I'll admit I was a tad nervous putting holes in fabulous artwork, but I wanted it to have the same feel as the large print. Want to know how to use a Grommeter??
I keep my grommet tools in the little bin Nate gave me. Who knew one could love Tupperware?
Take one of the female grommets and determine your placement. I traced it with a pencil (a very fancy pencil I might add!)
Next place the cutting tool (might have an official name, but I don't know it) on your traced circle, and put the mini block of wood under it. The wood comes with your kit.
Give it a solid pounding with a hammer and you have a nice little circle cut-out
Pop the male piece through the opening. Make sure the pointy end is on the back of your artwork.
Now start stacking. Add the female part to the back…
Here' the order…The large metal ring goes on the bottom (part of the tool kit), then the male grommet, then paper, then female grommet, then the big mama tool (that's the really official term). Now Hammer, Hammer, Hammer. (Don't do it on your granite counter. I took mine outside in the garage)
Ta-da! Perfectly adorable grommet!
I took my art to the wall and hung it with plain nails. I'll use decorative ones to cover 'em up.
I added my chain, which again only cost me about $1.45 at Lowes
And vioila! I'm also going to add a fun door nob to the peak of the chain. I didn't quite get to Architectural Antiques this weekend as I planned to. Now, here's the question of the day… What should I put in the open gold frames??
Here's the room to give you the full picture…
Side note: Does anyone else have a weird husband that flips the cushions backwards? He does it when we don't have company over because the kids make a mess of the cushions. Sometimes I forget and then it's an awkward, mad rush as people are walking in the door. Weird. I know. So let me know what you think of my retro camera art, and what I should do to finish off this wall!
Well lookie here… a new blog name and a whole new look! {Eeek!} Let us tell you that this has been one crazy journey. If you’re new around here or missed the drama he’s the low down… We’re a DIY and home décor blog. We’re Housewives. We’re Real. But, now we’re East Coast Creative… the bloggers formerly known as “The Real Housewives of Bucks County.” Hey, if Prince can do it, so can we! Change stinks, but we love our new name! So, our name is different, but everything else is the same. We’ll still be bringing you awesome DIY projects, cool design trends, and plenty of goofy Monica and Jess tossed in. Here’s where you come in… 1. We need help letting people know that East Coast Creative is still us! Facebook it, Tweet it, give us a shout out on your blog, whatever it takes. We want the world to know we’re still here! 2. For now, the old address will work, but (as soon as it's functional, hopefully sometime today) try to get in the habit of using www.eastcoastcreativeblog.com *will be working soon! 3. Let’s all just put RHBC behind us and move on. {Excuse us while we weep in the corner} On another note… none of this would be possible without the amazing talent of Kim at 733 Designs. She put up with a lot of our crazy ideas, slight breakdowns, and was super helpful and fast in making this all happen. Finally, we are so thankful for all of YOU! The positive feedback we get from you (especially in response to yesterday’s post) is so encouraging. We love this blog no matter what the name,(wait… what’s the name again??) and we’re so glad you do too.
Soooo…what do you think?! With love, The Bloggers Formerly Known as The Real Housewives of Bucks County ** Other blog post titles that were considered:-How not to get sued-East Coast What???-The Housewives are Dead to us-Crap we need a blog name-A Case of Mistaken Identity
Ok, it's time to get really real with you. About us and our blog. It involves a little something we like to call:
We recently received a very nice comment from a regular follower that prompted us to write this post. Before you read it, I have to say that we were very grateful for this reader's honesty, and the sweet way she voiced her concerns. There's nothing we love more than good, honest feedback from the lovely people who visit our blog every day!
Ack! She nailed our current dilemma right on the head! Let me give you a little back story…when we started this blog a little over a year ago, we did not anticipate it interrupting our lives at all. It was just a place to throw all our ideas and projects. We literallythought that only our moms would read it. Then came Nate (not once, but four times!),
Crafting with the Stars…
local TV coverage, newspaper articles (you get the point) which equalled rapid blog growth. AND WE LOVED IT. All of these amazing opportunities meant that we were doing loads of projects, pouring hours of our time into the blog, and spending a lot of money to keep it all together. The blog is the most important, most rewarding and most fun thing we do (yes, even more than the Nate Show! It's our first love.), so we make every effort to put 5 great posts out per week. We LOVE this blog and it has become bigger and better than we ever expected.
But here's where our dilemma comes in: In addition to the blog, we both work other jobs, raise a bunch of kids and try to be good wives, friends, daughters, sisters etc. Realistically we could not possibly keep up the pace we had been going for the first year, even though we would like to. Not only did this little blog take a lot of time away from our families, but we also spent a lot of our own money to do all those projects! We need to find a better way. We are trying to adjust our own expectations (which, believe me, are sky-high!) and are experimenting a bit with our posts.
So what does all this mean for the blog you love to read? 1 You'll probably see only a few DIY projects a week from us. Instead of scrambling to come up with a DIY project just for the sake of having one to post about, we're being more intentional about our projects so that they're well done, and have a purpose in our homes.
2. We'll be highlighting our wonderful sponsors every once in a while to expose you to their awesomeness and also, to express our gratitude for their support of our blog that allows us to keep doing our projects. Don't worry we won't be throwing them in your faces at every turn, and we promise to only accept sponsor whose products we absolutely love!
3. We might host a guest poster, or highlight other blogs we feel like are worthy of notice! The design blog world is like a family, and we want to promote other people, like others have promoted us!
4. We'll keep bringing you our thoughts on all those fun, crazy and fabulous design trends out there, and how we're incorporating them in our homes!
So, in conclusion (are you still there?), we are crazy about this blog and all of you, and hope to continue doing this for a long time, and even (crossing our fingers) turn it into a full-time job. We hope you'll stick around for the long haul, and be understanding as we try to find balance and a system that works for us. And now, a question for all you bloggers/mothers/wives etc. out there: How do YOU find balance?
P.S. We'll be doing a follow-up post on our top tips for Part-Time Bloggers, so get excited!; )
Thanks for all your great comments about my new front door color. Valspar's Spritz of Lime paint might be a new obsession for me! I gave you a little sneak peek of the door numbers yesterday, but today I'll give you the full low down. Adding numbers to a metal door can be tricky, but don't worry, I made all the mistakes for you and can save you some time!
My front door is heavy, and metal or something like it… bottom line, it's not wood. I didn't want to make any holes in it. I found these clean lined, modern house numbers at Lowes. I had big plans to DIY numbers out of MDF, but for $4.99 each, I decided these would work just fine. I'm all about the DIY, but not when it makes more sense to just buy em!
So… metal numbers on a metal door… hmm… I'm smart (or so I think…) so I decided heavy-duty, double sided magnet was a perfect non-permanent solution. This way, depending on what wreath (or not) I have on my door, I can move the numbers around! Pure Genius!
The magnet has adhesive on one side, so just cut little strips and stick it to the back.
Like this!
Umm… Guess what?? I guess my door isn't really metal and doesn't work with a magnet. DARN! Would have been nice to check that out first. Oops!
They work great on my fridge! So if you even need house numbers on a fridge, now you know how!
Okay, plan B… off I went to Lowe's with plans to get double sided adhesive. I asked the nice man where the industrial strength tape would be found. Of course he asked about my project and had a better idea. He suggested industrial velcro.
It's nice and heavy duty, so I was swayed from my plan and gave it a try.
Apply it the same as the magnet…
Because this stuff is sticky, I wanted to be sure I had it straight. Look how muddy my level is… not really sure why…
Peel the plastic off the adhesive and firmly press on…
Wait 30 seconds and… watch them fall to the ground. ARRRGGG! This is the point where I started to get a wee bit annoyed. Then I started to laugh… why would I think velcro was a better idea than just double sided adhesive? I must have had temporary brain loss.
Here's the winner and what I should have used from the start. So, if you want to add house numbers, just begin here and skip the other methods I tried!
Finally! There they are. Nice and permanent (well sorta, if I want to remove them I can pull them off, and I'd just need to touch up paint)
I love the way they look against the green/yellow!
And just as a reminder, here's what else I have planned for my porch!
There ya have it… 2 ways NOT to add numbers, and 1 way that works like a charm! Aren't you glad you have me to do all the trial and error for you? Do you have numbers on your door? Do Tell!
About a month ago, I asked for your help deciding what color to paint my front door. I was really stumped! Thanks to all of you for your input! We collected over 400 responses! Best.Readers.Ever!
Here's what you all suggested…
Red was clearly the winner with 52% of the vote and I agree that red would look fabulous on this house… if someone else owned it. For me, it's just too typical. I'm not the type that has to be different just for the sake of being different, but I do want my house to reflect me inside and out, and I just wasn't feeling the red.
So after staring at my house and this picture for what seemed like an eternity, I made my decision…
Tips for How to Paint Your Front Door 1. Clean the door well and let it dry (clearly this picture was pre-cleaning). Doors get really dingy and you want your paint on the door, not the dirt! 2. Tape your hardware Some people might suggest that taping is for a bad painter, but for me, I paid a pretty penny for this hardware and I don't want to be scraping paint off. Put your painter's pride aside and tape that baby nice and tightly!
3. Use Steel wool on any imperfections. Have any old drips or sticky spots? Steel wool will take care of that and make it nice and smooth. I had used some Zots on my door and had some sticky residue… not anymore!
4. Choose an Exterior Paint that you LOVE! Drumroll please… Introducing… Valspar's Allen & Roth: Spritz of Lime!
I love it because it keeps me wondering… Yellow or Green? Depends on the light and that's perfect with me. Gives me two colors to love!
I really am happy. I was a tad nervous… well, after the ombre door fiasco, who wouldn't be! But, it in the end she's a real beauty!
I'm not showing you the whole front of the house because there's some major landscaping DIY going on and you'll have to wait and see! I will show you my To Do list… -House Numbers (finished and tutorial for adding numbers to a metal door coming this week) -Must find the perfect rug -Make planters
So, be honest… what do you think? Would you have gone with Red or is Spritz of Lime workin' for ya? What color is your front door?
Spraypainting a chandelier is REALLY easy and it's a super cost-effective way to change things up in your home. Back in January we shared our home goals with you, and one of mine was to start redecorating our dining room space. ALL of the furniture pieces in this room were bought on clearance (hooray for a $60 dining table!), through Craig's List (the hutch was $100) or from a family member (the red chairs were my grandmas!). Even the art was upcycled! Anyway, it's just not fitting in with that lighter, brighter, coastal-cottage look I'm going for, so I figured it was time to get moving.
I have had a light fixture in mind for this room for months, and I guess I've gotten stuck on that idea. Because it's not in the budget right now, I had just resigned myself to wait until the time was right. Then, inspiration struck after seeing Kelly's pinteresting home, and I realized that taking stuff I already own and making it better is what I DO! Duh. So, you guessed it, I took that baby down (by myself!) and spraypainted it. Here are my go-to tips:
1. Take your chandelier outside and find a tree with a low-hanging branch. Throw a dropcloth down under the area you'll be painting.
2. Using rope or wire, tie the chandelier firmly to the branch. Hanging your chandelier allows you to spraypaint the entire thing at one time. No spraying the top, waiting for it to dry, doing a second coat, waiting for it to dry, turning it over, painting etc etc etc. (I'm such an idiot and forgot to take before pictures of the process, so you'll notice my chandy had already been attacked by spraypaint!)
3. Stuff cottonballs down into the stems (where the lightbulb screws in), so you don't damage it with paint.
4. Pick your poison favorite paint and start spraying! I am embarrassingly in love with this color I found from Valspar called Hacienda Tile. It's a mix between pink, red and orange that is absolutely perfect, and satisfies my longing for an infusion of coral in my home. Also, this spraypaint is awesome for this project because it can spray at all angles, so you can easily get down under the chandelier to spray the undersides. Spray 3 light coats, with some drying time in between, for the most even coverage without drips.
5. Hope that your neighbors don't turn you in to the association for being white trash. (Yes, that is my FRONT yard!).
I'm thankful I have such nice neighbors. Anyway, I can NOT wait to show you how this has one little change has inspired a major makeover of our dining room. Yay for more projects! How many of you spray painted something this weekend?
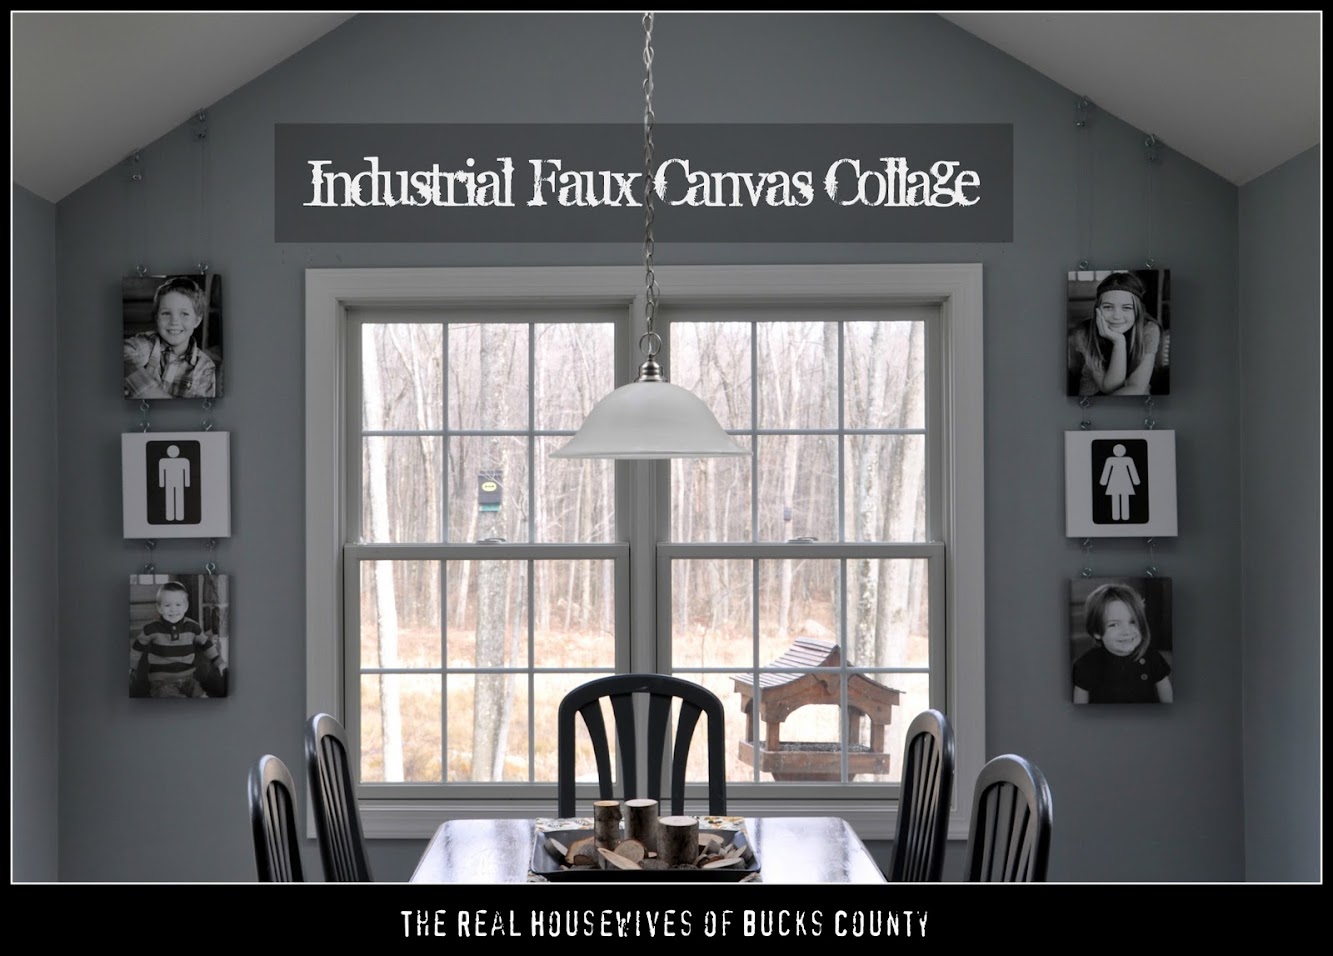
Happy Friday to our favorite readers ever! I've been really excited to share this tutorial with you! I wanted to hang canvas prints of my kiddos in a unique way. Add some wire, screws, and clamps, and I think I came up with something pretty cool!
Industrial Faux Canvas Collage
Everyone loves gallery-wrapped canvases these days, and why wouldn't you? They're fabulous! Although, we don't know about you, but sometimes $60.00+ for one print is a wee bit hard for us to swallow. We were super excited to hear that WalMart came out with a faux canvas:
Now what, you ask, is a faux canvas? Well, we were wondering the same thing, so of course we tried it out. What they do is print your photo on heavy, dimpled paper (canvas look-alike) and then wrap it around a cardboard box. Sounds glamorous, huh? Let me tell you that for the price, we were thrilled!
And, of course, we didn't pay full price… and neither should you! We used a coupon that brought the total down to $9.96 each but… it's expired. BOO! Have no fear, we've got your back! Canvas People will give you a FREE 8x10 canvas and it's not even cardboard! lol. Just use this link to get the deal.
So, you should know by now that I have 4 kids, yup FOUR, and so we got prints of each of the kiddos. We thought it would be fun to add a little boys vs. girls flare, so, inspired by Mandi's Epic Room Makeover we made two graphic canvases as well. We just used some images we found online and Picnik to create them. Sadly, Picnik is actually closing (today in fact!) but PicMonkey is the perfect replacement!
The first step was to add the screw eyes to each canvas. Just measure to the center and screw them in. Since they're made of cardboard it was crazy simple to do. (Umm, please ignore my creepy monster looking hands)
Add screw eyes to the top and bottom of each canvas except for the one which will be at the bottom of your display. The bottom canvas will only get top screw eyes.
Next, add screw eyes to the ceiling. This will require a little measuring, but you'll want them to be even. My vaulted ceiling required some additional math, but we made it work.
Here's where it got a bit tricky. The nice man at Lowe's gave us these clamps to lock the wire in place. Have you ever felt like your hands were made of stone? It's very clear that we're not surgeons. It took about 30 minutes to clamp the first side. Ugh! The hubs finally got home and it took him 30 seconds. We were just happy to have it done!
Now for the fun part! Weave the wire through the screw eyes on the top, behind the back and out the bottom. Repeat for the remaining canvases. Ok, we're all about keeping it Real on our blog, so we'll be honest here too… This is a two person job and preferably with a person you really like, because it's a tad frustrating. The canvases tend to slip down a bit and did we mention our stone hands? We promise it's all worth it in the end.
Once your canvases are threaded through, you'll want to secure the bottom one first. We used a staple gun to hold the wire in place and then added some hot glue (because they were slipping and because Jess is slightly obsessed with the stuff!)
Determine how far apart you want your canvases and adjust them accordingly. The tension of the taut wire should keep the upper canvases in place, but if you want extra support you can add some glue to each one.
The end result is a unique, industrial-looking display that we love!
I couldn't be happier with this project and the unique way to share pictures of my kids! I have to give a shout out to our photographer and friend at Salvatori Photography. These pictures are SO my kids! This was just the first project in my breakfast room makeover, we have lots more planned. I've switched out the light fixture (thankfully!) and this weekend I'm adding avocado chairs, stenciling my table top, and more! I hope to have more to reveal next week!
So, what do you think? Is the wire style workin' for you?
We were absolutely thrilled when we were contacted by the Village Improvement Association of Doylestown- the team that plans the amazing Bucks County Designer House & Gardens. My mom and I have been huge fans for a long time, and {before kids} made a point to visit the home every year. I mean, what's better than being told that you're allowed to snoop in someone else's house?! The BCDHG is a fundraiser to support the Doylestown Hospital that combines gorgeous, old homes in Bucks County and fabulous designers from the area. Designers submit ideas for the rooms they'd like to design in a specially chosen Bucks County home, and the best ones are chosen by the committee. This year's home is unbelieveably gorgeous, with loads of character and charm.
Isn't it beautiful? And this doesn't even showcase the grounds! Love it. Anyway, the lovely ladies on the committee asked Monica and me to run two seminars, and of course, we agreed! We're so excited to be doing one seminar on Upcycling (duh! What else?) and the other on Accessorizing like a Pro. The seminars are included in the price of admission, so there's no excuse for all you design enthusiasts!We'd LOVE to flood the Designer House with as many RHBC fans as possible, so be sure to check out the calendar of events for more information and details. Plus, there's nothing more fun than meetingour readers in real life, so you'd be making us really happy.; ) Will YOU be coming out to support us?
I'm serious when I say that I think one of the best things about blogging and the internet is free printables! They add so much character to your home without having to spend lots of money. Thank you to all you who provide little ol' me with free stuff for my home! I've talked about a few different places you can find free printables here, but I decided that for my open shelves in the kitchen I wanted something specific and custom-matched to my color scheme. What's a DIYer to do? Why, make one herself!
I wanted to create something that was meaningful to me, but that also had some connection to eating and the kitchen. While searching around, I came across 1 Corinthians 10:31 and knew that it was perfect for this!
I found a pattern that I loved by Moo & Puppy (it's the morrocan trellis pattern that comes in a bajillion colors), uploaded it to Picnik and went to town. Why doesn't everyone buy digital paper? Seriously, there are SO many uses for it and it's so darn cheap! Plus, you can get 15% off if you use the code RHBC15. ----------------------------------------------------------------------------------------------------------------------Anyway, back to the printables. I have three identical frames in the kitchen that I spray-painted turquoise, and needed to fill them with something. I made this one using a great Julia Child saying…
…and printed this beautiful peacock from The Graphics Fairy!
Three cheap thrift store frames + free printables = one happy girl! And since I'm so happy, I decided to share the love. Free Eat, Drink, Glory of God Printable
It's a 5 x 7 print and you can choose from three different colors: mustard yellow, turquoise and lime green.
Click here to Download Printables I'm excited to finish accessorizing my open shelves, but you got a little glimpse today of how they're shaping up. What do you think? Have you ever made your own printable? Do share!
I finally made the switch and got myself a sweet iPhone a few weeks ago. I'm loving it… I will never go back to the world of Blackberry. So of course I'm search of all the greatest apps (leave me a comment with your must-haves), but the app I was most excited to get was Instagram! I love it! I'll warn you, my Instagram feed isn't just blog stuff. You'll see plenty of goofy pics of me and the fam as well. Follow at your own risk! If you want to follow along on my Instagram fun my username is RHBC. Today, I thought I'd give you a peek via Instagram into my house and some things you might not see all the time on the blog. Crystal light… I drink it 24-7.
Spoiler alert… Hello beautiful
Can you even believe I'm a DIY blogger? Yup, that's my master bedroom. Remember how I stole Eric's dresser for our Anthro Knockoff? He's still living out of bins 7 months later. I will get to this room someday…
Jess framed this for me on our first Nate Show. It's our version of family rules… we're not really the hugging type.
Chalkboard back splash. Love this rocket! (I also LOVE my knives!)
Chase and Polly, we're really dumb, so we agreed to get my daughter 2 ducks.
Spray paint makes everything better. This project coming to you soon!
And last, but not least. I love my memo board… even if it has December's calendar still. Go me.
Also, one of our good friends (and actually our guest poster Staci's husband) is kind of a big deal on Instagram (like 35K followers). He takes amazing pictures and I'm always amazed that his incredible pics are taken with a phone!! His username is Curious2119
So, now that I'm on Instagram, come follow along (RHBC) I think I currently have 9 followers. Ha! Maybe you can be the big number 10! Have an awesome day- it's going to be almost 90 here in Bucks County!
** Wait! One more thing! Want to turn an Instagram pic into a canvas? I just got this deal in my inbox. 57% off from Canvaspop. Use this google link to get the deal.
Last week we mentioned that we've been really busy working on this Pepto Bismol pink room. Trust me, I love me some Pepto once in a while, but on the walls… not so much. Does this guest room make you want to come and visit? I mean, look, it has it's own personal gym, cable TV, and extra pillows! What more could you want? We're talking 5 Stars Baby!
Ha! It's okay, I know the anonymous homeowners of this guest room and they don't mind a little teasing. Trust me, with how awesome the room is looking, last night Jess and I told them that we definitely want a sleepover once it's all finished! The grand reveal with come on April 24th, but until then here are some major spoilers! Drool-worthy hardware We are sooo crushing on the furniture upscale we did. It was incredibly simple, but makes a BIG impact!
Perfect Colors Have you ever walked into the paint department and felt like certain colors were just screaming for you to notice them? That's completely how this pallette came together. Jess and I met at Home Depot one night and honestly within 3 minutes we had our minds made up.
Umm Gears? Just wait and see. We're actually not 100% sure about all the details for this project, but we know it's going to be awesome. As we told the homeowners…"Trust Us"
Industrial Flair Notice a trend? One of the coolest things about this room is the awesome juxtaposition of styles. We're pairing some funky modern pieces with an amazing 18th Century find. Can't wait to see it all come together!
Honoring Service The homeowners really wanted to incorporate this picture of their grandfather, who served our country. I'm totally a non-emotional gal, but this picture sort of gets to me. One of my good friends Jane, would be so proud of me (she's uber emotional and loves all things military)!
Did We Mention Juxtaposition? Haha! From Army to Blue Birds in a single bound. Don't worry, we're not crazy (okay, maybe a tad) and this will all work out nicely!
Examples of Love & Commitment We have a very cool gallery project for the room. The homeowners (which btw it's really weird to refer to them as"the homeowners" and not just Connie and Mark… Oops! Did I just accidentally reveal their secret identity!) Anyhow… The homeowners had a collection of old wedding pictures from both sides of their parents and grandparents. They've had some amazing examples of what it takes to make a marriage work for the long run. They're going to have a special place to recognize that commitment and how God has blessed those couples in awesome ways.
Have you heard Jason Mraz's new song? I Won't Give Up is one of my top ten favorites right now and it's a great reminder that the road isn't always easy, but it's always worth it. Go listen to it and I'll warn you right now, that it will be stuck in your head, but it's a pretty good thing to be singing all day! So how's that for some spoilers? What do you think of the direction we're headed in? Did you love the Song as much as I did?
Only following on the blog? You're missing out. Use the buttons below to join in on all the fun!
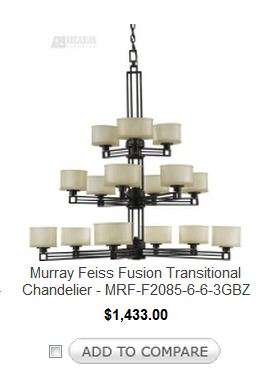
Today we have a Jessica (not our Jess, a different one) from Arcadian Lighting guest posting about blending modern and country designs. We love this trend, so we were excited to see what she had to share. I (Monica) happen to love Arcadian Lighting. We made one big lighting purchase when we built our home. Our foyer needed a huge light and it needed some major wow factor. We must have looked at 192364 stores, and Arcadian was where we found a winner!
It's one of my favorite things ever (and they have great sales, so of course I didn't pay full price!) So, thanks for being here today Jessica! **********************************************************************************
Hi there! I'm Jessica, a writer for Arcadian Lighting, which is a wonderful online resource for beautiful, affordable lighting fixtures. I'm delighted to be guest posting for Monica and Jess today because I'm going to be sharing a collection of inspiring modern country interiors. Rustic and casual with a sophisticated modern edge, these country interiors are just right for the fresh, airy days of Spring. I hope you enjoy!
A simple checked table cloth and set of traditional English china give this lovely dining table a classic farmhouse feel. The contrasting modern wine glasses and Donghia stacking chairs are cool accent pieces.
A chic neutral color palette and a checked upholstered arm chair in the corner bring together new and modern with old and classic beautifully. The branch candlesticks are fun and unexpected.
A gorgeous mix of crisp, modern furniture and rustic exposed wood beams creates a perfectly elegant, yet relaxing atmosphere in this living room. These types of ornate wooden mirror frames and chandeliers add a bit of drama.
The slate fireplace, twinkling candles and brilliant chandelier give this sophisticated dining room just enough simple country beauty. A lovely bouquet of fresh greenery makes the perfect accent, as well.
The vaulted ceiling and shelving gives this living room a distinctly farmhouse appeal. Weathered antiques and cushy modern furniture make the room cozy and inviting.
The handsome dark wooden floorboards and rustic, industrial stools add a rugged edge to this chic kitchen. The pendant lights overhead are simply beautiful, and the under cabinet lighting is a great touch.
A dusty blue wall color and sheer white curtains make this bedroom absolutely dreamy and romantic. The wood beam ceiling add so much natural texture and color that it makes a perfect accent against the very simple furnishings.
The paneled walls in this bedroom lend a cozy country atmosphere to the room, especially with a serene beige paint color. The rustic nightstand and modern headboard are particularly handsome together. Images 1 | 2 | 3 | 4 | 5 | 6 | 7 | 8 Which of these modern country rooms is your favorite? Let us know in the comments! And be sure to stop by Arcadian Lighting for a modern light fixture or two to brighten your home! -Jessica
My daughter turned four a few weeks ago, and as her gift, we promised that Daddy would build her a new playhouse loft bed, and then Mommy would decorate it. We love our girl and were more than thrilled with how excited she was about her new bed. Every day of the week we built it, she would ask us if it was done and could she sleep in the loft? My hubs could not be more proud of the work he did (he did a seriously amazing job!), and I'm so excited to share it with you today! Playhouse Loft Bed
This is not a tutorial, because we basically followed Ana White's plans word for word, although we did make some minor adjustments to the bars at the top of the bed. Check out her plans here for more information.
We cleared the bed out of Campbell's room in preparation for the building process. Because of the size of this bed, my hubs had to build it in pieces and assemble it right in the room because it wouldn't fit through the door.
Poor girl slept in a sleeping bag the entire week! (Find out more about the family tree mural here).
I can honestly say that I have the best in-laws ever. They willingly help out whenver they can and we so appreciate them! My hubs called in my father-in-law for reinforcements, and we were thankful for his expertise!
The biggest expense is obviously all the wood you need to build it. Since my hubs has such a limited amount of free time (he works 6 days a week!), we decided to have Home Depot make all the cuts for us to save some time. It worked perfectly- in about an hour, the really helpful Home Depot guy had all the cuts done, whereas we would have had to set up a work area, do all the measurements, make the cuts and clean-up which would have taken loads more time. They didn't charge us for any cuts since we bought so much wood (about $250 worth), so it was totally worth it.
Ana's plans are pretty extensive, but my hubs and father-in-law quickly threw them around on the floor in a haphazard manner. I'm not really sure how much they actually followed the directions, now that I think of it…
But after a few nights of building, a few more of painting and decorating, we had this:
Pretty adorable, right? One of my favorite parts of the house is the faux"siding" (which is pretty hard to see in pictures). We saved a bit of money on a couple sheets of plywood since we already had them on hand, so I splurged on two sheets of faux wood panelling ($24 each) that we hung horizontally on the outside walls. The guys used wood glue and clamps to hold it in place until it was secure. It adds such a cute touch and I'm so happy we decided to go for it.
The inside walls are painted an in-your-face pink that made it ridiculously hard to get a good picture. Note to self: 1) Turn off Christmas lights before taking pictures next time, 2) Straighten picture frames after the kids attack that area, 3) Don't try and take pictures with the kids around because they immediately mess things up. Ah well…life with kids! I wanted a place for Campbell to play dress-up and also a spot to corral all her jewelry and makeup, so I created a little vanity area with a simple mirror from Walmart ($4) that I spray-painted and a shelf that was already in her room that I spray-painted white. The two little patterened boxes are from Walmart, as well, and were only $.99 cents each. Score!
I found the super-cute flower hook at Joann's on clearance for $2.00 and used two Ikea hooks I had on hand to create a place to hang her princess dresses. The flower hook was already blue, but I spraypainted the other guys a similar blue for a cohesive look.
My wonderful mom bought fabric from Joann's and whipped up some curtains for the windows and door. I still need to make some tiebacks, but I love the polka dots and sweet flower prints!
Our original plan was to build stairs, but we didn't have enough space, so Kevin built a ladder, which she actually loves. She did fall all the way down once, on her very first try, but she's gotten used to them, by now!
All in all, this playhouse loft bed made one little girl very happy, and that's just what we wanted. Woohoo!
Did you have an awesome play area when you were little? What was it like?
This is NOT a sponsored post. I just want to share with you some of my favorite things!
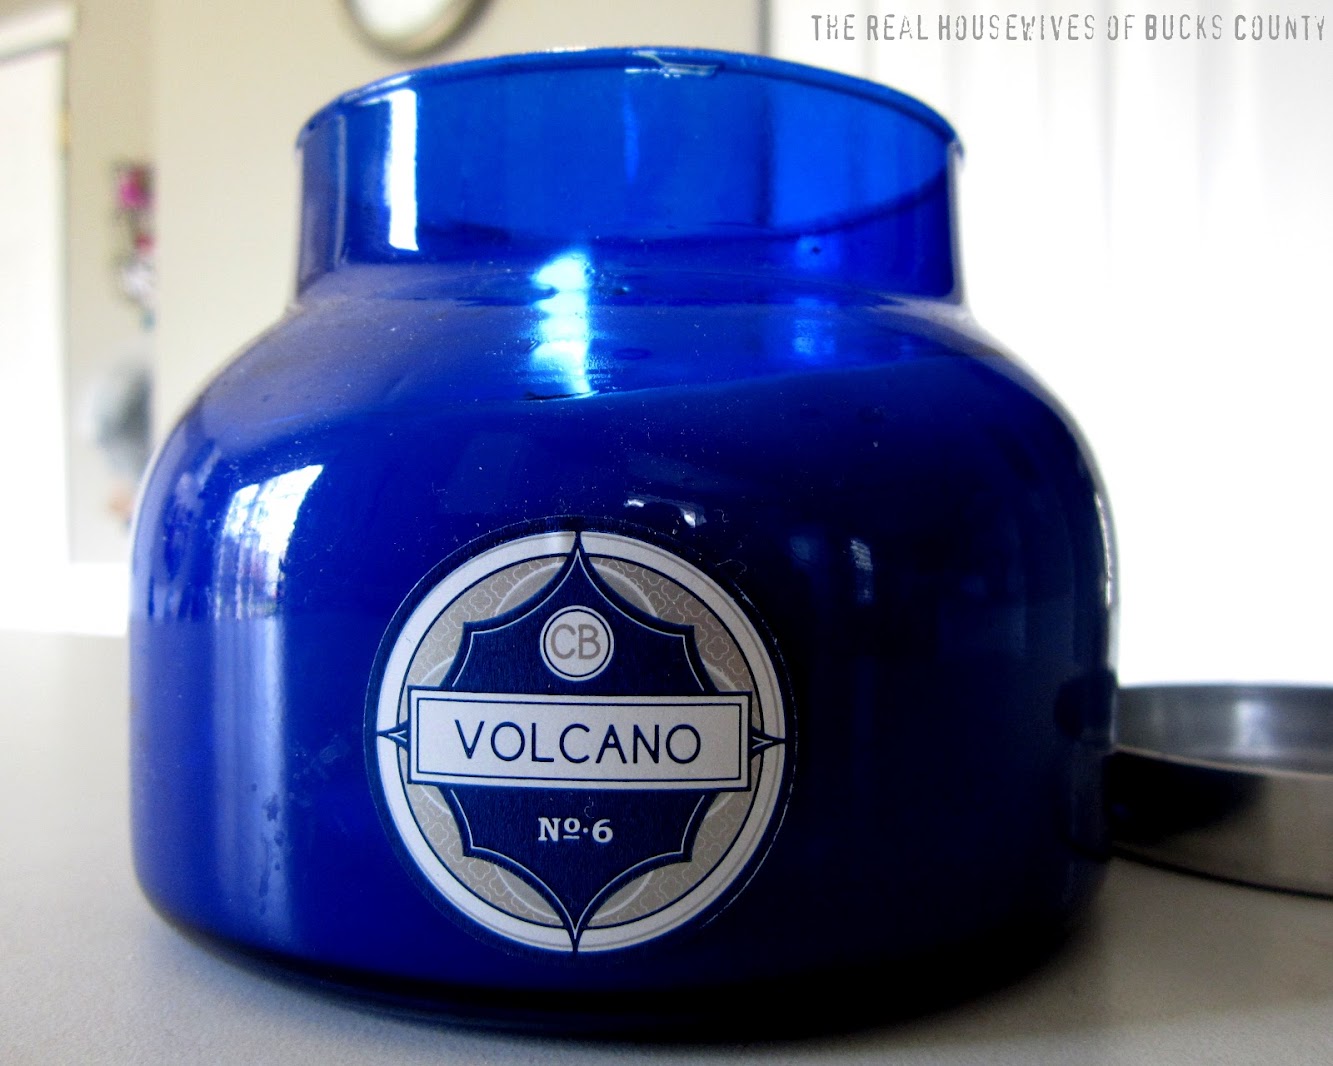
You may remember that a few weeks ago (or was it months? I can't remember anymore!) we mentioned that we attended the new Ladies Home Journal launch in NYC. We got the chance to chat with the amazing women who are in charge of making the magazine fabulous, and had a great time brainstorming about how we can begin contributing to the magazine. But, I just have to say that one of the best parts of the day was walking away with a swag bag filled with amazing stuff! I've taken my time and used most of the products, and wanted to give you a rundown of my absolute favorites out of all the goodies. Trust me, once you try them (or try them on, in some cases), you'll be hooked too! Capri Blue by Aspen Bay Candles
This candle is like heaven on earth for me. I absolutely adore it. There are several different scents in the Capri Blue line, all of which sound amazing, but ours is the Volcano scent. It's a mix of tropical fruits and sugared citrus. It's a super fresh and clean smell that I'm loving with the spring weather we've been having. Gorjana Leather Wrap Bracelet
This bracelet is sweet and tough all at the same time. And I don't think you can tell in the picture, but it's a really pretty, metallic pale pink color. Of course it comes in loads of other colors, as well. Gorgeous. LeighElena Wide Jigsaw Bracelet
This bracelet is a show-stopper. No joke- every time I wear it someone asks me about it, or tells me how awesome it is. It is so cool. Obviously, I'm at a loss for words because it's just that awesome. It's a bit pricey at about $110, but man, it's money well spent (or would be, had I bought it.) Maybelline Illegal Length Mascara
Monica and I both agree that this mascara is the best. I have seriously short eyelashes, and because of this mascara, my eyelashes have never been so long (Maybelline claims this mascara actually extends the length of your eyelashes up to 4 mm, and I think I agree). And just because I do crazy things I'd never thought I'd EVER do as a result of this blog, here's the living proof:
Ack. I'm checking off"go out in public au natural" off of my bucket list, since I just exposed my naked eyes to all of blogland. Yikes. (No, that is not really an item on my bucket list, people) But, with mascara = so much better, right?!
And, if for some crazy reason these pictures of me didn't didn't convince you (what's wrong with you?!), go out and buy it yourself. You'll see. Boots No.7 Protect & Perfect Beauty Serum &Organix Morroccan Argan Oil Shampoo
Ok, I'll be honest. I haven't tried either of these, but after seeing those closeup pictures of myself it's clear that I need to start using the Protect & Perfect serum (find it at Target) that claims my skin will look younger after use. Monica did give it a try, and said it made her skin feel so smooth. And with all the abuse my hair takes (why can't I settle on just one hair color?!), I'm sure it wouldn't complain if I used the Moroccan oil shampoo every once in a while. Have you ever received a Swag Bag? If so, did you fall in love with anything you got? If not, what items would be a MUST in your Swag Bag?
>Only following on the blog? You're missing out. Use the buttons below to join in on all the fun!
We all love Pinterest… there are so many ideas and cool people to be inspired by. I wish I took the time to do more of the projects I see, but honestly this lil' old blog takes a lot of time, so I don't do as many as I'd like to (sounds weird that a DIY blog would take time away from DIYing, but it's true!)
Today I'm excited to introduce you to two people I adore. Meet my adorable sister-in-law Kelly and my awesome brother-in-law Bryan. This cute couple lives in Ohio, so we miss them 24-7, but we have a blast when we're together.
I also have to introduce you to their little stud Jax. He's our one and only nephew and we think he's the best!
Okay, so why are we having this Mangin Family blog reunion?? Well, Kelly is not just a Pinterest addict, she actually does what she pins! {Gasp!} On our recent visit to Ohio, I felt like I was walking through a Pinterest Museum. It was too awesome not to share. Kelly has some creative friends and family, and between them all they have done so many fun projects for her home. So without further ado… Welcome to Kelly's Pinteresting Home!State Artwork Kel is from OH and Bry is from PA.
Aqua Painted Pedestal Table Kel got her table and chairs at goodwill for $75 total. Add aqua and white paint and you have an awesome statement piece!
Funky Pendant Light This was one of the first changes Kelly made to her kitchen when she moved in!
Crossword Names Takes 2 seconds, but is so cute as an accessory. It's just a frame turned chalkboard.
Kitchen Office Space She removed the wall cabinets, added open shelving, and did some adorable accessorizing. Kelly claims she can't decorate, but I'm pretty sure you'd all beg to differ!
Spray Painted Faux Antlers Kel is super lucky to have a Hobby Lobby right around the corner. These beauties came from there and got a coral spraypaint treatment.
Simple Printables She doesn't just PIN free printables, she actually uses them… imagine that! A simple piece of twine, some clothespins, and voila!
Modern Painted Chandelier Bye Bye Brass, hello funky green. The circle bulbs are just right and add a cute modern flare.
Window Frame Kel found this awesome salvage shop in Springfield, OH. They have windows galore!
Family Rules and More Printables Kelly and Jess both have the Be Happy print. You can get it at Sprik Space.
Magazine Paper Frame & Vase These two were purchases, but I liked them too much not to include them. If you're patient enough you can make your own!
House Numbers and Hooks There are so many things you can do with frames, and digital paper. Our favorite site is Moo & Puppy!
Yarn Wreath You know I'm the"anti-wreath," but this one is really cute! I love the homemade pompoms
Paper Flowers Kelly's friend Amy made these for her and they match her aqua table so well. Jones Design Company has tons of paper flower tutorials!
Clip Hooks Are you seeing a clothes pin trend? They're affordable, easy to use, and cute!
Fabric Lined Shelves Kel took plain bookshelves from drab to fab with this blue fabric. Her shelves always look so cute! Her sister gave her the frame with the subway art and has it loaded up with a print for every season/holiday.
Unique Gallery Wall These cool rounded frames are from Ikea and the doorknob is from Hobby Lobby.
Growth Chart I love this growth chart that Kelly's sister made for her. It's exactly like this one from Miss Natalie. No time to make one? You can buy one on Etsy for $56.00.
Last but not least, check out this fabulous fabric choice for a DIY headboard!
What do you think? Are you inspired to go look at your pin boards and actually do a project? I know I have a list a mile long that I want to do now! I also have to tell you that Kel had no idea I was snooping around her house taking pictures, so none of this was staged or cleaned… this is real-deal, everyday life and I think it's great! Have you turned a pin into a project? Share the link, we'd love to see!
Only following on the blog? You're missing out. Use the buttons below to join in on all the fun!
We've been crazy excited about this post since our friend Staci agreed to partnering with us! From time to time, we revisit our Be Intentional series. Staci's story is one that we hope encourages you to set goals in your life (in any and all areas) and then take intentional steps to achieve them. We love this girl, we're so proud of her, and are honored to share her story today!
Meet our friend Staci… ********************************************************************************** I am going to be honest. I am"no good" at home decorating and DIY design and crafting. To be brutally honest, I flat out stink! Oh, believe me, I have dreams about a beautifully decorated bedroom and a warm and cozy living room with amazing wall colors and fresh flowers in beautiful vases accented on my tables and shelves. But, I am just not good at putting everything together to transform a room. So, thankfully, I am NOT writing this post to give you tips about DIY design! Really…you should be thanking me!!! Haha! On the other hand, I thank God for making us all unique and designed for the purposes HE designed us for. So, you may be wondering who am I and why have I been given access to writing to an audience of DIY pros and creatives?!?! I may not be good at DIY design and transforming the rooms of my living space, but I have been on a little DIY transformation…in my body and in my life. My name is Staci. This is me in January of 2010.
I know what you are thinking. Oh goodness. Yikes. I am thinking it, too. "Did she stuff her shirt with melons?""Did she put pillows in her pants?""Is she a really grouchy person?""She looks angry." All to which I can reassure you…NO. I did not put melons in my shirt. I didn't add pillows to my pants. And no…I am not grouchy nor angry!!! Okay, maybe you weren't thinking"exactly" that, but when I look at these pictures of who I was 2 years ago, I can hardly believe that was me. The reality is, I was 260 lbs. of hurt. 260 lbs. of frustration. 260 lbs. of failed diets. 260 lbs. of zero confidence. 260 lbs. of someone I never, ever wanted to become. Sad, unhealthy, embarrassed, lonely and hopeless.
Have you ever been at your rock bottom? The place where you feel that you are never going to get out of? The place where you feel that no one understands? The place where you feel so far away from where you truly want to be? That was me 2 years ago. I don't exactly remember what it was that sparked a deep desire in me to change once and for all, but I was really starting to think that God didn't create me to be any of the things I was becoming. And he surely didn't desire for me to be trapped in a body that I was ashamed of, embarrassed about and so hurt to be in. Although, one post is not nearly enough to share with you all that has gone on in my life and my transformation over the past 2 years; I will share with you where I am today and the main reasons I am where I am.
I reached my final goal in November 2011. This is me today at 135 lbs.:
Never in a million years did I believe that this was possible. I still look at my before and after photos and I cannot believe that was me and now this is me. You can only see the images, but I can see the hurt and defeat in the before photos. And I can see the strength and hope in the after photos. I haven't just transformed physically, I have transformed emotionally as well.
This picture of my old jeans is a clear reminder of where this journey started! Staci would love for her story to reach and help anyone that might need encouragement. So, you have her permission to Pin her pictures and share it with anyone that could use some encouragement and motivation!
When people hear of my success or they see it for themselves when they see me, there is always one question that gets asked: WHAT DID YOU DO TO LOSE THE WEIGHT?!?! At first, I used to give people my simple cookie cutter answer of what I did: I started eating right and exercising daily. And I prayed. Sometimes minute by minute. But, after seeing the sometimes disappointed looks back at me because for some reason or other, when people give us the straight up hard truth (even though it is common sense), we somehow think that we could never do that. We believe the lies: "I could never do that."
"I don't have that kind of willpower." You know what? I am not crazy motivated. I don't have any more"willpower" than you. I don't have a magic formula and I sure don't have a magic potion. But, I do have intention and a God who never gives up on me. Even when I give up on myself. Jess and Mon talk often about"Being Intentional". For me, being intentional means doing things even when I don't want to because it is what I need to do. Being intentional means having a plan at all times. Being intentional means setting goals. I am not speaking of having plans and setting goals because I believe I have my future all figured out or that I can truly control what happens tomorrow or next week, but I desire to have a plan and set goals because it is one of the ways that lives can change. It is one way that people can move from an undesirable place in life to a place of freedom and the ability to fully live the life they were designed for! By setting goals, I had to make choices as to"how" I could get to that goal. I set a 6 -week, 90-day, 6-month and"end of year" goal. If the scale wasn't moving, I had to assess what I was doing. And change something immediately. There was no time to go off the path I needed to take if I wanted to meet my goals. This was me about 1/2 way through… I was around 190lbs.
In addition to setting goals, I also had to learn what I needed vs. what I wanted. Monica and Jess have talked about wants vs. needs in decorating. Well, I may have wanted to go out to my favorite restaurant for a big burger and fries, but I truly didn't need a big burger and fries. See the difference? I know, I know…it still seems like it is a willpower thing. But it really isn't. It's looking at my plan. If I want to weigh 10 lbs. less in 6 weeks, a burger and fries isn't what I need. Does it mean I will never be able to have a burger and fries? Not at all. But right now, that isn't part of the plan.
Bottom line, I am not here to tell you what to do and how to do it. I am merely trying to tell you that you CAN do it. Do what works for you. Do what you know you need to do. Even if you don't have to lose weight, it is still important to fuel your body with healthy, nutritious foods. And it is so important to take some time out of your day to get moving. Find something that you enjoy and get moving! Be intentional. And above all else, remember that you were created for a purpose. By taking care of your body; physically, emotionally and spiritually…you are unleashing a power within that no one can take away. And you are unleashing the power to connect and encourage others around you! When I am struggling or having a day where my wants seem to be trying to overpower the intention of my needs, I cling to the words below. Maybe it is with eating, maybe it is trying to get through an intense workout, maybe it's facing the daily pressures of life. Here is what I hold on to:
" I know how to live on almost nothing or with everything. I have learned the secret of living in every situation, whether it is with a full stomach or empty, with plenty or little.For I can do everything through Christ,who gives me strength." ~Philippians 4:12-13
In the midst of the depth of all of this; the tears, hard work, the defeats and the triumphs, I have made every effort to maintain a attitude of openness and realness with others as well as a level of humor. So, I will leave you with one last photo. It is my favorite one of all!!! This is my mom and I in my old pants…yes,two of us!: -) 125 lbs. lost and gone forever!!! I am forever changed!!!
P.S. I must share that I am a recovering sweets & desserts addict! So, I will share one of my absolute favorite treats that I make almost daily for myself! Enjoy! Quick Chocolate Oatmeal(adapted from my absolute favorite dessert blog Chocolate-Covered Katie) 1/2 cup quick oats 1 small banana (broken up into small chunks) 1 1/2 Tbsp Unsweetened Cocoa 2 Tbsp Unsweetened Applesauce 15-20 drops of Liquid Stevia 1 tsp. vanilla extract 3/4 cup of Light Unsweetened Vanilla Almond Milk or Light Vanilla Soy Milk dash of salt 2 Tbsp. fat free cool whip (optional) Spray small saucepan with cooking spray. Combine all of the ingredients together in the small saucepan. Stir everything together until thoroughly mixed. Turn heat to high and continue stirring oatmeal until oatmeal starts to bubble slightly and thicken. After oatmeal starts to slowly boil, turn heat off and continue stirring for another minute or so to finish heating all the way through. Pour into a bowl and enjoy! For an extra treat, add some fat free cool whip on top! *You can also add a Tbsp of Peanut Butter to the above recipe for a Chocolate Peanut Butter Cup bowl of oatmeal!My husband's favorite!: -) *********************************************************************************** So how's that for some intentional living? I don't know about you, but Staci has encouraged, inspired, and motivated us big time! Staci recently started blogging about all things health,fitness, and nutrition, so check out Musings of a Wellness Hopeful for all kinds of recipes, motivation, and more!
Got questions for Staci? Leave a comment and she'll get back to you!
Only following on the blog? You're missing out. Use the buttons below to join in on all the fun!
I'm not a huge fan of spring, mainly because I LOVE summer and get a tad impatient for the hot pool-weather days. However, I do love seeing all the new spring trends, products, and ideas. Today we're sharing a few Spring Must Haves from our fabulous sponsors. We so appreciate our sponsors. They make this blog possible and we're so grateful for that! Make sure you check them out and tell them RHBC sent you! ********************************************************************************** Remember the awesome artwork we made for Jess' house? Well, it wouldn't have looked half as amazing without the mad-photo-skills of Stacy Salvatori. She's local to Bucks County and would be a great choice for your family pictures or next big event. Visit Stacy's Website
I'm love with the Just for Girls Collection from Red Letter Words. How fun and springy are these prints? I plan to order a few for Kenzie's room in the next few weeks. I love art that looks cool and will also daily encourage my tween (holy cow that is the first time I've written that. I can't believe I have a ten year old!) Visit Red Letter Words
#1- Make 5 Dinners in One Hour… that's NO JOKE! These crazy affordable meal plans with shopping lists and directions will rock your world. Head over to their Facebook page to try one week for FREE!
#2- We're so glad that 31 Gifts jumped on the Grey & Yellow bandwagon and came out with this adorable line! I'd love an organizing utility tote in this pattern! Contact Mandy to get yours (you can get me one too!)
#3- Have you visited My Best Friend's Hair yet? You definitely need to. If you have a stylist you love, go let the world know by leaving a review or if you have yet to find the right stylist for you, head to their site to read other users reviews and find yourself a rockin' stylist today!
#4- I require a perfect spring candle in my kitchen this time of year. CJ's EcoChic Candles smell amazing, and because they're soy they last forever! (ok, not literally, but figuratively). They best part… you're not going to pay $25 like you would at the big chain stores and you're supporting a great small business.
#5-This is a spoiler alert! Remember the SuperFab room makeover we're currently working on? Well, we have Royal Design Studios to thank for one of the amazing design elements in the room. They have the best stencil selection around! Check out their new and improved website and they have an idea blog with all kinds of inspiration. Guess who was featured there for our Nate Show stencil project? Visit their new website!
#6- Kotton Pickin' Kute is more than just hats! For Spring you need to check out the fun headbands she offers. Seriously, that baby is adorable!
#7- Guess what?? Liberty Thrift listened to its shoppers and extended their hours! Woohoo! It's now open M-Sat 9-7pm. We have a fun outing in the works with Liberty and can't wait to share the details with you!
#8- Moo & Puppy is our favorite digital scrapbook company out there! We love the preppy look of this madras paper pack. (I'll confess that in the 90s I loved and wore lots of Abercrombie before they went all half-naked. But man, I do love me some preppy styles!) Moo & Puppy is giving you 15% off with the code RHBC15.
#9- Jet Upholstery is more than just chairs and cushions! Look at that amazing bed! Even for these DIYers some projects are better left to the pros! Visit Jet's Website for more info!
Those links should keep you busy for a while! I actually have about 15 tabs open on my computer right now, because I want to place a ton of orders! Thanks again to our sponsors! You're the best!
We share a lot of projects here on our blog. We've showed you all kinds of DIYs we've tried and loved! Today is NOT going to be one of those days… I'm going to keep things real, and show you a complete and utter Epic Fail. Ready?? Just remember, don't try this at home.
Ombre Door Disaster So ombre everything entered the scene in 2011 and it looks like it's sticking around for most of 2012. I love this ombre hair (and if my blonde roots keep growing in, it will look like I'm heading in that direction)
I also love these ombre striped curtains.
Source: remodelaholic.com via Brandy on Pinterest So, when I was thinking about what color to pain the interior of my foyer door I started thinking maybe I'd do something a tad"out there" and go with ombre! I found these four colors and thought they would be awesome to create the unique look I was going for!
I bought a sample of each color at Lowes. These colors make me so ready for summer!
See my blah foyer door? (The grainy pics make it look even bleaker than it really is.)
I also have plans to add some graphic art above the door, that's a DIY for another time!
In my mind, this project seemed really simple, so I grabbed my trusty helper and got measuring. I made each section increase in size.
I was just using the tape to give me a line to mark a pencil guideline and then I removed it.
Here's where it all started going downhill… I painted the lightest color first and then went to the next darkest tone.
These two colors blended fairly well, so it was onto the next color. Then came my dilemma… how to blend the remaining colors. I could have left them with a clean line, but that would have been more like color-blocking than ombre.
I tried using a wet brush, a dry brush, sponges… I tried it all. Epic Fail.
Look at that hideously awful, splotchy door! HA! It's really, really terrible isn't it? The hubs said we could add a wooden seagull cutout and it would look like it came right out of a cheesy seafood joint.
Here are my lessons learned (So that you don't have to make my mistakes): 1- Don't try decorative painting on a door with indents and grooves. It's nearly impossible to make things perfect. 2- When going for an ombre effect, get ONE color and then achieve your gradations by adding white paint. That way you won't have 4 very different colors that you're trying to blend. (This was my biggest mistake, and I should have known better!) 3- Don't be afraid to try. Although this project might have driven me a wee bit crazy, it took all of an hour or so and hey, now I can at least say I tried an ombre door once!
So there you have it… we might have been given the title,"Nate's Favorite DIYers," but we still have a major flop once in a while. I plan to paint my door solid yellow in the next few days, but until then we'll keep pretending we live at Larry's Crab Shack! Have you ever had a major DIY fail? Do tell! It will make me feel better about the great ombre disaster!
Only following on the blog? You're missing out. Use the buttons below to join in on all the fun!