My Creative Blog:
MegaCreative
How to Paint Cabinets White

Kitchen Renovation {Putting it Back Together}

Family Room Art & How To Add Grommets!

What's in a Name? {Introducing East Coast Creative}
The Part-Time Blogger's Dilemma {Let's Be Honest}

How to Add {Awesome} House Numbers
How to Paint a Front Door {and my color reveal!}
How to Spray Paint a Chandelier

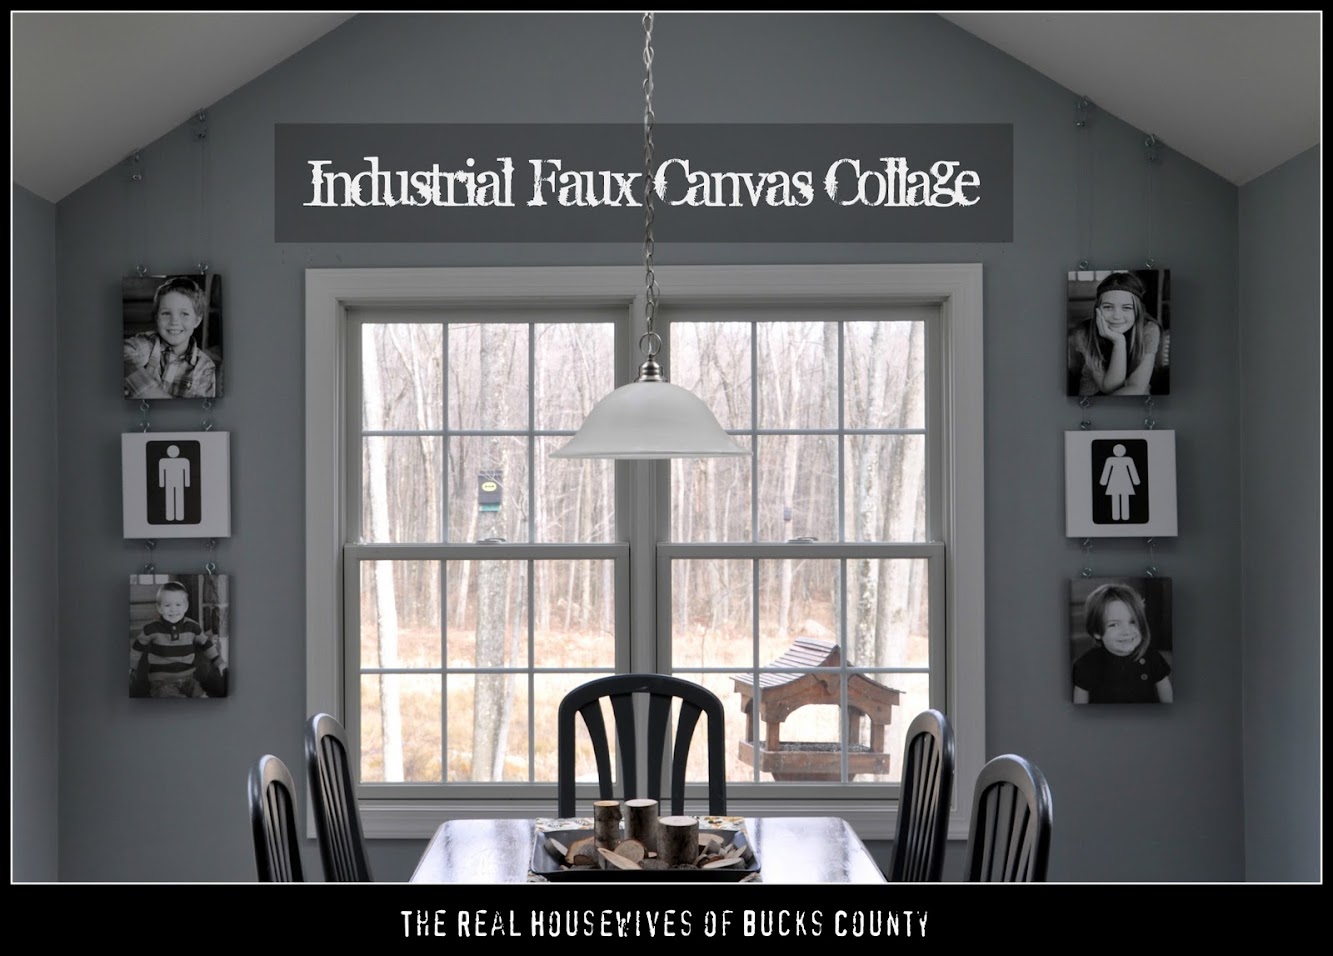
Industrial Faux Canvas Collage
Bucks County Designer House & Gardens

Free Printable Invasion


