My Creative Blog [Search results for Pinterest Link]
Make Homework Happy {B2S Day 2}

Pinterest Inspiration

These Are a Few of My Favorite…Pins!

Spring Things {Spring Mantle Inspiration}

Free Canvas for You!

Countdown to Christmas

{Design it Forward}

Doggy Style…

5 Tips to Make DIY-ing Easier

Monumental Event! (Well, okay…not really)

From Fluorescent Diffuser to Statement Pendant {Sarah M. Dorsey Designs}

A Pinteresting Home! {Meet Kelly}
79 Valentines & An Instagram Valentine's Idea

$300 Home Depot Giveaway with KILZ brand!

Projects Not to Miss

Father's Day Gift Round-Up

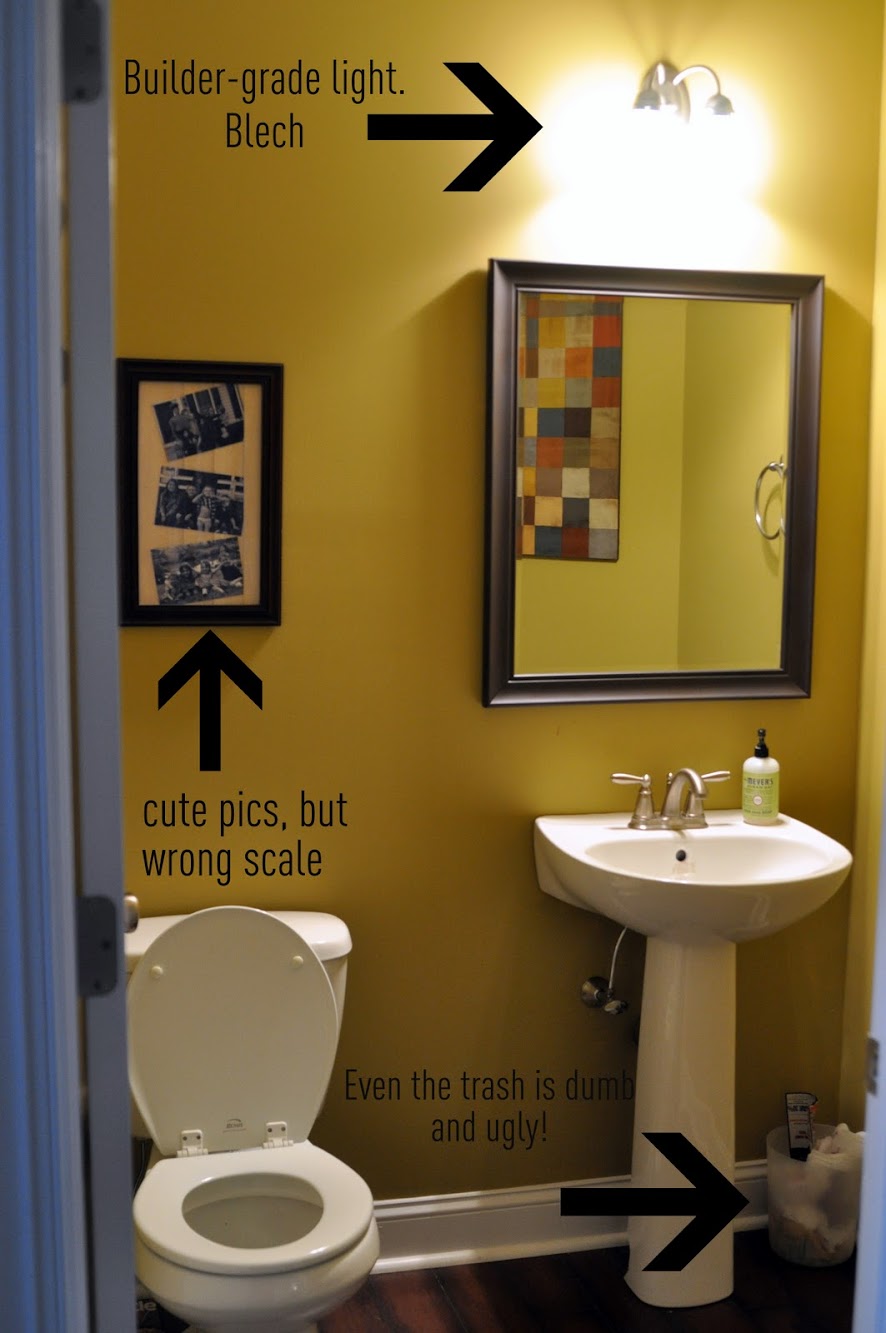
Ugly. Ugly. Ugly.
Instagram Love
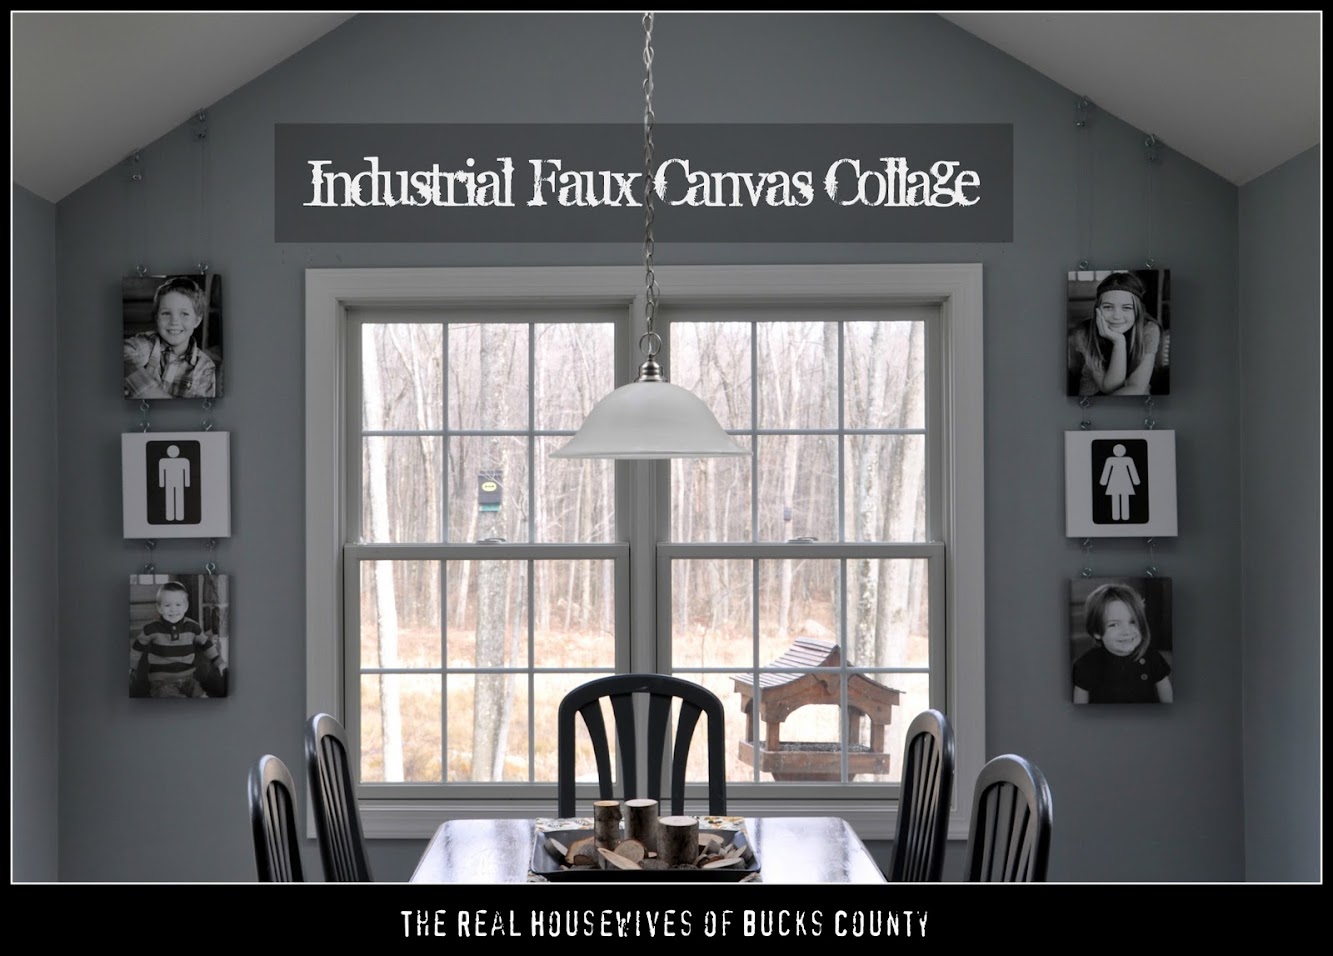
Industrial Faux Canvas Collage
Creating with the Stars Round 1 Voting


