Kid-size furniture is often really pricey and hard to find. We solved these problems by building our own for under $100!
-edited.jpg)
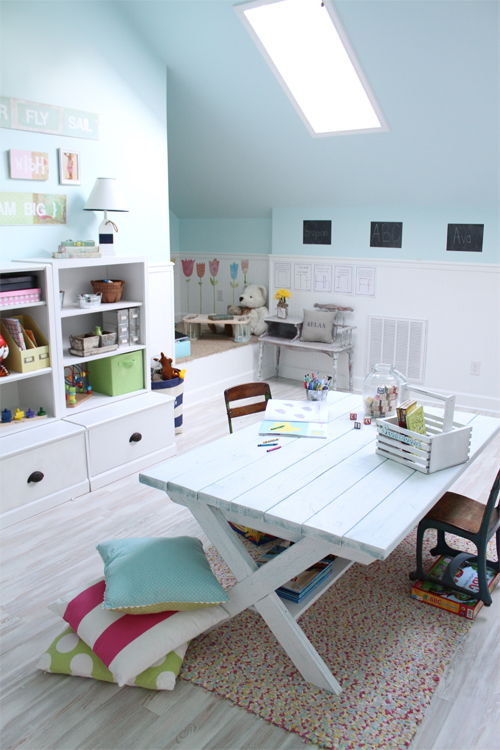
There are some crazy, talented people out there in blogland, and so when we saw the homeowner's inspiration picture of this table built by Shaunna and her husband of Perfectly Imperfect blog, we were sold.
Here's how to build your own: 1. Decide on your furniture plans. You can find loads of free plans on the internet, but our go-to source for awesome, inexpensive plans is Ana White. For this table, we started with this basic tutorial, but altered it to fit our room and style preference. Visit your hardware store and purchase your materials. You really could use any type of wood you want, but we decided to use inexpensive pine to keep cost down and because it distresses nicely- which let’s be honest, is pretty key if four crazy kids are using it on a regular basis!!
2. Assemble the legs of the table. This step is really important- you want to get them as square as possible so that the table is nice and sturdy! We decided to do A-frame legs to resemble a true picnic table, but just like our inspiration photo, added a shelf for lots of extra storage!

3. After attaching the lower shelf, trim it out for a nice, finished look. Achieving the high-end custom look means taking the time to add some polished details, like trim! This is the stuff you just can’t skimp on! 4. Create an apron and attach it to the legs. This gave us a strong base to attach our table top to. Your table should definitely look like a table now!

5. Build the top of your table and attach it to the apron, screwing in from the under side, which ensures a seamless look for the top. For our table top, we used two pieces of pine that we sanded really well and attached tightly together.

6. Time to put on the finishing touches! Make sure that all surfaces are nice and smooth before painting or staining. We chose to do a combination of stains, Walnut and Grey, for a custom stain on the top of our table. Don’t be afraid to mix stains to create the perfect finish! Then we painted the legs white, and sealed the top with two coats of polyurethane and we were done!

7. This table is fabulous and ready to be used over and over again by Shannon and Anthony's four busy kids!

A custom table can really make the entire room. We've actually made a few other tables that were super simple and saved us tons of money!
Farmhouse Table Remix

Barnwood Coffee Table

Building furniture might seem intimidating, but trust us, if we can do it, so can you! Just be sure to follow the directions closely and take your time. You'll be so happy you did…and so will your wallet!