I don't know about you, but I'm itching to Fall-ify my home. You know that"let's get cozy, wear sweatshirts and bring out the pumpkins" feeling? Yeah, I have it. One of the major focal points for seasonal decor in our house is our fireplace and mantel, which I decided to give a little makeover before bringing out my Fall stuff. All it takes is chalk paint, a stencil and a lot of patience. I originally posted this project a few weeks ago over at Infarrantly Creative, but have been dying to share it with you! I can't believe how much I love my fireplace now, and I think you will too.
I'm not going to lie, this was not an easy project. In fact, it took me at least 6 hours of painting and stenciling, but it was so totally worth! Here'e what you need to do: 1. Prep your fireplace. Remember my peach marble tile fireplace surround that I hated? Yuk. I first painted it with Annie Sloan chalk paint that I got from Shaunna who writes Perfectly Imperfect and sells AS paint, but before I did that, I wiped it down with a damp cloth to remove and dirt, dust and soot.
2. Choose your paint. I used Annie Sloan's chalk paint in Pure White and French Linen. Man, I am in love with this stuff! It adheres to any surface- even marble!- with no trouble. Just a quick word about fire safety: we don't use our fireplace, so I wasn't worried about whether or not it was flammable, but be sure to check your paint if you have an active fireplace.
3. Brush your base coat onto the surround. I used Pure White and it took 2 coats to get even coverage. I recruited my hubs to do this part, since, let's be honest, painting trim is not my strong suit and I'll take help when I can get it!
4. Place your stencil in the upper corner of the surround. Adjust the stencil sheet and check to make sure it's level, then tape it in place with painters tape. If you want to use a spray adhesive (which I didn't), spray it on the back of the stencil and place it down evenly. I highly recommend using the adhesive for this job, because it took me a loooong time to get clean lines without it. (We have an awesome tutorial on stenciling must-haves if you need help with this!)
5. Begin stenciling. The trick to stenciling without any bleeding is to off-load your brush properly. After dipping into the paint, dab it onto absorbant paper towels, or cardboard until it there is very little paint on the brush. Both my stencil (Beehive Furniture Stencil) and brush are from Royal Design Studio, and they are excellent quality, which makes the job go much smoother.
I had to do two to three coats for every stencil to get the coverage I was looking for. Words can not express the excitement of pulling back that very first stencil. Go ahead- try it and tell me that's not true.
Once the paint is dry, realign the stencil, level it and keep on moving! You might want to turn on some music, because you'll be doing this for a while.: )
At the end of the first night, here's what I had accomplished. Ugh. I saved the hard parts for last. Yippee!
6, Cut your stencil to fit the corners and edges. Oh, this part is so hard, because as I was cutting my stencil, I was envisioning all the projects I could do with it go right down the drain. But, it's absolutely crucial to cut the stencil if you want clean, crisp lines all the way around.
7. Touch up any paint bleeds with a small fine-tipped paint brush…or toothpick, in my case. No matter how good you are at stenciling, there will always be some bleeding. It's easy to touch it up with the base paint color and a steady hand. No one will be the wiser!
8. Finally, wax it and you're done! You'll want to add some kind of protective finish, and I used Annie Sloan soft wax, which was formulated to work with chalk paint. After all that hard work, you'll want a force field surrounding this thing, but wax will have to do.
Step back, grab a drink and enjoy your pretty new fireplace surround!
I love love love it, and am already planning a room makeover based on this fireplace!
If you want a cheap project that will instantly give your room a facelift, this one is for you. Showstopping material, folks! -------------------------------------------------------------------------------------------------------------------------
In other news, if you follow us on facebook (if you don't, you totally should) you know that I finally entered the year 2012 and have a new HTC OneX smartphone. This thing is amazing and I can't wait to share with you how it has made my life soooo much easier, but for now I'm totally loving Instagram, and would be thrilled if you decided to follow me!
Monica has been on Instagram for quite a while now, but if you don't already follow her, add her to your list too!
We'll give you lots of sneak peeks at our current projects, as well as fun insights into our daily lives and what makes us tick. We promise.: )
Even though gold jewelry is back in style, a dated, brassy fireplace can put a major damper on the style of a room! Updating your fireplace can seem overwhelming, but let me tell you it's not as hard as it seems and if you're really determined (like me) you can get it done less than 24 hours!
Here's the story behind this makeover… One of my best gal pals was moving into a new house, so I trucked on down to Maryland to help move and to try to tackle a few fun projects. The fireplace wasn't even something they had thought of me working on, but the moment I walked in, it was SCREAMING for some DIY love from me.
Here's the order of my steps: 1- Whitewashed the brick2- Painted the mantle and built-ins3- Painted the brass surround****************************************** How to Whitewash Brick:
Whitewashing brick is really simple! You'll need an inexpensive paint brush, a plastic container, a rag, water, and paint. I mixed the paint and water with a ratio of 1 part paint to 3 parts water. If you want more coverage, increase your paint and for less coverage increase the water.
Start in one corner and work in small sections. Your paint mix will be really thin, so you'll want the rag in hand to catch any drips. Brush your paint mix on a 1x1 area and then immediately use your rag to rub it deeply into the brick and then remove any excess. The process goes really quickly, but I'll warn you it's a little messy. The grout can be a tad sandy, so you'll definitely need to vacuum when you're done. The whole fireplace and hearth took me less than 30 minutes. The difference in color is awesome!
After whitewashing and painting the shelves and mantle, it was time to get rid of that brass! My exact words to my gal pal Mandy were,"Do you trust me?" and I'm so glad she did! How to spray paint a brass fireplace surround: There are some key items you'll need to do this project right: Frog tape, craft paper, disposable plastic drop cloth, and Rust-oleum High Heat Ultra Spray Paint
We started off by taping off the brick right around the surround. Make sure that you get it as close as possible. We were lucky enough that the tape could slip behind the surround, so there was no chance of bleeding through. Once the edges are take care of, you'll want to use the craft paper and tape to make sure all of the brick is covered. It's sorta like wrapping a really big, awkward present!
Once the brick was covered, we cut a section from the plastic drop cloth and wrapped the mantle in it. We were really careful to make sure we'd taped it tightly, so no paint could sneak in.
For the glass doors, we used more tape and paper. I found that if I used a spatula, I could get the tape really close to the edges for a perfect, crisp look.
Now it was time for a little craziness… Making a spray paint cocoon! Since we were spraying in the house, we needed to seal off everything. Basically, I got in, and we sealed the drop cloth all around me. WARNING: the fumes will be very strong. I recommend a face mask. I didn't have one, so we used a towel.
Thankfully, this paint is awesome and doesn't require more than one solid coat. I, on the other hand, required about 3 showers before all the black paint was off my face and hands! It was totally worth it though!
Here's the finished product. Doesn't it look so much better?
I'd love to show you a perfectly styled mantle, and all the doors on, but we were on a tight time schedule, and I had to get back to PA. So this was DIY on the fly!
I was so pleased with the update and loved that the entire project took about 4 hours of work time and cost less than $30.00! If you have a fireplace that you were wishing you could change, I totally recommend doing it yourself! The impact it can have on a space is incredible! And if you missed it, Jess transformed her fireplace with some paint and a stencil this past summer. Two updates= no excuses not to get rid of those dated fireplaces, people!
And, I just have to add, that only only is Mandy one of my very favorite people in the entire world, she's all a rockin' sponsor of this very blog!! She's our Thirty-One Gift's Consultant and hooks up our readers for all kinds of giveaways and deals! Christmas is coming people, head over to Mandy's website HERE and check out the awesome products they have in the current catalog! I'm so loving the new Metro bags! Tell me, do you or someone you love have an outdated fireplace that's in need of an intervention? **UPDATE 7/13/13: Due to the popularity of this post and lots of reader questions, I thought I'd answer a few of the common questions here.Q: What kind of paint did you use on the brick? A: We just used white paint we had on hand. It was eggshell and worked fine. I really think any finish would work okay because you're watering it down anyhow. Q: What color did you use on the mantle and shelves? A: Ahh! I wish I knew! I am calling my friend now and will see if she still has the can. I do know it was from Lowes: )
It's a week early! I'm both excited and nervous all at the same time! Why you ask is it still covered in plastic? Well, the delivery guys just left for one, and for two, we have an issue with our floor finish that the floor guy has to deal with tomorrow (hopefully) and although no dust will be created, I don't want to unwrap them until he's done. So pictures are a bit premature but I thought I'd give you a sneek peek as to what we've been up to the past few weeks. We never did break into a waltz like I described in my fantasy BUT we did accomplish something equally as romantic and painted all the windows! I'm kidding, although I do find it very attractive when Hubby is working on the house — why is that? (wink, wink Hubby)
I also painted the fireplace bricks white! After priming the bricks to cover up the glue stains, I had a panic attack and questioned what I had done. Joan at For the Love of a House (my dear friend) calmed me down (I love her!). I wish I didn't have to paint them but when I spoke to a local mason, he told me that the blond bricks weren't original to the house. Meaning, that at some point probably in the 60's, the fireplace surround was rebuilt and that's why they didn't match the gray bricks on the exterior chimney....which has made me contemplate painting the bricks gray as I'm not completely sold on the white. Thoughts? Do you like the white? Once again, Joan came to my rescue (she does that a lot) and sent me some Sherwin Williams colors to try and upon doing so, I discovered this amazing digital tool they offer on their web site where you can upload your personal photo and try different paint colors (I'll post them soon). It's been so helpful in determining what shade of grey may work as I wouldn't want it to look too flat, too dark or like concrete!
My other update is the new mirror over the fireplace. I absolutely love the botanical detail on the frame. I was in an antique shop in Portland, one of my favorites, when I stumbled across it- on sale. Was I looking for a new mirror for over the fireplace, not really, but my Great-Great Grandparent's mirror never looked quite proportionate to the size of the mantle (I've relocated it to the guest room for now). When I saw the mirror, I put a hold on it and then went to another favorite antique store to see what other similar items were out there. I discovered that compared to other mirrors of similar size and style, the one I had on hold was a really great deal so I went back and bought it. It was $120, normally priced at $195. I hope that we'll be able to unwrap our furniture by tomorrow — although I'm sure we'll take a few peeks before then! I normally don't get very nervous about new purchases but typically that's because I don't spend as much money and they're also not purchased sight unseen (we didn't get to actually see our chosen fabrics on the pieces). So again, excited and nervous all at the same time! Hubby is more calm and Lucy just wants to know what all the fuss is about.
I've been enjoying this fantasy that we've just bought our house and everything is just as it is now....crisp, clean and ready to decorate! In this fantasy world, it is as if the era of pea green carpeting and faux wood paneling never existed... So my fantasy goes like this....Hubby and I pull up to a lovely country house that's in our price range! Wow, huh? We're instantly in love as we can see that the house has been well-taken care of. We walk up to the front door and as I step in, I begin to glide through the each room seeing nothing I don't like. When I make my way to the living room, my eyes light up and as I turn, Hubby takes me in his arms (suddenly I have my wedding dress on) and we begin to dance, giddy with laughter as we know that we have finally found exactly what we're looking for in our new home. We pause only for a moment, with bright beaming smiles, and say to our realtor without any doubt or hesitation, "we'll take it!" Nothing in this fantasy had anything to do with what really happened, especially the part about the doubt and hesitation. But I'm enjoying every minuteof my fantasy as I stare into this empty room, dreaming of how I'm going to decorate! It feels like such a luxury! So let me take you through the room...
This is the perspective you get when coming from the kitchen. The french door next to the picture window will eventually take you to a balcony, which we'll build this spring. The original 'deck' was torn down when they put in the new Marvin windows. The door you see through the entryway, goes to the wraparound porch....this is our formal entry into the house.
This is looking towards the fireplace from a corner that no one will ever stand in, but I thought I'd give every perspective. Entry is where the hall tree stands.
If I pan left a bit more, you'll see the coat closet to the left and to the left of that, the hallway where the den, guest bedroom and downstairs bathroom are located. So this is what I've come up with so far...
....the main layout. The couch will face the fireplace and the two chairs will flank each side of the fireplace. I love the coziness that this layout will offer and I know that there will be many hours spent snuggled in front of the fire.
Here's the new couch we've ordered....accompanied by two of the above chair! We went with a couch with more modern lines to contrast a little with the more traditional lines of the coffee table. The coffee table (you can see here ) is an antique pedestal with rounded feet and oval top, which will compliment the round lines in the chair.
Here are the fabrics we chose....the sofa fabric is a beautiful velvet (so luxurious) and the chair fabric, which goes really well with the tarragon velvet, is linen- esque (the photo doesn't really show the chair fabric very well). And due to the furniture store's amazing sale — I made sure that I picked out the highest grade of fabric — of course I did! I've also been considering a tall narrow table to put behind the couch. I'd put two table lamps on each end to illuminate the room. I was thinking of something a little modern, made of mostly glass so that it doesn't feel too heavy. I think this would be the best option as end tables wouldn't work well with the tuxedo-style (high arms) couch. Also, we'll order a 9x12 natural fiber rug, perhaps this one from Pottery Barn, to go in front of fireplace. All the furniture fits on the 9x12 size. I'll accent the rest of the room with antique rugs I already have.
I'll put an antique rug in front of the french door. This door will eventually lead to a balcony. There's about a seven foot drop outside the door right now. The balcony will have wide center stairs going down into the yard. It will be big enough to put a couple of rocking chairs or a small table and chairs for an extra place to eat or drink.
Our existing dining cabinet, that I'll be stealing from our dining room (photo below), will be relocated to the above wall. Instead of holding dining odds and ends, it will be transformed into a secretary that will be a place for beloved books, unframed art, special momentos, etc. I'll be stealing this cabinet from the dining room because we've decided to add two more windows on the wall where the cabinet is now. But I'll go into the dining room plans later. Here's the cabinet we'll be stealing for the living room. Hopefully, someday I'll find a narrower dining cabinet to replace it.
On that small wall to the right of the kitchen entry, I've been considering a temporary bookshelf. Lauren at Pure Style Home inspired me when she put one in her house, on a similar sized wall, and it looks fabulous — like everything else she does. And I say 'temporary' because as you can see in the next photo, I have plans for Hubby (wink, wink Hubby), to build a built-in bookcase (love the look of those — I have a gazillion inspiration photos of them) on that huge wall.
We're waiting to begin this project until after we get rid of that floor furnace. It's the one 'functional' thing in the house we have yet to figure out. But whatever we decide to do, that floor furnace grate will eventually go....and hello bookcase. ; ) So odds and ends still left to find are: some sconces for above the mantle (any suggestions?), a 9x12 natural fiber rug, perhaps a white bookcase, a tall modern table and... Any other inspiring ideas? I would love your feedback! Just love it! *Also, I've made another friend over atHigh Street Market.... Kelly has the most amazing Etsy shop with so many beautiful treasures. I was eyeing the pair of marble table lamps, an antique oval mirror and a lovely pewter pitcher....and it's all so reasonably priced! How fun is that!
Antique shops along Magazine Street My best friend and sister of my heart, Debbie, yes we're both Debs, lives clear across the country from me so once every two years or so we meet up in a different city to play for a week. We decided to meet up in New Orleans since she had never been there and of course there was magazine street to look forward too since we both love antiques. Magazine Street is well known for all their antique shops although there are fewer since hurricane Katrina.
A restored shotgun house with newly added dormer We stayed in the French quarter and played tourists and the first thing that struck me were the stunning shotgun houses. A single shotgun house is usually 12 feet wide and has 3-5 rooms in a row, sometimes only two rooms deep, front to back, with no hallways and doors that open on the front and back.
(Excuse the dates on the pictures I never learned how to set that on my camera.) Shotgun houses were popular mainly in southern cities since they occupied a small area of land, usually 30 feet wide at most, so it allowed a great number of homes to be built side by side. New Orleans housing taxes contributed to the shotgun house since taxes were based on the lot frontage. Later when people tried to take the houses to a second story known as 'Camelbacks' the houses were then taxed based on square footage. Since hallways and closets were considered rooms this type of house has no closets or hallways.
'Double-barrel' shotgun houses that consist of two houses sharing a central wall that would have allowed more homes to be built. They became known as being a shotgun house for the saying that you could shoot a gun through the front door and have the bullet pass cleanly through the back door since the doors line up on the same sides. I love the vibrant colors used for the house colors.
The houses usually had big rooms with high ceilings that helped with cooling purposes, when the warm air rises it helped to keep the lower part cooler. The shutters on the main doors helped as well since the shutters can be locked from the inside and the front door could be left open to allow air flow through the house.
This house is actually two houses the entrances being on the far left and right and each with a window and dormer in the center. The left house is for rent if you're interested.
A modern shotgun house with detailed floor plan that includes a bathroom, the original shotgun houses had no bathroom.
Interior pictures via Southern Accents, December, 2002 These interior shots are from Gerald Pierce' pied-a-terre in the French Quarter of his double-barrel shotgun house that has been turned into a single dwelling. Gerald is a designer of Jim Thompson Thai Silks in Bangkok.
If you notice the pictures hung over the windows in the living room and how far up on the opposite wall the pictures go up it'll give you a sense of how high the ceilings are, usually 14' in height.
Chimneys tended to be built in the interior so the front and middle rooms could share a chimney and each have a fireplace. Notice how slender the fireplace surround is, not much wider then the antique trumeau mirror above it. Typically there was another chimney built in the kitchen.
The kitchen, located at the very back of the house, looks to be a simple gallery kitchen hidden behind silk drapes. This is a man who obviously doesn't cook much since those drapes would get ruined by cooking grease.
If you click on Gerald' bedroom picture you can pull it up bigger to see how narrow the bedroom looks and how high the ceilings are, the ceilings do have cove molding. Notice how he kept the wood floors dark so that they almost disappear?
The bedroom fireplace exactly on the other side of the living room fireplace.
While I love the look and the idea about these little houses I don't think I could live in one since I get claustrophobic. Love the tall floor to ceiling windows and the ceiling heights, so European. I'm also thinking these homes are best for a single person since there isn't much square footage. They're such a charming part of our architectural history and I'm glad I got to see so many first hand with my best friend.
Voting is closed! To see the winners of Round 1,click here. Check back next Monday, March 18th for Round 2 projects and voting! --------------------------------------------------------------------------------------------------------------------------
Welcome to Creating with the Stars 2013! Let the contest officially begin! This season of CWTS is going to be Epic and these Round 1 projects are a clear indication of the insane talent of these contestants! Just a few reminders before we get to the voting… Round 1 Challenge:
Round 1 Prize Package: We have the Best Sponsors for CWTS2013 and here's a reminder of what our Contestants are playing for this week… $50 worth of 31 Gifts products $60 worth of Twysted Yarn products $70 of Henle Headbands products $100 Blog Re-design from 733 Design (who designed all the CWTS logos!) Project featured by HomeTalk We also want to thank Homes.com for being the Official Grand Sponsor of Creating with the Stars!
Without Further Ado… In No Particular Order, Here are the Round 1 Projects…#1- Dresser Turned Modern Sandbox This dresser had no hope. It was in extremely poor shape. I mostly bought it for the legs, but after learning I was in CWTS, I thought I could do something with it. I decided to turn it into a sandbox filled with sand and dirt. What kid does not like sand or dirt?! The issue I have with sand tables is how much of an eye sore they can be. After cutting off an entire level of drawers that brought it down to kid/side table height, I placed sand and dirt inside the top two drawers. When guests come over, I simply place the dresser's top back on covering up the dirt and sand. It is an easy solution that is modern and stylish. Using a friendly exterior paint protects the furniture from the elements. Placing the dresser top on when not in use protects the sand and dirt. The two bottom drawers are functional and can be used for outdoor storage like small plant pots, garden tools, and kid toys. I used a couple of rabbit knobs for fun and green paint for a punch of color.
#2- Little League Lounger I love taking old, crappy stuff and turning it into something that I will actually use! I found an ugly outdoor folding chair at my local thrift store, and knew it would be perfect for my upcycle project. Now, I have a completely re-done"little league lounger" to use at all my boys' baseball games this summer!
Here's what the chair looked like before I worked my magic:
I added all new cream-colored webbing {with a navy pin stripe}, updated the arm rests by re-purposing an old wooden baseball bat, and made a baseball stitch pillow from an old table runner. I love how it all came together!
I can't wait for baseball season to get started so I can use my new chair!
#3- Floor Board Kitchen Island
I love our kitchen, but I've always wanted a big kitchen island where we could hang out. I wanted to take this unused space in our family room and add a table or counter. I had no idea what to use, but all of a sudden, a light bulb went off in my head. I remembered some old floor boards hidden in the basement rafters. They were dusty and worn and perfect. BAM — perfect for an old rustic island! We washed and sanded the boards, and got to work building our new favorite spot.
Add in some painted stools and we now have a space just off the kitchen that is perfect for parties, eating, hanging out, or working on crafts.
#4- Man Chairs Often the"dreaming up" of a new project can be done in my sleep, literally. But execution can feel like a trip to the dentist, one in which I go in for a routine cleaning and find I need a double root canal. The trick to any DIY project is COMMITMENT. Commit to your goal and don't let up no matter how many coats of paint are applied in vain. These previously drab, brown, faux-leather club chairs were purchased on sale for $12 each at a local thrift shop.
A bit of auto upholstery paint, steal tacks, metal coating paint, a couple patinas for good measure and some tough new casters and this thrift store find is ready for"the man".
#5- Tin Tile Mirror So, I'm still totally in shock that I was chosen to be a part of Creating with the Stars. With the first theme being"Upcycle", I wanted to do something a little different. I hit up a local flea market, hoping to find something that screamed my name, and when I saw these vintage tin ceiling tiles, I knew these were it. The fun color that looks so much like patina, the rust, the texture, the scuffed parts revealing the silvery color underneath. LOVE! They were marked $6 a piece, but I offered her $5, and she accepted. So $40 for all 8. Score!
The next stop was Home Depot for wood, and I built a simple frame. Each tile was approx 12x12, so the finished size is 36x36. Not all of the tile sides matched up when I nailed them in, so I'm going to blame the tiles and say that they're wonky, rather than my measuring (which is probably more true). A little paint matching, painting in the gaps, building a frame for a mirror that I picked up at Michaels, attaching the mirror and frame with some glue, and we're almost done.
I had the perfect spot in my hallway that was just begging for some oomph. For under $60, it's a huge statement piece that fits perfectly. I'm thrilled with how it turned out.
#6- Television Stand Upcycled to a Bar When I saw this ugly, 80’s style television stand at our local Goodwill for a whopping $30, my mind immediately started churning with ideas. I’ve been wanting to set up a bar area in our house, and I knew this would be the perfect piece to turn into a bar. It just needed a little (or, um, a LOT) of love!
I added legs and a little stand at the bottom to make it a bit taller, and gave it a few coats of navy paint (and, of course, a stencil to add some fun). I turned the drawers on either side that used to be used for VHS storage into the perfect place to stash a few bottles. And, since most alcohol bottles are all different sizes and shapes, I poured our frequently used ones into uniform glass bottles that I etched with the name – that way I can be sure the bottles fit and they look pretty to boot!
Finally, for a last little touch, I dipped some of our glasses in gold paint to make things a little more sparkly and fun. I’m so happy with how it turned out and I’m loving the extra storage! I can’t wait to put this thing to good use!
#7- Trash Pile Tire Made Trendy Table Early Saturday morning, still bra-less and in my PJs, I drove to a neighbor's house and hurled an old tire from their curb-side trash pile into the back of my car. My plan for the filthy tire was still foggy… as was my pre-coffee brain, but I was determined to turn it into something cool. After a day of deliberation, trial, and error, I determined side table was to be its fate. Let's get upcycling.
I started by giving the tire a scrub with some dish soap. Next, I tried to figure out what to use for legs. Since this tire still has the (very!) heavy rim attached, I needed something sturdy. After contemplating many possibilities, I decided to cut them out of a piece of pine left in my garage from another project. The legs were stained and attached to a plywood circle I cut for the base. Then, I glued the tire on top of that with construction adhesive, and added a smaller circle to the top of the tire to act as the table top.
I covered the entire tire in rope using Liquid Nails and"dipped" the legs in a bright citrus-ey yellow paint. I'm pretty jazzed with how it came out and can't wait to tell people I have an old tire in my living room. Ha!
#8- Vertical Blinds Headboard Why is it that bedrooms are always the last rooms to get decorated? This room had no artwork, no matching furniture, and a mattress sadly sitting on a cheap bed frame. The only good thing about it was that it was prime for a makeover!
When my parents upgraded their patio doors from vertical blinds to curtains, my mom saved the blinds for me thinking I could “make something with them.” Does this happen to all creative types? But Mom was right, those old vertical blinds were the perfect material to make an over sized woven headboard for the bedroom.
A sleek wooden frame hangs so that the headboard almost reaches our 8 foot ceilings, and two spray painted clamp lights provide adjustable lighting for bedtime reading.
Similar, but smaller, woven headboards can cost over $700, but since I re-purposed my materials, this statement-making headboard cost less than 1/10th that much. No more sad, bland bedroom for us! #9- Bicycle Wheel Clock
There are clocks. And then…there areclocks. There are clocks that tick and tock and ring and jingle and tell time underwater and sound an alarm. And then there are clocks made from a bicycle wheel with yardstick ruler hands perched on a chalkboard surrounded by roman numerals above a table strategically styled with a bicycle seat. That is one fine clock.
And the best part? I got the bicycle wheel for free. Can you even believe it? I walked into a bicycle shop and randomly explained to the resident bike expert that I wanted to make a clock and I needed a cute bike wheel that had preferably been around the block a time or two. Wordlessly he stared at me. I don't really know why. I'm sure they get that request all the time.
And then he went to the back where they keep all the spare wheels for people who come in with clock requests and he handed me this bicycle wheel. I totally wish he could see his wheel now. He'd probably charge me for it.: )
#10 Statement Piece Light Fixture
Walking through Habitat ReStore, I spotted a few egg crate diffusers — you know those grates that cover fluorescent lights in basements across the country. It's the last lighting fixture I would consider for a project but once I got around my thoughts of drop ceilings, I began thinking how neat it would be to use the grid to create any square cornered geometric shape that I wanted. At $2 each, what could I lose?
Browsing Pinterest I found this amazing light and fell in love with the arms. It's lines are simple, but make a big impact! Perfect for a statement piece! The egg crate diffuser was cut into the shape of the arms, filled with plaster of paris, sanded and painted. So that the wiring and housing wouldn't compete with the outer arms, I made a simple fixture out of metal tubing, PVC plumbing parts, and a few parts from an existing chandelier. After wiring it (and being elated that it worked!) I installed trim on the ceiling to frame the chandelier, and added a little more interest by painting alternating stripes in ivory and a light gray. Finally, I installed a gallery wall with a few fun pieces!
From a designer's nightmare to an energetic statement piece, this diffuser has come a long way! #11- Lab Station Turned Dining Room Buffet
servin' it up old school… The story of how a lonely old science lab station gained new life as an industrial-style dining room buffet. Once upon a time…on an unusually warm and sunny spring day, I was leisurely browsing a flea market when I spotted this piece and was immediately drawn to it…the color, the rust & patina, it's industrial style, and the fact that it was old and had great visual evidence of it's previous life--lots of it. As I looked closely at the butcher-block top complete with bunsen burner stains, student-carvings (i.e."jennie-loves-alex") and distress-marks galore, I knew that I had to have it--for something, but what that something was, wasn't clear to me at the time. We just had"chemistry"--I could feel it.; ) Luckily, the kind gentleman who I was buying this (very heavy) treasure from was willing to help me get it into my truck…and let me tell you: it. weighs. a. ton. Chapter Two: Fast forward to Project One CWTS: Upcycle. I knew instantly that this sad science lab station was about to have a major career change. I tossed around a few ideas, but pretty quickly decided it would be a fabulous, industrial-style dining room buffet. The hardest part was this: while I love the"vintage-industrial-rusty-patina" look and eagerly welcome it into my house, this was looking a bit too"raw" for my dining room. Well, try googling"how to tone down rust on metal, yet keep just the right amount of color and patina". If there is a tutorial for this…I didn't find it!
Chapter Three: So, I did a little DIY-science-experimenting and discovered a technique to get just the look I was hoping for. After this process I added the casters, the door knobs, stenciled on the quote and stained the butcher-block top. Add some wine, grapes, cheese…and this"new" buffet is all ready to help you eat, drink and be merry.; )
…and she lived happily ever after in my dining room.
#12-From Frumpy to On Fire, Fireplace! When I was told that the first week of Creating With the Stars theme was upcycle I was over the moon excited. Upcycling is my thing. It’s where I get my groove on. And so, it wasn’t a matter of finding something to upcycle; it was a matter of deciding which thing to upcycle. So, I took a tour of my house and gazed at all of the items that needed some good loving. And then, I sat and thought about what I wanted in my home. And, it came to me. Hmm… could I? Would it be possible? Yes… yes, it could!!
I’ve wanted a fireplace forever and ever. Okay, that’s an exaggeration. But, you get the gist. And, while this fireplace/bookcase might not be the real thing it fits the bill quite nicely. I was able to create my “fireplace” from an old bookcase that was sitting in my laundry room, a mirror frame that was on it’s way to the trash, and an antique footboard that had lost it’s headboard (poor thing). The bookcase is the most important element; the mirror and footboard helped create awesome and turn the bookcase/fireplace into something spectacular.
I cut the footboard down to size and used it as the “mantel” as well as give the fireplace/bookcase a skirt at the bottom. Scrapbooking chipboard embellishments gilded, painted, and antiqued look like beautiful wood cutouts on the mantel. The trim on the sides of the fireplace/bookcase are pieces of the mirror cut down to size. A chimney that runs the length of my 12 foot wall was created with a simple frame covered in tin. The back of the bookcase was covered in that same tin for added charm. I must say this project exceeded my expectations and far surpassed the image of awesome I had for this project when I started out. I love walking into my home and seeing this and am so pleased waiting forever and ever is over!
Can You Believe That Talent? It's Time to Vote!You can only vote one time, but you can vote for your favorite 3 projects.Before voting, please LIKE EC2 on Facebook. Thanks! If you're having trouble viewing the voting box, click HERE to vote. Don't forget that tomorrow it's your turn to link up your own upcycle project!Thanks for playing along!!
From a distance, you may not notice the stains on the brick fireplace. These stains come from the glue that the previous owners used to adhere the faux wood paneling.
Here is our fireplace in its former glory. The incinerator-like wood stove compliments the dark gloomy look and took two grown men (chimney guys), several hours, and several swear words to remove.
Here's Hubby prying off the first bit of the faux paneling. This is literally thefirst day (maybe even the first hour), after taking ownership of the house.
This is after all of the paneling was removed. We knew that there had been an old leak so that wasn't a surprise, but what we didn't expect was their generous use of glue (glue ended up being a four letter word during the remodel as the former owners used it everywhere).
This is how things look now. We've covered up the bookcases with drywall, added crown and base mouldings and had a cabinetmaker design and install the mantle.
Here's a closer look at the glue stains. We've tried everything to remove them — nothing has erased them completely. Initially, we had intended to paint over it but then kind of liked the brick (from a distance) with the white mantle so ended up leaving it....until now. With the new furniture on its way, and with an empty room just screaming for a painting project, we're thinking that it might be time to paint it. All along, we thought we'd paint it white, but there have been other suggestions such as black or gray. What do you think? I'm looking through some old magazines to try and see what different colors would look like. The good thing is that no matter what color we end up painting it, we can always change it later on....
No, 1st dibs didn't make a new record selling anything, at least I don't think they did? Congratulate me, this is the first time I have ever made it through the entire new listings on 1st Dibs in one day. As anyone knows that's not an easy feat considering there are typically 18 pages of mouth watering, eye dropping, goodies galore to peruse! Such fabulous stuff and I can't afford a single thing! Then again my birthday is coming up in September and for those of you needing some gift ideas I've gone ahead and chosen a few morsels'''
offered by Alexander Westerhoff Here These 17th century Baroque Marble Corbels would look perfect on either side of my fireplace and who doesn't love angels? But then again I'll need a nicer fireplace surround to go with the corbels so toss this in too please. Then again my ceilings will need to be raised but that's what a wish list is for huh?
offered by M. Naeve Here Love stone fireplace surrounds and this 18th centry French job fills the bill, in fact maybe I should ask for two of these, the other would look amazing in a bathroom!
offered by Karla Katz Here Italian gilt Lantern My entry hall fixture really needs some serious help and I thought this would be the perfect fix!
offered by William Laman Here I just love this Swedish Baroque table it would go perfectly in the entry way as well, I need to find a mirror to go over it and oh yeah, I need a bigger entry hall!
offered by Lotus Gallery Here This Empire silk velvet pillow is right up my alley, anyone who knows me knows how much I love anything orange! Throw in some metallic anything and I'm yours!
offered by Watkins Culver Here I will always accept fabulous 18th century paintings with angels but when they come with an outstanding frame, Perfection! To round things out I think I should pick a little something for the outdoors but then again these urns are stunning and might look great in my dining room.
offered by Rose Uniacke Here I was utterly amazed to have noticed I made it thru all the new listings and then I looked at the time and wasn't to pleased with myself since I didn't get a single thing done today. But it was a nice rainy day here in New Hampshire and we haven't seen rain in two months so I think I'll count this as my celebration for the rain. What do you wish for on rainy days?
After a long and exhaustive search that included the criteria of fabulous, affordable and well-made, we have finally found a couch for the living room. The furniture store was having a special sale where all fabrics, no matter what grade you chose, were priced at the lowest grade fabric price! You can imagine how exciting it was to look at fabrics with no regard for cost. This freedom led us to a beautiful neutral velvet called 'Tarragon' and it's very luxurious. We also found a beautiful chair, which was on sale and included the same special savings on the fabric. So we ordered two of these chairs to flank either side of the fireplace. For these, we chose a linen-esque fabric that is several shades lighter than the velvet.
Due to these purchases, we've started to spruce up the living room before the new furniture arrives (which will be six to eight weeks). The biggest change is that we've decided to relocate the old Karastan rug to the guest house. The following picture shows the room with the Karastan just before we rolled it up.
Below is the room after we rolled it up. It was absolutely amazing to see how much brighter the room became. This room already gets a lot of light due to all the windows but the room truly glows without the heaviness of the dark rug.
The room is pretty empty right now because we stole the couch that was in here for the den (photos soon to follow!). Then after I rolled up the Karastan this past weekend, I thought we'd start with a clean slate and continued to remove all tables, artwork and lamps. The new couch will face the fireplace. The two new chairs will flank each side of the fireplace. We'll add a new natural fiber rug for floor. The antique mirror (a Great-Great Grandparents piece), will remain but I would like to think of something new and fresh for the mantle. I'm going to go through some of my magazines to look for some ideas! Any suggestions?
Ladies-and the approximately 1% of readers who are dudes-, we have awesome sponsors. They are the ones who make the rest of our posts and projects possible. Not only do they support us, but they have some pretty cool stuff in their stores. We've rounded up some of favorite items for a cozy Fall season. Make sure you don't miss the discount codes and special promotions!
1. We are digging on this Antique Thread Display Drawer from Nachokitty. It could serve so many different purposes: jewelry organizer, craft supply organizer, or pretty display for your tiny treasures. Don't stop there, though. You should definitely take a look at their Etsy shop- I could browse their finds for hours!
2. I love this Industrial Table Lamp from Lucent Lampworks! I can see it snuggled up to some pretty Fall decor on a mantel or side table. Love. it. To get 10% off your purchase use the code EC2TENOFF.
3. We're heading into the holiday season, and it's always good to have small gifts on hand for teachers, neighbors etc. Stock up on these Premium Soy Candles from CJS Eco Chic in the mini 4 oz. and you won't ever have to worry! And oh man, the holiday scents are to die for!
4. We love using non-traditional materials for headboards! How about this fireplace mantel headboard? Not bad, right? Architectural Antiques is hands-down our favorite place for incredible salvaged materials to repurpose.
5. Did you see Mandi's Epic Room Makeover. She used the Nova Trellis, from Royal Design Studio in the bathroom and well, it is fabulous. As a thank you to their 10,000 FB fans, RDS is offering25% of all orders through Sunday with the code WELOVEU.
6. You've all been waiting for Monica's big patio reveal, and tomorrow, the wait is over! They couldn't have done it without Stone Depot, and their super helpful staff. Now's the time to build an outdoor fireplace or firepit, and they guys at Stone Depot have everything you need to make that happen!
7. We can't seem to control our love for photo canvases from Canvas People! Right now you can buy a 11 x 14 Canvas for only $15 from Canvas People and $1 of every order will be donated to help fight Breast Cancer! If you need some inspiration for what to put on a canvas, check out this post! 8. Not gonna lie, once the holiday season starts (right after Halloween, in my opinion), I often need a reminder to stop and be thankful for all that I have. This 1 Thessalonians 5:16 Print from Red Letter Words makes a perfect visual reminder of that very thing…and it looks cool, too. Check out the fun new turquoise color, too! They also have a really fun, very sweet Print of the Month focused on the value we women have, and you will receive 20% off this entire section through the end of this month. 9. We love Moo & Puppy digital paper so much, we even wrote a post about all of it's many uses! I'm really liking the fall-ish colors of the Retro Digital Scrapbook Paper. Use the discount code EC2blog20 for 20% off your order!
10. We all know that Thirty-One Gifts has cute and affordable bags, but the one item I've had my eye for over a year is this small Magazine Basket. I love it's shape and versatility! Plus, you can personalize all baskets for only a few dollars more. Right now, mention EC2Blog when you order any basket and get any second item in the catalog 31% off. To place your order, click here and shoot an email to Amanda with your order.
11.Liberty Thrift Store is hands-down our go-to thrift store. Did you know that we found the chair we reupholstered for the Nate Show there? You never know what you'll find thrifting, but it's always fun! -------------------------------------------------------------------------------------------------------------------------- Wait, one more thing! We're happy to announce that we're accepting new sponsors! We have a few openings that we would love to fill, so if you have a business that you think we'll love and can help you promote, send us an email at eastcoastcreativeblog@gmail.com! Seriously, what better way to sell your stuff than to have two loud, passionate, crazy women on your side?! For all the nitty-gritty info about our sponsorship opportunities, click here. -------------------------------------------------------------------------------------------------------------------------- Have a great day, and be sure to stop over and say hi to our wonderful sponsors!
In New England fall goes hand in hand with major amounts of yard work preparing for the coming winter. It means stacking several cords of wood for the wood stove and fireplace.
They say the average 80 foot tall maple tree can have as many as 1.5 million leaves and when you have several maple trees that's a lot of leaves!
It also means those beautiful autumn colored leaves will soon be hurling themselves to our lawn.
But that's OK because we're ready for them with our lawn vacuum!
See what a great job it does! Since we have a few acres of lawn this lawn vacuum does in one day what would take us weeks to rake....love it!
After a long hard workweek I'd much rather be sitting in front of a fireplace but since there's work to be done I'm off to stack wood. I hope you all are having a more relaxing weekend! ?
One of my 2012 goals was to make my family room reflect ME a little bit more. I'm not going for some adult, anti-kid room or anything… I just want the style to fit me a bit more. Okay, and if I'm being honest, the room currently has no style at all, it's sort of a mish-mash of randomness. The first step in this direction is… Stenciled Wall Panels
Since we moved in, I've never been sure of what to do on either side of the fireplace. I've never wanted to compete with the fireplace, because I love the stacked stone so much. We've talked about built-ins someday, but someday isn't any time soon. So, we decided to try something a bit more creative. Wall stencils have been around for as long as I can remember. I definitely stenciled a border of berries and leaves in our very first master bedroom. Gag! Well, thank goodness they've come a long way! Royal Design Studio is my very favorite place to get stencils! Seriously, I bought a stencil a year ago from another unnamed company and it bled like crazy because it just wasn't made of heavy plastic. Royal's stencil was strong enough for a perfectionist like me! Ok, so here's what I did… We measured out a big old rectangle on both sides of the fp and then used a chalk-line to get super straight lines. I love my chalk-line. I use it all the time!
Then, I used another favorite, Scotch blue tape to outline the shape. (Random note: Did you know Picnic.com has a"skinny" edit button. Of course I tried it on my butt for this picture, but it didn't do a blessed thing. Drats!)
Then, it was time to line up my stencil and get painting! (Use a level to get the stencil straight. Royal Design Studio sells this cute little level that clips right onto the stencil. Genius!)
Rather than rolling this stencil, I used the brush method. Basically just tap the wall over and over and over again.
Darn that I'm easily distracted. Zoey 101… seriously?? I couldn't focus at all until I knew if little Chase and Zoey made up! (yes, I'm a lame mom of 4 kids)
Thankfully, after Zoey ended, I was able to get down to work…
Whoa! Look at that fancy time lapse…
I'm a stenciling machine!
Then, it was onto the other side. The whole process only took me a little over an hour of stenciling. I have to mention that a good brush is essential. I can't stress this enough. My Royal Design Studio brush was over at Jess' house, so I started stenciling with a small, craft store brush and it was a waste of time. I did one section and then stopped and waited for my brush. The cruddy brush took forever, was leaving bristles all over the wall, and needed two coats. Once I got my big, Royal Design brush it was so.much.easier! Look at the difference…
Here's how the room looks right now… and here's where I need your help!
My original plan was to trim out the stencil with molding (the molding will be the same grey color as the stripe on the curtains and the wall), but now that it's on the wall I'm unsure of what direction to go in. Here are my options… Option # 1- Rectangle Trim
Option #2- Square Trim
Option # 3- Rows of Trim
Option # 4- You Tell Me! What other ideas do you have for me? I can't wait to hear your opinion and ideas!I plan to finish the wall this weekend!
PS- Two things… 1- My mantle will be decorated one of these days… hopefully for the"after" pics. 2- My children don't sit around watching TV all day…I took my pics over a span of two days!
I am totally sold on Annie Sloan Chalk Paint. Up until last week, I had read that people fall in love with this paint after trying it out, but we don't have stockist near us, and it never occurred to me to order some online. Then, our pal, Shaunna, opened up her shop and I knew it was time. (Yes, it was just that dramatic). Did you know that you can paint almost any surface with chalk paint (not chalkboard paint) without prepping? No sanding, no stripping, nothing. And it adheres to everything because it's magic. And awesome. And we're a match made in DIY heaven if I ever saw one. Paint that eliminates all the hard work? Yes, please. I thought I'd give it a whirl on my marble fireplace surround, because I'm crazy like that. I did not like this marble one bit. It was sort of dirty-looking and leaned toward the peach color family. Yuk. Like I said, it was time for an upgrade.
I also took this time to try out the new Purdy paint brush I received in my haven swag bag. We love these things so much!
I used the color Coco- it's kind of brownish, and kind of grayish, if that's possible. It's crazy at how easily the paint goes on…even on a marble surface! Notice that we didn't prime this marble at all!
I still need to buff and wax the paint so that it's all sealed nicely, but I'm happy with the small, but noticeable change. I originally was planning on painting stripes, but for now, I'm digging the simplicity of the matte color. Doesn't it look better? More serene and understated and classic.
I've been messing around with some of the ideas I learned from Layla about photo styling, and alas, I still have much to learn.: ( But it's still fun to try!
I brought a few of the pillows my mom made for the bench in my basement upstairs to our living room to add some color and a summertime feel. So fun!
Looks pretty darn nice with my target dollar bin mantel, if I do say so myself.
And now for the {very subtle} before and after shot:
I'm thrilled with the way the paint adhered to the marble and the coverage it gave. I can not WAIT to use Annie Sloan chalk paint on a few dining room projects I have in mind.
Have you guys tried chalk paint yet? What are your thoughts about it?
I almost never watch TV mainly because it bores me right to sleep in under five minutes'LITERALLY! One show I discovered last year that bowls me over on Bravo on Tuesday nights is 'Flipping Out' with house flipper turned back to interior designer Jeff Lewis. He's an obsessive-compulsive neat freak/control freak who would be absolutely impossible to live with but watching him is fun.
Kitchen at Valley Oak One House, Jeff's personal home until it sold I got a little curious about his finished designs since you almost never get to see them on his show. The houses are usually under construction and the show seems to be more about Jeff's bizarre behavior rather than his finished work. I could never have a glass refrigerator like the one pictured I would be trying to arrange the contents all the time.
Kitchen at Valley Oak 2 House, Jeff's personal home now but for sale I have to admit his obsessive behavior shows right down to the smallest detail. He designs are clean and open, well laid out and very contemporary, he says his designs are "California Modern" and I'll agree. I know from watching the show Jeff prefers open shelves in place of upper cabinets.
Commonwealth Kitchen by Jeff Lewis While those open shelves look nice they show Jeff doesn't cook. Those shelves don't hold much and people who cook need their stuff. Plus what happens to all that stuff out in the open from cooking grease, the dust? I know I don't want to be cleaning something when I don't need too.
House Beautiful Kitchen of the Year 2010 by Jeff Lewis
House Beautiful Kitchen of the Year 2010, the other half of the kitchen I love this kitchen! Tons of gourmet cook conveniences, nice clean lines with an eating area and sitting area all combined. The only thing I would change is the dining table since I prefer something lower and more intimate when having guests. Love the shot of red in the dining area, every room needs one little surprise.
House at Edgemont, LOVE the gray paint color and how warm this room looks!
Edgemont Living room by Jeff Lewis Perhaps it's just me but what is up with everyone placing the flat screen TV above the fireplace? I thought the fireplace WAS the focal point of the room and the TV with its size takes away from it. Love this room otherwise!
While this living room is masculine looking it's stunning and so clean. While I think this guy is an absolute riot he's also a wonderful designer, shame Bravo doesn't show a little more of his finished designs. What do you think?
In case you didn't notice, we did TONS of projects in that short 48 hour period, so there's just too many to break down with tutorials, and I'll be honest, some were so easy that anyone can figure them out without me giving you the play by play. But, even so, the details are really fun, so I'll give you a glimpse of the little stuff that makes me happy.
I hung the silver chargers on the wall on either side of the fireplace to add some interest. I used a little trick to hang them that was super easy: I took a safety pin and hot glued it to the top of the center of the plate. Then all you have to do is hang it! It works awesome for things that aren't heavy, but I wouldn't recommend it for big pieces of art or picture frames. I loved how the metallic color added a modern contrast to the rustic accent branch and stones of the fireplace, and how it mirrored the circles in my modern snowflake garland.
One of the other fun things I did was to add whole cloves to limes in fun patterns for some of my mantel decor. I used to do this with oranges every year with my Grandma, and it's such a great memory. The limes add a pop of Christmas color, but they also smell amazing. Love this for easy decor!
I made two stockings out of burlap and hot glue. Ha! What I wouldn't be able to do without the help of my glue gun! Would you believe that Monica and I don't sew? We get around it pretty well, but man, you should have heard the Nate Show producers when we told them that we were DIYer's who didn't sew.: ) I didn't even use a pattern for the stockings, just drew a shape I was happy with and cut them out. I also made faux metal ornaments out of, wait for it…rolled cork! I used two different metallic spraypaints for the finish, and they turned out cute! Granted, they are soooo flimsy, but they worked perfectly for the show!
One of my absolute favorite additions to the room was the galvanized steel tub I used for holding the base of the tree. Unfortunately, the base of the tree didn't quite fit, so my hubs cut out the bottom of the tub with something (I just gave instructions and he made it happen. I didn't watch so I don't know how he did it! Sometimes that's better.; )
Because of the tub around the tree, I didn't have a ton of space for presents, so I used them as accents on the hearth. I love the simple look of kraft paper and traditional ribbon.
Ok, here's the truth. This pillow stinks. I was totally not thinking about the right way to make a pillow cover and so I folded, folded some more, and hot glued in place. DO NOT TRY THIS AT HOME! But still, I like the sentiment of"Be Merry". However, Monica, feel free to rip that thing to shreds any ol' time.: )
These two are the pillows I made for the couch under the window. I took my time with these, so they're tons better! I can't get enough of the burlap against the green velvet- such a mix of textures!
Taking a cue from Monica's anti-wreath, I hung several pinecones from festive ribbon in a large frame. Even though it was super easy, I totally dig the pinecones. Actually, I adore pinecones now that we've used them in everything from placecard holders, ornaments and now art! They will be making a regular appearance in my Christmas decor from now on. Mark my words.
These two little frames make me smile. Nothing is easier than decoupaging a cheap wood frame from Michaels, and you already saw how simple it is to use artificial moss here. I lined the backs of the frames with burlap, took apart a necklace for the pearl tree on the left and a dismantled a few strange-looking earrings for the specimen art frame on the right. It's nothing if not non-traditional, and I think it's pretty darn cute.
This felt garland was a bear to make because it took forever! At least, it seemed that way. I like quick and easy projects, and this one was easy, but NOT quick! Lots of cutting squares, alternating colors and threading the squares with a car tire repair kit (yes,, you read that right. I didn't have a needle and thread, so I used what was on hand!) and then repeating a million and one times. The end result was so cool, so I guess it was {almost} worth it! Tomorrow is the last day of our Nate DIY's, so don't forget to check back for all the little details from my basement family room. Thanks for stopping by today.: )
Have you ever been somewhere and found the absolute perfect decoration, gift, clothing item etc? You just KNEW it was exactly the right match? For me, these times are far and few between, but as I've stumbled upon developed my sense of style and a direction for our home, I've been a bit more successful since I know how I want the rooms to evolve. Monica mentioned the barn sale we went to yesterday, and it was awesome. However, I won't spend any more time boring you with details about it, but I will tell you this: I didn't know what I was looking for. This, my friends, is dangerous. Especially since there were, literally, thousands of items just waiting to be repurposed into something fabulous. Luckily, for me, I found an item that is PERFECT for my living room.
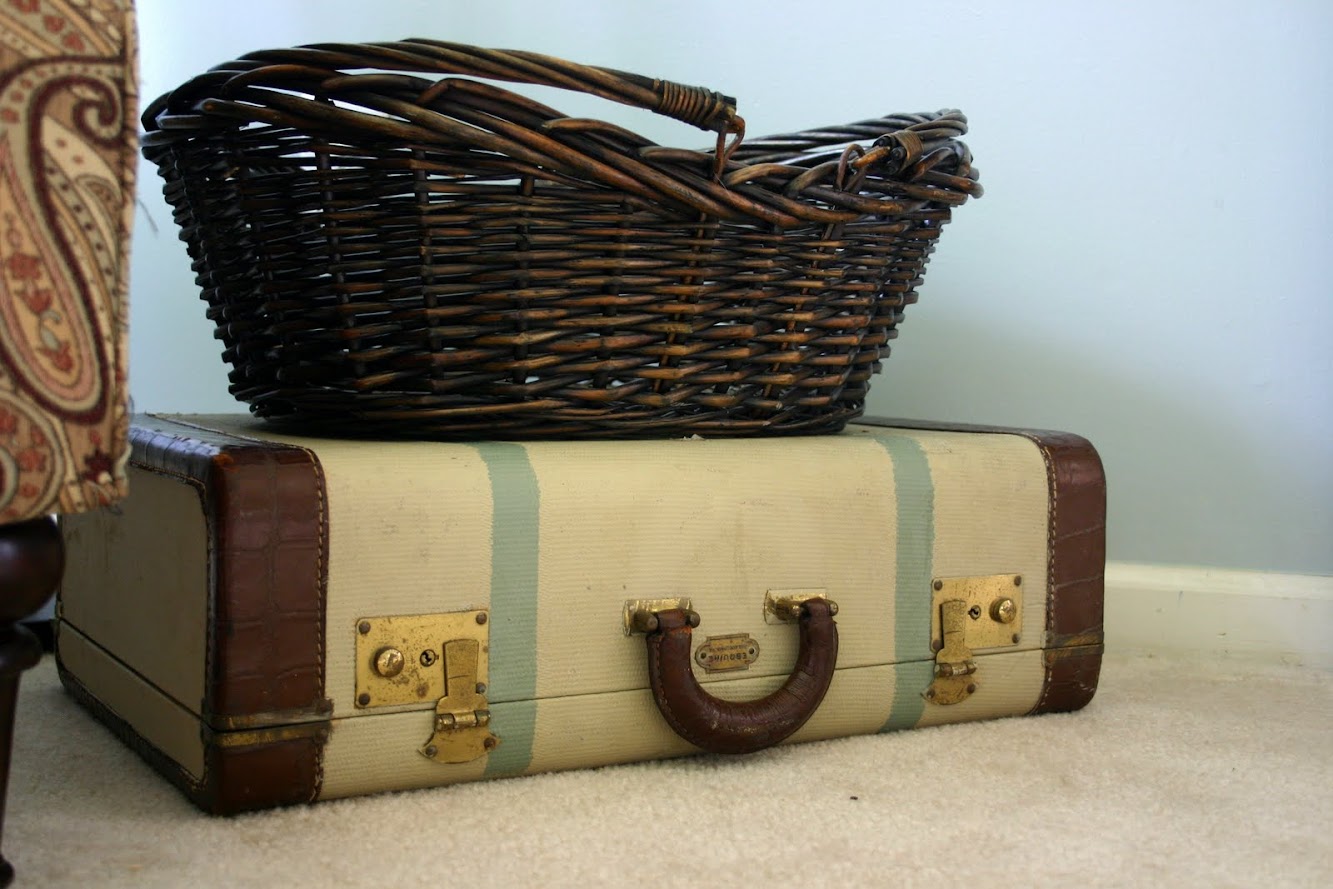
See that vintage suitcase? Yup, that's her. When I picked her up at the sale, my original thought was to stack her with a few other vintage suitcases in my fireplace, since we don't use it at all. Something that looked sort of like this:
Source: kaseybuick.com via April on Pinterest
But, alas, my suitcase didn't fit in our tiny fireplace opening, which meant stacking three suitcases was definitely not happening. My hubs, brilliant man that he is, suggested putting it next to my statement piece under the basket I'm temporarily using to hold a throw blanket.
Great thought, hun! I love it, and like I've been saying all along, looks like it was meant to be there. The light gray-blue stripes and dark brown leather on the suitcase match the wall color, and the legs of my favorite chair as if they were long-lost twins. {Sigh}
I've been fortunate enough to have a few other lovelies in my living room that are perfect accessories for the room. Piece of evidence #1:
This pillow was found at Home Goods in January, and again, I wasn't looking for something like this at all, but it works!
No matter how hard I try, I can almost NEVER get a shot of my house without a) one of my two children, or b) toys in my pictures. It's just a phase (and by that, I mean the toys! Not my kids!: )
See? Random lanterns are not rare in this house. No sir.
Piece of Evidence #2: I also found a pair of these paisley pillows at Home Goods on the same day. I saw them just as another woman picked them up. I couldn't believe my bad luck that they were EXACTLY right for my house, but I was a minute too late! My mom and I discreetly followed her around the store for awhile, and lo and behold, she put them back! I cheered and jumped for joy nonchalantly walked over to them and grabbed them for myself. Score!
Finding these pretties rank high on my happiness scale, right up there with birthing my babies and marrying my husband. (Don't you dare judge me.: ) So, fill me in, is there an item that was made for you and your home? I'm secretly crossing my fingers, hoping that I'm not the only one.
If you missed all the amazing projects in the first three weeks of CWTS, be sure to check them out below! Round 1 Projects & WinnersRound 2 Projects & WinnersRo und 3 Projects & Winners
We want to thank HomeGoods and Homes.com for partnering with us for this competition. They believed in this contest from the start and I'm positive the contestants have knocked their socks off! Since this is the Final Round, and we'll be crowning a CWTS 2013 Champion, we needed an awesome Grand Prize Package! The Grand Prize Winners -Contestant and Blog Star- will EACH receive: $500 from Homes.Com $500 Gift Card to HomeGoods Project featured by HomeTalk
Also, for this round, HomeGoods provided each contestant a $100 HomeGood's gift card! Jess and I adore HomeGoods and just last week we picked up about 8 rolls of the best wrapping paper ever! You never know what awesomeness you'll score!
--------------------------------------------------------------------------------------------------------- Okay, now let's get to business! There are only 3 projects this week, so you're voting for your 1 and only favorite! We're so proud of each of these ladies and we know they've worked crazy hard the past month! As you're voting and commenting, please keep things positive & encouraging and just pick your favorite project. We've tried to keep things as anonymous as possible, so don't bother playing Sherlock Holmes.: ) Without further ado, We present to you… The Round 4- Grand Prize Projects
#1- Guest Room Makeover For my final CWTS project, I chose to makeover a guest bedroom. I envisioned a guest room that was full of personality…fun pops of color and an interesting mix of textures and objects that feels comfortable, unique and welcoming to guests.
What do you make with an old fireplace mantel and a shower curtain? Create a headboard of course! I loved the gorgeous detail in the border of the dark wood, in addition to the design of the shelf with the mirror and paneling. To complete the transformation to a headboard, I closed in the fireplace opening with plywood. and then I upholstered it with the blue and green ikat fabric---A.K.A a shower curtain from Target!
After I spent about an eternity installing bead board and chair rail, I felt like the room needed a really fun pop of color that would also work well with the headboard fabric. For balance, I purchased a white round side table at HomeGoods, and painted it with some fabulous emerald paint! In selecting bedding, I chose to go with a crisp white duvet cover, so as not to overshadow the headboard fabric and pillows. Picking out pillows was super-fun and HomeGoods never lets me down when I am in need of a"new pillow fix." I fell in love with the vintage camera pillow (also from Home Goods) and felt it added an interesting and unique element to the room. The blue lamps added another great pop of color. My goal was to incorporate interesting objects with a mix of coordinating colors and textures into the room…the collage below shows all the details that I hope will make overnight guests feel cozy, comfortable and inspired.
Homegoods was the perfect sponsor for the home decor round. HomeGoods is one of those stores where you may go in with the intention"just to browse"…but never leave without something"you just had to have!"
#2- Colorful, Texture-filled Bedroom Makeover The home decor challenge gave me the perfect opportunity to complete some of the projects I have wanted to try for a long time! Starting with a bare white room, I couldn't wait to add some color, pattern and texture
. To frame the bed, I created an accent wall covered with grasscloth wallpaper and used trim to frame the bed and nightstands. I love the touch of glamor that the nailhead adds to the space. While installing the nailhead, I tried a few new techniques that made it go surprisingly fast! Best of all, this wall is completely removable, renter or indecisive designer approved! I added a few accessories from Homegoods. And customized a few pillows using scarves, napkins and paint.
I constructed the headboard from lumber and cut the detail in the arms with a jig saw. I then upholstered it with foam and a bright coral fabric. I love the simplicity of the headboard, but the curved detail and bright coral color make it extra special!
I love the subtle texture of the grasscloth, and how the nailhead adds a little extra detail. I hope you enjoy this colorful, energetic transformation!
#3- Reading Room Makeover When it was time for the Home Decor round, I waffled back and forth on what to do until I remembered that I had this nice (relatively) empty room in my house just waiting to be turned into something fun. After playing around with a few ideas, I decided I wanted a place to relax, read, and spend a little quality alone time…and the next thing I knew, the reading room was created.
I took regular ol' Ikea Billy bookcases and turned them into built-ins (thanks to some crown molding and a little DIY magic) and amped up the room a bit with trim and some paint in a traditional"library"-ish color. To make it more modern, I painted the back of the bookcases with some chunky gold stripes and tossed in a cozy chair and pouf, a DIY-ed tree stump table, and a ton of bright and colorful accessories.
When I was shopping for the room, one of the first places I wanted to hit up was HomeGoods — I'm obsessed with basically everything they carry and knew their store would be perfect for our bookcases. I managed to snag that gorgeous throw pillow for the chair, as well as several of the cute accessories you can see on the bookcases (including my personal favorite, the blue elephant up at the top)!
I'm so excited to have this space now, and I can't wait to settle in and start reading!
Now, it's time to Vote!
You can only vote once and only for one project.(the past weeks you could change your vote if you wanted. You might have thought you could cast multiple votes, but nope- it was just changing your vote- it was set to just one per IP. This week we didn't allow vote changes, so make sure you have your mind made up when you vote! Good Luck- it's a tough choice!!) In order to vote, you must first LIKE EC2 on Facebook.
I know that I'm a little behind on Fall mantle decor, but I thought I'd share what I have going on right now on my newly updated fireplace. When I stenciled the fireplace, I rearranged the mantle, as well, in a back-to-school/early Fall style.
I loved how light and airy it felt, yet still included some Autumn touches like the rust and yellow books and green apples. Works beautifully with my stencil, doesn't it?
The books are actually Monica's that she bought at the barn sale, and I know she wants them back, but I don't think she realizes how at home they look on my mantle. Maybe these pictures will convince her?!; ) The propeller thing was an item I found while on vacation at the Jersey shore and I whole-heartedly adore it. The tiles are from the historic Moravian Tile Works not far from my house. I have four of them and each represent a different season.
But then, I got itching to really fallify my house with rich, deeper colors, so today, I brought out all my junk and got to work. When I'm styling a mantle- or any space for that matter- I like to collect things from all over the house and mess around with them for a while. I should have taken a few outtake pictures, because oh boy, you would have thought I lost my head at some of the arrangements I came up with. I usually try to follow a few simple rules, like grouping in threes and mixing up patterns and textures. So, here's mantle # 2 for you:
In my opinion, you can't ever go wrong with pumpkins so I made sure to include them.
Some of the pieces were used in my fall mantle last year, like this copper-colored vase and faux grasses. The mirror was a $4 find at Liberty Thrift Store, that I've been holding on to until just the right time.
I've had the little dried gourds for years, and the over-sized acorn came from Hobby Lobby.
I always love decorating and redecorating my mantle again and again and again. It's a sickness. Do you change your mantle decor to fit the season?Which style do you prefer: Mantle #1 or #2?I'm undecided.: )
This post brought to you by FrogTape brand painter’s tape. All opinions are 100% mine. So cutting hair isn't our normal post topic here on East Coast Creative, but when it involves Frog Tape® and a rockin' hair style… well, I think it's just right for EC2! Cutting a mohawk isn't easy business- do you have any idea how many crooked mohawks there are in the world? A lot let me tell you! (and yes, that claim is purely fictional, but I'm 99% sure I'm right!) Thanks to my ingenious husband (or maybe it's just DIY overkill that made him think of it) we created the easiest way to cut a straight, perfect, and rockin' mohawk!
And let me shed a little light on the old 'hawk before I tell you how to do it. Callen (my youngest) has my husband's hair- which means pouffy awfulness. It's okay, Eric owns it (aka shaves it all off!) It's just really bushy and we can't do anything with Cal's hair style-wise. EXCEPT… for an awesome mohawk! It's the best style because his hair is going to poof out and stick up anyhow, so it's just making the mohawk styling that much easier! Eric and I often chat about which of our son's hair styles the grandparents hate more… Cal's mohawk or Kade's super long shaggy mop. I still think the long hair gets to them the most!: ) (And no, we're not cutting the mohawk off before school starts next week. We get asked that a lot. Why would we get rid of his swagga just in time for him to meet all the little ladies??) Alright, so let me tell you how to cut the perfect mohawk so that your kids' grandparents can think you're nuts too! #1- Determine how wide you want the 'hawk to be. We liked a pretty thick one, so we used about 2 widths of Frog Tape®. Now, we were asked to share a project we'd done with Frog Tape®- they said it's multi-surface tape- good for a variety of materials. I had already cut Cal's mohawk and was like,"how's this for a unique material!" So, while Frog Tape® wasn't made with the mohawk in mind… it works like a charm!!
#2- Place the tape down on your kiddo's head exactly where you want the hair to remain. Make sure it's straight from front to back AND side to side. Remember… crooked mohawks just aren't cool! Don't worry about pressing the tape down too hard, the edge will serve as more of a guide for your buzzers, not an paint lock like we usually use Frog Tape® for.
I wonder if this little guy has any clue that this process isn't quite the norm… Such is the life of a blogger's kid! (Also, ignore the pile of clothes and messy bathroom. This is real life here people! )
#3- Use your buzzers to shave along the edge of the Frog Tape®. Don't press into the side too much, you don't want a wonky line. Any buzzers will do, but we've always used this Wahl kit.
#4- This is just a preference, but we always have our boys sit on a stool in the shower while we buzz. It's so much easier for clean up. We use a hand vac to get as much of the hair up as we can, and then the rest just gets rinsed down the drain. Easy peasy!
I couldn't love Cal's hair any more than I do. It's definintely my favorite and it's sticking around for a long time! Since cutting it in for the first time, we've trimmed the sides 3 or 4 times, so now the middle section is nice and long and big boy mohawk-ish!
If you're thinking of embarking on the mohawk journey, I definitely recommend this method to get the perfect mohawk! A little outside the box, but this straight mohawk just wouldn't have happened without FrogTape painter’s tape. We really do love Frog Tape® and have done a lot of cool projects using it. Last year when we were at the Haven Blogger Conference, we got to meet our friends from Frog Tape® and we learned a lot more about its paint lock technology. Basically it seals the edge of the tape so the paint doesn't bleed through! That's huge for me because I have some perfectionist tendencies. Did you know that FrogTape painter’s tape also recently came out with Shape Tape®? It is patterned tape, so you can get waves, chevron, etc… without measuring! We think it's pretty cool! Check out a few other projects we've one
Check out a few other projects we've done using Frog Tape®! My Chevron Accent Wall
Mosaic Accent Wall
Fireplace Makeover
If you haven't tried FrogTape painter’s tape yet, what are you waiting for? I mean you can try it on an awesome DIY project for fall OR for the most epic of all mohawks! Frog Tape is also on Twitter @Frogtape- give them a shout out and share your fall projects!
Today we have a Jessica (not our Jess, a different one) from Arcadian Lighting guest posting about blending modern and country designs. We love this trend, so we were excited to see what she had to share. I (Monica) happen to love Arcadian Lighting. We made one big lighting purchase when we built our home. Our foyer needed a huge light and it needed some major wow factor. We must have looked at 192364 stores, and Arcadian was where we found a winner!
It's one of my favorite things ever (and they have great sales, so of course I didn't pay full price!) So, thanks for being here today Jessica! **********************************************************************************
Hi there! I'm Jessica, a writer for Arcadian Lighting, which is a wonderful online resource for beautiful, affordable lighting fixtures. I'm delighted to be guest posting for Monica and Jess today because I'm going to be sharing a collection of inspiring modern country interiors. Rustic and casual with a sophisticated modern edge, these country interiors are just right for the fresh, airy days of Spring. I hope you enjoy!
A simple checked table cloth and set of traditional English china give this lovely dining table a classic farmhouse feel. The contrasting modern wine glasses and Donghia stacking chairs are cool accent pieces.
A chic neutral color palette and a checked upholstered arm chair in the corner bring together new and modern with old and classic beautifully. The branch candlesticks are fun and unexpected.
A gorgeous mix of crisp, modern furniture and rustic exposed wood beams creates a perfectly elegant, yet relaxing atmosphere in this living room. These types of ornate wooden mirror frames and chandeliers add a bit of drama.
The slate fireplace, twinkling candles and brilliant chandelier give this sophisticated dining room just enough simple country beauty. A lovely bouquet of fresh greenery makes the perfect accent, as well.
The vaulted ceiling and shelving gives this living room a distinctly farmhouse appeal. Weathered antiques and cushy modern furniture make the room cozy and inviting.
The handsome dark wooden floorboards and rustic, industrial stools add a rugged edge to this chic kitchen. The pendant lights overhead are simply beautiful, and the under cabinet lighting is a great touch.
A dusty blue wall color and sheer white curtains make this bedroom absolutely dreamy and romantic. The wood beam ceiling add so much natural texture and color that it makes a perfect accent against the very simple furnishings.
The paneled walls in this bedroom lend a cozy country atmosphere to the room, especially with a serene beige paint color. The rustic nightstand and modern headboard are particularly handsome together. Images 1 | 2 | 3 | 4 | 5 | 6 | 7 | 8 Which of these modern country rooms is your favorite? Let us know in the comments! And be sure to stop by Arcadian Lighting for a modern light fixture or two to brighten your home! -Jessica