My Creative Blog [Search results for Craft]
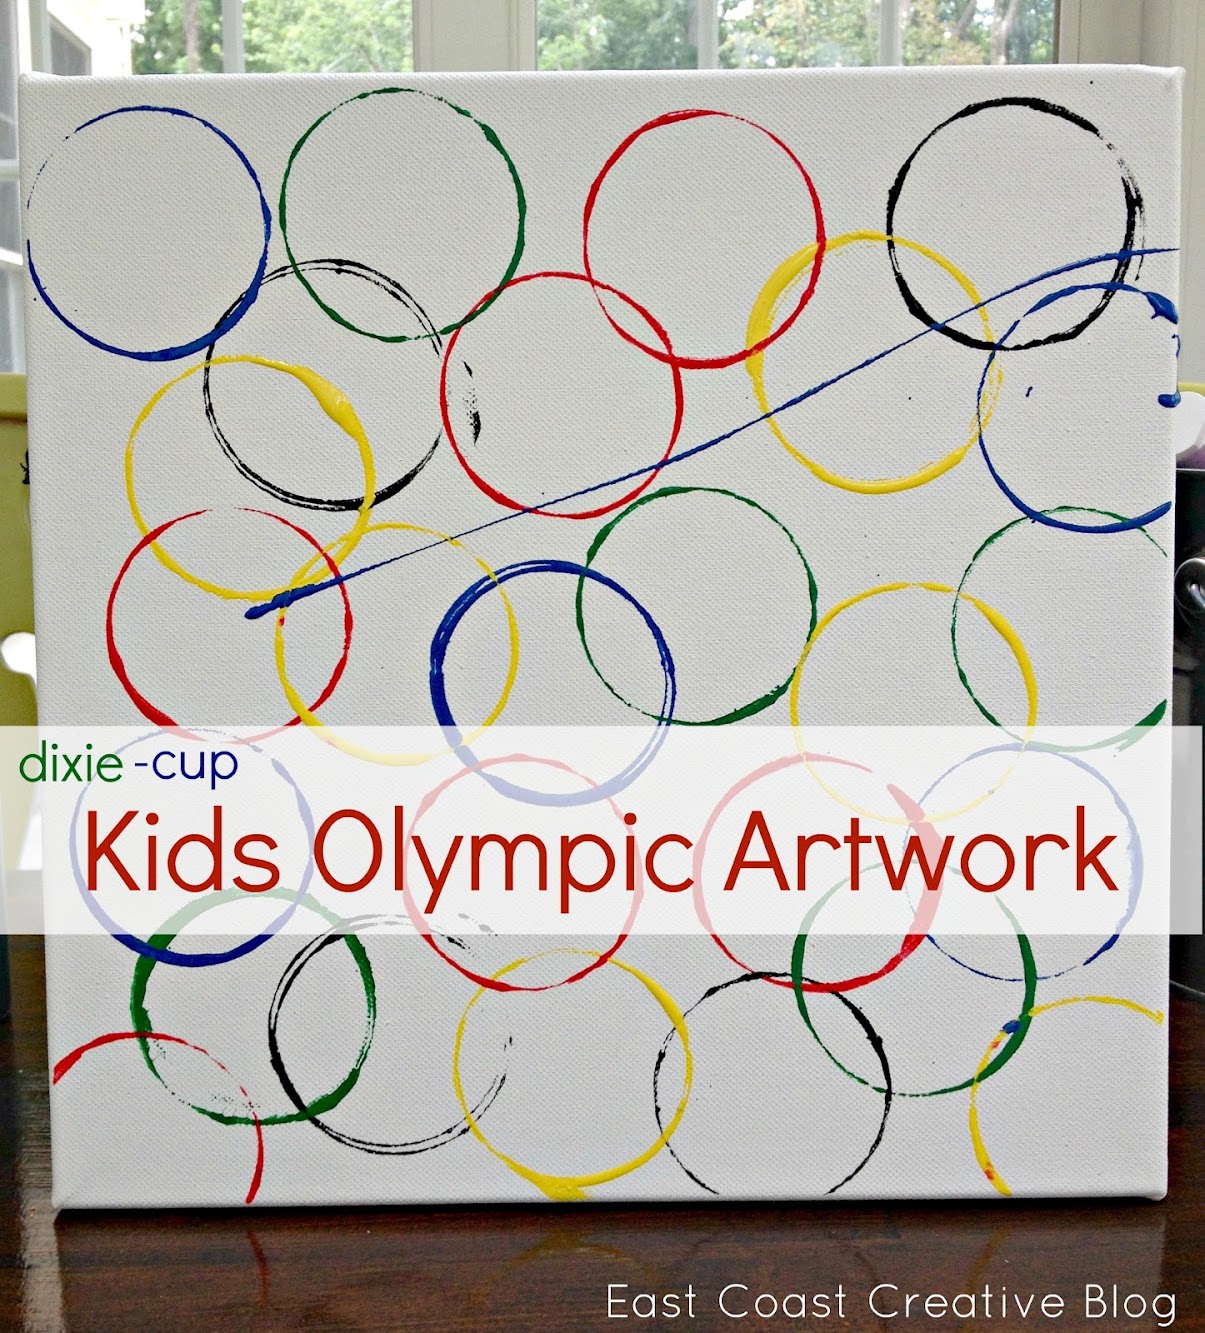
Olympic Crafts for Kids {2012 Olympic Games}
Make your own Cube Puzzle {Jamie from C.R.A.F.T}

Interactive Playroom Wall {Five Foot Twelve Creations}

DIY Photo Block Display {Shanty 2-Chic}
DIY Tiered Planters {With a Little Southwest Flair!}

Kids Desk & Craft Area

Anthro-Inspired Ikat Console {5 Foot 12 Creations}

FOR SALE!

Thanksgiving Leftovers Station

Wood Grain Christmas Countdown 2012

DIY Plywood World Map {Knock It Off}

Faux Industrial Metal Letters {Tutorial}

10 Fall Kids' Crafts
Fabric as Art {The Nate Show Artwork}

Brass Fireplace Update

Family Room Update {AKA What ever happened to those stenciled wall panels?}

Monica's Christmas House Tour 2012
DIY Bicycle Wheel Wall Clock {Knock It Off DIY Project}
October Sponsor Love

Teacher Love {B2S Day 3}


