A few months back I partnered with 3M Scotch Blue to work on a fun project. I had to wait to share it with you guys, but I finally can spill the beans and show you the coolest planters ever! Now that it's summer, it matches with my outdoor decor and the flowers are thriving!! Enjoy!
----------------------------------------------------------------------------------------------------------------------------
We had a 60 degree day this weekend and it totally put me in the mood to get ready for Spring! It was perfect timing because I teamed up with 3M ScotchBlue and had a super simple, and fun project to work on.

Southwest decor is all the rage this year, so I wanted to bring a touch of this trendy style to my outdoor living space this Spring. Here's what you need to make your own: 2-3 Planters in a variety of sizes 3M ScotchBlue tape Craft Knife Spray Paint Dirt Flowers or Plants
I found these planters at my local Target and immediately thought the colors went perfectly with my outdoor cushions.

See the red, aqua, and grey? It was like a match made in Heaven!

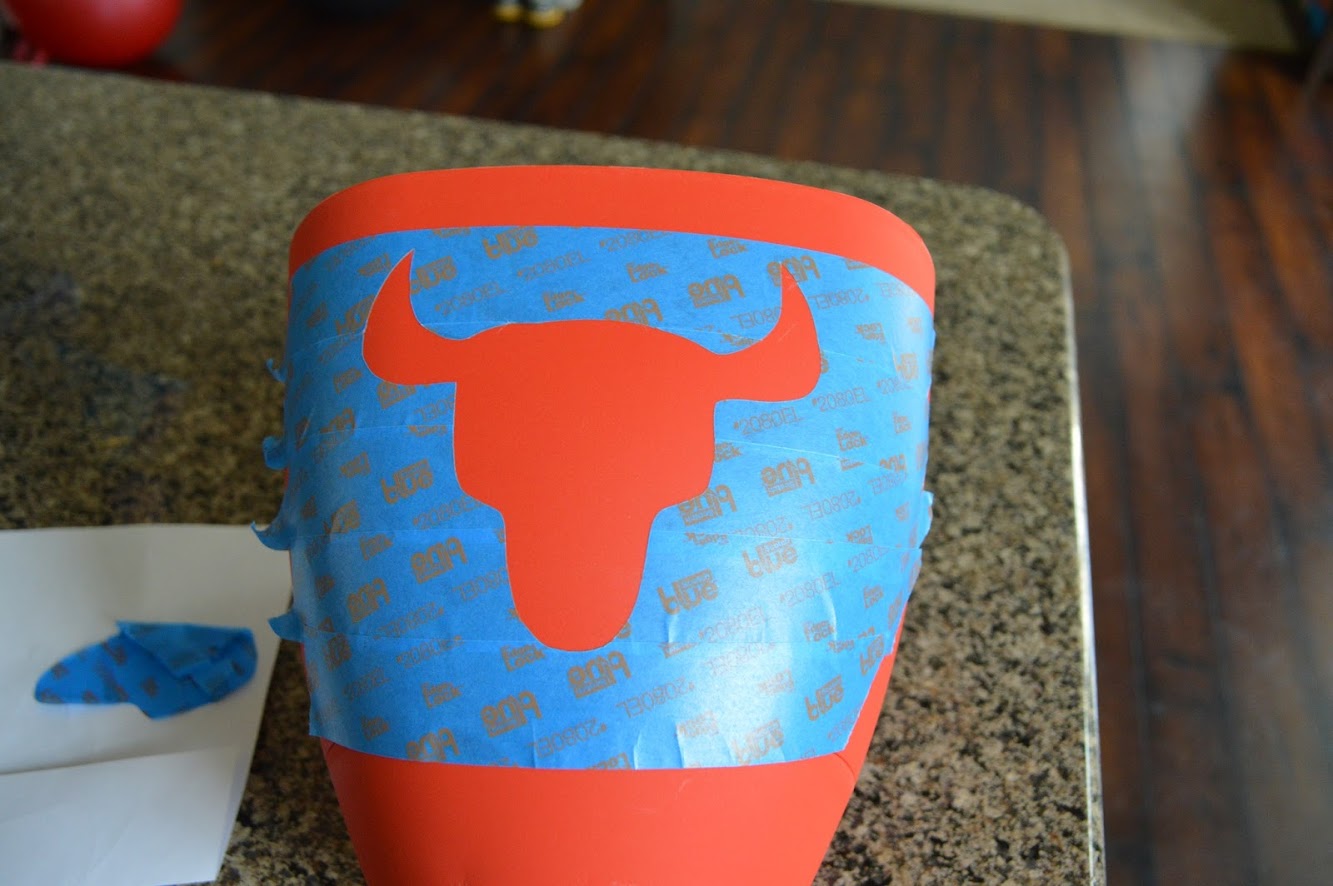
Step 1- Cover the surface of your planters where you plan to add your Southwestern flair. I totally knew ScotchBlue tape would seal tightly and prevent any dripping.


Step 2- Trace your pattern. I printed out a steer head and traced it with a pen, so I could see where to cut. It doesn't actually make a clear line, but more of an indent in the tape, that you can see.

I used the exact same process for the arrows on the other planter.

Step 3- Use a craft knife to cut the outline of your shape.

Step 4- Remove the shape cutout. Use the edge of your craft knife to get under the tape and peel away only the inside of your shape.

You'll be left with perfectly crisp lines ready for some paint!
Step 5- Spray paint your shape. Now, make sure you tape off any area that might get paint on it. See the top there… it would be blue, if I didn't tape it off.

ScotchBlue tape is the perfect seal while you paint. Use two thin coats of spray paint and then allow it to dry for about 30 minutes before removing the tape.

To add a little more color, I popped the bottoms off the planters and gave them two coats of spray paint as well.

Step 6- Plant & Enjoy! After everything has dried for 24 hours, you can plant and stack your planters. Just remember to leave enough space to stack the upper planter on top, as you plant the lower one.


I'm hoping for plenty more warm days ahead, so I can enjoy hanging outside and relaxing near my super-cute Southwest planters!

Apparently I have a thing for cool planters- if you missed my original tiered planters you can check them out HERE. (They were featured by Apartment Therapy last month- So exciting! woohoo!!!)

So are you digging the southwest trend or are you ready for it to take a hike??
**This post was sponsored by 3M, but all opinions belong 100% to yours truly! **
Want more EC2? Use the icons below to follow us!


