My Creative Blog [Search results for outdoor furniture

  • How to Build an Outdoor Sectional {Knock It Off}

    How to Build an Outdoor Sectional {Knock It Off}

    Outdoor furniture can cost an arm and a leg. Since I'm not interested in selling my firstborn to afford nice furniture, we often build it ourselves- and we do the same thing with homeowners on Knock It Off. We wanted to build Barb and Derek a sectional for their sunroom that would have a high end feel and not the price tag.

    Doesn't it look great in their finished sunroom?

    We are huge fans of giving credit where credit is due- Ana White is the queen extraordinaire of all things DIY furniture! Her blog is full of FREE furniture plans and one of her projects inspired our outdoor sectional.

    We didn't use Ana's plans exactly, because we wanted it a certain size for Derek and Barb's room, so we came up with our own version, but if you want to make one, you should follow her step by step directions with awesome pictures!

    Ana's plans for an outdoor sectional can be found HERE and you can download a PDF with everything you'll need.
    A few tips for making one of your own…
    # 1- Have the right tools! You don't need anything extravagant to build this sectional, but a strong drill, a Kreg Jig, and a Chop Saw are essential.

    A Kreg Jig is a great, inexpensive tool for building furniture. We used one when we built our farmhouse table, outdoor table, garage lockers and so much more.

    It creates a pocket hole to hide your screws.

    You can check out Kreg's website here (and no, this isn't sponsored, I just really love this tool!!)
    # 2- Have a friend to help! this is a two person job. There are lots of times where you'll need one person to hold and the other to attach something.

    # 3- Use Exterior paint or Stain with a Sealant For our sectional, we used exterior paint, but watered it down a bit, so we could still see some of the wood grain. It's a little trick if you're in a time crunch. It spreads easily, like a stain, but you don't have to do an extra coat of sealant. We've learned lots of quick trips doing rooms for Knock It Off.

    This project looks amazing and expensive, but it's really simple and a good first project if you're wanting to try your hand at building. All the cuts are straight and the plans are simple (you can thank Ana White for that!)

    If you want to see how this sectional looks in the room, click HERE to watch the full episode online.

    Hopefully this project encourages you to take that first step and give building your own furniture a try! It will save you a ton of money (maybe even your firstborn!!)

    Monica
  • Outdoor Furniture Upcycle

    Outdoor Furniture Upcycle

    As you all know, my hubs and I have been DIYing a 600 square foot patio. It's been a huge job, but it's 99% done and we're loving it! (We've even put on an addition, but our lights were back ordered so I can't give the full reveal yet-boo!)

    600 square feet is a lot of space to fill and I wasn't about to go out and buy all new furniture for the space. I've had this old record player hutch (if that's even such a thing) in my basement for about 7 years now- It was just waiting to be upcycled.

    This baby used to house my in-laws old record player and then eventually a boombox. It's crazy to think that now that all of my music is on a 4 inch iPhone. Anyhow, if you need any convincing that this piece needed some upcycling, I've provided you with some evidence…

    One of my favorite things to do, is to look at a piece of furniture and see past the"yuck" and into the potential it has. Remember when we upcycled this dresser into an Anthro Knock off.

    They key to a good furniture upcycle is to believe that anything can be changed and set some goals!

    To Upcycle this piece, I had a few goals:
    #1- Get rid of any and all scrolly things (I sorta loathe them)
    #2- Remove the speaker fabric
    #3- Paint it with outdoor paint
    #4- Add some bold details
    #5- Distress it (so I don't get mad when one of my 4 kids"distress" it for me)
    #6- Add new hardware

    Get Rid of Scrolly Things Sometimes it's easy to think there are things you can't change about a piece, but it's amazing what you can do with a jigsaw! I just taped off a straight line and cut those scrolly babies off!

    Remove Speaker Fabric
    I ripped off all of the lovely fabric and then had to take out the speakers. There was no magic to this step. I actually gave a hammer to my seven year old son and said,"bang away!"

    I love when furniture has an industrial flair, so I cut plywood panels and covered them with chicken wire. It isn't the most fun to work with, but it's not impossible either.

    Paint with Outdoor Paint
    This piece was originally intended to be used indoors, so I wanted to be sure to paint it with good quality outdoor paint. I really don't love taking tons of time painting furniture, so I used Valspar's Exterior Spray Paint. It took about 3 cans to do two coats on the whole piece.

    Add Bold Details
    Since this piece was originally so traditional, I wanted to do something graphic and more modern as a detail. I thought a thin herringbone would do the trick.

    Herringbone is super-simple!
    #1- Mark out your center line. Then, measure the width you want the stripes (I used 1") and make tick marks down both sides of the column. #2- Tape off your lines. The top of the left side slants down to one tick mark below on the right. #3- Paint & Remove your tape. Let it dry and repeat on the opposite side, but shift your painted section down one, so you have the"every other" look.

    Distress the Piece
    You might notice that my lines weren't completely crisp in the herringbone. I was painting outside in 100 degree heat (blogger foul), but I also knew I was going to distress it anyhow. I'm not always into distressing, but I figured it was going to get banged up outside (and I have 4 kids that are pretty rough on furniture).
    To distress, first I went at it with a sander with 220 grit paper.

    Have you ever had this problem? I ran out of the right size sanding pads. Oops!
    After sanding it down a bit, I gave the entire piece a good glazing. I actually began my glazing love affair by reading Living with Lindsay's blog (check her out it you haven't)!
    My favorite glaze is Martha's Black Coffee. As you can see, I slopped it on, rubbed it around, and then wiped it off. I wanted pretty solid coverage, so I used a good bit of glaze.

    After adding some hardware she was all finished and ready for the patio!

    I think she's much more my style now!

    All that's missing now is some cool, outdoor artwork. I'd love to hear any ideas you have in a comment. We have some insanely creative readers! P.S. I have to mention that I'm so glad to have my BFF home from vacation! A week apart feels like such a long time to us! Now that she's home, Jess is working like a mad-woman on some cool projects for her dining room!!

  • Patio Furniture Update on a Budget! {and a giveaway}

    Patio Furniture Update on a Budget! {and a giveaway}

    The weather is finally warming up and I feel like summer is right around the corner! I thought I'd invite you over to my awesome yard and beautiful patio furniture! Doesn't it look welcoming and just scream, let's drink some lemonade?

    table before

    Oh, and how rude of me, I need to offer you a comfy seat!

    IMG_0345

    No… you don't want to come? You don't want to get rust all over your clothes? Hmm…
    Okay, so clearly I had two choices… buy a new set or figure out an update on a budget. You may or may not know that I have a BIG project up my sleeve (a new paver patio coming soon!) so I didn't want to spend much $$$ on the table and chairs. I turned to my go-to solution… Spray Paint! Looking a wee bit more inviting wouldn't you say?

    table after

    Here's how the transformation happened… First, I removed the legs of the table. Not sure it was ever meant to come off, but after removing some screws and jiggling it a bit we had it off. This would allow me to paint the base and not the underside of the glass.

    IMG_0359

    Next, I needed to cover the glass top, so it didn't turn red. I turned to Scotch Blue painter's tape. If I have a job where I need the tape to really stick well, but NOT pull off paint, I use Scotch Blue. I had to use little pieces to get around the curves, but it was worth it to get a nice, crisp edge.

    IMG_0347

    Then, I needed to cover up the glass in the middle, so I took trash bags, cut them along the seams so I could flatten them out.

    IMG_0351

    Then, I tape it down on the table. I had some weird open areas, so I patched holes with scrap paper. It looks pretty fancy doesn't it?

    IMG_0353

    I painted it on a sheet, so I didn't make my grass red (not that I haven't done that 100 times before)

    IMG_0364

    Since I knew this furniture was going to take a beating, I opted for Valspar's Outdoor spray paint.

    IMG_0360

    The improvement was instant! I was so excited as soon as the base was started!

    IMG_0361

    Next, came the chairs, and again it was instant improvement! I used a little steel wool on really rusty spots, but other than that didn't do any other prep. It was really quick and simple!

    DSC_0333

    I originally thought I'd go with solid grey cushions, but these striped ones from Target's spring line caught my eye ($12 each). They're a perfect match!

    DSC_0021-001

    This Before and After makes me happy (and apparently my chairs too!)

    Before after chairs

    All ready for a fun get together! Now let's play I SPY… what's missing in this picture? Yup, 5 more cushions. They're still"In Transit" from Target.

    DSC_0006-001

    The total cost for this project was $30. I used 2 cans of red and 5 cans of blue. I know it won't last for five years or anything, but I'll definitely get another year or two out of them.
    I've learned something from this experience… if you own nice outdoor furniture, cover it up in really bad weather. So that you don't have to learn the hard way, like I did, we're giving away a $75 Gift Certificate to Empire Patio Covers They sell covers to fit everything from tables and chairs, to grills, fire pits, etc. My fire pit always got rusty without a cover.

    To Enter: Comment on this post with the words"Empire Patio" Bonus Entry: Like us on Facebook leave a comment letting us know Bonus Entry: Visit Empire Patio and tell us in another comment what product you need the most on their site Giveaway Closes: Friday, May 18th at 11:59pm. Winner will be announced on Saturday. Details: One winner. Prize ships to the US and Canada. One entry per email address. Winner is selected through random.org

    spray paint chairs

    So there you have it. A patio update on a tiny budget. For $30, I couldn't be happier with the results.
    So, now do you want to come over?

    Follow Me on Pinterest
  • Ombre Painted Dresser {Knock It Off DIY Project}

    Ombre Painted Dresser {Knock It Off DIY Project}

    Got an old dresser that needs some love and attention? Don’t kick it to the curb just yet! Try out this ombre paint method for a fun, modern design that will give your dresser new life!

    *Insider tip: When we're looking for furniture to upcycle, we make sure that the piece is in relatively good condition. That doesn't mean it looks good, just that it's structurally sound. Ideally, we love a piece with clean lines and a classic style, but don't overlook a piece just because it has scroll-work or is ornate. Oftentimes, those things can be removed easily with a jigsaw.
    1. Prep the dresser by giving it a thorough sanding with an orbital sander to get rid of the old finish. Remove any hardware from the drawers for easy painting,, too! After sanding, wipe down the dresser with a damp cloth.

    2. Choose your color and get to work! You can actually achieve the ombre effect two different ways- by buying three or four colors from the same paint swatch, or, if you’re trying to save money like we were, using one paint color and changing the color with white paint! We’ll explain this method, since it’s the one we used. Don’t worry, it’s not hard and it’s worth the little bit of extra work!

    3. Go ahead and paint the bottom row of drawers using a small foam roller (designed for painting furniture) with the undiluted, fully-saturated color. The key to a nice finish is even long, even strokes and several light coats of paint. Set drawers aside.

    4. To thin out your paint for the next color, pour three parts of the original paint color in a small paint tray and add one part white paint (3:1 ratio). Roll onto next row of drawers.

    5. Using the same method, thin out the paint with a 2:2 ratio for the third row up from bottom and a 1:3 ratio for the top row of drawers. Paint and let dry the specified amount of time. 6. Add new hardware- we chose to bling out our dresser with clear, glass and gold knobs for this adorable little girl. Or, put the old hardware back on to save even more money!

    Voila! You’ve easily accomplished the fabulous and trendy ombre effect on your dresser! This style is awesome for a nursery, but depending on the colors you choose, could really be used anywhere in your house!

    We've tried our hand at lots of different dresser upcycles. Our absolute favorite is this Anthropologie- inspired dresser

    But, we also kind of love this outdoor furniture upcycle:

    So, please…for our sake…don't throw out your old furniture! Do something fun with it.: ) To watch the full episode of this nursery makeover, click Here! There were so many fun projects in this room!

    jess
    Monica
  • Spring is FINALLY here! {The Home Depot Gardening Club}

    Spring is FINALLY here! {The Home Depot Gardening Club}

    Holy Cannoli Batman… could Spring have taken any longer to come this year? Finally, we're getting some warmth up in here!

    I really love spring (once it gets here)… it means flowers, outdoor projects, and flip-flops (do you remember those days in college, when you'd have a warm-ish spring day, so you'd put on flip-flops, a tank, shorts, and act like it was 100 degrees out? Yup, that was me!)
    This Spring, I have a ton of projects I want to work on in our yard. Last summer we finished up our huge patio project, but we didn't have much time or budget left to tackle the landscaping and some other fun projects to make the space complete!

    Landscaping around the patio and building a shed are our first two orders of business! I've successfully taken over 3/4s of our huge garage with all my DIY projects and materials, so the hubs has decided it's time for a shed for our mower, yard tools, etc.

    User-added image

    Since these are two pretty hefty sized projects, I need all the help and advice I can get. I visited the Garden Club on The Home Depot's website to get some expert advice, inspiration, and I got an awesome coupon just for signing up as part of the community. SCORE!

    Check out who else is part of the Garden Club Community…

    I mean if Martha is doing it… I'm so there!

    I was browsing the site looking for landscaping ideas, but got completely distracted by all the awesome project inspiration ideas! Have you heard of Envirotile? If I had an old, cement slab patio, I would do this in an instant… I found an awesome step-by-step guide that seemed so simple!

    One of the other things I loved once I became a member of the Garden Club community, was their Monthly to-do lists! Once I click on where I live on the map, it provides me with a list of what I should be doing when, based on my zone!

    Especially with how cool this spring has been, it's easy to forget about some of the outdoor things I need to be taking care of now! I printed out my list for March and it's right on the fridge for the hubs and me to tackle! (Actually, he's outside working in the yard, as I'm writing this!)

    We love the Home Depot (and not just because they're one of our CWTS sponsors!!), and I'm so glad I checked out their site and became a member of the Garden Club

    To join yourself & get your coupon (c'mon, all the cool kids are doing it)- click HERE

    Happy Spring and Happy Gardening!!

    ---------------------------------------------------------------------------------------------

    It's home improvement time, and The Home Depot has everything you need for spring. No matter what projects you want to tackle, The Home Depot has you covered and can help you #DigIn to spring.

    Spring is the perfect time for all your outdoor home renovations. Shop The Home Depot for terrific values on new patio furniture, landscape supplies such as fertilizer and potting soil and outdoor grills. Keep your lawn and garden looking great, too, with the huge selection of lawn mowers, edgers and trimmers, and garden tools.

    Visit The Home Depot Garden Club for product ideas from kick-starting your Spring with seed starter kits to building a window birdfeeder.

    This is a sponsored post written by me on behalf of The Home Depot.

    Monica
  • Top Projects 2012

    Top Projects 2012

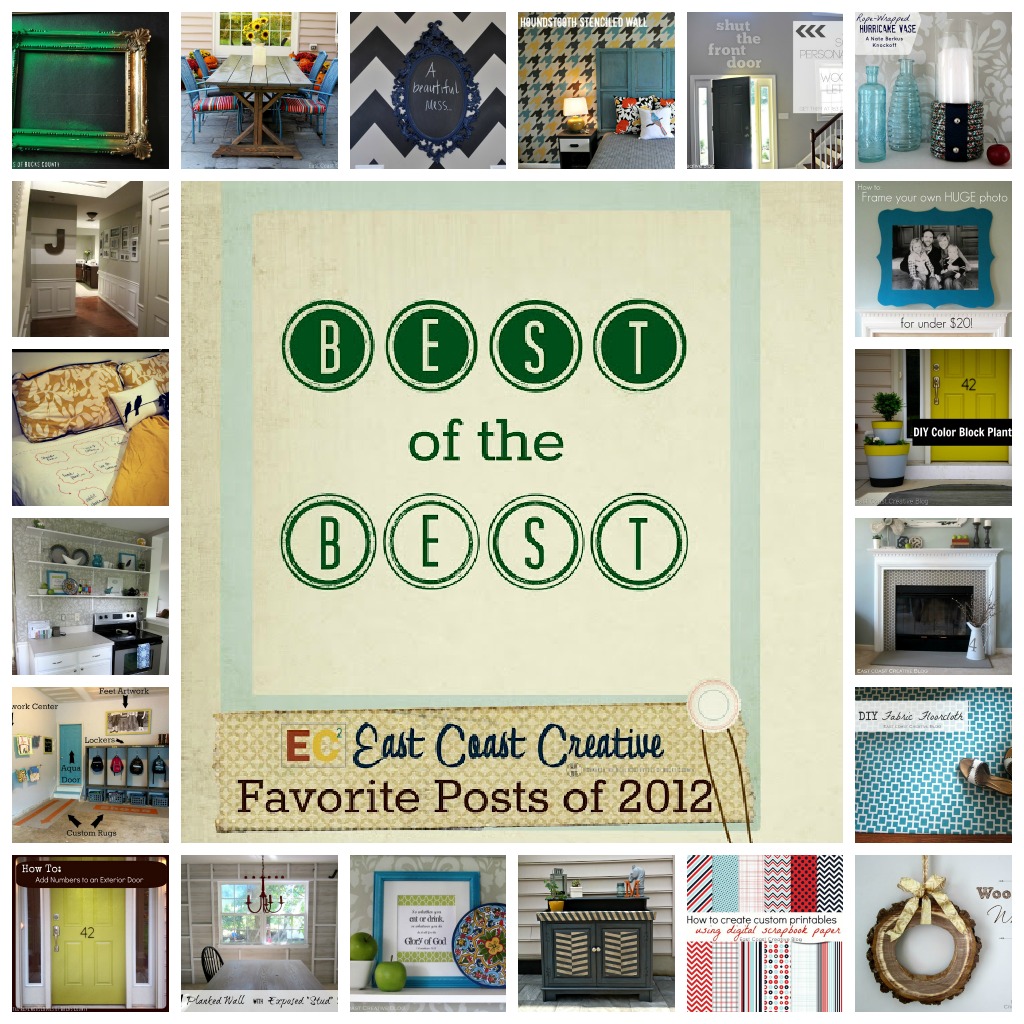
    Phew! Can you believe that 2012 is over already? We are gearing up for an unbelievably awesome 2013 filled with lots of fun and exciting things for this little blog (we'll share those with you tomorrow!), but we thought we'd take some time to round up our favorite projects from each month in 2012. Take a look, let us know what you think, and pin it if you like it!

    January Monica's Fav: I loved going green in 2012! Not really in the earthy-crunchy way, but by adding a pop of color to my collection of ornate frames. These Green Granny Frames had a fun impact on my dining room!

    Jess's Fav: I breathed some new life into our New and Improved Entryway by adding a striped accent wall and a big gallery wall.

    February:
    Jess' Fav: This project injected what can only be called Stencil Happiness into my kitchen renovation. Thanks to an awesome stencil from Royal Design Studio, my kitchen now has style for miles!

    Monica's Fav: I took a bit of a risk and got personal with all of you by sharing my Game of Love Perfect Valentine's Gift. You ladies sure loved it, because it became our #1 post of 2012! Stay tuned for this year's version- it'll be on the blog on Monday!

    Since 2012 was a leap year, I get to add another for February! This post went live on 2/29 and it's such a time saver in our house! Once a Month Sandwiches

    lunches intro

    March
    Jess' Fav: This Giant Shaped Frame is by far my favorite project from 2012! I'm pretty sure there is no better way to dress up your wall for this crazy low price. This is a big impact project, people. *I also have to nominate this one too! Jess and I had no idea how successful this project was going to be when we created it- we sure love Staples Prints! -Mon*

    Main Pic

    Monica's Fav: I love the BIG impact my Chevron Wall made in my kitchen. It's packed with personality and was pretty easy to paint!

    DSC_0093

    April
    Jess' Fav: My hubs and I surprised my daughter with this Playhouse Loft Bed for her fourth birthday. It was totally worth it, because she and my son play in it all the time. I'm all for a DIY project that keeps the kids happy and occupied! *wink*

    Monica's Fav: My Front Door got a major face lift with a super cool color and house numbers that are so my style!

    Add numbers

    May
    Jess' Fav: We started our kitchen renovation in December and were finally ready to do the big Kitchen Reveal in May. Of course, I'm still tweaking it, but this room makes me super happy. It's filled with tons of DIYs like painting the cabinets, stenciling the wall, making a fabric shade pendant light, painting color-blocked curtains and adding a fab rug.

    Monica's Fav: Warm weather meant it was time for some outdoor projects! I loved how simple and inexpensive these DIY Planters were. Even now, they have winter pansies and look great on my front porch!

    Color Block Planter

    June Jess's Fav: I love the ability to customize things and this Fabric Floorcloth let me create the perfect mat for my entryway!

    Monica's Fav: Jess and I completed our Super-Fab Guest Room Makover. We loved everything from the shutter headboard, fun accessories, and of course the houndstooth stenciled wall! We also had a blogger's dream come true when Young House Love featured our makeover!

    Houndstooth Stenciled Wall

    July
    Jess: My son turned 2 this month so I showed you how I made his custom invitations using digital scrapbook paper and picmonkey. How to Make Custom Printables became one of our top posts- you guys obviously love free things!: )

    Monica's Fav: While we were busy finishing up our patio project, I also worked on an Outdoor Furniture Upcycle

    August
    Jess' Fav: We took our house exterior from boring to awesome by painting the front door and shutters. Hello Curb Appeal!

    Monica's Fav: August was when I pulled off a birthday surprise for my hubs with a Garage Mudroom Makover I'm still loving the organization and how it's actually functional for this family of 6!

    September
    Jess: It's a tie! I just can't decide between Stenciled Faux-Tile Fireplace & Planked Wall with Exposed"Stud' Shelves. Both of these guys transformed the room and I'm in love with them!

    Monica's Fav: I went a little outside the box with my Shut the Front Door — Foyer Update. It's still one of my favorite things in my house.

    October Jess: Our dining room has been slowly undergoing a transformation and my refinished dining table fits perfectly in the new space! Refinished Dining Room Table

    Monica's Fav: In October, we had our DIY Patio Reveal! It was a HUGE DIY project, but we saved tons of money doing it ourselves and the end result was pretty awesome!

    November
    Jess's Fav: I love Mr. Berkus and didn't think he would mind me knocking off one of the items from his new line- the Rope-Wrapped Hurricane Vase. Want to know a secret? I like mine better.: )

    Monica's Fav: During a road trip to visit one of my best gal pals, I whipped up a Fireplace Makeover in her new house. It's a super-simple way to get rid of that brass fast!

    December
    Jess: This project was honestly a surprise to me. It came out so much better than I ever thought it would! The Wood Slice Wreath is the perfect winter decoration.

    Monica's Fav: Just in time for Christmas Jess and I made this Illuminated Silhouette Art. It looked great next to my Christmas tree, and now I'll be swapping out the silhouette for a lovey-dovey Valentine's quote!

    One thing that stands out to us the most this year is how thankful we are for YOU! We so appreciate your comments, emails and faithful visits to our blog. Here's to another crazy, fun year!

  • DIY Sunroom Makeover {Knock It Off Episode}

    DIY Sunroom Makeover {Knock It Off Episode}

    We were really excited when we heard about this screened in sunroom needed a makeover! We hadn't tackled an outdoor space yet for Knock It Off, and we were bursting with ideas. Here's where things started…

    And here's where we ended up… We created a space that was fully comfortable, much more weather-proof, and filled with style- all on a small budget!

    Soon we'll post tutorials for the sectional, plant wall, how to paint siding, and the painted rug, but for now, here's some eye candy from the makeover!
    This drink station is actually a fold down table. When it's not in use, you can attach it to the wall and it looks like artwork. It was incredibly simple to make and such a great thing to have for entertaining.

    We wanted to set this space off as a room of it's own, so we went bold by painting stripes on the exterior siding. It added a huge pop of color and just made the space super cheery (and I know that sounds cheesy, but it's true!). The plant wall was much cheaper than large artwork and also helped with our goal of bringing the outside in!

    We were excited that we not only gave the homeowners an entire sitting area with the sectional, but we were also able to give them a little dinette where they could enjoy a meal (or soft pretzel!) outside!

    These solar lanterns are from Ikea and you should see how fun they look at night! We added so much mood lighting that we almost wished we could have revealed the room at night! Our producers told us night reveals are a no no: )

    And the sectional… ahh we loved how this turned out!! We know many bloggers have built outdoor furniture, but this was our first attempt at it (we didn't mention that to the homeowners of course!!) We basically decided how large we wanted the sectional, did a lot of math to determine how big each piece should be, and then crossed our fingers. Amazingly, it was really simple to build once we had a plan! We'll write a full post on our build within the next week!

    If you missed this episode, head over to The Live Well Network for our Knock It Off Page. You can watch the full episodes online HERE.

    Stay tuned for all the tutorials coming to EC2 in the next week or so!!
    Do tell, what was your favorite part of this Sunroom Makeover?

    jess
    Monica
  • CWTS Updates, Link Up, and some Favs!

    CWTS Updates, Link Up, and some Favs!

    We weren't lying when we said we were floored by the all of the talent that showed up in our Creating with the Stars submissions post. Seriously, you all made us feel a little bad about ourselves.; ) Every single one of the stars said they had a terrible time narrowing their favorites down to the top 11, and we agreed wholeheartedly! So, while there are only 12 contestants vying for the CWTS title this year (you can see them here!), we thought it would be fun to highlight a few of our favorite submissions that didn't quite make the cut.
    DIY Chunky Floating Shelves by Desert Domicile These babies are gorgeous, and just look at how beautifully they're styled!! We're definitely taking some notes.

    Beaded Chandelier by My Simple Obsession Ack, the time and patience that must have gone into this amazing chandelier! Will you make us one…please?

    Custom Painted French Provencal Dresser by J.Rox Designs Hot pink, curvy furniture? Never thought I'd say this, but sign me up! I loooooove this dresser.
    

    Custom Painted French Provencal Dresser by jRoxDesigns

    Painted Dresser (and that fabulous pallet wall!) by Cape 27 You know we love a good pallet wall, and this one is no exception. Plus, that dresser reminds us of Monica's outdoor furniture upcycle, and we're totally digging the fun art!

    .and because we apparently have a thing for painted dressers, this Woodland Dresser makeover by The DIY Village is so sweet and woodsy that it caught our eye right away.

    Stenciled Dresser

    We just didn't want all the fun and inspiration to end for all of you talented bloggers out there that didn't make it as contestants this year, so we're hosting a weekly linkup party throughout the entire contest. Basically, that means you get to play along and win great prizes!

    Here's how it will work: Every Tuesday Monica and I will be revealing our project for that week's theme. Woohoo! We have some good projects up our sleeves.: ) That same day you can submit your own project that meets the criteria for that week (For example, week one is Upcycle, so anything that you've given new life or repurposed in some way in the last year is game). The winner will receive an awesome prize package from Belmonili and Perfectly Imperfect Shop! So fun! We can't wait to be inspired by your creativity each week.; )
    Don't forget to mark your calendars for these important dates next week when things really get moving!

    Have an awesome weekend!
    Want more EC2? Use the icons below to follow us!

  • Last Vestige...

    Last Vestige...

    There's a definite fall like crispness in the air here in New England today and soon the leaves will be changing colors, pumpkins will be carved and fireplaces lit.

    So it's time to finish up the last bit of yard work and put the garden beds to sleep....

    Time to move the outdoor furniture in for the winter....

    Time to get the house in shape for the upcoming holiday season....

    Time to bring out our sweaters and boots....

    images via Old Houses The cooler weather keeps me indoors more reminding me it's time to get cozy. What does fall say to you?

  • Spring Things {All things Spring 2012}

    Spring Things {All things Spring 2012}

    It's officially spring! Although, it has been feeling like summer with the weather we're having in Bucks County lately! I'm loving it! We thought we'd take a few posts to get you all ready for the season. We're talking spring cleaning (gag), Spring decor, Spring mantles (mine is so NOT springy yet), Spring landscaping, and more ("more" means whatever we feel like on a given day!) So, whip out your flip-flops, pull on some cute crop jeans, and let's get moving with Spring Things! (and I by no means am trying to suggest that you only wear flip-flops and jeans… a shirt is highly recommended too!)

    Spring Thing # 1: Outdoor Plans

    As most of you know, we finished building our house 16 months ago. As with lots of BIG projects, when you're finally finished you're kind of ready to be done spending money for a while. So, we decided to wait until the fall to do landscaping. I'm not really sure what happened to that plan, I think it had something to do with the craziness of a certain show that rhymes with"Late Smirkus"… but the landscaping didn't get done. Now it's spring and we're ready to attack the front of the house with all things green and planty. (I'll talk more about landscaping for a serial plant killer next week)
    Before the hubs breaks ground, I wanted to tackle the porch. Here's the sad looking state of my porch… (and no, my grass isn't that green yet, it's an old pic)

    house

    I have plans to add some fun furniture, but first there's a BIG question at hand…

    Door Collage

    Forgive my terrible sample pics, but I wanted to try and get an idea of how different colors would look. I think a pop of color on the door will look awesome and make me happy every time I come home! Here are some awesome inspiration pics that got me motivated to start with the door!

    Source: centsationalgirl.com via The Real Housewives on Pinterest

    I'm loving this color blue, but I'm not sure it would work with our sand/grey/blech siding. (FYI We couldn't pick our siding because we bought a partially started home from the bank and finished it. Siding was already on. Boo!))

    Source: maisonsblanches.tumblr.com via The Real Housewives on Pinterest

    Source: google.com via The Real Housewives on Pinterest

    Source: number-2-pencil.blogspot.com via The Real Housewives on Pinterest
    So, what do you think? I need some input on this one. I asked my hubs and he sarcastically said,"How about we paint, the door, then all the shutters, Oh, and add some chevron!" Grrr… I gave him the stink eye for sure! Since he's NO HELP, I'm leaning on all of you. Create your free online surveys with SurveyMonkey, the world's leading questionnaire tool.
    Thanks for your help! I'm excited to get working on the door and the porch furniture this weekend. Here's a sneak peek at some bistro sets that are in the running. (I scoured craigslist and thrift stores for one I could DIY and people are just insane with their pricing. Most were more expensive than what I could buy new and they were hideous!) Now, don't be swayed by the yellow, these just happened to catch my eye!

    Source: target.com via The Real Housewives on Pinterest

    Source: target.com via The Real Housewives on Pinterest
    Thanks for your help! I can't wait to share my NEW porch with you!

    Monica

    Only following on the blog? You're missing out. Use the buttons below to join in on all the fun!

    Follow Me on Pinterest
  • Ladies Night Out White Box Challenge: The Details

    Ladies Night Out White Box Challenge: The Details

    Yesterday we shared 25 awesome upcycle projects and Ikea hacks, but we wanted to give you some of the juicy details for a couple of the projects we actually tackled during our crazy Women's Night Out White Box Challenge.

    Wall Paint Colors
    First, the paint colors. Everyone always ask us what colors we use and we never remember to share! Well, this is going to change! We're even going to try to get our acts together and post our color palettes for each of our Knock it Off episodes. One of these days!! Anyway, our bland room started off with Oxford Tan (from Lowes) walls, lightened by 25%. In our 30 minute intermission, the top portion quickly got covered in Classic Teal, which is a gorgeous, rich blue. I wouldn't be surprised if you saw us use that color again- loved it!

    Furniture Paint Colors
    The dresser got decked out in four different colors, which really added a lot of interest. We are in love with the color-blocking trend and were excited to give it a go with these inexpensive Rast dressers from Ikea. We used Tuxedo Tie on the frame, English Tea Party on the bottom drawers, Mountain Smoke on the middle drawers and Bamboo Leaves on the top drawers (all from Lowes). Such fun colors that matched our fabrics perfectly! We definitely would have liked to build a base for our new buffet so that it would sit higher, but unfortunately, we ran out of time. So, take note if you're planning on giving this upcycle a try.: )

    We shared a whole bunch of fun ideas for painted rugs, but this one that Monica did last summer is definitely our favorite: quick, easy and cute! Check out her Stenciled Outdoor Rug for the step by step deets!

    Spray Paint Stenciled Rug

    This tufted Lack table turned ottoman was a big hit with the ladies during our event and it's a super simple upholstery project that any one can handle.

    This past spring, I made this Ikea Lack Ottoman using the same method as above. The only difference is that we added tufting to the one we made during the White Box Challenge. It looks so good I might just have to add some to mine!
    Here's the cheater way to add tufts: 1. Follow steps for upholstering the table. 2. Mark where you want to place your tufts. 3. Use a button-making kit to create some cute buttons using your fabric, or buy pre-bought buttons to use. 4. Using a staple gun, shoot a 3/4 inch staple through the fabric, batting and foam on the mark you made. This creates the tuft, without having to drill through the table and bringing sewing into the equation. 5. Hot glue your buttons in place. That's it!!

    We love the way this nail head trim dressed up our plain, old white chair. They were so simple to attach and took this chair to a whole new level!

    In fact, it wasn't our first time using nail head detailing- we upholstered a chair and added nail heads for one of our Nate Show episodes!

    Finally, this upcycled art was definitely the fan favorite of the night. You wouldn't believe how easy it was to do and what an awesome impact it makes.

    If you want to know how to make your own, Monica took this old piece of art and made a completely custom canvas for her powder room using a stencil, spray paint and her silhouette machine.

    Phew! I think we touched on everything, but if you were at the event and still have questions, leave us a comment! There aren't many things that are as gratifying and budget-friendly as upcycyling. I'm serious, people. Go give it a try!

    jess
  • Pallet Possibilities

    Pallet Possibilities

    I didn't know Jess was going to mention one of our favorite blogs yesterday, but it was the perfect lead-in for my post today. Layla and Kevin from The Lettered Cottage have a wall that I love and want to create something similar to.

    Now, their wooden walls were hiding out under the drywall, because they have an old home, but I'm going to have to bring in wood to create this look. Eric and I were talking about where to get inexpensive old, wood flooring, but then we thought about pallets. They're free, they're easy to aquire, and I think they just might work. Thus began my search for pallet inspiration.

    This wall is not my style and I think the TV is completely out of place, but I was able to get some good tips from this DIY project. I'm pretty sure I want to whitewash or colorwash my wood.

    Moma and Her Drill During my pallet search I found tons of other ideas and creative uses for pallets… I'm learning that they're all the rage right now! Children's Headboard

    Apartment Therapy I really love this headboard. I'm not sure if I love the headboard or just the fact that it's in my favorite colors and my style bedding.

    House Tweaking This reading nook is adorable! I need to find a spot in my house to create one for my kiddos! I might need to wait until we finish the basement, but I'm saving this project idea for sure!

    Kojo Designs I'm not a big coffee table fan (perhaps because we have four kids and have had a toddler around for the last 9 years) but this is a cool idea and I think you could give it a rustic or very polished look.

    DIY Ideas A Sweedish company makes interrlocking furniture that doubles as art. This is just a sample of their colors, but check out the link below to see how it's used functionally. So cool!

    Sibylle Stœckli How fun are these bright outdoor chairs? This company sells them, but there are tons of DIY directions online. They would be fabulous in an urban backyard or patio.

    Inhabitat Lastly, an adorable idea that my kids would love! Seriously, what little kid wouldn't love to play inside this… of course I'd add some fun accessories and a pop of color, but the idea is awesome.

    Tiny Pallet House
    What do you think of these Green building ideas? I think I'm all about it and I just need to decide which room I'm going to attempt it in… I'm between Callen's bedroom and the Master Bathroom. We're leaning towards Cal's room because the master bathroom has really high ceilings and is a much bigger project for the hubs. Currently"Pallet Wall" is about # 4 or 5 on the Honey-do-list… Eric's Honey-do-list… 1. Hang DIY hardware in kids bathroom (I'm pretty sure he's doing that now. I hear banging!) 2. Build Dining Room Table (we're in the planning and researching stage still, but making progress) 3. Assemble the kids' new swingset (a Christmas present, but we've been waiting for grass to grow) 4. LANDSCAPE this crazy yard (the builder is re-seeding this week and then we can start!) 5. Create Pallet Wall I'll keep you posted on our projects, and until we get to #5 on the list, I'll just keep being inspired by other people's DIY ideas. What cool Pallet Possibilies can you think of?

  • Rustic outdoors

    Rustic outdoors

    During the Winter, plants and pots sits in the garage workshop, but when Spring arrives they move out in the sun.  The owners have designed the plant table themselves and it's a perfect working place.

    @Boligpluss

    The old garage has been renovated with Cement floor and ceiling tree balks. I love the colour of the tree!

    Most of the furniture has been found at flee markets and auctions, and the working tables, as mentioned, the owners made themselves.

    @Boligpluss

    The plane bench cost just about nothing at an auction and the garden tools was bought used in Sweden.

    @Boligpluss

    The doors, with original numbers still intact, come from an old drying room.

    @Boligpluss

    Outdoor kitchen. What a dream a hot summer! This mobile kitchen is self made and just so smart and pretty.

    @Boligpluss
  • Fab Find Friday {Random Pinterest Edition}

    Fab Find Friday {Random Pinterest Edition}

    Happy Friday! Isn't this week completely WEIRD?? What's up with 4th of July on a Wednesday?!? Thursday morning my hubs came down stairs wearing a polo and jeans and I was like,"are we going on a date or something?"… he was like,"Hello… I work for a living and it's the middle of the week." Boo! Anyhow, I'm glad that it's finally the real weekend (and we're excited to celebrate Jess' son's birthday on Saturday!).
    I was supposed to write a final Patio post before the big reveal, but all my pictures give too much away, so you're just going to have to wait until the grand reveal. I'm not 100% sure when it will be because I want to show it with with table, outdoor rug, etc… Stay Tuned!
    Instead, I'm going totally rando on ya (a gal pal of mine said"rando" the other day and I laughed at her and then said it about 15 minutes later. I'm a nerd like that)… Here are some fab finds and things I've recently Pinned … 1- Some words of wisdom.

    Source: thatonerule.com via East Coast Creative on Pinterest
    2- Pallet Bench. Now that my real patio furniture is on my patio, my front porch is bare! I am thinking of building a few of these. Super Cute!

    Source: funkyjunkinteriors.blogspot.com via East Coast Creative on Pinterest
    3- I printed these out this week. I have NOT been listening to any skinny rules for a long while now. Time to change that.

    Source: hepburnandhoundstooth.com via East Coast Creative on Pinterest
    4- Here's why I need the skinny list… The hubs and I are planning a trip to Europe in the fall. We're planning London, Paris, and probably one other destination. I can't wait to nail down all the details.

    Source: Uploaded by user via Franniee on Pinterest

    5- This is how I want to dress on our trip.

    Source: fashionworship.com via East Coast Creative on Pinterest
    6- Found this blog this week. This gal is crazy talented. For 365 days she upcycled a thrift store outfit into something fabulous. You have to check it out! (Jess and I also love the faces she makes in all the"before" pics)
    Source: dollarstorecrafts.com via East Coast Creative on Pinterest

    Source: refashionista.net via East Coast Creative on Pinterest
    Source: a8.sphotos.ak.fbcdn.net via East Coast Creative on Pinterest

    7- I love this chair and I want to try something similar. I don't have a chair though… I'm tucking this idea away for another time, because I love it.

    8- And just in case this isn't a random enough post for you… This totally is my sense of humor. I'm actually laughing while I type this.

    Well, that's all for now! Do you follow is on Pinterest? If not, I think you should (just sayin') http://pinterest.com/real_housewives/
    Have a great weekend! We have some awesome projects to share next week! 9- ONE more… This is what I'm reading right now. Jess read the first two books last week and loved them. Have you read it? Did you like it? What are you reading right now? Did you know we're both total book worms? (Sorry for the 20 questions!)

    Source: 11993.genderweb.in via Melisa on Pinterest

  • How to Display Instagram Photos {Instagram Wreath}

    How to Display Instagram Photos {Instagram Wreath}

    Just in case you missed it on Friday… we announced the 12 contestants for Creating with the Stars. Check out this post to see their insanely awesome projects!

    We'll be tweeting lots of updates, so click below just to make sure you're following us on Twitter. Follow @EC2blog ----------------------------------------------------------------------------------------------------
    I'm sure you know by now, but Jess and I are pretty obsessed with Instagram (you can follow us at @eastcoastcreative and @Jess_ec2blog) and lately we've started printing our pictures and using them within our projects. We printed some Instagram pics on cool, wood tiles from InstaThis in this post.

    Jess printed some Instagram pics from FoxGram and shared about them in this post.

    And since I'm a self-proclaimed wreath hater, I love to create what I've coined"The Anti-Wreath"… Today, I bring you an Outdoor Instagram Anti-Wreath! _

    Here's what you'll need for this super simple DIY…

    Many places will now print Instagram pictures, but I used Foxgram.com they offer three FREE pictures so definitely try them out! After getting my"grams" in the mail, I went to Staples and had them laminated. Since they're going to be outside, I wanted them to be weatherproofed. It cost me $2.28 total!

    I chose some of my kids' favorite Instagram pictures and then a few of my favs too! It would be super easy to swap this"wreath" out seasonally… these are a few of my favorite winter pictures if I wanted a winter look.

    I took an old 11x14 frame from my basement, but it was kind of beat up, so I decided to glaze it for a distressed look.

    My absolute favorite glaze is Martha's Metallic glaze in the coffee grounds finish.

    There's no secret to glazing, I just brushed it all over and then used a paper towel to wipe it off.

    The glaze helped hide the imperfections and toned down the white.

    White it was drying, I trimmed around each picture. I used my paper cutter (one of my favorite Christmas gifts this year), but scissors would work just fine too!

    I played around with the layout a bit before securing the pictures.

    I added some leftover furniture pads to the back of the frame so that it wouldn't scratch my painted door, and then I measured and marked where I wanted to attach wire.

    I used leftover picture wire and my staple gun

    Wire can be a pain to get 100% straight, but I knew I would be covering it up with pictures. I originally planned to use mini clips, but I liked the clean look better, so I just hot glued them onto the wire.

    Gah! I love it!

    Seriously, who wouldn't love a mustache cat on their door? Did you notice that picture? It's the craziest cat I've ever seen (it lives at the farm where my daughter rides) and our whole family is obsessed with it!

    I'm pretty sure this"wreath" says,"Come on in, we're fun, we love life and weird cats!"

    It's tricky to take pictures when the sun is setting. So, if you can't beat the sun, make finger shadows!

    So what do you think of my Instagram"Anti-Wreath?" Are you as obsessed with Instagram as we are? I hope this inspires you to get those fun pictures off your phone and into your home!

  • Creating with the Stars Round 1 Voting

    Creating with the Stars Round 1 Voting

    Voting is closed! To see the winners of Round 1, click here. Check back next Monday, March 18th for Round 2 projects and voting!
    --------------------------------------------------------------------------------------------------------------------------

    Welcome to Creating with the Stars 2013! Let the contest officially begin! This season of CWTS is going to be Epic and these Round 1 projects are a clear indication of the insane talent of these contestants! Just a few reminders before we get to the voting…
    Round 1 Challenge:


    Round 1 Prize Package: We have the Best Sponsors for CWTS2013 and here's a reminder of what our Contestants are playing for this week…
    $50 worth of 31 Gifts products $60 worth of Twysted Yarn products $70 of Henle Headbands products $100 Blog Re-design from 733 Design (who designed all the CWTS logos!) Project featured by HomeTalk We also want to thank Homes.com for being the Official Grand Sponsor of Creating with the Stars!

    Without Further Ado… In No Particular Order, Here are the Round 1 Projects… #1- Dresser Turned Modern Sandbox This dresser had no hope. It was in extremely poor shape. I mostly bought it for the legs, but after learning I was in CWTS, I thought I could do something with it. I decided to turn it into a sandbox filled with sand and dirt. What kid does not like sand or dirt?!
    The issue I have with sand tables is how much of an eye sore they can be. After cutting off an entire level of drawers that brought it down to kid/side table height, I placed sand and dirt inside the top two drawers. When guests come over, I simply place the dresser's top back on covering up the dirt and sand. It is an easy solution that is modern and stylish. Using a friendly exterior paint protects the furniture from the elements. Placing the dresser top on when not in use protects the sand and dirt. The two bottom drawers are functional and can be used for outdoor storage like small plant pots, garden tools, and kid toys. I used a couple of rabbit knobs for fun and green paint for a punch of color.

    #2- Little League Lounger I love taking old, crappy stuff and turning it into something that I will actually use! I found an ugly outdoor folding chair at my local thrift store, and knew it would be perfect for my upcycle project. Now, I have a completely re-done"little league lounger" to use at all my boys' baseball games this summer!

    Here's what the chair looked like before I worked my magic:

    I added all new cream-colored webbing {with a navy pin stripe}, updated the arm rests by re-purposing an old wooden baseball bat, and made a baseball stitch pillow from an old table runner. I love how it all came together!

    I can't wait for baseball season to get started so I can use my new chair!

    #3- Floor Board Kitchen Island

    these 77 year old floor boards were upcycled into a rustic kitchen island!

    I love our kitchen, but I've always wanted a big kitchen island where we could hang out. I wanted to take this unused space in our family room and add a table or counter. I had no idea what to use, but all of a sudden, a light bulb went off in my head. I remembered some old floor boards hidden in the basement rafters. They were dusty and worn and perfect. BAM — perfect for an old rustic island! We washed and sanded the boards, and got to work building our new favorite spot.

    these 77 year old floor boards were upcycled into a rustic kitchen island!

    Add in some painted stools and we now have a space just off the kitchen that is perfect for parties, eating, hanging out, or working on crafts.

    these 77 year old floor boards were upcycled into a rustic kitchen island!

    #4- Man Chairs Often the"dreaming up" of a new project can be done in my sleep, literally. But execution can feel like a trip to the dentist, one in which I go in for a routine cleaning and find I need a double root canal. The trick to any DIY project is COMMITMENT. Commit to your goal and don't let up no matter how many coats of paint are applied in vain. These previously drab, brown, faux-leather club chairs were purchased on sale for $12 each at a local thrift shop.

    A bit of auto upholstery paint, steal tacks, metal coating paint, a couple patinas for good measure and some tough new casters and this thrift store find is ready for"the man".

    #5- Tin Tile Mirror So, I'm still totally in shock that I was chosen to be a part of Creating with the Stars. With the first theme being"Upcycle", I wanted to do something a little different. I hit up a local flea market, hoping to find something that screamed my name, and when I saw these vintage tin ceiling tiles, I knew these were it. The fun color that looks so much like patina, the rust, the texture, the scuffed parts revealing the silvery color underneath. LOVE! They were marked $6 a piece, but I offered her $5, and she accepted. So $40 for all 8. Score!

    The next stop was Home Depot for wood, and I built a simple frame. Each tile was approx 12x12, so the finished size is 36x36. Not all of the tile sides matched up when I nailed them in, so I'm going to blame the tiles and say that they're wonky, rather than my measuring (which is probably more true). A little paint matching, painting in the gaps, building a frame for a mirror that I picked up at Michaels, attaching the mirror and frame with some glue, and we're almost done.

    I had the perfect spot in my hallway that was just begging for some oomph. For under $60, it's a huge statement piece that fits perfectly. I'm thrilled with how it turned out.

    #6- Television Stand Upcycled to a Bar When I saw this ugly, 80’s style television stand at our local Goodwill for a whopping $30, my mind immediately started churning with ideas. I’ve been wanting to set up a bar area in our house, and I knew this would be the perfect piece to turn into a bar. It just needed a little (or, um, a LOT) of love!

    I added legs and a little stand at the bottom to make it a bit taller, and gave it a few coats of navy paint (and, of course, a stencil to add some fun). I turned the drawers on either side that used to be used for VHS storage into the perfect place to stash a few bottles. And, since most alcohol bottles are all different sizes and shapes, I poured our frequently used ones into uniform glass bottles that I etched with the name – that way I can be sure the bottles fit and they look pretty to boot!

    Finally, for a last little touch, I dipped some of our glasses in gold paint to make things a little more sparkly and fun. I’m so happy with how it turned out and I’m loving the extra storage! I can’t wait to put this thing to good use!

    #7- Trash Pile Tire Made Trendy Table Early Saturday morning, still bra-less and in my PJs, I drove to a neighbor's house and hurled an old tire from their curb-side trash pile into the back of my car. My plan for the filthy tire was still foggy… as was my pre-coffee brain, but I was determined to turn it into something cool. After a day of deliberation, trial, and error, I determined side table was to be its fate. Let's get upcycling.

    I started by giving the tire a scrub with some dish soap. Next, I tried to figure out what to use for legs. Since this tire still has the (very!) heavy rim attached, I needed something sturdy. After contemplating many possibilities, I decided to cut them out of a piece of pine left in my garage from another project. The legs were stained and attached to a plywood circle I cut for the base. Then, I glued the tire on top of that with construction adhesive, and added a smaller circle to the top of the tire to act as the table top.

    I covered the entire tire in rope using Liquid Nails and"dipped" the legs in a bright citrus-ey yellow paint. I'm pretty jazzed with how it came out and can't wait to tell people I have an old tire in my living room. Ha!

    #8- Vertical Blinds Headboard Why is it that bedrooms are always the last rooms to get decorated? This room had no artwork, no matching furniture, and a mattress sadly sitting on a cheap bed frame. The only good thing about it was that it was prime for a makeover!

    Headboard made from Upcycled Vertical Blinds

    When my parents upgraded their patio doors from vertical blinds to curtains, my mom saved the blinds for me thinking I could “make something with them.” Does this happen to all creative types? But Mom was right, those old vertical blinds were the perfect material to make an over sized woven headboard for the bedroom.

    Sad bedroom plus vertical blinds equals

    A sleek wooden frame hangs so that the headboard almost reaches our 8 foot ceilings, and two spray painted clamp lights provide adjustable lighting for bedtime reading.

    Upcycling Challenge Headboard

    Similar, but smaller, woven headboards can cost over $700, but since I re-purposed my materials, this statement-making headboard cost less than 1/10th that much. No more sad, bland bedroom for us!
    #9- Bicycle Wheel Clock

    Bicycle-Clock-Label

    There are clocks. And then…there are clocks. There are clocks that tick and tock and ring and jingle and tell time underwater and sound an alarm. And then there are clocks made from a bicycle wheel with yardstick ruler hands perched on a chalkboard surrounded by roman numerals above a table strategically styled with a bicycle seat. That is one fine clock.

    Bicycle Wheel Clock

    And the best part? I got the bicycle wheel for free. Can you even believe it? I walked into a bicycle shop and randomly explained to the resident bike expert that I wanted to make a clock and I needed a cute bike wheel that had preferably been around the block a time or two. Wordlessly he stared at me. I don't really know why. I'm sure they get that request all the time.

    Bicycle-Wheel-Clock-Paint-Can-Label

    And then he went to the back where they keep all the spare wheels for people who come in with clock requests and he handed me this bicycle wheel. I totally wish he could see his wheel now. He'd probably charge me for it.: )

    #10 Statement Piece Light Fixture

    Walking through Habitat ReStore, I spotted a few egg crate diffusers — you know those grates that cover fluorescent lights in basements across the country. It's the last lighting fixture I would consider for a project but once I got around my thoughts of drop ceilings, I began thinking how neat it would be to use the grid to create any square cornered geometric shape that I wanted. At $2 each, what could I lose?

    Browsing Pinterest I found this amazing light and fell in love with the arms. It's lines are simple, but make a big impact! Perfect for a statement piece!
    The egg crate diffuser was cut into the shape of the arms, filled with plaster of paris, sanded and painted. So that the wiring and housing wouldn't compete with the outer arms, I made a simple fixture out of metal tubing, PVC plumbing parts, and a few parts from an existing chandelier. After wiring it (and being elated that it worked!) I installed trim on the ceiling to frame the chandelier, and added a little more interest by painting alternating stripes in ivory and a light gray. Finally, I installed a gallery wall with a few fun pieces!

    From a designer's nightmare to an energetic statement piece, this diffuser has come a long way!
    #11- Lab Station Turned Dining Room Buffet

    servin' it up old school… The story of how a lonely old science lab station gained new life as an industrial-style dining room buffet.
    Once upon a time…on an unusually warm and sunny spring day, I was leisurely browsing a flea market when I spotted this piece and was immediately drawn to it…the color, the rust & patina, it's industrial style, and the fact that it was old and had great visual evidence of it's previous life--lots of it. As I looked closely at the butcher-block top complete with bunsen burner stains, student-carvings (i.e."jennie-loves-alex") and distress-marks galore, I knew that I had to have it--for something, but what that something was, wasn't clear to me at the time. We just had"chemistry"--I could feel it.; ) Luckily, the kind gentleman who I was buying this (very heavy) treasure from was willing to help me get it into my truck…and let me tell you: it. weighs. a. ton. Chapter Two: Fast forward to Project One CWTS: Upcycle. I knew instantly that this sad science lab station was about to have a major career change. I tossed around a few ideas, but pretty quickly decided it would be a fabulous, industrial-style dining room buffet. The hardest part was this: while I love the"vintage-industrial-rusty-patina" look and eagerly welcome it into my house, this was looking a bit too"raw" for my dining room. Well, try googling"how to tone down rust on metal, yet keep just the right amount of color and patina". If there is a tutorial for this…I didn't find it!

    Chapter Three: So, I did a little DIY-science-experimenting and discovered a technique to get just the look I was hoping for. After this process I added the casters, the door knobs, stenciled on the quote and stained the butcher-block top.
    Add some wine, grapes, cheese…and this"new" buffet is all ready to help you eat, drink and be merry.; )

    …and she lived happily ever after in my dining room.

    #12-From Frumpy to On Fire, Fireplace! When I was told that the first week of Creating With the Stars theme was upcycle I was over the moon excited. Upcycling is my thing. It’s where I get my groove on. And so, it wasn’t a matter of finding something to upcycle; it was a matter of deciding which thing to upcycle. So, I took a tour of my house and gazed at all of the items that needed some good loving. And then, I sat and thought about what I wanted in my home. And, it came to me. Hmm… could I? Would it be possible? Yes… yes, it could!!

    CWTS collage

    I’ve wanted a fireplace forever and ever. Okay, that’s an exaggeration. But, you get the gist. And, while this fireplace/bookcase might not be the real thing it fits the bill quite nicely. I was able to create my “fireplace” from an old bookcase that was sitting in my laundry room, a mirror frame that was on it’s way to the trash, and an antique footboard that had lost it’s headboard (poor thing). The bookcase is the most important element; the mirror and footboard helped create awesome and turn the bookcase/fireplace into something spectacular.

    CWTS collage2

    I cut the footboard down to size and used it as the “mantel” as well as give the fireplace/bookcase a skirt at the bottom. Scrapbooking chipboard embellishments gilded, painted, and antiqued look like beautiful wood cutouts on the mantel. The trim on the sides of the fireplace/bookcase are pieces of the mirror cut down to size. A chimney that runs the length of my 12 foot wall was created with a simple frame covered in tin. The back of the bookcase was covered in that same tin for added charm. I must say this project exceeded my expectations and far surpassed the image of awesome I had for this project when I started out. I love walking into my home and seeing this and am so pleased waiting forever and ever is over!

    CWTS final final5

    Can You Believe That Talent? It's Time to Vote! You can only vote one time, but you can vote for your favorite 3 projects. Before voting, please LIKE EC2 on Facebook. Thanks! If you're having trouble viewing the voting box, click HERE to vote.
    Don't forget that tomorrow it's your turn to link up your own upcycle project! Thanks for playing along!!

  1. Just Contemporary Review — But I Love Him by Amanda Grace
  2. Just Contemporary Interview with Yvonne Collins & Sandy Rideout! And Giveaway!: D
  3. Just Contemporary Guest Post! Asheley from Into the Hall of Books!
  4. Just Contemporary Review — Audrey, Wait! by Robin Benway
  5. Memory Monday — A little bit different today