My Creative Blog [Search results for Gallery Wall]
Gallery Walls {We Love Them}
Kid-Friendly Design: A Gallery Wall With Staples Engineer Prints

Welcome {to my New & Improved Entryway!}

Faux Gallery-Wrapped Canvases {Knock It Off DIY Project}

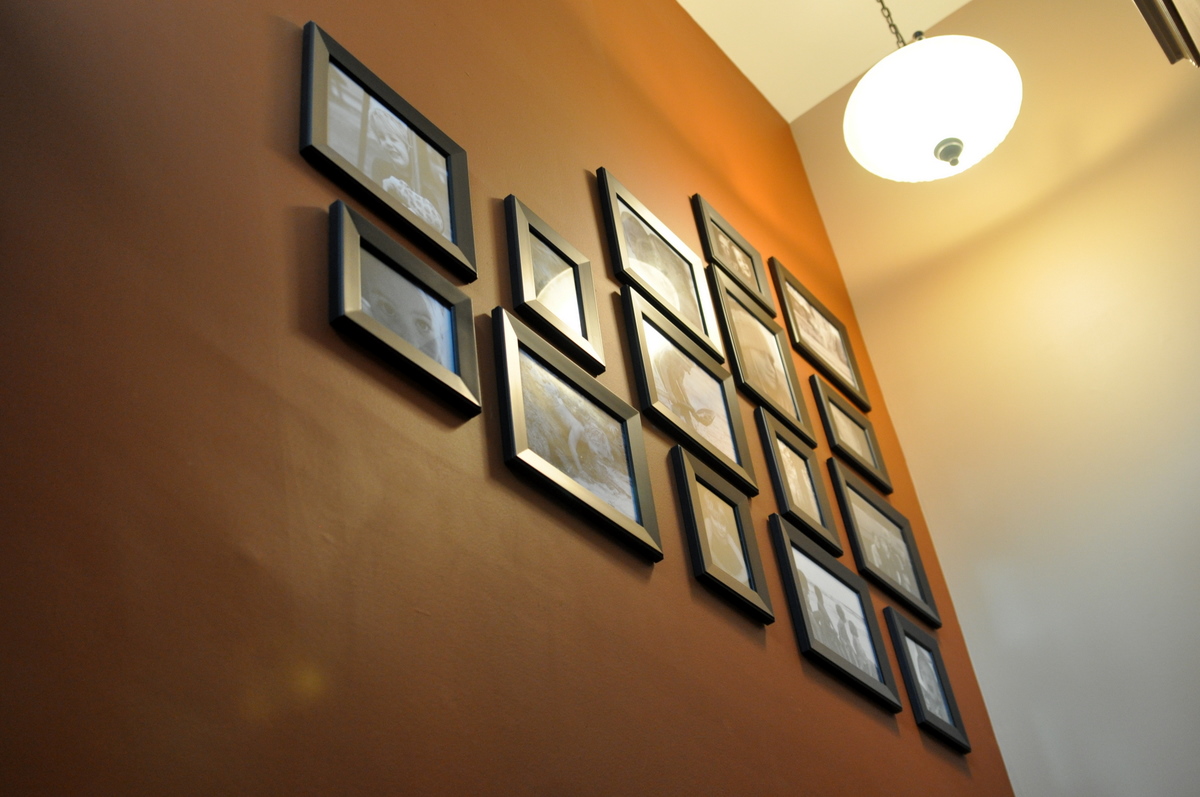
It's the Little Things {Hallway Update}

Top Projects 2012

SuperFab Room Redesign REVEAL {Guest Room}
Free Printable Art Round-Up

How To Hang Pictures in a Grid {Tutorial}

Welcome {To My Entryway}

EC2 Home Tour — Welcome to My Foyer!
Photo Stripping

Painted Wall Mural and Dresser {Love and Renovations}
Anthro-Inspired Plate Wall {While They Snooze}

Creating with the Stars Round 2 Link Party
Out of Office

A Pinteresting Home! {Meet Kelly}

12 Free Nursery Printables

Glazed Paper Tutorial & Finished Gallery

Travel-Inspired Design {Part 2}


