My Creative Blog [Search results for furniture

  • Outdoor Furniture Upcycle

    Outdoor Furniture Upcycle

    As you all know, my hubs and I have been DIYing a 600 square foot patio. It's been a huge job, but it's 99% done and we're loving it! (We've even put on an addition, but our lights were back ordered so I can't give the full reveal yet-boo!)

    600 square feet is a lot of space to fill and I wasn't about to go out and buy all new furniture for the space. I've had this old record player hutch (if that's even such a thing) in my basement for about 7 years now- It was just waiting to be upcycled.

    This baby used to house my in-laws old record player and then eventually a boombox. It's crazy to think that now that all of my music is on a 4 inch iPhone. Anyhow, if you need any convincing that this piece needed some upcycling, I've provided you with some evidence…

    One of my favorite things to do, is to look at a piece of furniture and see past the"yuck" and into the potential it has. Remember when we upcycled this dresser into an Anthro Knock off.

    They key to a good furniture upcycle is to believe that anything can be changed and set some goals!

    To Upcycle this piece, I had a few goals:
    #1- Get rid of any and all scrolly things (I sorta loathe them)
    #2- Remove the speaker fabric
    #3- Paint it with outdoor paint
    #4- Add some bold details
    #5- Distress it (so I don't get mad when one of my 4 kids"distress" it for me)
    #6- Add new hardware

    Get Rid of Scrolly Things Sometimes it's easy to think there are things you can't change about a piece, but it's amazing what you can do with a jigsaw! I just taped off a straight line and cut those scrolly babies off!

    Remove Speaker Fabric
    I ripped off all of the lovely fabric and then had to take out the speakers. There was no magic to this step. I actually gave a hammer to my seven year old son and said,"bang away!"

    I love when furniture has an industrial flair, so I cut plywood panels and covered them with chicken wire. It isn't the most fun to work with, but it's not impossible either.

    Paint with Outdoor Paint
    This piece was originally intended to be used indoors, so I wanted to be sure to paint it with good quality outdoor paint. I really don't love taking tons of time painting furniture, so I used Valspar's Exterior Spray Paint. It took about 3 cans to do two coats on the whole piece.

    Add Bold Details
    Since this piece was originally so traditional, I wanted to do something graphic and more modern as a detail. I thought a thin herringbone would do the trick.

    Herringbone is super-simple!
    #1- Mark out your center line. Then, measure the width you want the stripes (I used 1") and make tick marks down both sides of the column. #2- Tape off your lines. The top of the left side slants down to one tick mark below on the right. #3- Paint & Remove your tape. Let it dry and repeat on the opposite side, but shift your painted section down one, so you have the"every other" look.

    Distress the Piece
    You might notice that my lines weren't completely crisp in the herringbone. I was painting outside in 100 degree heat (blogger foul), but I also knew I was going to distress it anyhow. I'm not always into distressing, but I figured it was going to get banged up outside (and I have 4 kids that are pretty rough on furniture).
    To distress, first I went at it with a sander with 220 grit paper.

    Have you ever had this problem? I ran out of the right size sanding pads. Oops!
    After sanding it down a bit, I gave the entire piece a good glazing. I actually began my glazing love affair by reading Living with Lindsay's blog (check her out it you haven't)!
    My favorite glaze is Martha's Black Coffee. As you can see, I slopped it on, rubbed it around, and then wiped it off. I wanted pretty solid coverage, so I used a good bit of glaze.

    After adding some hardware she was all finished and ready for the patio!

    I think she's much more my style now!

    All that's missing now is some cool, outdoor artwork. I'd love to hear any ideas you have in a comment. We have some insanely creative readers! P.S. I have to mention that I'm so glad to have my BFF home from vacation! A week apart feels like such a long time to us! Now that she's home, Jess is working like a mad-woman on some cool projects for her dining room!!

  • How to Build an Outdoor Sectional {Knock It Off}

    How to Build an Outdoor Sectional {Knock It Off}

    Outdoor furniture can cost an arm and a leg. Since I'm not interested in selling my firstborn to afford nice furniture, we often build it ourselves- and we do the same thing with homeowners on Knock It Off. We wanted to build Barb and Derek a sectional for their sunroom that would have a high end feel and not the price tag.

    Doesn't it look great in their finished sunroom?

    We are huge fans of giving credit where credit is due- Ana White is the queen extraordinaire of all things DIY furniture! Her blog is full of FREE furniture plans and one of her projects inspired our outdoor sectional.

    We didn't use Ana's plans exactly, because we wanted it a certain size for Derek and Barb's room, so we came up with our own version, but if you want to make one, you should follow her step by step directions with awesome pictures!

    Ana's plans for an outdoor sectional can be found HERE and you can download a PDF with everything you'll need.
    A few tips for making one of your own…
    # 1- Have the right tools! You don't need anything extravagant to build this sectional, but a strong drill, a Kreg Jig, and a Chop Saw are essential.

    A Kreg Jig is a great, inexpensive tool for building furniture. We used one when we built our farmhouse table, outdoor table, garage lockers and so much more.

    It creates a pocket hole to hide your screws.

    You can check out Kreg's website here (and no, this isn't sponsored, I just really love this tool!!)
    # 2- Have a friend to help! this is a two person job. There are lots of times where you'll need one person to hold and the other to attach something.

    # 3- Use Exterior paint or Stain with a Sealant For our sectional, we used exterior paint, but watered it down a bit, so we could still see some of the wood grain. It's a little trick if you're in a time crunch. It spreads easily, like a stain, but you don't have to do an extra coat of sealant. We've learned lots of quick trips doing rooms for Knock It Off.

    This project looks amazing and expensive, but it's really simple and a good first project if you're wanting to try your hand at building. All the cuts are straight and the plans are simple (you can thank Ana White for that!)

    If you want to see how this sectional looks in the room, click HERE to watch the full episode online.

    Hopefully this project encourages you to take that first step and give building your own furniture a try! It will save you a ton of money (maybe even your firstborn!!)

    Monica
  • Amazing Achievements

    Amazing Achievements

    I'm showing you bits and pieces of homes because my best friend Deb's company Village Interiors Inc. made some or most of the furnishings. I am so incredibly honored to be able to call her my friend but also I'm so incredibly proud of her and her achievements. She has worked so hard through the years in the background of others that I thought I would give her a little of her due credit here.
    The "Pierre" French for rock, designed by Tom Kundig of Olson Kundig Architects

    This home in Washington state is amazing, it was built within an outcropping of rocks up on a peak to capture the views, hence the name "Pierre".

    While the custom furniture was designed by Olson Kundig Architects' interiors studio, it was Village Interiors that had to make those dreams a reality.

    Hong Kong Villa designed by Jim Olson of Olson Kundig Architects

    This house was also designed by the same architectural firm of Olson Kundig Architects by Jim Olson who also designed the interiors, two very talented men in that architectural firm. This home is located in Hong Kong overlooking the South China Sea.

    Village made all the furniture in this residence too! Isn't that view something out that wall?

    Auckland, New Zealand Architecture by Pip Cheshire, Interiors by Terry Hunziker

    "Visually the house is intended to be seen as a piece of constructed jewelry amid a natural landscape,' architect Pip Cheshire says of the seaside Auckland residence he built for Sue and Peter Cooper. He collaborated closely on the project with interior designer Terry Hunziker."

    While modern house design is not typically my thing I just love this house and all the elements, that fireplace surround is zinc clad! Yep, more sofas and chairs by Village, they ship far and wide!

    Furniture by Village Interiors for projects of designer Holly McKinley

    Deb does so much more then make furniture she also owns Storage By Design better known as SBD, a high end white lab coat, white glove storage facility for antiques, furniture and specialty furniture installations.

    She also owns a pillow business called Olde World Pillows and is in the process of opening a well-anticipated shop next month. (Nope, no competition between us and our businesses since we don't really sell the same pillows, besides we're best friends!)

    It always amazes me what goes on behind the scenes, like the people who have to take a drawing and create what they see and not get any credit for their efforts such as Village. If you're a designer and live in the Pacific Northwest then Village and SBD is for you but Olde World Pillows will be open to everyone and wait until you see her shop, think jewel box! Be sure to check out some of the homes listed here they're freaking amazing!
    Located in Seattle Washington, conveniently just two blocks from the Seattle Design Center. Village Interiors Inc. 217 S. Findlay Seattle, Washington 98108 (206) 768-9601

  • A Statement Piece

    A Statement Piece

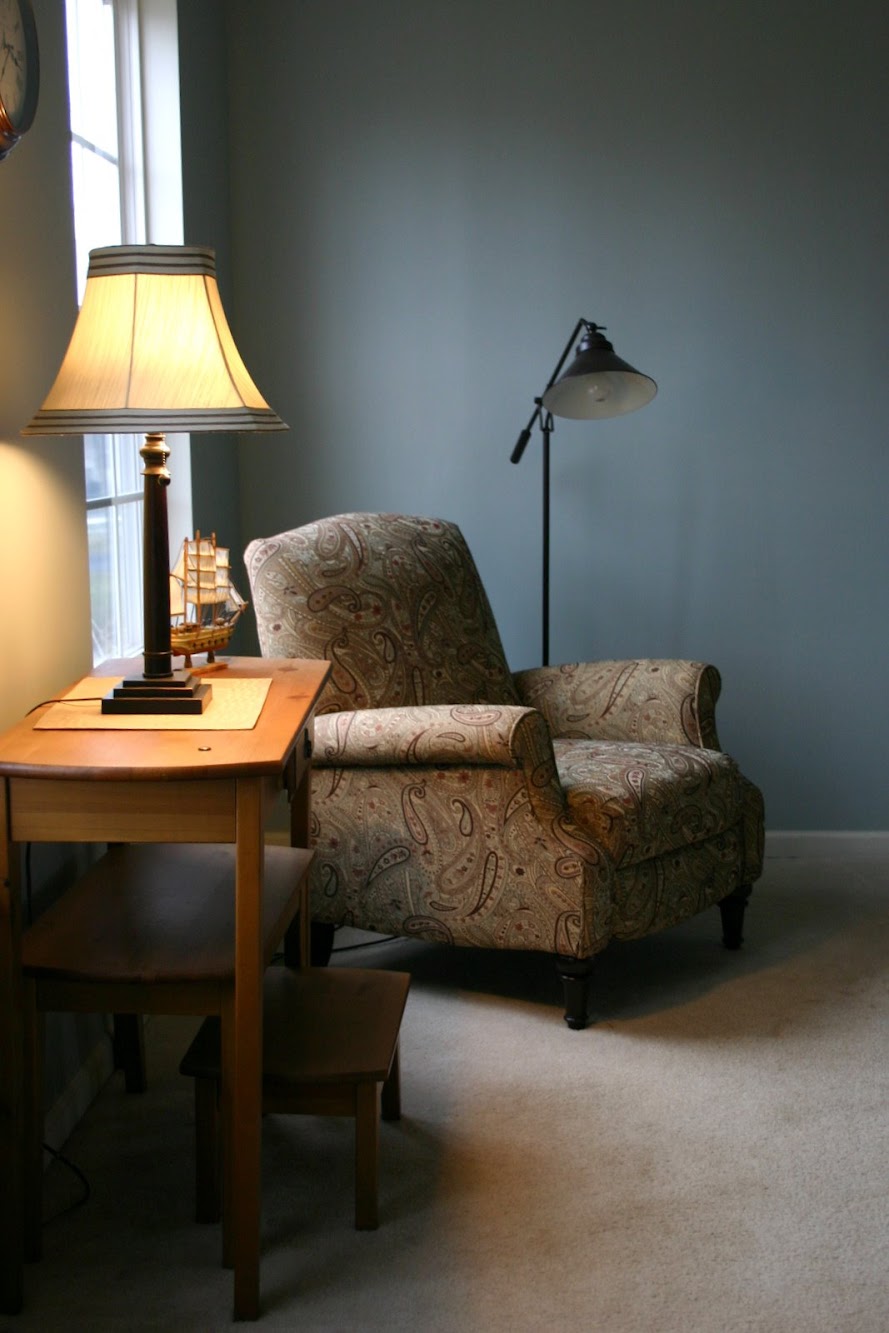
    Tap, tap, tap. Is this thing on? It is? Ok then, let's get started. I thought that for my very first post I would talk about my absolute favorite piece of furniture in our house. That this furniture became my favorite happened as kind of a wonderful accident. When hunky and I were moving into our current home, we realized we need to fill up some of the additional space we were acquiring with new furniture. If you know me, I am not too flashy, enjoy neutral colors and like traditional furniture with clean lines. However, I wanted an accent chair for our living room. We came across a lovely paisley fabric that was a bit more bold than the usual patterns I gravitate to. You know how you only get a 1x1 swatch of the fabric, and are supposed to be able to visualize the furniture piece with the fabric on it? Not all that easy, if you ask me. Well, we decided to go for it: put that pretty paisley all over that wingback, baby. And, what could have been an uh-oh-this-chair-is-ugly-but-cost-a-fortune-and-is-mine-no-matter-what chair, turned into one of the best things I've done in decorating. We've already made a bunch of memories on this chair, and some of my favorite pictures ever of C1 and C2 were taken on it.

    See what I mean? Worth the investment just for these three pictures! I did some searching and found some pretty amazing accent chairs. They make a huge difference in a room, don't they?

    Gilded Chair

    spaces design

    I just love the navy and gold combination in this room, and the subtle tone on tone pattern on the chair.

    Vanessa De Vargas living room

    living room design by los angeles interior designer Vanessa De Vargas

    And be still my heart, the patterened rug and chair combination in this picture rock my world.

    Pottery Barn
    I love the simplicity of this chair and the fact that it adds a bit of texture, instead of a bold pattern. Not sure why, but it makes me think of spring.
    So, what about you? Do you have a favorite furniture piece?

  • The Living Room: Before and After

    The Living Room: Before and After

    Just to review....this is how we found it.

    The single-paned window, and perhaps even the deck, were most likely added sometime in the 80's. When the contractors put in the new Marvin window, they had to tear down the deck in order to put in both the headers and footers. We'll rebuild something more period looking to the house — a balcony with a wide center staircase going down the middle and into the back yard.

    This is the opposite wall. See all that brown trim? That's all covered in faux wood tack paper to assimilate wood trim. It was horrible to remove.

    This room has evolved over the three years we've owned our house (we once had our bed in here). It was the very first room we tackled when we bought the place (the picture of Hubby was within hours of taking ownership) and so it was the first room we finished in terms of the bare bones part. The actual decorating would come much later, as in now....and it's quite serendipitous as again, we're 'moving' into this room just before Christmas.

    Here's sort of another 'before' picture that shows our previous color scheme, dictated primarily by the furniture and rug we had on hand at the time.
    And here are the 'afters.' I took these pictures on the darkest days of the year as we're having lots of fog and rain — hope they turned out alright!

    As you can see, I painted the room white. It's Simply White by Benjamin Moore (Eco-Spec line), which is the same color we've used on all of our house trim and many of our walls. The old color just felt too ruddy looking and I realized (no agonized over) that I'm most drawn to that classic white wall farmhouse look where the color of the walls isn't what the room is about.
    I wanted the room to be more about the fireplace, the windows, the view, the light coming in, the furniture, and the artwork. And I just thought that white allowed these things to shine more than any other color. Also, Janet (hi Janet!) over at The Gardener's Cottage just painted her living room Simply White and it completely inspired me!

    The mirror over the mantle is such a better fit than our other one. I found this several weeks ago at an antique store for $120.

    I picked up the brass sconces at an antique store for $20 each. I had been looking for some sconces online but found them to be very expensive. So these were in our price range and I've always loved the look of a pair of sconces over a mantle.

    The seagrass rug is a 9x12 (it hasn't quite flattened out yet after being rolled) and will be relocated to the dining room once I decide what size seagrass rug I want for this room. I know it will be several feet bigger but still trying to figure out exact dimensions before I order it (the first one I ordered had a mid-January delivery date so I cancelled it).

    The furniture is by a company called Rowe Furniture. We knew we'd choose something from their line because they are committed to natural fiber fabrics, eco cushion cores and wood from replenished forests. They are also members of the Sustainable Furniture Council (SFC).
    This was all very important to us as we have made great efforts to make our home as green and healthy as possible. We also liked the price — due to a special sale that they were having at the time, the couch was just $1,099 and the chairs were $599 each (and we chose the highest grade fabrics).

    The velvet couch is extremely luxurious. We love the high curved arms (much like a sleigh bed) as it provides the perfect support for reading a book, sipping a cup of tea or snuggling up next to the warm fire — especially on days like today.
    I picked up the brass easel a few years ago for $40 — a price I just couldn't pass up. The antique frame was my Great Great Grandfather's and I'm in the process of ordering a beautiful print for it. I can't wait as I've always loved the artist and will be absolutely delighted to have a piece of hers in our home.
    The cabinet used to be in the dining room. It got bumped from there because there will be two new windows going in this spring/summer leaving no room for it. It's sad but I absolutely love it in the living room. It's gone from dining cabinet to secretary, a look I have always loved.
    I also like the height it provides and think it really adds a nice finishing touch to the room. We found this piece at a local antique store that used to get antique furniture shipments in from England. During my semester abroad in college, I lived in England and would spend hours going through all of the gorgeous antique stores looking at beautiful cabinets very similar to ours. So it's sort of serendipitous that this piece found me after all of these years.

    The cabinet came with black oriental pulls on the drawers, which I don't believe were original due to the lovely brass button knobs on all of the cabinet doors. So I switched them out for Eastlake pulls which offer it more of a country look (and of course, I absolutely love all things Eastlake).

    So there it is! I'm sure it will continue to evolve as all rooms do! I hope you like it! We just got our Christmas tree today so we'll be putting that up tomorrow night....so more photos to follow!
    Photo updates:

  • It Was All Yellow… Refinishing Furniture

    It Was All Yellow… Refinishing Furniture

    Who knew one little trip to a barn sale could produce so many cool projects?!?

    While Jess and I were at this sale, I was on the hunt for a buffet for my dining room. I stumbled across this"beauty" and was lucky to score it for $50.00!

    Now, old-school brown wood is NOT my style, so I had to look past it. When thinking about refinishing or repurposing furniture, the most important thing is to look at the lines of the piece. The lines will remain. The ugly finish, or brass, scrolly hardware can be changed.
    Sorry, I don't have a picture with the ugly, old hardware (I was rushing for the Nate Show) but, I liked these drawers for their simple, rectangular shape, with no detailing.

    The cabinet doors also made me smile because there was just a simple line of trim and no scrolls anywhere. Yeah, I have a thing against scrolly stuff!

    I was away on a trip for work and came home to find my hubs doing this in the driveway… <3 him!

    I am not usually one for doing oodles of prep work, but I will admit that sanding this down a bit really helped. If your piece is super glossy, fear not! Just do a bit o' sanding! It doesn't have to be perfect, but rough it up and get some of the gloss,"de-glossy!"

    Source: designsponge.com via Kalila on Pinterest
    Have I mentioned that I love paint can pictures? I also am having a love affair with yellow… my goal is to sneak just a little yellow into every room in my house!

    Since I was really pressed for time and had about a million projects to complete, I called in some back up to help me paint. Thanks Mark!! The yellow ended up taking FIVE coats to fully cover and get the exact shade I was looking for.

    Five coats later, the finished product makes me smile every single time I see it! Seriously, this cost me $50.00 and I adore it!! I bought the sleek hardware at Lowes in their specialty hardware section.

    I can't show you how awesome it looks in the whole room, because you have to wait for the big Nate reveal, but here's a little peek!

    I hope you're inspired to look past your first impressions of a piece of furniture and see the true potential that it might hold! While I'm on my soapbox, please let me add… If I hear one more person tell me,"But I can't paint it! It's REAL wood!" I will scream! Who cares if it's"REAL WOOD" if it's UGLY?? I'm sorry, but real wood does not mean you can never alter it and have to deal with outdated pieces. Seriously ladies, let's muster up a little courage and get painting!
    Check out some of these awesome furniture facelifts… Maybe they'll make you feel a little braver…

    Seriously, how amazing are these pieces from Twice Lovely?? I obviously adore the white and grey damask! Design Sponge is a perfect example of being brave enough to change a REAL wood piece. This white dresser was fine… nothing special, nothing awful… just fine.

    And now it's fabulous! I mean this red is wicked awesome! Can you imagine if she was too scared to paint the wood?? It would have been a crying shame!

    Ok, so enough ranting and raving for one post. Do tell, have you painted a piece of furniture or have you been a wee bit scared?

  • Refinished Dining Room Table {Furniture Makeover}

    Refinished Dining Room Table {Furniture Makeover}

    Oh goodness, this dining room is taking forever to finish! I've been working on it for the past several months as money and time have allowed, and we're definitely in the home stretch, but it's the little things that are making me crazy! I've already showed you the side table I made over, and the planked wall with exposed studs accent wall we created, which really helped change the feel of the whole space. But let's be honest, one of the most obvious things that had to change to fit the whole"coastal/cottage" vibe I'm going for was the dining table.

    It's a nice, solid wood table that my hubs and I bought for only $60 (yes, you read that correctly!) when we first moved into this house. I was so over the black hutch and the finish on this table, but it's functional piece so I didn't want to buy a new one. I haven't done too much furniture refinishing, so I asked my bloggy pal and furniture expert, Shaunna, if she could make some recommendations as to what I should do to change them up to fit my style. Not only did she come up with some incredible furniture ideas, but she dreamt up an entire inspiration board for my room!

    furniture inspiration board and home decorating ideas at perfectly imperfect

    Isn't that amazing? I love so many of her ideas, and hope my room turns out half as nice as her dream room!: ) So with her help, I started out refinishing the table. The first step was to remove the legs of the table and give them a good painting with Annie Sloan Chalk paint, aka my new love. I decided to paint the legs in French linen, and then once that dried, did a wash of Pure White over top. That was the easy part.

    The table top…not so easy. I started off by sanding the top with 60 grit sandpaper and my palm sander. It was so difficult getting through all the layers of whatever they sealed it with that it probably took me a good hour and half to sand it all down. 

    I almost didn't mind, though, because what I saw as I was sanding made me super excited! I loved the look of the unfinished wood and the wood grain that began to show. 

    Even with all the sanding, I still didn't feel like I had removed all of the old finish, so I brushed on a layer of CitriStrip. Basically, you brush it on and leave it for the recommended time. Then, you wipe it off with a lint-free cloth and with it, off comes the finish! This sanding/stripping method really worked to get my table back to it's gorgeous, unfinished state. 

    Shaunna recommended that I try white-washing the table with Pure White chalk paint, so that's what I did. If you're unfamiliar with white-washing, it is an awesome way to keep the character of a piece, while subtly adding a touch of color to it. Basically, you add water to paint until it's the intensity you want. More water = less concentrated color.

    whitewash recipe

    I really wanted the grain of the wood to show, but I didn't care for the peachy color of the wood, so I went with a very watered down white wash.

    I brushed it on, and then wiped it back with a paper towel. Because my wash was mostly water, I had to wipe it immediately after I brushed it on because it was drying very quickly. Wiping the wash back helps brings the color of the grain out, which gives it a very reclaimed wood finish.

    After I washed the whole table, I was over the top giddy mildly pleased with the results. 

    I can't get over how well the table now fits in my dining room! It's like it was meant to live in a coastal cottage all along.

    The final step is sealing it with Annie Sloan Clear Soft Wax. Because this is a surface that will get lots of wear, since people will eat and drink there, it will need three coats of wax. I'm planning on doing that this week, but that's the kind of little detail (that makes a big difference!) that I don't want to do. Any one out there want to come finish my table? Please!?!?

    All that hard work was totally worth it, though, because I'm head over heels in love with the table now. A big thank you to Shaunna for helping me to see it's potential! Not bad for a $60 table, huh?; ) -------------------------------------------------------------------------------------------------------------------------- We're honored to be featured over at I Am Momma Hear Me Roar today for her week of all things curtains! Be sure to check it out to see what no-sew curtain solutions we came up with!

    --------------------------------------------------------------------------------------------------------------------------

  • Formal Living Room Makeover {Knock It Off}

    Formal Living Room Makeover {Knock It Off}

    Today marks our first day back to work filming for Knock It Off! We've had 6 weeks off so that Jess could enjoy time off with Baby Bennett- I was the lucky one to get maternity leave too! We really enjoyed our break, but we're also super excited to get back to helping homeowners with some awesome room makeovers!
    Before we went on our break we tackled our first Formal Living Room makeover. We were super excited about the challenge because neither of us have particularly formal homes.
    If you haven't watched the episode- check it out HERE!

    Here's where the room started off… The family had a TON of amazing pieces of furniture, but some of them were being hidden because there was a lot of stuff in the room.

    We used a bright, yet sophisticated kelly green on the top portion of the walls.

    And added a clean, crisp board and batten on the bottom two-thirds.
    And of course, we couldn't leave the black piano alone. It looks okay in pictures, but it was pretty beat up and needed some love… you know what that means… Yup! We painted it!! (painted piano haters everywhere are cursing us! lol)

    Isn't that so much more fun? The homeowner's kids all play piano and they were excited to have their first lesson on their blue piano. I kinda wanted to be a fly on the wall when the piano teacher saw it for the first time. Mwhaha. Actually, I heard the blue color made the kids play so well that they're all headed to Julliard!
    From the homeowner's submission video we actually hardly noticed there was even a fireplace in the room! It was so covered up by furniture and accessories.

    We narrowed down all the accessories and furniture, replaced the glass shelves with wooden ones, lined the back with fun zebra paper (we couldn't resist adding a fun pop) and then displayed some of their amazing plate collection on the freshly painted white wall.

    We kept many furniture pieces the same, but others- like the one below- we changed. The wood dresser on the left is what we turned into a mini office on the right. We painted it, added new hardware, removed the bottom two drawers and it became the perfect place to keep all their office supplies. You'd never know that it's totally functional… well minus the two printers I suppose!

    The room had a huge picture window, but it was really covered up by the sheer curtains. Sometimes people think sheers are great because they let in the light, but in this case, they were hiding so much!

    We brought in 4 curtain panels (you can only see three), and even though they're solid, not sheer- the window looks so much larger! These curtains are IKEA curtains that we painted to have a custom feel. You can see how to paint your own curtains in this post.

    We were so happy with this room- it might have been one of our favorites from Season 1! We can't wait to see what season 2 has to offer!!
    Check back tomorrow to see how we added the fun pop of gold on the piano wall…

    Monica
  • Ombre Painted Dresser {Knock It Off DIY Project}

    Ombre Painted Dresser {Knock It Off DIY Project}

    Got an old dresser that needs some love and attention? Don’t kick it to the curb just yet! Try out this ombre paint method for a fun, modern design that will give your dresser new life!

    *Insider tip: When we're looking for furniture to upcycle, we make sure that the piece is in relatively good condition. That doesn't mean it looks good, just that it's structurally sound. Ideally, we love a piece with clean lines and a classic style, but don't overlook a piece just because it has scroll-work or is ornate. Oftentimes, those things can be removed easily with a jigsaw.
    1. Prep the dresser by giving it a thorough sanding with an orbital sander to get rid of the old finish. Remove any hardware from the drawers for easy painting,, too! After sanding, wipe down the dresser with a damp cloth.

    2. Choose your color and get to work! You can actually achieve the ombre effect two different ways- by buying three or four colors from the same paint swatch, or, if you’re trying to save money like we were, using one paint color and changing the color with white paint! We’ll explain this method, since it’s the one we used. Don’t worry, it’s not hard and it’s worth the little bit of extra work!

    3. Go ahead and paint the bottom row of drawers using a small foam roller (designed for painting furniture) with the undiluted, fully-saturated color. The key to a nice finish is even long, even strokes and several light coats of paint. Set drawers aside.

    4. To thin out your paint for the next color, pour three parts of the original paint color in a small paint tray and add one part white paint (3:1 ratio). Roll onto next row of drawers.

    5. Using the same method, thin out the paint with a 2:2 ratio for the third row up from bottom and a 1:3 ratio for the top row of drawers. Paint and let dry the specified amount of time. 6. Add new hardware- we chose to bling out our dresser with clear, glass and gold knobs for this adorable little girl. Or, put the old hardware back on to save even more money!

    Voila! You’ve easily accomplished the fabulous and trendy ombre effect on your dresser! This style is awesome for a nursery, but depending on the colors you choose, could really be used anywhere in your house!

    We've tried our hand at lots of different dresser upcycles. Our absolute favorite is this Anthropologie- inspired dresser

    But, we also kind of love this outdoor furniture upcycle:

    So, please…for our sake…don't throw out your old furniture! Do something fun with it.: ) To watch the full episode of this nursery makeover, click Here! There were so many fun projects in this room!

    jess
    Monica
  • Dreary to Cheery Family Room Makeover {Knock It Off}

    Dreary to Cheery Family Room Makeover {Knock It Off}

    Have you ever looked at your house and thought, well… this is just what it has to be. I can't do much to change it. That's exactly what we heard from Terry, the homeowner of this episode of Knock It Off. I should mention that even though she wasn't liking much about her house, she had the most meticulously clean and cared for home- I want to be like her when I grow up! Now, back to the design- Terry had dark wood everywhere (which some peeps love, but it was dragging her down), wallpaper from almost every decade, and just not a whole lot going for them… Or so she thought!

    See what I mean? It's just not the kind of room that inspires you to"Be Awesome" on a daily basis. So, Jess and I decided to take this room from dreary to cheery (yes slightly cheese ball-ish) with a really fun, bright color palette.

    How's that for bright and cheery and just overall awesome?!?

    We love the impact an accent wall can have and after we removed the circa 1970s wallpaper, we knew that a Royal Design Studios stencil was the way to go! We'll be posting on how to remove wallpaper (we know you want our tips and tricks!) and all about stenciling an accent wall. For now, just enjoy the eye candy!

    Terry's family room connected directly to this tiny sunroom she uses as an office and study area. We didn't have money for new chairs, but we were able to build a bench seat (all we needed was wood and 1 piece of drywall! Tutorial coming soon!). We tossed on a few World Market pillows that were on major clearance and we had ourselves a super inviting sunroom! I literally had to pull Jess away from this comfy seat to keep working!

    We worked with furniture Terry owned, like this gem and just gave it a new sassy swaga with some paint and two pieces of hardware. If you have a piece of furniture that seems beyond dated, just try giving it a bold color paint and see what happens- it's kind of like magic!

    Some of Terry's furniture we used (like the adorable table we upcycled), but other things like the huge ottoman they had, had to go. Instead, we built our own table using 2x4s and 2x6s. This piece looks so expensive because of the X frame, but it's easy-peasy to build (tutorial coming soon!).
    I think my favorite thing from this episode was seeing how empowered Terry and Jesse felt. I sound all Dr. Phil, but I'm serious! They thought they just had to settle for how their house was, but now they know the awesome potential it has! Since we filmed that episode Terry has sent us pictures of other furniture they've upcycled, and she's painted her dining room walls and all the trim! Jess and I feel like proud Mamas!
    So, no, we can't come to every single reader's home (we wish we could!!), but hopefully by seeing what we're doing with homeowners on Knock It Off, you're feeling like you don't need to settle either!
    Here'a a little more before and after action for ya!

    Hello adorable sunglasses pillow! Thanks Homegoods for always having amazing things to use in our makeovers!

    See how the little sunroom flows right off the family room?

    If you missed this episode, what are you waiting for? Click HERE to watch it online!
    We promise we'll get all these tutorials to you really soon! I mean with our amazing intern Diana, is there anything we can't do??: ) She's the best!
    What do you think of this makeover? Do you have one of those rooms in your house where you just feel stuck? Do Tell!

    Monica
  • The Evolving House {C1's Bedroom}

    The Evolving House {C1's Bedroom}

    The evolution of a house and style is an interesting thing. I take great pleasure in changing, rearranging and tweaking the rooms in my house. My style has changed pretty drastically (since I basically started out my married life with no style preference at all), but I'm still developing my tastes and preferences. Things rarely stay the same for long, which is exactly how I like it. My desire is to create a home that is comfortable for my family and welcoming to guests, that is pleasing to the eye, but that is also practical for raising two kids. I'm fairly certain that this will be a life-long quest. However, money and time (or the lack there of) make it a little more difficult to decorate and change things like I'd like. Kevin and I have had a few rough years financially, and so, I am finding that if I want to redecorate, I have to be resourceful and creative, and most importantly, learn how to repurpose items we already have. I've been learning the very difficult lesson of contentment (Melissa, at The Inspired Room, said this about contentment that really resonated with me), and am realizing that I don't have to have the perfect house, just one that my family considers beautiful and can enjoy living in.

    With all that said, Monica and I will be showcasing our houses to you; not because they are perfect, far from it actually, but because they are a huge part of who we are. So, welcome to the evolving house.

    This is C1's bedroom. Just recently, we changed her over from a toddler bed to a full-sized bed. In one afternoon, it seemed like she grew older right before our eyes just because of the furniture! I love her room- it's girly and sweet, but can also really grow with her. We painted the walls a really pretty shade of green (I'm sorry I don't know the paint color anymore!), and we used all-white furniture. Every piece of furniture (except the headboard) is hand-me-down or was hand-made by my hubs. Her cute butterfly and flower bedding came from HomeGoods and was a gift from my mom. She has a great dormer window, in which Kevin built a toy box/window seat. When we were creating her baby nursery, I envisioned that little space as a great reading spot for her down the road. For now, she uses it to play and look out the window.

    This shelf came from my mom's attic (she has a great supply of decor and furniture she's not using and is really generous with it!). I made the monogram, using adorable patterned and hot pink card stock, and put them in frames we already had. I hot-glued ribbon to the tops to make them a little more feminine.This monogram project cost me no money at all, since I used items I already had! The little porcelain shoe to the left of the frames was a gift from her great-grandmother and has all her birth stats painted on it.

    This is my favorite feature in her room. Inspired by something I saw in Pottery Barn, Monica and I created a tree stencil for the walls. I then hand-painted the trees (there are two of them- one on either side of the dormer window area), and added leaves and pictures of our families to make it a family tree. One side is the hub's family, and the other side is my family. I wanted C1 to have an understanding of the importance of family, and how blessed she was to have such a Godly inheritance, from an early age.

    Isn't this chair the most precious thing you've ever seen? Ahh, I can't get enough of it, and you'd never guess that I got it at Big Lots for $40!

    But really, these pictures show what I love most about this room: My two kids living in it.

  • A Green Nursery

    A Green Nursery

    C reating a healthy home has been a priority of ours since we began our renovations five years ago. Our motivation was due, in part, to the fact that this was a home in which we hoped to raise children. So naturally, creating the healthiest nursery possible was also main priority for us. It motivated all of our choices, from furniture and wall treatments, down to the rug.
    These are the choices we made:

    The Cribs: We chose the Da Vinci Jenny Lind crib because it is made with wood harvested from sustainably-managed forests. It's also lead and phthalate free, and stained in a non-toxic finish. Also, the teething rail is BPA free.
    The Crib Mattresses: We chose Naturepedic organic mattresses. They offer a non-toxic waterproof surface that includes 100% food-grade polyethylene. They are also hypoallergenic, filled with organic cotton filling.
    The Crib Sheets: We chose 100% organic cotton crib sheets.

    The Armoire: It was important to us to not purchase any furniture for the nursery that was made with manufactured wood, that may contain glues, adhesives or other compounds which may off-gas over time. Antique furniture provides this safeguard, as well as the opportunity to recycle beautifully-crafted pieces made long ago.

    Mike created shelves for the armoire using solid tongue and groove pine floor planks. My Mom then covered them in 100% cotton fabric.

    Nursing Chair: We selected the IKEA Jenny Lund slipcovered arm chair for nursing. I was really nervous about bringing a new chair into our nursery, as most new furniture is constructed with manufactured woods that may off-gas. So, I was happy to learn that IKEA strictly procures wood from sustainably-managed forests, and their pressed wood products comply with low formaldehyde standards.
    The Rug: We narrowed down our rug choices quite fast in knowing that we would only buy something that was made with natural fibers (with no rubber or plastic backing). We initially looked for 100% wool rugs, but ended up ordering a 100% jute braided rug for its style and shape. It's also reversible, so it should stand the test of time.

    Wall Treatments: Like the rest of our house, the nursery was painted using Benjamin Moore's no-VOC line. Everything from the ceiling and the mouldings, to the doors and walls, were painted with the color Simply White in either flat or semi-gloss finishes.
    Choosing white for the plaster walls was a natural choice for me as it was the color of my childhood room, from birth until I left for college.
    White also has the added benefit of having less pigment added to the mix (pigments most often contain VOCs). I did just recently learn however that Benjamin Moore is one of the very few lines that uses VOC-free pigments. Thus their VOC-free line truly is VOC-free, no matter what color one chooses.

    When Mike created the paneled wainscoting, he used solid wood mouldings, assembled and secured in place with a finish nail gun instead of glue.

    The Closet: To create extra storage, we relocated the antique dresser from the guest house. We preferred using the dresser for the same reason that we chose the antique armoire. Also in the closet are the toys and books in waiting....until the babies are older.
    Purchasing two cribs, two mattresses, two car seats, clothing, diapers, etc.... added up as you can imagine. So we focused our budget on the things we knew we would need from birth through the first several months. Any toys and books we have were ours from childhood, or were given to us by family and friends.
    When we do start buying toys, we will focus on brands that offer phthalate-, BPA- and lead-free products.

    Baby clothes: We have been very lucky in that we have received lovely hand-me downs from my friend Karen, and my brother Steven and his wife Marna, who have a son and two sweet daughters. The above knit sweater was my adorable nephew's.

    This sweet outfit is a combination of a hand-me down (the white cotton onesie) from my niece and a purchase from a baby consignment store (the 100% organic cotton jumper with pink velvet piping). I've found consignment stores to be a wonderful resource for beautiful clothing, often hardly worn, at much lower prices than retail (organic knit jumper was $11).
    I hope that everyone had a lovely Thanksgiving holiday! I managed to stay on my feet long enough to make the pie crust... I spent the rest of the day on the couch nodding off and listening to the bustle of kitchen activity made by my mom and Mike.
    Happy Holiday Season to everyone! xo

  • Creating with the Stars Round 3 Link Up Winner

    Creating with the Stars Round 3 Link Up Winner

    If you missed all the amazing projects in the first three weeks of CWTS, be sure to check them out below!
    Round 1 Projects & Winners Round 2 Projects & Winners Ro und 3 Projects & Winners

    We've loved seeing all the projects that have been linked up to play along with CWTS each week! This week we were thrilled to be introduced to Meesh and her blog I.Meesh.U I spent a long time on her blog last night and I just kept reading because her stream of consciousness writing style had me hooked! We picked this project because we felt that everyone deserved to know the secret of how to get that super-cool, Restoration Hardware finish!
    -----------------------------------------------------------------------------------------------------------------------------------------

    oh Restoration Hardware… how i love thee…

    Restoration Hardware's Kenwood Bed

    Restoration Hardware's Kenwood Bed
    Big A is currently in his converted crib. Problem is that he's getting too big for us to comfortably snuggle and read books in the glider. and sitting on the floor to read to him isn't fun. so mamma started searching for a new bed on craigslist… and look what i found. a glossy white Pottery Barn-looking bed. the very nice fireman who sold it to me even delivered it for free.

    glossy white painted wood headboard close up

    here's the headboard in our garage. the pix are a bit dark, but you get the idea. glossy white paint on a well-constructed piece. the beauty about Annie Sloan Chalk Paint is that you don't have to sand or strip any varnish before starting. you just paint. and the paint just sticks. and you're just happy. and yes, i've heard the complaints about how expensive ASCP is, but really, when you take into consideration the time you've saved sanding, stripping, and priming, it all works out. AND, with the 4 quarts i purchased almost two years ago, i've probably painted out 15-20 pieces of furniture. yes.

    glossy white painted wood headboard

    looks a little girly with the white glossy paint, huh? so here are my steps to achieve the ever elusive Restoration Hardware distressed and weathered wood furniture finish:

    • using a 3" brush, paint out the pieces in Annie Sloan's Paris Grey. make sure you get in all the cracks and crevices. you'll note that this piece is similar to a bead board, so there are lots of nooks and crannies. let dry.

    MinWax water based gray stain and Old English dark stain

    • using a mixture of MinWax water-based gray and dark Old English, brush on liberally on top of the Paris Gray. after a minute or so, wipe the mixture off with a rag, but don't wipe off 100% evenly. you want some of the pseudo-glaze to stick to the paint, creating some depth on the furniture. because this is a water-based stain, it's translucent and allows you to see the wood below it. the dark stain mixed in was intended to darken the color a bit.

    MinWax water based gray stain and Old English dark stain mixture without flash

    in this experiment, i used about 1/4 cup MinWax, and 8 drops of the Old English. the above shot is taken without a flash and it looks more gray/brown. be sure you use the same mixture if you're remixing for additional pieces so that you achieve the same consistency and colors as you go.

    MinWax water based gray stain and Old English dark stain mixture with flash

    in the above shot, i used the flash so that you could see that this glaze had more of a blue-ish gray hue.

    • go over all the pieces using a 220 grit sandpaper…very lightly, with the grain. play around with the pressure. i was trying to achieve a pseudo wood grain look, so kept my pressure very light to accomplish the right look without removing too much of the chalk paint.

    Annie Sloan dark wax, gloves and old rag

    • then i brought out the Annie Sloan dark wax, my trusty gloves, and some soft rags. i generously applied the dark wax as i wanted a darker wood look.

    Restoration Hardware furniture refinish with Annie Sloan Chalk Paint

    what you'll notice about using the Annie Sloan dark wax is that you sometimes notice the brush marks. see in the above picture at the bottom center of the headboard? you see a dark area butted up against a lighter area. i've noticed this happens with AS wax… but never fear! the product is so malleable that you can buff it out and even out the look with some #0000 steel wool and elbow grease. that's right…get those arms in shape by buffing and making the wax more even across your piece.

    getting the Restoration Hardware distressed wood look after 1st coat of Annie Sloan dark wax

    see how i was able to get rid of the sharp contrast between the dark and light areas on the headboard? fancy.

    getting Restoration Hardware distressed wood finish close up headboard pre-0000 steel wool
    getting Restoration Hardware distressed wood finish close up headboard

    i LOVE how this piece turned out.

    Restoration Hardware-inspired big boy room
    close-up of Restoration Hardware knock-off bed footboard
    close-up of Restoration Hardware knock-off bed
    close-up of Restoration Hardware knock-off headboard
    Restoration Hardware-inspired big boy room
    IMG_2369

    thanks for reading!

    imeeshu.com

    ---------------------------------------------------------------------------------------------------
    Thanks again Meesh! And make sure you check back tomorrow for the reveal of the Grand Prize Round Projects!! You're going to flip over them!!

    jess
    Monica
  • Patio Furniture Update on a Budget! {and a giveaway}

    Patio Furniture Update on a Budget! {and a giveaway}

    The weather is finally warming up and I feel like summer is right around the corner! I thought I'd invite you over to my awesome yard and beautiful patio furniture! Doesn't it look welcoming and just scream, let's drink some lemonade?

    table before

    Oh, and how rude of me, I need to offer you a comfy seat!

    IMG_0345

    No… you don't want to come? You don't want to get rust all over your clothes? Hmm…
    Okay, so clearly I had two choices… buy a new set or figure out an update on a budget. You may or may not know that I have a BIG project up my sleeve (a new paver patio coming soon!) so I didn't want to spend much $$$ on the table and chairs. I turned to my go-to solution… Spray Paint! Looking a wee bit more inviting wouldn't you say?

    table after

    Here's how the transformation happened… First, I removed the legs of the table. Not sure it was ever meant to come off, but after removing some screws and jiggling it a bit we had it off. This would allow me to paint the base and not the underside of the glass.

    IMG_0359

    Next, I needed to cover the glass top, so it didn't turn red. I turned to Scotch Blue painter's tape. If I have a job where I need the tape to really stick well, but NOT pull off paint, I use Scotch Blue. I had to use little pieces to get around the curves, but it was worth it to get a nice, crisp edge.

    IMG_0347

    Then, I needed to cover up the glass in the middle, so I took trash bags, cut them along the seams so I could flatten them out.

    IMG_0351

    Then, I tape it down on the table. I had some weird open areas, so I patched holes with scrap paper. It looks pretty fancy doesn't it?

    IMG_0353

    I painted it on a sheet, so I didn't make my grass red (not that I haven't done that 100 times before)

    IMG_0364

    Since I knew this furniture was going to take a beating, I opted for Valspar's Outdoor spray paint.

    IMG_0360

    The improvement was instant! I was so excited as soon as the base was started!

    IMG_0361

    Next, came the chairs, and again it was instant improvement! I used a little steel wool on really rusty spots, but other than that didn't do any other prep. It was really quick and simple!

    DSC_0333

    I originally thought I'd go with solid grey cushions, but these striped ones from Target's spring line caught my eye ($12 each). They're a perfect match!

    DSC_0021-001

    This Before and After makes me happy (and apparently my chairs too!)

    Before after chairs

    All ready for a fun get together! Now let's play I SPY… what's missing in this picture? Yup, 5 more cushions. They're still"In Transit" from Target.

    DSC_0006-001

    The total cost for this project was $30. I used 2 cans of red and 5 cans of blue. I know it won't last for five years or anything, but I'll definitely get another year or two out of them.
    I've learned something from this experience… if you own nice outdoor furniture, cover it up in really bad weather. So that you don't have to learn the hard way, like I did, we're giving away a $75 Gift Certificate to Empire Patio Covers They sell covers to fit everything from tables and chairs, to grills, fire pits, etc. My fire pit always got rusty without a cover.

    To Enter: Comment on this post with the words"Empire Patio" Bonus Entry: Like us on Facebook leave a comment letting us know Bonus Entry: Visit Empire Patio and tell us in another comment what product you need the most on their site Giveaway Closes: Friday, May 18th at 11:59pm. Winner will be announced on Saturday. Details: One winner. Prize ships to the US and Canada. One entry per email address. Winner is selected through random.org

    spray paint chairs

    So there you have it. A patio update on a tiny budget. For $30, I couldn't be happier with the results.
    So, now do you want to come over?

    Follow Me on Pinterest
  • Custom Kids' Picnic Table {Knock It Off DIY Project}

    Custom Kids' Picnic Table {Knock It Off DIY Project}

    Kid-size furniture is often really pricey and hard to find. We solved these problems by building our own for under $100!

    There are some crazy, talented people out there in blogland, and so when we saw the homeowner's inspiration picture of this table built by Shaunna and her husband of Perfectly Imperfect blog, we were sold.


    Here's how to build your own: 1. Decide on your furniture plans. You can find loads of free plans on the internet, but our go-to source for awesome, inexpensive plans is Ana White. For this table, we started with this basic tutorial, but altered it to fit our room and style preference. Visit your hardware store and purchase your materials. You really could use any type of wood you want, but we decided to use inexpensive pine to keep cost down and because it distresses nicely- which let’s be honest, is pretty key if four crazy kids are using it on a regular basis!!

    2. Assemble the legs of the table. This step is really important- you want to get them as square as possible so that the table is nice and sturdy! We decided to do A-frame legs to resemble a true picnic table, but just like our inspiration photo, added a shelf for lots of extra storage!


    3. After attaching the lower shelf, trim it out for a nice, finished look. Achieving the high-end custom look means taking the time to add some polished details, like trim! This is the stuff you just can’t skimp on! 4. Create an apron and attach it to the legs. This gave us a strong base to attach our table top to. Your table should definitely look like a table now!


    5. Build the top of your table and attach it to the apron, screwing in from the under side, which ensures a seamless look for the top. For our table top, we used two pieces of pine that we sanded really well and attached tightly together.


    6. Time to put on the finishing touches! Make sure that all surfaces are nice and smooth before painting or staining. We chose to do a combination of stains, Walnut and Grey, for a custom stain on the top of our table. Don’t be afraid to mix stains to create the perfect finish! Then we painted the legs white, and sealed the top with two coats of polyurethane and we were done!

    7. This table is fabulous and ready to be used over and over again by Shannon and Anthony's four busy kids!

    A custom table can really make the entire room. We've actually made a few other tables that were super simple and saved us tons of money!
    Farmhouse Table Remix

    Barnwood Coffee Table

    Building furniture might seem intimidating, but trust us, if we can do it, so can you! Just be sure to follow the directions closely and take your time. You'll be so happy you did…and so will your wallet!

    jess
    Monica
  • The New Gray?

    The New Gray?

    Photo Simon Upton
    Suddenly I've got this thing for black furniture and it's all Darryl Carter's fault, once I saw this picture I was intrigued. I love how the black pops against all the white really making the furniture a statement and brings out the clean lines. Less seems to be more!

    voila!
    Then I saw this beautiful black bench on 1st Dibs and kept thinking how stunning it would look in an entryway. Before I knew it everything kept coming up black, so I'm now wondering is black the new gray?

    Cote de Texas
    It wasn't just furniture I was seeing in black but doors as in Joni Webb's home from Cote de Texas. Kitchens and whole rooms were taking on a whole new meaning of sophistication and seductiveness.

    House Beautiful

    House Beautiful
    I love how all the white ironstone pops in this beautiful cupboard, it looks so elegant.

    House Beautiful
    Black and white can look very classic, timeless, the walls almost seem to float.

    Tate Gunnerson

    Design Sponge
    A splash of bright bold color can keep a room from feeling to stark and adds a touch of playfulness.

    Design Sponge

    lonny mag

    http://www.melanieacevedo.com/
    So my questions are to you, is black becoming the new gray? Could you make a bold statement such as this and paint a room black? I don't think I could paint a whole room black but I'm certainly going to try it out on an interior door this weekend thanks to Joni at Cote de Texas. Baby steps for me, how about you?

  • IKEA Hack- Custom Built-in Shelves {Knock It Off DIY Project}

    IKEA Hack- Custom Built-in Shelves {Knock It Off DIY Project}

    High end built-ins can cost a fortune, but by using existing pieces of furniture as our framework, we were able to Knock-Off an awesome look at a fraction of the cost! This one project really made this makeover complete- without it, we're pretty sure the room would be a little blah.

    To begin, use store bought cube units as your base for the bench seat- you can get these at many stores now, the only think to make sure of is that they’re pretty heavy duty- we don’t want a flimsy bench now do we?!? Ours are the Expedit cubes from Ikea.

    Connect the cube units together to make one long bench seat. We just used a drill and a few long screws to do this.

    On either side of the cube unit, add two store bought bookshelves (you can find the ones we used here). The height will depend on your ceilings and if you want them to go all the way up. Use a drill and heavy duty screws to connect the sides of your shelves to the cube unit. Don’t worry about things matching up perfectly or seeing gaps- moulding covers a multitude of sins!
    Add trim moulding anywhere that the pieces of furniture meet and crown molding around the top of the bookshelves. We actually used two types of moulding stacked on top of a box that we added to increase the height of the bookcase. Moulding is where we’re getting our high end look! Don’t forget to use a miter saw with 45 degree angles.

    Add pillows and cushions to the seat, accessorize those shelves and you’ve just successfully knocked off high end built ins! Seriously impressive, right?

    We love a good Ikea hack…check out this one from Jess' living room:
    Ikea Lack Ottoman

    Never think that store-bought furniture can't be changed. We always look for possibilities to customize things, no matter where we are!

    jess
    Monica
  • Seating Pleasure...

    Seating Pleasure...

    Every year I like to wander about my home and see what it's lacking or needs in the form of furniture and accessories. Over the holidays I noticed I definitely need more lighting but for a couple of years now I've been coveting a Swedish settee.

    image from An Angel at my Table
    They look amazing in pairs, love this image with the dark burlap dress forms. But an antique settee, even a reproduction can cost in the thousands. And to be honest a Swedish settee wouldn't really go well with my other furniture in my home but it would in my studio.

    Painted French sofa from A. Tyner Antiques
    At first I was considering a solid back settee to use in my studio for photography but then I started seriously looking around.

    Reproduction settee from French Garden House

    circa 1900 Gustavian style settee from Alhambra Antiques

    rare, small settee, circa 1850, Cupboards & Roses Swedish Antiques
    I love this small settee at only 52" long, they're typically 70" plus in length but you pay for that smaller rare size. Love the faces on the arms.

    image from I Vassalletti
    This settee has a solid back with open arms

    circa 1810 gray painted settee from Judy Frankel Antiques
    Then I discovered the gray painted settee's with the burlap seat cushions and fell in love! But I'm a tad worried it might be to matchy with my French chair below.

    My French 19th century Louis XVI style cane armchair
    The similarity you often see between French and Swedish furniture came from the Swedes traveling to France and soaking up the styles of Louis in 1770 at Versailles.
    So what's your opinion, do you think an open back settee is too matchy for my chair? What's your favorite style of Swedish settee?

  • Nate Berkus Show {Our Farewell Episode}

    Nate Berkus Show {Our Farewell Episode}

    Hey! If you're new around here- welcome! We're super glad you found us and we hope you'll stick around a while. Use the icons on the right to take the plunge and follow us. We love all things DIY and we'd love to share our projects with you!
    -Monica & Jess ********************************************************************************
    What a bittersweet day… we’re so excited that our fourth episode airs today, but we’re also bummed that our crazy Nate Show journey is coming to an end. It has been such an amazing ride! If you’ve missed any of our episodes, you can check out some clips here.
    Since we spent a good amount of time in the studio this year, we really had a lot of work to do behind the scenes.

    collage 1

    Haha! Kidding! We totally snuck these pictures in the control room when we were waiting for our mics. Yup, we’re dorks. Want to know the funniest thing ever? When we were taking these, there was another woman waiting to go on for her segment. We didn’t know until she was on that it was Christiane Lemieux, the founder of Dwell Studios! We LOVE Dwell! Can you imagine us taking these pictures while she was watching. OMW we’re Dorks!
    Thrift a $250 room that looks like a Million bucks! This time Nate gave us a seriously tough challenge. $250 to design an entire room including furniture is insane! We never could have done it without an awesome thrift store. Liberty Thrift is a personal favorite and they have 5 locations in PA. We love the mission behind Liberty and it makes shopping there even better! They’re our newest blog sponsor, so if you’re in the area, go and check out one of their stores! Since you’ll get to see the finished product on the show, we’re going to highlight just a few of our favorite projects this week. We don’t have a ton of process pictures, because it was about 19 degrees in our work area and we were so tight on time, but we’ll try and give you the main gist. Here’s all the furniture pre-DIY… oh man it was in rough shape!

    DSC_0432

    Our very favorite piece in the room was the Navy buffet. Something we love to do is to look at a piece of furniture and think of what we could turn it into. The minute I saw this dresser, I envisioned it as a fabulous buffet! When you’re working with thrifted pieces, don’t be afraid to try something a wee bit daring, the worst thing you can do is ruin it and have to head back to the thrift store to try again! Here’s the pretty darn dramatic before and after…

    dresser b a

    We don’t have process pics, but we do have some process video outtakes! WARNING: These are totally unedited and really goofy, but we’re all about keeping it Real and this lets you see just how the navy beauty came to be!
    Step 1- The Game Plan!
    Step 2- TV makes it seem easy!
    Step 3- To Mold or not to Mold?
    Step 4- Oops Still looks like a Dresser!
    So you're getting the idea right? Good, because we don't have any more process shots! This picture shows all the changes we made. Isn't she pretty? We both were sooo thrilled with her makeover!

    Now, when you go thrifting you can look at the rows and rows of dressers in a whole new light! And now, here's the cheesy End of the Night recap from day 2!
    Tomorrow Jess is going to show you how two DIYers that have never upholstered a thing in their lives, decided to tackle a chair for Nate! We're crazy!
    We hope you had fun watching our final episode, let us know what you thought of the room!

    jess
    Monica

    *** If you're wondering about the amazing stencil we used for our wall art, you can get it here. We love Royal Design Studios and their stencils are by far the best! *** >Linking up to: TT&J, Sundae Scoop, Sunday Showcase, Saturday Night Special, Show & Tell Saturday,

  • Design Icons {of the Blogosphere}

    Design Icons {of the Blogosphere}

    It is absolutely unbelieveable how many amazing, talented and creative women there are out there. We spends loads of time reading our favorite design blogs which inspire us to create beauty in our homes, and so, every month once in awhile when we feel like it, we'll be featuring the homes of bloggers that we love-our

    Design Icons of the Blogosphere!

    Source: ourvintagehomelove.blogspot.com via Jessica on Pinterest

    Up first: my personal favorite, Our Vintage Home Love. Diana has captured the exact feel I want for my house, in her adorable home. She has such an amazing sense of style, and her house exudes calm. Not only is Diana super-stylish, but girl knows her way around a toolbox. She's built several pieces of furniture that I secretly covet really admire, like the Rustic Island she built for her kitchen, the barn door-turned-headboard for her master bedroom, and the salvaged wood shelving unit custom-made for her hubby. No joking- Diana has some serious skills.

    So, without further ado, let's take a little tour of her lovely home:

    Source: ourvintagehomelove.blogspot.com via Jessica on Pinterest
    If that doesn't say,"Welcome. Come sit awhile", I don't know what else would.

    Source: ourvintagehomelove.blogspot.com via Jessica on Pinterest
    Diana painted stripes in neutral colors on her side porch, which are so cute. Genius!

    Source: ourvintagehomelove.blogspot.com via Jessica on Pinterest
    I love Diana's use of textures in her house- lots of khakis and whites in the furniture and wall colors, woven baskets, warm wood tones and great, meaningful accessories complete the look.

    Source: ourvintagehomelove.blogspot.com via Jessica on Pinterest

    Source: ourvintagehomelove.blogspot.com via Jessica on Pinterest
    Aren't those floors to die for? I love the rich color. I'm guessing they're original to the house, which was built in 1905! And do you notice that vintage ladder over there in the corner? Does it remind you at all of my bathroom ladder? (Truth be told, Diana's ladder was the first of many to inspire me to get one of my own!)

    Source: ourvintagehomelove.blogspot.com via Jessica on Pinterest
    Her kitchen is so light and airy. I totally feel like you could walk in there and take a deep breath and poof!- there goes your stress. Yup, that's the kitchen island she built. Impressive, huh?

    Source: ourvintagehomelove.blogspot.com via Jessica on Pinterest
    Her master bedroom features the authentic barn wood headboard. I mean, really, couldn't you envision that door on a barn somewhere? Nope, she built it. Jealous much?

    Source: ourvintagehomelove.blogspot.com via Jessica on Pinterest
    Her den was a labor of love for her husband. She wanted a place he could relax that included items that were important to him.Sheesh- talented and thoughtful? Making me look bad, here, Diana. By the way, I LOVE the pop of red on the pillows.
    So, that's it. I think I'm in love. Head on over to Our Vintage Home Love and leave Diana a happy comment. Let her know we sent you.: )

    Who is your design icon?