My Creative Blog [Search results for Barnwood]
Hello World

DIY Barnwood Shelves

Barnwood Artwork

Top 11 Projects of 2011 {Jess' Recap}

Modern Typography Meets Reclaimed Barnwood

The Bench

DIY Barn Meets Beach Coffee Table

Wooden Memo Board
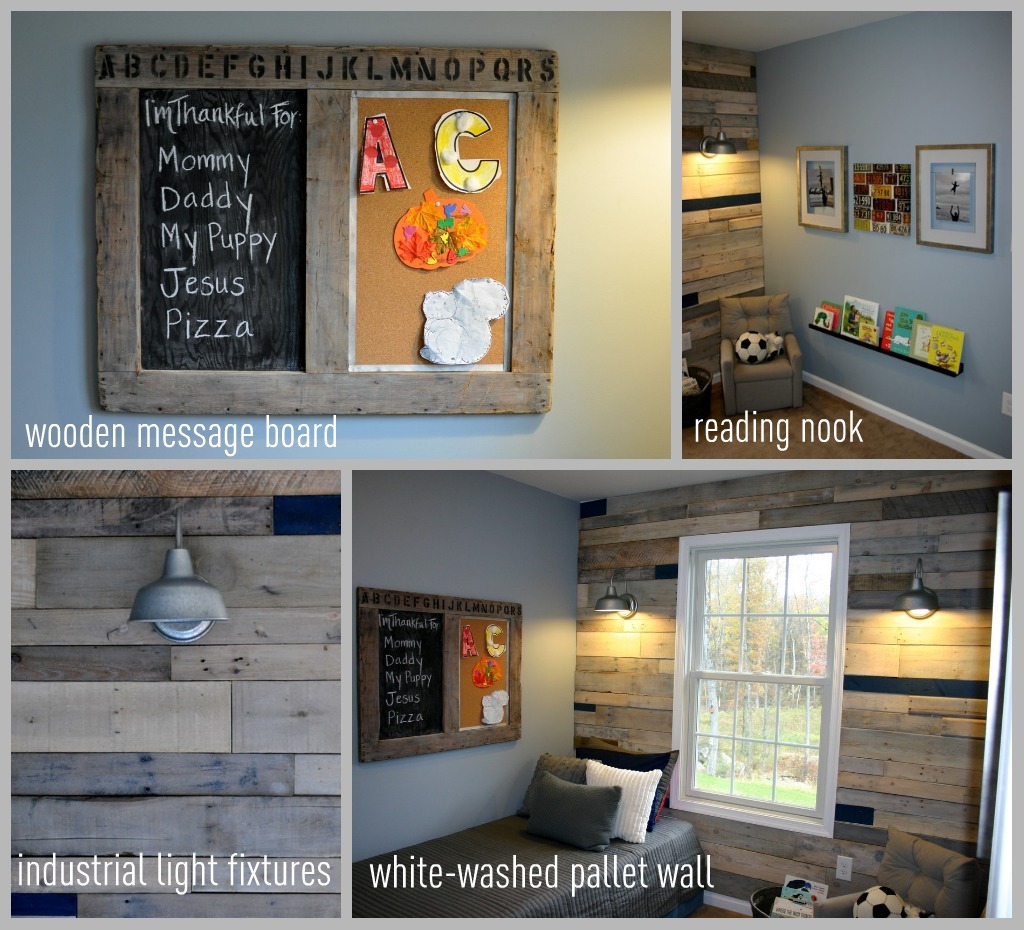
Pallet Possibilities {How to Build a Wooden Pallet Wall}

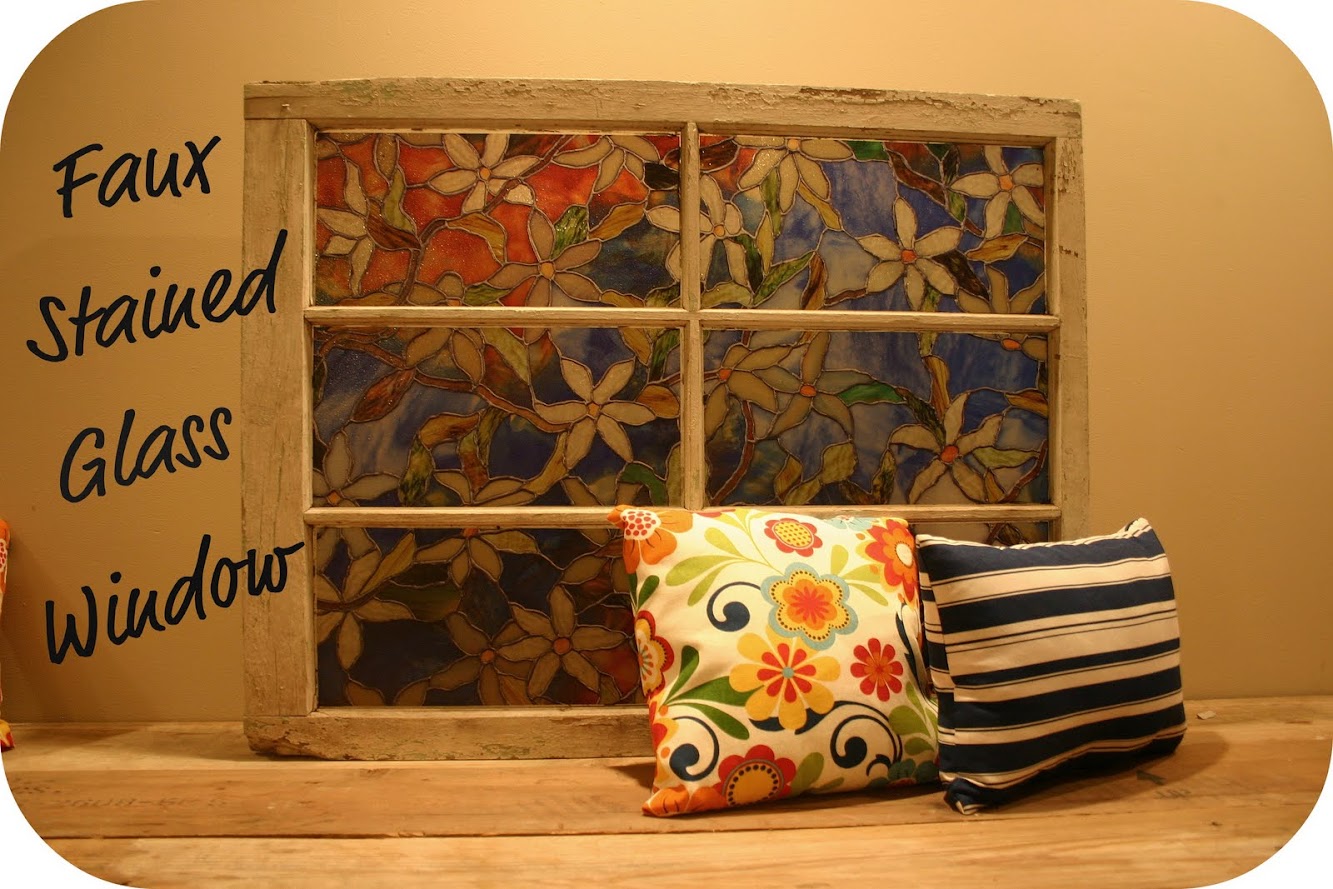
Faux Stained Glass Window {Tutorial}
Blogging 2 Better Summer Challenge

Custom Kids' Picnic Table {Knock It Off DIY Project}

Fab Find Friday

The Countdown is On! {CWTS 2013}

Why We Need Insurance {Strickler Insurance}

Thanksgiving Scramble
Moving Right Along {Bathroom Redesign}
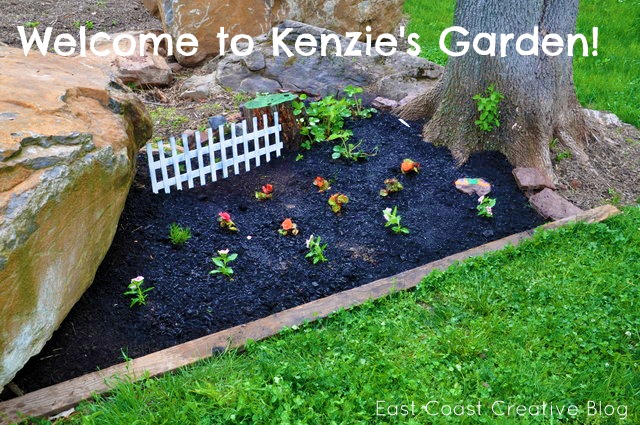
Gardening for Kids {Kenzie's Garden}
Design ADD

Striped Shore Frame
