This project is an oldie, but a goodie. We realized that we never posted about the amazing coffee table that Monica made for our first Nate Show, and that we now have listed for sale in our Etsy shop. We like to call this little beauty, our Barn meets Beach Coffee Table.

Luckily for us, my father-in-law supplies us with amazing barn wood from his barn in PA. but don't worry! We'll show you how to recreate that look if you don't happen to have piles of reclaimed wood laying around. Stop what you're thinking right now! We are NOT crazy, you just never know when a project might call for wood. Ha!

Are you ready for the DIY trick that makes this project sooooo easy? The base of our table is made of two adirondack tables! No extra assembly required, which, let's face it, is exactly what we like about this project! I bought ours for $12 each from Home Depot during an after-season sale (right now they're $29, but if you wait, they'll come down!), and had them laying around in my garage for when inspiration hit. (You should have seen the hoarding going on in our garages, just in case we needed something to impress Nate! )

We started by priming just the legs of the tables (you won't see the table tops once the barnwood top goes on) with Rustoleum's Ultra Cover in Gray.

We love the color of the primer so much that we often use it alone (true story: I have four frames in my basement that are painted with this primer!), but this table was going in my nautical/cottage style basement, so we went with a Valspar Spraypaint in Navy.

While the paint was curing, we got started on building our table top. We laid our wood down so we could move it around until we figured out the perfect arrangement. Isn't barn wood gorgeous?! Confession: the actual table top in the picture above was already assembled when my dad-in-law found it in his barn! All Monica had to do was place it on top of the adirondack tables she painted. How's that for good luck?! But since then, we've made them to sell, and follow this method for a very close match.

We measured 44 inches long and 33 inches wide, made marks, and cut the wood with a circular saw (you can use a chop saw, if you have one).

You may have noticed that our table has beautiful blue tones, and we can't take any credit for it because only years and the elements can create that, but we can fake that look pretty darn well, if you ask us.

So here's the break-down: We used a very dry brush to paint Benjamin Moore's Beach Glass on the wood. The key here is not to cover up all of the wood, just brush it on randomly. We are not aiming for perfect coverage here! Then, we wiped on Valspar's Translucent Color Glaze in Mocha, focusing on the cracks, bumps and holes in the wood. Let it sit for a few minutes and then wipe it away. Sand down any thick paint spots and then brush on one coat of a water-based polyurethane. We recommend water-based because it seals the wood (so a glass with condensation left on it won't ruin it!) and because it doesn't alter the color of the wood. Oh yeah, do the same treatment on the edges too, because they'll be visible!

Ta-da!

Just to prove it to you, here's the faux-barnwood next to the real thing:
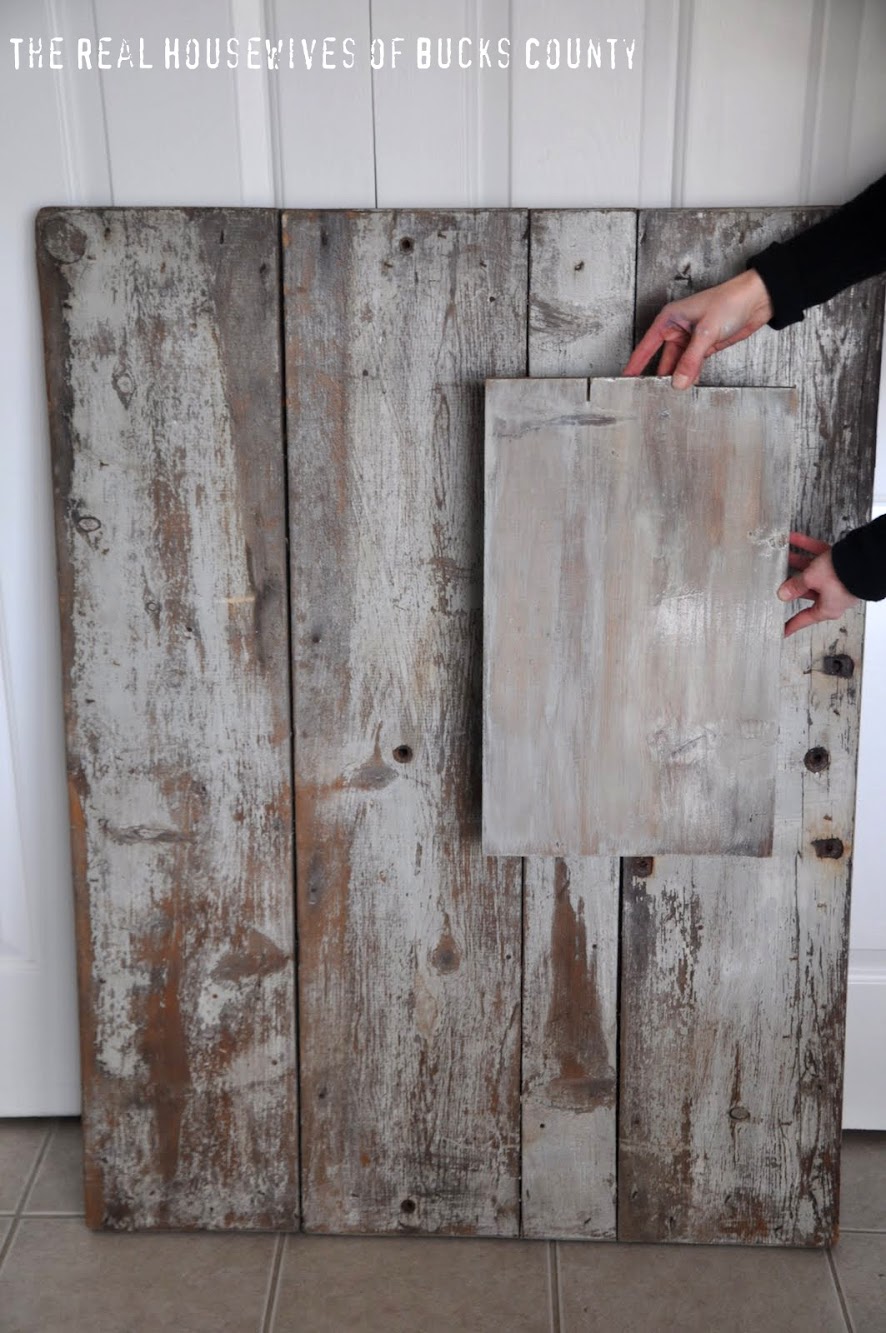
Pretty close, wouldn't you say? We wanted it to look a bit more polished, but if you want a more rustic look, you can sand it down even more to reveal the wood beneath.
To build the support frame underneath, we took four 1x2's and cut them to size. The two end pieces were 33 inches, and the long sides were approximately 40 inches (make sure the ends butt up against each other.) Lay the boards face down and then place your support pieces along the edges and nail into place. Grab a friend to help with this because you want all the edges to be aligned, and the boards to stay in place.

We also added two bigger boards in the center as an extra support, and so it rests evenly on the adirondack tables.

Once the top is done, flip it over and place it squarely on top of the adirondack tables. If you want, you can screw the adirondack tables into the barnwood top, but we skipped this step! I loved being able to switch things up if I want, or create open space if I need it by folding up the adirondack tables and hiding the top!: ) This beaut is now residing in my basement and I couldn't love it any more than I do!

We're hoping this table inspires you to bring a little barn wood into your homes!

Linking up to: TT&J, Sundae Scoop, Sunday Showcase, Saturday Night Special, Show & Tell Saturday,