Good morning, everyone! Before we get into today's post, stop everything and GO VOTE if you haven't already! The ladies did not disappoint with their Round 1 Projects. You just have to see the creative upcycle projects they came up with. These contestants and their stars are gunning for amazing prizes and they need your help to get there! Upcycling is kind of one of our favorite things to do. Last year for the contest, we turned an ugly, beat-up antique table into this:
Now that that's out of the way, it's time to check out our upcycle project this week. We have to say that it feels quite lovely to get to do the projects without all that extra pressure. We just get to do projects that we've been wanting to do in our homes! So, here we go!
Isn't that so fun? Unfortunately, the lighting in our basement is atrocious and my limited photography skills don't do this space justice. It's so cute and fits right in with the nautical basement makeover Monica gave me during our first Nate Show episode. We were originally going to use this door as a headboard in our Superfab Guestroom Makeover, but it just didn't work in the space.This door is over a hundred years old and has a beautiful, chippy, blue-green patina. It's been sitting in my garage waiting for it's new home and it finally found it! I could not believe that this door fit so perfectly in the nook under the stairs. It was most definitely meant to be!
This was a super-simple upcycle. We already had one filing cabinet on hand, and purchased another at Walmart for only $30. My hubs and I painted both with Valspar Paint + Primer in Beach Glass (a Benjamin Moore color we had color-matched).
The new filing cabinet was an inch shorter than our existing cabinet so Kevin built a base for it using leftover wood from our stash.
Once the filing cabinet was placed on the base, you don't even notice the difference!
We placed the door on top of the filing cabinets and might eventually *wink* actually screw it in to the cabinets, but for now it rests securely right on top. I couldn't stand the thought of making any holes in that gorgeous door.
I love that it blends so perfectly with the nautical lounge behind it!
Let's take a peek at the dramatic before and after, shall we?
Woohoo! That's quite the difference and I'm really happy with it.: ) -------------------------------------------------------------------------------------------------------------------------- Now it's YOUR turn! We are so excited to see what you guys have come up with!
The winner will receive an awesome prize package from Belmonili and Perfectly Imperfect Shop, and we promise you're going to love it! This link party will be open until Friday, March 15th at 10 PM EST. Monica and I are going to be choosing our absolute favorite upcycle project and revealing the tutorial for it on Sunday! If you win this week, we'll be contacting you sometime on Friday for the tutorial, so be ready! Please remember a few things before linking up: 1. Like us on facebook!
2. Make sure you link back to us in your post. Only those linking back will be eligible for the prize! 3. Only one submission per person. 4. Choose a project that you've done in the last 12 months. Ok, let's see what you've got!
Voting is closed! To see the winners of Round 1,click here. Check back next Monday, March 18th for Round 2 projects and voting! --------------------------------------------------------------------------------------------------------------------------
Welcome to Creating with the Stars 2013! Let the contest officially begin! This season of CWTS is going to be Epic and these Round 1 projects are a clear indication of the insane talent of these contestants! Just a few reminders before we get to the voting… Round 1 Challenge:
Round 1 Prize Package: We have the Best Sponsors for CWTS2013 and here's a reminder of what our Contestants are playing for this week… $50 worth of 31 Gifts products $60 worth of Twysted Yarn products $70 of Henle Headbands products $100 Blog Re-design from 733 Design (who designed all the CWTS logos!) Project featured by HomeTalk We also want to thank Homes.com for being the Official Grand Sponsor of Creating with the Stars!
Without Further Ado… In No Particular Order, Here are the Round 1 Projects…#1- Dresser Turned Modern Sandbox This dresser had no hope. It was in extremely poor shape. I mostly bought it for the legs, but after learning I was in CWTS, I thought I could do something with it. I decided to turn it into a sandbox filled with sand and dirt. What kid does not like sand or dirt?! The issue I have with sand tables is how much of an eye sore they can be. After cutting off an entire level of drawers that brought it down to kid/side table height, I placed sand and dirt inside the top two drawers. When guests come over, I simply place the dresser's top back on covering up the dirt and sand. It is an easy solution that is modern and stylish. Using a friendly exterior paint protects the furniture from the elements. Placing the dresser top on when not in use protects the sand and dirt. The two bottom drawers are functional and can be used for outdoor storage like small plant pots, garden tools, and kid toys. I used a couple of rabbit knobs for fun and green paint for a punch of color.
#2- Little League Lounger I love taking old, crappy stuff and turning it into something that I will actually use! I found an ugly outdoor folding chair at my local thrift store, and knew it would be perfect for my upcycle project. Now, I have a completely re-done"little league lounger" to use at all my boys' baseball games this summer!
Here's what the chair looked like before I worked my magic:
I added all new cream-colored webbing {with a navy pin stripe}, updated the arm rests by re-purposing an old wooden baseball bat, and made a baseball stitch pillow from an old table runner. I love how it all came together!
I can't wait for baseball season to get started so I can use my new chair!
#3- Floor Board Kitchen Island
I love our kitchen, but I've always wanted a big kitchen island where we could hang out. I wanted to take this unused space in our family room and add a table or counter. I had no idea what to use, but all of a sudden, a light bulb went off in my head. I remembered some old floor boards hidden in the basement rafters. They were dusty and worn and perfect. BAM — perfect for an old rustic island! We washed and sanded the boards, and got to work building our new favorite spot.
Add in some painted stools and we now have a space just off the kitchen that is perfect for parties, eating, hanging out, or working on crafts.
#4- Man Chairs Often the"dreaming up" of a new project can be done in my sleep, literally. But execution can feel like a trip to the dentist, one in which I go in for a routine cleaning and find I need a double root canal. The trick to any DIY project is COMMITMENT. Commit to your goal and don't let up no matter how many coats of paint are applied in vain. These previously drab, brown, faux-leather club chairs were purchased on sale for $12 each at a local thrift shop.
A bit of auto upholstery paint, steal tacks, metal coating paint, a couple patinas for good measure and some tough new casters and this thrift store find is ready for"the man".
#5- Tin Tile Mirror So, I'm still totally in shock that I was chosen to be a part of Creating with the Stars. With the first theme being"Upcycle", I wanted to do something a little different. I hit up a local flea market, hoping to find something that screamed my name, and when I saw these vintage tin ceiling tiles, I knew these were it. The fun color that looks so much like patina, the rust, the texture, the scuffed parts revealing the silvery color underneath. LOVE! They were marked $6 a piece, but I offered her $5, and she accepted. So $40 for all 8. Score!
The next stop was Home Depot for wood, and I built a simple frame. Each tile was approx 12x12, so the finished size is 36x36. Not all of the tile sides matched up when I nailed them in, so I'm going to blame the tiles and say that they're wonky, rather than my measuring (which is probably more true). A little paint matching, painting in the gaps, building a frame for a mirror that I picked up at Michaels, attaching the mirror and frame with some glue, and we're almost done.
I had the perfect spot in my hallway that was just begging for some oomph. For under $60, it's a huge statement piece that fits perfectly. I'm thrilled with how it turned out.
#6- Television Stand Upcycled to a Bar When I saw this ugly, 80’s style television stand at our local Goodwill for a whopping $30, my mind immediately started churning with ideas. I’ve been wanting to set up a bar area in our house, and I knew this would be the perfect piece to turn into a bar. It just needed a little (or, um, a LOT) of love!
I added legs and a little stand at the bottom to make it a bit taller, and gave it a few coats of navy paint (and, of course, a stencil to add some fun). I turned the drawers on either side that used to be used for VHS storage into the perfect place to stash a few bottles. And, since most alcohol bottles are all different sizes and shapes, I poured our frequently used ones into uniform glass bottles that I etched with the name – that way I can be sure the bottles fit and they look pretty to boot!
Finally, for a last little touch, I dipped some of our glasses in gold paint to make things a little more sparkly and fun. I’m so happy with how it turned out and I’m loving the extra storage! I can’t wait to put this thing to good use!
#7- Trash Pile Tire Made Trendy Table Early Saturday morning, still bra-less and in my PJs, I drove to a neighbor's house and hurled an old tire from their curb-side trash pile into the back of my car. My plan for the filthy tire was still foggy… as was my pre-coffee brain, but I was determined to turn it into something cool. After a day of deliberation, trial, and error, I determined side table was to be its fate. Let's get upcycling.
I started by giving the tire a scrub with some dish soap. Next, I tried to figure out what to use for legs. Since this tire still has the (very!) heavy rim attached, I needed something sturdy. After contemplating many possibilities, I decided to cut them out of a piece of pine left in my garage from another project. The legs were stained and attached to a plywood circle I cut for the base. Then, I glued the tire on top of that with construction adhesive, and added a smaller circle to the top of the tire to act as the table top.
I covered the entire tire in rope using Liquid Nails and"dipped" the legs in a bright citrus-ey yellow paint. I'm pretty jazzed with how it came out and can't wait to tell people I have an old tire in my living room. Ha!
#8- Vertical Blinds Headboard Why is it that bedrooms are always the last rooms to get decorated? This room had no artwork, no matching furniture, and a mattress sadly sitting on a cheap bed frame. The only good thing about it was that it was prime for a makeover!
When my parents upgraded their patio doors from vertical blinds to curtains, my mom saved the blinds for me thinking I could “make something with them.” Does this happen to all creative types? But Mom was right, those old vertical blinds were the perfect material to make an over sized woven headboard for the bedroom.
A sleek wooden frame hangs so that the headboard almost reaches our 8 foot ceilings, and two spray painted clamp lights provide adjustable lighting for bedtime reading.
Similar, but smaller, woven headboards can cost over $700, but since I re-purposed my materials, this statement-making headboard cost less than 1/10th that much. No more sad, bland bedroom for us! #9- Bicycle Wheel Clock
There are clocks. And then…there areclocks. There are clocks that tick and tock and ring and jingle and tell time underwater and sound an alarm. And then there are clocks made from a bicycle wheel with yardstick ruler hands perched on a chalkboard surrounded by roman numerals above a table strategically styled with a bicycle seat. That is one fine clock.
And the best part? I got the bicycle wheel for free. Can you even believe it? I walked into a bicycle shop and randomly explained to the resident bike expert that I wanted to make a clock and I needed a cute bike wheel that had preferably been around the block a time or two. Wordlessly he stared at me. I don't really know why. I'm sure they get that request all the time.
And then he went to the back where they keep all the spare wheels for people who come in with clock requests and he handed me this bicycle wheel. I totally wish he could see his wheel now. He'd probably charge me for it.: )
#10 Statement Piece Light Fixture
Walking through Habitat ReStore, I spotted a few egg crate diffusers — you know those grates that cover fluorescent lights in basements across the country. It's the last lighting fixture I would consider for a project but once I got around my thoughts of drop ceilings, I began thinking how neat it would be to use the grid to create any square cornered geometric shape that I wanted. At $2 each, what could I lose?
Browsing Pinterest I found this amazing light and fell in love with the arms. It's lines are simple, but make a big impact! Perfect for a statement piece! The egg crate diffuser was cut into the shape of the arms, filled with plaster of paris, sanded and painted. So that the wiring and housing wouldn't compete with the outer arms, I made a simple fixture out of metal tubing, PVC plumbing parts, and a few parts from an existing chandelier. After wiring it (and being elated that it worked!) I installed trim on the ceiling to frame the chandelier, and added a little more interest by painting alternating stripes in ivory and a light gray. Finally, I installed a gallery wall with a few fun pieces!
From a designer's nightmare to an energetic statement piece, this diffuser has come a long way! #11- Lab Station Turned Dining Room Buffet
servin' it up old school… The story of how a lonely old science lab station gained new life as an industrial-style dining room buffet. Once upon a time…on an unusually warm and sunny spring day, I was leisurely browsing a flea market when I spotted this piece and was immediately drawn to it…the color, the rust & patina, it's industrial style, and the fact that it was old and had great visual evidence of it's previous life--lots of it. As I looked closely at the butcher-block top complete with bunsen burner stains, student-carvings (i.e."jennie-loves-alex") and distress-marks galore, I knew that I had to have it--for something, but what that something was, wasn't clear to me at the time. We just had"chemistry"--I could feel it.; ) Luckily, the kind gentleman who I was buying this (very heavy) treasure from was willing to help me get it into my truck…and let me tell you: it. weighs. a. ton. Chapter Two: Fast forward to Project One CWTS: Upcycle. I knew instantly that this sad science lab station was about to have a major career change. I tossed around a few ideas, but pretty quickly decided it would be a fabulous, industrial-style dining room buffet. The hardest part was this: while I love the"vintage-industrial-rusty-patina" look and eagerly welcome it into my house, this was looking a bit too"raw" for my dining room. Well, try googling"how to tone down rust on metal, yet keep just the right amount of color and patina". If there is a tutorial for this…I didn't find it!
Chapter Three: So, I did a little DIY-science-experimenting and discovered a technique to get just the look I was hoping for. After this process I added the casters, the door knobs, stenciled on the quote and stained the butcher-block top. Add some wine, grapes, cheese…and this"new" buffet is all ready to help you eat, drink and be merry.; )
…and she lived happily ever after in my dining room.
#12-From Frumpy to On Fire, Fireplace! When I was told that the first week of Creating With the Stars theme was upcycle I was over the moon excited. Upcycling is my thing. It’s where I get my groove on. And so, it wasn’t a matter of finding something to upcycle; it was a matter of deciding which thing to upcycle. So, I took a tour of my house and gazed at all of the items that needed some good loving. And then, I sat and thought about what I wanted in my home. And, it came to me. Hmm… could I? Would it be possible? Yes… yes, it could!!
I’ve wanted a fireplace forever and ever. Okay, that’s an exaggeration. But, you get the gist. And, while this fireplace/bookcase might not be the real thing it fits the bill quite nicely. I was able to create my “fireplace” from an old bookcase that was sitting in my laundry room, a mirror frame that was on it’s way to the trash, and an antique footboard that had lost it’s headboard (poor thing). The bookcase is the most important element; the mirror and footboard helped create awesome and turn the bookcase/fireplace into something spectacular.
I cut the footboard down to size and used it as the “mantel” as well as give the fireplace/bookcase a skirt at the bottom. Scrapbooking chipboard embellishments gilded, painted, and antiqued look like beautiful wood cutouts on the mantel. The trim on the sides of the fireplace/bookcase are pieces of the mirror cut down to size. A chimney that runs the length of my 12 foot wall was created with a simple frame covered in tin. The back of the bookcase was covered in that same tin for added charm. I must say this project exceeded my expectations and far surpassed the image of awesome I had for this project when I started out. I love walking into my home and seeing this and am so pleased waiting forever and ever is over!
Can You Believe That Talent? It's Time to Vote!You can only vote one time, but you can vote for your favorite 3 projects.Before voting, please LIKE EC2 on Facebook. Thanks! If you're having trouble viewing the voting box, click HERE to vote. Don't forget that tomorrow it's your turn to link up your own upcycle project!Thanks for playing along!!
If you missed it, last week we had the chance to complete a 30 minute White Box Challenge in front of 450 women! It was so much fun and pushed our DIY skills to the max- 30 mins feels like 2 seconds when you're working on an entire space! Here's the before and after- to see the full post about the challenge, click HERE.
Throughout the evening, we upcycled and hacked our way to a completed room, but there are so many other great ideas for these inexpensive pieces, that we just had to share! So get ready for… 25+ Upcycles and Ikea hacks!
First up… the Ikea LACK side table. The Lack table is a DIYers dream because the options are endless!
Here are 3 of our favs… (Click on the number to see each full post from the source) 1…2…3…
At the event, we turned ours into a tufted ottoman! (Tutorial coming later this week!)
We LOVE the Ikea Rast dresser because it's under 40 bucks!
How fabulous are these hacks? 1…2…3…
We combined two Rast dressers, added new hardware, some metal detailing and had ourselves an awesome buffet!
Here's a generic accent chair. Ikea has lots of different styles, but left alone, they're pretty plain…
These chairs went from drab to fab with a little DIYing. 1…2…3…
We paint dipped the legs a bold orange and added gold nail heads to add a punch of style!
Rugs can be expensive! One of our favorite places to get them cheaply is RugsUSA.com, but another way is to buy a cheap outdoor rug and paint it yourself! This one was $19.99 at Home Depot!
It's amazing what a little paint can do! 1…2…3…
We added wide stripes to our rug for the white box, but in our hurry to get the room done, I may or may not have walked across the wet paint! Oops! No pics for you!
Okay, isn't this creepy art awesome?? Well, you might not have something this creepo, but you can score great art at thrift stores or upcycle a piece you already own!
Each of these projects use paint to tone down the"creepy art" factor! 1…2…3…
Here's what we did with our blah artwork…
Target and Walmart sell book shelves so inexpensively! The problem… they look inexpensive!
How about these ideas for fancying up your shelves? We love every hack Kate from Centsational Girl has ever done! 1…2…3…
Almost everyone has a dated lamp around the house- and if you don't you can get one any Saturday at a local yard sale!
Here are three fun ways to spruce up those dated lamps. 1…2…3…
For ours, we replaced the shade, added some ribbon, and spray painted the base.
Pictures of family and friends are awesome, but here are some outside the box ideas for your extra frames!
I'm a huge fan of what Lindsay did with her open frames! 1…2…3…
And what would a post on upcycles be without mentioning pallets? 2012 and 2013 were the years of the pallets!!
Here's a variety of ideas from walls, to plants… 1…2…3…
We used a pallet to make a simple shelf- unfortunately, we didn't bring any mags, so in 30 minutes… scrap paper and Bibles it was! lol!
So that should leave you on Upcycle and Hack overload!! Have you ever DIYed any of these items before? Do tell!!
As you all know, my hubs and I have been DIYing a 600 square foot patio. It's been a huge job, but it's 99% done and we're loving it! (We've even put on an addition, but our lights were back ordered so I can't give the full reveal yet-boo!)
600 square feet is a lot of space to fill and I wasn't about to go out and buy all new furniture for the space. I've had this old record player hutch (if that's even such a thing) in my basement for about 7 years now- It was just waiting to be upcycled.
This baby used to house my in-laws old record player and then eventually a boombox. It's crazy to think that now that all of my music is on a 4 inch iPhone. Anyhow, if you need any convincing that this piece needed some upcycling, I've provided you with some evidence…
One of my favorite things to do, is to look at a piece of furniture and see past the"yuck" and into the potential it has. Remember when we upcycled this dresser into an Anthro Knock off.
They key to a good furniture upcycle is to believe that anything can be changed and set some goals!
To Upcycle this piece, I had a few goals: #1- Get rid of any and all scrolly things (I sorta loathe them) #2- Remove the speaker fabric #3- Paint it with outdoor paint #4- Add some bold details #5- Distress it (so I don't get mad when one of my 4 kids"distress" it for me) #6- Add new hardware
Get Rid of Scrolly Things Sometimes it's easy to think there are things you can't change about a piece, but it's amazing what you can do with a jigsaw! I just taped off a straight line and cut those scrolly babies off!
Remove Speaker Fabric I ripped off all of the lovely fabric and then had to take out the speakers. There was no magic to this step. I actually gave a hammer to my seven year old son and said,"bang away!"
I love when furniture has an industrial flair, so I cut plywood panels and covered them with chicken wire. It isn't the most fun to work with, but it's not impossible either.
Paint with Outdoor Paint This piece was originally intended to be used indoors, so I wanted to be sure to paint it with good quality outdoor paint. I really don't love taking tons of time painting furniture, so I used Valspar's Exterior Spray Paint. It took about 3 cans to do two coats on the whole piece.
Add Bold Details Since this piece was originally so traditional, I wanted to do something graphic and more modern as a detail. I thought a thin herringbone would do the trick.
Herringbone is super-simple! #1- Mark out your center line. Then, measure the width you want the stripes (I used 1") and make tick marks down both sides of the column. #2- Tape off your lines. The top of the left side slants down to one tick mark below on the right. #3- Paint & Remove your tape. Let it dry and repeat on the opposite side, but shift your painted section down one, so you have the"every other" look.
Distress the Piece You might notice that my lines weren't completely crisp in the herringbone. I was painting outside in 100 degree heat (blogger foul), but I also knew I was going to distress it anyhow. I'm not always into distressing, but I figured it was going to get banged up outside (and I have 4 kids that are pretty rough on furniture). To distress, first I went at it with a sander with 220 grit paper.
Have you ever had this problem? I ran out of the right size sanding pads. Oops! After sanding it down a bit, I gave the entire piece a good glazing. I actually began my glazing love affair by reading Living with Lindsay's blog (check her out it you haven't)! My favorite glaze is Martha's Black Coffee. As you can see, I slopped it on, rubbed it around, and then wiped it off. I wanted pretty solid coverage, so I used a good bit of glaze.
After adding some hardware she was all finished and ready for the patio!
I think she's much more my style now!
All that's missing now is some cool, outdoor artwork. I'd love to hear any ideas you have in a comment. We have some insanely creative readers! P.S. I have to mention that I'm so glad to have my BFF home from vacation! A week apart feels like such a long time to us! Now that she's home, Jess is working like a mad-woman on some cool projects for her dining room!!
We weren't lying when we said we were floored by the all of the talent that showed up in our Creating with the Stars submissions post. Seriously, you all made us feel a little bad about ourselves.; ) Every single one of the stars said they had a terrible time narrowing their favorites down to the top 11, and we agreed wholeheartedly! So, while there are only 12 contestants vying for the CWTS title this year (you can see them here!), we thought it would be fun to highlight a few of our favorite submissions that didn't quite make the cut. DIY Chunky Floating Shelves by Desert Domicile These babies are gorgeous, and just look at how beautifully they're styled!! We're definitely taking some notes.
Beaded Chandelier by My Simple Obsession Ack, the time and patience that must have gone into this amazing chandelier! Will you make us one…please?
Custom Painted French Provencal Dresser by J.Rox Designs Hot pink, curvy furniture? Never thought I'd say this, but sign me up! I loooooove this dresser.
Painted Dresser (and that fabulous pallet wall!) by Cape 27 You know we love a good pallet wall, and this one is no exception. Plus, that dresser reminds us of Monica's outdoor furniture upcycle, and we're totally digging the fun art!
.and because we apparently have a thing for painted dressers, this Woodland Dresser makeover by The DIY Village is so sweet and woodsy that it caught our eye right away.
We just didn't want all the fun and inspiration to end for all of you talented bloggers out there that didn't make it as contestants this year, so we're hosting a weekly linkup party throughout the entire contest. Basically, that means you get to play along and win great prizes!
Here's how it will work: Every Tuesday Monica and I will be revealing our project for that week's theme. Woohoo! We have some good projects up our sleeves.: ) That same day you can submit your own project that meets the criteria for that week (For example, week one is Upcycle, so anything that you've given new life or repurposed in some way in the last year is game). The winner will receive an awesome prize package from Belmonili and Perfectly Imperfect Shop! So fun! We can't wait to be inspired by your creativity each week.; ) Don't forget to mark your calendars for these important dates next week when things really get moving!
Have an awesome weekend! Want more EC2? Use the icons below to follow us!
Today is the last day of Round 1… That was an intense amount of DIY awesomeness for one week… One night this week, Jess and I had a text conversation that went something like this… Jess: Did you see all those awesome projects?Me: Yes! They're insaneJess: I think I'm mildly depressed from it all- these girls are amazing.Me: Yes, I believe I will quit blogging, go eat cookie dough, and mope around my house. Well, thankfully we didn't quit blogging, I didn't eat too much cookie dough, and we got over it, and are ready for Round 2 tomorrow! Before we say goodbye to Round 1, we are super excited to share our favorite Upcycle that was Linked Up this week!
Jessica blogs over at Dear Emmeline and we loved her Embroidery Hoop Pendant Light! We are definitely going to try this upcycle soon! Check out how she did it and don't forget to link up your favorite Knock off starting Tuesday! -------------------------------------------------------------------------------------------------------------- Ever get inspired by someone else's work to create something similar yet so completely different? When I saw View Along the Way's Dodecahedron Pendant Light I fell in love but I also knew that not only did I not have the tools to recreate it but it would be a TON of work.
Then I had the thought,"Is there anything I could use to create a pendant with a similar feel with a lot less work?" A thought sprang to mind, and here is the result!
It took us about 30 minutes of actual work time to make this fixture! If you want to make your own here's what you'll need:
2, 14" quilt hoops (we bought ours at Jo-ann Fabrics, original price $4.99 each) stain or paint 3/4" square dowel pendant light kit 7, 8-32 x 3/4 flat head Hillman knurled screws 7, 8-32 hex nuts drill wood glue clamps spray paint
Before we began assembling the fixture we gave the hoops and 3/4 dowel a coat of vinegar and steel wool oxidation stain to give them a weathered finish and used oil rubbed bronze spray paint to paint the cement colored part of the pendant fixture.
Next, line up the 3/4 dowel with the hoop connectors (outer piece of hoop) and mark a cut line. Drill a hole down the middle of the dowel. This will be the place that you feed the pendant cord through.
Remove the hoop fasteners and center your 3/4 dowel between the hoop tops. Glue and clamp each hoop to the dowel.
Feed the inner piece of each quilt hoop into the ball overlapping them to make an X shape.
Starting with the bottom, drill through each hoop overlap (there should be 7). Feed the screw through each hoop and fasten with a hex nut.
You could cut down the screws if you want the to end up being flush with the nut but we chose to leave them as is since the piece has an industrial look to it already.
I recommend drilling and fastening in the following order.
Feed the pendant cord through the 3/4 dowel and you're ready to hang it up!
We purchased an antique look filament bulb from Lowes to complete the look.
Isn't that such a creative idea? Amazing work Jessica! We can't wait to see what you link up this week! Don't forget that voting on the Round 2 Projects starts bright and early tomorrow!
Got an old dresser that needs some love and attention? Don’t kick it to the curb just yet! Try out this ombre paint method for a fun, modern design that will give your dresser new life!
*Insider tip: When we're looking for furniture to upcycle, we make sure that the piece is in relatively good condition. That doesn't mean it looks good, just that it's structurally sound. Ideally, we love a piece with clean lines and a classic style, but don't overlook a piece just because it has scroll-work or is ornate. Oftentimes, those things can be removed easily with a jigsaw. 1. Prep the dresser by giving it a thorough sanding with an orbital sander to get rid of the old finish. Remove any hardware from the drawers for easy painting,, too! After sanding, wipe down the dresser with a damp cloth.
2. Choose your color and get to work! You can actually achieve the ombre effect two different ways- by buying three or four colors from the same paint swatch, or, if you’re trying to save money like we were, using one paint color and changing the color with white paint! We’ll explain this method, since it’s the one we used. Don’t worry, it’s not hard and it’s worth the little bit of extra work!
3. Go ahead and paint the bottom row of drawers using a small foam roller (designed for painting furniture) with the undiluted, fully-saturated color. The key to a nice finish is even long, even strokes and several light coats of paint. Set drawers aside.
4. To thin out your paint for the next color, pour three parts of the original paint color in a small paint tray and add one part white paint (3:1 ratio). Roll onto next row of drawers.
5. Using the same method, thin out the paint with a 2:2 ratio for the third row up from bottom and a 1:3 ratio for the top row of drawers. Paint and let dry the specified amount of time. 6. Add new hardware- we chose to bling out our dresser with clear, glass and gold knobs for this adorable little girl. Or, put the old hardware back on to save even more money!
Voila! You’ve easily accomplished the fabulous and trendy ombre effect on your dresser! This style is awesome for a nursery, but depending on the colors you choose, could really be used anywhere in your house!
We've tried our hand at lots of different dresser upcycles. Our absolute favorite is this Anthropologie- inspired dresser
But, we also kind of love this outdoor furniture upcycle:
So, please…for our sake…don't throw out your old furniture! Do something fun with it.: ) To watch the full episode of this nursery makeover, click Here! There were so many fun projects in this room!
Yesterday we shared 25 awesome upcycle projects and Ikea hacks, but we wanted to give you some of the juicy details for a couple of the projects we actually tackled during our crazy Women's Night Out White Box Challenge.
Wall Paint Colors First, the paint colors. Everyone always ask us what colors we use and we never remember to share! Well, this is going to change! We're even going to try to get our acts together and post our color palettes for each of our Knock it Off episodes. One of these days!! Anyway, our bland room started off with Oxford Tan (from Lowes) walls, lightened by 25%. In our 30 minute intermission, the top portion quickly got covered in Classic Teal, which is a gorgeous, rich blue. I wouldn't be surprised if you saw us use that color again- loved it!
Furniture Paint Colors The dresser got decked out in four different colors, which really added a lot of interest. We are in love with the color-blocking trend and were excited to give it a go with these inexpensive Rast dressers from Ikea. We used Tuxedo Tie on the frame, English Tea Party on the bottom drawers, Mountain Smoke on the middle drawers and Bamboo Leaves on the top drawers (all from Lowes). Such fun colors that matched our fabrics perfectly! We definitely would have liked to build a base for our new buffet so that it would sit higher, but unfortunately, we ran out of time. So, take note if you're planning on giving this upcycle a try.: )
We shared a whole bunch of fun ideas for painted rugs, but this one that Monica did last summer is definitely our favorite: quick, easy and cute! Check out her Stenciled Outdoor Rug for the step by step deets!
This tufted Lack table turned ottoman was a big hit with the ladies during our event and it's a super simple upholstery project that any one can handle.
This past spring, I made this Ikea Lack Ottoman using the same method as above. The only difference is that we added tufting to the one we made during the White Box Challenge. It looks so good I might just have to add some to mine! Here's the cheater way to add tufts: 1. Follow steps for upholstering the table. 2. Mark where you want to place your tufts. 3. Use a button-making kit to create some cute buttons using your fabric, or buy pre-bought buttons to use. 4. Using a staple gun, shoot a 3/4 inch staple through the fabric, batting and foam on the mark you made. This creates the tuft, without having to drill through the table and bringing sewing into the equation. 5. Hot glue your buttons in place. That's it!!
We love the way this nail head trim dressed up our plain, old white chair. They were so simple to attach and took this chair to a whole new level!
In fact, it wasn't our first time using nail head detailing- we upholstered a chair and added nail heads for one of our Nate Show episodes!
Finally, this upcycled art was definitely the fan favorite of the night. You wouldn't believe how easy it was to do and what an awesome impact it makes.
If you want to know how to make your own, Monica took this old piece of art and made a completely custom canvas for her powder room using a stencil, spray paint and her silhouette machine.
Phew! I think we touched on everything, but if you were at the event and still have questions, leave us a comment! There aren't many things that are as gratifying and budget-friendly as upcycyling. I'm serious, people. Go give it a try!
When we opened submissions for Creating with the Stars on February 4th, we had no idea how how incredibly amazing the submissions would be. Really, we knew we'd get some good ones, but this was out of control! You guys made choosing so.incredibly.hard! We want to thank all 361 of you that took the time to enter. It has already been a great start to our first season!
Without further ado, let's get down to business… Introducing the Contestants for CWTS2013 (In no particular order)
1. Janel
#23 Boys Bedroom Makeover on a Budgetand her Blog Star is… Brittany from Pretty Handy Girl!
2. Jourdan & Ashley
#33 DIY Barndoor Headboard
and their blog star is… Beth from Home Stories A to Z!
3. Sarah
#48 80's Chandelier to Glass Mirror
and her blog star is… Brooke from All Things Thrifty!
4. Jane
#75 DIY Plank Wall
and her blog Star is… Jamielyn from I Heart Naptime!
5. Amanda & Corey
#131 Handmade Dining Room Light
and their blog star is… Beckie from Infarrantly Creative!
6. Nancy
# 137 Owen's Nursery Makeover
and her blog Star partner is… Kari from U-Create!
7. Jessica
#164 Anthro-Inspired Inventor's Bell Jar Lamp
and her star is… Mandi from Vintage Revivals!
8. Sarah
#223 Herringbone Metallic Artwork
and her blog Star is… Sarah from Thrifty Decor Chick!
9. KariAnne
#243 Shutter Wall
and her blog stars are… Ashley and Whitney from Shanty 2 Chic!
10. Nat & Holly
#281 Living Room Makeover
and their blog star is… Jane from Tatertots & Jello!
11. Ann Marie
#344 Mom Cave Makeover
and her blog star is… Shaunna from Perfectly Imperfect!
12. Melissa
#345 Bedroom Reading Corner
and her blog star is… Sherry from Young House Love!
Aren't those projects amazing? It's going to an incredible season! The first week's challenge is a fun one. Week 1: UPCYCLE
You Can Play Along with CWTS Too! Now, if we could have chosen all of you, we would have. We still want to showcase all of your talent and project. For every weekly challenge, we're going to have a link party where you can link up one of your favorite projects that fit in with the weekly theme. We'll pick our favorite project each week and we'll feature our favorite here on EC2. Get your Upcycle DIY projects ready for week one, starting next week! And we're sure don't need reminding, but just incase… we have an EPIC prize package! The 2013 CWTS Prize packages Total over $4100!! A special thanks to Homes.com, HomeGoods, HomeTalk, and Home Depot for their generous sponsorship of CWTS. We're so honored to have them!
The Grand Prize Winners (Contestant and Blog Star) will each receive: $500 from Homes.Com $500 Gift Card to HomeGoods Project featured by HomeTalk
All contestants that make it to Week 4 will be given a $100 Giftcard to HomeGoods to use during the week 4 home decor challenge!
The Semi-Finals Winner will receive: $500 Gift Card to Home Depot (Contestant & Blog Star) $100 worth of Martha Stewart supplies from Plaid Crafts $125 Gift Card to Lucent Lamp works Project featured by HomeTalk
The Week 2 Winner will receive: $100 Gift Card to Royal Design Studio A pair of $120 Robert Allen pillows from Chic Decor Pillows Project featured by HomeTalk
The Week 1 Winner will receive: $50 worth of 31 Gifts products $60 worth of Twysted Yarn products $70 of Henle Headbands products $100 Blog Re-design from 733 Design Project featured by HomeTalk
One of the most fun parts of the CWTS contest is getting to see the fun projects linked up in our weekly link party! The girls in this contest are seriously talented, but guess what?! So are YOU! If you want to get a burst of inspiration, check out the fab upcycle projects that were linked up right here.
We were immediately drawn to this end table when we saw it in the party since we're both HUGE fans of rustic industrial style furniture. Allison from The Golden Sycamore put some serious effort and time into this piece and it tells! It's absolutely gorgeous! Well done, girl.; )
As I mentioned a few weeks ago on my blog, I'm really into the industrial look right now. I seriously can't get enough of it! While I was playing around online one day, showing my husband all these cool industrial tables, he got an idea in his head: Why not build one ourselves? One thing led to another and now we have our own custom industrial end table for our living room! (You can see the reveal post {here}). This was our inspiration for the table …
My husband and I are really happy with how our table turned out and I'm excited to share this project with you, but I want to warn you, this particular DIY project is not for the faint of heart. This project is a bit of a process and can be dangerous if you don't know what you're doing and aren't careful. PLEASE do not attempt this unless you feel very confident in your abilities. Please be sure you take all safety precautions when using a power tool or dangerous chemicals or objects and read the instruction manuals before using them. I am not a trained professional. If you are uncertain, please consult an expert before attempting this or any projects on this blog. I will not be responsible for any injuries or damages caused by any attempts to recreate this or any projects posted on this blog.
Alright, now that that's out of the way, onto the tutorial. Aging Galvanized Metal
SUPPLIES: 8 — 3/4" x 10" galvanized pipe ($29.60) 16 — galvanized floor flanges ($116.16) 48 — 1/4" x 1" galvanized lag screws ($22.08) HCl / toilet bowl cleaner Plastic container Small map gas torch ($41.97) Heat safe gloves ($4.46) Vegetable oil Beeswax Metal pan Metal pliers PROCEDURE: Start by putting your galvanized metal plumbing supplies in a plastic container. Add enough HCl / toilet bowl cleaner to cover all the metal and let sit for 2-3 hours. This process will remove the zinc coating off the galvanized metal. **DO THIS PART OUTSIDE OR IN A VERY WELL VENTILATED AREA — YOU DON'T WANT TO BE BREATHING THESE CHEMICALS IN!! (This is a picture of the screws in toilet bowl cleaner. We did them separately, but you can just put everything together.)
After a few hours, rinse all your metal pieces off. Pour some vegetable oil in a metal container. Wearing heat safe gloves and holding your piece of metal with a pliers, heat metal with torch until it is hot enough that it turns orange. Once it is thoroughly heated, dip in vegetable oil. Then reheat the piece of metal to orange hot. Once it is hot enough, set in oil to cool for about 30 seconds. **AGAIN — USE CAUTION. DO THIS PART IN A SAFE AREA AND HAVE A FIRE EXTINGUISHER NEAR BY IN CASE OF FIRE!!
The metal will still be very hot, so take the piece of metal out of the oil with a pliers.
Cool the metal with water.
Once it's cool to the touch, scrub off burned oil residue with water and a wire brush.
Lightly heat metal again with torch (about 30 seconds) and coat with beeswax. Once coated, rub with cotton rag while still warm.
Let cool before handling. Metal will still be hot for a while.
And that's it! Haha! I know the process is intense, but if you really want the aged look, it's worth it! Here is what your finished product should look like. Repeat process for all your pieces of metal.
Now onto the wood shelves.
SUPPLIES: 1 — IKEA Numerar oak butcher block countertop ($129.00) — we used a little over half the length, so the cost of what was used was roughly $70 Tape measure and pencil Circular saw Straight edge clamp Router Orbital sander and sand paper Stain Silhouette Cameo and stencil Paint and paint brush Mineral oil PROCEDURE: Start by measuring your Numerar butcher block to the size you want your shelves and mark where to cut. Our shelves measure 19.5" wide x 24" deep.
Set up your straight edge clamp so that your saw will cut on your measured line. You'll probably have to set it to about a half inch over to allow for the width of the saw.
Cut butcher block with circular saw. Repeat this process for second shelf.
Run orbital sander along the edges to ensure a smooth finish. Then router the edges of each shelf — remember to do the top and bottom sides to keep the look cohesive.
With your orbital sander, sand the finish off the top and bottom of both shelves.
Using Minwax Dark Walnut stain, wipe on stain and immediately wipe off to get a slightly darker color, but not too much penetration. If you desire a darker stain color, either leave the stain on longer before wiping off or apply more layers of stain to darken it.
I don't have pictures of this part, but if you wish to add numbers to your top shelf, here's how to do it. Choose the style and size of numbers you want and cut them out using your Silhouette Cameo. If you don't have a Cameo, you can always print numbers out on your printer and then cut them out by hand. Once you have your numbers, arrange them on the shelf the way you want them and then trace around them using a white or black colored pencil. Once your numbers are traced, use craft paint and a small paint brush to paint inside the lines. Let paint dry and sand lightly with sand paper to desired distressed look.
Once you are done with your numbers (or if you skipped that step) wipe both shelves with mineral oil (or some other sealant like wax or polyurethane) to seal the shelves.
Now to put it all together. SUPPLIES: Drill Wrench or impact driver All your metal pieces Both shelves Level PROCEDURE: Drill pilot holes in each shelf. You'll drill four holes per flange. Drill holes in the bottom of the top shelf. The bottom shelf will get holes drilled in both sides — top and bottom. Make sure to stagger your holes on the bottom shelf so that they don't meet up with each other through the wood. Using your wrench or impact driver, on the bottom shelf, attach 4 flanges with your lag screws on the top side of the shelf. Screw pipe into the four flanges. Attach flanges to the bottom of the top shelf with lag screws. Screw those flanges to the pipe that is already attached to the bottom shelf. Attach flanges to the bottom side of the bottom shelf. Screw pipe into flanges and screw final flanges to the bottom of the pipe — these are the table's"feet". Check to make sure the table is level. If it isn't, screw or unscrew pipes until the table is level.
Alright, if you've made it to the end of this post, I applaud you! I told you it was intense! I definitely can see why our inspiration piece was almost $700! Not only are the materials relatively expensive, but it is also quite labor intensive! In the reveal post, I said that the table cost us about $300 to make. We had a lot of the tools on hand, but we had to purchase most of the supplies. In this post I've added up the supplies we bought and calculated our total cost (using about half the countertop cost since we can use the remainder of the countertop for another project). The total came to $284.27. If you add MI tax, it comes to $301 and some change. That's a pretty good estimate on our part, if you ask me!: ) If I didn't explain something well enough or you have any questions, PLEASE feel free to ask! I'll do my best to help you out! Thanks so much for reading my loooong tutorial!: ) -------------------------------------------------------------------------------------------------------------------------- Isn't that incredible?! Seriously, so good. Thanks for linking up, Allison! Don't forget to check back at midnight tonight to see the Contestants Round 3 projects!
Phew! The contestants and their Star partners really set the bar high this week with their Round 1 projects. Almost every one of you commented about how hard it was to choose only three favorites and we felt that pain right along with you! We know that you're not really here to read lots of mumbo jumbo from us, so let's get to those results, shall we? And the Winner of Round 1 is…
We loved this project and think it was executed so well! Nice work Karianne!! Can't wait to see what you'll come up with for Round 2. Let's see who else made it to Round 2… 2. Sarah {While They Snooze} & Sarah {Thrifty Decor Chick} Trash Pile Made Trendy Table
3. Sarah {Sarah M. Dorsey Designs} & Brooke {All Things Thrifty} Statement Piece Light Fixture
4. Amanda {Love and Renovations} and Beckie {Infarrantly Creative} Televison Stand Upcycled to a Bar
5. Jane {Life, Crafts & Whatever} & Jamielyn {I Heart Naptime} Tin Tile Mirror
6. Melissa {5 foot 12 Creations} & Sherry {Young House Love} Lab Station Turned Dining Room Buffet
7. Nancy {Owen's Olivia} & Kari {Ucreate} Dresser Turned Modern Sandbox
8. Ann Marie {White House, Black Shutters} & Shaunna {Perfectly Imperfect} Floor Board Kitchen Island
9. Janel {Nellie Bellie} & Brittany {Pretty Handy Girl} Frumpy to On Fire, Fireplace
We're so sorry to say goodbye to the following three contestants! Boo, we hate this part. Thanks for all your hard work and excellent projects this week, girls! 10. Jourdan and Ashley {Little Yellow Barn} & Beth {Home Stories A to Z} Man Chairs
12. Nat and Holly {My Sisters Suitcase} and Jane {Tatertots & Jello} Little League Lounger
To keep things legit, here are the official results!
I'm sure she doesn't need a reminder, but here's what Karianne won this week! Round 1 Prize Package: $50 worth of 31 Gifts products $60 worth of Twysted Yarn products $70 of Henle Headbands products $100 Blog Re-design from 733 Design (who designed all the CWTS logos!) Project featured by HomeTalk We also want to thank Homes.com for being the Official Grand Sponsor of Creating with the Stars!
Congratulations to the nine moving on! You have your work cut out for you, for sure! Next week's theme is KNOCKOFF!
The winner of Round 2 will win the following AWESOME prizes: (to see the entire prize package, click here) The Week 2 Winner will receive: $100 Gift Card to Royal Design Studio A pair of $120 Robert Allen pillows from Chic Decor Pillows Project featured by HomeTalk
Voting for Round 2 will begin on Monday, March 18th at 12 AM EST. Don't forget that you can link up your favorite upcycle through this Friday at 10 PM EST right here for the chance to win prizes and be featured here on EC2! Finally, we're super excited because: 1. Tomorrow we'll be sharing Karianne's tutorial for her awesome bike clock. 2. On Friday you'll get to see how Sarah put together that amazing trendy tire table and, 3. Saturday, Sarah will be giving us the step-by-step process behind that insane light fixture! Be sure to come on back for loads of inspiration starting tomorrow!!
There's nothing like a good, old-fashion upcycle, is there? Remember when my hubs and I recently renovated our kitchen and in the process took down some of our cabinets to make room for open shelving? I know I could have sold them, but I love the thrill of coming up with a new use for something rather than having it sit around waiting for a purpose. Planters are soo expensive, and so the thought occurred to me that I could use one cabinet to make a planter box! A virtually free project makes me one happy girl.
The cabinet was nothing special to begin with. Can you see why I wanted to get these things out of my kitchen?! First, I removed the door and all of the hardware;
and then lightly sanded down the entire cabinet. I just wanted to rought it up enough so that the spray paint would"stick" to it. If your cabinet is really glossy, make sure you give it a good sanding before painting. Next came the spray primer. I used this red one because it was all I had on hand.
I used my favorite shade of blue (Rustoleum Ultra Cover 2x in Satin Lagoon) and lightly sprayed the box with three coats.
I wanted to make sure it had good drainage, so I drilled several holes along the bottom of the box. The holes are small enough that dirt won't easily fall through, but large enough for the water to seep out. There is no perfect number of holes, so drill away until your satisfied!
I also added castors to the bottom because this thing was bound to be really heavy once I added potting soil and plants and I wanted to be able to move it around whenever inspiration struck (which happens really often at my house!)
Polyurethane is your best friend when it comes to protecting any surface from water damage. I applied several coats, letting each coat dry in between. My poly is well-loved, can you tell?I've had this planter sitting on my deck for about a month now. My cabinet is partially made of particle board and is beginning to show major signs of wear. Make sure your cabinet is solid wood OR coat both the outside AND inside with at least three coats of poly. Trust me- I know!
To protect the inside of my box from damage, I lined it with heavy plastic sheeting (found with the dropcloths in the paint section of Lowe's or Home Depot), and secured it with duct tape. Then I poked holes in the bottom of the plastic sheet, again, to aid with drainage.
Then came the fun part! Filling it up with potting soil and gorgeous flowers! I love how it came together and the way it adds a pop of fun color to my deck.
For less than $15, I had a brand new planter box! Even better, I repurposed something I already had and gave it new life.
I love it even more now that the flowers have grown in. So pretty! What would YOU do with an old cabinet?
If you missed the announcement about which nine contestants made it through to Round 2 of Creating with the Stars, click here! We're dying to see what those ladies come up with for this week's Knockoff theme!
-------------------------------------------------------------------------------------------------------------------------- There are some nice end tables out there, but this one ranks way up there on the coolness scale (is there such a thing? If not, we just made one.) We love how Sarah, from While They Snooze, used something free to create something totally fabulous for her home. Booyah to pricey furniture everywhere. Let's take a look at how she made this bad boy…
On a run a week or so back, I passed a house in my neighborhood with 6, count 'em 6, old tires on the curb (Where you at HOA??). My slightly hoarderish brain immediately tried to think of projects I could use them for. Alas, as Beyonce blasted in my ears, I thought of nothing and ran past. Fast forward a few days to when the Creating with the Stars announcement was made and I learned theme one was Upcycle. In the midst of picking my jaw back up off the floor, I remember those grimy tires. Early Saturday morning, still bra-less and in my PJs, I drove to that house and hurled the one tire that was left into the back of my car. Let's hope the morning fog prevented most from seeing that. Don't be fooled, though the kids look excited, they are confused as to why mommy threw garbage in the car.
As the tire lay in my garage, it dawned on me that it was the perfect size/shape for a side table. 24" round. Just needed some legs and some (a boat load of) prettying up. Here's what I did. Supplies:
Old tire — Mine still had the rim… it will still work if it doesn't.
Plywood — One circle for the base and one for the top. My plywood is 1/2" thick.
Legs — Get creative! I used wood but you could use an upside down flower pot, metal, or buy pre-made legs from Ikea. This tutorial will show you how to make wood legs.
Rope — to disguise the tire. I used 350 feet (yikes!) of 1/4" sisal and manila rope sold in little bags at Home Depot.
Glue/Screws/hardware to attach the legs — This will vary depending on what legs you get.
Construction Adhesive — To glue the tire to the base and the rope to the tire. I used Liquid Nails.
Basic tools - This will vary depending on what your base is made from. I used a jig saw to cut the circles. A chop saw, table saw, and jig saw the cut the legs. Drill to attach the legs.
Step 1:Scrub your tire. Chances are it's going to be really grimy. Give it a scrub with some dish soap to cut the grease. This will also help your adhesive stick better. Let it dry.
Step 2:Cut out two plywood circles. First circle should fit in the center of your tire to make a flat surface to form the table top. I measured, then nailed a piece of string into the center of my plywood, attached a pencil, and drew the circle. I had to sand the edges of the circle here and there to make it fit in the tire. The second circle is the base that the tire will sit on. Trace your tire and cut the circle one or two inches smaller than that.
I bribed the hubs with lunch so he would cut them out for me.: )
Step 3:Cut out some legs. Since this table will be replacing another (ugly) table in my living room, I measured the height of that existing table. It was 20". The tire is 9" high, so I needed 11" legs. Side tables vary in height though. They should work well with the seating they will be next to. So measure your tire and then figure out how high you need your legs. I must confess, my husband came up with the idea of using the rocker slats from our rocking octopus, cut in half, for the legs.
Since I didn't want to destroy the octopus (poor Ollie!), we took them off, traced them onto some scrap pine from the garage, and cut them out. If you don't have rocking octopus legs to trace: ) rectangles would be fine! Trace.
Cut out.
Cut in half and sand smooth.
Step 4:Assemble the legs. Take your larger base circle and arrange the legs equally spaced around the perimeter. To make the table a little more sturdy, I cut some small blocks from the scrap pine to use as supports for the legs. I glued the blocks to the legs with wood glue and clamped overnight. Once they were dry, I glued them to the wood circle, attached L brackets, and put a screw in through the top of the wood.
At this point I stained the legs and the rim of the base circle. However, they didn't turn out that great. I'll fix that in a minute.
Step 5:Glue tire to base. Once the legs are secure and dry, flip the base over, apply generous blobs of construction adhesive, and set your tire in the center.
Step 6.:Glue smaller circle to top of tire. The smaller circle should fit slightly inside the inner curve of the tire so when it's in place, the whole surface is flat… or close to flat. Since my tire has the rim, I just glued to that.
Step 7:Glue rope to tire. Attention: hot glue does not stick to tires just incase you were considering it.: ) I tried… no go. Stick with the liquid nails. Bonus: Liquid nails is the same color as rope. Some of it bled through. You can't even tell. Turn the table over, start around the base, and work your way to the top of the table.
Keep going! Once you get around the lip it's e asier if you flip it back over. I used a combination of sisal rope (the lighter color) and natural manila rope (the dark color). Both are sold in 50' sections at Home Depot.
Once you get to the top rim it gets tricky. The rope kept wanting to pop off so I had to keep it taped down with painter's tape as I went until the adhesive dried.
Then, when I hit the plywood, I switched to hot glue. Much easier! (Does anyone else have toys mixed in with their projects?)
Step 8:Paint the legs. Remember how the stain on the legs came out kind of meh? Sarah from Thrifty Decor Chick had the great idea to"dip" them. Basically, I painted the bottom half of the legs bright citrus yellow. Not meh anymore!
And that's it. You can put the rope down. You're done. I can't wait to have people over and see if anyone knows it's an upcycled tire!
My staging assistant.; )
And so you know last week was one CRAZY week… here's a lovely shot I took of myself, gluing rope to a tire at midnight while the rest of the family snoozed. Enjoy.
Ahhh, so fun! You guys have to see the behind the scenes look at Sarah's round 1 project. You know we love it when people keep it real! Sarah is super talented with a sewing machine, but we totally dig these fun DIY Chevron Curtains she made from Ikea curtains.
Be sure to check back tomorrow to see how Sarah created that who-would-have-ever-thought-you-could-do-that-with-egg-crate-insulation light fixture. Omw. Soooo creative. Also, do you want to be a part of Creating with the Stars yourself? You can link up your favorite upcycle project right here until tonight at 10 PM EST for a chance to win a great prize package and be featured on EC2! Happy Friday, friends!
If you missed the announcement about which nine contestants made it through to Round 2 of Creating with the Stars, click here! We're dying to see what those ladies come up with for this week's Knockoff theme!
-------------------------------------------------------------------------------------------------------------------------- We fell in love with Karianne's clock the moment we laid eyes on it. It's so orignal and creative, not to mention perfectly placed on that chalkboard wall. *Swoon* I'm already brainstorming how I can use this idea somewhere-anywhere- in my house. Because Karianne took the number one spot, this project is going to be featured on Hometalk and Homes.com. Woohoo! Take it away, Karianne!
There are clocks. And then…there areclocks. There are clocks that tick and tock and ring and jingle and tell time underwater and sound an alarm. And then there are clocks made from a bicycle wheel with yardstick ruler hands perched on a chalkboard surrounded by roman numerals above a table strategically styled with a bicycle seat. That is one fine clock.And the best part?
I got the bicycle wheel for free. Can you even believe it? I walked into a bicycle shop and randomly explained to the resident bike expert that I wanted to make a clock and I needed a cute bike wheel that had preferably been around the block a time or two. Wordlessly he stared at me. I don't really know why. I'm sure they get that request all the time. And then he went to the back where they keep all the spare wheels for people who come in with clock requests and he handed me this bicycle wheel. I totally wish he could see his wheel now. He'd probably charge me for it.: )
Bicycle Wheel Clock with Yardstick Hands
Supplies:Bicycle wheelPaint stickCan lidWeightsClock kit specifically designed for large handsYardstick
Step 1: Purchase a kit from any craft store specifically designed to power big hands. Remove torque, insert a AA battery and attach to center of bicycle wheel using wire or adhesive tape.
Step 2: Drill a hole in the center of a paint can lid. The hole should be large enough to fit over the center mechanism of the torque. Place over center spoke of torque.
When you are done it should look something like this.
Step 3: Cut out yardstick hands I used a vintage yardstick. Cut longer hand 16" and shorter hand 8" long. You may need to adjust length depending on size of bike wheel. Notch out the end of each hand to resemble and arrow and cut small triangles of yardstick and attach to the other end of the yardstick hand to form an arrow.
Step 4: Drill holes in yardstick and attach parts of clock hands Drill a hole 5 1/2 inches from the notched end of the longer hand. Drill a hole 1 inch from the notched end of the shorter hand. Cut circles from the hands of the clock kit and hot glue around the holes that you just drilled.
Step 5: Attach yardstick hands to the center spoke of torque The center spoke on the torque is designed to have a space between the two hands. This is critical to make sure the hands turn properly. Make sure there is a space as shown in the picture. Attach the washer from the kit to the very top of the center spoke of the torque. Tighten the washer until hands are fastened securely. Depending on the thickness of your yardstick, you may have to countersink the washer to ensure everything fits properly on the center spoke.
Step 6: Attach weights to the back of the longer hand Hot glue washers to the back of the longer hand until the hand is balanced properly on the center spoke. We attached four washers, but you may need more or less depending on the weight of your clock hands.
Step 7: Adjust your hands to the right time using the tiny dial on the torque. Hang on a chalkboard and chalk in some roman numerals. Telling time has never been so fun! PS Monica and Jess…thank you so much for hosting such a fun contest and a big shout out to the amazing creativity of all the contestants! If you have any questions about this project be sure and e-mail me at thistlewoodfarms@yahoo.com! -------------------------------------------------------------------------------------------------------------------------- Isn't that awesome?! And that bike tire was FREE! That makes this project even better, in our humble opinions. Have you seen Karianne's blog? If not, you definitely should. It's chock full of awesome projects like this Herringbone Paint Stick Table…
And this Butler's Pantry. We're sorry, but we can't stop drooling over it. We are embarassed about the drool, but we just can't stop.
Thanks so much for sharing with us today, Karianne! Don't forget to check back tomorrow to see how Sarah made that awesome trendy tire table. Also, do you want to be a part of Creating with the Stars yourself? You can link up your favorite upcycle project right here until Friday evening for a chance to win a great prize package and be featured on EC2!
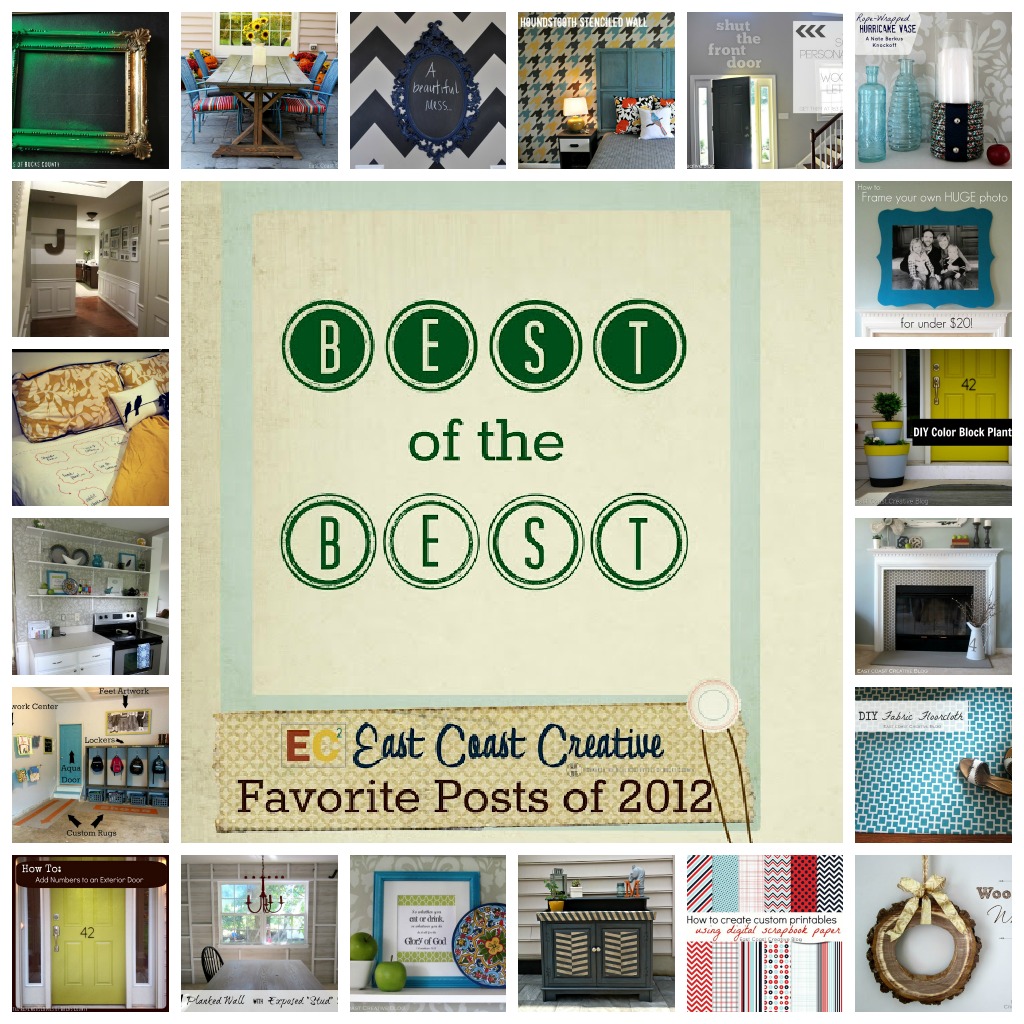
Phew! Can you believe that 2012 is over already? We are gearing up for an unbelievably awesome 2013 filled with lots of fun and exciting things for this little blog (we'll share those with you tomorrow!), but we thought we'd take some time to round up our favorite projects from each month in 2012. Take a look, let us know what you think, and pin it if you like it!
January Monica's Fav: I loved going green in 2012! Not really in the earthy-crunchy way, but by adding a pop of color to my collection of ornate frames. These Green Granny Frames had a fun impact on my dining room!
Jess's Fav: I breathed some new life into our New and Improved Entryway by adding a striped accent wall and a big gallery wall.
February: Jess' Fav: This project injected what can only be called Stencil Happiness into my kitchen renovation. Thanks to an awesome stencil from Royal Design Studio, my kitchen now has style for miles!
Monica's Fav: I took a bit of a risk and got personal with all of you by sharing my Game of Love Perfect Valentine's Gift. You ladies sure loved it, because it became our #1 post of 2012! Stay tuned for this year's version- it'll be on the blog on Monday!
Since 2012 was a leap year, I get to add another for February! This post went live on 2/29 and it's such a time saver in our house! Once a Month Sandwiches
March Jess' Fav: This Giant Shaped Frame is by far my favorite project from 2012! I'm pretty sure there is no better way to dress up your wall for this crazy low price. This is a big impact project, people. *I also have to nominate this one too! Jess and I had no idea how successful this project was going to be when we created it- we sure love Staples Prints! -Mon*
Monica's Fav: I love the BIG impact my Chevron Wall made in my kitchen. It's packed with personality and was pretty easy to paint!
April Jess' Fav: My hubs and I surprised my daughter with this Playhouse Loft Bed for her fourth birthday. It was totally worth it, because she and my son play in it all the time. I'm all for a DIY project that keeps the kids happy and occupied! *wink*
Monica's Fav: My Front Door got a major face lift with a super cool color and house numbers that are so my style!
May Jess' Fav: We started our kitchen renovation in December and were finally ready to do the big Kitchen Reveal in May. Of course, I'm still tweaking it, but this room makes me super happy. It's filled with tons of DIYs like painting the cabinets, stenciling the wall, making a fabric shade pendant light, painting color-blocked curtains and adding a fab rug.
Monica's Fav: Warm weather meant it was time for some outdoor projects! I loved how simple and inexpensive these DIY Planters were. Even now, they have winter pansies and look great on my front porch!
June Jess's Fav: I love the ability to customize things and this Fabric Floorcloth let me create the perfect mat for my entryway!
Monica's Fav: Jess and I completed our Super-Fab Guest Room Makover. We loved everything from the shutter headboard, fun accessories, and of course the houndstooth stenciled wall! We also had a blogger's dream come true when Young House Love featured our makeover!
July Jess: My son turned 2 this month so I showed you how I made his custom invitations using digital scrapbook paper and picmonkey. How to Make Custom Printables became one of our top posts- you guys obviously love free things!: )
Monica's Fav: While we were busy finishing up our patio project, I also worked on an Outdoor Furniture Upcycle
August Jess' Fav: We took our house exterior from boring to awesome by painting the front door and shutters. Hello Curb Appeal!
Monica's Fav: August was when I pulled off a birthday surprise for my hubs with a Garage Mudroom Makover I'm still loving the organization and how it's actually functional for this family of 6!
September Jess: It's a tie! I just can't decide between Stenciled Faux-Tile Fireplace & Planked Wall with Exposed"Stud' Shelves. Both of these guys transformed the room and I'm in love with them!
Monica's Fav: I went a little outside the box with my Shut the Front Door — Foyer Update. It's still one of my favorite things in my house.
October Jess: Our dining room has been slowly undergoing a transformation and my refinished dining table fits perfectly in the new space! Refinished Dining Room Table
Monica's Fav: In October, we had our DIY Patio Reveal! It was a HUGE DIY project, but we saved tons of money doing it ourselves and the end result was pretty awesome!
November Jess's Fav: I love Mr. Berkus and didn't think he would mind me knocking off one of the items from his new line- the Rope-Wrapped Hurricane Vase. Want to know a secret? I like mine better.: )
Monica's Fav: During a road trip to visit one of my best gal pals, I whipped up a Fireplace Makeover in her new house. It's a super-simple way to get rid of that brass fast!
December Jess: This project was honestly a surprise to me. It came out so much better than I ever thought it would! The Wood Slice Wreath is the perfect winter decoration.
Monica's Fav: Just in time for Christmas Jess and I made this Illuminated Silhouette Art. It looked great next to my Christmas tree, and now I'll be swapping out the silhouette for a lovey-dovey Valentine's quote!
One thing that stands out to us the most this year is how thankful we are for YOU! We so appreciate your comments, emails and faithful visits to our blog. Here's to another crazy, fun year!
Early in the summer we started what will go down as our biggest DIY project of the year … We decided to build our own brick paver patio! (Check out the process posts 1,2,3,4) With my creative ideas and my amazing husband that has an un-human work ethic we knew would could handle it! We teamed up with two amazing companies to make it happen, and we loved working with Stone Depot and EP Henry throughout the process.
Drum-roll Please… Presenting My DIY Patio…
Let's take a closer look at this bad boy Here's a quick peek back to where we started…
And now, for where we are now!
I couldn't be happier with the results and none of it would have happened without this fella. I won't get all sappy, but he's the hardest worker I've ever met. Our friends have affectionately coined the phrase"Mangin to the Max" when he's in his crazy hardworking mode. So, thanks for all your tireless hours, love- you're the best! View from the door before…
And After…
I love the sitting area and have spent tons of hours working from there the last few months. I can't get enough of all the fall foliage this year- almost makes me feel like I'm back in New England.
We made a last minute decision to add this little area off of the main patio. We wanted a place to be able to grill and where we could put a kids' table when we have a crowd, although I think the fire pit looks pretty cute there too!
Eric and I built a huge farmhouse table using Ana White plans after we were inspired by the Shanty 2 Chic sisters (Full table post coming soon!) For now we're using the chairs I painted back in the spring, but we plan to build long benches this weekend!
I know it sounds cheesy, but I sort of think the patio reminds me of the big family dinners they always have on Parenthood. Do you see it too? (Man, I love that show!)
Here's a peek at some of the fun details I love… Remember this upcycle?
We have fun cattails in our pond (it's more of a swamp, but come on, pond sounds so much nicer!) and they look so cool!
Eric was pretty proud of the stairs… the EP Henry stone was too nice to just do plain, basic steps. I love the tiered look he built!
I plan on having tons and tons of awesome meals out here with family and friends!
It's the perfect place to sit down and browse through one of my favorite magazines… I suggest checking out page 92… Did you know we were featured this month? It pretty much rocked our world!
We got all of our EP Henry stone from Stone Depot in Perkaise, PA and it's top quality for sure. I love the look of the pillars with the huge caps (which are crazy heavy btw- I spent so many hours just carrying brick from the driveway to the backyard.)
The guys at Stone Depot recommended slate for the sitting wall and I'm so glad they knew what would look best- the slate is one of my favorite parts of the whole project.
I had to share this picture with you because you've got to check out the pumpkin on the left… doesn't it look like he's eating the green goose gourd? We grew tons of gourds this year and my kids love the goose ones!
Pennlyn loves that she can go out the sliding door now- it's so nice to be able to easily let her in and out.
We only have two things left on the Patio-To-Do-List… 1- Finish the landscaping (we need mulch and plants)
2- We need outdoor pillar lighting. I ordered 4 lights that I really liked, but they ended up being discontinued. Boo! Our blog sponsor Brad from Lucent Lampworks is going to help me come up with some cool ideas, so I'm excited to get that final detail taken care of!
So, there you have it! Our Big Old DIY project is done!
What do you think of my new outdoor oasis? Do you have any awesome lighting suggestions or just any ideas to make the space even better?
Have you ever noticed how incredibly expensive planters are? For about $40 I could get one itty bitty planter, that's not even cute. No thanks. I decided I would DIY planters that would work perfectly with my new painted door and rockin' house numbers. I didn't want anything to frilly, or girly. I wanted my style inside my house, reflected on the outside too! This project cost me $20 each, was incredibly simple, and totally fits my style.
Here's What you'll need to DIY your own color block, tiered planters: Plastic planters (mine were from Target) 2 colors of spray paint 1 color of latex paint Dirt, Mulch, Plants, Etc. I started with these plain Jane planters from Target (find them here). You can't really tell how big they are, but they're pretty big (I can't wrap my arms around the top of the large one- I tried, so that gives you an idea and a weird mental picture. Sorry about that!) They cost $7 for the medium and $13 for the extra large.
The first step was to spray paint the middle color. I used Valspar's grey primer because I love the color.
You don't need to worry about the top or bottom at all. Just get a nice, even coat on the middle. I did two light coats on mine.
I painted the top color block with the same color I recently used on my front door. I'm a bit obsessed with it. I didn't need to tape for a clean line, because the planter had a lip that I was able to use as a guide. Also, make sure you paint down pretty far on the inside. I'm assuming your house guests will be taller than the planters, so they'll get a peek down inside.
The next step, made this DIYer do the dance of joy (remember Perfect Strangers?) because it saved me so much time! I used a paint can opener to pop the bottom of the planters. I'll warn you, it will sound like you're breaking them, but you're not! They'll pop right back on when you're done painting them.
Taking the bottom off, meant no need for tape or cutting in. Just spray paint the bottom whatever color you'd like. This was my little work station (aka messy garage).
Put the pieces all together and you're left with cool, color block planters.
They're nice like that, but I wanted to take it up a notch! I wanted some height, so I stacked them up. I didn't do any permanent attaching or anything, just fill the bottom with dirt, plant your flowers, add the next planter, and repeat. Again, remember the angle people will see them from when they walk in… mulch is a must. No one wants to see this…
I used white wave petunias on the bottom and a boxwood on top.
Here was my porch a few weeks ago. It was a sad situation… trust me, I know!
Take a look now! I think it's just a tad more welcoming don't you?
For a grand total of $40 and less than an hour, I got two color block, tiered planters that perfectly match my style and house colors. (You can see the door and house numbers Here) Now… if only I can keep the plants alive… What do you think of my DIY Planter Upcycle?
**Since my mom loved my planters, she kind of hinted around to wanting one of her own. Here's what she got for Mother's Day! Black and Red to match her house!
If you thought Round 1 was impressive, what do you think of these Round 2 Knockoffs? If you haven't already, stop everything and click here to vote for your favorite 3 knockoffs! We aren't exaggerating when we say we were blown away this round. And… lucky me, I get to share my knockoff today… no pressure right! Ha!
Before I share mine, let's enjoy a Blast from the Past and look at the Knockoff that won us Round 2 of Creating with the Stars in 2012. It appears that Anthro is DIYers favorite store to knockoff. Last year we tackled their Ordinal Dresser (you can see the full tutorial here)
---------------------------------------------------------------------------------------------------------- Now, onto my little ol' knockoff project…
I really wanted Anthro's Woodcut Print, but at ahem $1600… are you kidding me?? At that price, it had better grow into a money tree!! I'll take my $6.99 version thank you very much.
Here's how I made mine… it took about 5 minutes. I searched Google images for a woodcut picture I liked. It was black and white, but I wanted a red tone similar to the original. I brought it into PicMonkey (love that site) and used the tint effect to choose a new color. The options are endless as you can see from my screen shot below.
If I wanted a smaller size this project would have been FREE, but I needed a 12x12, so I printed it at Staples for $6.99. It's not an earth shattering knockoff, but I saved $1593.01- Woohoo! Jess and I love getting a high end look for less… Why pay full price, when you can just Knock-it-Off? The woodcut art is part of my new Kid Friendly Gallery Wall! Every single item on this wall is plastic, wood, or just plain paper. With 4 kids, and after about 7 broken frames I knew I needed a plan B!
I'll be posting more about this wall after CWTS, but here are a few pics for you to enjoy…
And yes, those prints are just paper, framed in washi tape. Break proof!
That metal print is SO us! Eric and I might be a wee bit sarcastic… It says,"National Sarcasm Society… Like we need your support"
----------------------------------------------------------------------------------------------------------------- Alright, enough about me, let's talk about you! Are you ready to link up your favorite Knockoff project?
The winner of Round 2's link up will receive an awesome prize package from Belmonili and Perfectly Imperfect Shop, and we promise you're going to love it!
This link party will be open until Friday, March 22nd at 10 PM EST. Jess and I are going to be choosing our absolute favorite knockoff project and revealing the tutorial for it on Sunday! If you win this week, we'll be contacting you sometime on Saturday for the tutorial, so be ready! Please remember a few things before linking up: 1. Before linking, please LIKE us on Facebook (Thanks!)
2. Make sure you link back to us in your post. Only those linking back will be eligible for the prize! 3. Only one submission per person. 4. Choose a project that you've done in the last 12 months. Want to see all the amazing Upcycle projects that were linked up last week?Click here!The Round 1 Link Up Winner was thisawesome light fixture!
When a close friend asks you to help re-do their bubble-gum pink, non-descript guest room, you can't say no. You almost feel like you need to stage a design intervention immediately. Everyone has a room like this one: a forgotten catch-all guest room/play room/ exercise room/ office. We decided that it was our duty to save the world (and Connie and Mark's parents!) from this room so we spruced the place up a bit. I mean, anything would have been better than that color pink, and we were game for the challenge. So.without further ado, here's our first official SuperFab Room Redesign! Update: Welcome YHL Readers! For the Stencilled Wall Tutorial and Paint colors click HERE To see the room with and without accessories click HERE For the Shutter Headboard Tutorial click HERE
Yay! Doesn't it look incredible? Over the next few days we'll be posting the tutorials on everything you see in the rooms, but for now, let's take a look at some beauty shots, huh? Obviously, the scene-stealer is the multi-colored houndstooth stenciled wall. This was a definite labor of love (we even called in some backup assistance), but it makes a huge impact in the room, don't you think? We love the mix of the classic houndstooth pattern with the modern color scheme. It definitely set the tone for the rest of the room: mixing old with new. We'll be posting a tutorial next week, but if you want to get a jump start on your own, you can visit Royal Design Studio to get this amazing stencil for yourself!
Just take it all in, people.: ) Another fav is the headboard we made out of old shutters (or are they doors? Not sure!) we found at our favorite salvage place, Architectural Antiques. We needed something that would stand out from the wall, command attention, and add some character and and this baby does that. Gorgeous!
Another fun part of the design for us was coming up with a unique way to showcase Connie's collection of old family photos. This gallery wall is super simple and allows the photos to be the main focus. We can't wait to tell you how we did it, so you can try it too. And now you know what the gears were for!: )
Connie & Mark had this dresser that we knew we could make fabulous with some paint and new hardware, so that saved us some big bucks! That blue may be one of our all-time favorite colors and changed this dresser from one that was ready to be kicked to the curb, to something that they'll never want to part with!
This little vignette makes us super happy, because not only is it adorable, but it's totally functional, as well. Since this is their guest room, we made sure to add some towels and an extra blanket to the cart to make their guests feel at home. An $8 industrial cart never looked so good! The metal cubby shelf was a great find from HomeGoods that completes this corner of the room.
And a room makeover is nothing without accessories. Pulling together all of these items was our idea of a good time, and they make a world of difference. We'll show you the proof this week, trust us.
We're already planning a sleepover at Connie and Mark's.; ) We hope you enjoyed our makeover! Be sure to stop back over to see all the juicy DIY details in the next few days. Oh yeah, one more thing: You can see a whole lot more of our DIY escapades on our projects page!
And don't forget that Monica is in the running to be the New Face of Proctor & Gamble Home! Please head over and vote for her. You can vote once a day, now through October 3rd. We know voting things can be a pain, but this one is simple and man, winning would Rock our World! So thanks so much! Want more EC2? Use the icons below to follow us!
If you missed the announcement about which nine contestants made it through to Round 2 of Creating with the Stars,click here! We're dying to see what those ladies come up with for this week's Knockoff theme!
-------------------------------------------------------------------------------------------------------------------------- We didn't think it could get much cooler than Sarah's 80's Chandelier to Glass Mirror project, but man, were we wrong! This light fixture is a show-stopper and we were both completely in awe of Sarah's creative vision for old fluorescent light covers. I'm not sure I would have ever thought of this project, but I wish I did, because it's stinkin' awesome. Kudos to you, Sarah!
Walking through Habitat ReStore I spotted a few egg crate diffusers — you know those grates that cover fluorescent lights in basements across the country. It's the last lighting fixture I would consider for a project, but once I got around my thoughts of drop ceilings, I began thinking how neat it would be to use the grid to create any square geometric shape that I wanted. At $2 each, what could I lose?
Browsing Pinterest I found this amazing light, Lolita — Shine by SHO and fell in love with the arms. It's lines are simple, but make a big impact! Perfect for a statement piece!
Once we decided on the shape, we measured and marked the edges with a permanent marker. The egg crate diffuser was cut into the shape of the arms with small clippers (clipping as close to the edge as possible).
Next we taped the bottom with painters tape and filled with plaster of paris (mixing it on the thinner side so that it would level itself at the top). You want it as level as possible to reduce sanding. Any excess was leveled off with a spackle knife.
Once firm, they were placed in the sun to fully cure (I ended up letting it sit overnight) Then excess was sanded off. Some of the squares fell out during sanding, so I used a little craft glue to get them back in place. Then I patched the imperfections with drywall spackle and sanded again once dry. This part was pretty messy — so I was definitely glad to be done with sanding! We wanted a simple fixture so that it wouldn't compete with the arms. Looking through thrift shops, all we could find were ones with curves (very '80s) we needed something more mid-century modern. So we ended up building our own electrical housing out of old chandelier parts, PVC, and brass tubing. Here's how we did it:
Honestly, this wasn't the easiest task, but definitely doable. It required modifying (mostly cutting holes in the PVC) so that all the parts would fit snugly. To assemble all of the pieces we used Gorilla Glue Epoxy
We followed the directions by mixing equal parts of the resin and the hardener (in small batches so it wouldn't harden too fast). This stuff worked SO well! It set up fairly quickly and was SUPER strong!
All parts were lightly sanded to remove any gloss, and dust was removed with a microfiber cloth. Then it was primed, and painted with Sherwin William Rivulet (2 coats).
We finished it off with 2 coats of Krylon Lacquer to give it a super glossy finish. Turning off the electricity first, we installed the light and held our breath as we flipped the switch. Success! It works!
We also installed trim and painted 8" stripes on the ceiling to frame the fixture.
and a gallery wall with a few fun prints, paintings, and some fabric mixed in!
I love this fun addition to our office area!
Here's the price breakdown: (2) Fluorescent diffusers: $4 (Habitat ReStore) Plaster of Paris: $5 (with coupon at Michaels) Gorilla Glue Epoxy: $5 Chandelier: $5 (Habitat ReStore) PVC parts: ~$3 (Home Depot) Brass parts: ~$10 (Ace Hardware) Total = $32 Not bad for a statement piece! So next time you see a plastic diffuser don't just pass it by, think about what you can create with it! -------------------------------------------------------------------------------------------------------------------------- You guys, Sarah has unbelievably good taste and mad DIY skills. I was browsing her blog and this Fabric-wrapped parsons table just jumped out at me! Would you believe that she made that with hollow-core doors??
and take a look at this tufted headboard with nailhead trim. She had to have bought that, right? Nope! she made the entire thing. Gorgeous!
Don't forget to check back tomorrow because one of YOU might be featured here on EC2! We've picked our favorite upcycle project from the link party and will share the tutorial for that project! Get excited, peeps! Also, start thinking about which project you want to link up for Round 2's link party theme: Knock Off! Beginning Tuesday, you can link up any knock-off project you've done in the last year for the chance to win more prizes and a feature here on our little ol' blog!