My Creative Blog [Search results for repurposed]
What exactly is Upcycling?

CWTS Updates, Link Up, and some Favs!

How To Turn an Old Cabinet into a Planter Box

Fab Find Friday {Contact Us- Help a Reader Out}

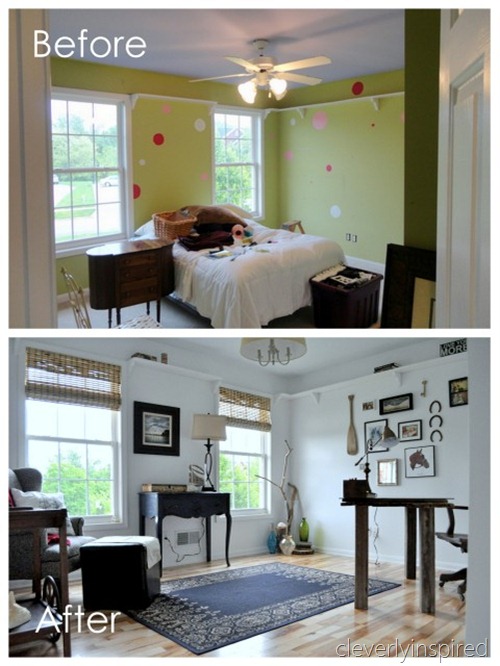
Dining Room — After

I-Can't-Believe-This! Finds
Repurposed Art into Bulletin Board {Cleverly Inspired}
20 Hours and Counting…

Do you Vista?