My Creative Blog [Search results for accent paint

  • How to Paint a Mosaic Accent Wall {Bedroom Makeover}

    How to Paint a Mosaic Accent Wall {Bedroom Makeover}

    Yesterday, I shared my daughter Kira's Colorful Bedroom Makeover with all of you. Check it out here if you missed it. It's interesting when you're doing a room for a little person… there's this part of me that wants to go all crazy blogger-designer-nutso on the space, and then there's the realistic mom side that reminds me that her room will be a disaster of toys in about 3 minutes flat and that I don't need to go over the top to make her happy. Honestly, I'd kind of be going over the top just for my own self-interest. So, with that being said, the mommy voice won out and I went with a fun, yet practical room makeover. I'll guess I'll save up the glitz and glam for the master bedroom (if I ever do tackle it!).

    Today I'm going to share with you the focal point of the room… The Mosaic Accent Wall!

    I'm a total sucker for an accent wall. Honestly, since I was a junior in high school I've been whipping them up! My very first was a blue feather dusted wall in my parents' house. Then, I did a pretty cool square grid wall (again at the 'rents house) when I was a senior. Kenzie's first bedroom had vertical stripes and stars, then I changed to a fun magenta gingham. We had an argyle bedroom too! I wish I had pictures of all of those, but it was in the film day and age- boo! Enough of the trip down memory lane, let's get going with the tutorial! How to Create a Mosaic Accent Wall Since this is the room of my 5 year old, I asked her what she wanted, and she told me LOTS of colors."Mommy, I want purple, blue, green, orange…" and the list went on and on. I thought about it and finally decided, I could give Kira exactly what she asked for- lots of color!

    I bought a sample size of each color and a gallon of white paint to use as my base and for all the other walls. One word of caution, Valspar sample paints do not have the normal bonding agents that regular paint has. It will require more coats for solid coverage. Just keep that in mind when you're planning a project. For me, buying 8 quarts wasn't an option (this was a makeover on a budget) and I'd rather have to do a few extra coats of paint. I had JUST enough- it was close, but we stretched the samples far enough.

    This unfortunate event occurred as soon as we got home with the paint. Grrr… I was sort of hoping Hurricane Sandy would wash some of the stain away a few weeks ago- No.Such.Luck!
    Blogger Fail!

    Here's my supply list: Valspar® Sample Paints Base coat paint Purdy® Paint Brush Chalk-line (a DIYer Must Have!) Tape Measure Pencil Frog Tape® Mini Rollers Paint Trays

    I had to get rid of that BRIGHT aqua color and amazingly, the Valspar white paint & primer in one did the trick! I was left with a blank"canvas" and two weirdos (the hubs and my oldest)!

    There are all kinds of approaches to getting perfectly straight painted lines, but I really think we use the BEST method. I'll tell ya about it, and then you can be the judge…
    1- Measure out your stripes and put tick marks on both sides of the wall.

    2- Use a Chalk-line to get Perfect Guide Lines- Simply, put the string directly on the tick marks on both sides of the wall, pull the string taut, and snap that baby! It is so much MORE accurate and FASTER than using a level and a pencil. Let me remind you of something… you've seen how awkward I am at dancing… would you trust me to use a level on wall stripes? I think not.

    These bad boys are crisp, straight and ready for some Frog Tape!

    3- Use Frog Tape to Divide your Stripes. When I'm working on an accent wall, I know it's going to be the main focus of the room, so I have to have crisp, perfect lines (yes, perfectionist tendencies admitted).

    My hubs uses a few pieces per stripe, but I'm a one stripe wonder. I definitely prefer to do the entire stripe with one piece to make sure there aren't any uneven seams. Also, make sure you tape off the two side walls.

    I love me some stripes!

    After all my horizontal stripes were finished, I randomly placed my vertical dividers. I toyed with using a mini level to get them perfect, but then decided I could do it well enough by eye. Please ignore the epitome of frumpy DIY clothes, no shower, and tape on the leg.

    Whenever I'm working on a project like this I rip off a bunch of pieces the length I need and keep them on the wall so I can get to them quickly, if I'm not using that method, I keep the roll of tape on my arm. Works like a charm.

    4- Paint the Edge of your tape with your Base Color. It's one extra step, but it's the MAGIC INGREDIENT to perfect, crisp lines. Frog Tape alone is excellent, but on an accent wall like this, I had to be sure everything would be perfect. Just take your base coat color (whatever color is under the stripes) and with an semi-dry brush (not dry, but not sopping wet either) paint over every edge. I don't recommend using a roller for this step, I always use a paint brush.

    It makes the wall look a little scary, but it will all work out in the end! Allow it to dry- I gave it about 40 minutes before putting color over it.

    I had a tray and roller for each color. I wanted to work in a random pattern and that meant making decisions as I went along- no time for washing rollers and brushes.

    Finally, it was time to put some color on the walls!

    If you want a random look (like mine) I'd recommend working in one section at a time, mixing your colors as you go.

    Because of the sample paints, it took 3 coats per square. It was a tad scary at first, but by the second coat, I was confident the coverage would be good.

    Jimniy Cricket- Even before I removed the tape I knew I was in love!

    Now, for the Moment of Truth-Removing the tape…
    Once again Frog Tape & the Mangin Method = Perfection!
    Seriously, I do a cheesy dance (you can picture it) every time I remove tape from a project!
    I do recommend removing the tape as soon as you're done-I don't wait for the paint to dry, and I remove it VERY slowly and evenly.

    Here's the finished product!
    It was so simple and took me and Eric about 4 hours from start to finish.

    Here's a before and after…

    It's a lot of color (as requested by Kira), but I like the extreme contrast that the white walls bring. I also could totally picture doing this with muted tones or even all in one color with an ombre effect!

    Almost every morning, I find KJ hunkered down reading books in her PJs… She loves her new room!

    Tomorrow, I'll be giving you all the details on the whiteboard wall and Wednesday one of our favorite things… DIY faux canvases with Staples prints! Make sure you check it out!
    What do you think of the accent wall? Have you ever tried something bold with paint?

  • Creating with the Stars Round 3 Voting

    Creating with the Stars Round 3 Voting

    Ok, guys, we are in the last two weeks of competition with Creating with the Stars and to say that the contestants exceeded our expectations would be the understatement of the century. We have six competitors still fighting for a spot in the final 3 and no one is going down without a major fight. If you missed the first two weeks of projects, check them out below: Round 1 Projects & Winners Round 2 Projects & Winners

    This week some amazing prizes are at stake. The semi-finals winner will take home…
    $500 Gift Card to Home Depot (Contestant & Blog Star!!) $100 worth of Martha Stewart supplies from Plaid Crafts $125 Gift Card to Lucent Lampworks Project featured by HomeTalk

    -------------------------------------------------------------------------------------------------------------------

    Now, we know you're all dying to see what amazing projects our contestants have come up with this week with paint! Let's go!
    1. Painted Couch Featuring a Handmade Horse Stamp

    We have all seen these couches before in someone's grandma's house. This vintage couch is not the good kind of vintage, but I may have some of you convinced that this traditional style can be made more modern. I painted the couch white, carved out a horse, and stamped the living daylights out of it with black paint from Home Depot. Enjoy!

    2. Painted Map Coffee Table Painting! I'm not going to lie, I was pretty stoked about this week… and amazed I made it here. Painting is one of the easiest and cheapest ways to transform almost anything. And my table was in need of some transforming- big time. I picked it up at a flea market type place for $40… peeling, chipping, splinters, dirt and all.

    I sanded and scraped (forever) until no more paint chips fell off when you walked by. Then I gave the entire table a coat of latex paint from Home Depot (mixed with a little plaster to make chalk paint), leaving some of the peeling paint texture on the legs. After that was dry, I taped off a large"X" pattern on the smaller shelf and added a painted stripe detail to IKEA storage boxes for the bottom.

    On the top, I made my own basic map stencil by cutting away the continents on a large world map I printed out. I stuck the map to the table with painter's tape, then painted over top with blues and greens. Once that was"roughed in", I removed the paper map and spattered the rest of the painted detail free hand using mostly a plastic spoon and really watered down paint. The last step was to give the entire table a coat of protective finishing wax.

    I kind of think the end result is out of this world… hehe, get it?

    3. Painted Desk and Accent Wall Using Custom Stencils

    I love paint! It sets the mood of a space and has the power to completely transform a piece. I found this large bookcase at Goodwill and loved the detail on the doors, arch at the top, and the drop panel but didn't like choppy layout, worn finish, and heavy bottom. Luckily, all of my dislikes were easy to fix with a little paint and reconfiguration of the layout.

    With a little help from the Home Depot, I was well on my way to getting started. Thanks Chris!

    Fix #1 — I moved the drop panel down to 30" so that it can now be used as a secretary desk. Goodbye choppy bookcase, hello new desk!
    Fix #2- Paint! The finish was worn and it had a few areas that needed to be filled with wood filler so painting was the perfect solution! I chose a classic ivory and paired it with a deep turquoise stenciled background. I created the stencil based on one of my favorite Farrow and Ball wallpapers.
    Fix #3-the thick base and doors made this piece look bottom heavy. To fix this, I added small feet to lift it off the ground and create a little visual space at the base.
    I also created a large stencil based on one of my favorite rugs. The large scale and contrast provides a lot of visual impact and adds variety from the small scale stencil used on the back.

    With the help of paint and a few power tools, this bookcase has been given a new life and I love the way it looks in my new space! 4. Painted Chalkboard with Map and Games
    This week's theme was my favorite so far…I love the many many ways that paint can be used to make an instant change and impact on a space or an object. I also love chalkboard paint. This week's project is dedicated to my kiddos who surprise, surprise…love to get that their craft on too!; )

    In designing the chalkboard wall, we decided to have a map of the U.S.A…I love the way it looks and it will be fun to track the different states we go to as a family. After coloring in the states my kids have been to, they commented"well that's not very many", so I let them each choose a state they would like to go to someday…which explains why Hawaii and Alaska are colored.: )
    Lately my oldest child has loved playing tic-tac-toe, so I thought a large, interactive wall version would be super-fun! I also included many"frames" for the kiddos to draw their masterpieces in. I picked the step-stools up at IKEA and painted them in fun colors, and the animal hooks holding our chalk and erasers came from Anthropologie.
    It was a blast picking out all the fun paint colors at Home Depot! Because I was using so many colors and didn't need a gallon of each color…Home Depot made my day when they told me that they can mix any color in a small, 7.5 oz jar…perfect!!!

    And after a super-busy week painting…I'll go to bed tonight and dream about being on a beach in…

    ;)

    5. Aztec Wonder Painted Rug I have been in love with the Aztec inspired rugs that I have been seeing in catalogs and online lately. The drool kind of love. But alas, rugs can be expensive. They are not something I can change an a whim. So, when the paint round came about I decided that it was time for me to get my hands on my latest crush and do it in a budget-friendly way. In DIY style, of course.

    Isn’t she beautiful?! This rug was a labor of love. And a lot and lot of sponges cut into stamps…applied one by one. Fabulous colors, a gentle application of paint from Home Depot, and lots of patience made this rug come together into something lovely.

    My rug is more then happy living with me. And, I am so pleased to have my own version of this latest craze. And… you know what? I’m glad we’ve moved on from Chevron to Aztec. I’ve got my Aztec rug and I’m ready to go!

    6. Painted Wall Mural and Dresser
    I have a thing for maps right now — doesn't everyone? So, when it came time for the"paint" challenge, I was pretty excited to hop right in and paint a giant world map on my wall. Because who doesn't need one of those?!

    I used a projector to hand-paint the whole thing, and then for a bit of contrast (and fun!) I added an old Ikea sideboard we had laying around that I painted Sunny Side Up by Behr from Home Depot. For a couple more little touches, I added bicycle drawer pulls (because, why not?) and numbers to the door fronts — you can barely see them from straight on, but if you look at it from a different angle, they suddenly show up. It's a subtle touch, but I didn't want anything to compete with the map above it!

    I love how the black and yellow work together, and I'm pretty excited to finally achieve my dream of covering a wall with the entire world. And, really, I find it hard to believe that this bright and sunny sideboard was once a plain, boring black Ikea piece — don't you love how big of a transformation paint can make?!


    It's time to vote! You guys have a ridiculously hard job- we don't envy you a bit! You can only vote one time, but you can vote for your favorite 3 projects. **The voting glitch for Round 3 has been corrected and voting will be adjusted accordingly. Thanks!
    In order to vote, please LIKE EC2 on Facebook.

    jess
    Monica
  • Modern Houndstooth Stencil

    Modern Houndstooth Stencil

    Thank you all for your awesome response to our SuperFab Room Redesign! We were thrilled with how it all turned out, (and thankfully, so were the homeowners!), but we realize that the houndstooth stencil from Royal Design Studio totally steals the show! Our favorite thing about this wall is the modern color scheme paired with the very classic houndstooth pattern. However, it's one thing to tackle an entire accent wall with a stencil, but it's another whole thing to do it with multiple colors! There's quite a saga behind this wall, and we learned some really helpful things about how to stencil well that we thought we'd pass along to you. When you DIY, it's all about learning as you go, right?

    Houndstooth Stenciled Wall

    But first, let's talk about these gorgeous colors. When Monica and I met up at Home Depot, these paint colors literally jumped out at us and we picked them within five minutes of getting there. Gotta love when that happens. Of course, no one does it better than Martha Stewart, and these colors are all from her paint line. So without further ado, here are the beauties by name:

    Now, back to the saga. We planned this stenciling project like any other; chose the order of the colors, picked our starting point, leveled the stencil and got to work. The only problem is that we did NOT have the right supplies. We started with only two brushes (for 4 paint colors!) and four jars of paint samples, which, unbeknownst to us, contain no binding agents so they don't work for stenciling. Each individual"tooth" took three coats of paint! And after four hours (no joke!) this is how much we had finished:

    (Sorry, bad phone photo!)
    Ugh! So frustrating! We took a break to kick ourselves for starting this project, and then reevaluated our situation. We estimated at least another 8 hours of work, which scared us silly. We are all about DIYing as much as possible, but we can also recognize when we are in over our heads, so we called in the big guns to help us out.

    We had the good fortune of meeting Bernadette of The Faux Pro, Inc. through this blog, and boy, were we happy we did! Bernie specializes in stenciling (she's friends with Melanie from RDS), faux finishes of every kind and is truly a talent! Her work has been featured on HGTV and has an amazing portfolio of work on her site. She was generous enough to come help us out, and brought her assistant, Mary along, too. They let me tag along and watch what they do, and gave us loads of tips for making the process go smoother. And today we get to share those with you. Woohoo!
    1. Gather the Right Supplies:

    1- Five in One Tool: Comes in handy for all sorts of jobs like opening paint cans, cleaning rollers etc. 2- Frog Tape: Bernie swears by Frog Tape because it doesn't pull the paint off the walls. 3- Paint brushes, angled brushes, stenciling brushes: 4- Razor: 5- Detail brushes: Mary's entire job was to follow Bernie and touch up any bleeding. The result is an unbelieveably crisp finish! 6- Scissors: Bernie uses these to cut the stencil as needed along the ceiling and corners, instead of trying to bend the stencil. 7- Foam Rollers: Most of the time, Bernie uses a roller to stencil, especially because Mary can touch up any bleeds. 8- Spray Adhesive (not pictured): this is a must! We learned this the hard way.

    9- Simple Green: This cleaner is the best for keeping your stencil like new so that you can use it over and over again, but she uses it for absolutely everything!

    10- The Quality Masker: I have never seen anything like this, but it works magic! You attach the tape, along with brown paper to the masker and run it along the baseboard or ceiling. As you roll it out, the tape adheres to the brown paper creating a barrier. It takes literally half the time as taping out the edges by hand. You can find them at any paint store.

    2. Set-up a Stenciling Station Before ever starting, Bernie finds a place to set up her work station. She lays out a drop cloth, covers it with a trash bag, then a towel and then the stencil. In between every set, she wipes the stencil clean and dries it with the towel. This ensures that you don't get paint on the carpet, but also that no paint remains on the stencil and gets on the wall. She keeps a hair dryer close by, if she wants to hurry the process along.

    3. Use the Right Method If you're using a stenciling brush, make sure to blot it on something very absorbant, like paper towels or cardboard. Here's the most important tip I learned that day: Brush from the outside of the stencil in towards the center. Basically, brushing away from the edge lessens the likelihood of bleeding, which saves you tons of time!

    Hopefully, this helps you out a bit, like it did for us. A big thank you to Bernie and Mary for pitching in with our project. If you have a project in mind, we totally recommend that you contact them! The end result of this saga is an amazing focal wall that makes us so proud! Have you ever gotten in too deep with a project? Do share!

  • Wood Grain Christmas Countdown 2012

    Wood Grain Christmas Countdown 2012

    Hey Everyone! I'm so excited that I can finally share my Christmas Countdown with all of you! I had to wait until P&G was ready for it on their pgtryit.com site, so I'm sure you've already created yours for 2012, but hey, Pin it for next year! Tomorrow is Jess' Christmas home tour and I don't know about you, but I'm really super excited (okay, yes I've seen it all, but not in pictures!)
    ------------------------------------------------------------------------------------------------------------------- Hope your Thanksgiving was awesome and you're ready for the crazy holiday marathon that is the next few weeks! I don't know about you, but the time between Thanksgiving and Christmas is probably the most exciting time of the year for my family. It's also really easy to get so busy that we miss taking time to do some of the things we love!
    As the Trend Trio Home Expert from P&G’s Have You Tried This Yet? I'm going to share with you a fun craft that you can make to ensure the month doesn't pass you by!

    Christmas Countdown Tutorial Christmas Countdown Tutorial This is not yo mama's countdown where you just get a little piece of candy that most likely was packaged last year… This is an interactive family activity that I know your family will love. The best part is that it will ensure that none of the special activities and traditions slip through the cracks.
    Step 1- Start with a plain Jane piece of plywood. I'd recommend looking for one that has really cool patterns in the grain like this one does!

    Step 2- Lightly spray paint. I gave the wood the lightest possible coat of white spray paint. Keep the can far back and move it back and forth very quickly. The spray paint got rid of the warm brown tones and began to highlight the grain.
    Step 3- Paint the grain to highlight the details. I used about 1 part paint to 3 parts water to paint over the awesome grain! I dipped my brush in the mixture and then dabbed it dry on some paper towels. I used a really light hand and tried to feather the paint on, so that it looked natural.

    Step4- Use Stencils to title your board. I used a simple, industrial font and stencils that are adhesive backed. They make my crafting life so much easier.

    Step 5- Spray paint 25 wooden clothes pins. I picked a cool-toned grey blue color that would pop on the white-washed plywood.

    One tip about spray painting- have an old drop cloth handy. I use this piece of plastic when I need to paint in my garage so that I don't get it all over the floor.

    Step 6- Choose some washi tape colors. Washi tape comes in almost every pattern imaginable these days. You can order from a huge selection online, but I actually got these colors at my local craft store. Washi tape is really versatile and can be used on all kinds of surfaces.


    Accent each mini envelope with your washi tape and then either hand write or stamp your countdown numbers.

    Step 7- Measure, Place & Hot Glue your clothes pins. The easiest way to do this is to just lay it out on the wood and then measure your spacing to keep it consistent in each row.


    I just love the end result!


    Step 8- Plan 25 Awesome Family Activities. Write down 25 things that you want to do. Each day you will open an envelope and do what's written inside. I recommend using a calendar to plan out your activities before putting one inside each envelope.


    Our activities range from something as simple as reading a holiday story as a family to going out to see all the Christmas lights in our neighborhood.

    I hope your 2012 holiday season is super special and that your family enjoys all the awesome activities you plan for them!

    The countdown is on!
    What kinds of activities will you choose for your family to do this month?

    Make sure you check back to keep up with all of the Trend Trio videos, blog posts, and product tips to help make this holiday season the best one yet!

  • Side Table Makeover {Annie Sloan Chalk Paint}

    Side Table Makeover {Annie Sloan Chalk Paint}

    So by now you know that I'm in love with chalk paint. I basically shout it from the rooftops whenever I get the chance. It totally transformed my fireplace, and is now helping me to makeover my dining room, one furniture piece at a time. The first piece I tackled is this old Ikea table that we bought when we were first married. Even though it looked fine with our barnwood organizing bins, I was so over the warm wood tone and ready for a change!

    I chatted with Shaunna about some different color options and decided on the gorgeous Aubusson blue as an accent color. 

    I seriously would kiss this paint if I could…and it wasn't so messy. I love that you don't have to prep the piece at all before beginning to paint. Because of this, I had a regular paint shop going on in my kitchen a few weeks ago… 

    Once I finished painting, I decided I wanted to add a little more depth to the piece, so I brushed on Valspar's Translucent Color Glaze in Mocha, focusing on the cracks, bumps and holes in the wood. 

    It's a bit scary, but immediately you can see a difference. Basically, you brush the glaze on, let it sit for a minute and then wipe it off with a lint-free cloth (I used an old t-shirt). 

    Shaunna recommends that you use wax before distressing and adding a glaze, but oops! I didn't know that before I tried it. As I was wiping off the glaze, the paint came with it! Ahhhh! So then,I had to repaint and reglaze. Ugh. So… paint, wax, then glaze and distress! 

    Finally, once the paint had dried, I waxed the entire piece in order to protect it from damage. I used this method and it helped me tremendously and worked like a charm! This wax is unbelieveably smooth, goes on like butter and goes a long way. I've never tried the other brands of furniture wax, but now that I've tried Annie's, I don't think I ever will.

    I made sure to let it cure for the specified time before setting anything on it, and then got busy decorating for Fall. Now for a slew of pretty pictures…

    I can't get enough of this color. It doesn't scream at you, but it makes a statement, you know? It's like he's saying in a very polite voice,"Look at me. Aren't I handsome?"

    I'm on the lookout for some late Fall/Winter decorative pillow or covers, so if you have recommendations, send them my way!

    Gotta love the details.

    And look! A sneak peek at my new accent wall partly dressed up! I'm still messing around with the layout of things, but we're getting closer to the big reveal!

    I'm thinking it's a whole lot prettier now, but let's take a look at the before and after, shall we? 

    What do you think of the transformation? I like it so much better.

  • How to Paint a Whiteboard Wall

    How to Paint a Whiteboard Wall

    Thanks for all your feedback on Kira's Colorful Room Makeover this week! Funny story… Jess and I are doing some filming this coming Monday (can't spill the beans yet!) and they need to get some footage of Kira's room… can I just tell you how messy her room is now? There are about 200 tiny Polly Pocket accessories on the floor! If only my house could stay as clean as it is on the blog! If you missed the makeover reveal check it out here and you can read the full accent wall tutorial here.

    Today we're talking whiteboard walls!! It's the perfect solution for creative kids that color on walls anyway!

    I recently learned of IdeaPaint and I was super excited that they wanted to have me try out some of their new CREATE Idea Paint and accessories! I am a sucker for packaging and good fonts and they scored major points with me right off the bat!

    Most people think of whiteboard paint as just that… White! Guess, what? IdeaPaint actually comes in clear (also black and white) so that you can put it over any color wall. That allows for so much more creativity… so guess what I did?? Yup, painted it on white walls! Ha! I have another can that I plan to use on a color-filled space when Jess and I get a blogging office (someday!)
    I have to show you the way IdeaPaint comes… you get two ingredients that need to be mixed… you add THIS to THAT (did you know I love witty things?!?) The prep directions were super simple.

    Office

    So, here's how it all went down… We painted the entire room stark white. It's actually the first time I've ever painted a wall white…ever!

    We didn't use a chalk line to mark off our whiteboard area because we didn't want blue chalk getting into the clear paint. We made really small pencil marks. I knew I was adding a frame, so the edges didn't have to be perfect. The paint was simple to apply with a roller (included in the paint kit) and you could clearly see the painted and unpainted areas because of the shine.

    We bought two 8 foot pieces of plywood for the frame.

    I wanted to mirror the rectangular shapes of the mosaic wall, so I sketched out a happy little drawing. I'd almost kill for just an ounce of artistic ability! (Don't worry, I won't really!)

    We cut the plywood with a jigsaw (Jess and I sure love our jigsaws!!) We didn't take any pictures of that part, because it was really late… Yes, that's AM!

    We waited until the IdeaPaint had dried for about an hour and was dry to the touch before we placed any wood near it. We needed to measure for a few cuts.

    One REALLY important thing to know about IdeaPaint… you need to let the paint cure for 4 days before you write on it at all. They even include a really cute sign to put on the wall!

    The next morning (yes, we do sleep sometimes) I spray painted the plywood. I really liked how some of the grain showed through.

    Want to see something funny?… I don't have sawhorses… but I do have Power Wheels!

    Once the boards were dry, we simply nailed them into the wall with finishing nails (making sure to hit some studs)

    We were left with a HUGE area for Kira to color on! She and her little friends have so much fun playing school, store, and creating"Princess lands" on her wall now! (And don't forget the plain surrounding walls are getting something very special- hopefully this weekend!)

    I highly recommend IdeaPaint- I know chalkboards are all the rage, but they're really messy! I didn't want a constant pile of dust on Kira's light carpet. The whiteboard wipes off easily and I feel like the kids can be even more creative with their color choices. There are so many dry erase colors available.
    I was browsing the IdeaPaint website and found these other cool ideas that I just might try in other areas of my house!
    I love the simple calendar!

    See how cool a colored surface looks with IdeaPaint? That green is awesome!

    Kaden has bunk beds in his room and as soon as he saw this picture he wanted a bunk bed that could write on! I've also seen it used on student desks and table tops for homework etc… There are so many cool ideas you could try (no pun intended!)

    I want to give a great big Thank You to IdeaPaint for allowing me to try out their CREATE paint. Kira and I love the result and I can't wait to try it in on some other surfaces!
    Have you ever thought of adding a whiteboard to your house? Where would you try one first?

    Check out IdeaPaint's Website IdeaPaint on Facebook
    ** I was provided with IdeaPaint to review. I was not compensated in any other way for this post. All opinions are 100% legit and all mine. **

  • The Anti-Wreath {Fall Lovers Series Day 1}

    The Anti-Wreath {Fall Lovers Series Day 1}

    If you read our posts last week, then you know that Jess and I adore fall. We love it so much that we thought it deserved its own mini-series!

    I set out to write a post on awesome ideas for fall wreaths. Sounds simple enough right? I mean wreaths are making a major comeback these days. Well… through my research and pursuit of fabulous wreaths to share, I realized one thing… I HATE wreaths! Yup, I'm confessing it publicly. I think about 90% of them look dumb. So, I needed to find a non-dumb looking something for my door… I found some inspiration and I'm pretty happy with it!
    The Anti-Wreath Tutorial Here's what you'll need: An 11x14 frame (with the glass removed) Paint Ribbon Pumpkins (real or"funkins" haha I just love that cheesy name) Staple Gun Chair Pads
    I went to Michaels and bought this frame 50% off, but… it was still $15.00. I headed down to the basement in search of another 11x14 frame that I could use.

    Here's what I found. I didn't like the lines as much as the other one, but I sure did like the price tag… FREE! (Do you like all the dust on the edges?)

    The best part about this project was that I ended up only buying 2 pumpkins and a can of spray paint!

    I really wanted to use mini real pumpkins, but I think I was about a week too early in the season. Instead, I found these cuties at Michaels for $2.99 each.

    The first step was to spray paint the frame purple. I didn't take pictures of this because really, how many times do you want to see me spray paint something? Then, of course I didn't wait long enough and scratched the paint. GRRR… back to do another coat. I might add here that I used Krylon paint and it was awesome. I loved the way it sprayed and it did dry really quickly… 10 mins max… I just touched it at about 7 mins!

    I did a little test run of the frame on the wreath hanger and it was banging all over the place. NOT COOL. I don't want a dinged up door! So… I ran to my closet of tricks and grabbed these chair pads.

    No more destroying my door

    For the ribbon, I simply tied ribbon onto the stem of each pumpkin and then stapled it to the back of the frame. I also tied one piece of ribbon around the frame and knotted it onto the wreath hanger.

    I think that as far as wreaths go, well, it's pretty cute! The whole project took about 15 minutes (ok, maybe 20 because I smudged my spraypaint!)

    It's not an"In Your Face" wreath… I think it's just a little accent that fits my style just right. (don't you love the little halloween stickies that my kids taped on the windows with scotch tape? They're my mini decorators. I'm finding faux leaves and pumpkins everywhere!)

    For Christmas, I plan to paint it red and add some christmas balls. Something like this…

    Source: google.com via The Real Housewives on Pinterest So, there you have it. An anti-wreath post, from a wreath hater.: ) I might be a hater, but I know some of you dig the wreath. If so, you need to check out Emily over at one of our favorite blogs Jones Design Company. The Nonna Wreath Tutorial

    And even as a wreath hater, I admit this one is pretty cool! Perhaps it's the English teacher in me… Book Page Wreath Tutorial

    I'd love to know if you're a lover or a hater… and head over to Emily's blog tutorials and let her know we sent you! Have a fabulous Monday!

    P.S. Jess and I hung out Sunday night and did what BFFs do… ate brownie batter, browsed Pinterest, read blogs, and planned out some super fun posts for the next month! Can't wait!
    Linked up to: Stories of A to Z Tip Junkie The Inspired Room southernhospitality

  • Painted Secretary Desk & Accent Wall {Sarah M. Dorsey Designs}

    Painted Secretary Desk & Accent Wall {Sarah M. Dorsey Designs}

    If you missed all the amazing projects in the first three weeks of CWTS, be sure to check them out below!
    Round 1 Projects & Winners Round 2 Projects & Winners Ro und 3 Projects & Winners

    -------------------------------------------------------------------------------------------------------------------------------------------------------------------
    Sarah really outdid herself this week with her amazing paint project. She's consistently delivered high quality, beautiful projects in the contest! We are in love with her sense of style and the way she mixes patterns!

    When I first heard that they theme for week three was paint, I instantly knew that I wanted to transform this bookcase! It had great lines and details, and with the help of a little paint and power tools, it's issues could easily be turned around! We started with a bookcase from Goodwill. They were remodeling the back end of the building so we got it for 50% off, which ended up at $30. I'm thinking the drop panel was originally intended to be a dry bar, Goodwill even had it staged with an ice bucket and martini glasses!
    Turning it into a secretary was the perfect solution since it would fix the choppy layout and add more functionality! We also added little feet to help it look not as bottom heavy and swapped the hardware for something smaller.

    Thanks for the help Home Depot!

    We designed the stencils in the computer and cut them out on the silhouette. The big one is 9 — 12x12 sheets that were taped together! See those little lines? They were necessary to hold the stencil together, so I went back and filled them in with a little paint afterwards.

    And a few pics of our process. We adjusted the layout so that it doors were together (on the bottom) and the shelves were together (at the top). I now love how the fold down door doesn't break up the shelving, and now acts as a desk!
    To paint, I followed the same principles I always do: sand, fill in holes/dents with wood filler, sand again, wipe down with a microfiber cloth, prime, lightly sand with a fine sandpaper, wipe with a microfiber cloth, and then apply the top coat (3 coats)!
    and a few behind the scenes shots …
    This stencil was pretty exhausting since it was so big, I had to hold down the stencil as I went since it didn't want to stay flat on the wall. We did photograph it in the garage, but there is concrete there! I picked up some cheap (about $1 a ft) laminate from Home Depot. Finally, when styling, I'm big on placing it and stepping back to see what it looks like, David was nice enough to move things around for me: )

    I found these brass pieces at a local antique store, only a few dollars each!

    Vase and pencil holder are votive containers from Target.

    I was so excited to see ranunculus, my second favorite flower (favorite = peonies)

    See how thick that door is!? The doors alone were super heavy!

    I really love how a little paint can completely refresh a piece! Goodbye worn bookcase, hello new secretary desk! ------------------------------------------------------------------------------------------------------------
    Oh my word, not only does Sarah have amazing vision, she's a pro at making her vision come to life! We can't get enough of the way those stencils complement each other and the way she staged the shelves. Isn't it crazy that Sarah did this in her garage too? Lucky garages this week, for sure!: ) We can't wait to see what she's going to come up with this week! I just spent way too much time drooling over Sarah's house. Make sure you take a look at her home tour- it's fab!

    We'll probably be double-posting tomorrow (you know, we're crazy like that) so be sure to check to see which linked up project this week is our favorite!
    We hope you have a wonderful Easter. This holiday means so much to us and we're grateful for what God has done for us today and every day!

    jess
    Monica
  • 25+ Upcycle Ideas & Ikea Hacks

    25+ Upcycle Ideas & Ikea Hacks

    If you missed it, last week we had the chance to complete a 30 minute White Box Challenge in front of 450 women! It was so much fun and pushed our DIY skills to the max- 30 mins feels like 2 seconds when you're working on an entire space! Here's the before and after- to see the full post about the challenge, click HERE.

    Throughout the evening, we upcycled and hacked our way to a completed room, but there are so many other great ideas for these inexpensive pieces, that we just had to share! So get ready for… 25+ Upcycles and Ikea hacks!

    First up… the Ikea LACK side table. The Lack table is a DIYers dream because the options are endless!

    Here are 3 of our favs… (Click on the number to see each full post from the source) 1…2…3…

    At the event, we turned ours into a tufted ottoman! (Tutorial coming later this week!)

    We LOVE the Ikea Rast dresser because it's under 40 bucks!

    How fabulous are these hacks? 1…2…3…

    We combined two Rast dressers, added new hardware, some metal detailing and had ourselves an awesome buffet!

    Here's a generic accent chair. Ikea has lots of different styles, but left alone, they're pretty plain…

    These chairs went from drab to fab with a little DIYing. 1…2…3…

    We paint dipped the legs a bold orange and added gold nail heads to add a punch of style!

    Rugs can be expensive! One of our favorite places to get them cheaply is RugsUSA.com, but another way is to buy a cheap outdoor rug and paint it yourself! This one was $19.99 at Home Depot!

    It's amazing what a little paint can do! 1…2…3…

    We added wide stripes to our rug for the white box, but in our hurry to get the room done, I may or may not have walked across the wet paint! Oops! No pics for you!

    Okay, isn't this creepy art awesome?? Well, you might not have something this creepo, but you can score great art at thrift stores or upcycle a piece you already own!

    Each of these projects use paint to tone down the"creepy art" factor! 1…2…3…

    Here's what we did with our blah artwork…

    Target and Walmart sell book shelves so inexpensively! The problem… they look inexpensive!

    How about these ideas for fancying up your shelves? We love every hack Kate from Centsational Girl has ever done! 1…2…3…

    Almost everyone has a dated lamp around the house- and if you don't you can get one any Saturday at a local yard sale!

    Here are three fun ways to spruce up those dated lamps. 1…2…3…

    For ours, we replaced the shade, added some ribbon, and spray painted the base.

    Pictures of family and friends are awesome, but here are some outside the box ideas for your extra frames!

    I'm a huge fan of what Lindsay did with her open frames! 1…2…3…

    And what would a post on upcycles be without mentioning pallets? 2012 and 2013 were the years of the pallets!!

    Here's a variety of ideas from walls, to plants… 1…2…3…

    We used a pallet to make a simple shelf- unfortunately, we didn't bring any mags, so in 30 minutes… scrap paper and Bibles it was! lol!

    So that should leave you on Upcycle and Hack overload!! Have you ever DIYed any of these items before? Do tell!!

    Monica
  • Barn Sale Treasure! {DIY Chalkboard Mirror}

    Barn Sale Treasure! {DIY Chalkboard Mirror}

    This weekend Jess and I got up bright and early on Saturday morning to attend a barn sale. We weren't 100% sure what to expect (the details were limited) and on the way we were laughing at the possibility of us walking it and it being all farm equipment! Thankfully it wasn't! The sale was inside and out of this cool, old barn

    There were plenty of random things, but also tons of furniture, mirrors, and stuff that was right up our alley!

    I REALLY wanted to buy this piece for my dining room, but it's a corner unit that wouldn't fit. I was bummed!

    Jess almost bought this mantle to turn into a headboard, but I kind of talked her out of it!

    We both loved this cool sign!

    I spotted and scored this awesome"Mirror, Mirror, on the wall…" style mirror for $5.00!

    DIY Chalkboard Mirror Have I mentioned I'm impulsive?? By Saturday afternoon I was ready to start working on my mirror project! I make my poor husband take all kinds of dorky pictures of me holding things… He accidentally got himself in this picture (don't tell him I used it on the blog!)

    Here's the mirror before… Jess is in a gold phase, and liked it gold, but me… not so much…

    I went to Lowes and after staring at the spraypaint choices for an eternity, I decided that blue will now be my kitchen accent color. A worker actually made a comment about how long it took me to choose.: )

    Did the blue in the above picture worry you?? It just looks crazy bright in the pic, in reality, it's a really great, dark blue! Love it! If you're doing this project with a mirror, I recommend spraypainting right over the mirror as well. It acts like a primer for the chalkboard paint.

    See the little cobwebs?? I clearly didn't take the time to prep the mirror. Thankfully, they wiped right off. Impulsive remember?

    Next, it was time to paint the mirror surface with chalkboard paint. You can get it by the quart at any Lowes or Home Depot.

    Rather than using my real painting brushes, I opted for some art brushes because I was going to freehand the edges.

    It is just me or do other people like taking pictures of open cans of paint? I always think they look so cool!

    Thankfully, the mirror had an easy edge to follow and I was able to get my lines nice and crisp (perfectionist tendencies!)

    The chalkboard paint went on really evenly and only required one coat.

    And of course I hung it before it was dry! Ahhh I love it so much!

    We decided we'd use it for a countdown for this kids for now. Eventually, I'll need some kind of quote that makes me seem way cooler than I am.

    Here's where it's hanging in my house…It's on a small wall area between the kitchen and living room. And look, I've been using my Key Hooks and you can see them in this picture!

    So, do you have any cool frames or broken mirrors that you can make into a cool chalkboard? What do you think of my Mirror, Mirror on the Wall turned Chalkboard?

    The Lettered Cottage

    We're linking up to a few Great Blogs! Shabby Nest, Remodelaholic, Under the Table and Dreaming, Today’s Creative Blog, DecorChick, Finding Fabulous, The DIY Show-Off, Be Different Act Normal, Tatertots and Jello, Polly Want a Crafter?, Shabby Chic Cottage, Stories of A-Z, House of Hepworths, Beneath My Heart, Shanty 2 Chic, The CSI Project, CRAFT, House of Grace, Domestically Speaking, Creations by Kara, Southern Hospitality, Lolly Jane, Keeping it Simple, Somewhat Simple, Making the world Cuter, Young and Crafty, My Backyard Eden, Dittle Dattle, A Glimpse Inside, At Home with K, Brambleberry Cottage, Beyond the Picket Fence, Sumo’s Sweet Stuff, Someday Crafts, Serenity Now, The DIY Club, My Girlish Whims

  • Refinished Dining Room Table {Furniture Makeover}

    Refinished Dining Room Table {Furniture Makeover}

    Oh goodness, this dining room is taking forever to finish! I've been working on it for the past several months as money and time have allowed, and we're definitely in the home stretch, but it's the little things that are making me crazy! I've already showed you the side table I made over, and the planked wall with exposed studs accent wall we created, which really helped change the feel of the whole space. But let's be honest, one of the most obvious things that had to change to fit the whole"coastal/cottage" vibe I'm going for was the dining table.

    It's a nice, solid wood table that my hubs and I bought for only $60 (yes, you read that correctly!) when we first moved into this house. I was so over the black hutch and the finish on this table, but it's functional piece so I didn't want to buy a new one. I haven't done too much furniture refinishing, so I asked my bloggy pal and furniture expert, Shaunna, if she could make some recommendations as to what I should do to change them up to fit my style. Not only did she come up with some incredible furniture ideas, but she dreamt up an entire inspiration board for my room!

    furniture inspiration board and home decorating ideas at perfectly imperfect

    Isn't that amazing? I love so many of her ideas, and hope my room turns out half as nice as her dream room!: ) So with her help, I started out refinishing the table. The first step was to remove the legs of the table and give them a good painting with Annie Sloan Chalk paint, aka my new love. I decided to paint the legs in French linen, and then once that dried, did a wash of Pure White over top. That was the easy part.

    The table top…not so easy. I started off by sanding the top with 60 grit sandpaper and my palm sander. It was so difficult getting through all the layers of whatever they sealed it with that it probably took me a good hour and half to sand it all down. 

    I almost didn't mind, though, because what I saw as I was sanding made me super excited! I loved the look of the unfinished wood and the wood grain that began to show. 

    Even with all the sanding, I still didn't feel like I had removed all of the old finish, so I brushed on a layer of CitriStrip. Basically, you brush it on and leave it for the recommended time. Then, you wipe it off with a lint-free cloth and with it, off comes the finish! This sanding/stripping method really worked to get my table back to it's gorgeous, unfinished state. 

    Shaunna recommended that I try white-washing the table with Pure White chalk paint, so that's what I did. If you're unfamiliar with white-washing, it is an awesome way to keep the character of a piece, while subtly adding a touch of color to it. Basically, you add water to paint until it's the intensity you want. More water = less concentrated color.

    whitewash recipe

    I really wanted the grain of the wood to show, but I didn't care for the peachy color of the wood, so I went with a very watered down white wash.

    I brushed it on, and then wiped it back with a paper towel. Because my wash was mostly water, I had to wipe it immediately after I brushed it on because it was drying very quickly. Wiping the wash back helps brings the color of the grain out, which gives it a very reclaimed wood finish.

    After I washed the whole table, I was over the top giddy mildly pleased with the results. 

    I can't get over how well the table now fits in my dining room! It's like it was meant to live in a coastal cottage all along.

    The final step is sealing it with Annie Sloan Clear Soft Wax. Because this is a surface that will get lots of wear, since people will eat and drink there, it will need three coats of wax. I'm planning on doing that this week, but that's the kind of little detail (that makes a big difference!) that I don't want to do. Any one out there want to come finish my table? Please!?!?

    All that hard work was totally worth it, though, because I'm head over heels in love with the table now. A big thank you to Shaunna for helping me to see it's potential! Not bad for a $60 table, huh?; ) -------------------------------------------------------------------------------------------------------------------------- We're honored to be featured over at I Am Momma Hear Me Roar today for her week of all things curtains! Be sure to check it out to see what no-sew curtain solutions we came up with!

    --------------------------------------------------------------------------------------------------------------------------

  • Green China Cabinet: {Dimples and Tangles}

    Green China Cabinet: {Dimples and Tangles}

    We are so happy to have Janenifer from Dimples and Tangles here today sharing all the details on this stunning china cabinet transformation that she linked up last week in our final round of Creating with the Stars. Janenifer has great taste and impeccable style. We know that once you take a look at her blog, you won't be able to stop! ---------------------------------------------------------------------------------------------------------------------
    Well, here she is!

    After almost two full weeks of work (off and on), it's finally done, and I'm going to make you scroll through way too many pictures.
    Let's remember the very sad before…

    And the oh so fun after!

    I wanted to create a glam, sophisticated look and lighten up the inside, so I used my wedding china, crystal, some other white dishes and thrifted milk glass I've collected to style the shelves.

    I like symmetry.

    Now for the details, I sanded, filled in gouges, sanded, wiped, and primed before painting three coats of color. Yes, I can confirm that dark colors are tricky and take more paint. The color I used was Behr's Pine Scent in semi-gloss. I used a good Purdy brush for the corners and a foam roller for the rest. Also, a huge trick I've learned when painting with latex paint is to use a coat or two of poly on the flat surfaces that will have something sitting on top of them. Latex paint can stay tacky for up to a month, but with a layer of poly it's ready to go after 24 hours or so…no tackiness!

    . One of the knobs on the bottom doors was missing, and a few of the pulls on the top doors. I kept and cleaned up the brass backplates on the glass doors, and found these perfect glass knobs at Hobby Lobby. They are an oval shape rather than round so they fit nicely together where the doors meet.

    I also gave you a sneak peak at the chunky hardware on the bottom. The oversize glass knobs were out of my stash. Did you guess what the backplate was? I knew I wanted something big and was coming up empty looking online, and then I remembered I had these…

    They started their lives as…Christmas ornaments! I bought them and used them as hangers for an old window treatment (seen here). My handy husband drilled a hole in the middle and they were perfect! Along with the original drawer handles, they got a coat of Rustoleum's Metallic Brass spray paint, and then a coat of Rub-n-Buff in Gold Leaf.

    I had planned to add height by adding an extending shelf in between the two pieces to house some cubbies for storage baskets, but I ended up just needing to get this piece d.o.n.e! I probably will still add that piece in the future.

    With this project completed, I'm down to artwork and a new table for this room. I have the table but it needs some work so I am waiting for a streak of warm-enough days outside to work on it. That probably won't be happening until later in the spring. Artwork, though, coming up!

    Isn't that gorgeous? We're totally digging the kelly green and gold together and how smart was it to use Christmas ornaments as part of the knobs??!! If you think that piece is awesome, you just have to see the Accent panel wall in Janenifer's office…it is to die for!

    Thanks so much for sharing with us today, Janenifer! Check back tomorrow for an AWESOME Mother's Day giveaway that you don't want to miss!

    jess
    Monica

    P.S, We're the ones in a contest now and if we win, we get to give $5000 to the charity of our choice! We need your help, though- you can learn more about our project and the charity we chose here, or go vote for us every day for the next two weeks right here. Thank you!

  • Modern Country Designs…Say What?

    Modern Country Designs…Say What?

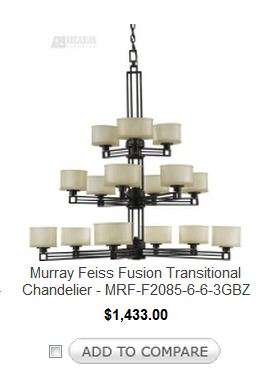
    Today we have a Jessica (not our Jess, a different one) from Arcadian Lighting guest posting about blending modern and country designs. We love this trend, so we were excited to see what she had to share. I (Monica) happen to love Arcadian Lighting. We made one big lighting purchase when we built our home. Our foyer needed a huge light and it needed some major wow factor. We must have looked at 192364 stores, and Arcadian was where we found a winner!

    It's one of my favorite things ever (and they have great sales, so of course I didn't pay full price!) So, thanks for being here today Jessica!
    **********************************************************************************

    Hi there! I'm Jessica, a writer for Arcadian Lighting, which is a wonderful online resource for beautiful, affordable lighting fixtures. I'm delighted to be guest posting for Monica and Jess today because I'm going to be sharing a collection of inspiring modern country interiors. Rustic and casual with a sophisticated modern edge, these country interiors are just right for the fresh, airy days of Spring. I hope you enjoy!

    Modern Country

    A simple checked table cloth and set of traditional English china give this lovely dining table a classic farmhouse feel. The contrasting modern wine glasses and Donghia stacking chairs are cool accent pieces.

    Modern Country

    A chic neutral color palette and a checked upholstered arm chair in the corner bring together new and modern with old and classic beautifully. The branch candlesticks are fun and unexpected.

    Modern Country

    A gorgeous mix of crisp, modern furniture and rustic exposed wood beams creates a perfectly elegant, yet relaxing atmosphere in this living room. These types of ornate wooden mirror frames and chandeliers add a bit of drama.

    Modern Country

    The slate fireplace, twinkling candles and brilliant chandelier give this sophisticated dining room just enough simple country beauty. A lovely bouquet of fresh greenery makes the perfect accent, as well.

    Modern Country

    The vaulted ceiling and shelving gives this living room a distinctly farmhouse appeal. Weathered antiques and cushy modern furniture make the room cozy and inviting.

    Modern Country

    The handsome dark wooden floorboards and rustic, industrial stools add a rugged edge to this chic kitchen. The pendant lights overhead are simply beautiful, and the under cabinet lighting is a great touch.

    Modern Country

    A dusty blue wall color and sheer white curtains make this bedroom absolutely dreamy and romantic. The wood beam ceiling add so much natural texture and color that it makes a perfect accent against the very simple furnishings.

    Modern Country

    The paneled walls in this bedroom lend a cozy country atmosphere to the room, especially with a serene beige paint color. The rustic nightstand and modern headboard are particularly handsome together. Images 1 | 2 | 3 | 4 | 5 | 6 | 7 | 8 Which of these modern country rooms is your favorite? Let us know in the comments! And be sure to stop by Arcadian Lighting for a modern light fixture or two to brighten your home! -Jessica

  • How to Make a Headboard {Shutter Headboard}

    How to Make a Headboard {Shutter Headboard}

    We'll admit we're not the first ones to DIY a headboard…there are so many awesomely creative headboard ideas out there! What we wanted most for this headboard was to create a juxtaposition of old and new. You might remember the accent wall- a classic houndstooth, with a modern multi-colored flare… well, we felt like it needed a fabulous antique headboard.

    DIY Headboard ideas

    What do you think? We love the end result. But guess what?? It was actually our Plan B… Plan A was a flop. And because we're all about keeping it real, we're going to show you the Plan A.

    This door is amazing. The layers and layers of old, chippy paint are incredible. As soon as we saw it at Architectural Antiques we knew we had to have it. We hoped it would be enough of a contrast on the wall, but we wrong. It got completely lost with the stencil.

    We headed back to Architectural Antiques and walked around their huge outdoor salvage yard. The bold blue color of the shutters jumped out at us. We loved how we'd be able to use three panels to create a solid look. We were back in business! Of course the blue wasn't the right color… Boo! That just meant we needed to DIY the doors a bit. We simply dry brushed the blue color we used in the room over the existing blue.

    How To Dry Brush: 1-Put a small amount of paint on your brushDab most of it off on a paper towel 3- Quickly sweep the"dry brush" over the surface

    (Late night phone picture FAIL. Sorry!) We also rubbed the paint in with a paper towel because we wanted to preserve as much of the original character of the shutters as we could. It gave just enough of the new color to make it work in the room. Installing a shutter or door headboard is really simple. So simple even a rookie DIYer can do it! Jess used this method when installing her door headboard and it worked like a charm! How to Install a Headboard: 1- Get a 2x4 piece of wood2- Cut the wood about 6 inches shorter than the width of the bed (you don't want to see the board)3- Determine the height you want your headboard and mark the bottom4- Use a level to straighten the 2x4 on the wall, where you marked it5- Find your studs and screw it in

    6- Rest your headboard on the 2x47- Put a few screws in the headboard for extra stability

    It took us all of about 10 minutes to get ours installed. We love an easy DIY!

    So what do you think of our Plan B? --------------------------------------------------------------------------------------------------------------------------Ok, so there are a TON of Shabby Apple lovers out there (we told you that would happen!), and we're thrilled to announce that the winner is:

    It's your lucky day, April G.! Email us to claim your prize.: ) For the rest of you, don't forget to use the code EASTCOAST10OFF to receive 10% off your order at Shabby Apple. Thanks to everyone who entered! -------------------------------------------------------------------------------------------------------------------------

  • Helping Hobbies…

    Helping Hobbies…

    Confession: I DO NOT volunteer in the nursery or Sunday school classes at my church. {GASP!} I found out through trial and error that at this phase of life it's not my cup of tea. Now, don't go quitting your volunteer positions after reading this post, but I do want to challenge you to think outside the"norm" of how we can help those around us. I think we all have hobbies that we love and often times we don't think of those abilities as unique, God-given gifts. Maybe you knit, scrapbook, paint, read, etc. All of those things you love can be used for others! Knit super-cute baby accessories for a pregnancy center, create mini scrapbooks that a nursing home can offer to residents that don't get visited often, offer to help a single mom paint her master bedroom, volunteer to read at a library or preschool… My point is this… use what you love to bless others. It's doubly rewarding. I've had an amazing example in my life… My Mom. She is a volunteer at the Bucks County Women's Recovery Center in New Britain (BCWRC). She is passionate about helping the women at the center turn their lives around, and even more passionate about introducing them to the Lord. She's started a Bible study through the WRC and so many women's lives have been changed. I visited the center once a few years ago and left feeling really sad.

    The house that the women live in wasn't a place that would make these precious ladies feel important, treasured, and valuable. Many of the rooms didn't have anything on the walls, all the furniture was donated and mismatched. The wheels started turning… I was just wrapping up my homestaging business and had TONS of accessories, artwork, and decor. Last spring a team of wonderful friends helped and we did room transformations in six rooms at the WRC.
    Last weekend we did a mini phase two for the project because there were two additional rooms that needed some TLC. This basement room wasn't being used at all

    Really, who would want to spend time down here with it looking like this?

    Stark white walls

    It was screaming"Help!"

    Thanks to my wonderful husband, our friend Mark, and other volunteers, we painted all night on Friday night… that red wood was not easy to paint, and took a bit more time than I anticipated, but the end results were great!

    Saturday, Jess was able to come and help decorate and accessorize the space. We really liked this vinyl phrase because the WRC has many guests reside there, but hopefully they leave with a brighter future and support from new friends.

    All the furniture was donated, but worked great- My mom is amazing at finding people willing to help and share.

    Much warmer space that the ladies will actually use!

    We created the HOPE artwork that will actually match the new accent pillows that we have being custom made for us. It was awesome to be able to do a fun craft project that will encourage those that see it.

    So, how have you used your hobbies or talents to help others? If you've never associated your hobbies with blessing others, well, now is the time!

  • Colorful Bedroom Makeover {KJ's Bedroom}

    Colorful Bedroom Makeover {KJ's Bedroom}

    November marked 2 years in our"new" house. I can't believe it's already been two years, and at the same time, it feels like we've always lived here! Before we moved in, I quickly painted each of the kids' rooms in a solid color and did very minimal decorating. Last year, I did Callen's room with the fun Pallet Wall, but he's the only one that has a"cool room" as my kids say. Kira was next on the list for a room makeover and thankfully, it's already gotten the"cool room" stamp of approval from my kids!

    This room makeover was part of one of my projects for P&G. It was my first video for those readers, so sorry about the introductions, but this video does give you a great little room tour! (Excuse the creepy freeze frame… why does Youtube do that?)

    Here's a still shot before and after

    Pretty Big Difference isn't it? I can't wait to share all the fun projects and DIY details with you- I'll be featuring one project each day this week, but for now, here's ton of pictures!

    I grabbed this adorable little hooter at Target.
    The mirror was something we DIYed about 8 years ago, yup, we DIYed before DIYing was cool!

    Little Book Nook!

    Spray paint and round bulbs make all the difference!
    All the color details coming later this week.

    And this is the other side of the room! Helloooo… huge whiteboard wall!
    As you heard in the intro video, KJ had a tendency to write all over the walls. We now have a dedicated place for that!
    Wednesday you'll get all the product info and tutorial for this.

    A little DIY took this dresser from boring to custom-ish!

    For P&G I can't have any pictures showing, so I left Kira a little note in this cute frame instead.

    Creative coloring storage!

    Masterpieces from my little artist

    Now that you've gotten the quick tour…
    Here's the plan for the posts for this week… Tomorrow (Tuesday) I'm going to give you all the details on this stinkin' awesome mosaic accent wall. I'm not sure I'm allowed to say something I did was awesome, but man I love it!

    Wednesday, I'm going to tell you all about Idea Paint and how it can turn almost anything into a cool whiteboard surface!

    Thursday, it's more Staples LOVE and I'll give you the 411 on these foam core faux canvases. And to think I almost bought 4 frames at 39.00 each! The entire project ended up costing me under $25!

    There's actually one REALLY BIG step left before this room is finished. You might have been thinking that the walls are a little too plain and white, and I agree! They won't be that way for long! One crazy-talented Art Teacher from my school, who Kira has now titled"The Artist" is coming to doodle on the white walls with paint pens! Kira has all sorts of fun, things she wants doodled… peace signs, butterflies, and flowers are at the top of her list."The Artist" and I are coordinating our schedules, but once we do I'll be sure to do an update post! Until then, make sure you check back this week for all the tutorials and fun details of the room! So what do you think of my colorful bedroom makeover? Any favorite parts? Do tell!

  • Pimp My Billy {Part 1}

    Pimp My Billy {Part 1}

    My Billy Bookcase that is!

    Source: ikea.com via Ashley on Pinterest
    I honestly think about 90% of people have had an IKEA bookshelf in their home at some point. I'm pretty sure you can find four in mine right now. The problem I have with the Billy bookshelves is that they don't have anything unique or cool about them. They're just functional. So, I decided to"Pimp my Billy" and bring on the DIY. I didn't go too crazy, but fabric was a definite must! I did this pre-blog, so I don't have step-by-step pictures, but here's the after shot.

    The fabric totally works with the accent chairs in the room…

    but, try as I may to like it… I don't!

    I reluctantly let was thrilled to have the hubs pick out the paint color in this room and I think it's way too dark enjoy the challenges this color brings!: ) The fabric however is just blah and doesn't pop at all.

    So, here's the new fabric…

    I think It's gonna do the trick! This week I have to go away on a work trip, but it's the first project I plan to tackle when I get home!
    Once we heard about The Nate Show coming to our house to tape, I went into high speed to get the house semi-ready. One area that was pretty weak-sauce were these bookshelves. I feel like I threw random books and stuff on and went"Ta-da!" So, this week I went on a hunt for new accessories and armed myself with oodles of spray paint!

    I honestly adore my little Mr. and Mrs, but I love them even more in their new colors. Check back tomorrow to see what fun you can have with just a little paint!

    **PS. Today is your LAST chance to enter our giveaway to win two tickets to see our live Nate Berkus Show taping in NYC on September 1st. Click here for all the details.

    **PSS. If you missed Friday's awesome post by our guest blogger, Stacy, of Salvatori Photography, and her AMAZING giveaway (1 hour photography lesson plus 10 of her best photos of your kids), today is your lucky day. We're extending the giveaway until Thursday and will announce the winner on Friday.
    GO ENTER NOW!

  • How to Build a Custom Headboard with Arms {Sarah M.Dorsey Designs}

    How to Build a Custom Headboard with Arms {Sarah M.Dorsey Designs}

    If you missed all the amazing projects of our first annual Creating with the Stars, be sure to check them out below!

    Round 1 Projects & Winners Round 2 Projects & Winners Ro und 3 Projects & Winners Round 4 Projects & Winners -------------------------------------------------------------------------------------------------------------------------- Sarah is back today with another awesome tutorial from the home decor project that won her the grand prize in Creating with the Stars. I love the way she built this headboard and broke it down for us- it makes any custom headboard within the realm of possibility! Plus, it looks unbelievable with that grasscloth and nailhead accent wall!

    To complement the accent wall, we wanted to create a headboard that wouldn't compete yet wouldn't get lost against the nailhead and grasscloth.
    We made a plan and gathered our supplies.
    1/2" plywood (1 sheet cut to width of bed frame, ours was 62.5") 2x8" (x2) 1x8 (x2) 1x3 (x4) coral curtain panels from Target heat n' bond batting
    I drew a few diagrams for the basic construction and dimensions of the headboard. See below for some the specifics on the upholstery. Measurements are for a queen bed frame. Note: make sure to measure your bed frame first, in case yours is different! You want to make sure that the frame will fit inside of the arms.

    For the arms, we screwed a 1x8 and a 2x8 together, measured and drew the circle with a lid. We then followed the line with a jigsaw to cut it out (we did remove any screws that were in the way first!).

    For the foam, we cut a 3" camping pad in half and attached to the plywood with spray adhesive.
    Next we upholstered the back piece by wrapping in batting and then fabric. To make sure that the top was pulled evenly, we attached a thin strip of scrap wood and pulled tight. This made it much easier to get an even look!

    Next, we cut the fabric to wrap around the entire arm, starting at the inner part of the arm, we put a few staples in (on the inside so it stays in place while you attach the arm), we cut little holes in the fabric at the pilot holes (where arms attach to the frame). We then installed the arms with heavy duty screws (we used cabinet anchors) and attached it to the 1x3 frame.
    Then we finished upholstering! We pulled the fabric tight around the arm and stapled, leaving it loose at the top. We cut the angles, almost to the edge, but not close enough so that it frays to the side of the arm, pull tight and staple. It doesn't have to be pretty on the top because that will be covered next. We cut a band of fabric the total height of the arm (accounting for the bends) plus a few inches and the width (2.5") of the arm plus enough fabric to fold under (at least.5" on each side, so at least 3.5" total). We folded the raw edges under and pressed with a hot iron so that the edges were crisp and attached the band to the arm with no-sew adhesive (my preference is Heat n' Bond) and a hot iron, staple to secure the ends.
    That's it!

    I finished the bed off with a few DIY pillows. The euro pillow shams are made from a white table cloth and a scarf from World Market. Since the scarf was translucent, I doubled it up with the white table cloth. The throw pillows are white shams from Ikea, I then painted a border using painters tape and latex paint with fabric medium. The bolster pillow is a kitchen towel from World Market and the left over headboard fabric.

    I love how the grasscloth slightly shimmers depending on the lighting.

    The nightstand is from World Market, the sphere from TJ Maxx and I picked up little letters (to spell his and hers) from a local antique store. Books were wrapped in paper from the Paper Source.

    Hydrangeas and Ranunculus are two of my favorite flowers!

    This week was sponsored by Home Goods, and if you've read my blog, you probably know that I'm pretty obsessed with the Home Goods/TJ Maxx/Marshalls brand! I love the thrill of the hunt, designer names and the affordable prices!
    I picked up a cute accent chair, fluffy white rug (my puppy love it too!) and the white sphere!

    Finally, here's where we got everything!
    Headboard: Fabric Coral drapery panel from Target (x2), Batting,

    3" camping foam from Home Depot only $20!
    Feature Wall: Grasscloth wallpaper,

    Nailhead (we used about 2.25 boxes),

    Trim- I found 2.5"wide synthetic trim from Home Depot on clearance for $4/8ft board
    Accessories: Night stand (World Market — not on website), decorative sphere (TJ Maxx), His and Her letters (local antique shop), Throw pillow on chair, chair (TJ Maxx), lamp and lamp shade, duvet cover
    I'm crazy about our new transformation and I hope you love it too!

    We totally love it too! Well done, Sarah! We 're ready for you to make a trip to good ol' Bucks County to fix up our master bedrooms. Any time.: )

    jess
    Monica

    P.S Have you linked up yet?

  • How to Cut a Perfect Mohawk using Frog Tape!

    How to Cut a Perfect Mohawk using Frog Tape!

    This post brought to you by FrogTape brand painter’s tape. All opinions are 100% mine. So cutting hair isn't our normal post topic here on East Coast Creative, but when it involves Frog Tape® and a rockin' hair style… well, I think it's just right for EC2! Cutting a mohawk isn't easy business- do you have any idea how many crooked mohawks there are in the world? A lot let me tell you! (and yes, that claim is purely fictional, but I'm 99% sure I'm right!) Thanks to my ingenious husband (or maybe it's just DIY overkill that made him think of it) we created the easiest way to cut a straight, perfect, and rockin' mohawk!

    And let me shed a little light on the old 'hawk before I tell you how to do it. Callen (my youngest) has my husband's hair- which means pouffy awfulness. It's okay, Eric owns it (aka shaves it all off!) It's just really bushy and we can't do anything with Cal's hair style-wise. EXCEPT… for an awesome mohawk! It's the best style because his hair is going to poof out and stick up anyhow, so it's just making the mohawk styling that much easier! Eric and I often chat about which of our son's hair styles the grandparents hate more… Cal's mohawk or Kade's super long shaggy mop. I still think the long hair gets to them the most!: ) (And no, we're not cutting the mohawk off before school starts next week. We get asked that a lot. Why would we get rid of his swagga just in time for him to meet all the little ladies??)
    Alright, so let me tell you how to cut the perfect mohawk so that your kids' grandparents can think you're nuts too!
    #1- Determine how wide you want the 'hawk to be. We liked a pretty thick one, so we used about 2 widths of Frog Tape®. Now, we were asked to share a project we'd done with Frog Tape®- they said it's multi-surface tape- good for a variety of materials. I had already cut Cal's mohawk and was like,"how's this for a unique material!" So, while Frog Tape® wasn't made with the mohawk in mind… it works like a charm!!

    Frog Tape

    #2- Place the tape down on your kiddo's head exactly where you want the hair to remain. Make sure it's straight from front to back AND side to side. Remember… crooked mohawks just aren't cool! Don't worry about pressing the tape down too hard, the edge will serve as more of a guide for your buzzers, not an paint lock like we usually use Frog Tape® for.

    Cutting Mohawk

    I wonder if this little guy has any clue that this process isn't quite the norm… Such is the life of a blogger's kid! (Also, ignore the pile of clothes and messy bathroom. This is real life here people! )

    Mohawks

    #3- Use your buzzers to shave along the edge of the Frog Tape®. Don't press into the side too much, you don't want a wonky line. Any buzzers will do, but we've always used this Wahl kit.

    Wahl Clippers

    #4- This is just a preference, but we always have our boys sit on a stool in the shower while we buzz. It's so much easier for clean up. We use a hand vac to get as much of the hair up as we can, and then the rest just gets rinsed down the drain. Easy peasy!

    Kids Mohawk

    I couldn't love Cal's hair any more than I do. It's definintely my favorite and it's sticking around for a long time! Since cutting it in for the first time, we've trimmed the sides 3 or 4 times, so now the middle section is nice and long and big boy mohawk-ish!

    Mohawk hair

    If you're thinking of embarking on the mohawk journey, I definitely recommend this method to get the perfect mohawk! A little outside the box, but this straight mohawk just wouldn't have happened without FrogTape painter’s tape.
    We really do love Frog Tape® and have done a lot of cool projects using it. Last year when we were at the Haven Blogger Conference, we got to meet our friends from Frog Tape® and we learned a lot more about its paint lock technology. Basically it seals the edge of the tape so the paint doesn't bleed through! That's huge for me because I have some perfectionist tendencies. Did you know that FrogTape painter’s tape also recently came out with Shape Tape®? It is patterned tape, so you can get waves, chevron, etc… without measuring! We think it's pretty cool! Check out a few other projects we've one

    Frog Tape Shape Tape

    Check out a few other projects we've done using Frog Tape®! My Chevron Accent Wall

    Chevron Wall

    Mosaic Accent Wall

    Painted Wall

    Fireplace Makeover

    Painted Fireplace

    If you haven't tried FrogTape painter’s tape yet, what are you waiting for? I mean you can try it on an awesome DIY project for fall OR for the most epic of all mohawks! Frog Tape is also on Twitter @Frogtape- give them a shout out and share your fall projects!

    Visit Sponsor's Site
  • Planked Wall with Exposed Stud Shelving {Tutorial}

    Planked Wall with Exposed Stud Shelving {Tutorial}

    Good morning, everyone! I'm so excited to share this project with you today! I've been slowly working on making over our dining room which was sorely lacking in personality and style. You may remember that it looked like this back in the Fall of last year:

    Then, I got tired of everything the way it was and removed the hutch from over the buffet, decided to refinish the table, and move everything around in the Spring:

    I'm going to be sharing the reveal of my new coastal/cottage dining room sometime in the next two weeks, but I just had to show you what we've been up to so far. When AT&T sent me a new phone and a gift card and asked me to do a project to see how technology could help me out, I knew exactly what I was going to do. I've been a huge fan of Layla's dining room"wonder wall" and decided to come up with a way to duplicate the look of an older house inside my newer, 15 year old house.

    So, with a little help from my phone, and a lot of help from my hubby, here's what I came up with:

    Now, obviously, this picture is completely undecorated, but I wanted to save the final reveal for later when the room is finished, but isn't it fabulous?!! This accent wall is actually remarkably simple and cost only $100! Here's what I did:
    1. Decide on a layout for your shelves and mark on the wall with chalk. This is absolutely not neccessary, but it helped me a ton with visualizing the layout. I took pictures of it, so that I could look back and see the placement after the planks went on the wall. The camera on my HTC OneX phone came in handy because I documented the whole process (and texted Monica loads of pictures!)…

     2. Choose your supplies! Thankfully, I got a coupon from Lowes the day before we headed out to pick up supplies, so with that and the visa gift card, I knew I could get what I needed.

    The funniest thing happened at Lowes. Kevin and I were chatting about our options and got cold feet right before buying the stuff we needed because we thought we should research our options online more. Just as we were leaving, I remembered that my phone had internet capability (remember I was living in the dark ages!), and that I could look stuff up while we were there. I pulled up Pinterest and got to work.

    Our friend, Shaunna, used faux wood planked paneling in her dining room, and since it seemed relatively easy and looked gorgeous, we headed to that section first. Lo and behold, we found this 4x8 sheet of coastal cedar lookalike paneling.

    We only needed 4 sheets to cover the wall, so this was going to be the most cost effective way to plank the wall. I snapped pics of the paneling and the price, so that I could go home and make sure the colors would work in the room, and that I was getting the best price on the paneling. Plus, I knew my hubs could use the extra guidance so that when he went back with the truck to pick it up, he could have all the info he needed right on his phone.

    We also got 12 2x2's for the wood"studs" and flat, white paint, as well. 3. Measure, measure, measure and cut. We held each section of paneling up the wall and made marks on it where we needed to cut it with chalk. This project would have been super easy had we not had to make cuts around the window. We took it out to the garage and set up a makeshift workstation.

    We honestly did measure at least three times before making our first cut. We didn't want to have to buy more paneling because of a mistake!

    It was dark and our garage doesn't have the best lighting, so we had to hold a flashlight while cutting with the jigsaw. Not the perfect working conditions, by any means! 

    4, Hang the paneling on the wall. The paneling is incredibly easy to work with. It's thin and light, which makes putting it on the wall a piece of cake. Make sure you level each piece before nailing it into place.

    We shot nails into the ends of the planks, just as you would with real wood to give it an authentic look. 

    \
    There were some really tricky cuts around the window, but a jigsaw works wonders!

    Once all the planking was up, I was soo excited! It was coming along just as I had envisioned. Now for the"stud" shevling. 5. Paint your studs. I chose to use a flat white paint for a rustic look. I laid them all of the 2x2's in a row and knocked them out in about 30 minutes.

    6, Nail the studs into the wall, vertical ones first, then horizontal shelves. We used the nail gun again to hang the studs. We started with the studs in the corner, and worked our way in to the middle, evenly spacing them as we went. Level the studs so that they are completely straight before nailing them in place.

    I really wanted these to feel rustic, so we kept the nail holes visible.

    The space under the window presented a tricky situation, but my hubs angled the wood down from the sill, and it looked so much better! 

    9. Caulk the seams and spaces around the window. Sorry! No pictures of this step, but I'm sure you know what to do.: )
    I am so happy with the way it looks, and can't wait to show you them all styled!

    This project really was an easy one, and I can't believe how different the room feels now that it's done. Much more cozy and warm. And, if you like it now, wait until I reveal the finished room with all the fun accessories. I want to thank AT&T for the amazing phone that made this project go so smoothly! I was able to research, document the process, and update you via facebook, instagram (follow us at eastcoastcreative and Jess_EC2blog) and twitter. Seriously, my blogging life got 100x easier with this phone! Don't forget that you can enter the contest to win your very own HTC OneX Smartphone here!

    So, what do you think of my planked wall? Are you in love like I am? -------------------------------------------------------------------------------------------------------------------- Oh! And there's only a couple more days to vote for Monica in Proctor & Gamble's Great Try Out contest, so please take a minute and go vote!

    ---------------------------------------------------------------------------------------------------------------