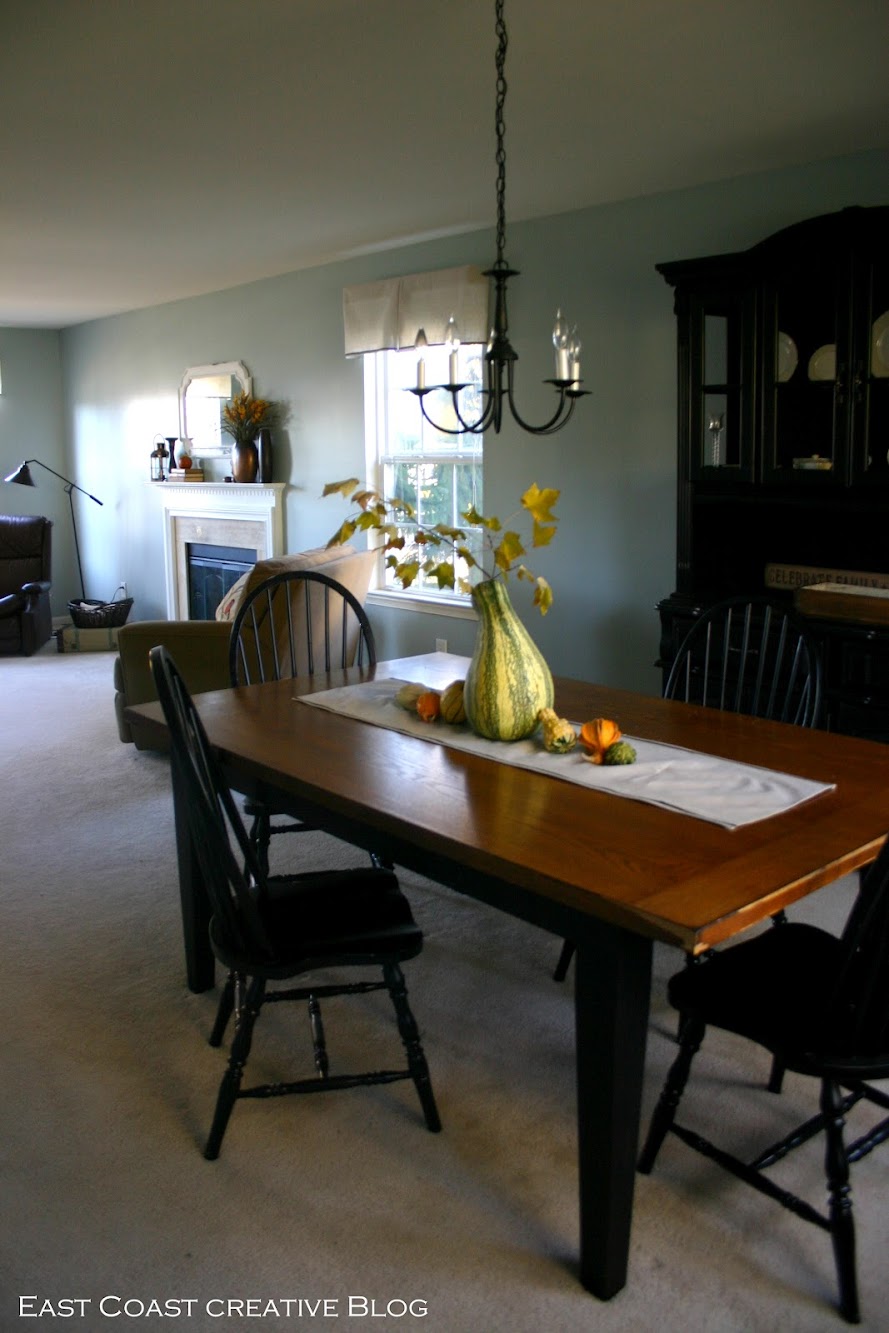
Good morning, everyone! I'm so excited to share this project with you today! I've been slowly working on making over our dining room which was sorely lacking in personality and style. You may remember that it looked like this back in the Fall of last year:
Then, I got tired of everything the way it was and removed the hutch from over the buffet, decided to refinish the table, and move everything around in the Spring:

I'm going to be sharing the reveal of my new coastal/cottage dining room sometime in the next two weeks, but I just had to show you what we've been up to so far. When AT&T sent me a new phone and a gift card and asked me to do a project to see how technology could help me out, I knew exactly what I was going to do. I've been a huge fan of Layla's dining room"wonder wall" and decided to come up with a way to duplicate the look of an older house inside my newer, 15 year old house.

So, with a little help from my phone, and a lot of help from my hubby, here's what I came up with:

Now, obviously, this picture is completely undecorated, but I wanted to save the final reveal for later when the room is finished, but isn't it fabulous?!! This accent wall is actually remarkably simple and cost only $100! Here's what I did:
1. Decide on a layout for your shelves and mark on the wall with chalk. This is absolutely not neccessary, but it helped me a ton with visualizing the layout. I took pictures of it, so that I could look back and see the placement after the planks went on the wall. The camera on my HTC OneX phone came in handy because I documented the whole process (and texted Monica loads of pictures!)…

2. Choose your supplies! Thankfully, I got a coupon from Lowes the day before we headed out to pick up supplies, so with that and the visa gift card, I knew I could get what I needed.

The funniest thing happened at Lowes. Kevin and I were chatting about our options and got cold feet right before buying the stuff we needed because we thought we should research our options online more. Just as we were leaving, I remembered that my phone had internet capability (remember I was living in the dark ages!), and that I could look stuff up while we were there. I pulled up Pinterest and got to work.

Our friend, Shaunna, used faux wood planked paneling in her dining room, and since it seemed relatively easy and looked gorgeous, we headed to that section first. Lo and behold, we found this 4x8 sheet of coastal cedar lookalike paneling.

We only needed 4 sheets to cover the wall, so this was going to be the most cost effective way to plank the wall. I snapped pics of the paneling and the price, so that I could go home and make sure the colors would work in the room, and that I was getting the best price on the paneling. Plus, I knew my hubs could use the extra guidance so that when he went back with the truck to pick it up, he could have all the info he needed right on his phone.

We also got 12 2x2's for the wood"studs" and flat, white paint, as well. 3. Measure, measure, measure and cut. We held each section of paneling up the wall and made marks on it where we needed to cut it with chalk. This project would have been super easy had we not had to make cuts around the window. We took it out to the garage and set up a makeshift workstation.

We honestly did measure at least three times before making our first cut. We didn't want to have to buy more paneling because of a mistake!

It was dark and our garage doesn't have the best lighting, so we had to hold a flashlight while cutting with the jigsaw. Not the perfect working conditions, by any means!

4, Hang the paneling on the wall. The paneling is incredibly easy to work with. It's thin and light, which makes putting it on the wall a piece of cake. Make sure you level each piece before nailing it into place.

We shot nails into the ends of the planks, just as you would with real wood to give it an authentic look.

\
There were some really tricky cuts around the window, but a jigsaw works wonders!

Once all the planking was up, I was soo excited! It was coming along just as I had envisioned. Now for the"stud" shevling. 5. Paint your studs. I chose to use a flat white paint for a rustic look. I laid them all of the 2x2's in a row and knocked them out in about 30 minutes.

6, Nail the studs into the wall, vertical ones first, then horizontal shelves. We used the nail gun again to hang the studs. We started with the studs in the corner, and worked our way in to the middle, evenly spacing them as we went. Level the studs so that they are completely straight before nailing them in place.

I really wanted these to feel rustic, so we kept the nail holes visible.

The space under the window presented a tricky situation, but my hubs angled the wood down from the sill, and it looked so much better!

9. Caulk the seams and spaces around the window. Sorry! No pictures of this step, but I'm sure you know what to do.: )
I am so happy with the way it looks, and can't wait to show you them all styled!


This project really was an easy one, and I can't believe how different the room feels now that it's done. Much more cozy and warm. And, if you like it now, wait until I reveal the finished room with all the fun accessories. I want to thank AT&T for the amazing phone that made this project go so smoothly! I was able to research, document the process, and update you via facebook, instagram (follow us at eastcoastcreative and Jess_EC2blog) and twitter. Seriously, my blogging life got 100x easier with this phone! Don't forget that you can enter the contest to win your very own HTC OneX Smartphone here!
So, what do you think of my planked wall? Are you in love like I am? -------------------------------------------------------------------------------------------------------------------- Oh! And there's only a couple more days to vote for Monica in Proctor & Gamble's Great Try Out contest, so please take a minute and go vote!

---------------------------------------------------------------------------------------------------------------