W e have a new house house plant living with us. I thought our Eastlake plant stand could use some company as I couldn't keep it appointed with fresh bouquets as often as I would like. The fact that I chose a spider plant is quite funny because as a child, I was deathly afraid of my parents' spider plant. This was because my young imagination believed that actual spiders (most likely thousands) made their home in it. This house plant acquisition (which I couldn't help but thoroughly examine for spider inhabitants) was instigated by my Mom, who sent me the following note not too long ago. It read:
Now just to give some history, my Mom and I talk on the phone often (almost daily). She lives in California. Nevertheless, I think my Mom still thinks I'm off at college and getting something in the mail makes me feel loved. Ok, it does. The things she sends in the mail vary....health tid bits like the above, articles on river and wetland restoration (for Hubby), recipes, and then there's the hard goods such as holiday decorations, clothing, books, pruning shears and twine....and most recently, lots and lots of baby clothes. My Mom is actually coming to visit next week and truth be told, I'll miss getting that little something special in the mail. Although I wouldn't put it past her to mail something on her way to the airport. Love her. xo
Occasionally, Jess and I do or see a project that is deserving of the"Try this Now" title. The project needs to be super simple to execute and have a major awesomeness factor. We know it's easy to have an ever-growing DIY list, but these babies are projects that you should try right away. We've started a page on the blog where we'll catalog these super-simple projects, including today's Family Valentine's Idea. So be on the lookout for our fun Try this Now logo. TRY THIS NOW PAGE
I was browsing the Target dollar bins and spotted these cute mini mailboxes. We have a little over a month before Valentine's Day, so I decided that we were going to create a little family mail center!
Here's the plan… we set these mailboxes in the family room with a stack of blank notes where anyone can leave a note for the kids and they can leave notes for each other. We're encouraging them to write something nice to one of their siblings each day. Of course I wouldn't leave you hanging without free printable notes of your own! You can download the ones I created HERE.
I printed them on plain,old computer paper, but I think they're pretty cute!
I had bought one mail box for each kiddo and some Valentine's stickers. I pulled out some washi tape and a bunch of Sharpie markers.
After dinner last night, the kids went to town decorating. They were really into it!
The best part wasn't the decorating though… it was seeing how excited they were to write each other notes! Kira is really sweet and put so much effort into her brother's note.
Here are a few of the notes that are going to be read this morning…
Kaden is honestly the best big brother on the planet!
He actually wrote 2 notes for Cal!
I'm really excited about the next month and how excited my kiddos are to send each other thoughtful notes. We're not a super touchy-feely family, so this is one way we can do Valentine's Day on our terms!
Are you ready to Try This Now? Will your family be getting a Valentine's Mail Center? Linking up to: I Heart Naptime
Ahhhhhh…I can finally breathe a sigh of relief. Well, kinda. Our kitchen renovation that I've chronicled here, here, here and here, is done…for now! You may remember that it all started like this:
Ugh. That's a sad picture, people. It's not sad anymore, though, just look at it now in all it's *almost* finished glory!
Seriously, that is one big difference! I am absolutely crazy about our open shelves, new kitchen layout and big opening to the dining room. (Although I REALLY wish I made some sort of effort to clean up our dining room before snapping pics! Bad blogger!) I've been decorating and undecorating the shelves for weeks now, and I'm pretty happy with them, so I figured it was about time I shared. This is how they look right now, but I can absolutely guarantee you that they won't stay this way forever, since I crave change after about 4 days of anything staying the same.
The blue and green add just the right pop to my otherwise serene color scheme. I really do love the contrast of the fancy stencil with the trendy aqua blue accents. So fun! Those two round pie plates were wedding gifts, but they're only hanging out there until I can find a tray or something that I love- the blues just aren't perfectly spot on.
Up close and personal:
You've already seen the printable I made, but the plate right next to it is from the Pottery Barn Outlet. Can't get enough of that thing. That and the bird (from Joann's) are the only new things I bought for the shelves. Everything else was gathered from around the house- you got to work with what you have sometimes, right? Ok, I lied. I forgot that I bought this blue vase at a flea market this weekend for $4, and the mugs came from Ikea.
I have been scouring the stores to find dish towels that I liked and that matched the kitchen, and couldn't find anything that wasn't chevron (no offense to all you chevron-lovers out there, but I'm just not on that bandwagon!), but I found this one at Kmart! Yes, I was shocked too.: ) Cute, cute, cute!
I'm showing you this picture of all our mail for two reasons: 1) I just got this mail sorter from Kmart and it's a lifesaver. Really. All that stuff used to just lay on my counter making my already frazzled brain even more frazzled (if that's possible), and 2) See that uncovered outlet? I didn't even realize it didn't have a cover on it until I looked at this picture. It's so ridiculous what you get used to living with, and then start to ignore. *Fingers crossed that that baby EVER gets a cover.*
Here's a view of the other side of the kitchen:
We finally cut and hung two more open shelves to house our microwave. I gotta tell you, I so enjoy the extra space on the counters now that thing is off of it. So roomy! And if you're wondering about that crack in the counter, it's there because we moved a cabinet and it's counter from it's original spot on the other side of the fridge. It'll stay like that until we upgrade our countertops, and then it'll be seamless. Technically, I could hide the seam using a painting method a friend told me about, but, honestly, there are so many other things I'd rather be doing with my time.; )
I'm thrilled that, after 8 years of marriage, I can finally easily access my china. What a nice surprise to see that it actually works really well with my damask stencil and the colors in the kitchen. Woohoo for happy accidents!
Oh yes! I almost forgot that we installed this new light fixture above the window, and it's stinkin' awesome. Forget about all the additional light it gives off, it's adorable!
***Update: Several people have asked where I got this light. It's Allen + Roth from Lowes.
And finally, a view from the hall. I'm contemplating adding simple, wooden blinds to the window because it seems a bit bare. Anyone have thoughts about that? Should I or shouldn't I?
So now I've promised my husband that I'll tackle only really easy projects that don't involve him for a while.: ) I think this room has come a long way, and it just feels so much more like me. After a few annoying touchups on paint, fixing some broken tile and installing one more light switch, this pretty baby will be complete. Phew! Next week I'll show you what I finally decided about the curtain situation on the other side of the room.
Next on my agenda? A dining room redesign! I can't wait to show you what I have up my sleeve.
So, what's your favorite part about my new kitchen? Color scheme, open shelving, white cabinets, something else entirely?
I am delighted to be starting this week with a visit at Monika's lovely Splendid Willow. Please join me there today to see the special postcard I'm sending to you... I'm also happy that I am finally able to offer e-mail and e-reader subscription toa perfect gray. Please check my side-bar to sign up. To everyone who asked about an e-mail subscription, thanks so much for your patience...
Country by Mail has simply amazing products for a raw, relaxed, country inspired home. I love this site! Also, have a look at their Christmas products. You'll find them here.
Jess and I have had some pretty cool opportunities in the past 14 months. We've had a lot of people to say THANK YOU to, and we feel like snail mail is still an awesome way to give a real, heartfelt thanks. We had some old Real Housewives of Bucks County (sniff, sniff) postcards, but those are now part of my kids' scrap paper bin. We were super excited when Uprinting asked us to try out some of their products. We immediately knew we wanted to order some new UPrinting Postcards, EC2 style!
How awesome are those?? I was completely blown away by the quality the moment I opened the shipping box. They were so clear and crisp!
This was our first time ordering anything from Uprinting, and we weren't sure what to expect, but the postcards far exceeded our expectations! The process was really simple. 1st- we called the best designer on the planet- Kim from 733 Design (She did our blog too) and asked her to whip up a design. You can design right on Uprinting, but we wanted the same look as our blog. 2nd- We headed to the Uprinting Website. It was simple to upload our file.
3rd- We proofed our picture and I'm so thankful for this step, because I accidentally uploaded a low resolution picture at first and was able to change it before it went to print. Thanks goodness for dummy-proof systems (because I'm a dummy!)
Just a few days later these beauties were in my hands and ready to go into the world, spreading the love from East Coast Creative!
We're both so glad we found UPrinting and this is one business we're thrilled to recommend. Check out their site for all kinds of great printing products! Uprinting WebsiteUPrinting on PinterestUPrinting on Twitter**This was a sponsored post from UPrinting. All opinions are 100% ours!** Here's what some of our other gal pals got from UPrinting!
You all know I'm cheap careful with our money, so it should come as no surprise that when I was considering what type of party I should have for my son (Bob the Builder? Veggie Tales?), I decided to go with an All-American Boy party because I could get all the July 4th stuff cheap the day after the holiday (Charlie-man's birthday is the 9th). Even though it was really affordable (yay!), I was really excited about all the cute stuff I got or made for the party. Monica helped me out with a few of the projects and then was there to help set up, so I want to send a big thank you out to her!: )
I made Charlie's invitations on Picmonkey (stay tuned for a tutorial on how to make your own!), and since I didn't have time to mail them because I am a last-minute kind of girl, I just sent them as an attachment to an email. I know that probably breaks all kind of birthday party invitation rules, but I figured my friends and family would love me anyway. I had planned on having the party at a local park so that the kids could play on a big playground, but the weather was supposed to hit 101 degrees, and we Bucks Countians can't handle that kind of heat. Thankfully, a good friends of ours let us move the party to their house so we could be near a pool. Crisis averted! (Or so I thought…)
I hit the jackpot with the Target dollar bins (is there ANYTHING you can't do with supplies from the dollar bin? Seriously, they totally should be paying me!), and cleaned out their fourth of July goodies like big stars, cute pails with handles, adorable sunglasses and a couple of other things I can't think of now.
Changing the location messed with all of the plans I had for decorating, but we managed to tweak some things and come up with this backdrop for our food table (this is pre-food. Darn that I didn't get a picture of it all set up lookin' fine!)
I love this pennant banner that we made, and can't wait to fill you in on how we made it, and what I'm doing with it now that the party is over!
I also made and printed out a few food labels (as if anyone needs help identifying Chick-Fil-A nuggets, right?!). I did these last minute-of course!- and so decided to poke a hole and stick a toothpick through to help the sign stand. Worked like a charm! Monica may have said that this was ingenious.; )
I think this table runner was my favorite feature of the whole party! It was super easy, but deserves a post all of it's own.: )
My mom gave Charlie this chair for Christmas, and I thought it would be the perfect spot for him to open his presents. We added a little banner (from Target) to the bushes behind his chair and two little pinwheels to either side. A red blanket completed our present-opening spot!
Each kid got to choose a pair of sunglasses to take home, and to help them"stay cool".
This is when the drama started. A major storm with lightening, thunder, and high winds blew in fast and knocked down all of the decorations and ended our party rather quickly! I'm thankful for such helpful family and friends who didn't care at all, and helped clean up the place in a hurry!
We took a few minutes to eat our brownie-fruit kebabs (recipe from here).
…and eat our cupcakes, and then wrapped things up.
So, it was not exactly as I had envisioned but it sure was memorable. I love this sweet, funny, little boy more than words can express. Happy birthday, Charlie-man!
Have you ever had any major weather drama during a party? Did it make you wonder why you even bother, too?; )
Ok, Thanksgiving is over and the Christmas season has officially begun in our house. One of my favorite things about the month of December is receiving loads of Christmas cards from our friends and family- some who we see weekly and some who we haven't seen in a year (or years!). There's something so special about getting real mail (vs. email, facebook messages etc.) and it's even better when it includes pictures of beautiful families or gorgeous Christmas cards. But, what do you do with all those cards? I loathe the idea of throwing them out (and no, I am not a hoarder! Not in the least, I just LOVE pictures). In years past, we've put all of our cards in a cheesy little mailbox that my hubs and I made early in our marriage.
Don't judge. We were young, dumb, and had not tapped into our creative sides yet. This year, I decided to do something different.
I am so happy that I can put these christmas card"books" out in our living room so that people can browse through them when hanging out. I originally saw this idea by Allen Designs here, but all I did was to buy binder clips or rings, and used my hole punch to punch two holes in the cards. Then, just slip the cards on the binder rings and voila! Your cards are ready to display, don't take up a lot of space, and can be kept year after year. Now that I know what I'm doing, I'm going to be sure to write the year on the back of each card so I can keep track. You just can't beat a project that is easy and cheap. I think that's going to be my tagline from now on. Just stop me if you're tired of hearing it. On second thought, there's no stopping me. Simple is my middle name. Believe it or not, I had a really hard time finding other great Christmas card display ideas, but I was able to scrounge up a few cool ideas that are not cheesy and look elegant!
Source: marthastewart.com via Jessica on Pinterest Leave it to Martha, to come up with something amazing. I couldn't stop drooling over that card tree.
Source: marthastewart.com via Jessica on Pinterest
Have an old shutter laying around? If not, you might just want to go find one, because this is a.dor.a.ble.
Source: prettyhandygirl.com via Jessica on Pinterest
Source: tatertotsandjello.com via Jessica on Pinterest Ooh, and I might just have found another use for my old ladder. It's your turn: Share your great Christmas card display ideas! Feel free to upload a pic to facebook and tag RHBC so we can see what you do!
I have been living in the dark ages. It may not seem like a big deal to you, but trust me when I say that blogging without a smartphone is not easy! So when AT&T wrote to us asking if we would be willing to try out their brand new HTC OneX smartphone to see how it could help simplify doing projects and blogging, I didn't even give Monica a chance to say yes. I jumped all over it so fast, she didn't know what happened (Sorry Mo!) I've been moaning and complaining that blogging without a smartphone is difficult because you can't connect with your readers on Facebook, Twitter or through emails unless you're physically at the computer, which for me doesn't happen often. I mean, who wants to sit at a computer all day instead of playing and interacting with their kids?! Not me. Anyway, let's just say that when I received this package in the mail, I literally jumped up and down, clapping.
Not only did they send this awesome phone, they included a gift card to use for a project to demonstrate how much this phone can help you get things done. Ummmm, yes, count me in, please. I can't wait to show you what project I did tomorrow and how this phone helped me along the way! AT&T's mottos is"It's what you do with what we do", and I can't even tell you how much I've been doing with what they do. However, I'll be honest, I don't know much about smartphones or technology in general, so I'd never heard of the HTC OneX, but I figured that I would take anything over my old-school cell.
This phone far exceeded my expectations! It is so sleek, has a huge screen (4.7 inches) and is easy to use. The only problem I've had so far, is that when I'm texting, the phone autocorrects in Spanish, which is pretty darn funny. Just ask Monica. By far, my favorite feature of the phone is the camera- it's 8MP (same as the iphone) so the pictures are clear, even in low light (which happens all the time when you do all your projects at night). Here's the proof:
Of course, I've put the camera to good use documenting projects and showcasing amazing stuff we found at Clover Market.
I can't even tell you how valuable the camera is to me, though, because of the amazing pictures I can take of my kids at a moment's notice. I mean, seriously, I would-and probably will!- hang these on my walls.
The camera is just one feature of the many things I love about this phone. It takes HD video, my kids love watching Veggie Tales on youtube on the big screen, and the Beats audio is incredible. I'm telling you, this phone is no joke. And want to know something cool? AT&T gave us an extra HTC One X smartphone to give away to one of you!
Yay! That's right. All you need to do to enter is leave us a comment telling us how technology helps you get stuff done. For extra entries, like us on facebook and twitter.: ) a Rafflecopter giveaway This giveaway will be open until Sunday, September 30th, so make sure you tell all your friends! The winner will be announced Monday, October 1st. And don't forget to come on back tomorrow for a tutorial on one of my most favorite projects I've done to date! -------------------------------------------------------------------------------------------------------------------------- And don't forget that we're in the running to be the New Face of Proctor & Gamble Home! Please head over and vote for Monica. You can vote once a day, now through October 3rd. We SO APPRECIATE you taking the time to vote each day!
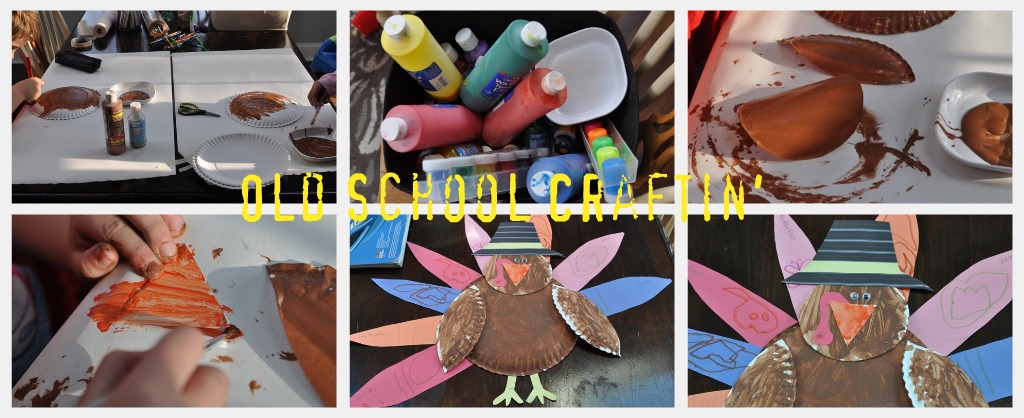
I can't even tell you how stuffed I am right now. I couldn't eat another bite if you paid me! We had Thanksgiving with some of our close friends and it was awesome. We're so thankful to be blessed with such amazing friends. I didn't go crazy with decor, but I did a few cute little things that I thought you might like to see… My kiddos helped me make"really fancy" centerpieces for the kids' table… Craftin' it old school my friends…
Who doesn't love a paper plate turkey? My favorite part is that we made these before 9am Saturday! I wanted the kids' table to be fun (so that the adults might actually get to sit down and eat), so my younger two helped me make placemats.
I made the little name cards on Picnik and then snagged a free printable from Pinterest (I pinned it if you want it), added a piece of construction paper, tied up the utensils and voila! Remember, this was quick and easy, not fancy schmancy, but the kids loved it and had a blast!
Look at all those happy kiddos!
Since the kids had a fun table, I had to do a little something for the adults. Using the same method we shared on 69 News, I just printed out some little cards. Under the"Thankful" I listed the people at Thanksgiving. If you wanted to use these as place cards, you could just circle the name of the person.
Since Jess shared a fail (turned awesome) yesterday… I'll share a fail (turned umm… still fail!) today. So, I was inspired by this jute runner, but forgot to get jute, so I figured I'd use my kids' craft paper and do the same thing… umm, not so much…
I measured out the paper, I had the hubs help me fold it (then I mentioned he was in the picture, and this is the cheeseball pose I got. Nice one babe), I started cutting on the lines and was reminded that I'm a lefty in a right handed world (and my perfectionist husband couldn't stand the sight) so Eric cut. I started weaving, but guess what? The paper was all rolly and wouldn't stay put and needed tape every two inches. UGH. I gave up halfway through, trimmed what I had done, plopped a huge gourd on it and had a good laugh with Jess over it!
Lame table runner or not, we had an amazing time together! Now, ready for a dining room update? Well, thanks to an awful cold, I've been worthless the past few days. Today, about 4 hours before 20 people arrived for thanksgiving Eric and I used our lunch breaks to paint the bottom half. (I love the days he works from home!)
We love chalklines. Honestly, I won't paint a line without one! Since we're using a chair rail we didn't have to be neat with the top line (just in case you thought we were sloppy!)
I'm so thrilled with the color. It's Antique Silver, from Olympic (but I got it color matched in Valspar).
We still need to paint the area between the moulding, but that can wait until after I've wallpapered. It arrived in the mail and I can't wait to put it up!! I called in the big guns for that job. My father in law is coming this week to lend a hand. There are just some things that I know better than to do with the hubs! So there you have it. Thanksgiving # 1 and at least some progess on the dining room. I'm hoping that my next update will have the room almost done!
PS… Did I mention that we deep fried our first turkey? It was amazing, but I'll point out that it's never a good sign when someone is lighting the gas and has the directions in hand. We were clueless, but in the end, it was worth all the craziness!
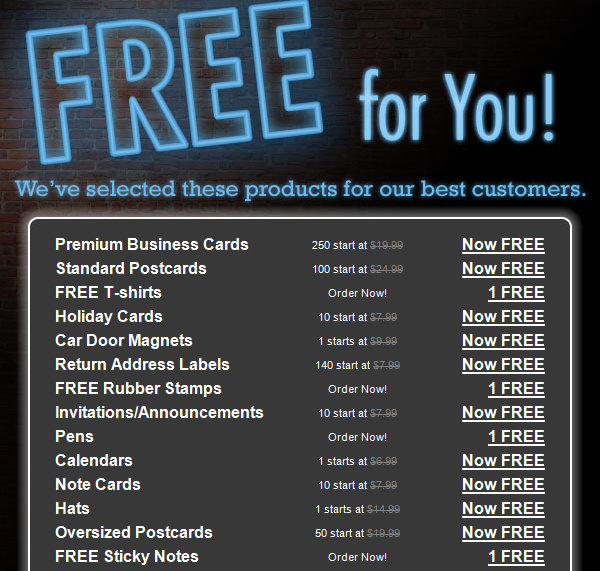
Okay, so two years ago Vista Print entered my life… yes, it sounds dramatic, but man, it Rocked My World! Maybe you've heard of Vista, and maybe you know you can get FREE pens and oodles of business cards, but that really doesn't excite nor apply to you. Well, I'm hoping that some of these ideas will get you almost as sold on Vista as I am (and no, I don't get commission- lol.) Ok, so with Vista Print, you sign up for their emails (and yes, you'll get a lot, so don't use your everyday email address unless you want to. I have one email account for all my"junk" emails I subscribe to and one"real" account that I use daily) Every few days, Vista will send you FREE products you can order- you only pay shipping. There are 3 shipping options, so the price is decent and totally worth all the products you'll be getting for free!
Now onto the fun part… what you can create in Vista! The suggestions I'm giving in this post were all made without using Photoshop or any professional design programs. Vista has designs to choose from or you can create your own and upload a completed design. I do a lot of both. Idea # 1- Mommy Cards These little cards are perfect for the playdate lovin' mom. Keep them in your purse and when your child makes a friend at the local park, you can give new friend's mommy one of your super-cool cards so that you can meet up again. If you're like me, you've jotted down a mom's cell number on a scrap of paper, only to completely lose it and then feel awful that you never called. 250 Mommy Cards Printed as business cards = FREE!
Idea # 2- Shower Invitations You don't need to pay insane prices for cool, trendy invitations. Get ideas online and then design your own! Baby Lucas (after Luke Skywalker) was due to arrive last summer and of course we needed fabulous Star Wars invitations for our Star Wars themed Shower. The pictures were simply pulled from Google Images and the font was free online. 50 Invites Printed as Oversized Postcards = FREE!
(sorry for the blurry parts, but I wanted to get rid of the personal info) Have I mentioned I have the best, most super-fun friends ever?
Idea # 3- Children's Birthday Parties I haven't bought an invitation in two years. Small postcards, large postcards, notecards, or invitations can all be used to create your invites in Vista. This is Kenzie's Spa Party invite. She had so much fun helping me design it! This one was one-sided, but the back can be personalized as well. We put them in 5x 7 envelopes and voila! I only needed 10 invites, but 100 were Free, so we have lots to use as scrap cardstock. 100 Party Invitations = FREE!
Idea # 4- Christmas Cards Can you believe how much Christmas cards have changed in the last few years? Gone are the days of the painted, snowy scene cards and in are awesome photo cards and more! The only problem is that it can cost a small fortune to send the nice photo cards to everyone. These were our Christmas Cards from 2009. I used Picnik (free editing software) to edit our pics, create a collage, and add some bling; and then I uploaded it onto the oversized 5 x 7 postcards.
I think my favorite part was that I could fully customize the back and had plenty of space to say exactly what we wanted to share. Another bonus was that I could mail them as postcards and didn't need envelopes. Score! 100 Christmas Cards (2 orders of 50) = FREE!
Idea # 5- Kids Pretend Supplies Last Christmas I used Vista to put together a Vet Kit for Kenzie. She loves animals and loved playing vet, but she was getting a little"old" for typical pretend play. So, we made pretend"cool" again by giving her a present of real vet supplies. Her vet supplies included: a Pet Vet Poster, a personal stamp, business cards, a personalized pen, a tote bag, stationary and printed forms (I went online and grabbed a basic vet form.) She LOVED it and had so much fun playing vet again, since now it seemed a bit more grown up. You could do this for anything your child is into… Doctor, Builder, Photographer, Ballerina, etc. Oodles of Pretend Play Supplies = FREE! Pet Vet Poster
Personal Stamp
Idea # 6- Totes for Everything I mean everything! Every time I put in an order I add a tote (umm they're free, why not!) Here are some ideas: Library Book Tote, Sports Tote (the one below was for Kenzie's cleats, shinguards, and water bottle for soccer.) Books for the Car, Snacks for on-the-go, Sleepover Bag (sized just right for one night and you could write something cute on it), Pretend Shopping Bag. What ideas do you have? Share them and I'm sure I'll order one! Everything Tote Bag = FREE!
Idea # 7- Gift Tags These are just business cards repurposed into gift tags. I used these for Christmas presents and they matched so well. I used a hole punch in the corner and attached them with coordinating ribbon. You could also make some non-holiday tags to have on hand. You could even make a set from each child for all the class birthday parties. My kids love when I have things personalized. To: _____ From: Kaden. I haven't done that yet, but I will be soon! 250 Gift Tags printed as Business Cards = FREE!
Idea # 8- Teacher Gifts Want a great, personal gift for a teacher? How about giving them a collection of coordinating, personalized supplies? Hit up Target's dollar bin for a cute container and your gift will be the talk of the teacher's lounge! Here are some items that you could include: notepads, sticky notes, pens, postcards, notecards, and more! I plan to do this for my kids' teachers this spring, so I won't give all my ideas away, but stay tuned for some inspiration! Personal, Thoughtful Teacher Gifts = FREE Notepad with magnet on the back
Matching sticky notes
Phew… that was a long post, but hopefully at least one of these ideas made you ready to jump in and give VistaPrint a try. I promise you'll be hooked! Use this link to sign up for Vista today and be sure to share your creations with us!
via Rebecca June I often receive e-mail requests for gray paint color recommendations; but, I'm just a gal who's out here searching, too... Maybe we can help each other out a little here. Have you found a gray that you love? Leave a comment telling us about your perfect gray. You might want to include: the paint brand and name (or number if you have it) where you used the paint (living room walls? kitchen cabinets?) qualities you like about the color (cool/ warm, light/dark) Maybe we can put together a piece like Paige at Tracery Interiors did recently on blues. That was awesome! This is such a subjective area. But you may really help someone to narrow down their search for 'a perfect gray.' (And that someone could be me....)
Well hey there! Want to know something about me? I find something I like and then stick to it. I have only ever ordered one meal at The Olive Garden for about 14 years straight (Chicken con Broccoli and FYI they took it off the menu, so I don't go there anymore! Ha!) I wish jeans, sneaks, and a sweater with an oxford underneath was still as cool now, as it was when I was in high school. So basically, I don't do much in the way of mixing things up (except for in my decor and design, which is weird, but who knows…). This month some of that changed! Hello Bangs and Glasses!
A few things happened to bring about these changes… #1 I spent 8 days in London and Paris surrounded by people that had more style in their pinky finger than I will in my entire lifetime. #2. I was given an opportunity from Firmoo Glasses to try a pair of glasses for free #3. I got a zit on my forehead (I'll explain later) So, here's what we ended up with… Awesomely geeky glasses that I completely adore (plus, I can see better!) and blunt bangs! I know I'm completely wild and crazy aren't I?
Let me tell you a little about Firmoo and the glasses first, then we'll get onto the bangs. Firmoo is the largest online retailer of glasses (who knew right?!). For years I'd been going to my eye doctor and ordering the uber expensive glasses they had. None of them were super cool, so I only wore them when I really needed to. Well now, I know that there is a HUGE world of glasses out there at like 80% less! And guess what peeps?? They give you your first pair FREE! Seriously doesn't get much better than that! (If you're the type that hears FREE and now is all distracted, here's the link to get your own free pair right away Firmoo Free Glasses) **Oh, and lots of people asked which style I got, they're #ZS8024 **
I knew I needed to post pics of myself (not my fav thing to do), so I added fun quotes I like to distract you! Is it working? Okay, back to Firmoo… Check out their website and make sure you try out their cool virtual try-on system. You can upload a picture of yourself and try glasses on. It's like paper dolls of the future. I made a quick call to my eye doctor and got my prescription info and just typed it in when ordering. If you don't have vision issues, that's okay- they make clear lenses too! Jess' hubs Kev, calls them his placebos and I LOVE that name! Glasses are definitely an accessory, not just a necessity anymore. A few day later, I got my glasses in the mail and it was love at first sight (Get it? Sight? Sorry, I can't resist a cheesy joke). They were step one in my mini Monica makeover. Then, I started toying with the idea of bangs… I love the look on other people, but I was a little worried because of my curly, unruly mop. Then, last week I was at the salon getting Kaden a hair cut and noticed this annoying zit on my forehead - suddenly I had my solution…bangs! If you can't beat em, hide em! Kaden gave me the go-ahead and I had one of my favorite hair stylists cut them for me! I couldn't be happier!! (If you're local, Rachel is awesome! Here's their FB page call her if you need a new do!)
I have to tell you, I am amazed that it took me so long to try something a little more daring with my"style"… I think it's a lot more"me" even. And just in case you're wondering, I'll still be ordering all the same foods at restaurants-I'm not that changed!! Here are all the details you need to get your first pair free from Firmoo… Firmoo Website Firmoo on Facebook (head over and let them know EC2 sent ya!) Just check out their site, choose a pair you love, and have them in about a week! (There are a few designer pairs that are excluded, but I found tons that I liked that were included) So are you going to get a free pair? Any other"stuck-in-a-rut" readers out there? ** A huge shout out to our favorite photographer Stacy Salvatori for taking these pictures of me. She is a Bucks County local and does amazing family, portrait, and wedding pics. Check out her site and let her know EC2 sent you!! **I wasn't compensated for writing this post. I got a free pair of glasses from Firmoo (like you can) and was thrilled to review them for you guys. All opinions are 100% mine**
I'll be quite honest, unless it's something I can wear on my finger or as a dress, I'm not all that into things that glitter. However, Tulip sent us some products from their Tulip Shimmer line to try out. I DO love all sorts of metallics at Christmas, so I knew that I could come up with something and maybe fall in love with glitter in the process. Well, mission accomplished!
Luckily for me, I scored two white placemats at the thrift store for a dollar a piece. Woohoo! That makes me excited. You can probably find something similar at Target or Walmart for a few bucks, as well. So with my two placemats, plus a box full of Tulip Shimmer products, I was ready to get going!
I love getting packages like these in the mail! For this project, I decided to use the Fashion Glitter, Fashion Glitter bond, and a few cling stencils. (Haha, all that glitter it makes laugh)
Here's how to make your own: 1. Decide on your design. For the first placemat, I used the sewn blue border as a guide, and then placed stencils that said"merry" and"bright" near the bottom.
For the second placemat, I placed painters tape at random increments to create a few irregular stripes (a la Williams-Sonoma). Be sure to press the edges of the tape down so that the glitter doesn't bleed underneath.
2. Brush the bonding glue on with a small paint brush where you're planning on placing the glitter. The glue is permanent and washable, which makes it perfect for any project that includes fabric.
3. Sprinkle the glitter liberally on the glue and let it dry for 2 hours. At this point, I was really thinking this was going to turn out horribly. I mean, just look at it!
4. Remove the stencils and tape. There's nothing more satisfying- and frightening!- than peeling back painters tape or stencils. I dare you to disagree.
5. Shake the glitter off of the placemats and breathe a deep sigh of relief that your placemats are so chic!
Please excuse me now while I hit you with a whole bunch of"after" shots of these beauties.
Don't you think a set of these would make a great Christmas gift?
I was super happy with how crisp the lines came out!
Don't worry, we'll share those cute wooden tag ornaments with you next week. You can see loads of other project ideas and helpful tips when you follow Tulip here: Web: http://www.ilovetocreate.com/ Facebook: https://www.facebook.com/lovetocreate Twitter: https://twitter.com/ilovetocreate Pinterest: http://pinterest.com/ilovetocreate/ I'm officially a glitter-loving fool! What about you?!! --------------------------------------------------------------------------------------------------------------------------Also, don't forget that our sponsors are running a whole bunch of awesome sales today through this weekend! Happy shopping!-------------------------------------------------------------------------------------------------------------------------- Linking up to: Tutorials & Tips
If you missed the announcement about which nine contestants made it through to Round 2 of Creating with the Stars, click here! We're dying to see what those ladies come up with for this week's Knockoff theme!
-------------------------------------------------------------------------------------------------------------------------- We fell in love with Karianne's clock the moment we laid eyes on it. It's so orignal and creative, not to mention perfectly placed on that chalkboard wall. *Swoon* I'm already brainstorming how I can use this idea somewhere-anywhere- in my house. Because Karianne took the number one spot, this project is going to be featured on Hometalk and Homes.com. Woohoo! Take it away, Karianne!
There are clocks. And then…there areclocks. There are clocks that tick and tock and ring and jingle and tell time underwater and sound an alarm. And then there are clocks made from a bicycle wheel with yardstick ruler hands perched on a chalkboard surrounded by roman numerals above a table strategically styled with a bicycle seat. That is one fine clock.And the best part?
I got the bicycle wheel for free. Can you even believe it? I walked into a bicycle shop and randomly explained to the resident bike expert that I wanted to make a clock and I needed a cute bike wheel that had preferably been around the block a time or two. Wordlessly he stared at me. I don't really know why. I'm sure they get that request all the time. And then he went to the back where they keep all the spare wheels for people who come in with clock requests and he handed me this bicycle wheel. I totally wish he could see his wheel now. He'd probably charge me for it.: )
Bicycle Wheel Clock with Yardstick Hands
Supplies:Bicycle wheelPaint stickCan lidWeightsClock kit specifically designed for large handsYardstick
Step 1: Purchase a kit from any craft store specifically designed to power big hands. Remove torque, insert a AA battery and attach to center of bicycle wheel using wire or adhesive tape.
Step 2: Drill a hole in the center of a paint can lid. The hole should be large enough to fit over the center mechanism of the torque. Place over center spoke of torque.
When you are done it should look something like this.
Step 3: Cut out yardstick hands I used a vintage yardstick. Cut longer hand 16" and shorter hand 8" long. You may need to adjust length depending on size of bike wheel. Notch out the end of each hand to resemble and arrow and cut small triangles of yardstick and attach to the other end of the yardstick hand to form an arrow.
Step 4: Drill holes in yardstick and attach parts of clock hands Drill a hole 5 1/2 inches from the notched end of the longer hand. Drill a hole 1 inch from the notched end of the shorter hand. Cut circles from the hands of the clock kit and hot glue around the holes that you just drilled.
Step 5: Attach yardstick hands to the center spoke of torque The center spoke on the torque is designed to have a space between the two hands. This is critical to make sure the hands turn properly. Make sure there is a space as shown in the picture. Attach the washer from the kit to the very top of the center spoke of the torque. Tighten the washer until hands are fastened securely. Depending on the thickness of your yardstick, you may have to countersink the washer to ensure everything fits properly on the center spoke.
Step 6: Attach weights to the back of the longer hand Hot glue washers to the back of the longer hand until the hand is balanced properly on the center spoke. We attached four washers, but you may need more or less depending on the weight of your clock hands.
Step 7: Adjust your hands to the right time using the tiny dial on the torque. Hang on a chalkboard and chalk in some roman numerals. Telling time has never been so fun! PS Monica and Jess…thank you so much for hosting such a fun contest and a big shout out to the amazing creativity of all the contestants! If you have any questions about this project be sure and e-mail me at thistlewoodfarms@yahoo.com! -------------------------------------------------------------------------------------------------------------------------- Isn't that awesome?! And that bike tire was FREE! That makes this project even better, in our humble opinions. Have you seen Karianne's blog? If not, you definitely should. It's chock full of awesome projects like this Herringbone Paint Stick Table…
And this Butler's Pantry. We're sorry, but we can't stop drooling over it. We are embarassed about the drool, but we just can't stop.
Thanks so much for sharing with us today, Karianne! Don't forget to check back tomorrow to see how Sarah made that awesome trendy tire table. Also, do you want to be a part of Creating with the Stars yourself? You can link up your favorite upcycle project right here until Friday evening for a chance to win a great prize package and be featured on EC2!
Today's a Seriously Important Day: Happy 30th Birthday Jess!
(Kev and Jess at the"decades" prom we went to last year- they looked awesome!) Let me just tell you that I officially have the best friend ever. Jess is hands down, my favorite person in the world. She's confident, strong, dedicated to her family, friends, and most importantly her faith and having her in my life for the last 13 years has made it all that much better. So here's to 30 Jess, I can't wait to see what this decade has in store for you. Love ya- have an awesome day! ***********************************************************************
So every once in a while I have a pretty cool, unique idea… trust me, it doesn’t happen all that often, but when it does I pretty much love it. The stenciled wall panels in our Nate Show room were one of those rare times. If you haven’t seen the room yet, here she is in all of her fuzzy, screen shot taken from a video glory.
We were walking through the thrift store and saw a roll of this black paper stuff. I didn’t know what it was at first, but then I thought way back when and remembered putting a new roof on my parents’ house with a high school boyfriend (ah, the crazy things teenage girls will do to impress boys. Eric couldn’t pay me enough to get on a roof now!)… Anyhow, I remembered it was like the paper that you put under shingles. Tar Paper it’s called.
This is where the random awesome idea part comes in… I immediately stopping seeing this as roofing material, and I saw it as a canvas-like material for some fabulous high-end-meets-industrial-art. Jess sort of wasn’t quite sure about my plan, but being the wonderful BFF that she is, she trusted me and encouraged me to go for it. Here’s how I turned this roll into art. We had just gotten the stencil in the mail from Royal Design Studio for Jess’ kitchen renovation. Remember, she used it here:
The first step was to simply figure out the size of my panels, I knew I wanted two stenciled images on each panel. Once I had them cut to size I rolled on two coats of semi-gloss navy paint. I was worried it wouldn’t take the paint well, but it worked like a charm. No primer needed- score one for the lazy DIYer! Once they were really dry, it was time to stencil. Stenciling 4 images was a cake-walk compared to Jess’ kitchen. It took me about 15 minutes to complete both panels. I used DecoArt metalic gold paint and it needed about two coats to really get the pop we wanted.
Did you notice all the gold on the stencil when Jess posted about her kitchen? It was a mini spoiler alert!
One additional thing I’m crushing on and could have added to my crush post are grommets. I have been using them as much as I can lately. I pretty much can make an argument that everything is better with grommets! We added them to this piece to give it a finished look and also play off of the industrial nature of the tar paper.
These are grommeting tools. The funny thing is that no matter how many times I use it, I have to think pretty hard to get it all lined up correctly. Once you do, it’s a piece of cake.
There she is… I’m pretty sure it’s the prettiest a piece of tar paper has ever looked. She’s like the Miss America of roofing materials. (It got a tad wrinkled when it was shipped back to us after the show, but it really does stay nice and flat on the wall)
I was really thrilled with how they looked in the room and wow, look what Nate was saying during this part of the show…
Oh, you didn’t hear him say that?… weird. Must have been a glitch with your TV. (hehe) The bottom line here is that ANYTHING, literally anything can be turned into art and it doesn’t need to cost a million bucks to be fabulous. This was $10 tar paper (for a whole roll, I could make about 50 more with what I have left) and it was beautiful enough for Nate Berkus. So who’s going to their local roofing supply store today? Ha! Actually, next week I’ll share another awesome project I used tar paper for. It’s a pretty cool one and saved me a ton of moolah!
You get to read about our projects, you know what the inside of our houses look like, but who are The Real Housewives of Bucks County? Well, this must be your lucky day, because today we're sharing a bit of ourselves with you… (Warning, some of these questions are cheesy, but who doesn't like a little cheese and we like 'em!) Meet the Real Housewives of BC
Do you have kids?
M- Do we ever! 4 kiddos that either keep me young or make me old, not sure which. Girl, boy, girl, boy (and done!) J- Yes, I have two adorable, blond-haired, blue eyed kiddos (a girl and a boy) who keep me busy: one who talks my ear off. and one who makes a lot of noise and dives off of furniture head first
Where is your birth place and are you far from it now?
M- I was born in Massachusetts and lived in Attleboro, MA until I moved to Bucks County, PA when I was 17 years old. When I first moved, PA seemed like the ends of the earth, but now it’s a simple 5 hour drive “home.” J- I was born in good old Grandview Hospital in Sellersville, so that makes me oh, um, about 7 miles away from there.
What is one thing you could not do when you were a child, but you can do now?
M- Eat as much uncooked cookie dough as I want to J- I wasn't allowed to watch Saved by the Bell, but am pretty sure my parents would be ok with me watching it now (totally love that show, by the way) 4. What is your motto? M- I’m the anti-motto. I am too forgetful to even remember my own motto. J- My motto for this year is"Be Intentional". I tend to be extremely impulsive and all over the place and so I'm working hard at making purposeful choices regarding our weekly menu, the the design of our home, my spiritual life and the work decisions I make.
What are your hobbies?
M- Photography, blog-stalking, reading & anything involving spray paint. J- Well, this is a no-brainer: reading design blogs. However, I also LOVE coaching the highschool girls tennis team at my alma mater, Plumstead Christian School. And I adore reading and can easily get sucked into a book which usually leads to me tuning out everything around me. (I was reading when the rest of my neighborhood felt the earthquake last week. And nope, I didn't feel a thing.)
What is your favorite ice cream flavor?
M- Chocolate chip cookie dough and Oreo Cookie combined! (Unless I’m at Ben & Jerry’s and then it’s New York Super Fudge Chunk! Unless I’m at Coldstone and then it’s Cake Batter-YUM!) J- Not a huge icecream fan (gasp!), but if we get icecream as a family, I usually get the mini Reese's Peanutbutter Cup Blizzard from Dairy Queen.
If you could travel anywhere in the world — where would you go and why?
M- A tropical beach… any amazing beach… with the hubs… and a good book… oh, and maybe with Starbucks in hand… J-. Italy, hands down. I travelled there in college with two great friends (we were studying abroad in Greece at the time) and loved every inch of it. Florence was like heaven for me- great architecture, friendly people and to-die-for foods.
Have you ever met a famous person?
M- We’re spending the day with Nate Berkus on Thursday… does that count? (See more about that here) J- Well, we'll be meeting Nate Berkus on Thursday, betcha didn't know that, did you?; ) One of my other favorite celebrity encounters was Charles Barkley. He was the biggest human being I've ever seen in person
What is your least favorite thing about yourself?
M- Physically, my ears… everyone denies that they're weird, but I know that they don’t point in the right direction. Ugh! Now stop trying to look at them! Personality-wise, sometimes I fail to think before I talk… ugh! J- Physically, my nose, although my hubs says he really likes it. (He kind of has to, though.) Personality trait: impulsiveness. Sometimes it works for me, but most of the time I'm left wishing I did a little more research or talked to more people before jumping in head first.
One that describes your BFF and blog partner?
M- One word to describe Jess = determined- she is completely committed to her goals and also growing and changing into the person she wants to be. J- Extrovert! I've never met anyone who enjoys being with people, or wants to have people around as much as she does. She gathers friends like no one else!
How tall are you?
M- 5 feet 8 inches J- 5 feet 4 inches
When you were little — What did you want to do"when you grew up?" Are you doing it?
M- I wanted to be a lawyer… I loved to argue. I’m not a lawyer, but I get some argument practice in with the hubs! J J- I really wanted to be a veterinarian, but I now can recognize that animals are not my thing. Honestly, what"I want to do when I grow up" is constantly changing. I feel like I'm getting closer though!
How do you spend your free time?
M- What free time?? Although, I love getting so obsessed with a book that my kids eat cookies and poptarts for 24 hours while Mommy finishes reading! J- Playing with the kiddos, writing this here little blog, coaching tennis and hanging out with the hubs.
Favorite sport you like to watch or participate in?
M- Fav to watch = football. I LOVE football Sundays! Fav to play = basketball J- Watch: Basketball, Play: Tennis
What kind of food do you prefer eating when you are out?
M- It’s pathetic, but 90% of the time I order a grilled cheese wherever I am. I long for my kids menu days (who am I kidding, I order from it all the time!) J- Italian, Mexican & Tapas
Last Movie You Watched?
M- Unknown it was only okay… I’d say a B-. (Although, I also saw The Help and it was an A++) J- The Help, with my girlfriends
Would you like to be famous?
M- I have some pretty fancy tastes, but I don’t need tabloid magazines claiming I’m preggo every other week! J J- I'd like to make the money of a celebrity without worrying about some crazy paparrazzi taking my picture while I'm getting the mail in my jams.
What Book Are You Reading?
M- The Tenth Circle by Jody Picoult J- I can't believe this, but I'm not currently reading one!
Favorite Bible Verse?
M- John 3:30 “He must became greater, I must become less”… it just reminds me that I’m constantly in progress and that I can continually be growing and changing to be more like Him. J- Jeremiah 29:11"For I know the plans I have for you; plans to prosper you and not to harm you, plans to give you a hope and a future." Isn't it wonderful knowing someONE else is in charge? 20. What’s your favorite DIY project to date? M- My daughter’s first “big girl” room 8 years ago was my very favorite project. Checkerboard painted walls, and chalkboard furniture made my day. Sorry, no pics… darn the days of film cameras! A more recent favorite is of course, is my Farmhouse Table Remix. J- Favorite DIY project to date: My fav project so far is the reclaimed barnwood art piece I made for Monica's dining room for the Nate Berkus Show. (Sorry, can't show you it yet, but we'll reveal it soon!) I also am pretty in love with my free old door headboard and the family tree mural we painted for our daughter's nursery.
*Photos courtesy of Doug from Candid Moments Photography. Thanks so much, Doug! You did a great job working with some very amateur models.: ) So, it's your turn now. What questions do you have for us? We're game for answering {almost} anything!
Well hey there! Want to know something about me? I find something I like and then stick to it. I have only ever ordered one meal at The Olive Garden for about 14 years straight (Chicken con Broccoli and FYI they took it off the menu, so I don't go there anymore! Ha!) I wish jeans, sneaks, and a sweater with an oxford underneath was still as cool now, as it was when I was in high school. So basically, I don't do much in the way of mixing things up (except for in my decor and design, which is weird, but who knows…). This month some of that changed! Hello Bangs and Glasses!
A few things happened to bring about these changes… #1 I spent 8 days in London and Paris surrounded by people that had more style in their pinky finger than I will in my entire lifetime. #2. I was given an opportunity from Firmoo Glasses to try a pair of glasses for free #3. I got a zit on my forehead (I'll explain later) So, here's what we ended up with… Awesomely geeky glasses that I completely adore (plus, I can see better!) and blunt bangs! I know I'm completely wild and crazy aren't I?
Let me tell you a little about Firmoo and the glasses first, then we'll get onto the bangs. Firmoo is the largest online retailer of glasses (who knew right?!). For years I'd been going to my eye doctor and ordering the uber expensive glasses they had. None of them were super cool, so I only wore them when I really needed to. Well now, I know that there is a HUGE world of glasses out there at like 80% less! And guess what peeps?? They give you your first pair FREE! Seriously doesn't get much better than that! (If you're the type that hears FREE and now is all distracted, here's the link to get your own free pair right away Firmoo Free Glasses) **Oh, and lots of people asked which style I got, they're #ZS8024 **
I knew I needed to post pics of myself (not my fav thing to do), so I added fun quotes I like to distract you! Is it working? Okay, back to Firmoo… Check out their website and make sure you try out their cool virtual try-on system. You can upload a picture of yourself and try glasses on. It's like paper dolls of the future. I made a quick call to my eye doctor and got my prescription info and just typed it in when ordering. If you don't have vision issues, that's okay- they make clear lenses too! Jess' hubs Kev, calls them his placebos and I LOVE that name! Glasses are definitely an accessory, not just a necessity anymore. A few day later, I got my glasses in the mail and it was love at first sight (Get it? Sight? Sorry, I can't resist a cheesy joke). They were step one in my mini Monica makeover. Then, I started toying with the idea of bangs… I love the look on other people, but I was a little worried because of my curly, unruly mop. Then, last week I was at the salon getting Kaden a hair cut and noticed this annoying zit on my forehead- suddenly I had my solution…bangs! If you can't beat em, hide em! Kaden gave me the go-ahead and I had one of my favorite hair stylists cut them for me! I couldn't be happier!! (If you're local, Rachel is awesome! Here's their FB page call her if you need a new do!)
I have to tell you, I am amazed that it took me so long to try something a little more daring with my"style"… I think it's a lot more"me" even. And just in case you're wondering, I'll still be ordering all the same foods at restaurants-I'm not that changed!! Here are all the details you need to get your first pair free from Firmoo… Firmoo Website Firmoo on Facebook (head over and let them know EC2 sent ya!) Just check out their site, choose a pair you love, and have them in about a week! (There are a few designer pairs that are excluded, but I found tons that I liked that were included) So are you going to get a free pair? Any other"stuck-in-a-rut" readers out there? ** A huge shout out to our favorite photographer Stacy Salvatori for taking these pictures of me. She is a Bucks County local and does amazing family, portrait, and wedding pics. Check out her site and let her know EC2 sent you!! **I wasn't compensated for writing this post. I got a free pair of glasses from Firmoo (like you can) and was thrilled to review them for you guys. All opinions are 100% mine**
I'm so excited to introduce you to one of our biggest DIY Projects ever! Over the next weeks we're going to be taking you step-by-step through our DIY Patio Project. I was thrilled when Stone Depot and EP Henry decided to partner with us on this crazy adventure.
So, here's the plan, each week I'll be giving you an update with info and tips on what we've completed. You're going to be amazed at how do-able this DIY really is (just LOTS and LOTS of work- husbands, please don't send me hate mail!) and don't worry, for those of you that definitely don't want to tackle this as a DIY, I'll hook you up with the pros at Stone Depot and they can help you out. I'm way impulsive, so for a Big-Mama DIY, I needed a plan to keep me focused and doing things in the right order (or I would drive my hubs nuts!)
Step #1- Plan Patio Layout This was honestly very, very tricky. I learned a few things… As I planned, my patio mysteriously got BIGGER and BIGGER and planning is not as easy as I thought it would be. I had a few requirements 1- A large space for a BIG Dining Table (I feel another DIY table coming soon!) and 2- An area for a fire pit and sitting. Here was brainstorm number one… Now, remember I'm NOT an artist or a landscape designer. This looked pretty on paper, but having an opening for stairs off the patio only about 3 feet away from the opening for the walkway was weird.
Brainstorm Number Two looked like this… Still had the weird stairs/walkway combo and I also added a bump out area. Why you ask? Well, I love sitting in the sun! The way the sun crosses our house, that little area would have sun 24-7 (Well, not really, but you get the idea). Eventually I talked myself out of that because it was weird and made me seem a tad vain (enter the Carly Simon music).
The Final Plan is different than both of our initial ideas, but it's clean, simple, and big enough for all my requirements!
Now, it looks kind of small in these pictures, but it's about 600sq/ft and will be perfect for parties and lots of outdoor fun. DIY PATIO TIP: Use leftover spray paint to draw out your design on the grass to make sure it's what you really want. I had about 7 colors going on at one point.
Step #2- Choose EP Henry Stone from Stone Depot Once we had our plan, we headed off to Stone Depot in Perkasie. They have a HUGE selection and their guys know their stuff! We were able to walk around outside and see actual patios and samples of each of the different paver options and colors.
Here's what we picked! Bristol Stone in Blue Spruce. I think the color will go really well with our house.
Here's a better picture, but in a different color. We're going to have sitting wall, like this, along the back and we're going to add fun lighting too!
I love how the stone sizes are varied and I like that they're larger than traditional pavers. At our old house we had Old Town Cobble, which is nice, but the Bristol Stone has a more contemporary feel to me. The next step is measuring and planning outside the house. Here's a picture to give you a general idea. Next week I'll give you all of our tips for the measuring, trust me we learned a thing or two along the way! DIYing with my hubby is a tad different than DIYing with Jess! HA!
So be honest, are we CRAZY for taking on this DIY? Any tips or advice?