My Creative Blog [Search results for Country Living

  • Rustic from Country Living

    Rustic from Country Living

    Good morning to you all! It's such a beautiful morning here, the sun is rising fast over the horizon and promises spring at it's best in midst April. I am definitely going for a walk today.

    Near the house is an old Viking grave, it's on a hill and the man lying here named Ingjald Illr'de, and it's said that he wasn't a very nice man. Oh well, he's been buried for a long time so I guess it's safe to visit the place. ;)

    Country Living — rustikk landstil 3
    Country Living — rustikk landstil 1
    Country Living — rustikk landstil 2


    Country Living — rustikk landstil 4
    Country Living — rustikk landstil 5
    Country Living — rustikk landstil 6
    Country Living — rustikk landstil 7
    Country Living — rustikk landstil 8
    Country Living — rustikk landstil 9
    Country Living — rustikk landstil 10
    6380842
    Country Living — rustikk landstil 12
    Country Living — rustikk landstil 13
    Country Living — rustikk landstil 14
    Country Living — rustikk landstil 15
    Country Living — rustikk landstil 16
  • Modern Country Designs…Say What?

    Modern Country Designs…Say What?

    Today we have a Jessica (not our Jess, a different one) from Arcadian Lighting guest posting about blending modern and country designs. We love this trend, so we were excited to see what she had to share. I (Monica) happen to love Arcadian Lighting. We made one big lighting purchase when we built our home. Our foyer needed a huge light and it needed some major wow factor. We must have looked at 192364 stores, and Arcadian was where we found a winner!

    It's one of my favorite things ever (and they have great sales, so of course I didn't pay full price!) So, thanks for being here today Jessica!
    **********************************************************************************

    Hi there! I'm Jessica, a writer for Arcadian Lighting, which is a wonderful online resource for beautiful, affordable lighting fixtures. I'm delighted to be guest posting for Monica and Jess today because I'm going to be sharing a collection of inspiring modern country interiors. Rustic and casual with a sophisticated modern edge, these country interiors are just right for the fresh, airy days of Spring. I hope you enjoy!

    Modern Country

    A simple checked table cloth and set of traditional English china give this lovely dining table a classic farmhouse feel. The contrasting modern wine glasses and Donghia stacking chairs are cool accent pieces.

    Modern Country

    A chic neutral color palette and a checked upholstered arm chair in the corner bring together new and modern with old and classic beautifully. The branch candlesticks are fun and unexpected.

    Modern Country

    A gorgeous mix of crisp, modern furniture and rustic exposed wood beams creates a perfectly elegant, yet relaxing atmosphere in this living room. These types of ornate wooden mirror frames and chandeliers add a bit of drama.

    Modern Country

    The slate fireplace, twinkling candles and brilliant chandelier give this sophisticated dining room just enough simple country beauty. A lovely bouquet of fresh greenery makes the perfect accent, as well.

    Modern Country

    The vaulted ceiling and shelving gives this living room a distinctly farmhouse appeal. Weathered antiques and cushy modern furniture make the room cozy and inviting.

    Modern Country

    The handsome dark wooden floorboards and rustic, industrial stools add a rugged edge to this chic kitchen. The pendant lights overhead are simply beautiful, and the under cabinet lighting is a great touch.

    Modern Country

    A dusty blue wall color and sheer white curtains make this bedroom absolutely dreamy and romantic. The wood beam ceiling add so much natural texture and color that it makes a perfect accent against the very simple furnishings.

    Modern Country

    The paneled walls in this bedroom lend a cozy country atmosphere to the room, especially with a serene beige paint color. The rustic nightstand and modern headboard are particularly handsome together. Images 1 | 2 | 3 | 4 | 5 | 6 | 7 | 8 Which of these modern country rooms is your favorite? Let us know in the comments! And be sure to stop by Arcadian Lighting for a modern light fixture or two to brighten your home! -Jessica

  • From Country Living

    From Country Living

    country living
  • Orange Crush...

    Orange Crush...

    I can't help myself I simply love ORANGE! It doesn't matter if it's bright orange, burnt orange or anything in-between, I simply love orange. So when I opened the October issue of Elle D'cor, I'm always running a month behind, and saw the home of hairstylist Fr'd'ric Fekkai and his wife Shirin von Wulffen I drooled.

    Orange is a power color and it also stimulates creativity so it isn't surprising that someone as creative as Fr'd'ric Fekkai is drawn to orange. I love how the burnt orange of the dining chairs play off the bronze chandelier.

    They even have orange carpets that I think looks fabulous with that gray sofa. My husband reads my blog so''honey what do you think of orange and gray for our new living room scheme?' Loving it!

    Fr'd'ric Fekkai and his wife Shirin also own a country home in Millbrook, New York. This picture was taken in their living room and as you can see they continued the orange theme.

    Seems like a lot of people in the hair and makeup business like orange, this orange framed mirror belongs to Est'e Lauder executive John Demsey.

    Hair guru John Barrett is no different and used pops of orange in his living room too. I personally think orange works better then red for that bit of pop, orange isn't as explosive. So what's your take, do you like orange or not?
    images via Elle Decor

  • Christmas Inspiration Guest Post

    Christmas Inspiration Guest Post

    I hope you'll find time in your busy day to pop on over to Providence Ltd. Mona was kind enough to invite me over for a guest post on Christmas inspiration where she's doing a wonderful series every Tuesday and Thursday with our wonderful world of design bloggers for the month of December.

    image via Country Living Magazine
    You'll find inspiring ways to decorate with all natural, simple items found just outside your door! Be sure to leave a comment and tell us what you think, will you be using the great outdoors in your holiday scheme?
    Thank you Mona for inviting me over! & Happy Holidays Everyone!

  • The Living Room: Before and After

    The Living Room: Before and After

    Just to review....this is how we found it.

    The single-paned window, and perhaps even the deck, were most likely added sometime in the 80's. When the contractors put in the new Marvin window, they had to tear down the deck in order to put in both the headers and footers. We'll rebuild something more period looking to the house — a balcony with a wide center staircase going down the middle and into the back yard.

    This is the opposite wall. See all that brown trim? That's all covered in faux wood tack paper to assimilate wood trim. It was horrible to remove.

    This room has evolved over the three years we've owned our house (we once had our bed in here). It was the very first room we tackled when we bought the place (the picture of Hubby was within hours of taking ownership) and so it was the first room we finished in terms of the bare bones part. The actual decorating would come much later, as in now....and it's quite serendipitous as again, we're 'moving' into this room just before Christmas.

    Here's sort of another 'before' picture that shows our previous color scheme, dictated primarily by the furniture and rug we had on hand at the time.
    And here are the 'afters.' I took these pictures on the darkest days of the year as we're having lots of fog and rain — hope they turned out alright!

    As you can see, I painted the room white. It's Simply White by Benjamin Moore (Eco-Spec line), which is the same color we've used on all of our house trim and many of our walls. The old color just felt too ruddy looking and I realized (no agonized over) that I'm most drawn to that classic white wall farmhouse look where the color of the walls isn't what the room is about.
    I wanted the room to be more about the fireplace, the windows, the view, the light coming in, the furniture, and the artwork. And I just thought that white allowed these things to shine more than any other color. Also, Janet (hi Janet!) over at The Gardener's Cottage just painted her living room Simply White and it completely inspired me!

    The mirror over the mantle is such a better fit than our other one. I found this several weeks ago at an antique store for $120.

    I picked up the brass sconces at an antique store for $20 each. I had been looking for some sconces online but found them to be very expensive. So these were in our price range and I've always loved the look of a pair of sconces over a mantle.

    The seagrass rug is a 9x12 (it hasn't quite flattened out yet after being rolled) and will be relocated to the dining room once I decide what size seagrass rug I want for this room. I know it will be several feet bigger but still trying to figure out exact dimensions before I order it (the first one I ordered had a mid-January delivery date so I cancelled it).

    The furniture is by a company called Rowe Furniture. We knew we'd choose something from their line because they are committed to natural fiber fabrics, eco cushion cores and wood from replenished forests. They are also members of the Sustainable Furniture Council (SFC).
    This was all very important to us as we have made great efforts to make our home as green and healthy as possible. We also liked the price — due to a special sale that they were having at the time, the couch was just $1,099 and the chairs were $599 each (and we chose the highest grade fabrics).

    The velvet couch is extremely luxurious. We love the high curved arms (much like a sleigh bed) as it provides the perfect support for reading a book, sipping a cup of tea or snuggling up next to the warm fire — especially on days like today.
    I picked up the brass easel a few years ago for $40 — a price I just couldn't pass up. The antique frame was my Great Great Grandfather's and I'm in the process of ordering a beautiful print for it. I can't wait as I've always loved the artist and will be absolutely delighted to have a piece of hers in our home.
    The cabinet used to be in the dining room. It got bumped from there because there will be two new windows going in this spring/summer leaving no room for it. It's sad but I absolutely love it in the living room. It's gone from dining cabinet to secretary, a look I have always loved.
    I also like the height it provides and think it really adds a nice finishing touch to the room. We found this piece at a local antique store that used to get antique furniture shipments in from England. During my semester abroad in college, I lived in England and would spend hours going through all of the gorgeous antique stores looking at beautiful cabinets very similar to ours. So it's sort of serendipitous that this piece found me after all of these years.

    The cabinet came with black oriental pulls on the drawers, which I don't believe were original due to the lovely brass button knobs on all of the cabinet doors. So I switched them out for Eastlake pulls which offer it more of a country look (and of course, I absolutely love all things Eastlake).

    So there it is! I'm sure it will continue to evolve as all rooms do! I hope you like it! We just got our Christmas tree today so we'll be putting that up tomorrow night....so more photos to follow!
    Photo updates:

  • Going Full Circle

    Going Full Circle

    Downtown with only two streets
    I thought I'd tell you how we came to be living in an 18th century house in the country. My husband Rick and I were living in NYC and had been searching the suburbs for 5 ' years looking for the perfect antique house to no avail. We had quite the list of wants and weren't willing to settle. After one particularly disappointing day my husband brightened up and said time to go farther out and made a call to an old childhood friend who was in real estate.

    Autumn in Our Town
    An hour later our fax machine started humming away spitting out house listing after house listing, talk about excitement! The house listings were in Rick's childhood hometown up in New Hampshire and one house in particular caught both our attention and Rick couldn't figure out why it seemed so familiar so time to take a drive up and have a look.

    Front of House at first meeting
    Rick had driven up alone to see the house and called that night telling me I needed to hop on a plane and get up to NH pronto, he had found our dream home. Meeting our home for the first time took a bit of imagination to envision what it could look like when brought back to life. Upon arrival to our house you couldn't see it sitting up on the side of the mountain from the road since the front forest was so over grown. But once up the drive there she was'''a cape built in 1790 sitting looking very blank and forlorn just waiting for someone to love her.

    Side yard looking into the back
    The property was blank! No shrubs around the house, no gardens, no nothing except what Mother Nature planted. Those 'shrubs' you see at the back of the house were actually invasive weeds called Japanese knot weed or bamboo and were next to impossible to kill off.

    Back of house

    The property in general was an absolute mess! The side field weeds had grown part way into the side yard and calling them weeds was putting it mildly. There were huge wild rose bushes the size of a vehicle, poisonous sumac trees and giant weeds taller then a man. The only way around that mess was walking around on the road because you couldn't go through it.

    Rick told me while we were touring what we termed 'the mess' that he finally knew why this house seemed so familiar, it was his old pediatricians house. My husband was born and raised right down the road from this house, talk about going full circle. Another surprise from our realtor, the old gal is buried right out back on the tier. I guess she really loved this house!

    Yes, as far as you can see this is our mess!

    The interior turned out to be as dismal as the outside, the whole house had white walls, not semi flat painted white walls but the white of primer paint. Yes, you read that right, everything was painted with primer white paint! While almost every trim throughout the entire house was painted that strange blue/green. Take it from me people white is not neutral it's shockingly bright!

    We had seen our house on a rainy day so found out first hand that the roof needed help since it was raining on the first floor of a two story house. See the rain coming down the window shade? It's was flowing steadily from the ceiling as well. Despite the fact we were going to need a bulldozer and every surface in the house needed help the structural bones of the house were perfect and ready to stand for another 200 years.

    Front forest after we cleaned and thinned it out
    We found everything we wanted in a property and house even if it was going to take a very strong back and many years to put right. So after nearly six years of searching we took the plunge and bought our home. Welcome to our dream!

  • New Orleans Style

    New Orleans Style

    Antique shops along Magazine Street
    My best friend and sister of my heart, Debbie, yes we're both Debs, lives clear across the country from me so once every two years or so we meet up in a different city to play for a week. We decided to meet up in New Orleans since she had never been there and of course there was magazine street to look forward too since we both love antiques. Magazine Street is well known for all their antique shops although there are fewer since hurricane Katrina.

    A restored shotgun house with newly added dormer
    We stayed in the French quarter and played tourists and the first thing that struck me were the stunning shotgun houses. A single shotgun house is usually 12 feet wide and has 3-5 rooms in a row, sometimes only two rooms deep, front to back, with no hallways and doors that open on the front and back.

    (Excuse the dates on the pictures I never learned how to set that on my camera.)
    Shotgun houses were popular mainly in southern cities since they occupied a small area of land, usually 30 feet wide at most, so it allowed a great number of homes to be built side by side. New Orleans housing taxes contributed to the shotgun house since taxes were based on the lot frontage. Later when people tried to take the houses to a second story known as 'Camelbacks' the houses were then taxed based on square footage. Since hallways and closets were considered rooms this type of house has no closets or hallways.

    'Double-barrel' shotgun houses that consist of two houses sharing a central wall that would have allowed more homes to be built.
    They became known as being a shotgun house for the saying that you could shoot a gun through the front door and have the bullet pass cleanly through the back door since the doors line up on the same sides. I love the vibrant colors used for the house colors.

    The houses usually had big rooms with high ceilings that helped with cooling purposes, when the warm air rises it helped to keep the lower part cooler. The shutters on the main doors helped as well since the shutters can be locked from the inside and the front door could be left open to allow air flow through the house.

    This house is actually two houses the entrances being on the far left and right and each with a window and dormer in the center. The left house is for rent if you're interested.

    A modern shotgun house with detailed floor plan that includes a bathroom, the original shotgun houses had no bathroom.

    Interior pictures via Southern Accents, December, 2002
    These interior shots are from Gerald Pierce' pied-a-terre in the French Quarter of his double-barrel shotgun house that has been turned into a single dwelling. Gerald is a designer of Jim Thompson Thai Silks in Bangkok.

    If you notice the pictures hung over the windows in the living room and how far up on the opposite wall the pictures go up it'll give you a sense of how high the ceilings are, usually 14' in height.

    Chimneys tended to be built in the interior so the front and middle rooms could share a chimney and each have a fireplace. Notice how slender the fireplace surround is, not much wider then the antique trumeau mirror above it. Typically there was another chimney built in the kitchen.

    The kitchen, located at the very back of the house, looks to be a simple gallery kitchen hidden behind silk drapes. This is a man who obviously doesn't cook much since those drapes would get ruined by cooking grease.

    If you click on Gerald' bedroom picture you can pull it up bigger to see how narrow the bedroom looks and how high the ceilings are, the ceilings do have cove molding. Notice how he kept the wood floors dark so that they almost disappear?

    The bedroom fireplace exactly on the other side of the living room fireplace.

    While I love the look and the idea about these little houses I don't think I could live in one since I get claustrophobic. Love the tall floor to ceiling windows and the ceiling heights, so European. I'm also thinking these homes are best for a single person since there isn't much square footage. They're such a charming part of our architectural history and I'm glad I got to see so many first hand with my best friend.

  • A Clean Slate

    A Clean Slate

    I've been enjoying this fantasy that we've just bought our house and everything is just as it is now....crisp, clean and ready to decorate! In this fantasy world, it is as if the era of pea green carpeting and faux wood paneling never existed...
    So my fantasy goes like this....Hubby and I pull up to a lovely country house that's in our price range! Wow, huh? We're instantly in love as we can see that the house has been well-taken care of. We walk up to the front door and as I step in, I begin to glide through the each room seeing nothing I don't like.
    When I make my way to the living room, my eyes light up and as I turn, Hubby takes me in his arms (suddenly I have my wedding dress on) and we begin to dance, giddy with laughter as we know that we have finally found exactly what we're looking for in our new home. We pause only for a moment, with bright beaming smiles, and say to our realtor without any doubt or hesitation, "we'll take it!"
    Nothing in this fantasy had anything to do with what really happened, especially the part about the doubt and hesitation. But I'm enjoying every minuteof my fantasy as I stare into this empty room, dreaming of how I'm going to decorate! It feels like such a luxury!
    So let me take you through the room...

    This is the perspective you get when coming from the kitchen. The french door next to the picture window will eventually take you to a balcony, which we'll build this spring. The original 'deck' was torn down when they put in the new Marvin windows. The door you see through the entryway, goes to the wraparound porch....this is our formal entry into the house.

    This is looking towards the fireplace from a corner that no one will ever stand in, but I thought I'd give every perspective. Entry is where the hall tree stands.

    If I pan left a bit more, you'll see the coat closet to the left and to the left of that, the hallway where the den, guest bedroom and downstairs bathroom are located.
    So this is what I've come up with so far...

    ....the main layout. The couch will face the fireplace and the two chairs will flank each side of the fireplace. I love the coziness that this layout will offer and I know that there will be many hours spent snuggled in front of the fire.

    Here's the new couch we've ordered....accompanied by two of the above chair! We went with a couch with more modern lines to contrast a little with the more traditional lines of the coffee table. The coffee table (you can see here ) is an antique pedestal with rounded feet and oval top, which will compliment the round lines in the chair.

    Here are the fabrics we chose....the sofa fabric is a beautiful velvet (so luxurious) and the chair fabric, which goes really well with the tarragon velvet, is linen- esque (the photo doesn't really show the chair fabric very well). And due to the furniture store's amazing sale — I made sure that I picked out the highest grade of fabric — of course I did!
    I've also been considering a tall narrow table to put behind the couch. I'd put two table lamps on each end to illuminate the room. I was thinking of something a little modern, made of mostly glass so that it doesn't feel too heavy. I think this would be the best option as end tables wouldn't work well with the tuxedo-style (high arms) couch.
    Also, we'll order a 9x12 natural fiber rug, perhaps this one from Pottery Barn, to go in front of fireplace. All the furniture fits on the 9x12 size. I'll accent the rest of the room with antique rugs I already have.

    I'll put an antique rug in front of the french door. This door will eventually lead to a balcony. There's about a seven foot drop outside the door right now. The balcony will have wide center stairs going down into the yard. It will be big enough to put a couple of rocking chairs or a small table and chairs for an extra place to eat or drink.

    Our existing dining cabinet, that I'll be stealing from our dining room (photo below), will be relocated to the above wall. Instead of holding dining odds and ends, it will be transformed into a secretary that will be a place for beloved books, unframed art, special momentos, etc. I'll be stealing this cabinet from the dining room because we've decided to add two more windows on the wall where the cabinet is now. But I'll go into the dining room plans later.
    Here's the cabinet we'll be stealing for the living room. Hopefully, someday I'll find a narrower dining cabinet to replace it.

    On that small wall to the right of the kitchen entry, I've been considering a temporary bookshelf. Lauren at Pure Style Home inspired me when she put one in her house, on a similar sized wall, and it looks fabulous — like everything else she does. And I say 'temporary' because as you can see in the next photo, I have plans for Hubby (wink, wink Hubby), to build a built-in bookcase (love the look of those — I have a gazillion inspiration photos of them) on that huge wall.

    We're waiting to begin this project until after we get rid of that floor furnace. It's the one 'functional' thing in the house we have yet to figure out. But whatever we decide to do, that floor furnace grate will eventually go....and hello bookcase. ; )
    So odds and ends still left to find are: some sconces for above the mantle (any suggestions?), a 9x12 natural fiber rug, perhaps a white bookcase, a tall modern table and...
    Any other inspiring ideas? I would love your feedback! Just love it!
    *Also, I've made another friend over at High Street Market.... Kelly has the most amazing Etsy shop with so many beautiful treasures. I was eyeing the pair of marble table lamps, an antique oval mirror and a lovely pewter pitcher....and it's all so reasonably priced! How fun is that!

  • Finding Treasures {Flea Market Hunt}

    Finding Treasures {Flea Market Hunt}

    Monica and I both went to the Dublin Fire Co. annual flea market last week (went the same day, but not together. Boo!) This was the first flea market I had been to where I was actually looking for items to repurpose. I had a couple of things in mind that I wanted, but also found a few other things that just begged to come home with me. I went with my mom, and she is a great person to go with because she, like me, can see potential in anything! (It's one of the perks of being an eternal optimist).

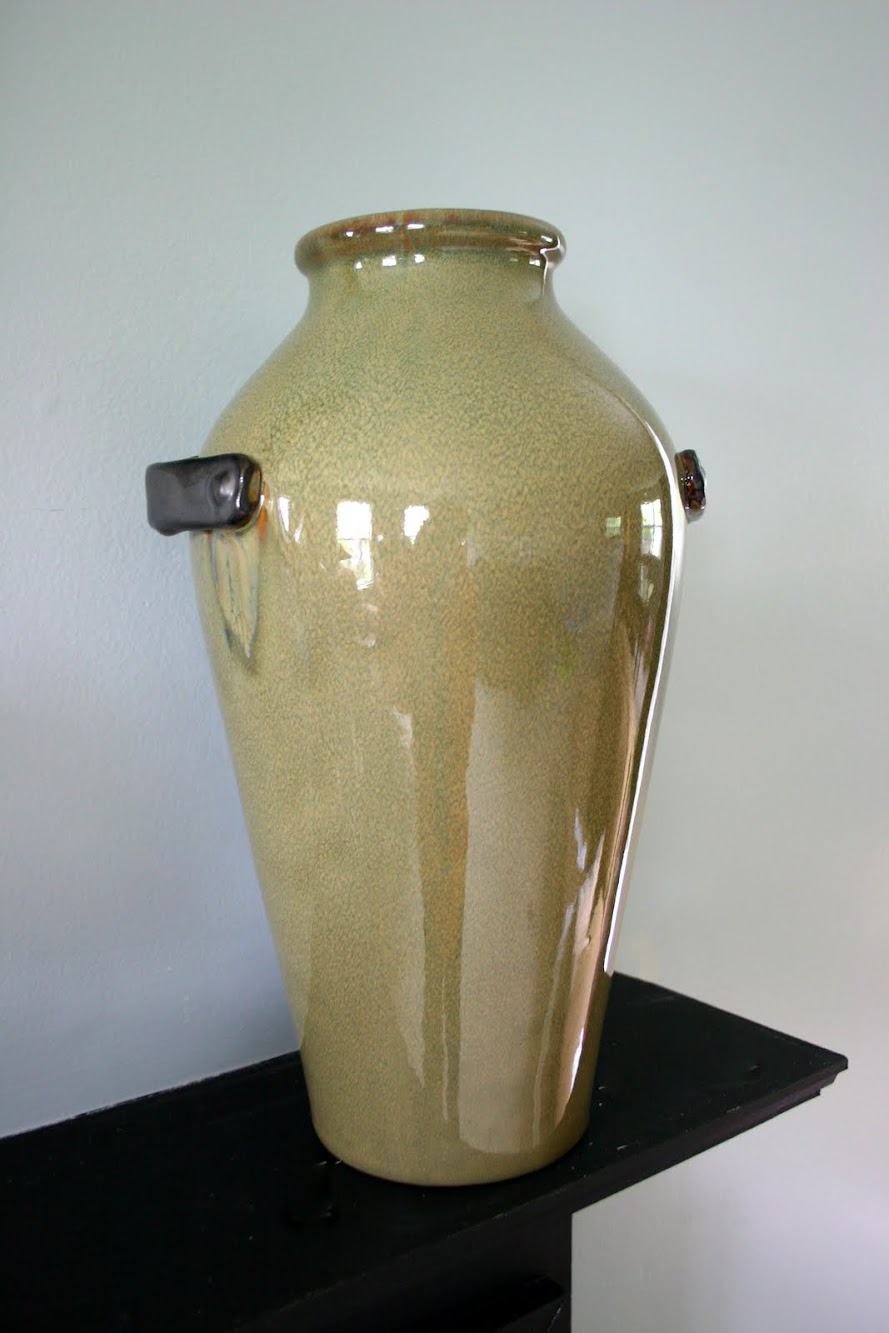
    I got this awesome Pier 1 vase/urn for $5 (regularly $30) and it now graces my mantel.

    One of the other things I purchased was an old workbench/sawhorse thingy. This was a little bit of a risk for me- I had an idea of where I would put it, but wasn't sure it would work out. But for $20, I knew I could use it somewhere!

    That little beauty fit perfectly in my entryway! I had been wanting something to make that space a little more welcoming (and I little less"go away"-like, as Monica says), and this fit the bill. I can't get enough of the color, either.

    Good, sturdy legs, huh?

    This large pitcher caught my eye on the first table I went to. It was very country-looking with it's red and white checker pattern (sorry, no before pictures, but trust me, it's much better this way), but a little Rustoleum Painter's Touch spray paint in glossy white took care of that. I filled it with pussy willows from a local garden center and now it looks like it was meant to sit on that bench all along, and I just led it home.

    Over on the other side I stacked a few books and an old lantern of my grandmothers. I love having a few of her things in my home as a way to remember her. That cute little plant is from Ikea and the mug was from a friend. (Thanks, Lindsey S. It's getting good use!)

    (The view from the hallway upstairs.) On a side note, the pictures have made me hate the color of paint on our walls in the entry even more than I already did. When we moved into this house, the walls were peach. Like literally peach. We said goodbye to those as soon as we could, but lo and behold, the color I picked to replace it has a pink undertone, as well. Definitely the color of swine. (Melissa, at the Inspired Room, dealt with an entire house of swine, and I realized that this is the PERFECT description of my color). Blech! It will be a nice, non-swine, beige soon. Add that to the never-ending to-do list for my hubs. Poor guy.

    Some of you may be wondering about the frame hanging above the new bench vignette. My hubs and I made this out of reclaimed barn wood (my father-in-law has a treasure trove of barn wood in his barn. Go figure.: ) Kevin cut the picture holes (is that the right word?) and then mounted another board to the back that I painted black, so that I could attach the pictures to it. I then painted the entire frame black, then painted it again in a brick red color with a thick bristle brush and minimal paint so that it looked a bit distressed. Finally, I added the phrase that I bought from Uppercase Living to it. I am so in love with this frame, it's not even funny.

    Speaking of reclaimed barn wood, I have two big pieces ready to be made into frames (one holds four pictures, and the other holds one picture). If you're interested in purchasing one, send me an email to let me know. You can totally customize the color and phrase. This piece never fails to get lots of"wows", so if you want one in your home, give a holla!

    What are some of your favorite flea market treasures?
    Happy Monday,

  • Happy day!

    Happy day!

    (Although a very cold one.)

    It's one of those twilight days. Still summer but fall is catching in. The green couldn't be greener from the sunshine but when you stick your head out the door it's cold as h***. I'm not sure I'm amused.

    Here life goes on, whether it's summer or fall. We're happy and enjoying life and each other. My Black Panther (cat) is running around calling for attention, wanting to go out all the time, which is making me a bit suspicious so today I'm booking her for a vet. 'Snip snap'

    A happy day to you all. Enjoy fall, soon the winter is here.


    19755_1090549599352_1694850024_192715_1477579_n
    7d99ff1916indian
    7d993b3025derson
    7d99211c0ok1
    Outdoor dining ih
    folk-style-seating countryhomes and inter
    hallway34 country homes and in
    livinetc
    garden-cushion hg
    relaxed-kitchen-diner chi
    Relaxed-courtyard hg
    chi
    folk bedroom @ living etc
  • On the move...

    On the move...

    Finally, we took the decision to move in together. So goodbye Gothenburg ' hello Nyk'ping.

    Big step, from the city to the country side. Surely, I've had a year and a half to practise living the no-civilisation-way, but I could always take a break from it in the big city.

    Now, it's a huge house to manage, an ever huger garden and forest and water as long as the eye can see. It's exciting but still, terrifying. Will I go crazy from the silence? Will I love the silence? Can I manage the garden (I don't even have green fingers, not even the little pinkie one)? Will I know where to start making the house 'mine'? I have no clue right now, only time will tell. And luckily; Nyk'ping is only 15 minutes away, with car, so I have to get my license NOW. And Stockholm is an hour away. So it isn't all bad.

    The pictures are from Ti Mo. They have really beautiful and special clothes! The two first photos made me fall totally in love!

    Ti Mo
    Ti Mo
    Ti Mo
    Ti Mo
    Ti Mo
  • Landscape Design

    Landscape Design

    T his time of year, I'm reminded of the other part of our farmhouse renovation....the yard. The above picture shows what the side of the house looks like today...

    ....this is what it looked like after the contractors left. Due to new electrical, plumbing and water lines, and grading new elevations around the entire house, we were left with a sea of dirt and gravel.
    So we had to start from scratch. The yard landscaping was a project we hadn't anticipated when we set forth on our farmhouse renovation and is one that is taking time to complete.
    Last summer, we put in a picket fence, front walk and stairs, and dining patio....these tasks alone took the entire summer to complete!

    Here's the what the front of the house looks like today. The picket fence offers a coziness to the area around our house. We also wanted to define the area of our property that would be for gardens (inside the fence), from the part that would be more natural and simple (outside the fence).

    This is what the front of the house looked like when the contractors left.

    This is what the outdoor dining patio looks like today.

    This is what it looked like after the contractors left. Once again, Mr. Engineer (Hubby) used all his know-how to design and build a retaining wall, level floor and two sets of stairs.

    This is what our 'backyard' looked like just before we went through the renovation. The edge of the 'lawn' previously dropped off a couple of feet past the old deck (which was torn down during the remodel due to rot). The fill we had excavated from the front of the house was hauled out back to extend the lawn area.

    This is what it looks like today. We planted over sixty (back breaking work!) White Simplicity hedge roses along the entire perimeter of the lawn. We have yet to rebuild the deck/balcony (this comes off from the french door in the living room)....as we're trying to enjoy summer this time around instead of always working on the house. Also, we're still deciding on some of the design elements of the balcony. I'll do a separate post on that soon.
    So that's what we've done so far.
    Landscape design is something I love but is not something I know. I've always loved gardens, especially old country gardens, and I love old houses with hedges and a sense of outdoor coziness. But exactly how to create that with a blank canvas completely stifled me.
    Then last fall I came across Tara Dillard's beautiful blog and was overjoyed to discover that she did long distance consults! After sending her dozens of photographs of the yard, and discussing ideas over a few phone calls, she created a beautiful landscape design plan for our property.
    It was just what I needed....professional vision. The plans will evolve over time, as money and time permit, but it feels really, really wonderful to have a plan. Tara's amazing gift for creating beautiful landscapes is something I truly admire. I feel quite honored and very happy that her vision will be expressed here on our property.
    As we progress with our landscape projects, I'll be sure to keep you updated!

  • True Confessions of a Blogger {and a Giveaway}

    True Confessions of a Blogger {and a Giveaway}

    It feels like I haven't blogged in forever! It's nice to be back… well, honestly if you told me I could jump on a plane now, I'd grab my suit and be gone in an instant. Mexico was insanely awesome. I'm going to do a whole post on it next Monday!
    So we're supposed to be giving interesting statistics this week… I've got a good one for ya!

    The Disappearing Giveaway.. If you've followed us since the very beginning you might remember a post about our Design Challeng{ed} contest… Or maybe you don't remember because not one single person entered. Ha! We'd only been blogging about two months and it was a major flop! It sure makes us laugh though!

    Famous Angelina… Jess wrote a cute post about Cam's 3rd birthday party last year. It was a cute Angelina Ballerina theme. The post is fine, but nothing over the top. We didn't have great lighting and all the pictures are so-so… however, thanks to the post's title it was in our top 15 posts for landing pages! So many people have Googled Angelina Ballerina and found us! Ha!

    So maybe we laugh a lot and blush a little over these silly posts, but it reminds us of the amazing road this blog has taken. We can't wait to look back next year and see what 2012 had for us!
    Now, get ready for some stinkin' awesome giveaways! --------------------------------------------------------------------------------------------------------------------- We have three awesome giveaways for you today! The giveaways are separate entities (in other words, if you win, you don't win them all, but you can enter all three!) Please let us know which giveaways you're gunning for in your comments.
    My Best Friend's Hair Giveaway My Best Friend's Hair is our most recent sponsor and it's the coolest concept! Their site can help you find the best stylists all over the country and get ratings and reviews. Want to find the best stylist in your area that can deal with insanely thick, unruly hair (that would be my wish)? They can help you with that! They also have tons of info about the hottest cuts and styles- so fun! Today they're giving away a Neuma Beauty Hair Products gift set. I don't know about you, but I love using high quality hair products, and getting them for free is even better!

    To enter: (This giveaway is now closed)
    1-Like My Best Friend's Hair Facebook Page and leave us a comment letting us know.
    2-For an additional chance to win, head over to the My Best Friend's Hair website and either search for a stylist in your area or leave a review of your stylist and then leave a comment letting us know you did.

    Scentsy Giveaway I must have been living under a rock for a while, because I had never tried Scentsy until Breanne joined our blog last fall. Honestly, I wake up, walk down stairs, and turn my warmer on immediately, my kids take turns picking out the scents we should use. It's awesome! Breanne is giving away one warmer and scentsy bar of your choice!

    To enter: (This giveaway is now closed)
    1- Go to Breanne's Scentsy website and then tell us in a comment what scent you'd love to try.
    2-For an additional chance to win Follow RHBC on Twitter and leave us a comment letting us know.

    Kotton Pickin' Kute Hat My poor kids were all born well before the world thought to make amazingly cute hats- boo! I honestly don't think there's anything cuter than a baby with a sock monkey hat! Krista hand knits all of her hats and lucky for us, she's giving one away! Don't have an itty bitty baby? No worries, she can make them in child and even adult sizes. I just might buy the hubs a sock monkey hat… actually, I won't because I could possibly die of laughter.

    To enter: (This giveaway is now closed)
    1- Go to Kotton Pickin Kute's Etsy Store and then tell us in a comment what hat you love!
    2-For an additional chance to win like Kotton Pickin' Kute on Facebookand leave us a comment letting us know.

    Giving things away is so darn fun! I can't wait to announce the winners tomorrow! Hope you're enjoying our week of giveaways just as much as we are!

    AND NOW FOR THE WINNERS FROM YESTERDAY!

    The winner of the Thirty-one Gifts giveaway is: Dwell Wool Knits! Congratulations!

    The winner of the Dream Dinners meals is: Whitney! (and I promise I didn't cheat just because she's having her first baby! Congrats Whitney!)

    (email us your address so we can get you your prizes!)

    jess
    Monica
  • Summer Drive

    Summer Drive

    This is one of my favorite fields in the valley. I drove by it on my way up to a nearby lake this morning. It's very peaceful out here.
    Less than a minute after taking this picture however, I was harassed by a few wasps. I decided to jump back in the car to get away from them but unfortunately, they jumped in with me. Better yet, they were in my pants leg. Knowing the inevitable, I swatted at them. I felt the sting and that's when I jumped out of the car and pulled down my pants. In fact, I went further than that and took them off altogether.
    Standing in the middle of the road with no pants on, I realized yet another luxury of living in the country. You may take your pants off anywhere you like without much fear that there will be witnesses.

    Here's a familiar scene around here. The orchards are almost ready to harvest. The white boxes you see stacked will soon be filled with several varieties of ripe pears and apples. And you'll be glad to know that during this stop, I managed to keep my pants on.

  • Nate's 12 Days of Holiday DIYs {Day 6 Ornament Recap}

    Nate's 12 Days of Holiday DIYs {Day 6 Ornament Recap}

    Guess what we have for you today?? Another Video!! Just kidding! Hehe… We're joint posting and will be sharing all about our Nate Show ornaments with you.

    In the midst of our 48 hour challenge, my ornaments were pretty much one of my last concerns. I was pretty focused on building a pallet wall (details coming soon), moving and rehanging Jess' long wall shelves, and some other BIG projects. I had the room 90% done and was like,"Hmm… I guess the tree needs ornaments??" So here are some insanely simple and quick ideas for you to try.

    1. Wooden Ornaments: Jess loves bringing the outside in… (which is sort of funny because she hates outdoorsy stuff and camping and and every year on our annual friends and families camping trip, she brings her family for dinner and s'mores and then leaves! Hehe) Anyhow, enough secret insider info, onto the ornament. If you live in the suburbs (like us) or the country you can find wood I'm sure. Nate reminded me that he can't just grab some wood in NYC (ha! Totally didn't occur to me), but he gets his at Michael's. You'll need to use a chop saw or find a willing friend to help. Slice them about 1/4 inch thick, drill a hole, add ribbon. It's really that simple! I also used some of these as gift tags on the presents I wrapped and just wrote on them with a Sharpie.

    2. Bracelet Ornaments: Time to admit something here… these kind of happened as an accident! We were spray painting some of the bracelets to get rid of the gold color and some of them got tangled. Wait… Could that look amazingly similar to a ball?? A few twists of the hand and we had ourselves bracelet ornaments! All we had to to was add ribbon!

    3. Scrabble Ornaments: Crafty people all around the blogosphere have been using Scrabble tiles for all kinds of cool things! Jules shared some scrabble ornaments she had found at a boutique in one of her blog posts and it got me thinking that it was definitely something to DIY not BUY! All I did was take Scrabble letters and hot glue them onto popsicle sticks that were part of Nate's Crate.

    I just snapped off the extra wood (with my crazy-strong muscles) and then used a little sand paper on the edges to smooth it out. Add your favorite ribbon and voila! I was wondering today, if I sanded the tiles down a bit, if I could whitewash them a fun color?? Hmm… Let us know if you try that!

    4. Accent Decor Balls: You know those balls that people use in vases or bowls for filler decor? Well, we had a bag of them sitting around and I thought, Hmm… I have like no time left and a whole tree staring me down. Let's just use those bad boys as ornaments! All I had to do was jab some wire into them and they were done. I only have a picture of one of them, but it yielded about 12 ornaments in 4 different styles. So grab your filler balls and you have insta-ornaments!

    5. Sweater Ball Ornaments: Okay Monica, behave. Don't write anything embarrassing. You're a grown adult. Please excuse my note-to-self. So, these balls were created just using styrofoam balls from the crate and an old knit sweater. I cut the sweater into strips, wrapped it around the ornament, and tied the top and bottom with twine. I also think it could be fun with some really bold colored sweaters. I might need to try that next year!

    So there you have it, my easy-peasy ornaments! And just to set the record straight… I am not a neat person. The picture of my nice and neat supply table was a"Made for TV" display… Here's what it turned into…

    I had a lot of fun coming up with several different ideas for ornaments. If you haven't figured it out yet, I was going for a natural and organic in my decor, and I'm so happy with the way each one complimented the other. You might remember (if you watched our crazy video) that I had never made an ornament before this show, but it was sooo much easier than I thought it would be! And even if they don't turn out exactly as you had envisioned, once you put the tree up and turn the lights no, no one notices the imperfections! So here's the breakdown:

    1. Jewelry Ornament: This one is a combination of a chunky, metallic bracelet and a pair of really funky earrings, both from H & M. The earring sort of reminded me of a Christmas tree, so it worked. I simply spray-painted the bracelet in our favorite Valspar primer in Red Oxide. (Mo used the same color on her reindeer artwork)

    Then, I altered the earrings until nearly unrecognizable and hot-glued the whole thing together. Add some jute twine and that's it!

    2. Jute-Wrapped Ornament: This one is my favorite ornament of all! Although it takes a lot of patience, it really isn't difficult to do. You also need hands of steel, because trust me, they will get hot glue burns. I found that the easiest way to do this was to start wrapping at the middle of the ornament and wrap the jute around until you get to the top. Then start in the middle and work down the opposite way. Make sure to push the rows together as you go so you don't see the styrofoam, and use hot glue to secure the jute along the way.

    3. Pinecone Ornament: This one wins the reward for easiest DIY ornament. Right now you can get a pack of scented pinecones at Michael's or Joann's for around $3.00, which means loads of cute ornaments for almost nothing! I brushed Mod Podge on the"petals' of the pinecone in a random pattern and then sprinkled epsom salt on top. Pretty and wintery (or is it wintry?)

    4. Burlap Ornament: I love love love this ornament. It was inspired by the ornaments sold here on Esty. Cut the burlap in strips and hot glue around the styrofoam ball. I totally didn't measure the widths, but I figure the messier the better with burlap. And if you don't want to make your own, go ahead and buy them. No shame in that.: )

    5. Scrapbook Paper Ornament: I used the same method as we used on our decoupaged pumpkin, and it worked great! Cut your scrapbook paper into thin strips (about 1/4" thick) and slap a generous amount of modpodge on the back of the strips and wrap them around the ball. Make sure your strips are long enough to go the entire way around the ornament. I also mentioned that I used glossy modpodge for these, and it gave it a really nice sheen- a little bit dresser, if you ask me. Side note: I had a few brown kraft-paper ornaments in my crate that worked a heck of a lot better for this than the styrofoam balls, so use those if you can!

    6. Chalkboard Ornament: There aren't many things better than something you can change and customize year after year, depending on your mood or preferences. I used chalkboard paint on a round, flat, kraft-paper ornament, painted the edges with modpodge (what is this? An advertisement for modpodge? I promise you, we're not getting anything from them, I just use their stuff A LOT!), and rolled it in epsom salt. These are great ornaments, but you could also use them as gift tags for a super cute addition to your presents! Love that.
    I'm sort of in love with the Christmas tree I decorated for Monica's living room (and Monica's isn't half-bad either. Hehe.) I hope this inspired you to try something new, use what you have, and think outside the box!
    Well, there you have it! 2 Full trees of ornaments and not one from the store. DIY to the max! Now, it's your turn- we'd love to see what you come up with!

  • Creating with the Stars Round 1 Voting

    Creating with the Stars Round 1 Voting

    Voting is closed! To see the winners of Round 1, click here. Check back next Monday, March 18th for Round 2 projects and voting!
    --------------------------------------------------------------------------------------------------------------------------

    Welcome to Creating with the Stars 2013! Let the contest officially begin! This season of CWTS is going to be Epic and these Round 1 projects are a clear indication of the insane talent of these contestants! Just a few reminders before we get to the voting…
    Round 1 Challenge:


    Round 1 Prize Package: We have the Best Sponsors for CWTS2013 and here's a reminder of what our Contestants are playing for this week…
    $50 worth of 31 Gifts products $60 worth of Twysted Yarn products $70 of Henle Headbands products $100 Blog Re-design from 733 Design (who designed all the CWTS logos!) Project featured by HomeTalk We also want to thank Homes.com for being the Official Grand Sponsor of Creating with the Stars!

    Without Further Ado… In No Particular Order, Here are the Round 1 Projects… #1- Dresser Turned Modern Sandbox This dresser had no hope. It was in extremely poor shape. I mostly bought it for the legs, but after learning I was in CWTS, I thought I could do something with it. I decided to turn it into a sandbox filled with sand and dirt. What kid does not like sand or dirt?!
    The issue I have with sand tables is how much of an eye sore they can be. After cutting off an entire level of drawers that brought it down to kid/side table height, I placed sand and dirt inside the top two drawers. When guests come over, I simply place the dresser's top back on covering up the dirt and sand. It is an easy solution that is modern and stylish. Using a friendly exterior paint protects the furniture from the elements. Placing the dresser top on when not in use protects the sand and dirt. The two bottom drawers are functional and can be used for outdoor storage like small plant pots, garden tools, and kid toys. I used a couple of rabbit knobs for fun and green paint for a punch of color.

    #2- Little League Lounger I love taking old, crappy stuff and turning it into something that I will actually use! I found an ugly outdoor folding chair at my local thrift store, and knew it would be perfect for my upcycle project. Now, I have a completely re-done"little league lounger" to use at all my boys' baseball games this summer!

    Here's what the chair looked like before I worked my magic:

    I added all new cream-colored webbing {with a navy pin stripe}, updated the arm rests by re-purposing an old wooden baseball bat, and made a baseball stitch pillow from an old table runner. I love how it all came together!

    I can't wait for baseball season to get started so I can use my new chair!

    #3- Floor Board Kitchen Island

    these 77 year old floor boards were upcycled into a rustic kitchen island!

    I love our kitchen, but I've always wanted a big kitchen island where we could hang out. I wanted to take this unused space in our family room and add a table or counter. I had no idea what to use, but all of a sudden, a light bulb went off in my head. I remembered some old floor boards hidden in the basement rafters. They were dusty and worn and perfect. BAM — perfect for an old rustic island! We washed and sanded the boards, and got to work building our new favorite spot.

    these 77 year old floor boards were upcycled into a rustic kitchen island!

    Add in some painted stools and we now have a space just off the kitchen that is perfect for parties, eating, hanging out, or working on crafts.

    these 77 year old floor boards were upcycled into a rustic kitchen island!

    #4- Man Chairs Often the"dreaming up" of a new project can be done in my sleep, literally. But execution can feel like a trip to the dentist, one in which I go in for a routine cleaning and find I need a double root canal. The trick to any DIY project is COMMITMENT. Commit to your goal and don't let up no matter how many coats of paint are applied in vain. These previously drab, brown, faux-leather club chairs were purchased on sale for $12 each at a local thrift shop.

    A bit of auto upholstery paint, steal tacks, metal coating paint, a couple patinas for good measure and some tough new casters and this thrift store find is ready for"the man".

    #5- Tin Tile Mirror So, I'm still totally in shock that I was chosen to be a part of Creating with the Stars. With the first theme being"Upcycle", I wanted to do something a little different. I hit up a local flea market, hoping to find something that screamed my name, and when I saw these vintage tin ceiling tiles, I knew these were it. The fun color that looks so much like patina, the rust, the texture, the scuffed parts revealing the silvery color underneath. LOVE! They were marked $6 a piece, but I offered her $5, and she accepted. So $40 for all 8. Score!

    The next stop was Home Depot for wood, and I built a simple frame. Each tile was approx 12x12, so the finished size is 36x36. Not all of the tile sides matched up when I nailed them in, so I'm going to blame the tiles and say that they're wonky, rather than my measuring (which is probably more true). A little paint matching, painting in the gaps, building a frame for a mirror that I picked up at Michaels, attaching the mirror and frame with some glue, and we're almost done.

    I had the perfect spot in my hallway that was just begging for some oomph. For under $60, it's a huge statement piece that fits perfectly. I'm thrilled with how it turned out.

    #6- Television Stand Upcycled to a Bar When I saw this ugly, 80’s style television stand at our local Goodwill for a whopping $30, my mind immediately started churning with ideas. I’ve been wanting to set up a bar area in our house, and I knew this would be the perfect piece to turn into a bar. It just needed a little (or, um, a LOT) of love!

    I added legs and a little stand at the bottom to make it a bit taller, and gave it a few coats of navy paint (and, of course, a stencil to add some fun). I turned the drawers on either side that used to be used for VHS storage into the perfect place to stash a few bottles. And, since most alcohol bottles are all different sizes and shapes, I poured our frequently used ones into uniform glass bottles that I etched with the name – that way I can be sure the bottles fit and they look pretty to boot!

    Finally, for a last little touch, I dipped some of our glasses in gold paint to make things a little more sparkly and fun. I’m so happy with how it turned out and I’m loving the extra storage! I can’t wait to put this thing to good use!

    #7- Trash Pile Tire Made Trendy Table Early Saturday morning, still bra-less and in my PJs, I drove to a neighbor's house and hurled an old tire from their curb-side trash pile into the back of my car. My plan for the filthy tire was still foggy… as was my pre-coffee brain, but I was determined to turn it into something cool. After a day of deliberation, trial, and error, I determined side table was to be its fate. Let's get upcycling.

    I started by giving the tire a scrub with some dish soap. Next, I tried to figure out what to use for legs. Since this tire still has the (very!) heavy rim attached, I needed something sturdy. After contemplating many possibilities, I decided to cut them out of a piece of pine left in my garage from another project. The legs were stained and attached to a plywood circle I cut for the base. Then, I glued the tire on top of that with construction adhesive, and added a smaller circle to the top of the tire to act as the table top.

    I covered the entire tire in rope using Liquid Nails and"dipped" the legs in a bright citrus-ey yellow paint. I'm pretty jazzed with how it came out and can't wait to tell people I have an old tire in my living room. Ha!

    #8- Vertical Blinds Headboard Why is it that bedrooms are always the last rooms to get decorated? This room had no artwork, no matching furniture, and a mattress sadly sitting on a cheap bed frame. The only good thing about it was that it was prime for a makeover!

    Headboard made from Upcycled Vertical Blinds

    When my parents upgraded their patio doors from vertical blinds to curtains, my mom saved the blinds for me thinking I could “make something with them.” Does this happen to all creative types? But Mom was right, those old vertical blinds were the perfect material to make an over sized woven headboard for the bedroom.

    Sad bedroom plus vertical blinds equals

    A sleek wooden frame hangs so that the headboard almost reaches our 8 foot ceilings, and two spray painted clamp lights provide adjustable lighting for bedtime reading.

    Upcycling Challenge Headboard

    Similar, but smaller, woven headboards can cost over $700, but since I re-purposed my materials, this statement-making headboard cost less than 1/10th that much. No more sad, bland bedroom for us!
    #9- Bicycle Wheel Clock

    Bicycle-Clock-Label

    There are clocks. And then…there are clocks. There are clocks that tick and tock and ring and jingle and tell time underwater and sound an alarm. And then there are clocks made from a bicycle wheel with yardstick ruler hands perched on a chalkboard surrounded by roman numerals above a table strategically styled with a bicycle seat. That is one fine clock.

    Bicycle Wheel Clock

    And the best part? I got the bicycle wheel for free. Can you even believe it? I walked into a bicycle shop and randomly explained to the resident bike expert that I wanted to make a clock and I needed a cute bike wheel that had preferably been around the block a time or two. Wordlessly he stared at me. I don't really know why. I'm sure they get that request all the time.

    Bicycle-Wheel-Clock-Paint-Can-Label

    And then he went to the back where they keep all the spare wheels for people who come in with clock requests and he handed me this bicycle wheel. I totally wish he could see his wheel now. He'd probably charge me for it.: )

    #10 Statement Piece Light Fixture

    Walking through Habitat ReStore, I spotted a few egg crate diffusers — you know those grates that cover fluorescent lights in basements across the country. It's the last lighting fixture I would consider for a project but once I got around my thoughts of drop ceilings, I began thinking how neat it would be to use the grid to create any square cornered geometric shape that I wanted. At $2 each, what could I lose?

    Browsing Pinterest I found this amazing light and fell in love with the arms. It's lines are simple, but make a big impact! Perfect for a statement piece!
    The egg crate diffuser was cut into the shape of the arms, filled with plaster of paris, sanded and painted. So that the wiring and housing wouldn't compete with the outer arms, I made a simple fixture out of metal tubing, PVC plumbing parts, and a few parts from an existing chandelier. After wiring it (and being elated that it worked!) I installed trim on the ceiling to frame the chandelier, and added a little more interest by painting alternating stripes in ivory and a light gray. Finally, I installed a gallery wall with a few fun pieces!

    From a designer's nightmare to an energetic statement piece, this diffuser has come a long way!
    #11- Lab Station Turned Dining Room Buffet

    servin' it up old school… The story of how a lonely old science lab station gained new life as an industrial-style dining room buffet.
    Once upon a time…on an unusually warm and sunny spring day, I was leisurely browsing a flea market when I spotted this piece and was immediately drawn to it…the color, the rust & patina, it's industrial style, and the fact that it was old and had great visual evidence of it's previous life--lots of it. As I looked closely at the butcher-block top complete with bunsen burner stains, student-carvings (i.e."jennie-loves-alex") and distress-marks galore, I knew that I had to have it--for something, but what that something was, wasn't clear to me at the time. We just had"chemistry"--I could feel it.; ) Luckily, the kind gentleman who I was buying this (very heavy) treasure from was willing to help me get it into my truck…and let me tell you: it. weighs. a. ton. Chapter Two: Fast forward to Project One CWTS: Upcycle. I knew instantly that this sad science lab station was about to have a major career change. I tossed around a few ideas, but pretty quickly decided it would be a fabulous, industrial-style dining room buffet. The hardest part was this: while I love the"vintage-industrial-rusty-patina" look and eagerly welcome it into my house, this was looking a bit too"raw" for my dining room. Well, try googling"how to tone down rust on metal, yet keep just the right amount of color and patina". If there is a tutorial for this…I didn't find it!

    Chapter Three: So, I did a little DIY-science-experimenting and discovered a technique to get just the look I was hoping for. After this process I added the casters, the door knobs, stenciled on the quote and stained the butcher-block top.
    Add some wine, grapes, cheese…and this"new" buffet is all ready to help you eat, drink and be merry.; )

    …and she lived happily ever after in my dining room.

    #12-From Frumpy to On Fire, Fireplace! When I was told that the first week of Creating With the Stars theme was upcycle I was over the moon excited. Upcycling is my thing. It’s where I get my groove on. And so, it wasn’t a matter of finding something to upcycle; it was a matter of deciding which thing to upcycle. So, I took a tour of my house and gazed at all of the items that needed some good loving. And then, I sat and thought about what I wanted in my home. And, it came to me. Hmm… could I? Would it be possible? Yes… yes, it could!!

    CWTS collage

    I’ve wanted a fireplace forever and ever. Okay, that’s an exaggeration. But, you get the gist. And, while this fireplace/bookcase might not be the real thing it fits the bill quite nicely. I was able to create my “fireplace” from an old bookcase that was sitting in my laundry room, a mirror frame that was on it’s way to the trash, and an antique footboard that had lost it’s headboard (poor thing). The bookcase is the most important element; the mirror and footboard helped create awesome and turn the bookcase/fireplace into something spectacular.

    CWTS collage2

    I cut the footboard down to size and used it as the “mantel” as well as give the fireplace/bookcase a skirt at the bottom. Scrapbooking chipboard embellishments gilded, painted, and antiqued look like beautiful wood cutouts on the mantel. The trim on the sides of the fireplace/bookcase are pieces of the mirror cut down to size. A chimney that runs the length of my 12 foot wall was created with a simple frame covered in tin. The back of the bookcase was covered in that same tin for added charm. I must say this project exceeded my expectations and far surpassed the image of awesome I had for this project when I started out. I love walking into my home and seeing this and am so pleased waiting forever and ever is over!

    CWTS final final5

    Can You Believe That Talent? It's Time to Vote! You can only vote one time, but you can vote for your favorite 3 projects. Before voting, please LIKE EC2 on Facebook. Thanks! If you're having trouble viewing the voting box, click HERE to vote.
    Don't forget that tomorrow it's your turn to link up your own upcycle project! Thanks for playing along!!