We love getting together each year to have a DIY night dedicated to pumpkin decorating. We love seeing the pumpkin trends for each year and then coming up with some of our own fun twists! (Click here to see what we did last year) Here's what our 2012 pumpkins look like!


Sadly for us, most of our DIYing is done after 9pm… in this case we didn't start until around 10:15pm, so our apologies about the picture quality.


I had this glossy green paint leftover from my Distressed Frames project from last year. I thought it was perfect for Mr. Frankenstein!

I didn't pre-drill holes for the bolts, I just tipped it on it's side and banged it right in. I got these big bolts at Lowes for about $1.00 each.

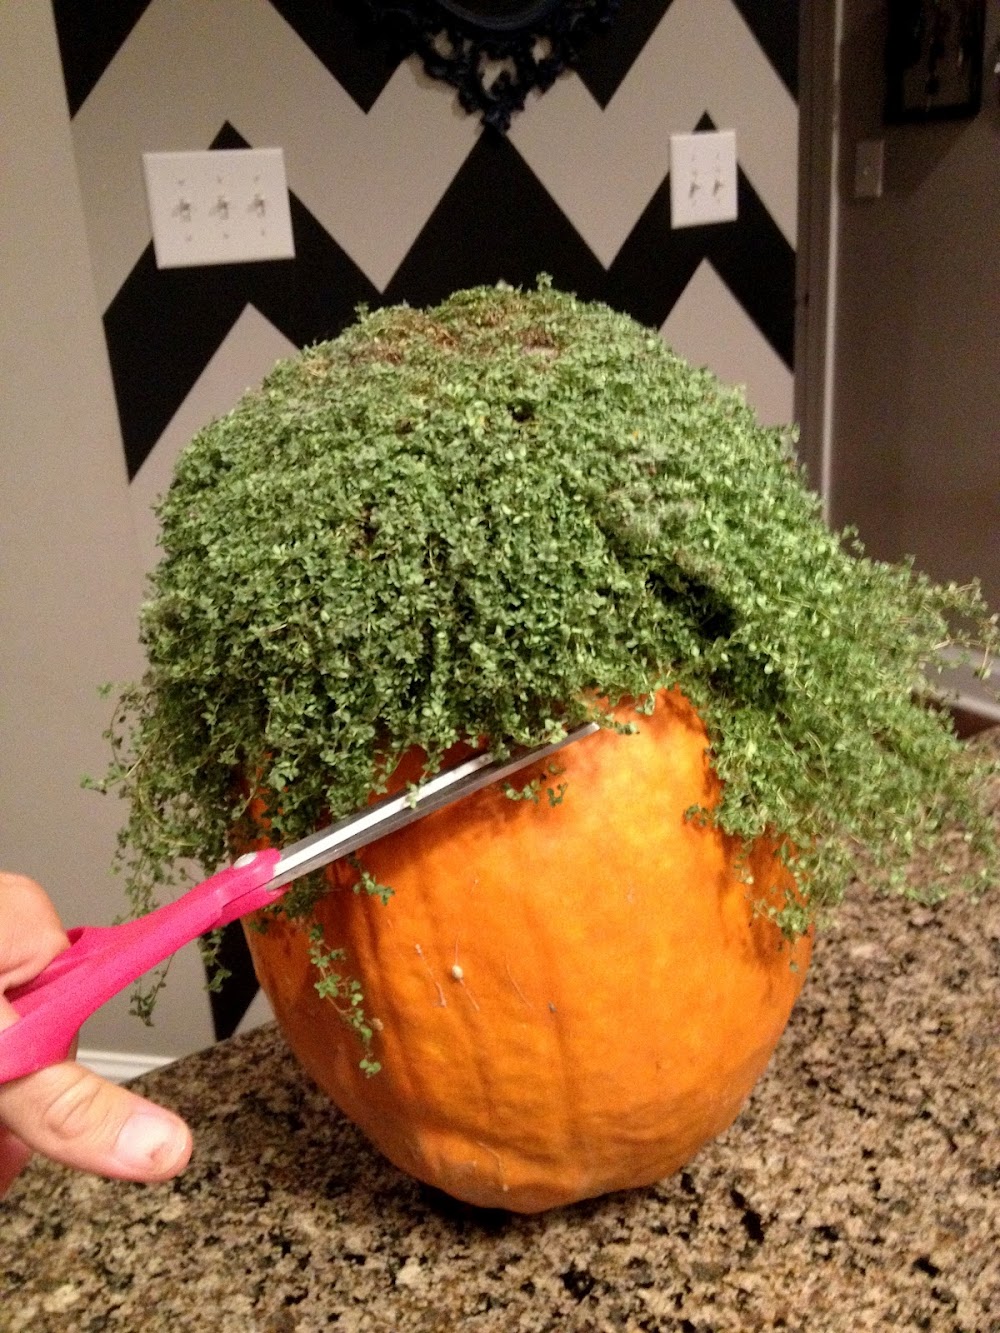
I found it was easiest to take some felt, cut a small X in the middle, place it over the stem, and then cut him so franken-awesome hair.


I'd recommend keeping your plant"hair" in it's pot, because then you can water your"hair" and keep it nice and healthy!

Every girl needs a little trim, so I gave her some cute, angled bangs.

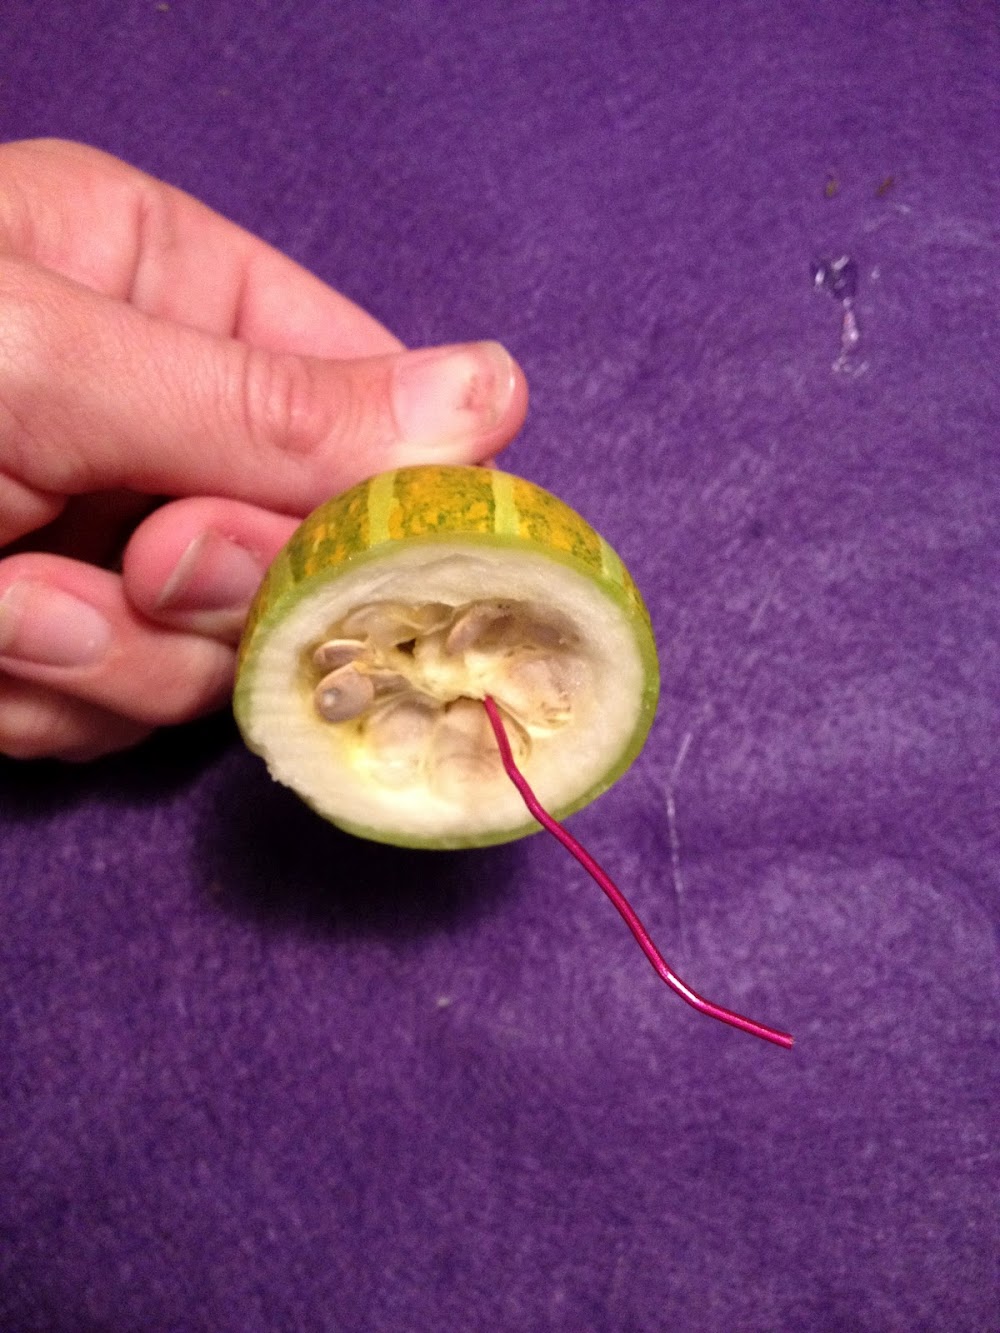
We used felt to make a headband and accessories, buttons for eyes, and nail heads for a goofy grin. We were stuck on what would be the perfect nose…

Then, we remembered that we had some mini, baby gourds that Monica's kids had grown.

We cut one in half

Straightened out a paper clip and used it to poke the nose in place.

Jess picked up this fun mask at the dollar store- we have a really good Dollar General near us!

We found it helped to trace out our lines with pencil and then Jess used her mad artistry skills to create our little masterpiece.

Have your tried Martha's new stencils? They're reusable, but sticky on the one side. It made working on a round pumpkin a breeze! We highly recommend you make an EC2 pumpkin as well! Ha!

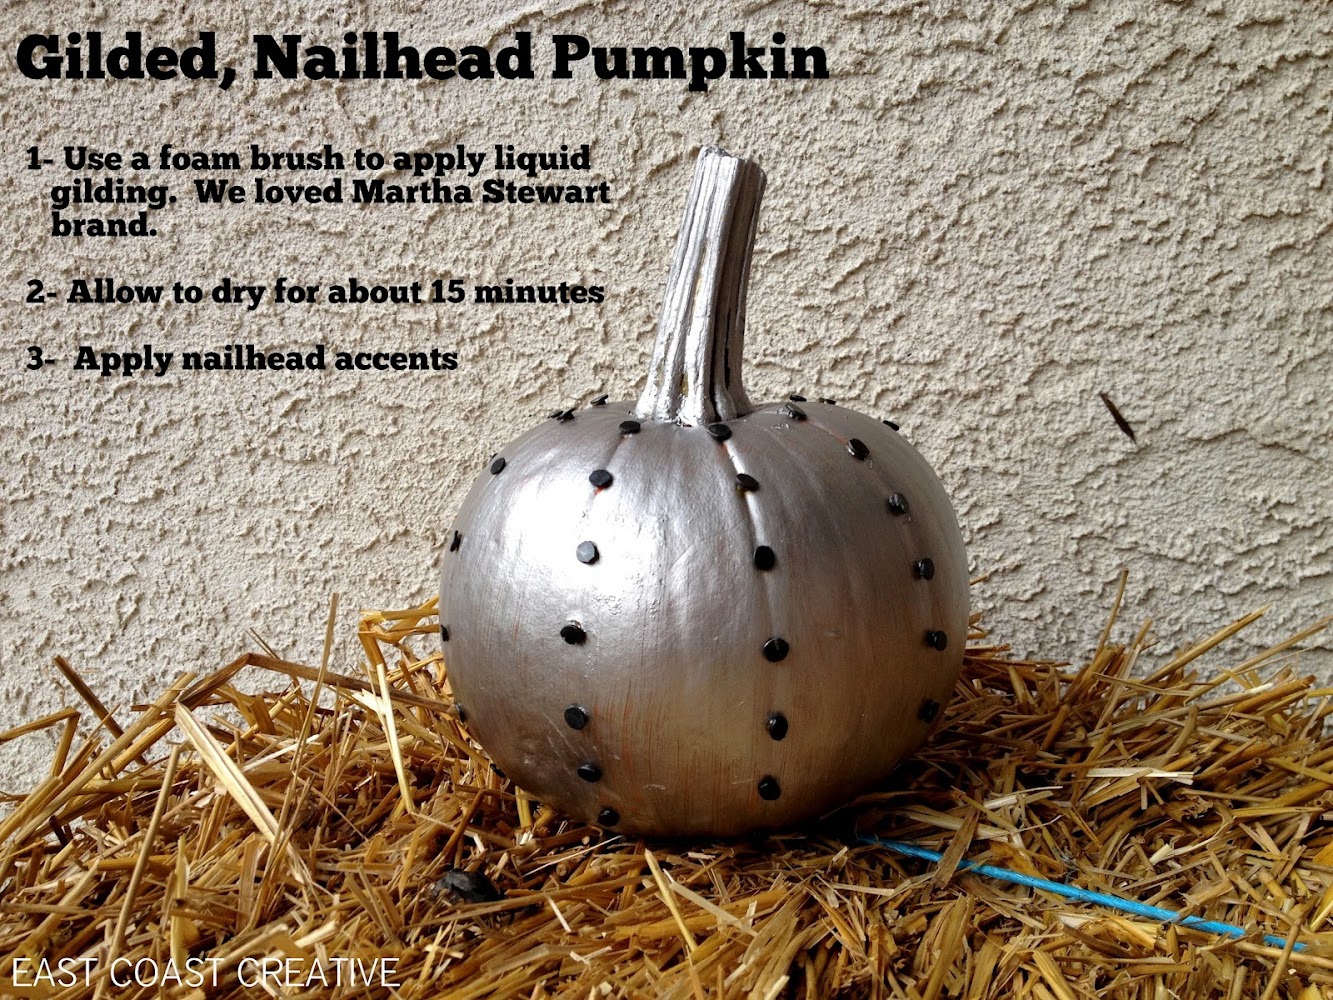
We love a gilded pumpkin! Have you tried gilding liquid? If you haven't, you should- it rocks our socks! Within 30 seconds and can take your pumpkins from drab to fab! We also had some left over nail heads, so we accented with them. We kind of think they look like mini chocolate chips!


We've loved seeing so many cool, paint dipped pumpkins this year, so we had to jump in and try our own. We're all about keeping it real, and we'll be honest, we love the look of these, but they were a little bit of a pain. You need to have containers that are wide and deep enough and then you need to prop them up on a cup or something where it can balance and drip dry. In the end, we love them enough that the slight hassle was worth it, but just know ahead of time that it might take a little patience.

There's our happy little crew for 2012!

We love getting together as friends to do fun things like decorating pumpkins, and we want to encourage YOU to do the same. It's so easy to get busy as moms, wives, or even college students (oh, how I wish!) that we don't take time to have fun and connect with women. Heck, even if you start at 10pm (like we do!) with only a friend or two, you'll still have a blast!
You can use the invitation template below to customize your own Pumpkin Decorating Girls' Night Out Invitation! A huge Thank You to Moo & Puppy Digital Paper for letting us use her paper. Head over and check out all the fun Halloween and Fall papers she has and you can even design your own invite. To use this template, click HERE to download and then add your own text in the box using any software you'd like. We love Picmonkey because it's quick and free!

We hope you're inspired to try some new ideas with your pumpkins this fall! How many of you will commit to a Pumpkin Decorating GNO? (Can we be invited?!?)
And don't forget that we're in the running to be the New Face of Proctor & Gamble Home! There are only a FEW DAYS LEFT to vote for Monica. You can vote once a day, now through October 3rd. We SO APPRECIATE you taking the time to vote each day!