My Creative Blog [Search results for Round 3

  • Creating with the Stars Round 2 Winners

    Creating with the Stars Round 2 Winners

    We thought Round 1 was pretty impressive, but Round 2 officially blew us away. Apparently all of blogland was pretty excited too, because we had a bajillion of votes over the last two days (yes, that's the official number, FYI). This round was the closest one yet, with 1st and 2nd place only separated by around 20 votes the entire time! Let's see who ended up on top!

    The Winner of Round 2 {Knockoff} is…
    1. Amanda { Love and Renovations } and Beckie { Infarrantly Creative }
    West Elm-inspired Wood Tile Dresser

    We thought this project was amazing and it's actually been on our list of"Knockoffs to Try" for a while now! Thanks, Amanda, for showing us how it's done! Congratulations on the Round 2 Win!
    Who else made it to Round 3, you ask?
    2. Sarah { While They Snooze } & Sarah { Thrifty Decor Chick }
    Anthropologie-inspired Sharpie Plate Art

    We want to give Sarah a shout out for her project too. It was incredible and so many of you loved it and voted for it, too! Congrats Sarah!
    3. Melissa { 5 foot 12 Creations } & Sherry { Young House Love }
    Anthro-inspired Ikat Console

    4. Sarah { Sarah M. Dorsey Designs } & Brooke { All Things Thrifty } Schumacher Zimba-inspired Drapes, Anthro-inspired Bench, Custom Cornice

    5. Janel { Nellie Bellie } & Brittany { Pretty Handy Girl } Anthro-inspired Wall Lamp

    cwts2 collage side by side

    6. Nancy { Owen's Olivia } & Kari { Ucreate } Restoration Hardware-inspired Lighted Sign

    Ok, so now we totally know how Len, Carrie-Ann Inaba and Bruno feel on Dancing with the Stars each week…saying goodbye to talented people is HARD!! We're sorry to let the next three incredible DIYer's go, but wish them tons of success with their blogs. We've loved having them! 7. Jane { Life, Crafts & Whatever } & Jamielyn { I Heart Naptime } Horchow-inspired Mirrors

    8. Ann Marie { White House, Black Shutters } & Shaunna { Perfectly Imperfect } Anthro-inspired Duvet

    no-sew Anthropologie Corin Duvet knockoff

    9. Karianne { Thistlewood Farms } & Whitney and Ashley { Shanty 2 Chic } Faux Chair Slipcover

    Faux-Chair-Slipcover-Label

    Once again, to keep things legit, here are the official results…

    And here's a reminder of the awesome prize package that Amanda won from this round…

    $100 Gift Card to Royal Design Studio A pair of $120 Robert Allen pillows from Chic Decor Pillows Project featured by HomeTalk

    ------------------------------------------------------------------------------------------------------------------------------------------------
    Congratulations to the 6 contestants moving on! Are you ready to get your paint on? We hope so, because Round 3's theme is Paint!

    Round 3 is our Semi-Finals Round, so this is when things really get serious! This week both the Contestant and their Star partner are in it to win it!
    The Semi-Finals Winner will receive:
    $500 Gift Card to Home Depot (Contestant & Blog Star!!)
    $100 worth of Martha Stewart supplies from Plaid Crafts
    $125 Gift Card to Lucent Lampworks
    Project featured by HomeTalk

    Voting for Round 3 will begin on Monday March 25th at 12AM EST. Don't forget that you can link up your own Knockoffs through this Friday at 10PM EST…the winner will get an awesome prize pack and have their tutorial featured here on EC2 this weekend. Click here to link up!
    Make sure you check back throughout the week! Thurs, Fri, and Sat we'll have the full tutorials for the top three projects and Sunday we'll share the Link Up winner's tutorial!
    Thanks so much for making this contest awesome so far!

    jess
    Monica
  • Creating with the Stars Round 3 Link Up

    Creating with the Stars Round 3 Link Up

    If you haven't voted for Round 3-! If you missed the first two weeks of projects, check them out below: Round 1 Projects & Winners Round 2 Projects & Winners -------------------------------------------------------------------------------------------------
    Tuesdays are a busy day for CWTS… We share our projects, you link up yours, peeps keep voting, and today we're adding even more!! We know you love all of these amazing projects from these bloggers and we wouldn't want you to miss out on all their awesomeness year round (yeah, they're this awesome on a regular basis!), so today we're encouraging you to LIKE their Facebook pages- we've even made it super simple for you… Get your click on and show these ladies some FB love!!

    Okay, our second order of business is to share our project for the week, but guess what… We're NOT! Yup, we have a project that we can't wait to share, but we're taking part in a Homes.com charity event next month and we're saving the project for that. I know, it's terrible of us, but we have a charity we LOVE and we want to win the grand prize for their organization. Here's tiny peek, but don't worry, I'm not giving away any of the awesomeness!!
    Outdated, oak piano…

    Antibes Green Piano…

    Sorry guys, that's all your getting! I am so jazzed up over this room and this project though. Don't worry, I'll keep you posted and show you the full Monty (umm awkward…) soon!!
    Now it's your turn! Link up your favorite paint projects from the past year. We know you ALL have done something with paint, so you have no excuse… link it up baby!! (Said in my best March madness, Dick Vitale voice)
    Make sure you check back tomorrow to find out the Winner of Round 3 and to see which three are moving onto the Grand Prize Round!!

    jess
    Monica
  • Creating with the Stars: Link Up Winner {Round 1}

    Creating with the Stars: Link Up Winner {Round 1}

    Today is the last day of Round 1… That was an intense amount of DIY awesomeness for one week… One night this week, Jess and I had a text conversation that went something like this… Jess: Did you see all those awesome projects? Me: Yes! They're insane Jess: I think I'm mildly depressed from it all- these girls are amazing. Me: Yes, I believe I will quit blogging, go eat cookie dough, and mope around my house. Well, thankfully we didn't quit blogging, I didn't eat too much cookie dough, and we got over it, and are ready for Round 2 tomorrow! Before we say goodbye to Round 1, we are super excited to share our favorite Upcycle that was Linked Up this week!

    Jessica blogs over at Dear Emmeline and we loved her Embroidery Hoop Pendant Light! We are definitely going to try this upcycle soon! Check out how she did it and don't forget to link up your favorite Knock off starting Tuesday! --------------------------------------------------------------------------------------------------------------
    Ever get inspired by someone else's work to create something similar yet so completely different?
    When I saw View Along the Way's Dodecahedron Pendant Light I fell in love but I also knew that not only did I not have the tools to recreate it but it would be a TON of work.

    Then I had the thought,"Is there anything I could use to create a pendant with a similar feel with a lot less work?"
    A thought sprang to mind, and here is the result!

    It took us about 30 minutes of actual work time to make this fixture!
    If you want to make your own here's what you'll need:

    2, 14" quilt hoops (we bought ours at Jo-ann Fabrics, original price $4.99 each) stain or paint 3/4" square dowel pendant light kit 7, 8-32 x 3/4 flat head Hillman knurled screws 7, 8-32 hex nuts drill wood glue clamps spray paint

      Before we began assembling the fixture we gave the hoops and 3/4 dowel a coat of vinegar and steel wool oxidation stain to give them a weathered finish and used oil rubbed bronze spray paint to paint the cement colored part of the pendant fixture.

      Next, line up the 3/4 dowel with the hoop connectors (outer piece of hoop) and mark a cut line. Drill a hole down the middle of the dowel. This will be the place that you feed the pendant cord through.

      Remove the hoop fasteners and center your 3/4 dowel between the hoop tops. Glue and clamp each hoop to the dowel.

      Feed the inner piece of each quilt hoop into the ball overlapping them to make an X shape.

      Starting with the bottom, drill through each hoop overlap (there should be 7). Feed the screw through each hoop and fasten with a hex nut.

      You could cut down the screws if you want the to end up being flush with the nut but we chose to leave them as is since the piece has an industrial look to it already.

      I recommend drilling and fastening in the following order.

      Feed the pendant cord through the 3/4 dowel and you're ready to hang it up!

      We purchased an antique look filament bulb from Lowes to complete the look.

      Isn't that such a creative idea? Amazing work Jessica! We can't wait to see what you link up this week!
      Don't forget that voting on the Round 2 Projects starts bright and early tomorrow!

    • Creating with the Stars Round 3 Results!

      Creating with the Stars Round 3 Results!

      If you missed all the amazing projects in the first two weeks of CWTS, be sure to check them out below!

      Round 1 Projects & Winners Round 2 Projects & Winners
      -----------------------------------------------------------------------------------------------------------------

      This is so exciting, isn't it? We're almost into the final round of our first ever Creating with the Stars contest which is crazy! We know that the contestants are putting in hours and hours of work on their projects each week so that they are the best they possibly can be, and we just have to say that the caliber of their projects is blog star-level!

      This week was Sponsored by The Home Depot, and isn't it amazing what a huge impact a little paint can have? Ah-mazing! Here's a little reminder of the epic prizes our Round 3 winner will receive…
      $500 Gift Card to Home Depot (Contestant & Blog Star!!) $100 worth of Martha Stewart supplies from Plaid Crafts $125 Gift Card to Lucent Lampworks Project featured by HomeTalk

      The votes were neck and neck again this week, with only a few votes separating the top two spots. Only three contestants move on to the finals, so the pressure is really on! Ok, enough of our chatting, let's get those results!

      1. Amanda { Love and Renovations } and Beckie { Infarrantly Creative }
      Painted Wall Mural and Dresser

      This is Amanda's second week in a row in the top spot…for good reason! You just can't ignore that yellow dresser (Monica has a similar painted dresser in her dining room!) and set against that black wall, it's just stunning! Congrats again, Amanda!

      2. Melissa { 5 foot 12 Creations } & Sherry { Young House Love }

      Painted Chalkboard with Map and Games

      3. Sarah { Sarah M. Dorsey Designs } & Brooke { All Things Thrifty }

      Painted Desk and Accent Wall using Custom Stencils

      Ack, this is just so hard to do (does it ever get easier?!!), but we have to say goodbye to these three amazingly talented women.
      4. Sarah { While They Snooze } & Sarah { Thrifty Decor Chick }

      Painted Map Coffee Table

      5. Nancy { Owen's Olivia } & Kari { Ucreate }
      Painted Couch featuring a Custom Horse Stencil

      6. Janel { Nellie Bellie } & Brittany { Pretty Handy Girl }

      Aztec Wonder Painted Rug

      Seriously, we could cry about having to let Nancy, Sarah and Janel go! You guys are welcome back here anytime. And, now we know who to call when we need something awesome painted!
      Here's the voting break down… the first and second place projects were separated by under 50 votes!! Insane!

      ---------------------------------------------------------------------------------------------------------------------
      Ok, it's the finals now, people- the last chance these bloggers have to show what they're made of!

      The prizes are stinkin' awesome this round (and the Blog star gets them too!)
      The Grand Prize Winners (Contestant and Blog Star) will each receive:
      $500 from Homes.Com
      $500 Gift Card to HomeGoods
      Project featured by HomeTalk

      undefined

      Next week the challenge is Home Decor- so anything (even a room makeover) is fair game! Tomorrow we'll be sharing the tutorial for that amazing mural and yellow dresser! We'll be so sad when this contest is over and we don't have these incredible tutorials on our blog anymore!

      jess
      Monica
    • Creating with the Stars Round 4 Results {Grand Prize Winner!}

      Creating with the Stars Round 4 Results {Grand Prize Winner!}

      If you missed all the amazing projects in the first three weeks of CWTS, be sure to check them out below!

      Round 1 Projects & Winners Round 2 Projects & Winners Ro und 3 Projects & Winners Round 4 Projects
      Before we do anything else, we want to say thank you to all of our sponsors! This fabulous contest was made possible by them and we are ever so grateful! Also, a HUGE shout out to Homes.com and HomeGoods for sponsoring the Grand Prize round this week! You guys are the best!
      The Grand Prize Winning Team will EACH receive: $500 from Homes.Com $500 Gift Card to HomeGoods Project featured by HomeTalk

      undefined

      ------------------------------------------------------------------------------------------------

      We just can't keep you guys waiting in suspense any longer! Without further ado…
      The Grand Prize Winner of
      The 1st Annual Creating with the Stars Contest is…

      1. Sarah { Sarah M. Dorsey Designs } & Brooke { All Things Thrifty }

      (Sarah, her hubs, and cute pup!) Colorful, Texture-filled Bedroom Makeover

      Congratulations Sarah and Brooke! Sarah has delivered such amazing projects throughout this contest. Let's take a look back, shall we? Round 1: Statement Light Fixture

      Round 2: Custom Cornice, Drapes and Bench

      Round 3: Painted Secretary Desk and Accent Wall

      We have LOVED having Sarah in the contest and have been continually inspired by her. Well done, girl!
      Make sure you keep up with all of Sarah's DIY awesomeness- Follow her on Facebook!

      ------------------------------------------------------------------------------------------------------------------

      Melissa and Amanda have been awesome competitors too! They worked hard, stretched their DIY limits and came up with some super fun and stylish projects. Thanks for being a part of the contest, ladies! We also want to thank Beckie and Sherry for being amazing blog stars! Their partners loved working with them, and we already love them (duh!)

      2. Melissa { 5 foot 12 Creations } & Sherry { Young House Love } Guest Room Makeover

      3. Amanda { Love and Renovations } and Beckie { Infarrantly Creative } Reading Room Makeover

      Here's the official vote tally…

      This contest has been absolutely amazing and we're so thankful to all of you for playing along! Tomorrow we'll share how Sarah put her room together and then Friday we have a fun wrap up post for ya… think David Letterman top ten meets Monica and Jess. We know… you can hardly wait right?!? We'll also be sharing our favorite home decor project from the link up party (you have until Friday at 10 PM EST to link up right here).
      The good stuff just keeps on coming!: )

      jess
      Monica
    • Creating with the Stars Round 3 Voting

      Creating with the Stars Round 3 Voting

      Ok, guys, we are in the last two weeks of competition with Creating with the Stars and to say that the contestants exceeded our expectations would be the understatement of the century. We have six competitors still fighting for a spot in the final 3 and no one is going down without a major fight. If you missed the first two weeks of projects, check them out below: Round 1 Projects & Winners Round 2 Projects & Winners

      This week some amazing prizes are at stake. The semi-finals winner will take home…
      $500 Gift Card to Home Depot (Contestant & Blog Star!!) $100 worth of Martha Stewart supplies from Plaid Crafts $125 Gift Card to Lucent Lampworks Project featured by HomeTalk

      -------------------------------------------------------------------------------------------------------------------

      Now, we know you're all dying to see what amazing projects our contestants have come up with this week with paint! Let's go!
      1. Painted Couch Featuring a Handmade Horse Stamp

      We have all seen these couches before in someone's grandma's house. This vintage couch is not the good kind of vintage, but I may have some of you convinced that this traditional style can be made more modern. I painted the couch white, carved out a horse, and stamped the living daylights out of it with black paint from Home Depot. Enjoy!

      2. Painted Map Coffee Table Painting! I'm not going to lie, I was pretty stoked about this week… and amazed I made it here. Painting is one of the easiest and cheapest ways to transform almost anything. And my table was in need of some transforming- big time. I picked it up at a flea market type place for $40… peeling, chipping, splinters, dirt and all.

      I sanded and scraped (forever) until no more paint chips fell off when you walked by. Then I gave the entire table a coat of latex paint from Home Depot (mixed with a little plaster to make chalk paint), leaving some of the peeling paint texture on the legs. After that was dry, I taped off a large"X" pattern on the smaller shelf and added a painted stripe detail to IKEA storage boxes for the bottom.

      On the top, I made my own basic map stencil by cutting away the continents on a large world map I printed out. I stuck the map to the table with painter's tape, then painted over top with blues and greens. Once that was"roughed in", I removed the paper map and spattered the rest of the painted detail free hand using mostly a plastic spoon and really watered down paint. The last step was to give the entire table a coat of protective finishing wax.

      I kind of think the end result is out of this world… hehe, get it?

      3. Painted Desk and Accent Wall Using Custom Stencils

      I love paint! It sets the mood of a space and has the power to completely transform a piece. I found this large bookcase at Goodwill and loved the detail on the doors, arch at the top, and the drop panel but didn't like choppy layout, worn finish, and heavy bottom. Luckily, all of my dislikes were easy to fix with a little paint and reconfiguration of the layout.

      With a little help from the Home Depot, I was well on my way to getting started. Thanks Chris!

      Fix #1 — I moved the drop panel down to 30" so that it can now be used as a secretary desk. Goodbye choppy bookcase, hello new desk!
      Fix #2- Paint! The finish was worn and it had a few areas that needed to be filled with wood filler so painting was the perfect solution! I chose a classic ivory and paired it with a deep turquoise stenciled background. I created the stencil based on one of my favorite Farrow and Ball wallpapers.
      Fix #3-the thick base and doors made this piece look bottom heavy. To fix this, I added small feet to lift it off the ground and create a little visual space at the base.
      I also created a large stencil based on one of my favorite rugs. The large scale and contrast provides a lot of visual impact and adds variety from the small scale stencil used on the back.

      With the help of paint and a few power tools, this bookcase has been given a new life and I love the way it looks in my new space! 4. Painted Chalkboard with Map and Games
      This week's theme was my favorite so far…I love the many many ways that paint can be used to make an instant change and impact on a space or an object. I also love chalkboard paint. This week's project is dedicated to my kiddos who surprise, surprise…love to get that their craft on too!; )

      In designing the chalkboard wall, we decided to have a map of the U.S.A…I love the way it looks and it will be fun to track the different states we go to as a family. After coloring in the states my kids have been to, they commented"well that's not very many", so I let them each choose a state they would like to go to someday…which explains why Hawaii and Alaska are colored.: )
      Lately my oldest child has loved playing tic-tac-toe, so I thought a large, interactive wall version would be super-fun! I also included many"frames" for the kiddos to draw their masterpieces in. I picked the step-stools up at IKEA and painted them in fun colors, and the animal hooks holding our chalk and erasers came from Anthropologie.
      It was a blast picking out all the fun paint colors at Home Depot! Because I was using so many colors and didn't need a gallon of each color…Home Depot made my day when they told me that they can mix any color in a small, 7.5 oz jar…perfect!!!

      And after a super-busy week painting…I'll go to bed tonight and dream about being on a beach in…

      ;)

      5. Aztec Wonder Painted Rug I have been in love with the Aztec inspired rugs that I have been seeing in catalogs and online lately. The drool kind of love. But alas, rugs can be expensive. They are not something I can change an a whim. So, when the paint round came about I decided that it was time for me to get my hands on my latest crush and do it in a budget-friendly way. In DIY style, of course.

      Isn’t she beautiful?! This rug was a labor of love. And a lot and lot of sponges cut into stamps…applied one by one. Fabulous colors, a gentle application of paint from Home Depot, and lots of patience made this rug come together into something lovely.

      My rug is more then happy living with me. And, I am so pleased to have my own version of this latest craze. And… you know what? I’m glad we’ve moved on from Chevron to Aztec. I’ve got my Aztec rug and I’m ready to go!

      6. Painted Wall Mural and Dresser
      I have a thing for maps right now — doesn't everyone? So, when it came time for the"paint" challenge, I was pretty excited to hop right in and paint a giant world map on my wall. Because who doesn't need one of those?!

      I used a projector to hand-paint the whole thing, and then for a bit of contrast (and fun!) I added an old Ikea sideboard we had laying around that I painted Sunny Side Up by Behr from Home Depot. For a couple more little touches, I added bicycle drawer pulls (because, why not?) and numbers to the door fronts — you can barely see them from straight on, but if you look at it from a different angle, they suddenly show up. It's a subtle touch, but I didn't want anything to compete with the map above it!

      I love how the black and yellow work together, and I'm pretty excited to finally achieve my dream of covering a wall with the entire world. And, really, I find it hard to believe that this bright and sunny sideboard was once a plain, boring black Ikea piece — don't you love how big of a transformation paint can make?!


      It's time to vote! You guys have a ridiculously hard job- we don't envy you a bit! You can only vote one time, but you can vote for your favorite 3 projects. **The voting glitch for Round 3 has been corrected and voting will be adjusted accordingly. Thanks!
      In order to vote, please LIKE EC2 on Facebook.

      jess
      Monica
    • Anthro-Inspired Plate Wall {While They Snooze}

      Anthro-Inspired Plate Wall {While They Snooze}

      If you missed the Round 2 projects, you can see all of them right here. To see the bloggers you chose to move on to Round 3, click here. We're sure these girls are already working hard on their Paint challenge this week- ack! We're loving the suspense.: )

      -------------------------------------------------------------------------------------------------------------------------- This is Sarah's second week in the Top 3. She has shown incredible talent and this plate wall is no exception. Isn't it amazing that she recreated this Anthropologie favorite with just a sharpie and plates from the Dollar Store? Genius!

      Week 2! Time to get our knockoff on. After the crazy, hectic, eating-cereal-for-dinner kind of week last week was I was hoping for a"knockoff" project I could knockout quickly. Apparently, I don't know how to do that. I chose to knockoff Lost Arcadia By Molly Hatch sold by Anthropologie for $7,500! Since that's about $7,450 over my budget, I decided to see if it could be done on the cheap. Yup. Here's what you do.

      Supplies

      • 30 plates — I got mine at Dollar Tree for a buck! (you might want to buy a couple extras just in case… trust me)
      • Something to hang the plates with — I used 30 medium Command Strips. You could use actual plate hangers but they were too expensive for me (around $3 each). I've also seen some people hot glue some sort of loop on the back to hang plates. Any method will do!
      • A Sharpie — I only used one
      • A projector — My husband was lucky enough to borrow one from work that hooked up to the computer, but I think you can rent/borrow them from libraries too. Also, there are lots of tutorials around the net on how to make a projector if you don't have access to one.

      Step 1
      Buy some plates! I don't think I need to explain shopping but I have this picture I took at Dollar Tree while buying them so I thought I'd share: )

      Step 2 Stick Command Strips to all of your plates just inside the rim on the back and label your plates. A1, A2, A3… B1, B2, B3… etc. This way, when they come down, you'll know how to put them back up
      .

      Step 3 Make a level line on your wall to align the first row of plates. I taped a scrap board to my wall to act as a ledge. I stuck the center plate up first and then stuck the next ones right beside almost touching.

      Step 4 Continue sticking your plates. I put the center plate up first for each row and then worked my way out from there. Push hard. I just eyeballed to get it in the center of the plate below. Keep going until all of your plates are up.

      Step 5 Take the plates down! I repeat. Take the plates down! (this is why you need to label them). The Command Strips clearly say to stick your item, then rip it off the wall leaving only the Command Strip on the wall to cure before hanging your piece permanently. I failed to do this, (my bad) and had a plate crash down like a giant game of Plinko… taking the plates below with it. I might also add that this happened at 2am. My husband thought we were being invaded. It was not a fun evening… not at all. Let's have a moment of silence for the 2 plates lost in the chaos. Step 6 After your strips cure and you stick the plates back up (this time it worked… they've been up over a week… no casualties), you're ready to trace. I chose to do a botanical print I found via Sarah's blog, Thrifty Decor Chick. It's from the NYC Digital Gallery and you can read Sarah's post about it here. Set up the projector so the image is fairly centered and go to town. The tracing part only took maybe an hour.

      After I had it all traced, I went back over some parts to make them darker.

      That's it, you're done! I think these would look really nice in color too but for the knockoff week, I wanted to stay as close to the inspiration as possible.

      (PS… that dresser is from Goodwill! Who gives stuff like that away!?)

      And did you notice how my wall is beige in some pics and blue in others? Yep, midway through I decided white plates on beige walls wasn't looking that great. So I hit up Home Depot and got a gallon of"oops paint" for $5! And then proceeded to paint a square around the Command Strips that were already on the wall. Yeahhh… landlord, if you're seeing this… don't worry! It will be beige again in no time!: |

      Ha! Sarah is always keepin' it real and we love that! Plus, it's a serious competitor who will paint the wall just so the project looks good on it! You can check out the project that got Sarah in the top 3 in Round 1, right here. Check back later today to learn how Melissa made that fabulous Ikat console!
      Happy Saturday!

      jess
      Monica
    • Creating with the Stars Round 4 Voting {The Final Round!}

      Creating with the Stars Round 4 Voting {The Final Round!}

      If you missed all the amazing projects in the first three weeks of CWTS, be sure to check them out below!
      Round 1 Projects & Winners Round 2 Projects & Winners Ro und 3 Projects & Winners

      We want to thank HomeGoods and Homes.com for partnering with us for this competition. They believed in this contest from the start and I'm positive the contestants have knocked their socks off! Since this is the Final Round, and we'll be crowning a CWTS 2013 Champion, we needed an awesome Grand Prize Package! The Grand Prize Winners -Contestant and Blog Star- will EACH receive:
      $500 from Homes.Com $500 Gift Card to HomeGoods
      Project featured by HomeTalk

      undefined

      Also, for this round, HomeGoods provided each contestant a $100 HomeGood's gift card! Jess and I adore HomeGoods and just last week we picked up about 8 rolls of the best wrapping paper ever! You never know what awesomeness you'll score!

      ---------------------------------------------------------------------------------------------------------
      Okay, now let's get to business! There are only 3 projects this week, so you're voting for your 1 and only favorite! We're so proud of each of these ladies and we know they've worked crazy hard the past month! As you're voting and commenting, please keep things positive & encouraging and just pick your favorite project. We've tried to keep things as anonymous as possible, so don't bother playing Sherlock Holmes.: )
      Without further ado, We present to you… The Round 4- Grand Prize Projects

      #1- Guest Room Makeover
      For my final CWTS project, I chose to makeover a guest bedroom. I envisioned a guest room that was full of personality…fun pops of color and an interesting mix of textures and objects that feels comfortable, unique and welcoming to guests.

      What do you make with an old fireplace mantel and a shower curtain? Create a headboard of course!
      I loved the gorgeous detail in the border of the dark wood, in addition to the design of the shelf with the mirror and paneling. To complete the transformation to a headboard, I closed in the fireplace opening with plywood. and then I upholstered it with the blue and green ikat fabric---A.K.A a shower curtain from Target!

      After I spent about an eternity installing bead board and chair rail, I felt like the room needed a really fun pop of color that would also work well with the headboard fabric. For balance, I purchased a white round side table at HomeGoods, and painted it with some fabulous emerald paint!
      In selecting bedding, I chose to go with a crisp white duvet cover, so as not to overshadow the headboard fabric and pillows. Picking out pillows was super-fun and HomeGoods never lets me down when I am in need of a"new pillow fix." I fell in love with the vintage camera pillow (also from Home Goods) and felt it added an interesting and unique element to the room. The blue lamps added another great pop of color. My goal was to incorporate interesting objects with a mix of coordinating colors and textures into the room…the collage below shows all the details that I hope will make overnight guests feel cozy, comfortable and inspired.

      Homegoods was the perfect sponsor for the home decor round. HomeGoods is one of those stores where you may go in with the intention"just to browse"…but never leave without something"you just had to have!"

      #2- Colorful, Texture-filled Bedroom Makeover
      The home decor challenge gave me the perfect opportunity to complete some of the projects I have wanted to try for a long time! Starting with a bare white room, I couldn't wait to add some color, pattern and texture

      . To frame the bed, I created an accent wall covered with grasscloth wallpaper and used trim to frame the bed and nightstands. I love the touch of glamor that the nailhead adds to the space. While installing the nailhead, I tried a few new techniques that made it go surprisingly fast! Best of all, this wall is completely removable, renter or indecisive designer approved!
      I added a few accessories from Homegoods. And customized a few pillows using scarves, napkins and paint.

      I constructed the headboard from lumber and cut the detail in the arms with a jig saw. I then upholstered it with foam and a bright coral fabric. I love the simplicity of the headboard, but the curved detail and bright coral color make it extra special!

      I love the subtle texture of the grasscloth, and how the nailhead adds a little extra detail.
      I hope you enjoy this colorful, energetic transformation!

      #3- Reading Room Makeover
      When it was time for the Home Decor round, I waffled back and forth on what to do until I remembered that I had this nice (relatively) empty room in my house just waiting to be turned into something fun. After playing around with a few ideas, I decided I wanted a place to relax, read, and spend a little quality alone time…and the next thing I knew, the reading room was created.

      I took regular ol' Ikea Billy bookcases and turned them into built-ins (thanks to some crown molding and a little DIY magic) and amped up the room a bit with trim and some paint in a traditional"library"-ish color. To make it more modern, I painted the back of the bookcases with some chunky gold stripes and tossed in a cozy chair and pouf, a DIY-ed tree stump table, and a ton of bright and colorful accessories.

      When I was shopping for the room, one of the first places I wanted to hit up was HomeGoods — I'm obsessed with basically everything they carry and knew their store would be perfect for our bookcases. I managed to snag that gorgeous throw pillow for the chair, as well as several of the cute accessories you can see on the bookcases (including my personal favorite, the blue elephant up at the top)!

      I'm so excited to have this space now, and I can't wait to settle in and start reading!

      Now, it's time to Vote!

      You can only vote once and only for one project. (the past weeks you could change your vote if you wanted. You might have thought you could cast multiple votes, but nope- it was just changing your vote- it was set to just one per IP. This week we didn't allow vote changes, so make sure you have your mind made up when you vote! Good Luck- it's a tough choice!!) In order to vote, you must first LIKE EC2 on Facebook.

      jess
      Monica
    • West Elm-Inspired Wood Tile Dresser {Love & Renovations}

      West Elm-Inspired Wood Tile Dresser {Love & Renovations}

      How many times can we say we were floored by the Round 2 projects? Not enough, apparently, because, people, those projects were incredible. If you missed the Round 2 projects, you can see all of them right here. To see the bloggers you chose to move on to Round 3, click here. We're sure these girls are already working hard on their Paint challenge this week- ack! We're loving the suspense.: )

      We have been anxiously awaiting the tutorial for this wood-tiled dresser since we first laid eyes on it. I'm not sure you guys realize this, but the contestants get about 3-4 days to complete their projects, photograph them and submit them to us. That is a crazy turnaround, but you would never know it with this one! It was so well-executed and came out beautifully. Love it!
      ---------------------------------------------------------------------------------------------------------------------
      Is it awkward for me to admit that I knew I would be knocking off this dresser before I even got into this competition? I've been in love with it for a while now, and I remember a week or so before I even found out I was in the competition I stumbled on it again and my husband Corey and I decided right then and there that if we got in and if there was a knockoff round, we'd be doing this guy.

      (The inspiration — via West Elm) Luckily, we did, and there was, so here we are! Like I said, this dresser has been on my mind for a while because it's just so beautiful, but if you know me at all you know I'm not the type to spend $900 on a piece of furniture. It's just not gonna happen. So, Corey and I set out to re-create this dresser as affordably as possible, all while putting our own little spin on it. What we used:

      • An antique dresser
      • Scrap 1x4 wood — we used maybe one board total
      • White paint and Gray paint
      • Gorilla glue (or any wood glue you like)
      • 3/4" dowel rods (for drawer pulls)
      • 1/2" dowel rod (for drawer pulls)
      We started off with this beautiful antique dresser that we found at a local flea market. We loved the clean lines, the tall frame, and (of course!) those casters. Drool. Our style is a pretty good mix of modern and more traditional/vintage furniture, so we liked that this would lead to a slightly less sleek and modern look than the original, which fits right in with the rest of our house. It was basically perfect.

      The first step for us was figuring out a way to inset the drawers a bit so that when we added the wood tiles they wouldn't stick out. We wanted the entire front of the dresser to be flush (the West Elm one has the drawers slightly inset, but we thought a flush look would be a bit more fitting for our dresser). Our original plan was to just move the drawer slides back a few inches in the dresser, which would hopefully make the drawers sit the way we wanted them, but thankfully it was an even easier fix than that with this particular dresser — there were little metal pieces on the inside of the drawers that stopped them from going all the way in. All we had to do was pull those out and make some new stoppers with some little dowel rods and we were good to go.

      Next up was cutting all of our wood tiles. Let me warn you — this project isn't for the faint of heart…it took forever! But, I think the end result is totally worth it, so I won't complain. For the tiles we took a few 1x4 boards that we had already laying around and cut them down to 1/4" thick tiles. It was the quickest way we could think of to do it, and it also meant that the end-grain of the wood would be showing, which added some fun texture. It was a pretty quick job to cut the tiles — we just used a chop saw with a piece of wood clamped to it to make sure all of the tiles were the same size. Our stack quickly grew, and soon enough we had a giant pile of wood tiles.

      One they were all cut, we gave them a quick whitewash. I wanted a bit of variety within the tiles, so we did a whitewash on some of them and a gray wash on others. It was a subtle difference, but it makes the end product look a bit more random and varied, which I like.

      Once our tiles were all dried and ready to go, it was time to attach them to the drawers. We didn't want to nail them in because then we'd have a billion different nail holes to fill, so we just used some wood glue. We glued 'em on in a subway pattern and then clamped a board to the drawer while it dried to ensure they all stuck. As the tiles got wet with the glue, some of them started to bow, so clamping it down also kept that to a minimum. We let it all dry together for about 12 hours (just to be sure!) then removed the clamps, sanded down the edges, and that was all there was to it!

      The last step was creating the drawer pulls — we knew we wanted ones similar to the inspiration piece, but we also knew that actually finding and buying those pulls would be challenging (not to mention expensive!) so, we decided to make our own! Corey bought a 3/4" dowel, drilled two holes in the back, and inserted a small, 1/2" dowel piece. We then spray painted the whole thing with some oil-rubbed bronze spray paint, and screwed 'em in!

      Once we put it all together, it looked a little something like this:

      And that, my friends, is how we created our own version of West Elm's wood-tiled dresser — and under $200, to boot!
      --------------------------------------------------------------------------------------------------------------------
      Isn't that fabulous?! An amazing knock off that even West Elm would be impressed by.: ) We were peeking around at Amanda's blog and found these adorable DIY Animal Magnets. Another knockoff, and we are obsessed.

      This Dresser turned Media Console isn't too shabby either, is it?

      Check back tomorrow because we're pulling a Young House Love on ya, and posting TWICE!! We'll be sharing the tutorials for the super fun Anthro-inspired plate wall and the Anthro Ikat Console!!
      Also, do you want to be a part of Creating with the Stars yourself? You can link up your favorite knock off project right here until tonight at 10 PM EST for a chance to win a great prize package and be featured on EC2!

      jess
      Monica
    • Anthro-Inspired Ikat Console {5 Foot 12 Creations}

      Anthro-Inspired Ikat Console {5 Foot 12 Creations}

      We're pulling a Young House Love and are double-posting today. It's kind of fitting since Melissa is Sherry's partner!. If you missed the Round 2 projects, you can see all of them right here. To see the bloggers you chose to move on to Round 3, . We're sure these girls are already working hard on their Paint challenge this week- ack! We're loving the suspense.: )

      -------------------------------------------------------------------------------------------------------------------------
      If any knockoff was a bear to tackle, this one is it! All that detail-oriented stenciling makes us tired just looking at it. We love that Melissa took the design and changed it up so that it is unique and matches her home. Take it away, Melissa!

      Anthropologie is my very favorite store. I love all the colors, the design, the textures, the ambience and inspiration that I always find there. When I saw this gorgeous ikat hand painted console, I knew it was the perfect piece of inspiration for CWTS Project #2: Knock Off. (and at $1698--it's a great piece to knock off; )

      1. I bought a similar looking cabinet base from IKEA. In looking for the right piece of furniture to use for this project, the most important thing was to have flat doors with plenty of space for the ikat stencil design.

      2. In order to achieve a wood-like look similar to the anthro console, I did some research on painting IKEA furniture. Leaving the cabinet in pieces, I spray-painted them with three coats of Zinsser BIN shellac-based primer. In between each coat of primer, I sanded very lightly. This stuff is amazing and allowed me to paint right over it with no problems. After letting the primer dry, I painted the cabinet pieces with two coats of paint which I had left over from other projects. I painted all pieces with BM Wheeling Neutral, with the exception of the cabinet doors, which I painted BM Linen White.

      3. The next step included a bit of experimenting, but ended up turning out great. On top of the painted cabinet pieces, I used a soft dry cloth and applied a light layer of Annie Sloan Dark Wax. I wasn't sure how this wax would take to the paint, but it worked wonderfully and gave the piece a great look. In the second picture below, you can see the difference between the boards (before wax on the left and waxed on the right). After all the pieces of the cabinet were waxed and dry, I put the cabinet together, minus the front doors.

      4. I ordered the ikat stencil ("ikat pattern #1 repeating stencil") online from Olive Leaf Stencils. Next up was choosing paint colors. I went to the paint store and pulled paint chips to match the anthropologie console. I knew their color palette worked well but I wanted to create a similar palette that would work better in my own home. I played around with paint chips in my hand to create my palette. Then I took the paint chips to the craft store and matched them to acrylic craft paint. (While at the craft store, I also purchased Elmer's Spray Adhesive to help keep the stencil in place while I painted.)

      5. I put the cabinet doors on top of the kitchen counter and put the six different paint colors onto paper plates. I measured and marked the various spots where I would need to line up the stencil. Next, I sprayed the back of the stencil with the Elmer's Spray Adhesive and let it sit for about 2 minutes before placing it on the cabinet door. (Waiting the 1-2 minutes helps the spray to be more temporary, and easier to remove. I did not have any problems removing the stencil-and the paint on the doors did not peel off at all.)

      6. After I had my stencil in place, I began painting. You really only need to use a small amount of paint for stenciling, this helps to prevent bleeding of the paint. I used a soft jabbing motion to get the effect I was wanting and found that a small firm paint brush worked well. I had sketched the stencil out on cardboard and planned which colors were going where…this was especially helpful. It took me about three hours to stencil the cabinet doors.

      7. I let the doors dry overnight and in the morning I used a very small brush and linen white paint to touch up the few spots where little bits of paint had bled.

      8. Last, I applied a layer of Annie Sloan Clear Wax over the top of each door, which darkened the colors very slightly and gave it a nice smooth finish.

      9. After the wax was dry, I put the doors onto the cabinet base. I styled the console using some of my"real" anthropologie treasures: ) in addition to two old flea market wooden spools with candles, some favorite books and beautiful orange tulips.

      It's such an amazing piece and it's going to be a conversation starter, for sure! We snooped around Melissa's blog and found this adorable Secretary makeover. Love that color blue!

      You know we love us some reclaimed wood and this barnwood jewelry display is super cute!

      Check back tomorrow for our favorite knockoff from the link party this week! There were some great entries, and you all are NOT making our jobs easy.: ) And don't forget that you can begin voting for Round 3 midnight on Monday!

      jess
      Monica
    • Creating with the Stars Round 1 Winners Announced!

      Creating with the Stars Round 1 Winners Announced!

      Phew! The contestants and their Star partners really set the bar high this week with their Round 1 projects. Almost every one of you commented about how hard it was to choose only three favorites and we felt that pain right along with you! We know that you're not really here to read lots of mumbo jumbo from us, so let's get to those results, shall we?
      And the Winner of Round 1 is…

      1. Karianne {Thistlewood Farms} & Whitney and Ashley {Shanty 2 Chic}
      Bicycle Wheel Clock

      Bicycle-Clock-Label

      We loved this project and think it was executed so well! Nice work Karianne!! Can't wait to see what you'll come up with for Round 2.
      Let's see who else made it to Round 2…
      2. Sarah {While They Snooze} & Sarah {Thrifty Decor Chick}
      Trash Pile Made Trendy Table

      3. Sarah {Sarah M. Dorsey Designs} & Brooke {All Things Thrifty}
      Statement Piece Light Fixture

      4. Amanda {Love and Renovations} and Beckie {Infarrantly Creative}
      Televison Stand Upcycled to a Bar

      5. Jane {Life, Crafts & Whatever} & Jamielyn {I Heart Naptime}
      Tin Tile Mirror

      6. Melissa {5 foot 12 Creations} & Sherry {Young House Love}
      Lab Station Turned Dining Room Buffet

      7. Nancy {Owen's Olivia} & Kari {Ucreate}
      Dresser Turned Modern Sandbox


      8. Ann Marie {White House, Black Shutters} & Shaunna {Perfectly Imperfect}
      Floor Board Kitchen Island

      these 77 year old floor boards were upcycled into a rustic kitchen island!

      9. Janel {Nellie Bellie} & Brittany {Pretty Handy Girl}
      Frumpy to On Fire, Fireplace

      CWTS final final5

      We're so sorry to say goodbye to the following three contestants! Boo, we hate this part. Thanks for all your hard work and excellent projects this week, girls!
      10. Jourdan and Ashley {Little Yellow Barn} & Beth {Home Stories A to Z}
      Man Chairs

      11. Jessica {Mad in Crafts} & Mandi {Vintage Revivals}
      Vertical Blinds Headboard

      Upcycling Challenge Headboard

      12. Nat and Holly {My Sisters Suitcase} and Jane {Tatertots & Jello}
      Little League Lounger

      To keep things legit, here are the official results!

      I'm sure she doesn't need a reminder, but here's what Karianne won this week!
      Round 1 Prize Package: $50 worth of 31 Gifts products $60 worth of Twysted Yarn products $70 of Henle Headbands products $100 Blog Re-design from 733 Design (who designed all the CWTS logos!) Project featured by HomeTalk We also want to thank Homes.com for being the Official Grand Sponsor of Creating with the Stars!

      Congratulations to the nine moving on! You have your work cut out for you, for sure! Next week's theme is KNOCKOFF!

      The winner of Round 2 will win the following AWESOME prizes: (to see the entire prize package, click here)
      The Week 2 Winner will receive: $100 Gift Card to Royal Design Studio A pair of $120 Robert Allen pillows from Chic Decor Pillows Project featured by HomeTalk

      Voting for Round 2 will begin on Monday, March 18th at 12 AM EST. Don't forget that you can link up your favorite upcycle through this Friday at 10 PM EST right here for the chance to win prizes and be featured here on EC2!
      Finally, we're super excited because: 1. Tomorrow we'll be sharing Karianne's tutorial for her awesome bike clock. 2. On Friday you'll get to see how Sarah put together that amazing trendy tire table and, 3. Saturday, Sarah will be giving us the step-by-step process behind that insane light fixture!
      Be sure to come on back for loads of inspiration starting tomorrow!!

    • What We Learned {Creating with the Stars 2013)

      What We Learned {Creating with the Stars 2013)

      Phew! We don't know about you, but we are exhausted after that month-long Creating with the Stars. But on the other hand, we really miss it! We could not be happier with the way our first ever contest went and hope you all enjoyed it and were inspired by it too! We are chomping at the bit to get back into the swing of our own projects,but before we do that, we thought we'd take a look back at the things we learned form Creating with the Stars 2013- David Letterman-style!

      10. You get what you pay for. We learned this the hard way, for sure. We deicded to use a survey company that was very inexpensive to host each week's voting and we had major problems every week with it. You guys noticed it, too, and we promise that next year the voting will be sooo much easier! Putting out a little bit more money will be worth it if we can avoid all the hassles we dealt with!

      9. Running the contest and trying to do each round's projects = Crazytown Even though we like the projects we came up with during the season trying to do them while hosting the contest, coordinating posts, emailing back and forth with stars and contestants, all while wrangling our kids and managing the rest of our lives and another HUGE project, we were on overload. Whoever thought of participating in each round (I'm pretty sure it was Monica,) is insane, and you WON'T be seeing that next season.: )

      Week 1: Upcycled Door turned Desk, Week 2: Anthro Wood Cut Art Knockoff Week 3: Painted Piano, Week 4: Colorful and Fun Kid's Bathroom Makeover
      8. You people are competitive! For real! We went into this season thinking it would be awesome and a whole lot of fun, not ever thinking people would be so into it! Even readers who weren't contestants got fired up about the littlest thing!. Honestly, we had no idea we would be dealing with so many Sherlock Holmes! Now we know you guys are in it to win it, and will back up your favorites no matter what!
      7. Planning and preparation were key for these procrastinators! Posting seven days a week within a strict time frame is no joke. Usually, we decide the day before what we want to write about the next day, but not so with CWTS! We began seriously planning in October 2012- approaching sponsors and stars, writing emails, figuring out guidelines etc. We were super glad we did this because the contest went pretty smoothly. Thank goodness!

      We finished our round 1 project last year at 1 AM. Procrastinate, much? 6. The pressure is on when the world is watching, We absolutely hate it when something doesn't go quite as planned. We recognize there were a few glitches in the contest and because so many people were coming here every day, those mistakes were just that much more noticeable. Ick, we really don't like that. No more mistakes next year!
      5. Go big or Go home! We always say we're not afraid to try or go after anything and it worked in our favor with this contest! We landed some amazing sponsors by just asking if they wanted to partcipate! Plus, we went out on a major limb (that involved pretty lame dancing and fake mustaches) to get our incredible stars on board! (PS. this video gets a little long, so feel free to skip the middle!)

      4. It's pretty darn fun to help new bloggers get a step up! We were unbelievably grateful to Tam for giving us a platform to showcase our fun ideas when we won last year. It made people notice us, and we were so thrilled to do that for these 12 crazy-gifted girls. We hope that you'll continue to support your favorites and follow along as they grow bigger than us!
      3. The Stars you all love really are that incredible!
      These ladies took time out of their very busy schedules to help better the contestants projects and photos. All of the contestants comments on how wonderful the stars were to work with. Thanks ladies!

      2. It turns out we're not the only talented people in blogland. Ha! But seriously, the talent that the contestants showed, and the amazing projects you all linked up blew us away. We love that this blogging niche is so encouraging and open to sharing of ideas, and man, our list must-do project list grew by about a mile after all of the fabulous ideas we saw throughout the contest!

      1. Creating with the Stars is the Most Epic Blog Contest on the Web! We already can't wait for next year's contest. It's definitely not too early for you to start creating awesome things because submissions open in February 2014!

      What did YOU think of the contest? Will you get your game on next year?

      jess
      Monica

      Want to catch up on all the projects from Creating with the Stars 2013? Click below!

      Round 1 Projects & Winners Round 2 Projects & Winners Ro und 3 Projects & Winners Round 4 Projects & Winners

    • Creating with the Stars Round 2 Link Party

      Creating with the Stars Round 2 Link Party

      If you thought Round 1 was impressive, what do you think of these Round 2 Knockoffs? If you haven't already, stop everything and click here to vote for your favorite 3 knockoffs! We aren't exaggerating when we say we were blown away this round. And… lucky me, I get to share my knockoff today… no pressure right! Ha!

      Before I share mine, let's enjoy a Blast from the Past and look at the Knockoff that won us Round 2 of Creating with the Stars in 2012. It appears that Anthro is DIYers favorite store to knockoff. Last year we tackled their Ordinal Dresser (you can see the full tutorial here)

      ----------------------------------------------------------------------------------------------------------
      Now, onto my little ol' knockoff project…

      I really wanted Anthro's Woodcut Print, but at ahem $1600… are you kidding me?? At that price, it had better grow into a money tree!! I'll take my $6.99 version thank you very much.

      Here's how I made mine… it took about 5 minutes. I searched Google images for a woodcut picture I liked. It was black and white, but I wanted a red tone similar to the original. I brought it into PicMonkey (love that site) and used the tint effect to choose a new color. The options are endless as you can see from my screen shot below.

      If I wanted a smaller size this project would have been FREE, but I needed a 12x12, so I printed it at Staples for $6.99. It's not an earth shattering knockoff, but I saved $1593.01- Woohoo! Jess and I love getting a high end look for less… Why pay full price, when you can just Knock-it-Off?
      The woodcut art is part of my new Kid Friendly Gallery Wall! Every single item on this wall is plastic, wood, or just plain paper. With 4 kids, and after about 7 broken frames I knew I needed a plan B!

      I'll be posting more about this wall after CWTS, but here are a few pics for you to enjoy…

      And yes, those prints are just paper, framed in washi tape. Break proof!

      That metal print is SO us! Eric and I might be a wee bit sarcastic… It says,"National Sarcasm Society… Like we need your support"

      -----------------------------------------------------------------------------------------------------------------
      Alright, enough about me, let's talk about you! Are you ready to link up your favorite Knockoff project?

      The winner of Round 2's link up will receive an awesome prize package from Belmonili and Perfectly Imperfect Shop, and we promise you're going to love it!

      This link party will be open until Friday, March 22nd at 10 PM EST. Jess and I are going to be choosing our absolute favorite knockoff project and revealing the tutorial for it on Sunday! If you win this week, we'll be contacting you sometime on Saturday for the tutorial, so be ready!
      Please remember a few things before linking up: 1. Before linking, please LIKE us on Facebook (Thanks!)

      2. Make sure you link back to us in your post. Only those linking back will be eligible for the prize! 3. Only one submission per person. 4. Choose a project that you've done in the last 12 months.
      Want to see all the amazing Upcycle projects that were linked up last week? Click here! The Round 1 Link Up Winner was this awesome light fixture!

      Monica
    • Creating with the Stars Round 3 Link Up Winner

      Creating with the Stars Round 3 Link Up Winner

      If you missed all the amazing projects in the first three weeks of CWTS, be sure to check them out below!
      Round 1 Projects & Winners Round 2 Projects & Winners Ro und 3 Projects & Winners

      We've loved seeing all the projects that have been linked up to play along with CWTS each week! This week we were thrilled to be introduced to Meesh and her blog I.Meesh.U I spent a long time on her blog last night and I just kept reading because her stream of consciousness writing style had me hooked! We picked this project because we felt that everyone deserved to know the secret of how to get that super-cool, Restoration Hardware finish!
      -----------------------------------------------------------------------------------------------------------------------------------------

      oh Restoration Hardware… how i love thee…

      Restoration Hardware's Kenwood Bed

      Restoration Hardware's Kenwood Bed
      Big A is currently in his converted crib. Problem is that he's getting too big for us to comfortably snuggle and read books in the glider. and sitting on the floor to read to him isn't fun. so mamma started searching for a new bed on craigslist… and look what i found. a glossy white Pottery Barn-looking bed. the very nice fireman who sold it to me even delivered it for free.

      glossy white painted wood headboard close up

      here's the headboard in our garage. the pix are a bit dark, but you get the idea. glossy white paint on a well-constructed piece. the beauty about Annie Sloan Chalk Paint is that you don't have to sand or strip any varnish before starting. you just paint. and the paint just sticks. and you're just happy. and yes, i've heard the complaints about how expensive ASCP is, but really, when you take into consideration the time you've saved sanding, stripping, and priming, it all works out. AND, with the 4 quarts i purchased almost two years ago, i've probably painted out 15-20 pieces of furniture. yes.

      glossy white painted wood headboard

      looks a little girly with the white glossy paint, huh? so here are my steps to achieve the ever elusive Restoration Hardware distressed and weathered wood furniture finish:

      • using a 3" brush, paint out the pieces in Annie Sloan's Paris Grey. make sure you get in all the cracks and crevices. you'll note that this piece is similar to a bead board, so there are lots of nooks and crannies. let dry.

      MinWax water based gray stain and Old English dark stain

      • using a mixture of MinWax water-based gray and dark Old English, brush on liberally on top of the Paris Gray. after a minute or so, wipe the mixture off with a rag, but don't wipe off 100% evenly. you want some of the pseudo-glaze to stick to the paint, creating some depth on the furniture. because this is a water-based stain, it's translucent and allows you to see the wood below it. the dark stain mixed in was intended to darken the color a bit.

      MinWax water based gray stain and Old English dark stain mixture without flash

      in this experiment, i used about 1/4 cup MinWax, and 8 drops of the Old English. the above shot is taken without a flash and it looks more gray/brown. be sure you use the same mixture if you're remixing for additional pieces so that you achieve the same consistency and colors as you go.

      MinWax water based gray stain and Old English dark stain mixture with flash

      in the above shot, i used the flash so that you could see that this glaze had more of a blue-ish gray hue.

      • go over all the pieces using a 220 grit sandpaper…very lightly, with the grain. play around with the pressure. i was trying to achieve a pseudo wood grain look, so kept my pressure very light to accomplish the right look without removing too much of the chalk paint.

      Annie Sloan dark wax, gloves and old rag

      • then i brought out the Annie Sloan dark wax, my trusty gloves, and some soft rags. i generously applied the dark wax as i wanted a darker wood look.

      Restoration Hardware furniture refinish with Annie Sloan Chalk Paint

      what you'll notice about using the Annie Sloan dark wax is that you sometimes notice the brush marks. see in the above picture at the bottom center of the headboard? you see a dark area butted up against a lighter area. i've noticed this happens with AS wax… but never fear! the product is so malleable that you can buff it out and even out the look with some #0000 steel wool and elbow grease. that's right…get those arms in shape by buffing and making the wax more even across your piece.

      getting the Restoration Hardware distressed wood look after 1st coat of Annie Sloan dark wax

      see how i was able to get rid of the sharp contrast between the dark and light areas on the headboard? fancy.

      getting Restoration Hardware distressed wood finish close up headboard pre-0000 steel wool
      getting Restoration Hardware distressed wood finish close up headboard

      i LOVE how this piece turned out.

      Restoration Hardware-inspired big boy room
      close-up of Restoration Hardware knock-off bed footboard
      close-up of Restoration Hardware knock-off bed
      close-up of Restoration Hardware knock-off headboard
      Restoration Hardware-inspired big boy room
      IMG_2369

      thanks for reading!

      imeeshu.com

      ---------------------------------------------------------------------------------------------------
      Thanks again Meesh! And make sure you check back tomorrow for the reveal of the Grand Prize Round Projects!! You're going to flip over them!!

      jess
      Monica
    • Creating with the Stars Round 2 Voting

      Creating with the Stars Round 2 Voting

      Ok, time for Round 2, and let's just say we're back and better than ever. Well, not us, but the contestants. Their knockoff projects are killer this week!

      We can tell that they really want to win the awesome prizes from our fabulous sponsors this week! Let's just recap what they are, shall we?

      1. $100 Gift Card to Royal Design Studio .
      RDS is our go-to source for all of our stencil projects and our run on CWTS last year was where we were first introduced to them!

      2. A pair of $120 Robert Allen pillows from Chic Decor Pillows
      These pillows are hand-made and absolutely gorgeous. We're sorta jealous that we don't get them.

      3. Project featured by HomeTalk , which, come on, is kind of a big deal.

      These are pretty fabulous prizes, but let's not forget that one contestant and their star partner will win the Grand Prize at the end of these four weeks! Woohoo!

      $500 from Homes.Com
      $500 Gift Card to HomeGoods
      Project featured by HomeTalk

      --------------------------------------------------------------------------------------------------------------------------

      We are so impressed with how these ladies took these famous, really pricey items and put their own spin on them to make them unique and fabulous. Let's get this party started!

      1. Anthro-inspired Wall Lamp

      When I heard this week was knock-off week I knew immediately what I wanted to do. See, I've been seeing this lamp I wanted in the Anthropologie catalog. It makes my heart happy but…my budget doesn't allow for it. Well, could you afford $2800.00 for a lamp? I know, right?!? Ridiculous! So, I took it upon myself to figure out how to make this lamp accessible to mere peons. Or simply those that have a budget.

      cwts2 collage side by side

      Granted, I had to change things up a bit. I used pipes more than wooden spindles. And Rub n Buff to achieve some of the finishes. I also wasn't about to do the whole thing in copper piping (have you seen the cost of copper pipes?) so I sprayed pvc pipe with copper paint and Rub n Buffed it to get a nice shiny look. All in all, I have to say that this ridiculously expensive lamp just got beat. Oh yeah Anthro…you hear me??…you are charging too much!

      cwts2 collage1

      I'll agree that mine isn't exactly the same as Anthro's. True. But, let's see mine is…about 3% of the cost of their's. Okay, I'll make do with not exactly! Truthfully, I love this lamp. It's so quirky, fun, stylish, and feels like an art piece! I'm so glad this contest pushed me to create it, I'm in love with it!

      cwts on and off

      2. Restoration Hardware-inspired Lighted Sign

      When I think of knock off, I think copy cat (in a good way). I think of anything duplicated to the T, but is much less expensive. For this round, I chose not to duplicate, but rather I was inspired by this Restoration Hardware arrow and created something a little different. I'll tell ya… with the basic process, you can create just about anything you can imagine. A state, a letter, a number, a symbol, a phrase. It's totally up to you.

      Perfect for outdoors.

      Perfect for indoors.

      3. Schumacher Zimba-inspired Drapes, Anthro-inspired bench and Cornice

      I love designer fabric and furniture, but the high prices make it hard to justify (especially when I change my mind frequently!) I like to get a high end look at a fraction of the price by putting a little, time, effort, and creative thinking to work!

      I've been obsessing over Schumacher Zimba fabric forever, it is absolute perfection for draperies! But, at about $100 a yard (that means about $300 just for ONE panel), it is definitely not in the budget. By creating my own stencil and buying pre-made white draperies from Ikea, I was able to get two panels for about $25!!

      Ever since seeing one doubling as a window seat, I have been dying to build an upholstered bench ottoman. Inspired by Anthropologie's bench ottoman that costs $1,700, I built this ottoman for under $100. I cut costs by using an inexpensive comforter in lieu of foam, upholstry webbing as a top support, and a drapery panel for fabric. It's perfect for extra seating or a place to rest your feet.

      Custom cornices can be very pricey especially when topping a large window. For this window, I wanted a 95" length which can cost over $850. I built this cornice using 1x12 and 1x6 to create the frame and a long tablecloth for fabric for under $25.

      These three diy projects transformed this window area and cost me only $150. The time and effort was definitely worth it over paying over $3,000 for all of the originals! 4. Faux Chair Slipcover

      Faux-Chair-Slipcover-Label

      It looks like a chair, but kinda like a slipcover too…
      Well, that's because it's a chair covered by a slipcover! Who knew this chair had such high ambitions? I did, that's who!

      PicMonkey Collage-Faux Chair-Slipcover

      I saw this faux chair cover on this Danish website and I knew these covers would be perfect for my house. I drew a template and took it to a copy center to have it enlarged. Then I cut it out and appliqued each individual piece to a plain chair cover to create a faux chair on a slipcover.

      Faux-Chair-Slipcover-Project

      It's a fun easy project that takes an afternoon. And now all my other chairs are a little jealous!
      I had fun making that plate wall, too. Just plates and a few vinyl birds. I think they're perfect with my"fancy, new" chairs!

      5. Anthro-inspired Ikat Console

      ANTHROPOLOGIE. I LOVE this store. I love the colors, the design, the textures, the ambiance, and inspiration that I always find there. When I saw this gorgeous ikat hand painted console, I knew it was the perfect piece of inspiration for my CWTS Knock off. (and at $1698--it's a great piece to knock off; )

      Using a cabinet base from IKEA and an ikat stencil from Olive Leaf Stencils, I recreated the console, choosing a similar color palette, with some color adjustments to fit my own house and decor scheme.

      They say"imitation is the sincerest form of flattery." Well, Anthro, you most certainly have mine. In honor of my love for this store, I styled the console using some Anthropologie treasures, in addition to some old wooden spools & candles, books and beautiful orange tulips. 6. Anthro-Inspired Sharpie Plate Art

      Woo… week 2! After the crazy, hectic, eating-cereal-for-dinner kind of week last week was I was hoping for a"knockoff" project I could knockout quickly. Apparently, I don't know how to do that. I chose to knockoff Lost Arcadia By Molly Hatch sold by Anthropologie for $7,500! Since that's about $7,450 over my budget, I decided to see if it could be done on the cheap.

      It's basically 30 plates hung together with a painted scene going across all the plates. At $7,500, that's $250 per plate. Luckily Dollar Tree sells white plates for a buck. And, since I was pretty sure painting freehand on the plates wasn't going to look all that great, I used a Sharpie and a projector. All you have to do is trace… easy.

      I chose to trace a botanical print on my plates since I felt it looked a little more modern, but tried to keep the style and overall feel the same–very loose and all black and white. The plates are hung using Command Strips. At 5 feet wide and 6 feet tall, it makes quite the impact on the wall, not the bank account.

      7. Horchow-inspired Mirrors

      So, here we are at round 2 (Did you see all of the awesome projects in round 1?). This week's theme is Knock-Off, which I love. I'm cheap frugal, and just can't spend the money that some of the big name websites want for their stuff. Plus, I'm sure my husband would think I'm certifiably insane if I bought a $300 vase or $100 throw pillow. But just because I'm designing on a budget doesn't mean that I can't have nice things, right?

      I saw these mirrors over at Horchow, and loved them. I'm one of those ladies that thinks that you can never have enough mirrors in your house. Mirrors to make your room look bigger. Mirrors to reflect light and brighten up your space. Mirrors to make sure you don't have food in your teeth. The more, the merrier. But $1095 shipped? Yikes. No thank you. But looking at them, I figured I could make them.
      A quick stop at Hobby Lobby for the wooden plates and big mirror, a not so quick stop by Home Depot for the rope and other supplies, and a call and stop by the local mirror place for the smaller mirror size that I couldn't find pre-cut anywhere. Then it was time to go home to paint, sand and assemble.

      I did have to get creative with the black caps that Horchow has on the ends of their ropes. My solution? PVC end caps, simply spray painted black. Some black BBQ & Stove spray paint on the metal (which is holding nicely as long as you don't bang around the metal) and voila! Drill a hole in the PVC, hot glue the hooks and rope, and BOOM.

      Slightly smaller, slightly lighter in color, but perfectly me.
      8. West Elm-inspired Wood Tile Dresser
      It didn't take long for me to figure out what I wanted to do for this week's challenge. I've been lusting after this wood-tiled dresser from West Elm for months and months, but at a whopping $900, it just wasn't going to happen. So, this challenge gave me the perfect excuse to try and re-create it on my own! And I think it turned out pretty awesome.

      I found this gorgeous antique dresser at a local flea market and knew it would be the perfect piece for this project. It's not quite as modern as the original, but it has some nice clean lines and wooden casters, which make me a little weak in the knees. With a fresh coat of paint, some DIY-ed hardware, and a whole bunch of whitewashed, hand-cut wood tiles it looks pretty dang close to the original.

      Really, if I'm being honest, I like my version just a little bit better.; -) 9. Anthro-inspired Duvet When I first saw the Corin Duvet from Anthropologie, I fell in love with its details. Hand stitching, gathered fabric, pure gorgeousness. But it also came with a price tag that was way out of my league.

      no-sew Anthropologie Corin Duvet knockoff

      I wanted this look for our room but didn't want to spend $400 (and I didn't want to sew anything) so I bought a white duvet cover and a bottle of puffy paint. PUFFY PAINT?! Yes, I said puffy paint.

      no-sew Anthropologie Corin Duvet knockoff

      I used a picture of the original and a steady hand to paint the details onto my duvet.

      But don't worry, the look is nothing like those cheesy tee shirts you used to make!; )

      no-sew Anthropologie Corin Duvet knockoff

      --------------------------------------------------------------------------------- It's time to vote! You guys have a ridiculously hard job- we don't envy you a bit! You can only vote one time, but you can vote for your favorite 3 projects. In order to vote, please LIKE EC2 on Facebook. Thanks!


      Thanks for voting! Check back tomorrow to see Monica's Knockoff that saved her over $1500! Did you miss the Round 1 projects? You can see them all here. Want to know the results of Round 1? Click here!

      jess
      Monica
    • Antique Table Turned Vanity {Bathroom Redesign Update}
      Antique Table Turned Vanity {Bathroom Redesign Update}

      Oooh, I so wish you could see my hallway bathroom right now. It is coming along exactly how I had envisioned. Mostly because I finally found the perfect piece of furniture for my new custom vanity. This vanity earned us a spot in Round 3 of Crafting with the Stars over at Sew Dang Cute, and although she's pretty darn cute in pictures, she's absolutely gorgeous in real life. So, here's the breakdown of the transformation this little table underwent:
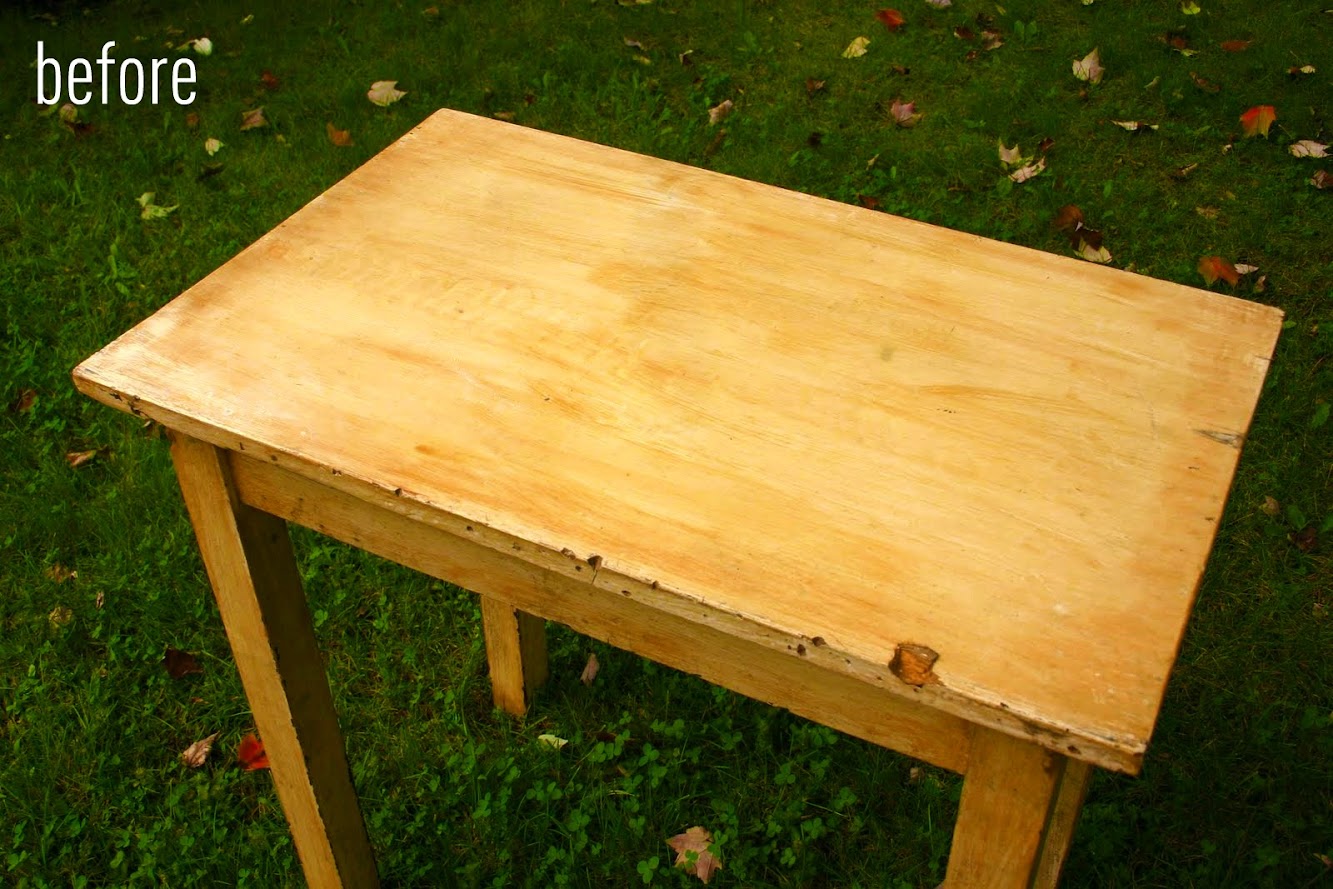
      Antiquated to Awesome Table Transformation While browsing one of our local antique stores, I stumbled across this table in an out-of-the-way-spot covered in loads of other stuff.

      Now, she doesn't look like anything special, but I could see through her battered, yellowing self to see the potential in her simple lines and aged charm. My initial thought was to sand the yellowish tones off to hopefully reveal a distressed white/wood look. After what seemed like an eternity of sanding with two palm sanders, I realized that this piece probably really was an antique and that the paint had mostly likely been there forever. I hesitate to reveal this information for fear of the antique-lovers out there giving me a hard time about sanding such an old piece, but hey, a girls gotta do what a girls gotta do.

      So anyway, the chippy paint look I was going for totally didn't happen because sanding it made the paint appear the color of a peach and that just was not at all the look I was going for.

      So, on to plan B. Monica came over to help out and she brought the custom gray stain they used on their farmhouse table and also a mahogany stain she had. We had some walnut stain left over from when we originally stained our kitchen cabinets, so we tested all three on the top of the piece. We knew we could always sand out the stains we didn't like, but we made sure to place the sample stains in the middle where the vessel sink would go, anyway.

      In the end, we decided on doing a custom mix of walnut and gray stains.

      I brushed on the walnut stain first in long even strokes.

      After about a minute, Monica wiped the stain off with a staining pad.

      Even with just the walnut stain, it was absolutely beautiful, but I knew that the addition of the gray stain would make it match the colors in the bathroom even better, so again, I brushed the gray stain overtop of the walnut in long even strokes.

      After wiping it off, we had this:

      Note to self: Do not stain a piece of furniture in your kitchen. If you're not careful, stain will get everywhere leaving you in a slight panic and making lots of extra work for yourself.

      Ahh! Let me stop here to point out how crazy our work environment was that evening:

      How we got anything done is a mystery to me. Monica and I work very quickly and as a result, leave a trail of disaster in our wakes. We were simultaneously working on the table, painting a custom destination sign with coordinates for a customer, planning our posts for the next few weeks and drinking our favorite Pumpkin Spice Cappuccino from Wawa. Craziness, I tell you. But I digress… on with the project:

      After the hours of sanding the top, I really REALLY didn't want to sand the legs, so we came up with the idea of doing a whitewash treatment. Basically, whitewashing is a combination of paint mixed with water that creates a translucent glaze of color.

      You can see that adding the whitewash took away the yellow tones, but kept all that yummy aged character of the piece.

      Finally, we broke out the power tools and got ready to make our holes for the new sink and faucet. This is a lot easier than you probably think it is. After measuring the center of the table where the sink would go, we used a drill with a 1 1/2" circle bit to make a hole for the pipes to run through.

      This creates a lot of sawdust which for us was a problem. DESIGN BLOGGER FOUL! We should have drilled the holes FIRST before we stained!

      Brushing off the saw dust on stain that hadn't dried yet gave us a minor heart attack, but we recovered after restained the parts that needed it. Phew! No big deal. (But if you attempt this project, drill first, stain second!)

      We added the sink that we bought at Lowes so we could determine the placement of the hole for the faucet. We didn't use any scientific method here; we simply placed the faucet next to the sink and eyeballed where it should go. Remember folks, I don't claim to be a perfectionist.: )

      In pictures, the faucet looks kind of goldish, but in reality it has a brushed nickel finish that adds just a touch of modern that is perfect.

      We wanted to add some detailing to the piece to make it more unique, so I picked up some oil-rubbed bronze knobs from Lowe's. Monica pre-drilled a few holes, and then we screwed them right in. They look so cool and give the affect of a drawer on the front.

      So, at the end of night one, this is how the table looked. Pretty sweet, huh? But the fun part was putting it all together the next day after I (and my mom who wanted to save me some time while I was coaching my tennis team) added 6-7 layers of a water-based polyurethane to the top to prevent water damage that may occur from my very messy wonderful family. We went with a water-based poly because it doesn't change the color of the wood tones. I'm not 100% sure this will be enough protection, and I'm paranoid about anything marring the surface of this beauty, so I'm going to be doing a bit more research on protecting the wood before we use it. Any suggestions?
      So now that all is said and done, this is how my beautiful vanity looks:

      I am so in love with this table, and am thrilled to death that it turned out just like I was hoping. It looks amazing in the bathroom, and pictures just don't do it justice. Next week, I'll be showing you the final reveal of our hallway bathroom after I add some finishing touches and I can't wait!
      What do you think of my table-turned-vanity? Have you ever turned a thrift or antique store find into something fabulous?

      Now, on to Round 3!

      Linking up to: TT & J, Show & Tell Saturday, Tips & Tutorials Tip Me Tuesday, Sundae Scoop, Sunday Showcase

    • How to Build a Custom Headboard with Arms {Sarah M.Dorsey Designs}

      How to Build a Custom Headboard with Arms {Sarah M.Dorsey Designs}

      If you missed all the amazing projects of our first annual Creating with the Stars, be sure to check them out below!

      Round 1 Projects & Winners Round 2 Projects & Winners Ro und 3 Projects & Winners Round 4 Projects & Winners -------------------------------------------------------------------------------------------------------------------------- Sarah is back today with another awesome tutorial from the home decor project that won her the grand prize in Creating with the Stars. I love the way she built this headboard and broke it down for us- it makes any custom headboard within the realm of possibility! Plus, it looks unbelievable with that grasscloth and nailhead accent wall!

      To complement the accent wall, we wanted to create a headboard that wouldn't compete yet wouldn't get lost against the nailhead and grasscloth.
      We made a plan and gathered our supplies.
      1/2" plywood (1 sheet cut to width of bed frame, ours was 62.5") 2x8" (x2) 1x8 (x2) 1x3 (x4) coral curtain panels from Target heat n' bond batting
      I drew a few diagrams for the basic construction and dimensions of the headboard. See below for some the specifics on the upholstery. Measurements are for a queen bed frame. Note: make sure to measure your bed frame first, in case yours is different! You want to make sure that the frame will fit inside of the arms.

      For the arms, we screwed a 1x8 and a 2x8 together, measured and drew the circle with a lid. We then followed the line with a jigsaw to cut it out (we did remove any screws that were in the way first!).

      For the foam, we cut a 3" camping pad in half and attached to the plywood with spray adhesive.
      Next we upholstered the back piece by wrapping in batting and then fabric. To make sure that the top was pulled evenly, we attached a thin strip of scrap wood and pulled tight. This made it much easier to get an even look!

      Next, we cut the fabric to wrap around the entire arm, starting at the inner part of the arm, we put a few staples in (on the inside so it stays in place while you attach the arm), we cut little holes in the fabric at the pilot holes (where arms attach to the frame). We then installed the arms with heavy duty screws (we used cabinet anchors) and attached it to the 1x3 frame.
      Then we finished upholstering! We pulled the fabric tight around the arm and stapled, leaving it loose at the top. We cut the angles, almost to the edge, but not close enough so that it frays to the side of the arm, pull tight and staple. It doesn't have to be pretty on the top because that will be covered next. We cut a band of fabric the total height of the arm (accounting for the bends) plus a few inches and the width (2.5") of the arm plus enough fabric to fold under (at least.5" on each side, so at least 3.5" total). We folded the raw edges under and pressed with a hot iron so that the edges were crisp and attached the band to the arm with no-sew adhesive (my preference is Heat n' Bond) and a hot iron, staple to secure the ends.
      That's it!

      I finished the bed off with a few DIY pillows. The euro pillow shams are made from a white table cloth and a scarf from World Market. Since the scarf was translucent, I doubled it up with the white table cloth. The throw pillows are white shams from Ikea, I then painted a border using painters tape and latex paint with fabric medium. The bolster pillow is a kitchen towel from World Market and the left over headboard fabric.

      I love how the grasscloth slightly shimmers depending on the lighting.

      The nightstand is from World Market, the sphere from TJ Maxx and I picked up little letters (to spell his and hers) from a local antique store. Books were wrapped in paper from the Paper Source.

      Hydrangeas and Ranunculus are two of my favorite flowers!

      This week was sponsored by Home Goods, and if you've read my blog, you probably know that I'm pretty obsessed with the Home Goods/TJ Maxx/Marshalls brand! I love the thrill of the hunt, designer names and the affordable prices!
      I picked up a cute accent chair, fluffy white rug (my puppy love it too!) and the white sphere!

      Finally, here's where we got everything!
      Headboard: Fabric Coral drapery panel from Target (x2), Batting,

      3" camping foam from Home Depot only $20!
      Feature Wall: Grasscloth wallpaper,

      Nailhead (we used about 2.25 boxes),

      Trim- I found 2.5"wide synthetic trim from Home Depot on clearance for $4/8ft board
      Accessories: Night stand (World Market — not on website), decorative sphere (TJ Maxx), His and Her letters (local antique shop), Throw pillow on chair, chair (TJ Maxx), lamp and lamp shade, duvet cover
      I'm crazy about our new transformation and I hope you love it too!

      We totally love it too! Well done, Sarah! We 're ready for you to make a trip to good ol' Bucks County to fix up our master bedrooms. Any time.: )

      jess
      Monica

      P.S Have you linked up yet?

    • Short & Sweet

      Short & Sweet

      Well, folks, today's post will be short and sweet. We figure you might need a break from all our crazy ramblings once in a while, so today's your lucky day.: )
      First Order of Business If you haven't already voted this week for the Crafting with the Stars competition, there's still time. Head on over to Sew Dang Cute and try to guess which one is ours, then vote for it!

      We are thrilled with the way our project turned out for Round 2! We're really hoping we make it to Round 3, because the idea we have is super cool. So, vote, people, vote!: )
      2nd Order of Business We may or may not be somewhere really fun, working on something totally cool. We're dying to share more about this top-secret project, but here's a glimpse of stuff we may or may not be using.

      Clockwise from top left: 1. Mason Jar Chandelier 2. Tissue Paper Art 3. Newspaper Wall 4. DIY Faux Buck 5. DIY Zebra Painted Rug 6. Benjamin Moore Sunburst 
      Ok, this meeting is adjorned. Have a great Tuesday!

    • Creating with the Stars Round 4 Link Up

      Creating with the Stars Round 4 Link Up

      If you haven't already done so, please GO VOTE for your favorite in the fourth and final round of CWTS! If you missed all the amazing projects in the first three weeks of CWTS, be sure to check them out below!
      Round 1 Projects & Winners Round 2 Projects & Winners Ro und 3 Projects & Winners

      -------------------------------------------------------------------------------------------------------------------------- We can't believe we are already in the final week of Creating with the Stars! This contest has far exceeded our expecations and has opened our eyes to so many new blogs and talented people! This week's challenge was Home Decor, and I knew right away that I needed to tackle my kid's bathroom. It was in bad shape- boring, dingy and gross. It had ugly vinyl flooring, yellowed rubber trim and purplish walls (we bought a $5 can of"oops" paint when we first moved in- big mistake!)

      We made a lot of easy and inexpensive upgrades like replacing the old flooring with vinyl peel & stick tile (it cost under $30!), adding chunky baseboard trims, painting the walls and the vanity, framing the mirror, hanging a new shower curtain and throwing a new bathmat down (both were from World Market). Not to mention, I accessorized with fun stuff from HomeGoods. Thanks, HG!

      This adorable bird shelf coordinated so well with the shower curtain and was marked waaaaayyy down from $120 to $30, which made me super happy. I lined the back of the shelves with coordinating paper for a fun pop of color.

      And just for fun, here's the before and after shot for you.

      Now it's your turn to link up your favorite home decor projects from the past year. Anything home decor-related, room makeovers included, are fair game! We can't wait to see what you've got!

      Don't forget to check back tomorrow to find out the Winner of the first ever Creating with the Stars contest! We're biting our nails over here!

      jess
      Monica
    • How To Make Necklaces With Vintage Keys

      How To Make Necklaces With Vintage Keys


      In my last blog post I discussed my basic design process for working with a unique focal element, in this case, some fantastic vintage & antique keys that I came across at a flea market last summer. I also discussed the basics of choosing complimentary materials such as beads, and the 'laying out,' or organization of the design. The following post will discuss the fabrication of those keys into a piece of unique, one of a kind piece of jewelry.
      Below are two styles of necklaces made with keys:
      Vertically Hung Key With Beaded Chain


      Horizontally Hung Key Necklace

      Materials List for both projects
      Vintage Keys
      WD-40 and paper towels to clean up your keys and remove rust
      Coordinating wire: Brass or copper work well. For the necklaces shown, I used Beadalon ColourCraft Permanently Colored Copper Wire in Brown (20 gauge) and Zebra Wire Colored Copper Wire in Brown in 18, 22 and 26 gauge
      Antique finish brass or copper chain (for horizontally hung necklace)
      Antique finish brass or copper jump rings (for horizontally hung necklace)
      Antique finish brass or copper clasps (toggle and or lobster-claw style)
      A variety of gemstone and glass beads
      Round nose pliers
      Flush-cut pliers
      Chain nose pliers
      *Aside from the keys, most items listed above are available through Fire Mountain Gems Jewelry Supply http://www.firemountaingems.com/

      FABRICATION

      If you find that your keys are a little rusty, spray them with WD-40 and clean well with paper towels. Because the keys I used were a nice, rusty brown, I decided to use brown colored copper wire for my necklaces. I liked the keys hung both vertically and horizontally so I decided to make both styles. Below are the instructions for both.
      Vertical Key Necklace:
      beaded chain technique with toggle clasp

      *For these necklace you will need to know how to make a basic wrapped loop. This is a simple technique that is basic to jewelry making. If you do not know how to make a wrapped loop, directions can be found here: http://www.firemountaingems.com/beading_howtos/beading_projects.asp?docid=652t


      Step 1. Cut a 2.5' piece of wire and connect one end to the hole in the top of the key with a basic wrapped loop. (For this style I used the 20 gauge wire)

      Detail of wrapped wire loops attached to key
      Step 2. Place a bead onto the other end of the wire and complete the end with another closed, wrapped loop.
      Step 3. Repeat your next section with another section of 2.5' wire, this time connecting one end of the wire to the previously finished beaded loop. Again, place a bead on the wire, and complete the unfinished wire end with another wrapped loop.
      Step 4. Continue repeating this 'wire, bead, loop' process until you have created one entire side of beaded chain in the length that you desire. (I made each side of my necklace approx. 10', for a total finished necklace length of 21' including key and clasp.)
      Step 5. Repeat steps one through four to create the other side of your beaded chain.
      Step 6. Attaching the toggle clasp: When you have finished your beaded chain in the length that you desire, attach your clasp. Using the same wrapped loop technique, attach the 'bar' part of the toggle clasp to one side of your beaded chain and the 'loop' part of the toggle clasp to the other side of your beaded chain. That's it! You are finished!

      Detail of toggle clasp attached with wire wrapped loops
      Directions for Horizontal Key Necklace:


      Step 1. Place key horizontally on table. Cut a 3' piece of wire and connect one end to the hole in the top of the key with a basic wrapped loop. (For this style I used the 20 gauge wire).
      Step 2. P lace a bead onto the other end of the wire and complete the end with another closed, wrapped loop.
      Step 3. Cut another 3' piece of wire and with a wrapped loop, connect one end to other, opposite end of the key, wrapping the wire around the body of the key to the inside of the key's teeth.
      Step 4. Place a bead onto the other end of the wire and complete the end with another closed, wrapped loop.

      Step 5. Continue this technique using 2.5' lengths of wire and beads, until you have the beaded look you want; I used two beads on one end of the key and four on the other end of the key. *Do NOT wrap the open end of the wire after your last bead.
      Step 6. Cut two lengths of chain (I used two 10' lengths of chain) and now making a loop in the wire after your last bead, thread the chain onto the loop and wrap the end. Repeat with other side. Your lengths of chain are now attached to each side of your necklace.
      Step 7. Attaching the clasp: At the end of each length of your chain you will attach your clasp. For this style necklace I used a lobster claw style clasp. Use a jump ring to attach the clasp to one side of your chain and complete the other side of your chain with another jump ring. You are finished!

      Lobster-claw style clasp

      A different color combination: Citrine and Honey Jade

      Pink Rhodonite gemstone beads
      If you have any questions, feel free to post them below! — Laura