There's no sense denying it, I'm a font snob. I spend far more time choosing a font for a presentation than I actually do coming up with content! My husband completely doesn't get it… I've even showed him things in Comic Sans and then a fabulous font like Basic Title and he just can't even tell the difference. So, instead of wasting my time on him, I thought I'd gather up 10 free fonts that I'll be using this fall and share them with you!!
Cafe & Brewery///Honey Badger///Chemistry///Aaargh///DK Sleepy Time/// nixie one///Neo Retro Draw///Veron///Kiwi School Handwriting///Harting/// Here's my take on a few of them… There's something I'm loving about Honey Badger- can't put my finger on it, but I'm drawn to it! Chemistry is all Breaking Bad and awesome, but not illegal- don't worry! Neo Retro Draw has recently made it's way to our sidebar pics- I love the simple hand drawn look! Vernon, oh wait… it's VERON… Apparently I loved the N so much I added an extra! oops! I love simple, clean fonts with stretched letters. So modern and fabulous!! And just for good measure… the"hello" is Learning Curve (a teacher go-to I might add) and our EC2 watermark is Hype. So… go download your favs, but first tell me… Which is your favorite?
It's here! B2S Week (Back to School) here on the Real Houseviwes blog… We've got some pretty fabulous stuff planned and today we're talking about back to school fashion. Make sure you read all the way to the bottom of the post because there's some crazy, exciting news we can't wait to share! B2S Fashion 2011 I must admit, I sorta dreaded back to school shopping this year. I have four kids and three of them are in school, so I had some serious shopping to do. My oldest is the only one that is a challenge. She's just developing her style and it's NOTHING frilly, NOTHING sparkly, NOTHING little kid, NOTHING that mom picks out- LOL. I think maybe I'll share this post with her. First off, here are the hot trends you should know about: Hot colors — jade, teal, bamboo, coffee, & orchid Nail polish colors — graphite, péridot and quartz Crackle nail polish Chunky funky bracelets — MeBands are cool & collectible Cool high tops, bold and bedazzled (Converse has an affordable line at Target) Funky jewelry — plastic bracelets Chunky rings Backpacks, multi-style and color Large watches Toms shoes — shoes that give back Retro sunglasses Trendy scarves (yes they are still in, and make great belts too.) Ballet flats Funky lunch bags — very eco-friendly. Think Green Feather earrings and hair accessories Crochet detailing Blazers Now, you might be thinking… hmm, I need this list, not my kids, but it can be for moms and their kiddos! (Oh, and just in case you don't know about hair feathers, you should… the trend moved from magazines, to Hollywood, to edgy women, and now to our kids!)
Source: noellesalon.com via The Real Housewives on Pinterest Now, let's get into some outfits. Here's the deal on where to shop… In case you missed the memo, department stores are back! I've read that, but I had to see it firsthand! JCPenney totally shocked me… My 9 year old LOVED the clothes and we did about 75% of our shopping there.
Source: jcpenney.com via The Real Housewives on Pinterest Macy's has some super preppy styles, but also plenty of retro looks as well. How happy do these catalog kids look? (hehe)
Source: macys.com via The Real Housewives on Pinterest I'm a layers junkie and this year all the stores are not letting me down. Now everyone knows that Gymboree is the king of too matchy matchy for me accessorized outfits, but did you know that their sister store Crazy 8 has some pretty cool fall looks? I love this outfit for my son Kade. Plaid shirt, cool graphic tee, and a puffy vest. I <3 vests!
Source: crazy8.com via The Real Housewives on Pinterest
How do you feel about the return of Converse? Ok, I'll be honest… I'm a big fan of a solid color Chuck Taylor with a pair of jeans. Last year Kenz was rockin' out a black pair, but we might go a little crazier this year. Not quite this crazy. I'm not a bedazzled kind of gal, but if your kiddos are, Converse has some amazing ones!
Source: seventeen.com via The Real Housewives on Pinterest
Now, what about if your kiddo has to wear a uniform?? I think they look adorable, but I know that kids still like to have some style of their own. The key to uniforms is accessories. Think belts, socks, hair bows, ties, and jewelry.
Source: gap.com via The Real Housewives on Pinterest Even though my preschooler doesn't wear a uniform, I plan to order her some adorable hair accessories from Blossom Bands! Remember Bethany from her guest post? Well, click on her button on the sidebar to check out the adorableness that I'll be choosing from.
Source: littlelovely.typepad.com via Amy on Pinterest Let's talk about socks for the little ladies. Little MisMatched has awesome socks! There was even a pair with sykscrapers on them!
Source: littlemissmatched.com via The Real Housewives on Pinterest I also found a fabulous tutorial to make some adorable embellished knee socks. Check these beauties out…
Source: alisaburke.blogspot.com via The Real Housewives on Pinterest There are about a million other cute trends, but I'm hoping you get the idea. Now, one last fashion tip… Don't let yourself be frumpy mom! This is the pot calling the kettle black, but it's something I at least try to work at. I work from home and have four kids. If that isn't a recipe for FRUMP, then I don't know what is. However, the days that I actually put an outfit on I feel so much better! I don't even mean fancy, I'm talking jeans and a tee if that's how you roll, but I'm convinced that I'm a better mom and wife when I'm not in my sweats all day. This outfit is simple and cute and I think the preschool moms would appreciate me showing up in this and not my sweats and the hub's old teeshirt.
Source: oldnavy.gap.com via The Real Housewives on Pinterest So, go throw on a fun mom outfit and do some B2S shopping! Let us know what you find and where you shop!
And now for the EXCITING NEWS… We were told this weekend that we were nominated as finalists for CBS News' Best Blog of the Year for Philadelphia! Insane right? To win the final honor of MVB, we need you to vote for us! You can vote once a day now through September 9th, so please vote and tell your friends and family to do the same!
Ladies-and the approximately 1% of readers who are dudes-, we have awesome sponsors. They are the ones who make the rest of our posts and projects possible. Not only do they support us, but they have some pretty cool stuff in their stores. We've rounded up some of favorite items for a cozy Fall season. Make sure you don't miss the discount codes and special promotions!
1. We are digging on this Antique Thread Display Drawer from Nachokitty. It could serve so many different purposes: jewelry organizer, craft supply organizer, or pretty display for your tiny treasures. Don't stop there, though. You should definitely take a look at their Etsy shop- I could browse their finds for hours!
2. I love this Industrial Table Lamp from Lucent Lampworks! I can see it snuggled up to some pretty Fall decor on a mantel or side table. Love. it. To get 10% off your purchase use the code EC2TENOFF.
3. We're heading into the holiday season, and it's always good to have small gifts on hand for teachers, neighbors etc. Stock up on these Premium Soy Candles from CJS Eco Chic in the mini 4 oz. and you won't ever have to worry! And oh man, the holiday scents are to die for!
4. We love using non-traditional materials for headboards! How about this fireplace mantel headboard? Not bad, right? Architectural Antiques is hands-down our favorite place for incredible salvaged materials to repurpose.
5. Did you see Mandi's Epic Room Makeover. She used the Nova Trellis, from Royal Design Studio in the bathroom and well, it is fabulous. As a thank you to their 10,000 FB fans, RDS is offering25% of all orders through Sunday with the code WELOVEU.
6. You've all been waiting for Monica's big patio reveal, and tomorrow, the wait is over! They couldn't have done it without Stone Depot, and their super helpful staff. Now's the time to build an outdoor fireplace or firepit, and they guys at Stone Depot have everything you need to make that happen!
7. We can't seem to control our love for photo canvases from Canvas People! Right now you can buy a 11 x 14 Canvas for only $15 from Canvas People and $1 of every order will be donated to help fight Breast Cancer! If you need some inspiration for what to put on a canvas, check out this post! 8. Not gonna lie, once the holiday season starts (right after Halloween, in my opinion), I often need a reminder to stop and be thankful for all that I have. This 1 Thessalonians 5:16 Print from Red Letter Words makes a perfect visual reminder of that very thing…and it looks cool, too. Check out the fun new turquoise color, too! They also have a really fun, very sweet Print of the Month focused on the value we women have, and you will receive 20% off this entire section through the end of this month. 9. We love Moo & Puppy digital paper so much, we even wrote a post about all of it's many uses! I'm really liking the fall-ish colors of the Retro Digital Scrapbook Paper. Use the discount code EC2blog20 for 20% off your order!
10. We all know that Thirty-One Gifts has cute and affordable bags, but the one item I've had my eye for over a year is this small Magazine Basket. I love it's shape and versatility! Plus, you can personalize all baskets for only a few dollars more. Right now, mention EC2Blog when you order any basket and get any second item in the catalog 31% off. To place your order, click here and shoot an email to Amanda with your order.
11.Liberty Thrift Store is hands-down our go-to thrift store. Did you know that we found the chair we reupholstered for the Nate Show there? You never know what you'll find thrifting, but it's always fun! -------------------------------------------------------------------------------------------------------------------------- Wait, one more thing! We're happy to announce that we're accepting new sponsors! We have a few openings that we would love to fill, so if you have a business that you think we'll love and can help you promote, send us an email at eastcoastcreativeblog@gmail.com! Seriously, what better way to sell your stuff than to have two loud, passionate, crazy women on your side?! For all the nitty-gritty info about our sponsorship opportunities, click here. -------------------------------------------------------------------------------------------------------------------------- Have a great day, and be sure to stop over and say hi to our wonderful sponsors!
{If you didn't hear, The Real Housewives of Bucks County are now East Coast Creative (Get the story here). You'll still be getting all the DIY, Design, and Monica & Jess that you love, but change your favorites to www.eastcoastcreativeblog.com Thanks!}
You might remember that one of my 2012 goals was to make our family room reflect my style more this year. I still am convinced I don't really have a style… I more or less, just take lots of things I like and smush them all together, hoping it works out okay. Recently, I took one more step in the right direction for the room.
I was browsing on Etsy a few weeks back and came across a shop I loved! Project Type has so many graphic art prints that I immediately fell in love with. This one in particular caught my eye.
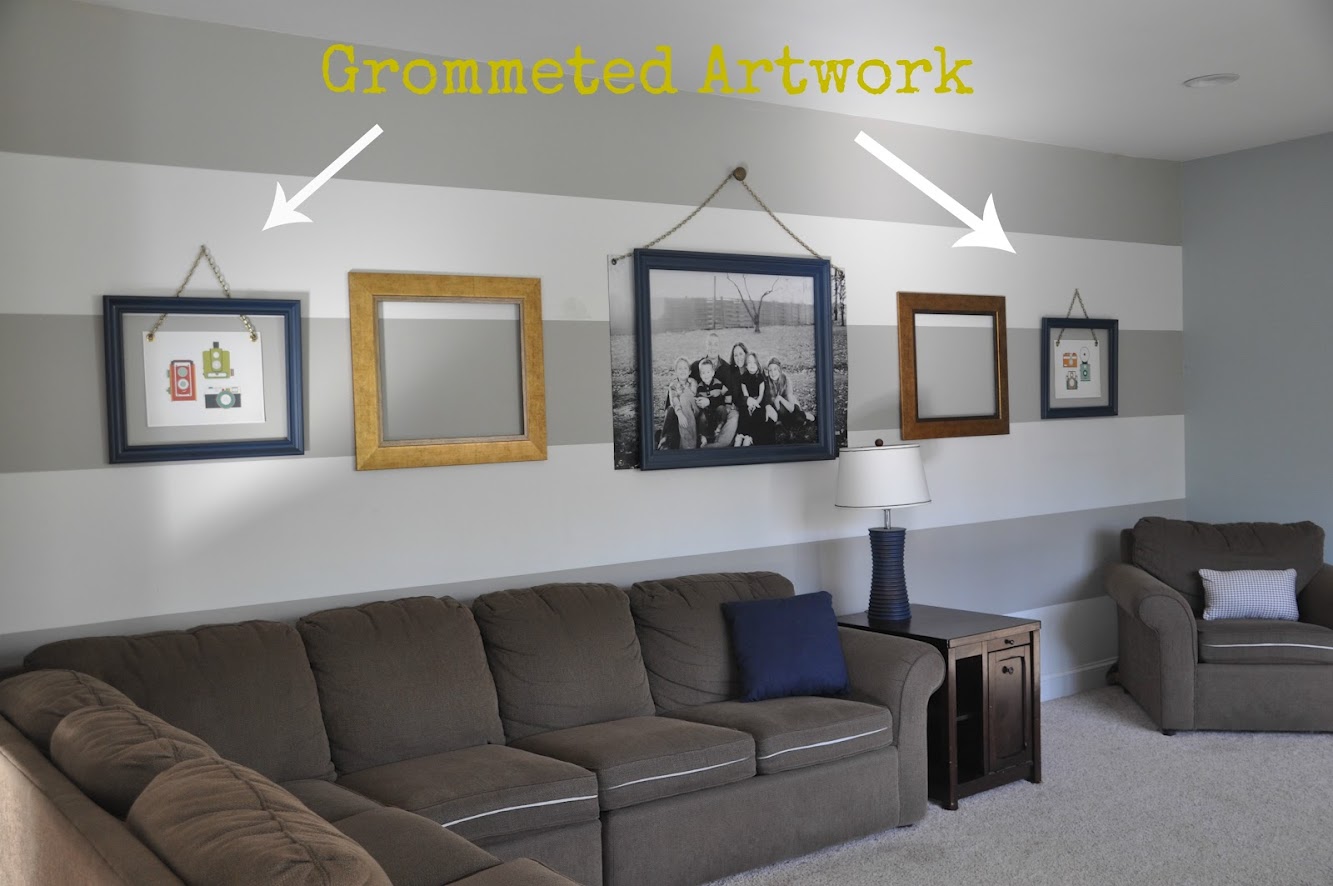
I had been toying around with the idea of vintage cameras in our family room and this picture was too cool to pass up. I contacted the artist to see if I could have a few custom tweaks made (it was vertical and I needed horizontal) and she said YES! I was so stinkin' excited when she agreed! I ordered two prints and honestly even the packaging they came in was super cool! Now, you might remember what was on the wall already. My ginormous family picture with the smaller frame…
Well this time, I was going for the reverse. Tricky aren't I? Bigger frame smaller picture. Once again I used my prized possession, AKA grommeter from Nate. I'll admit I was a tad nervous putting holes in fabulous artwork, but I wanted it to have the same feel as the large print. Want to know how to use a Grommeter??
I keep my grommet tools in the little bin Nate gave me. Who knew one could love Tupperware?
Take one of the female grommets and determine your placement. I traced it with a pencil (a very fancy pencil I might add!)
Next place the cutting tool (might have an official name, but I don't know it) on your traced circle, and put the mini block of wood under it. The wood comes with your kit.
Give it a solid pounding with a hammer and you have a nice little circle cut-out
Pop the male piece through the opening. Make sure the pointy end is on the back of your artwork.
Now start stacking. Add the female part to the back…
Here' the order…The large metal ring goes on the bottom (part of the tool kit), then the male grommet, then paper, then female grommet, then the big mama tool (that's the really official term). Now Hammer, Hammer, Hammer. (Don't do it on your granite counter. I took mine outside in the garage)
Ta-da! Perfectly adorable grommet!
I took my art to the wall and hung it with plain nails. I'll use decorative ones to cover 'em up.
I added my chain, which again only cost me about $1.45 at Lowes
And vioila! I'm also going to add a fun door nob to the peak of the chain. I didn't quite get to Architectural Antiques this weekend as I planned to. Now, here's the question of the day… What should I put in the open gold frames??
Here's the room to give you the full picture…
Side note: Does anyone else have a weird husband that flips the cushions backwards? He does it when we don't have company over because the kids make a mess of the cushions. Sometimes I forget and then it's an awkward, mad rush as people are walking in the door. Weird. I know. So let me know what you think of my retro camera art, and what I should do to finish off this wall!
In less than two weeks, one of my best friends is getting married. It happens to be on the same day as the Swedish Crown Princess Victoria is tying the knot and I'm a little frustrated with that, actually.
I would have really liked to see the chaos live (on TV) but of course my friend is a thousand times more important! Besides, I suppose they will show reruns for months and months to come so it's cool.
Anyhow, in the spirit of weddings, here's some beautiful pictures for you.
Well, while you're reading this, we're probably at the Nate Berkus Show trying hard to look cool and not say something dumb doing our thing. So, we wanted to take this time to give a huge thank you to our sponsors this month! We have enjoyed working with these fine ladies, and are thrilled with the services and product they offer. Would we advertise a product we didn't like/wouldn't use ourselves? No way. So, here they are in no particular order. Give them some love, ok? And tell them the Real Housewives of BC sent you.: )
Amanda with Thirty-One Gifts is pretty darn awesome. And if you haven't heard of Thirty-One Gifts yet, what rock have you been hiding under? Who doesn't want a super fun, trendy and cute customizable bag or purse? Seriously, every single one of my friends has the Retro Metro bag.
Order between today and Sunday, and get FREE SHIPPING! Click here, and email your order to Amanda with the code RealHBC as the title. And I just have to mention, that if you're looking for your dream job with great incentives, then you probably want to talk with Amanda. In her first year, she's earned a trip to Disney World for her whole family, a trip to Cancun for two and a laptop! Jealous? Call her to chat about this great opportunity! _____________________________________________________________________________________
Not only is Jane a great friend, but she is an amazing Pampered Chef Consultant. I can't even tell you how much PC has changed my cooking experience (and Monicas too!) We both swear by the baking stones and I loooooovvvve my garlic press. That thing is like gold in a household that loves garlic!
Get FREE SHIPPING on all orders (now through Sunday) and a bonus of a FREE Mango or Apple Wedger with a purchase over $60! (Trust me, that's easy to do!: ) Click here to contact Jane and place your order. Remember to mention the code RealHBC in the title of your email. _______________________________________________________________________________________
Bethany's business is absolutely booming, and it's no wonder why. Her headbands are out-of-this-world cute. And c'mon, you know your daughter/granddaughter/niece would be the most adorable thing in the whole world in a Blossom Band.
One of my favorite products Bethany offers is a Blossom Band of the Month subscription. Talk about the gift that keeps on giving. You get an adorable band once a month! It's crazy affordable and her style is just to die for, so you know it's going to be something amazing coming each month.
As an incentive, we'll pick one random order and make it FREE if you order with the code RealHBC between today and Sunday. Click here to see the Blossom Bands collection and to place your order. _______________________________________________________________________________________
If you're looking to buy or sell a house, Melanie is your girl! She is super nice, has a great personality, and TONS of experience. I would absolutely trust her with helping me make one of the biggest financial investments in life go smoothly.
Melanie is listing this gorgeous home now in, (do I even have to say it?) beautiful Bucks County! Get a FREE One-year Home Warranty when you mention RealHBC. Click here to get in touch with Melanie. You won't regret it! ________________________________________________________________________________________
Thanks again to all of our sponsors for helping us keep doing what we're doing! Say a prayer for us today! We sure would appreciate it. And we can't wait to share all the juicy Nate Show details with you here on the blog. Have a great day!
PS. Help us win the Most Valuable Blog award by CBS Philly by voting here!
You all are familiar with marquee signs, right? They're those lighted signs that you see outside of old movie theaters, hotels or casinos in Las Vegas.
Source These signs are definitely a retro throwback, but have come back as a home design trend in a big way! Adding one brought whimsy and fun to this kitchen and dining room that otherwise lacked both. These beauties aren't only meant for kitchens, though! They would look fabulous in a kids bedroom or playroom, a fun family room or even a game room. The best part about this project is that you can use absolutely any word that has meaning to you!
We've actually seen a bunch of tutorials for marquee signs using 3-D cardboard letters, and honestly, we toyed around with the idea of using them too. But we knew we wanted this to be a permanent fixture in her dining room so we didn't want it to be flimsy or break after awhile. Using chipboard letters (wooden would work too!) from Michael's on top of a plywood frame made this piece one that will last. To create the box that your letters attach to, we used a piece of plywood and 1x2 pine boards. Cut the plywood to your desired size and the cut two horizontal 1x3’s and two vertical 1x3’s. Attach those pieces to the back of the plywood with a nail gun, creating the frame. We painted our plywood with the same color as the kitchen cabinets (Summer gray by Valspar) to tie in with the rest of the room, but feel free to go as bright as you want. It's your project, after all!
Decide how many lights you’d like on each letter and mark their placement. Our bulbs were evenly spaced.
Drill pilot holes where on each mark on the letters. Doing this allows the larger bit to go through the letter without splintering it, so don't skip this step!
Using a large bit the slightly larger than the socket of the light bulbs, drill larger holes through your pilot holes.
Go ahead and clean off those letters and spray paint them in the color of your choice. We LOVE Rustoleum's spray paint in Blue Lagoon (it's the color we used on our giant shaped frame)
Once your letters are dry, lay them back down on the plywood and figure out the spacing you want. Draw a small “x” in each of the holes and then drill a hole in each of the “x’s”.Place a few dots of liquid nails on the back of the letters and align the letters over the holes in the plywood. Let dry completely. Thread the sockets through the holes and then screw the bulbs in. We used these string lights from Target- there are about 25 bulbs per strand, so plan accordingly.
We chose to add an outlet behind the marquee sign to hide the cord, but you could easily drill a small hole in the bottom of the frame to pull the cord through. If you paint the cord the same color of your walls, you'll never even notice that the cord is there!
We think this sign is pretty darn awesome and Linda has since told us that it inspires her to be more creative with her cookies and cakes business!
Haven't seen this episode yet? Watch the whole thing online HERE!
Also, we're always adding new Knock It Off projects to our DIY gallery, so be sure to check those out, as well.: )
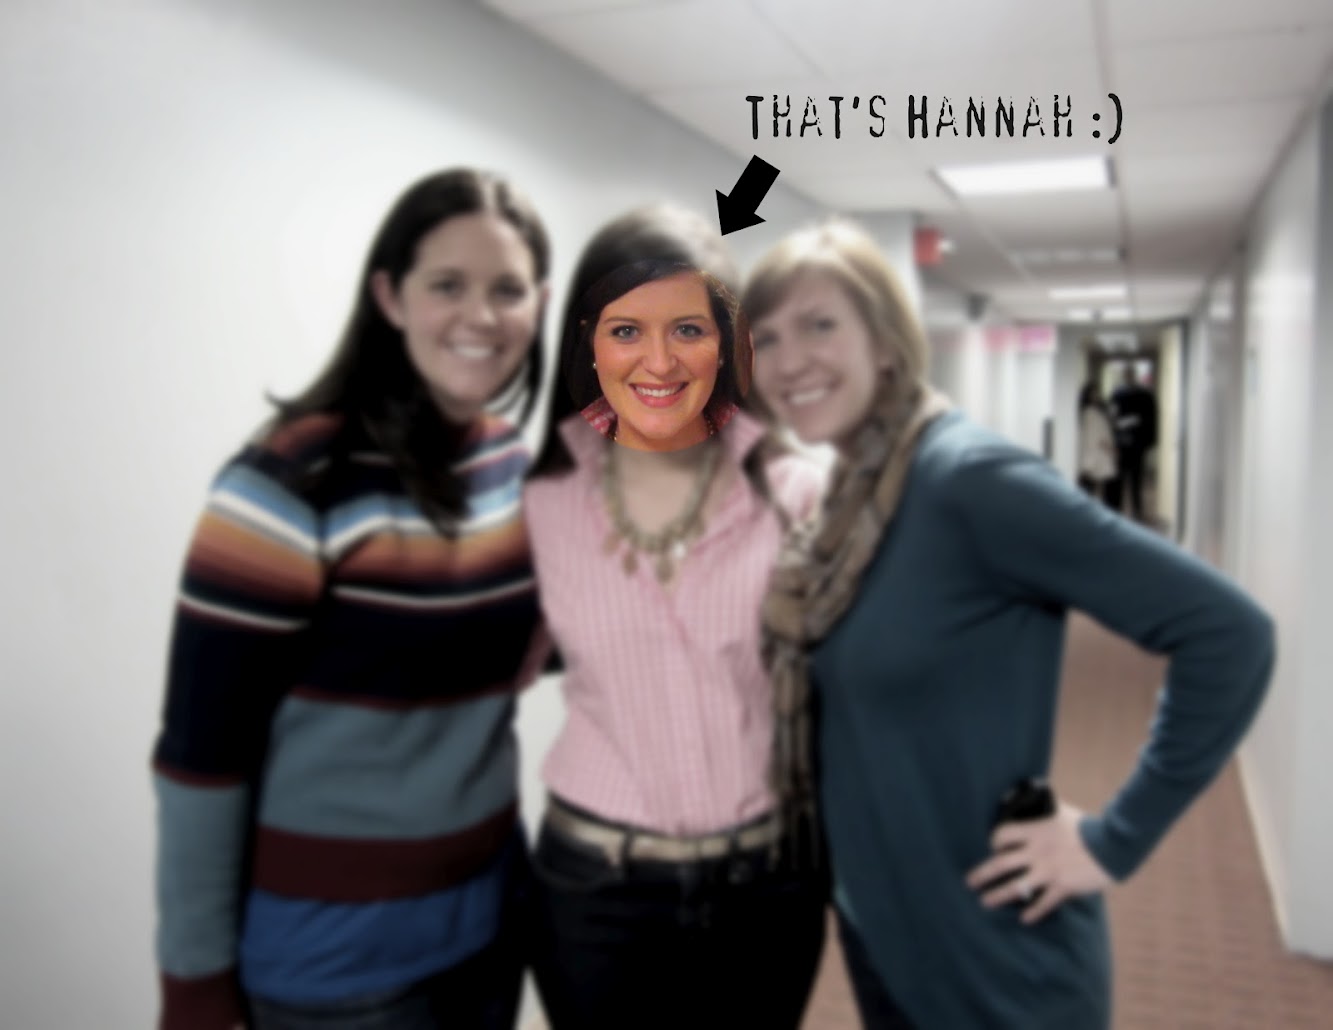
First of all, our guest poster today, Hannah, is stinkin' adorable. She is the only blogger we've met IRL, (in real life) and totally exceeded our expectations! Funny story: When we met Hannah, we were in NYC getting ready for our Nate Show taping and she had just finished hers. Needless to say, she looked amazing, and we looked like we had just rolled out of bed (what can we say? We hadn't been to hair and makeup yet!:) Take a look at what I mean:
Note: Faces appear blurry to protect the innocent. Secondly, Hannah is soooo talented. She has been featured twice on The Nate Show and has impeccable taste. She chronicles her designs and awesome street finds in NYC on her blog,Hannah Kate Flora. (And ohmygoodness, you HAVE to see thekitchen table she just made! Unbelievable!) So, without further ado, here she is!
Hi there! I'm so thrilled to guest blog for my sweet new friends, the Real Housewives of Bucks County. I met these darling girls backstage while we were filming seperate segments for the Nate Show. I told them, cheesy as it is, I'm so encouraged by them! Such strong, faithful, clever women! I racked my brain on what to post and was politely reminded by Brooklyn Boy, my soon to be husband, that I should write about Street Merch — left behind furniture found on the streets of New York (or anywhere for that matter) that just need a new life! You see, I'm a Texas girl who's lived in New York for the past 4 years. It's always been important to make my home (i.e. tiny apartment) feel warm, personal and lived in, but I haven't always had the budget to go crazy. But I noticed something living here, when you live in New York and move apartments or get rid of things, you don't have a car to throw your stuff in for a Goodwill trip. No sir. The street is your own personal Goodwill. Whatever you can't fit in your apartment goes to the curb. To put it plainly — this means you can find amazing pieces on the street, with nothing wrong except that there wasn't room for it in its previous home. There's one piece I want to tell you about in particular — the bar cart.
I had just wrapped an interior design job on the Upper West Side, when I saw this on the street curb.. and this cell phone conversation with my mom ensued: Hannah: Well I just had my final meeting with Erin and it went really great! Mom: Oh good! I can't wait to see more pictures. I'm glad everything worked out! What are you doing now? Hannah: Me too! Oh, I'm just walking home and wait… what is… hold on mom… Mom: What is it? Hannah: Well I think… hold on, let me move the bags of trash… Mom: What??? Hannah: Street Merch. Mom: Oh! What is it?? Can you take a picture? Hannah: Yea. Hold on, let me just get this bag of trash moved over. Sick. Ok. It's a retro looking bar cart. Or a really crazy overhead projector cart thing. Hm. Shoot. Should I get it? Mom: Well?? Maybe. Do you see a cab? Hannah: No. I have to get it, don't I? Ughhhhhhhh. (At this point, my mom is dying laughing at me. These Street Merch phone exchanges happen all the time between us.) Mom: Hahaaaa. Just get a cab! (I rustle around and end up manhandling the cart.) Hannah: Well now I've picked it up and am walking down the street. Damn Street Merch. I feel RIDICULOUS!!! Mom: Hahahahahahahahahahaha Hannah: Why do I always do this?! I look like a freak carrying this cart under my arm, down the street, in the freezing cold, while I'm on the phone. Mom: Hahahahahahahahahahahahahahahaa Hannah: Goodness gracious. TAXI!!!!! gottagoloveyoubye!!!
And here's my cramped view of the bar cart on my lap in the cab. No big deal. Anyways — I believe that everything has a purpose and I knew this piece had potential. My plan was to revive it with new paint & fabric! First step was to prime it. Don't worry about the sketchy area I'm spray painting in — you have to make do with cramped cement courtyards when you live in Manhattan.
I chose Navy Blue Spray Paint in high gloss. I gave it two even and thorough coats of paint.
And here it is all dry and sitting in our foyer! Apologies for the iphone pictures, these images are pre new Canon camera.
For the two shelves of the cart, I decided to use some preppy and bright Robert Allen fabric from fabric.com.
After measuring the fabric to fit neatly inside each shelf, I painted a coat of Matte Medium (which you can find at any craft store) directly onto the shelf. Then I laid the fabric onto the shelf and painted a 2nd coat of Matte Medium directly on top, wipping excess clean. I made sure there were no bubbles and the medium was equally distributed.
Once totally dry, I loaded the cart up with goods!
This bar cart has taken on many different forms — sometimes we use it as a side table and sometimes we use it for drinks and treats during parties! It's very functional, and has casters that make it easy to move.
Thats it!! Bonus: This piece was featured on my first Nate segment which you can watch here! Thanks Real Housewives of Buck's County! Loved visiting. ------------------------------------------------------------------------------------------------------------
That looks awesome, Hannah! Thanks so much for sharing your project with us. And best of luck with your wedding and new married life: )