My Creative Blog [Search results for Holiday Time]
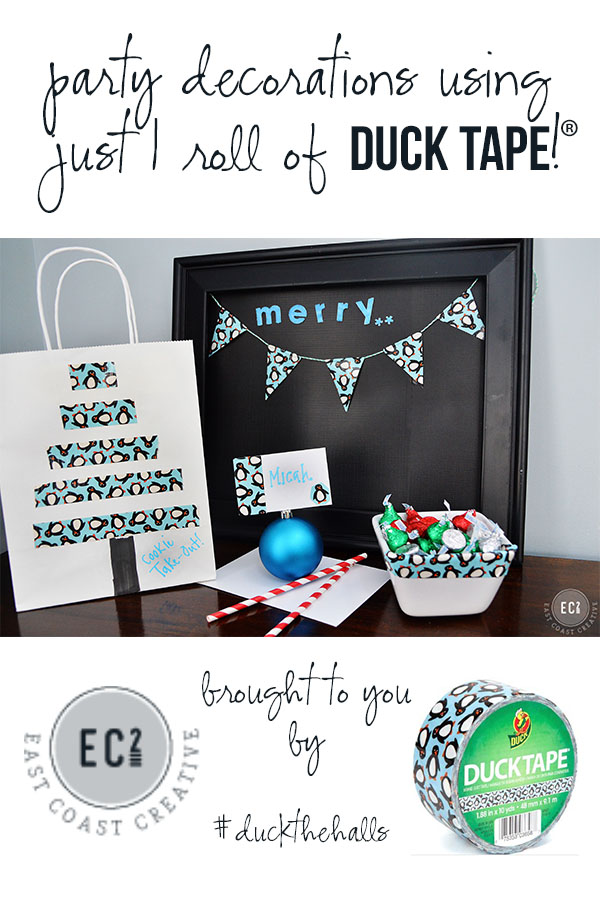
Decorate for a party using just 1 Roll of Duck Brand® Tape: Cookies & Carols
Holiday Your Way with Bed Bath & Beyond
Wood Grain Christmas Countdown 2012

Jessica's Christmas House Tour 2012

Last Vestige...
Vintage Halloween Postcards

Christmas Shopping, anyone?

Nate's 12 Days of Holiday DIYs {Day 12 Monica's Details…}

A Pinteresting Home! {Meet Kelly}

Nate's 12 Days of Holiday DIYs {Day 7: Great Minds}
A Green Nursery

October Sponsor Love

Nate's 12 Days of Holiday DIYs {Day 1}
Iconic photographs

Fabric Thankful Tree Canvas
Nate's 12 Days of Holiday DIY's {Day 4}
These are a Few of our Favorite Things {Sponsor Spotlight}

Memorial Day Drinks!
Nate's 12 Days of Holiday DIYs {Day 10 Pillow} & Fab Find
Our Vegetable Garden


