My Creative Blog [Search results for Entry way

  • Match that Blogger! {A contest and Ryobi Father's Day Giveaway}

    Match that Blogger! {A contest and Ryobi Father's Day Giveaway}

    Gooooood morning, friends!We’ve got a special surprise for you today… who doesn’t love a little friendly competition and GIVEAWAY?!?! ------------------------------------------------------------------------------------------------------------
    The premise of this contest stems from the fact that all of us are guilty of Pinning an idea without ever checking the source… guilty as charged! But there are likely pins on your boards that are from your favorite bloggers, and you don’t even know it! (Are we right? C'mon, admit it.) And that’s where the contest comes in:

    Here’s the line-up! Such an amazing group of bloggers that we wrangled!!

    And below are projects from each blogger (including us!) that you’ve likely seen viral all over Pinterest!

    Before we get to the rules, can we talk about how RYOBI is giving away $800 worth of POWER TOOLS? Just in time for Father’s Day!

    Perfect timing if you ask us.

    $400 RYOBI Giftcard goes to our randomly selected winner, and $400 RYOBI Giftcard goes to the first person to correctly match up all 16 bloggers with the correct projects! (there will be a randomly drawn winner in addition to the winner of the contest, so you should enter both ways!)
    When you click on the Contest Form (at the bottom of this post), it will direct you to a page that will show you an image of the project, and a drop-down menu of bloggers. You just go down the line and select away! Some projects you probably know already, but some you may need to snoop around blog-land to find!We call this blog-hopping, and it’s highly encouraged in the blogging world.

    Smile

    Here’s the links to the home page of each blog (in no particular order). Now get busy!

        1. Sawdust and Embryos
        2. All Things Thrifty
        3. Interiors by Kenz
        4. Whatever Blog
        5. Home Stories A to Z
        6. Sarah M. Dorsey Designs
        7. Twist Me Pretty
        8. The Idea Room
        9. DIY Village
        10. Pretty Handy Girl
        11. Domestic Imperfection
        12. One Good Thing
        13. Kara Paslay Designs
        14. Nine Red
        15. Vintage Revivals
        16. East Coast Creative

    Entry #1 (Randomly drawn) ‘Like’ us ALL on Facebook, and let us know that you did on the Rafflecopter form below! Entry #2 (Contest!) Click below to match up each blogger with their amazing project!

    a Rafflecopter giveaway

    Click Here!

    • One entry per person, per entry method.
    • Winner of matching contest will be emailed, and publicly announced on Facebook.
    • Winner of random-drawing giveaway will be announced on Father’s Day here on the blog, as well as Facebook.
    • Be sure to hop over to RYOBI Nation and check out some amazing inspirational projects!
    • Be AWESOME today!! (that’s a given)

    Ryobi Nation — leaderboard1[6]

    This contest/giveaway is in NO WAY affiliated with Pinterest or Facebook, and we hereby release them of any liability related to this promotion, the receipt of prize winnings, etc. The giveaway prize has been generously provided by RYOBI Nation. All prizes will be mailed by the sponsor and all participating blog owners are not held responsible if the prize is not fulfilled. Giveaway starts Monday 6/10/13 at 5am est and ends at midnight on Saturday 6/15/13. Alternate entry available by sending your entry via email to wehopeyouwin@gmail.com. Winner will be announced on Sunday 6/16/13 and will need to respond within 48 hours to claim their prize, or another winner will be chosen.Winner must be 18 years of age or older and a US citizen in order to win. May the force be with you.
    Good Luck, guys!! Thanks for playing along!

    jess
    Monica
  • 1stdibs, a New Record!

    1stdibs, a New Record!

    No, 1st dibs didn't make a new record selling anything, at least I don't think they did? Congratulate me, this is the first time I have ever made it through the entire new listings on 1st Dibs in one day. As anyone knows that's not an easy feat considering there are typically 18 pages of mouth watering, eye dropping, goodies galore to peruse! Such fabulous stuff and I can't afford a single thing! Then again my birthday is coming up in September and for those of you needing some gift ideas I've gone ahead and chosen a few morsels'''

    offered by Alexander Westerhoff Here
    These 17th century Baroque Marble Corbels would look perfect on either side of my fireplace and who doesn't love angels? But then again I'll need a nicer fireplace surround to go with the corbels so toss this in too please. Then again my ceilings will need to be raised but that's what a wish list is for huh?

    offered by M. Naeve Here
    Love stone fireplace surrounds and this 18th centry French job fills the bill, in fact maybe I should ask for two of these, the other would look amazing in a bathroom!

    offered by Karla Katz Here Italian gilt Lantern
    My entry hall fixture really needs some serious help and I thought this would be the perfect fix!

    offered by William Laman Here
    I just love this Swedish Baroque table it would go perfectly in the entry way as well, I need to find a mirror to go over it and oh yeah, I need a bigger entry hall!

    offered by Lotus Gallery Here
    This Empire silk velvet pillow is right up my alley, anyone who knows me knows how much I love anything orange! Throw in some metallic anything and I'm yours!

    offered by Watkins Culver Here
    I will always accept fabulous 18th century paintings with angels but when they come with an outstanding frame, Perfection!
    To round things out I think I should pick a little something for the outdoors but then again these urns are stunning and might look great in my dining room.

    offered by Rose Uniacke Here
    I was utterly amazed to have noticed I made it thru all the new listings and then I looked at the time and wasn't to pleased with myself since I didn't get a single thing done today. But it was a nice rainy day here in New Hampshire and we haven't seen rain in two months so I think I'll count this as my celebration for the rain. What do you wish for on rainy days?

  • Welcome {To My Entryway}

    Welcome {To My Entryway}

    While my hubs finishes up the stuff I don't know how to do (ie: drywalling, adding corner bead etc) in our kitchen, I've been busy trying to make myself feel better about the disaster inside my house (see kitchen demo post here) by prettifying my entry way! My sweet mother-in-law gave me a gift card to Home Goods for Christmas, which is heaven on earth for a girl like me. No joke- I've been there three times in the last week and a half. Anyway, I was so torn about what I should get with that precious gift card- because you know there are at least a million things in that store that were calling my name- but kept coming back to tihs gigantic letter"J". Our last name begins with"J", in case you were wondering. So, finally, today I went ahead and bought it, thinking it would be perfect for the wall in my entry that housed my advent calendar in December.

    This bad boy is made of some kind of metal substance but had a cherry, wood-grain finish that I did NOT like, but I knew I could spraypaint it and all would be well with the world. (What can't you improve with spray paint and hot glue, I ask you?)

    See how large it is in comparison with my hand?

    I picked up two metallic spraypaint finishes from Lowes (right before my son face-planted on the floor and received a nice, fat lip and bloody nose. Picture me trying to clean him up in the drywall isle full of construction-type men). I sprayed it first with the dark bronze paint, and then lightly sprayed it with the copper paint in concentrated areas. Then I went back over it with the dark bronze to make it a bit more authentic.I was trying to achieve a rusty, architectural letter look, and I think I achieved it!

    I wish you could see it in person, because it's has a lot of depth that just isn't showing right in pictures, but you get the idea. Then, using the hardware provided, I hung it on the wall facing the front door. Don't worry- it actually is level, it just tricks the eye with that curved shape!

    Right away, I felt like it was missing something, don't you?

    I love the letter, but really think it needs something to make it pop. (Ugh, just ignore that mess of a kitchen back there) I'm thinking I could do stripes on just that wall like this:

    Source: alittlelovelyblog.blogspot.com via Cassandra on Pinterest
    or do a stencil on that wall like this:

    Source: apartmenttherapy.com via Stfn on Pinterest
    Except a lot less bold, because you know, I'm the queen of neutral. This one is a lot more up my alley:

    Source: isabellaandmaxrooms.blogspot.com via Erin on Pinterest
    I've also thought about doing a gallery wall of family pictures around it, stenciling our names in a very subtle color around the"J", framing it with chunky trim and the list goes on.
    Help a girl out! Any ideas for me?

  • Adios Amigos Day 3 {Living with Lindsay}

    Adios Amigos Day 3 {Living with Lindsay}

    I'm so dang excited to introduce you to today's guest blogger… seriously, can you feel how excited I am all the way from Mexico?? Let me introduce you to Lindsay Ballard…

    As Tom Cruise would say, Lindsay"had me at layered frames." It was the first project of hers that I'd seen and seriously, I spent the next two days of my life reading through the rest of her blog, Living with Lindsay. She recently completed a crazy-cool master bedroom makeover that pretty much went viral in the blogosphere and on Pinterest. Lindsey, we're so flattered to have you here and I'm thrilled we're becoming blog buds! --------------------------------------------------------------------------------------------------------------
    When Monica asked me to put together a post to share with you guys while the ladies were on their Mexican vacation (¡Olé!), I think I did a few high kicks. You see, I swear that Monica and I were originally fraternal twins separated at birth, and the RHBC gals are some of my favorites on the internet. Their combination of wit and style is something we all aspire to, right? Ever the Teacher's Pet, I really wanted to wow you (and them!) with a fun post. I racked my brain for days to come up with the right project to share. Then, it hit me (or I hit it, because I accidentally banged a ladder into it) that I knew exactly what project that should be. This is a design that I put together late last year, but it quickly became one my favorite projects ever…
    What do you think of when you hear the word 'drum'? I'd assume that most people think of their kids loudly playing a drum kit in the garage, high school football halftime shows, or their favorite rock and roll band. But, most people aren't us, are they? We DIYers and home decor obsessed people probably have a drum shade spring to mind instead. Or, at least I do. I've been rolling around the idea in my head for the past few months on combining the best of both versions of drums. I'm glad that I let my mind wander down that path — it's a lot of fun when I can dream up something pretty farfetched that ends up becoming reality.

    Living With Lindsay Pendant Drum Light Fixture

    Creating this fixture was actually a pretty simple process once I figured out what to do. I put together a tutorial so that you could do it, too. DIY Drum Pendant Light Materials Needed: Used Tom drum Short piece of scrap wood 4 finishing nails Drill Jigsaw Pendant light kit (I HIGHLY recommend the cloth cord kits from Shanell's ) Scissors or X-Acto knife, if needed Canopy 1. I bought a used Tom drum off of Ebay for under $30 shipped. I'm sure I could have found a better deal at a thrift store or pawn shop around town, but I knew what I wanted and was willing to pay a little extra so that I didn't have to drag the kids all over town. This Tom is 12 inches tall and 10 inches wide. Any size will likely do — you'll just want to make sure it will fit in your space.

    Living With Lindsay Pendant Drum Light Fixture

    2. I removed the top and bottom of the drum by unscrewing the screws that hold it together. I was able to unscrew it with my fingers, but you may need a really small socket or"drum key." Please note, I know not one single thing about drums, and I'm sure the top, bottom and little screws have a name. I'm going to just call them my own terms so that other non-musician DIYers, such as myself, can more easily understand the instructions. The top and bottom will separate from the chrome ring.

    Living With Lindsay Pendant Drum Light Fixture

    3. I cut a piece of scrap wood so that it would fit tightly inside the drum without distorting its shape. I didn't curve the edges; I just cut it straight across. On either side, I hammered in 2 finishing nails to hold it in place (drill small holes first to make it easier). In the below photo, I hadn't hammered them in all the way so that you could see them more easily in the photo. Obviously, hammer them all the way in. I colored the nail heads black with a Sharpie marker since my drum is black, but they are pretty well hidden by the chrome rings once you put the drum back together, so you might not have to worry about that.

    Living With Lindsay Pendant Drum Light Fixture

    4. Once the strip of wood was in place, I needed to create a slot for my light fixture to thread through. I drilled three holes that were roughly the diameter of the the piece I needed to thread.

    Living With Lindsay Pendant Drum Light Fixture

    I used my jigsaw to connect all three holes into one long slot. The reason you need to do this is to be able to balance the drum. There is a clamp on the side of a Tom that attaches it to a drum kit, and it creates more weight on one side of the drum. The drum doesn't hang straight from the center, so a slot gives you the ability to slide the fixture around to figure out its balance point.

    Living With Lindsay Pendant Drum Light Fixture

    5. Thread your fixture through the slot. You can pick up a light kit at a home improvement store, which you will hang by a wire and chain. OR, you can do what I did and use one of the Pendant Light Kits from Shandell's. Instead of having the ugly chain, these kits are made from cloth cord. They come in several colors — red, gold, brown and putty — and in either nickel or brass finishes. These kits are $29 each and I couldn't speak more highly of them. They definitely give a much more finished and vintage look to a fixture.

    Living With Lindsay Pendant Drum Light Fixture

    I have a 60-watt blub in the fixture, but that could vary by project. You will need to test it on your own drum, but mine does not get warm to the touch at all, even when left on for many hours. 6. Replace only the chrome rim on the top of your drum (where the light fixture is). You may find that you need to cut (with scissors or an X-Acto knife) the little silver ring off of the what was then the bottom head (they part you don't play) and put that under the chrome rim. You'll see what I mean when you start to put it back together — you want the top to be open, but you may need that silver ring as a spacer in between the drum and the rim. Flip your drum over and attach the head (the part you actually drum) and rim to what is now the bottom of the drum. You can just screw the screws back in with your fingers.

    7. Hardwire your new fixture to the ceiling. You'll want to buy a light canopy to hide the wires. I got mine at Home Depot and spray painted it chrome. I hung my new drum pendant light in a small area of our entry way. I could not possibly be more in love with its quirkiness and originality. I bet you will be the only one in your neighborhood with this light fixture!

    Living With Lindsay Pendant Drum Light Fixture

    My favorite part about it is the amazing light it throws off at night. There is an almost ethereal glow that comes through the drum head, and the light that shines on the ceiling really highlights the fixture.

    Living With Lindsay Pendant Drum Light Fixture

    And yes, I totally bribed my dog boys with treats to sit right there. I sure love those crazy mutts, even if their constant barking makes my head feel like I'm actually living in a drum! So, what do you think? Does the term drum shade have a whole new meaning for you now?

    jess
    Monica
  • only the best for you....a giveaway!

    only the best for you....a giveaway!

    This giveaway has now ended...
    Thanks to everyone who entered!
    Happy Monday, everyone! I am so excited to announce that my friend Monika of Splendid Willow and I have teamed up to offer you
    a Perfect & Splendid Giveaway!
    This is my very first giveaway here, and I am so thrilled...
    You all know Monika,

    for her creativity, originality, and for her beautiful home.

    As a native Swede now living in Seattle, Washington, Monika draws from her Scandinavian roots for inspiration and design ideas. Not only is Monika a talented decor enthusiast; her eye for style extends to fashion as well. If you haven't already, take a look at Monika's newest venture...

    Splendid Willow Avenue , an on-line boutique, carries the high quality and fashionable rain and lifestyle gear of Danish designer Ilse Jacobsen.

    And from this fashionable line, Monika has very generously offered a pair of Ilse Jacobsen rubber boots, considered design icons in Scandinavia!
    These high-end boots are handmade in Europe and are just starting to get into the U.S. market in a serious way. They are stylish, warm (lined with cotton fleece) and designed for long hours of walking in rain and cold weather.

    the 'perfect gray' boot?
    This Perfect & Splendid Giveaway is for a pair of Ilse Jacobsen's stylish rubber boots, any model, size and color! (The tall boots retail for $179 + tax.)

    three different models to choose from tall, mid, and short
    The giveaway is open to U.S. and Canadian residents only.
    To enter:
    1) Become a follower of A Perfect Gray
    2) Go to Splendid Willow Avenue and have fun looking at the boots (and the rest of the gear)!
    3) Leave a comment to this post telling us which color you pick. (You can get all models in all colors.) Please make sure you leave your name and e-mail address, especially if your comment does not link to a blog.
    For additional entries (please, make sure to comment for each entry):
    a) Tweet about the Perfect & Splendid Giveaway
    (1 additional entry).
    b) 'Like' Splendid Willow's Facebook page.
    (1 additional entry).
    c) Mention it on your blog (2 additional entries).
    There is a maximum of five entries per person.
    This Perfect & Splendid Giveaway ends on Monday, March 14th at midnight, Eastern Standard Time.
    Our winner will be chosen using Random.org and will be announced on Tuesday, March 15th.

    Well, looky here....we caught the lovely Paula of Two Ellie sporting her camel Ilse Jacobsen boots!
    Please join me in thanking Monika for...

    Good luck, everyone!

  • Patio Furniture Update on a Budget! {and a giveaway}

    Patio Furniture Update on a Budget! {and a giveaway}

    The weather is finally warming up and I feel like summer is right around the corner! I thought I'd invite you over to my awesome yard and beautiful patio furniture! Doesn't it look welcoming and just scream, let's drink some lemonade?

    table before

    Oh, and how rude of me, I need to offer you a comfy seat!

    IMG_0345

    No… you don't want to come? You don't want to get rust all over your clothes? Hmm…
    Okay, so clearly I had two choices… buy a new set or figure out an update on a budget. You may or may not know that I have a BIG project up my sleeve (a new paver patio coming soon!) so I didn't want to spend much $$$ on the table and chairs. I turned to my go-to solution… Spray Paint! Looking a wee bit more inviting wouldn't you say?

    table after

    Here's how the transformation happened… First, I removed the legs of the table. Not sure it was ever meant to come off, but after removing some screws and jiggling it a bit we had it off. This would allow me to paint the base and not the underside of the glass.

    IMG_0359

    Next, I needed to cover the glass top, so it didn't turn red. I turned to Scotch Blue painter's tape. If I have a job where I need the tape to really stick well, but NOT pull off paint, I use Scotch Blue. I had to use little pieces to get around the curves, but it was worth it to get a nice, crisp edge.

    IMG_0347

    Then, I needed to cover up the glass in the middle, so I took trash bags, cut them along the seams so I could flatten them out.

    IMG_0351

    Then, I tape it down on the table. I had some weird open areas, so I patched holes with scrap paper. It looks pretty fancy doesn't it?

    IMG_0353

    I painted it on a sheet, so I didn't make my grass red (not that I haven't done that 100 times before)

    IMG_0364

    Since I knew this furniture was going to take a beating, I opted for Valspar's Outdoor spray paint.

    IMG_0360

    The improvement was instant! I was so excited as soon as the base was started!

    IMG_0361

    Next, came the chairs, and again it was instant improvement! I used a little steel wool on really rusty spots, but other than that didn't do any other prep. It was really quick and simple!

    DSC_0333

    I originally thought I'd go with solid grey cushions, but these striped ones from Target's spring line caught my eye ($12 each). They're a perfect match!

    DSC_0021-001

    This Before and After makes me happy (and apparently my chairs too!)

    Before after chairs

    All ready for a fun get together! Now let's play I SPY… what's missing in this picture? Yup, 5 more cushions. They're still"In Transit" from Target.

    DSC_0006-001

    The total cost for this project was $30. I used 2 cans of red and 5 cans of blue. I know it won't last for five years or anything, but I'll definitely get another year or two out of them.
    I've learned something from this experience… if you own nice outdoor furniture, cover it up in really bad weather. So that you don't have to learn the hard way, like I did, we're giving away a $75 Gift Certificate to Empire Patio Covers They sell covers to fit everything from tables and chairs, to grills, fire pits, etc. My fire pit always got rusty without a cover.

    To Enter: Comment on this post with the words"Empire Patio" Bonus Entry: Like us on Facebook leave a comment letting us know Bonus Entry: Visit Empire Patio and tell us in another comment what product you need the most on their site Giveaway Closes: Friday, May 18th at 11:59pm. Winner will be announced on Saturday. Details: One winner. Prize ships to the US and Canada. One entry per email address. Winner is selected through random.org

    spray paint chairs

    So there you have it. A patio update on a tiny budget. For $30, I couldn't be happier with the results.
    So, now do you want to come over?

    Follow Me on Pinterest
  • A Clean Slate

    A Clean Slate

    I've been enjoying this fantasy that we've just bought our house and everything is just as it is now....crisp, clean and ready to decorate! In this fantasy world, it is as if the era of pea green carpeting and faux wood paneling never existed...
    So my fantasy goes like this....Hubby and I pull up to a lovely country house that's in our price range! Wow, huh? We're instantly in love as we can see that the house has been well-taken care of. We walk up to the front door and as I step in, I begin to glide through the each room seeing nothing I don't like.
    When I make my way to the living room, my eyes light up and as I turn, Hubby takes me in his arms (suddenly I have my wedding dress on) and we begin to dance, giddy with laughter as we know that we have finally found exactly what we're looking for in our new home. We pause only for a moment, with bright beaming smiles, and say to our realtor without any doubt or hesitation, "we'll take it!"
    Nothing in this fantasy had anything to do with what really happened, especially the part about the doubt and hesitation. But I'm enjoying every minuteof my fantasy as I stare into this empty room, dreaming of how I'm going to decorate! It feels like such a luxury!
    So let me take you through the room...

    This is the perspective you get when coming from the kitchen. The french door next to the picture window will eventually take you to a balcony, which we'll build this spring. The original 'deck' was torn down when they put in the new Marvin windows. The door you see through the entryway, goes to the wraparound porch....this is our formal entry into the house.

    This is looking towards the fireplace from a corner that no one will ever stand in, but I thought I'd give every perspective. Entry is where the hall tree stands.

    If I pan left a bit more, you'll see the coat closet to the left and to the left of that, the hallway where the den, guest bedroom and downstairs bathroom are located.
    So this is what I've come up with so far...

    ....the main layout. The couch will face the fireplace and the two chairs will flank each side of the fireplace. I love the coziness that this layout will offer and I know that there will be many hours spent snuggled in front of the fire.

    Here's the new couch we've ordered....accompanied by two of the above chair! We went with a couch with more modern lines to contrast a little with the more traditional lines of the coffee table. The coffee table (you can see here ) is an antique pedestal with rounded feet and oval top, which will compliment the round lines in the chair.

    Here are the fabrics we chose....the sofa fabric is a beautiful velvet (so luxurious) and the chair fabric, which goes really well with the tarragon velvet, is linen- esque (the photo doesn't really show the chair fabric very well). And due to the furniture store's amazing sale — I made sure that I picked out the highest grade of fabric — of course I did!
    I've also been considering a tall narrow table to put behind the couch. I'd put two table lamps on each end to illuminate the room. I was thinking of something a little modern, made of mostly glass so that it doesn't feel too heavy. I think this would be the best option as end tables wouldn't work well with the tuxedo-style (high arms) couch.
    Also, we'll order a 9x12 natural fiber rug, perhaps this one from Pottery Barn, to go in front of fireplace. All the furniture fits on the 9x12 size. I'll accent the rest of the room with antique rugs I already have.

    I'll put an antique rug in front of the french door. This door will eventually lead to a balcony. There's about a seven foot drop outside the door right now. The balcony will have wide center stairs going down into the yard. It will be big enough to put a couple of rocking chairs or a small table and chairs for an extra place to eat or drink.

    Our existing dining cabinet, that I'll be stealing from our dining room (photo below), will be relocated to the above wall. Instead of holding dining odds and ends, it will be transformed into a secretary that will be a place for beloved books, unframed art, special momentos, etc. I'll be stealing this cabinet from the dining room because we've decided to add two more windows on the wall where the cabinet is now. But I'll go into the dining room plans later.
    Here's the cabinet we'll be stealing for the living room. Hopefully, someday I'll find a narrower dining cabinet to replace it.

    On that small wall to the right of the kitchen entry, I've been considering a temporary bookshelf. Lauren at Pure Style Home inspired me when she put one in her house, on a similar sized wall, and it looks fabulous — like everything else she does. And I say 'temporary' because as you can see in the next photo, I have plans for Hubby (wink, wink Hubby), to build a built-in bookcase (love the look of those — I have a gazillion inspiration photos of them) on that huge wall.

    We're waiting to begin this project until after we get rid of that floor furnace. It's the one 'functional' thing in the house we have yet to figure out. But whatever we decide to do, that floor furnace grate will eventually go....and hello bookcase. ; )
    So odds and ends still left to find are: some sconces for above the mantle (any suggestions?), a 9x12 natural fiber rug, perhaps a white bookcase, a tall modern table and...
    Any other inspiring ideas? I would love your feedback! Just love it!
    *Also, I've made another friend over at High Street Market.... Kelly has the most amazing Etsy shop with so many beautiful treasures. I was eyeing the pair of marble table lamps, an antique oval mirror and a lovely pewter pitcher....and it's all so reasonably priced! How fun is that!

  • Finding Treasures {Flea Market Hunt}

    Finding Treasures {Flea Market Hunt}

    Monica and I both went to the Dublin Fire Co. annual flea market last week (went the same day, but not together. Boo!) This was the first flea market I had been to where I was actually looking for items to repurpose. I had a couple of things in mind that I wanted, but also found a few other things that just begged to come home with me. I went with my mom, and she is a great person to go with because she, like me, can see potential in anything! (It's one of the perks of being an eternal optimist).

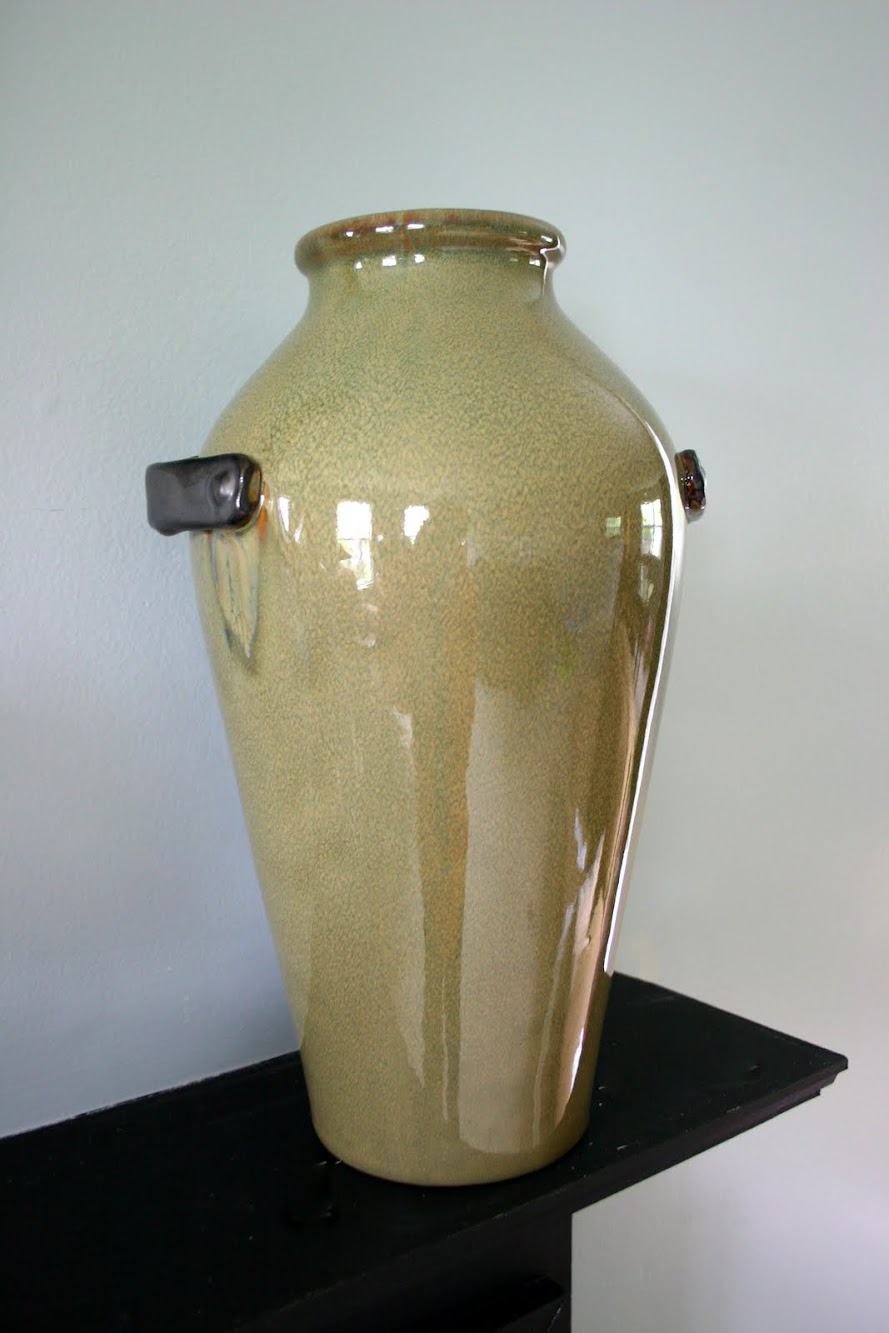
    I got this awesome Pier 1 vase/urn for $5 (regularly $30) and it now graces my mantel.

    One of the other things I purchased was an old workbench/sawhorse thingy. This was a little bit of a risk for me- I had an idea of where I would put it, but wasn't sure it would work out. But for $20, I knew I could use it somewhere!

    That little beauty fit perfectly in my entryway! I had been wanting something to make that space a little more welcoming (and I little less"go away"-like, as Monica says), and this fit the bill. I can't get enough of the color, either.

    Good, sturdy legs, huh?

    This large pitcher caught my eye on the first table I went to. It was very country-looking with it's red and white checker pattern (sorry, no before pictures, but trust me, it's much better this way), but a little Rustoleum Painter's Touch spray paint in glossy white took care of that. I filled it with pussy willows from a local garden center and now it looks like it was meant to sit on that bench all along, and I just led it home.

    Over on the other side I stacked a few books and an old lantern of my grandmothers. I love having a few of her things in my home as a way to remember her. That cute little plant is from Ikea and the mug was from a friend. (Thanks, Lindsey S. It's getting good use!)

    (The view from the hallway upstairs.) On a side note, the pictures have made me hate the color of paint on our walls in the entry even more than I already did. When we moved into this house, the walls were peach. Like literally peach. We said goodbye to those as soon as we could, but lo and behold, the color I picked to replace it has a pink undertone, as well. Definitely the color of swine. (Melissa, at the Inspired Room, dealt with an entire house of swine, and I realized that this is the PERFECT description of my color). Blech! It will be a nice, non-swine, beige soon. Add that to the never-ending to-do list for my hubs. Poor guy.

    Some of you may be wondering about the frame hanging above the new bench vignette. My hubs and I made this out of reclaimed barn wood (my father-in-law has a treasure trove of barn wood in his barn. Go figure.: ) Kevin cut the picture holes (is that the right word?) and then mounted another board to the back that I painted black, so that I could attach the pictures to it. I then painted the entire frame black, then painted it again in a brick red color with a thick bristle brush and minimal paint so that it looked a bit distressed. Finally, I added the phrase that I bought from Uppercase Living to it. I am so in love with this frame, it's not even funny.

    Speaking of reclaimed barn wood, I have two big pieces ready to be made into frames (one holds four pictures, and the other holds one picture). If you're interested in purchasing one, send me an email to let me know. You can totally customize the color and phrase. This piece never fails to get lots of"wows", so if you want one in your home, give a holla!

    What are some of your favorite flea market treasures?
    Happy Monday,

  • 4 Tips for Taking Fabulous Pics of your Kids {GIVEAWAY}

    4 Tips for Taking Fabulous Pics of your Kids {GIVEAWAY}

    Ok, you moms know how difficult it is to take good pics of your little ones and their squirmy, high-energy selves, right? Well, we are thrilled to have Stacy from Salvatori Photography guest posting for us today! We met her at a boot camp we were both attending, and one thing led to another, and here she is today sharing her top tips for taking great pictures of kids! Stacy is truly a talent. She captures everything from the excitement of a bride waiting to see her groom, to a family having a total blast together. Head on over to her website to check out her amazing work. But for now, stay here and read on.: ) You won't be disappointed.
    “Momographer” Tips From Stacy Salvatori
    1. Change your perspective. Sometimes as Moms we get locked into patterns, this is not a bad thing all. But when it comes to capturing some fun images of your Little Ones it never hurts to get out of the ‘norm’ and change up your perspective a little. Often times we pull out the camera and do the same old face shot from 3 feet away. Ever thought about lying on the floor and looking up at them? Maybe climbing up on the swing set? Switch it up a little. You might be pleasantly surprised to see something new!

    2. Play. Everyone has a different opinion and everyone has a different vision of what they may want their pictures to turn out like. I personally love, love, love when I get candid’s of my children laughing and playing and enjoying life! It’s those little in-between moments that tend to move my heartstrings. A Daddy, Aunt, or Grandma also comes in handy for this one! Get them running, swinging, playing and best off all laughing their little hearts out!

    3. Wait. Often we like to pose our kids, and tell them sit just ‘like this’ or ‘move over here’ like that. I’ve found that their patience level runs low when I do that, and they tend to look a lot less ‘real’ and at ease. More times than not, just waiting and watching is the best trick. I can be lounging in my lawn chair watching them play or draw with chalk on the sidewalk… and then BAM! I see the perfect opportunity!

    4. Set up different scenarios. One of the most fun things you can do is set up new and fun situations that might produce super original and creative pictures! So, for instance, rather than just tossing them in the back yard and hoping for something to happen… create a new scenario! Get out the bubble machine and capture them running through the bubbles. Turn on the sprinkler. Get out colorful paint or shaving cream… and let ‘em at it!! Play dress up. Get your daughter dolled up like a ballerina, or maybe your son is really into being a Pirate or a Fireman! Just have fun with it!

    Wow, Stacy, those pictures are inspiring! I can't wait to get out there and if give those tips a try on my two little loves. Thanks so much for being here!
    And because Stacy is AWESOME, she is giving away a ONE HOUR TUTORIAL PHOTO SHOOT
    WITH YOUR KIDS
    (including 10 awesome images from that session!)* WOW!

    Here's how you enter to win:
    1."Like" Salvatori Photography on facebook HERE.
    2. Leave us a comment telling us that you became a fan, and why you desperately need this photo shoot tutorial.
    3. For an extra entry:"Like" The Real Housewives of Bucks County on facebook HERE, and leave us a separate comment telling us you did it.
    4. For another extra entry: Become a Follower of The Real Housewives of Bucks County Blog. Use the button on our sidebar and then leave us a separate comment telling us you did. **That's 4 entries for you! Yippee!** Ok, now go and enter!

    *Photo shoot tutorial is good for use in Eastern PA, unless you want to pay for travel.: ) Which, by the way, would totally be worth it.

  • Spring Entry

    Spring Entry

    D espite the mix of cool spring showers with our sporadic spring sunshine, we're slowly inching our way towards warmer days. So much so that I removed our woolens from the hall tree and replaced them with wicker, straw and jute.

    White tulips from Hubby.

    Here's the other side of the entry. The light through the window offers a bright welcome.

  • New Curtains {REAL Confessions}

    New Curtains {REAL Confessions}

    So I've confessed that I'm impulsive, but have I mentioned that I'm a procrastinator? Yup, it's true. I never return library books on time… this is awful, but I actually owed over $100 in fines after completing my senior thesis in college (Sorry to any librarians reading our blog!) Anyhow…try as I may, I still put things off all the time occasionally. This week it was my new family room curtains. Since this blog is committed to keepin' it real, I'm going to show you my project anyhow! Painted Curtains
    Remember my journey to the perfect stripe? Well, now I needed to journey down the road to painted curtains. It's really simple, so here's what you need to do… Get your Suzie homemaker on… you need to iron! {GASP} People that know me, knowt that I don't iron! Honestly, before our Nate Show appearance a friend ironed for me (she's the best!) I did do this project's ironing all by myself! Go Me!

    You need a big open space to complete this project, I wouldn't do it outside though because bugs and dirt could end up as part of your curtains- gross! (Oh, and ignore the wrinkles… I didn't say I ironed well!)

    Determine the width of your stripes. I used 19 inches (almost the same as the wall stripes). Then, measure across the stipe and put a few pencil marks to use as guide lines when you're taping it off.

    Make sure you get your tape nice and flat and seal it down with your hands a few times

    Ta-da! (I swear, they're"wear wrinkles!!")

    Now, I took my own advice from Journey to the Perfect Stripe and I used Mod Podge to seal the edges. I'd rather have a clear liquid sneak through than paint. That's the idea with the Mod Podge.

    I waited about 10 minutes and then took my handy-dandy foam roller and got to work. I really need to invest in some"decent" looking paint clothes. These pink plaid pants and inside out tee are not the rockin' blogger look I should be going for!

    Don't worry if the fabric is a tad bunchy… it will dry fine. I needed to do two coats, but if your curtain will be having any direct light shine through, you'll probably need at least 3.

    I heart crisp lines!

    Well hello awesome curtain… welcome to my room!

    WAIT… Did she say curtain doesn't she mean curtains? Don't you need two panels for the window? Ugh, now we're back to confessions time… I only finished one panel! The other is hung, but plain white!

    Maybe you're wondering what's going on with the rods? Well, I didn't measure the window… I bought a rod… it was too short… so I ran with plan B! We're just going to cut down the rod and just have a little mini rod on each side. Even though it was born out of a mistake, I really love how it's going to look… when it gets done…

    Now the million dollar questions… how long have they been hanging that way? 9 Days. How long will they remain that way? Either 3 days or 14 (I'm headed out on a little trip soon, so we'll see if I get it done first)
    So there you have it… Custom Striped Curtains. This is a totally doable DIY. Ok, well I can't really vouch for that, but half of it is totally doable!

    PS One thing we didn't procrastinate on was our Crafting with the Stars Entry! Head over to the contest to see the winners from the first round. We are so excited about the results!! Check it out HERE! We'll give you a little hint…

    :)

  • Wood Shim Wall Art {Tutorial}

    Wood Shim Wall Art {Tutorial}

    If you didn't hear our BIG announcement, stop reading right now and take a look here. We are excited beyond words and are so grateful for your support and encouragement! And to think…it all started right here!: ) ------------------------------------------------------------------------------------------------------------ Remember that little contest we were a part of a couple weeks ago? It was a great contest run by Homes.com for an awesome cause- creating projects for a chance to win $5000 for your favorite charity. Well, sadly, we didn't win, but, we're pretty thrilled with our entry and wanted to share this super happy space with you guys.Let's get on with the project shall we?
    I (Monica) have had this project in my mind for a few months now. It was inspired by a printed pattern I had seen in the window of a shop. I couldn't remember exactly where I saw it, but I was pretty sure it was a cool shop we had passed when we were in London in November. Great story right? Crafty DIY project inspired by a European city… Then, two weeks ago it hit me… It was JCrew at our local mall! I just about died laughing when I put it all together! Well, JCrew or London, I sure am glad it inspired me…
    For under $20 we created DIY Wood Shim Wall Art

    I wanted something with BOLD color, and a modern feel, that married well with a bit of industrial flare!

    How's that for a Before and After?
    Who knew our dumpy oak piano could be such a show stopper? (You can read all about that little makeover right here. )

    Here's a peek at the details- the DIY light isn't my entry, but man I love how it works with the Wood Shim Art!

    Even though it looks pretty complex, the process was super simple and the longest part of the process was waiting for the paint to dry. Here's how we did it: #1- Purchase Long Wood Shims

    We bought 5 packs of these from Lowes for $3.84 each. They sell two sizes, so make sure you go with the longer of the two 11 7/8" (yellow package).
    #2- Cut the ends at a 45 degree angle. I used my miter saw and cut each piece- I started with one at a time, then did a little math in my head, noticed it would take an eternity, and then started cutting five at a time. Worked like a charm!

    #3- Paint Your Shims I created a little spray paint zone in my basement and used all my leftover spray paint colors. When you're painting, just make sure that you put half with the angle to the left and half with the angle to the right or you'll be stuck with one sided arrows!

    After they had dried I was left with this awesome assortment of color!! I used about 13 different colors, but I also think doing the whole project in various shades of one color could look pretty epic too!

    #4- Make (or use) a Plumb Line Once we decided where we wanted our center point, we needed to get a straight vertical line to follow.

    We took a nail, some bakers twine, and a socket to DIY a little old plumbline. Nail it in and voila!

    #5- String Line your Vertical I love my string line… seriously, I use it all the time! We put it at our top and bottom marks (created using our plumb line) and then snapped that baby to give us a guide line.

    #6 Determine your Pattern This step saved us major time. Use the floor to get your layout right and then installing it on the wall is a breeze. We wanted our pattern random and we wanted varying lengths and heights.

    #7- Glue it on the Wall Rather than using 300 tiny nails (that could very easily splinter the shims) we opted for Gorilla Wood Glue. It was simple to use, will hold securely, and won't damage my walls completely (the way liquid nails would).

    Following our pattern, Jess glued and I placed the arrows. Shims are very imperfect, so I had to be okay with tiny gaps and just kept using the center line to keep things straight.

    Even before it was finished, we knew we were obsessed with it!

    We finished it off with some fun accessories and the coolest light fixture ever, and called it a day.

    There were a lot of DIY elements around our Crafting for Charity project, so to find out details about other projects, you can check 'em out below., We'll be posting more about them in the next few weeks, so just hold tight.: )

    Even though we didn't win, we hope you'll still check out Worthwhile Wear, which was founded by our close friends Dan & Steph. They've committed their time and talents to make it their life's work.

    Jess and I both have daughters and we couldn't imagine any of them having to endure human trafficking. We love Worthwhile Wear's mission…
    Worthwhile Wear exists to rescue and restore girls from forced prostitution, and more importantly help prevent girls from ever entering it. We target highly trafficked areas both internationally and domestically, and offer women the opportunity to overcome two primary factors which are at the root of sex trafficking; poverty and lack of education. This solution is offered through vocational training centers which teach women how to make wears, such as jewelry, handbags, and clothing, which are sold to provide them employment. Additionally, the women are offered free education, a safe place to stay, and restorative programs geared toward encouraging personal growth and re-establishing self-worth.

    That beautiful face is not a stock image. They're from Dan's last trip to India a few months back. The work Worthwhile wear is doing is critical and we hope you'll check out their site and follow along with them on Facebook.
    What do you thinkj? Could you paint a piano green? Or glue shims to your wall?

    jess
    Monica
  • $300 Home Depot Giveaway with KILZ brand!

    $300 Home Depot Giveaway with KILZ brand!

    We know our posts have been off and on lately, but we hope you're still enjoying all the fun Knock It Off projects. We thought it was about time to do a fun giveaway, so we've teamed up with KILZ brand and some DIY bloggers to bring you this fun $300 Home Depot giveaway!! ----------------------------------------------------------------------------------------------- The wonderful people at KILZ know what a hectic time of year this can be and they want to give you a jump-start in the right direction by helping you"Get Primed For Fall".

    KILZ $300 Home Depot Gift Card Giveaway

    Who's gearing up for the back to school routine? Calendars already filled to the max with sporting schedules and instrument lessons and dance classes? And we all know our own to-do lists are never complete so KILZ is here to remind us all to take some time for ourselves this fall.
    They've reached out to us and some of our favorite DIY bloggers so we can combine our love of priming and pinning. By following KILZ and these 7 bloggers on Pinterest you can keep up with all of the great DIY inspiration and learn invaluable priming and painting tips.
    By simply clicking the Pinterest buttons below and clicking"Follow All", and then confirming that you did in the easy entry Rafflecopter form below, you will be entered to win the $300 Home Depot gift card!! Woot Woot! It really couldn't be any easier. Thank you, thank you to KILZ for sponsoring this great giveaway and good luck everyone … We're already dreaming about the projects you could make with that $300!

    KILZ Primers & Paints | East Coast Creative | Country Chic Cottage | Uncommon Designs

    |

    |

    |

    The DIY Village | Sew Woodsy | Remodelando la Casa | the space between

    |

    |

    |

    Click this link once you've followed each blogger!
    a Rafflecopter giveaway

    So, follow each of these awesome bloggers & KILZ on Pinterest- then use the Rafflecopter to let us know you're done! Isn't this a great way to start the weekend??!!
    Good Luck!! We hope an EC2 reader wins!!

    jess
    Monica
  • Fall Sponsor Love

    Fall Sponsor Love

    We absolutely could not do what we do without the support of some amazing people and businesses! As we head into Fall, we wanted to share a few of our Fall favs from some of our favorite people, Be sure to take notice of the coupon codes and special deals going on right now!

    1. You know I've got baby boys on the brain, so I'm totally loving htis Joshua 1:9 Boys Print from Red Letter Words.
    2. This adorable Dearborn Orange paper pack includes the perfect colors for Fall and with all those amazing patterns, you can create some really cute stuff! Use the discount code EC2blog20 for 20% off your order. Also, for a limited time, pay only $50 for 50 different paper packs - that's amazing! You can see what we do with our printable scrapbook paper here. Seriously…endless possibilities!

    3. If you're local and need some professional design advice or just help getting started, Bare Root Designs is the place to go! Great design classes and rekindling the art and love to sewing are just a few of the things offered1 Make sure you check for upcoming events and classes on their website.
    4. I actually almost squealed when I saw this Wall lighting with Opal Glass Shade from Lucent Lampworks. We can testify first-hand that Brad's lights are legit- gorgeous AND well-made (we've even used a couple custom lights on Knock It Off!) Save 10% off your order with the code EC2tenoff.

    5. We are all about stenciling walls, but have you thought of stenciling furniture? This trendy-cool Small Step Up Triangle Stencil from Royal Design Studio is the perfect size for that boring piece of furniture you have sitting around that you just didn't know what to do with! Use the code ECC10 to get 10% off your order.
    6. Window films from Artscape are such a great way to gain privacy or to add style to a plain window. They're easy to adhere and are non-permanent, plus there are some really cool designes like this New Leaf Design.

    7. Again with the orange, but this time it's on something you can wear! This Tangerine Braided Headband from Henle Headbands is sweet and simple, but a little punchy with that orange color. I'm digging this color for Fall, for sure! And be on the lookout- I wore a Henle headband in one of our episodes and it was so cute and really comfortable!
    8. Of course, along with a baby comes the need for a diaper bag! I've never been disappointed with Thirty-One gift bags and kind of think this Casual Cargo Purse is just the diaper bag for me! And if you hurry, you can c hoose any purse for 50% off when you spend $35 dollars in August! Done and done.: )

    9. Welcome to our newest sponsor, Misty with Stella & Dot! Stella & Dot sells gorgeous jewelry, bags, scarves and more. And f or every $50 spent on Stella and Dot website before tax and shipping between NOW and September 9th, you will receive AN ENTRY TO WIN the gorgeous Frida Necklace Hello, color and more color. A fashion forward statement piece that brightens up any look and outlook. Wear it with a t-shirt and jeans or wear it out for an evening on the town. The Frida is 17" long with 2" extender, hematite plating, and lead and nickel safe.
    10. Have you read Smart, Blonde & Crafty, yet? The completely FREE August & September edition has a great question & answer article with Karianne from Thistlewood Farms, lots of creative kids snacks for back-to-school and fun game ideas for your little ones. You're sure to find loads of inspiration on every page.
    11. Fall is my favorite time of year to burn candles! We cant get enough of CJS Eco Chic's Heirloom Candles in scents like Brown Sugar & Fig, Apple Cider, Amaretto Spice and Cranberry Apple Marmalade. And get this: A l arge 16 oz candle is only $13!! Plus, because these candles are soy, they last a really long time!

    12. Our favorite thrift store, Liberty Thrift is having their 15th Anniversary Sales through the month of August at all five locations! Check out the specials page. to see what they have going on this week!

    13. And finally, we have to give a shout out to our favorite photographer, Stacy from Salvatori Photography. If you're in need of amazing photos and are in the area, you need to call her! She took family photos of us as we revealed the gender of baby #3 and this one of my son is a total gem that I will love forever. She's totally booked for Fall, but it's never too early to schedule your session for Spring! This girl is busy, so get on it, people!
    --------------------------------------------------------------------------------------------------------------------- Now is the time to think Christmas presents, people! It will be here before you know it, and trust me, you can't go wrong with ANY of these incredible items. And remember- this is just a sampling of what they offer. Head over to their sites and give them all some EC2 love!: )

    jess
    Monica