My Creative Blog [Search results for Cleaning]
Spring Things { How to Clean Windows like a Pro}

Fab Find Friday (And a GIVEAWAY!)

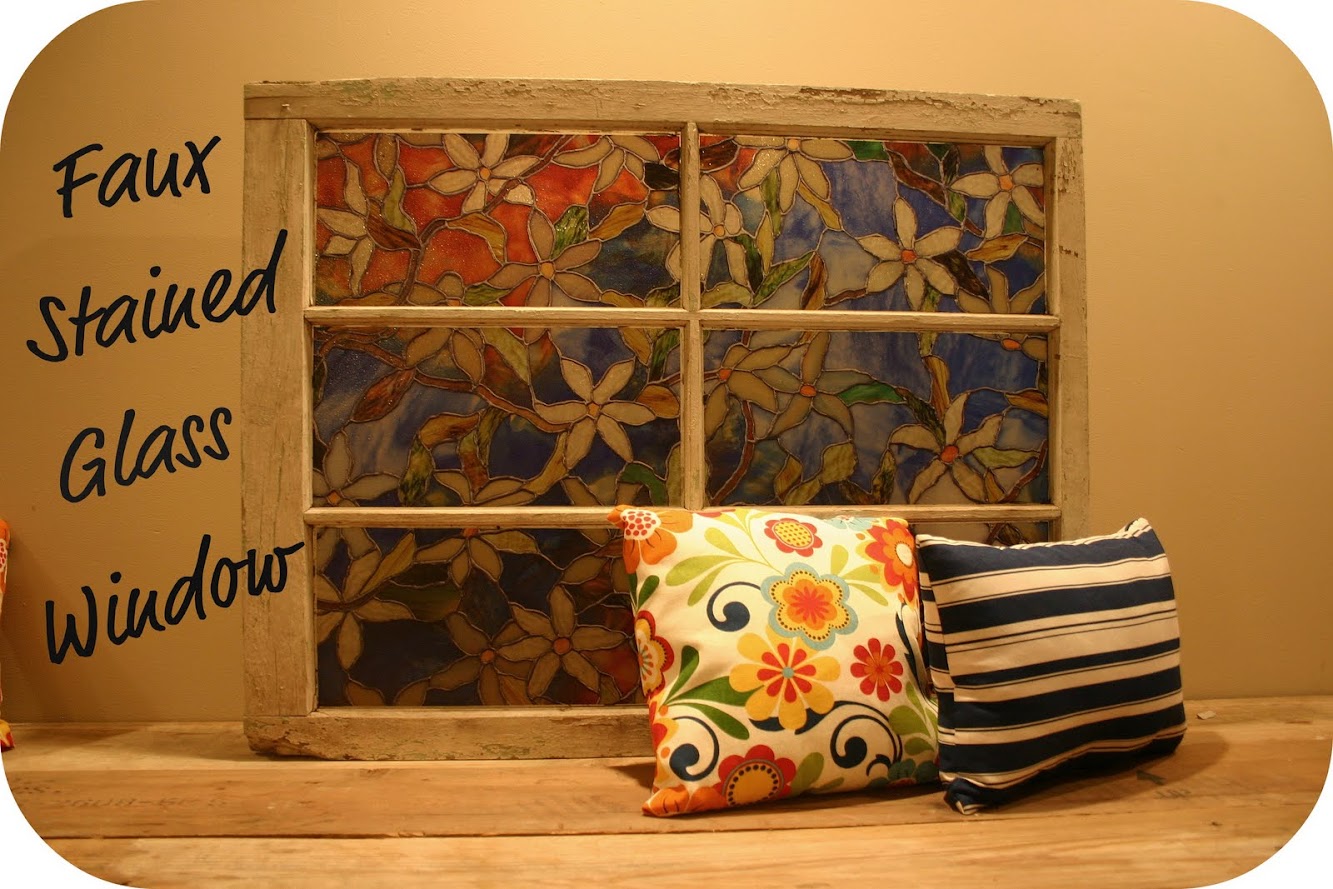
Faux Stained Glass Window {Tutorial}
Mosaic: When Art Inspires Poetry

Modern Houndstooth Stencil
Want vs. Need
FOR SALE!

Remember this one?

A Love Affair with Frames

February Sponsor Love

Jewelry Organizer {The Ugly Duckling House)

Design ADD

Curb Appeal

Spring Things {All things Spring 2012}

Flipping Out: Jeff Lewis Designs

How to Paint a Front Door {and my color reveal!}
Oh Christmas tree

Heirloom Pumpkins

Make Homework Happy {B2S Day 2}

Power-washing Saved My Deck's Life


