My Creative Blog [Search results for Bloggers

  • Blogging 2 Better Summer Challenge

    Blogging 2 Better Summer Challenge

    We've been keeping a secret from you. And it's a good one. But don't worry! We're about to let you in on it…ready??…ok, here goes: Six weeks ago we asked several amazing bloggers to join with us in a collaboration group we called Blogging 2 Better. We're a bunch of like-minded home, DIYand crafting bloggers that want to learn as much as we can about blogging, while also sharing ideas, encouraging one another and sharing each other's awesome projects as much as we can. We're so fortunate to be part of a blogging community that encourages sharing! (If you write a blog, we strongly suggest getting a group of girls together to learn from. No one understands all that blogging entails except for other bloggers! You can find more about that in our Part-Time Blogger series here.)

    Anyway, these girls are really, truly talented and it was a lot of fun getting to know them better. For our final week, we had Beckie from Infarrantly Creative give us a list of materials that we all needed to incorporate into an awesome project. It's like our version of a Nate's Crate Challenge! Woohoo! And today is the day we get to see what everyone's been up to!! Once you finish taking a look at what we created, make sure you hop over to the other gal's blogs to see what they made.

    Here's the list of the supplies from Beckie:

    And here's what we came up with:

    We struggled to come up with a clever name for it, but basically it's a rustic/industrial storage bin. A very easy project that turned out adorable, if we do say so ourselves. You know we love a good pallet project (we've done several here and here), but we also keep loads of barnwood on hand, too. We picked one that was already the perfect length (yay! no extra cutting required!)

    We also scored these three wire bins at HomeGoods for four bucks a pop! We didn't love the color, but knew immediately that this is where we could use coral! We spraypainted them with Valspar's Hacienda Tile- the perfect coral.

    Next we found a font that we liked and printed number 1 through 3 large on regular, old paper. With a pen, we traced the number while pressing down to leave the outline on the barn wood.

    Have you tried paint pens yet? They're so easy to use, but they still looks like paint. We carefully filled in the stencilled numbers with a black Sharpie paint pen.

    Once the paint on the bins had dried, we brought them in and laid them down in front of the wood to determind the placement. We measured the board, divided it into thirds and then marked where the hooks would go.

    Monica drilled pilot holes where we had previously marked and then we screwed in the eye hooks …Six hooks for three baskets.

    Then I gently sanded down the numbers to distress them a bit.

    Monica whitewashed the entire board with a mixture of paint and water to give the piece a little more depth. (Side note: working as a team makes the project go faster! We're so fortunate to have each other.: ) (I totally Agree! -Monica)

    The last step for the wood piece is to add a coat of water-based polyurethane (water-based won't change the color of the wood!).

    To hang it, we took chain, cut it to the length we wanted with wire cutters and screwed threw one of the links directly into the wood. Make sure your screw isn't so long that it goes right through to the other side!

    Then we hit a creativity wall. Booo. We could not for the life of us figure out how to incorporate fabric into this project. We toyed with lots of different ideas, but finally decided on a cute hanging pendant banner for one of the baskets. Recently we came across a shop called The Finest Kind and we couldn't get over how cute their stuff is! We decided to purchase three of their typographical tags to use on our pendant. You'll probably catch the significance: EC2.: ) First, we spraypainted the little cuties blue.

    Next, we took apart three 2x3 frames so that we could use the cardboard backing. Wierd, I know, but there's always an untraditional use for everything!

    We wrapped the fabric around the cardboard and mod podged it right on.

    Before the Mod Podge had dried, we stuck our tags on, and voila! An adorable pendant honoring our blog for the basket!

    We were thrilled with the finished product, and it has now made it's home in my dining room. And just so you know, it totally inspired me to rearrange my living room and gave me the motivation I needed to start our dining room makeover!

    To be completely honest, we liked this project better without the fabric banner, but do think it makes a super cute accessory!

    And now for the REALLY fun part! We were so excited to see what our blogging buddies came up with using the same materials, and they did not disappoint!

    Please stop over at these amazing ladies blogs to see what their projects. Share the EC2 love with them and tell them we sent you!
    Clockwise from top right:
    Kim from Sand & Sisal: Surfboard Pallet Art
    Brook from Being Brook: Fabric Wall Map
    Allison from House of Hepworths: Dangle Earring Frame
    Jenna from SAS Interiors: Monogrammed Chevron Pallet Tray
    We had SO much fun putting this project together and consider ourselves lucky to be in the company of these awesome bloggers. If you don't already follow them, shame on you! But it's not too late, go ahead and do it now.: )
    We want to know: What would YOU do with those materials?

    ** And if you're loving up all the wood ideas, this one is one of our favorites! Check it out!

    **If you're visiting from one of the other bloggers' projects, thanks for stopping by! If you like what you see use the links below to stay up to date with all of our projects and ideas!

    Follow Me on Pinterest
  • $300 Home Depot Giveaway with KILZ brand!

    $300 Home Depot Giveaway with KILZ brand!

    We know our posts have been off and on lately, but we hope you're still enjoying all the fun Knock It Off projects. We thought it was about time to do a fun giveaway, so we've teamed up with KILZ brand and some DIY bloggers to bring you this fun $300 Home Depot giveaway!! ----------------------------------------------------------------------------------------------- The wonderful people at KILZ know what a hectic time of year this can be and they want to give you a jump-start in the right direction by helping you"Get Primed For Fall".

    KILZ $300 Home Depot Gift Card Giveaway

    Who's gearing up for the back to school routine? Calendars already filled to the max with sporting schedules and instrument lessons and dance classes? And we all know our own to-do lists are never complete so KILZ is here to remind us all to take some time for ourselves this fall.
    They've reached out to us and some of our favorite DIY bloggers so we can combine our love of priming and pinning. By following KILZ and these 7 bloggers on Pinterest you can keep up with all of the great DIY inspiration and learn invaluable priming and painting tips.
    By simply clicking the Pinterest buttons below and clicking"Follow All", and then confirming that you did in the easy entry Rafflecopter form below, you will be entered to win the $300 Home Depot gift card!! Woot Woot! It really couldn't be any easier. Thank you, thank you to KILZ for sponsoring this great giveaway and good luck everyone … We're already dreaming about the projects you could make with that $300!

    KILZ Primers & Paints | East Coast Creative | Country Chic Cottage | Uncommon Designs

    |

    |

    |

    The DIY Village | Sew Woodsy | Remodelando la Casa | the space between

    |

    |

    |

    Click this link once you've followed each blogger!
    a Rafflecopter giveaway

    So, follow each of these awesome bloggers & KILZ on Pinterest- then use the Rafflecopter to let us know you're done! Isn't this a great way to start the weekend??!!
    Good Luck!! We hope an EC2 reader wins!!

    jess
    Monica
  • Match that Blogger! {A contest and Ryobi Father's Day Giveaway}

    Match that Blogger! {A contest and Ryobi Father's Day Giveaway}

    Gooooood morning, friends!We’ve got a special surprise for you today… who doesn’t love a little friendly competition and GIVEAWAY?!?! ------------------------------------------------------------------------------------------------------------
    The premise of this contest stems from the fact that all of us are guilty of Pinning an idea without ever checking the source… guilty as charged! But there are likely pins on your boards that are from your favorite bloggers, and you don’t even know it! (Are we right? C'mon, admit it.) And that’s where the contest comes in:

    Here’s the line-up! Such an amazing group of bloggers that we wrangled!!

    And below are projects from each blogger (including us!) that you’ve likely seen viral all over Pinterest!

    Before we get to the rules, can we talk about how RYOBI is giving away $800 worth of POWER TOOLS? Just in time for Father’s Day!

    Perfect timing if you ask us.

    $400 RYOBI Giftcard goes to our randomly selected winner, and $400 RYOBI Giftcard goes to the first person to correctly match up all 16 bloggers with the correct projects! (there will be a randomly drawn winner in addition to the winner of the contest, so you should enter both ways!)
    When you click on the Contest Form (at the bottom of this post), it will direct you to a page that will show you an image of the project, and a drop-down menu of bloggers. You just go down the line and select away! Some projects you probably know already, but some you may need to snoop around blog-land to find!We call this blog-hopping, and it’s highly encouraged in the blogging world.

    Smile

    Here’s the links to the home page of each blog (in no particular order). Now get busy!

        1. Sawdust and Embryos
        2. All Things Thrifty
        3. Interiors by Kenz
        4. Whatever Blog
        5. Home Stories A to Z
        6. Sarah M. Dorsey Designs
        7. Twist Me Pretty
        8. The Idea Room
        9. DIY Village
        10. Pretty Handy Girl
        11. Domestic Imperfection
        12. One Good Thing
        13. Kara Paslay Designs
        14. Nine Red
        15. Vintage Revivals
        16. East Coast Creative

    Entry #1 (Randomly drawn) ‘Like’ us ALL on Facebook, and let us know that you did on the Rafflecopter form below! Entry #2 (Contest!) Click below to match up each blogger with their amazing project!

    a Rafflecopter giveaway

    Click Here!

    • One entry per person, per entry method.
    • Winner of matching contest will be emailed, and publicly announced on Facebook.
    • Winner of random-drawing giveaway will be announced on Father’s Day here on the blog, as well as Facebook.
    • Be sure to hop over to RYOBI Nation and check out some amazing inspirational projects!
    • Be AWESOME today!! (that’s a given)

    Ryobi Nation — leaderboard1[6]

    This contest/giveaway is in NO WAY affiliated with Pinterest or Facebook, and we hereby release them of any liability related to this promotion, the receipt of prize winnings, etc. The giveaway prize has been generously provided by RYOBI Nation. All prizes will be mailed by the sponsor and all participating blog owners are not held responsible if the prize is not fulfilled. Giveaway starts Monday 6/10/13 at 5am est and ends at midnight on Saturday 6/15/13. Alternate entry available by sending your entry via email to wehopeyouwin@gmail.com. Winner will be announced on Sunday 6/16/13 and will need to respond within 48 hours to claim their prize, or another winner will be chosen.Winner must be 18 years of age or older and a US citizen in order to win. May the force be with you.
    Good Luck, guys!! Thanks for playing along!

    jess
    Monica
  • Smart Blonde and Crafty

    Smart Blonde and Crafty

    We love inspiring all of you and empowering you to take risks in your home and do what you love. We love it even more when other women are inspired to do the same thing. One of things that is so fabulous about this DIY/Home Design blogging niche is how supportive it is and that bloggers genuinely want to see others succeed. Not to mention, home bloggers are sooooo generous about sharing ideas and projects with each other! -------------------------------------------------------------------------------------------------------------------- Amanda emailed us a few weeks ago. Who is Amanda, you ask? She and her business partner (and best friend!), Kelly, are wives and mothers who own their own business (Smart Blonde Creative) and manage to be creative and crafty in their spare time. Sound familiar? Yeah, we liked them right away. They were so inspired by the blogs they read on a daily basis, that they decided to use their graphic design and marketing talents to create an online magazine that is a source for easy and fun projects inspired by bloggers like us! The first publication goes live today!

    We got an early peek at the magazine and immediately loved the bright colors, fun layouts and super on-trend chalkboard typography. Not only that, we are thrilled to be featured in a two-page spread!: )

    This month's premier issue features a super cute idea to make your own romantic dinner plates for Valentine's Day…

    …and an easy way to DIY a pillow cover with button detailing…

    …and a host of awesome blogs you should be reading!

    Every two months, Amanda and Kelly will bring you a round-up of their favorite projects and the women and blogs that gave them the inspiration. We hope you'll take a peek at their first issue by going to Smart Blonde and Crafty RIGHT NOW. Then hop over to their site to learn even more about these awesome ladies, what projects they have going on and their goals for their new mag! And if you love it, tell your friends all about it.: )

  • Creating with the Stars on EC2!

    Creating with the Stars on EC2!

    **Update: Submissions are NOW open! Click here to enter! You'd better be sitting down ladies and gents, because we're thrilled to announce that we are hosting the BEST, MOST AWESOME contest in all of blogland!! Remember that contest we won last year? Crafting with the Stars? Well, not only did we win it, but we also bought it! Tam, from Sew Dang Cute, took a leave from blogging and we jumped at the chance to run the contest that helped jump-start our blogging careers. We're hoping that we can help one of YOU jump start or boost your blogging career, too! Welcome to the new home of Creating with the Stars! ------------------------------------------------------------------------------------------------------------ We're super excited because it's bigger, badder and better than it has ever been. In case you didn't notice, we've renamed it Creating with the Stars, which means no limits to the incredible stuff you can create. It's not just crafts anymore, people.

    What the heck is Creating with the Stars, you ask? CWTS is the ultimate creative DIY competition that pairs 12 contestants with 12 of blogland's biggest stars to duke it out over 4 weeks. Only one team will make it to the end to claim the Grand Prize. The best part? You, the readers, choose the winners!
    Here's a peek into our projects from the 2012 season…

    One of our favorite parts of this competition is that contestants are paired with a super famous, awesome Blog Star! We've rounded up the best of the best and we know you all would LOVE a chance to work 1:1 with any of these bloggers!

    Introducing the 2013 Creating with the Stars Blog Stars!

    1- Sherry from Young House Love
    2- Whitney & Ashley from Shanty 2 Chic
    3- Brooke from All Things Thrifty
    4- Jane from Tatertots and Jello
    5- Sarah from Thrifty Decor Chick
    6- Beckie from Infarrantly Creative
    7- Mandi from Vintage Revivials
    8- Jamielyn from I Heart Naptime
    9- Shaunna from Perfectly Imperfect
    10- Beth from Home Stories A to Z
    11- Kari from U Create
    12- Brittany from Pretty Handy Girl
    That's some serious talent all in one place! And let me tell you, some of these bloggers are in it to win it-they're all about the competition!! Wouldn't it be so awesome to be paired up with one of them?!?

    We also have some ridiculously awesome sponsors, who are chomping at the bit to give you some great prizes!
    The 2013 CWTS Prize packages Total over $4100!!
    A special thanks to Homes.com, HomeGoods, and Home Depot for their generous sponsorship of CWTS! We're so honored to have them!
    The Grand Prize Winners (Contestant and Blog Star) will each receive:
    $500 from Homes.Com
    $500 Gift Card to HomeGoods
    Project featured by HomeTalk

    All contestants that make it to Week 4 will be given a $100 Giftcard to HomeGoods to use during the week 4 home decor challenge!
    The Semi-Finals Winner will receive:
    $500 Gift Card to Home Depot (Contestant & Blog Star)
    $100 worth of Martha Stewart supplies from Plaid Crafts
    $125 Gift Card to Lucent Lampworks
    Project featured by HomeTalk

    The Week 2 Winner will receive:
    $100 Gift Card to Royal Design Studio
    A pair of $120 Robert Allen pillows from Chic Decor Pillows
    Project featured by HomeTalk

    The Week 1 Winner will receive:
    $50 worth of 31 Gifts products
    $60 worth of Twtsted Yarn products
    $70 of Henle Headbands products
    $100 Blog Re-design from 733 Design
    Project featured by HomeTalk

    Here's how it all works:
    Submit one project that shows everyone your best stuff into the linky party here on East Coast Creative that will begin on February 5th. Projects must have been made October 1, 2011 or laterand must be your own work. You have until February 21st to enter. From those entries, 12 of you will be chosen by the blog stars and us as contestants and will be randomly paired up to work one-on-one with a Blog Star, to duke it out in a four-week competition to see who's the most creative. The Star will give suggestions, ideas, encouragement, and help so you can come up with the best project possible. Each round will have a theme and the bottom three will be eliminated based on reader votes. Once the contest is started, weekly projects are anonymous, so big blogger or rookie, everyone's on the same, even playing field! Find your favorite project to link up and be prepared to put your best foot forward if you want to survive!

    What to do Now!
    Submissions are NOW open! Click here to enter!
    Be sure to Like East Coast Creative on Facebook. We're going to be messaging reminders, sneak peeks, and lots of contest info via Facebook, so you don't want to miss out! Also, start deciding what one project you want to submit for your chance to be a contestant! The sky is the limit and we're so excited to see all the amazing project submissions! Anytime you tweet about the contest, make sure you use #cwts2013 to stay in the loop and see what everyone else is saying about the contest!

    If you have any questions about the contest, please email us at
    CWTScontest{at}gmail.com

    We're so excited about our 1st season hosting CWTS and we hope you are too!! Spread the word, because it's going to be one awesome ride!

  • I'm a legend in my own mind...

    I'm a legend in my own mind...

    See this photo of Nate? Looks like he was looking right at me, doesn't it? Well, he was. Because I totally asked him for hisPerfect Gray. And I did it all for you guys. His answer:
    Light Grays: Benjamin Moore's Moon Shadow (#1516) and Silver Lake (#1598) Dark Grays: from the Benjamin Moore Historical Collection (he didn't give a specific name)

    And here is Nate doing a fist pump and saying, "Woohoo! Thanks for coming, Donna! I love your blog!"
    Well, not really. But I did kinda get an inflated ego — being invited to The Nate Show and the HGTV luncheon. It was awesome meeting so many wonderful bloggers. I tried to meet as many as I could, so I introduced myself to a couple of ladies while we were in the 'green room,' asking, 'Are you design bloggers, too?' One replied, 'No, and I really don't know what a blog is. What is it....?"
    Then I remembered I'm just a gal with a computer. Pushing up pretty pictures.
    I'll be back with more of those on Monday.
    Have a great weekend.

  • The Part-Time Blogger's Dilemma {Let's Be Honest}

    The Part-Time Blogger's Dilemma {Let's Be Honest}

    Ok, it's time to get really real with you. About us and our blog. It involves a little something we like to call:

    We recently received a very nice comment from a regular follower that prompted us to write this post. Before you read it, I have to say that we were very grateful for this reader's honesty, and the sweet way she voiced her concerns. There's nothing we love more than good, honest feedback from the lovely people who visit our blog every day!

    Ack! She nailed our current dilemma right on the head! Let me give you a little back story…when we started this blog a little over a year ago, we did not anticipate it interrupting our lives at all. It was just a place to throw all our ideas and projects. We literally thought that only our moms would read it. Then came Nate (not once, but four times!),

    Crafting with the Stars…

    local TV coverage, newspaper articles (you get the point) which equalled rapid blog growth. AND WE LOVED IT. All of these amazing opportunities meant that we were doing loads of projects, pouring hours of our time into the blog, and spending a lot of money to keep it all together. The blog is the most important, most rewarding and most fun thing we do (yes, even more than the Nate Show! It's our first love.), so we make every effort to put 5 great posts out per week. We LOVE this blog and it has become bigger and better than we ever expected.

    But here's where our dilemma comes in: In addition to the blog, we both work other jobs, raise a bunch of kids and try to be good wives, friends, daughters, sisters etc. Realistically we could not possibly keep up the pace we had been going for the first year, even though we would like to. Not only did this little blog take a lot of time away from our families, but we also spent a lot of our own money to do all those projects! We need to find a better way. We are trying to adjust our own expectations (which, believe me, are sky-high!) and are experimenting a bit with our posts.

    So what does all this mean for the blog you love to read?
    1 You'll probably see only a few DIY projects a week from us. Instead of scrambling to come up with a DIY project just for the sake of having one to post about, we're being more intentional about our projects so that they're well done, and have a purpose in our homes.

    2. We'll be highlighting our wonderful sponsors every once in a while to expose you to their awesomeness and also, to express our gratitude for their support of our blog that allows us to keep doing our projects. Don't worry we won't be throwing them in your faces at every turn, and we promise to only accept sponsor whose products we absolutely love!

    3. We might host a guest poster, or highlight other blogs we feel like are worthy of notice! The design blog world is like a family, and we want to promote other people, like others have promoted us!

    4. We'll keep bringing you our thoughts on all those fun, crazy and fabulous design trends out there, and how we're incorporating them in our homes!

    So, in conclusion (are you still there?), we are crazy about this blog and all of you, and hope to continue doing this for a long time, and even (crossing our fingers) turn it into a full-time job. We hope you'll stick around for the long haul, and be understanding as we try to find balance and a system that works for us.
    And now, a question for all you bloggers/mothers/wives etc. out there: How do YOU find balance?

    jess
    Monica

    P.S. We'll be doing a follow-up post on our top tips for Part-Time Bloggers, so get excited!; )

  • Last Giveaway! {Royal Design Studios}

    Last Giveaway! {Royal Design Studios}

    We've been so fortunate to have been featured on some pretty great blogs and websites, but there are a few totally awesome blogs/bloggers who have been major players in our continuing growth.

    We've shared our love of Pinterest on more than one occasion and Monica even created a how-to video about it, but now we love it even more. U-Create, Vintage Revivals and Home Stories of A to Z were so good to us rookie bloggers. We hope we can pass the blog love forward to other small blogs just trying to grow in the same way they've helped us. And you already know how we feel about The Nate Show. So, from the bottom of our hearts, thanks blogging friends! We appreciate you.: ) -------------------------------------------------------------------------------------------------------------------------- Now, to cap off our Giveaways Galore Week, we have an unbelieveable giveaway for you!

    We both have been thrilled with our stencils from Royal Design Studio (you can see my kitchen here, and Monica's wall panels here), but there are endless possibilities and choices for you at
    Royal Design Studio. Just check out these beauties:

    Indian Paisley Damask Wall Stencil by Royal Design Studio
    3079L-Lg-Deco-Damask-Stencil

    {Swoon} Ok, time for the details on how to win:
    The Prize is a $75 Shopping Spree on Royal Design Studio. (Includes free shipping within the continental U.S.) All entries must be submitted by 11:59pm on February 26, 2012. Winner will be announced on February 27, 2012.
    1. To enter, go to the Royal Design Studio website, pick your favorite stencil and comment with your pick.
    2. Extra chances to enter by"liking" the RDS Facebook fan page and/or following them on Twitter and/or following them on Pinterest and commenting so on this post.
    --------------------------------------------------------------------------------------------------------------------------

    And finally, the winners from yesterday's giveaways:
    Scentsy

    My Best Friend's Hair

    Kotton Pickin' Kute

    Congratulations! Email us to claim your prizes, girls! Thanks for celebrating our one year blogiversary with us this week. It's been fun.: )

    jess
    Monica
  • What's in a Name? {Introducing East Coast Creative}

    Well lookie here… a new blog name and a whole new look! {Eeek!} Let us tell you that this has been one crazy journey. If you’re new around here or missed the drama he’s the low down…
    We’re a DIY and home décor blog. We’re Housewives. We’re Real. But, now we’re East Coast Creative… the bloggers formerly known as “The Real Housewives of Bucks County.” Hey, if Prince can do it, so can we! Change stinks, but we love our new name! So, our name is different, but everything else is the same. We’ll still be bringing you awesome DIY projects, cool design trends, and plenty of goofy Monica and Jess tossed in. Here’s where you come in… 1. We need help letting people know that East Coast Creative is still us! Facebook it, Tweet it, give us a shout out on your blog, whatever it takes. We want the world to know we’re still here!
    2. For now, the old address will work, but (as soon as it's functional, hopefully sometime today) try to get in the habit of using
    www.eastcoastcreativeblog.com
    *will be working soon!
    3. Let’s all just put RHBC behind us and move on. {Excuse us while we weep in the corner}
    On another note… none of this would be possible without the amazing talent of Kim at 733 Designs. She put up with a lot of our crazy ideas, slight breakdowns, and was super helpful and fast in making this all happen.
    Finally, we are so thankful for all of YOU! The positive feedback we get from you (especially in response to yesterday’s post) is so encouraging. We love this blog no matter what the name,(wait… what’s the name again??) and we’re so glad you do too.

    Soooo…what do you think?!
    With love, The Bloggers Formerly Known as The Real Housewives of Bucks County
    ** Other blog post titles that were considered:-How not to get sued-East Coast What???-The Housewives are Dead to us-Crap we need a blog name-A Case of Mistaken Identity

  • Haven 2012 {Conference Recap}

    Haven 2012 {Conference Recap}

    You want to know what we learned this year at the first ever Haven conference? There are so many talented people in the world. It's true. Every single blogger we met has unbelievable talent, was super cute (I'm not lying when I say that Monica and I left feeling old and frumpy!), and could not have been nicer. It totally felt like a huge family reunion (except that we had never met before!) Seriously, though, we attended some inspiring sessions, chatted with some of our favorite bloggers and enjoyed really fun BFF time, too! It started out with a smooth flight, a pricey cab to the hotel (60 bucks, one way!) and the discovery that the hotel had overbooked and that our confirmation was actually a pending notification. Booo. But the guys at the Crowne Plaza worked it out and we got a room (a nice one, I might add!)

    Upon arrival, we met some of the Haven crew and received our swag bags. There were some pretty sweet finds in the bag, but our favs were definitely the Annie Sloan Chalk paint, Purdy paint brush, Kreg Jig Jr. and a stencil from our go-to stencil girls at Royal Design Studio. Score!

    We attended six sessions total, each of them were taught by some blogging bigwigs- do you see that list below? Southern Rhoda, Tracie at Beneath my Heart, Beth from Home Stories A to Z, Sarah of Thrifty Decor Chick, and Myra from My Blessed Life We were SO thrilled to meet these ladies in real life and hear all the stuff they've learned through their blogging experience. We also spent time talking with vendors (Monica won 3 awesome paint brushes at the Annie Sloan chalk paint booth), and with business cards in hand, checked out all the blogs we hadn't read before,.

    Rashon Carraway, aka Mr. Goodwill Hunting, rocked the Thrifting 101 session! Remember him from The Nate Show? We had fun sharing stories about our times on the show and how great the staff was to us. Good times, I tell you.

    Sherry and John from Young House Love were the keynote speakers, and not only were they adorable, they were so down to earth, full of good tips and witty, to boot. Not fair. We loved their mindset about writing their blog, and their honesty about sort of stumbling into blogging fame.
    We could have talked with Sherry the entire night. She's totally like the other best friend we wish we had.

    We LOVED meeting so many people with similar passions as ours, and discovering awesome blogs we had never heard about. No one truly understands blogging except other bloggers, that's for sure.

    Beth from Free Stylin' and Jamie from C.R.A.F.T

    The highlight of our trip was meeting our blog mentor, Beckie. We've been chatting with her on the phone every week for the past few months. We knew she was insanely talented and driven, but we were so not prepared for how awesome she is in person! And drop-dead gorgeous. Her session about advertising had everyone buzzing about her. And for good reason! Love.that.girl.

    Monica was really excited to meet her, and I was scared, I guess. Awkward, Jess, awkward.
    And I'm sure you've all heard of Allison from House of Hepworths, but we were psyched to meet her since we were in the Blogging 2 Better collaboration with her the past 6 weeks.

    Layla from The Lettered Cottage, taught a killer session on photo styling that rocked our picture-taking world. How she preps rooms for photos is genius, and even though we learned a lot, we're pretty sure that she has a creative eye that can't be duplicated. I am a HUGE fan of hers, so was pretty excited that she sort of knew who we were (or pretended to, anyway!)

    We also had the priviledge of hanging out a bit with Ashley and Whitney from Shanty 2 Chic. These girls make DIYing look amazing. A gorgeous, creative blogging duo.

    And speaking of gorgeous-ness…take a look at Ana White building a rolling storage caddy in sky-high heels and tight cropped pants. Fabulous, isn't it? Makes us feel like we should maybe reconsider our t-shirt and sweatpants attire for DIYing. Or maybe not.

    And finally, here's a shot of us fooling around at the Homes.com photo booth. Our new bloggy best friend, Karah from The Space Between, took this picture and we love it. And you'll love her. First of all, she lives in Curacao, and secondly she does great projects (just check out her rooftop pallet bed) and thirdly, she's a lot of fun to hang out with.

    So that's our crazy recap! All in all we had as really fun time, and I can't say enough how much fun I have with Monica. It may actually be possible that two people share the same brain. Just sayin'.; )
    If you could meet one blog crush, who would you choose?

  • new york nate of mind...

    new york nate of mind...

    I am one lucky gal. I'll be in New York City this week for a taping of The Nate Berkus Show featuring an audience full of design bloggers. I am so excited and hoping to meet a lot of fellow bloggers...

    Thank you all for hanging out with me here. It's so awesome to know a group of folks that are excited about the same things that I am.

    You guys rock! See you in a few days!
    all photos: Nate Berkus Designs

  • Design Icons {of the Blogosphere}

    Design Icons {of the Blogosphere}

    It is absolutely unbelieveable how many amazing, talented and creative women there are out there. We spends loads of time reading our favorite design blogs which inspire us to create beauty in our homes, and so, every month once in awhile when we feel like it, we'll be featuring the homes of bloggers that we love-our

    Design Icons of the Blogosphere!

    Source: ourvintagehomelove.blogspot.com via Jessica on Pinterest

    Up first: my personal favorite, Our Vintage Home Love. Diana has captured the exact feel I want for my house, in her adorable home. She has such an amazing sense of style, and her house exudes calm. Not only is Diana super-stylish, but girl knows her way around a toolbox. She's built several pieces of furniture that I secretly covet really admire, like the Rustic Island she built for her kitchen, the barn door-turned-headboard for her master bedroom, and the salvaged wood shelving unit custom-made for her hubby. No joking- Diana has some serious skills.

    So, without further ado, let's take a little tour of her lovely home:

    Source: ourvintagehomelove.blogspot.com via Jessica on Pinterest
    If that doesn't say,"Welcome. Come sit awhile", I don't know what else would.

    Source: ourvintagehomelove.blogspot.com via Jessica on Pinterest
    Diana painted stripes in neutral colors on her side porch, which are so cute. Genius!

    Source: ourvintagehomelove.blogspot.com via Jessica on Pinterest
    I love Diana's use of textures in her house- lots of khakis and whites in the furniture and wall colors, woven baskets, warm wood tones and great, meaningful accessories complete the look.

    Source: ourvintagehomelove.blogspot.com via Jessica on Pinterest

    Source: ourvintagehomelove.blogspot.com via Jessica on Pinterest
    Aren't those floors to die for? I love the rich color. I'm guessing they're original to the house, which was built in 1905! And do you notice that vintage ladder over there in the corner? Does it remind you at all of my bathroom ladder? (Truth be told, Diana's ladder was the first of many to inspire me to get one of my own!)

    Source: ourvintagehomelove.blogspot.com via Jessica on Pinterest
    Her kitchen is so light and airy. I totally feel like you could walk in there and take a deep breath and poof!- there goes your stress. Yup, that's the kitchen island she built. Impressive, huh?

    Source: ourvintagehomelove.blogspot.com via Jessica on Pinterest
    Her master bedroom features the authentic barn wood headboard. I mean, really, couldn't you envision that door on a barn somewhere? Nope, she built it. Jealous much?

    Source: ourvintagehomelove.blogspot.com via Jessica on Pinterest
    Her den was a labor of love for her husband. She wanted a place he could relax that included items that were important to him.Sheesh- talented and thoughtful? Making me look bad, here, Diana. By the way, I LOVE the pop of red on the pillows.
    So, that's it. I think I'm in love. Head on over to Our Vintage Home Love and leave Diana a happy comment. Let her know we sent you.: )

    Who is your design icon?

  • CWTS Updates, Link Up, and some Favs!

    CWTS Updates, Link Up, and some Favs!

    We weren't lying when we said we were floored by the all of the talent that showed up in our Creating with the Stars submissions post. Seriously, you all made us feel a little bad about ourselves.; ) Every single one of the stars said they had a terrible time narrowing their favorites down to the top 11, and we agreed wholeheartedly! So, while there are only 12 contestants vying for the CWTS title this year (you can see them here!), we thought it would be fun to highlight a few of our favorite submissions that didn't quite make the cut.
    DIY Chunky Floating Shelves by Desert Domicile These babies are gorgeous, and just look at how beautifully they're styled!! We're definitely taking some notes.

    Beaded Chandelier by My Simple Obsession Ack, the time and patience that must have gone into this amazing chandelier! Will you make us one…please?

    Custom Painted French Provencal Dresser by J.Rox Designs Hot pink, curvy furniture? Never thought I'd say this, but sign me up! I loooooove this dresser.
    

    Custom Painted French Provencal Dresser by jRoxDesigns

    Painted Dresser (and that fabulous pallet wall!) by Cape 27 You know we love a good pallet wall, and this one is no exception. Plus, that dresser reminds us of Monica's outdoor furniture upcycle, and we're totally digging the fun art!

    .and because we apparently have a thing for painted dressers, this Woodland Dresser makeover by The DIY Village is so sweet and woodsy that it caught our eye right away.

    Stenciled Dresser

    We just didn't want all the fun and inspiration to end for all of you talented bloggers out there that didn't make it as contestants this year, so we're hosting a weekly linkup party throughout the entire contest. Basically, that means you get to play along and win great prizes!

    Here's how it will work: Every Tuesday Monica and I will be revealing our project for that week's theme. Woohoo! We have some good projects up our sleeves.: ) That same day you can submit your own project that meets the criteria for that week (For example, week one is Upcycle, so anything that you've given new life or repurposed in some way in the last year is game). The winner will receive an awesome prize package from Belmonili and Perfectly Imperfect Shop! So fun! We can't wait to be inspired by your creativity each week.; )
    Don't forget to mark your calendars for these important dates next week when things really get moving!

    Have an awesome weekend!
    Want more EC2? Use the icons below to follow us!

  • gray and red...

    gray and red...

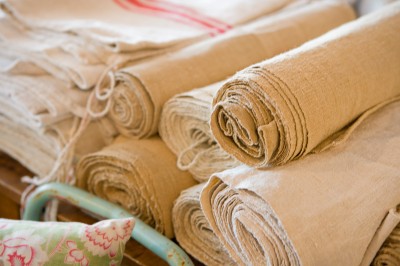
    vintage linens red ticking

    thanks, pam!
    I am crazy happy to have fallen in with you wonderful shelter bloggers and blog readers. You are an awesome group of folks who encourage and inspire. Pretty much every day, you make my day.
    And yesterday? I received this beautiful vintage homespun linen. I was the lucky winner of a recent give-away at Red Ticking. Thank you, Pam for your generosity and daily inspiration to all of us.

  • DIY Photo Block Display {Shanty 2-Chic}

    DIY Photo Block Display {Shanty 2-Chic}

    Good morning, everyone! It's very rare to meet other blogging duos in this blogland, so when we met Ashley and Whitney of Shanty-2-Chic at Haven last summer, we were thrilled! True story: when we were checking in to the hotel in Atlanta, we were told they didn't have a room for us. So we were sitting like total dorks in the lobby (we were even dressed in scrubby outfits!), waiting for a room, when two gorgeous, personable, cheerful girls entered the lobby. We were clueless as to who they were (what? Were we living under a rock?), but it turns out they were the Shanty girls! These two are the sweetest and prettiest women you'll ever see wielding power tools. Super-talented, down-to-earth. and uber-wecoming to the two of us newbie bloggers. If you haven't been to their site, please do so immediately (after reading about their awesome project!) and you won't be disappointed. Enjoy!
    --------------------------------------------------------------------------------------------------------------------------
    Hey guys! We are the Shanty Sisters, and we are so excited to be blog swapping with the ECC girls today! We had the pleasure of meeting them in Georgia last year, and we hit it off from the start! They are sweet girls, and we love that they are a blogging duo just like us!; -)

    With Christmas just around the corner, we thought it would be fun to share a quick DIY gift idea! I love photo gifts. This is a super simple, cheap and cute way to display photos. It cost me under $3 a piece to make these… Woohoo! It makes a great gift for friends and family. Here is how mine turned out…

    And, here is how I made it!

    For those of you that don’t have a saw… This is one you need to have. You can EASILY cut this project and so many others on our site using this. Cheap and easy… Promise! That’s a stocking stuffer gals! Come on… You will thank me! This is a perfect ‘craft’ saw, and you would be shocked at how many projects you can do with it! You can also have the hardware store cut the wood for you. HD has a handsaw just like this one in the wood section at all times.

    That's it for the building part! Now you are ready for the printable! I made a few printables for this project. Today I am sharing the 'So Very Blessed' printable. To print it, just click the photo below. Once it opens, just click print from your top browser bar. I printed mine on cream colored cardstock. I like the weight of cardstock paper for this project, and you can get it super cheap at any craft store.

    I chose to use upholstery tacks to hold my paper in place. These can be found at any craft or hardware store. They are really cheap and cute. They are also really easy to remove by using a small screwdriver under the head of the nail. This makes changing out your printable really easy!

    Your final step is adding photos! I like to print my photos out on photo paper at home. This saves me lots of money, and keeps me from dragging my 5 kiddos to Walmart to pick up photos… Win win! I cut my photos out, put them on the display and I was DONE. So quick, so cheap, but still so cute! My kind of project! And… Did I mention I made these babies for under $3 a piece?? Just making sure! Today I shared the 'So Very Blessed' Printable, but be sure to come visit Ash and I over at Shanty2Chic where I will be sharing the other 3 printables for this project! Here are a few more shots…

    A little bit more about the Shanty Sisters…

    We are 2 sisters sharing how we transform our homes on a budget! With 8 kiddos between the two of us, we put every naptime to good use; -)! From building projects like this $65 farmhouse table

    To transforming things like this $15 mirror made from a Walmart mirror

    And even offering free printables like our latest free alphabet banner!

    We would love for you to come check us out anytime at our site, Shanty-2-Chic.com!

    You can also follow us on Facebook! And keep up with all of our posts by following us on Pinterest!

    Thanks so much again for having us girls! We are honored; -)!! ~Whitney & Ashley
    -------------------------------------------------------------------------------------------------------------------------- Seriously, isn't that adorable?! We love us some cheap projects and this is one of the best ideas we've seen this year! Thanks so much for being here, girls!

  • Barnwood Artwork

    Barnwood Artwork

    We interrupt the Fall Lovers Series to bring you a super cool project that my BFF completed for my dining room. If you don't have a crafty best friend, I highly recommend one! (I'm not positive we're allowed to share this post yet because of The Nate Show taping we did two weeks ago, but I don't think they'll recognize us do you?)

    Now, first and foremost, I adore this project and it looks awesome in my dining room. Secondly, did I mention that Nate Berkus told us that he LOVED it and wanted it for his home (to which I said"Umm…you can have it!" Sorry Jess!)

    Jess is sort of obsessed with barnwood. She can get fabulous barnwood from her father-in-law's old barn. We have big plans for all the wood, so stay tuned for more info about that. (dedicated bloggers take pictures in their garages at midnight. Excuse the quality! It's dedication!)

    The awesome thing about using barnwood, is that it doesn't have to be perfect. I love the edges of this project. You can use any type of wood for the back of your artwork, just choose boards with lots of character to show on the front.

    Jess' inspiration for the pattern came from the material on the dining room chairs I had redone. Remember this post?

    Using some heavy plastic, she planned to trace the pattern from the fabric, but you couldn't see through it. Bummer!

    Don't worry, that didn't stop her! She FREE-HANDED it! Yup, impressive right? I totally wouldn't have tried it, but she did and it turned out great! If you're not as gutsy, you can just put whatever you're tracing on a lampshade and it will make it more transparent. (I can't be held responsible for minor house fires)

    After you paint your design on the wood, let it dry and the seal the entire piece with a water-based wood sealant. This makes the colors darken up a bit, emphasizing all the charater of the wood and gives it that rich, warm feeling.

    I hope you're inspired to create your own art. Amazing art doesn't have to cost millions. In fact, this piece is sorta priceless to me because it was made by my BFF.
    So, sorry Nate…you can't have it,
    but now you know how to make your very own!


    P.S. We're submitting this project to Crafting with the Stars… how cool would that be?? We're crossing our fingers and will keep you posted!!

    Linkin' Up to: TT&J, Tutorials & Tips Tuesday

  • Solar Terrarium Tutorial

    Solar Terrarium Tutorial

    Psssst! We're guest-posting today over at Home Stories A to Z for our bloggy friend, Beth. Head on over to see what we did with an old cabinet!
    --------------------------------------------------------------------------------------------------------------------------
    We love when a DIY project just kind of pops onto our laps. This Solar Terrarium was just that way. We were working on a succulent planter that was really flopping and suddenly came up with this project as a Plan B, and we sure love it!

    Solar Powered Terrarium

    Solar Terrarium Materials List Solar Light Succulent Plant Lantern from Lowe's Scotch Double sided Mounting Tape River Rocks

    Did you see this great project on Pinterest from The Shabby Creek Cottage? I had seen it earlier in the week and was so glad I did. It inspired me to grab a few solar lights at Lowes.

    Inspired to get creative with the solar lights, we first took the light apart to figure it out.

    I had picked up this lantern at Lowe's a while back and it was perfect to let sunlight shine through the top. They come in black and silver.

    We used Scotch double sided mounting tape because we needed it to really stick to the top of the lantern. This is intended for heavy mounting, so it did the trick!

    Flip the lantern over to make sure it adheres really well.

    All that was left was adding stones and a succulent plant. We even kept the succulent in it's plastic planter. It's really that simple! (And what's a blog post from us without a sweet cheesy picture?)

    East Coast Creative Bloggers

    We dimmed the lights and voila!

    Solar Light DIY
    Lantern Transformation
    solar lantern

    Now, you might wonder what we have planned for our Solar Terrarium… I plan to give it a home on our new patio and DIY outdoor table (coming soon).

    I have visions of 3 or 4 of these lanterns going down the center of the table during a nice evening dinner party! Until then, it's temporary residence is the accent table on my front porch. It looks so awesome at night!
    So for under $10 we have a unique Solar Terrarium that took less than 15 minutes to make. It doesn't get much better than that!

  • Halloween Decorating with Sharpie Neon Markers

    Halloween Decorating with Sharpie Neon Markers

    This post is part of a social shopper marketing insight campaign with Pollinate Media Group ™ and Sharpie, but all my opinions are my own. #pmedia #NeonSharpie http://cmp.ly/3/8vNxcO.

    So, occasionally I have those,"You Know You're a Blogger When…" moments. They're the moments when you step back and realize that yes, you are taking pictures of Chili outside and decorating it with wooden pallets and leaves… or like this week when I was checking out at the grocery store and this is what it looked like…

    (Want more of our crazy lives? Follow us on Instagram! @Eastcoastcreativeblog @Jess_EC2blog)

    The boy at the checkout counter was giving me some seriously weird looks!
    Anyhow… I scored the crazy realistic skull for $3.99!

    We have a bit of a"Not Too Scary" Halloween rule at the Mangin house. We're all for having fun and dressing up, but we're not into the darker, creepo side of the holiday. So, while I loved how authentic the skull looked, I knew I needed to pretty him up and my new Sharpie Neon markers that I bought at Target were just the thing I needed!
    I couldn't resist playing around a bit before he got his makeover!

    After playing around, I got down to work. I used the Sharpies to add a pop of color to all the fissures on the skull and then I got to work on his grill!

    He be all up in my grill… and I love it!

    Isn't he looking a lot more cheerful and less scary?!?

    Then came the moment I was most excited about! Seeing this bad boy GLOW!!

    Ahhh! I was jumping for joy over this for some reason! I can't believe how vibrant the colors are when you put them under a black light.

    Look at the difference with the black light!

    After seeing how simple it was to kick the skull up a notch, I decided that I'd use my Neon Sharpies to do a little more decorating. I used newspaper wrapping paper I had on hand (although real newspaper would work too) and made a Halloween themed table runner!

    I had just watched the movie A Beautiful Mind and I thought making the plain paper look like it had hidden messages would be fun! It was amazing how easy it was to find Halloween-like words! And once again the Sharpie Neon under the black light added just the right pop to make it seem totally legit!

    So, if you're looking for some simple ways to decorate this Halloween, instead of dishing out big bucks, just grab a pack of Neon Sharpie markers at Target using this $1.00 off coupon (while supplies last in select stores) and add a POP to some items you already have around the house. You could add some style to plain, dollar store mugs, make a glowing pennant banner, and so much more! One added bonus… my kids thought I was the coolest ever when I showed them how the black light worked! For more ideas using Sharpies for Halloween check them out on Pinterest and Facebook.
    If you love our Neon Sharpie Halloween decor ideas, then check out the other bloggers who linked up with Sharpie as well!

    Monica
  • FOOD & WINE

    FOOD & WINE

    J ust a quick note... F OOD & WINE magazine included a picture of our kitchen in a piece entitled, Food Bloggers' Best Kitchen Design Ideas (page 56) in their January 2011 issue. It came out while Trina was in the hospital, so we've just picked up a copy ourselves. Here's the digital version as shown on their web site.
    Wishing you all the happiest holiday season.
    All the best, Mike

  • Creating with the Stars Round 3 Link Up

    Creating with the Stars Round 3 Link Up

    If you haven't voted for Round 3-! If you missed the first two weeks of projects, check them out below: Round 1 Projects & Winners Round 2 Projects & Winners -------------------------------------------------------------------------------------------------
    Tuesdays are a busy day for CWTS… We share our projects, you link up yours, peeps keep voting, and today we're adding even more!! We know you love all of these amazing projects from these bloggers and we wouldn't want you to miss out on all their awesomeness year round (yeah, they're this awesome on a regular basis!), so today we're encouraging you to LIKE their Facebook pages- we've even made it super simple for you… Get your click on and show these ladies some FB love!!

    Okay, our second order of business is to share our project for the week, but guess what… We're NOT! Yup, we have a project that we can't wait to share, but we're taking part in a Homes.com charity event next month and we're saving the project for that. I know, it's terrible of us, but we have a charity we LOVE and we want to win the grand prize for their organization. Here's tiny peek, but don't worry, I'm not giving away any of the awesomeness!!
    Outdated, oak piano…

    Antibes Green Piano…

    Sorry guys, that's all your getting! I am so jazzed up over this room and this project though. Don't worry, I'll keep you posted and show you the full Monty (umm awkward…) soon!!
    Now it's your turn! Link up your favorite paint projects from the past year. We know you ALL have done something with paint, so you have no excuse… link it up baby!! (Said in my best March madness, Dick Vitale voice)
    Make sure you check back tomorrow to find out the Winner of Round 3 and to see which three are moving onto the Grand Prize Round!!

    jess
    Monica
  1. Just Contemporary Week 2 — Contemporary Roundup
  2. Just Contemporary Review: I Wanna Be Your Joey Ramone by Stephanie Kuehnert
  3. Just Contemporary Interview with Stephanie Kuehnert! (and a giveaway!)
  4. Just Contemporary Review: Thirteen Reasons Why by Jay Asher
  5. Just Contemporary Review: Moonglass by Jessi Kirby