I've shared my dining room conundrum with you in a previous post, and we're really making progress! My wonderful mother helped me score 14 chairs for free! The old Plumsteadville Inn was sold to new owners and they were getting rid of many of the old dining chairs. She knows her daughter well and within five minutes she and my dad had all 14 chairs in their garage. Best. Parents. Ever. Look at these beauties…
Ok, well maybe I have rose colored glasses, but I think they can one day be fabulous! I do wish they had either a more square, modern look or a more ornate, detailed look. They're somewhere in the middle… somewhere around"blah and boring"… but don't tell them or you might hurt their feelings… they do have star potential, I just know it!
oh and the fabric…
So, my first order of business was to create a chair assembly station in the basement
Did I mention this is going to be a Big Project? Fourteen of anything takes a while…
4 screws x 14 chairs = too many to count (It's my goal not to lose any of these, but it's quite unlikely)
14 ugly cushions
Now, comes the decisions… What new fabric to use and what color should the chairs be painted. Originally, I was just thinking black, but hmm… I do love grey, or slate blue, or yellow??? See what I mean, I need some help! I've decided that I'm going to choose fabric first and then work the chairs and the room around the fabric. Here are the options… Yellow and Sable Birds
Grey, Yellow, and Slate Blue (black chairs?)
Slate Blue and Sable Birds (perhaps with blue, distressed chairs?)
Not sure I love this one…
My plan with these fabrics would be to choose a few and have a variety of fabrics for the chairs
Green and Grey (Charcoal chairs?? Black??)
Olive, Orange, and Blue (something about this really appeals to me)
Grey and Green
Bold Yellow (Grey Chairs??)
Here's where you come in… Please give me your opinion in the survey below. Help a Sister out because I'm stumped on this one! Oh, and if you have another Fabulous fabric, please send it my way!
(oops # 1 and # 9 are the same!) Create your free online surveys with SurveyMonkey, the world's leading questionnaire tool. Thanks! Can't wait to hear your ideas!
P.S. The Hubs just previewed my post… BIG MISTAKE …"Birds?? Birds?? No Birds! When did Birds become cool?? We have Birds on the mantle; we don't need Birds on our chairs!"… I'm pretending he just told me he likes all the options and whatever the readers choose is going to be great. {Wink Wink}
Pendant approx. 1" "I once had a sparrow alight upon my shoulder for a moment, while I was hoeing in a village garden, and I felt that I was more distinguished by that circumstance that I should have been by any epaulet I could have worn."
-Henry David Thoreau
American china with bird motif Bluebird China
'Bluebird china enjoyed a brief but spectacular history, first appearing in the late 1800s, reaching its zenith in the early to mid-1920s, and was almost entirely gone by 1930. China decorated with the bluebird motif was produced by over 50 different American companies including Anchor Pottery Company, Atlas China Company and Atlas-Globe China Company, Chippendale China, Homer Laughlin China Company, and Steubenville Pottery Company to name just a few.'
-Excerpt from the book Bluebird China (Schiffer Book for Collectors), above, which can be found Here
Classic Homer Laughlin "Fluffy Bluebird" Pattern
Homer Laughlin Fluffy Bluebird pattern china
Necklace pendant
Necklace Pendant
Bracelet made from a broken tea cup
Broken china mosaic heart with bluebird Bluebirds of Happiness 'The mythology of the bluebird of happiness has deep roots that go back thousands of years. Indigenous cultures across the globe hold similar myths and beliefs about the bluebird. It is a widely accepted symbol of cheerfulness, happiness, prosperity, hearth and home, good health, new births, the renewal of springtime, etc. Virtually any positive sentiments may be attached to the bluebird. ' -Excerpt from Bluebird of Happiness, which can be found HERE in its entirety. Other Bluebird China Patterns
Vintage Lovebirds — Unknown pattern Some examples of a few less common American bluebird china patterns:
Necklace with freshwater pearl and Swarovski crystal
Necklace Pendant
Pin brooch with freshwater pearls and Swarovski crystals
Bracelet displayed on the plate it was made from
Link bracelet How about these sweet little birds? Looks like they've made their nest in a basket.
Necklace pendant, vintage American china
Necklace pendant Entry May 18 'Your words are born not spoken. Dimensional soft-vowelled words palpable to the eye or to the fingertip. Exquisitely curved as the young that flowers conceive. Often I have watched your lips shape words... and your tongue nudge them out like small birds not wholly certain of their wings. Your sweetest words are those shaped ovally like plums or wild birds' eggs. And the long bright ribbons you laugh, the multitudes of hyacinth and bluebells.' -Walter Benton, This Is My Beloved
Pin brooch with freshwater pearls and Swarovski crystals An older, unusual bluebird china pattern, probably circa 1920:
Necklace pendant
Pin brooch with freshwater pearl and Swarovski crystal
Necklace made with Amazonite, Rohodonite, and sterling wire
Necklace
Necklace, unknown pattern Mount Clemens Robin pattern
Heart Pendant
Heart pendant
Pendant
Pin brooch with sterling beads and Swarovski crystals
Heart pendant
Charm bracelet with pearls and various crystals and gems
Silver spoon bracelet
Pin brooch with crystals Another unusual American bird pattern. These look like lovebirds or budgies. Notice the motif surrounding the heart design in the second photo below.
Necklace pendant
Pin brooch Bird of Paradise & Pheasant Patterns "The bird of paradise alights only upon the hand that does not grasp." -John Berry
Unusual, ornate pattern. Pin brooch with Swarovski crystals and freshwater pearls.
' The birds-of-paradise are members of the family Paradisaeidae of the order Passeriformes. The majority of species in this family are found on the island of New Guinea... with a few species occurring in the Moluccas of Indonesia and eastern Australia. The family has forty species in 13 genera. The members of this family are perhaps best known for the plumage of the males of most species, in particular highly elongated and elaborate feathers extending from the beak, wings or head. For the most part they are confined to dense rainforest habitat.' -Excerpt from Bird-of-paradise, which can be found HERE in its entirety
Antique pattern. Pin brooch with heart-shaped coin pearl and crystal.
Heart charm, approx 7/8"
Pin brooch
Beautiful colors! Pin brooch with Swarovski crystals
Pendant Parrots & cockatoos
Art deco china pattern with parrot motif, American china
Same pattern as above. This pin brooch was made from the design on the center of the plate. This Parrot pattern is from England:
Pendant
Pin brooch
English china, necklace pendant Blue Willow birds:
Pendant
Blue willow porcelain from Japan. Necklace made with glass beads, glass pearl beads and sterling wire.
Necklace A few other bluebird and bird china patterns:
Pendant
Pin brooch
Silver spoon bracelet with 7/8" heart charm
Bluebird china earrings
Heart charm approx. 7/8"
Shelley fine bone china. Flow blue bird motif with gold overlay. "One must ask children and birds how cherries and strawberries taste." -Johann Wolfgang von Goethe
Pin brooch with amethyst briolette drop. Newer porcelain.
English transferware with swan motif. Pin brooch
Heart charm, approx 7/8" English transferware
Vintage American pottery with doves motif. Pendant Birds are flyin' south for winter. Here's the Weird-Bird headin' north, Wings a-flappin', beak a-chatterin', Cold head bobbin' back 'n' forth. He says, "It's not that I like ice Or freezin' winds and snowy ground. It's just sometimes it's kind of nice To be the only bird in town." -Shel Silverstein Weird-Bird
Birds are one of my most requested china patterns for jewelry. Because they can be hard to find, sometimes even rare, my finished jewelry pieces made from these patterns on average cost a bit more than other patterns. I hope you enjoyed this look into the world of vintage bird china! No matter how often I look at these patterns, they are still delight me each time I see them! -Laura (all jewelry shown above was made by me!)
I think we can all agree at this point that the some of the biggest theme trends we saw in jewelry and handcrafts in general for 2010 were the appearances of owls, and then later, foxes. (I like to believe, or at least tell myself, the latter was due to the popularity of the '09 November release of Fantastic Mr. Fox, a personal fav of mine that starred George Clooney and Meryl Streep.) If you haven't seen it, watch it. It's funny. My kids liked it too.
Along with the ever-present owl was the nature/trees/earth-friendly theme — a throwback from the 70's with a pinch of groove and dash of Bohemian — as well as recycle/re-use/repurpose theme, that's gaining momentum and I'm sure will continue to through 2011 and on. After all, it's the new standard....
Birds'especially vintage looking ones'they just will remain with u s forever, I suppose....this seems to be one theme that just remains popular year after year, and rightfully so.
What will be hot in 2011? It's a bit early to tell, although I can see the morphing has begun'
My personal forecast is as follows: I think we will see more deer, buck, stag and antlered motif items, also tree and forest themed items throughout the year, with these becoming more prominent during autumn. I also think there will be a return to the mythical'unicorns, Pegasus, etc., and I also think we will see more ocean and ship themes.
As for color in 2011, I think we'll see a lot of earthy, foresty greens and ocean blues, rich indigo and muted olive accented with amethyst, pale butter yellow, and soft honeysuckle.
Lemon Drop Quartz necklace by jbirdsgarden can be found here
Enchanted Forest print by arpadlukacs can be found here
Serenity Ring by happygolicky can be found here
Love Birds Necklace by StefenyStanyer can be found here
Finally, the Spring has come. In just a couple of weeks it has gone from totally white to green all over. Amazing! The trees are already about to blossom, colouful flowers covers the ground and the birds sing happy love hymns.
I reframed this owl print. This was actually a birthday present that I gave my Grandmother years ago. She loved birds. The print means a lot to me so I thought I'd give it a makeover with an old frame and a lighter mat.
Above is what it looked like before. As you can see it's more contemporary and not as crisp or bright with its darker frame and mats. For the first time, I tried the Museum Grade UV Glass because I thought the UV Clear I used on my peony piece was too reflective. In fact, I ended up replacing the glass in the peony piece with the Museum Grade UV Glass as well. Most of the art we have in our home are original oil or acrylic landscape paintings. But lately I've been framing up some prints because I'm working on a salon wall for our den. The antique frame was $20 (what a deal!). Add in the custom cut Museum Grade UV Glass, which was $23, and the custom cut mat for $12, my new piece of artwork cost me $55. But more than the affordable cost of hanging a new piece of art in my home, I am reminded of the memory of my Grandmother and her passionate love of nature.
So. It's Sunday. 20th of March. Bare ground haven't been spotted since midst November. It is now officially reported missing. The birds are starting to sing Spring love songs. And today, when I got up to heal my hurting head, the horizon was in cascades of clear Pink and deep Orange. And it was light outside. So, Spring is here. The problem is only; it isn't here yet.
To celebrate the Spring That Isn't Here, I thought I'd show you a very pretty (of course) Rose that bears my name. I'm amazed! I never thought I'd find a flower that had the same name as I.
Apparently it is a climbing Rose, from the family Hybrid Teas. It's quite thorny (well, so am I), large and with a darker or vibrant shade of Orange. And it is continuously blooming. I think I'll get me one of these. Or two.
O ne of my favorite fall breads is gingerbread. There's just something about ginger, cinnamon, cloves and rich molasses that make it so delicious.
I love to pair fall foods with my brown transferware. I'm certain it makes everything taste better. I purchased the transferware several years ago when I came across them at Home Goods. I bought twelve bowls, salad plates, and dinner plates as I thought they would make wonderful Thanksgiving dinner ware.
This is what the pattern looks like. I love the birds with the flower adornment.
This is the mark on the back.
This monogrammed 'B' silverplate was my Grandmother's everyday ware, but I keep it tucked away for special occasions. I actually found an entire set of this pattern at a flea market, but without the monogram. I wonder where one would bring silverware these days for monogramming ? Gingerbread Recipe: 2 cups organic all-purpose flour 1 1/2 teaspoons ground ginger 1 1/2 teaspoons ground cinnamon 1 teaspoon baking powder 1 teaspoon baking soda 1/2 teaspoon salt 1/8 teaspoon ground cloves 3/4 cup low-fat organic buttermilk 1/2 cup organic sugar 1/2 cup organic molasses 1/4 cup organic low-fat milk 1/4 cup organic canola oil 2 large organic eggs Preheat oven to 350 degrees. Coat 9-inch square baking pan with cooking spray. Combine flour through cloves in a large bowl with whisk. In a separate bowl, combine buttermilk through eggs and stir with whisk. Pour into flour mixture, stirring until moist. Bake for 45 minutes or until done. Cool on wire rack for 10 minutes and then remove from pan. Enjoy. Happy last weekend of October to you! xo
Our most popular blog post has been the Farmhouse Table Remix. If you haven't read the post, check it out here for all the nitty gritty details and the steps to make your own.
Since our table made its debut for the taping of The Nate Show, we thought we'd give you an add-on post that might answer some of the popular questions we get about it. Farmhouse Table Q & A Q. How long is your table and how many people can it seat? A. The table is just under 11ft long and can comfortably seat 16 people.
Q. How long did it take to make the table? A. Building it took about 4 hours, but the sanding took double that. However, if we had the proper tools it would have been a breeze. Eric just used an orbital sander on all the edges to round them. A router would have made this step a breeze. Total time was about 20 hours.
Q. How did you hide the original tables so well? A. Creating the edge casing was essential to hiding the old school tables underneath. If we hadn't added that detailing, you would have seen the old tables and the extender planks we added.
It would have looked something like this…
Q. Is it weird to have an 8-legged table? What does it look like underneath? A. Nah… we think it's kind of cool! Plus, if we have someone over for dinner and have any awkward silence, we can just be like,"Hey, did you know this table has eight legs?" I wouldn't recommend it as a pick-up-line, but for a conversation saver it works like a charm.
Q. What color stain did you use? (this is the most popular question we get) A. I can't answer this one. SORRY! Here's the deal… I tried a million stains and methods and finally had to go to Sherwin Williams. They were able to create a custom stain for me. They matched the stain to a paint swatch from the chair paint. I literally jumped for joy (can you picture that?) when we did a sample board. It was exactly what I was looking for. So, head over to the fellas at Sherwin, they make a mean color match! The reason I can't give you the formula is that we were messy with the stain and it got all over the label. We can't read it no matter how hard we try. Blogger foul. Sorry!
I hope that helps and we love getting emails and comments from our readers, so feel free to contact us if you have any other questions! The biggest thing I want to encourage you with is that YOU CAN DO THIS! We're not woodworkers, we're not all that savvy with tools, but we're pretty determined. If your you (or your husband) are doubtful, just shoot us and email and I'll have Eric convinceyou it's totally doable! Got Chairs? A 16-seater table means 16 chairs! Yikes… with most chairs costing well over $100 each, that would be a whopping $1600! Thankfully, my mom found us FREE chairs that a restaurant were getting rid of. Remember this post? Well, here's how I took these chairs from weak-sauce, to super-cool! (and yes, occasionally I talk like I'm 16 years old… I'm a high school teacher, it's not my fault!)
The first step was to sand every single chair. QUIZ: Do you think I actually did that? ANSWER: Not a chance! I'm far too impulsive and after sanding one chair I decided that sanding was for the birds! I like quick and efficient. I made a little chair assembly line in the basement.
To remove a chair cushion, just flip it over and unscrew all four corners. It might take a little kick to get it to pop out, but it'll budge eventually. Ugh, look at that hideous material.
The chairs needed two coats of grey paint and Eric and I just lined up the chairs in the kitchen and watched a movie while we painted. I must give the hubs HUGE props because I took the kids on a planned trip to Boston, and he finished painting all the chairs so that they'd be ready for the Nate Show taping. <3
This next step is really crucial… find some gal pals that are willing to come help you reupholster 16 seat cushions. If you could read the clock on the DVR, it says 10:15pm and we were just getting started. Have I mentioned I love my girls? We just pulled off the old material and wrapped and staple-gunned the new fabric. It's just like wrapping a present, but using staples instead of tape!
I had picked out some fabric at Calico Corners, but it wasn't going to arrive in time, so I went to JoAnn's and found these two fabrics that I was pretty happy with. I wanted something with grey, yellow, and some kind of aqua or blue. These fit the bill nicely. The Finished Freebie Chairs
I can't wait for everyone to see how great the table and chairs look in my dining room since Jess designed it on The Nate Show. Really, we're both like little kids waiting for Christmas! It can't get here soon enough. Countdown is T minus 3 days! (I really don't know what that means, but it sounds cool when they say it in movies right?)
Oh yes, we almost forgot! The winner of the Starbucks giftcard is…
Liz
Just shoot us an email with your address, and start checking your mailbox! Happy Starbucks-drinking!
Pileated Woodpecker, 16-19 inches tall While I know this has nothing to do with decorating it does have something to do with spring around our home that has made me very excited'our colorful birds have returned! This gives me great hope that spring is here. After Saturdays snow today's high of 72 degrees comes as both a shock and a welcome surprise although it's going cold again tomorrow.
Red-Breasted Grosbeak I looked over to our bird feeders and this guy is the first of his kind to arrive. I know it's a guy because the females are a dull spotted, striped brown. In the bird world it's always the males who are colorful.
Male and female Cardinals There's a whole lot of Amour going on around here!
Robin After that amour they're going to need a few nests for the little ones.
Golden American Finch The only female in that crowd is the dull looking one at the top in the row of three. Definitely not like the human world where females out number the males but the end result is still the same....;)
male Bluebird Just like a man to get the munchies afterwards but soon we'll have the babies visiting our feeders.
Dylan But the best part of the warmer days, a tired puppy after spending the day outside! May you know such peace! ?
Thank you! Thank you! Thank you! Our readers are seriously amazing! You guys have helped me out with two major design decisions in the past few weeks. I promise I'll update you about the family room wall stenciling soon, but Mr. Berkus has been keeping me away from that project. However, even being busy and sick, couldn't keep me away from my Granny Frames Gallery!
You all had so many awesome ideas and gave me great inspiration! I particularly loved this picture that Cori shared with me on Facebook. The colors of those spools are pretty spot on for the colors in the room now!
Here's the comment that did it for me though…
Tracie, who blogs over at Cleverly Inspired, gave me a total"Ah-ha" moment! About a year and a half ago, when I was initially planning out my dining room, I fell completely IN LOVE with this buffet that I found on Google images (remember life before Pinterest??) I tracked down the source and found an adorable blog called The Way We Are.
I love this more than I can even tell you! But, the hubs was sorta feeling like we'd be having St. Patrick's Day every day, so I went a different direction and began my love affair with yellow. Now, thanks to Tracie's comment I realize that I don't have to let go of the green completely. In fact, the vases I already have in the room marry the two quite nicely!
I was a little unsure about the color of this spray paint since the lid is a wee bit bright, but gave it a try…
I know some people are all into gold right now (and I'm liking it too), but for this room I'm going green!
Holy Moly- I'm in love! Okay, since I'm slowly but surely learning life lessons, I'm actually not going to rush and hang these while they're still dripping wet! I actually think I might be distressing the green a bit with some stain as well. I hope to have the whole project completed by Saturday. So look for a final reveal on Monday! ******************************* Now, since we mentioned our shopping excursion last night on Facebook, we thought we'd give you a sneak peek of what we're thinking of wearing. Of course we both got two options, and we'll make a game-time decision. Jess' Outfit Choices… The hangers aren't doing the outfits justice, but they look super cute on!
Jess is leaning towards the dark blue shirt- it's my fav!
Monica's Outfit Choices This one is the one I'm leaning towards, but it's hard to see in pics. It's like sheer knit-lacy combo… It surprised me that I liked it on. I'm kinda Plain Jane.
This is my safe option. I love the birds and can live with the flowers.
We'll let you know what we decided and of course we'll take tons of pics to keep you updated on our final NYC taping. Thanks again for all of your input with the Granny Frames!
P.S. If you don't follow us on Facebook, I'm pretty sure you should!: ) We'll update lots of fun Nate"inside info" there tomorrow! Go HERE to like RHBC!
I'm so happy. Even though I carry my mother's health in my heart, there's room for a man's love there too. We have grown so close these days and I just want to sing like the birds in the sky and hug everyone I meet.
I hope you all have this kind of love in your hearts!
Ok, time for Round 2, and let's just say we're back and better than ever. Well, not us, but the contestants. Their knockoff projects are killer this week!
We can tell that they really want to win the awesome prizes from our fabulous sponsors this week! Let's just recap what they are, shall we?
1. $100 Gift Card toRoyal Design Studio. RDS is our go-to source for all of our stencil projects and our run on CWTS last year was where we were first introduced to them!
2. A pair of $120 Robert Allen pillows fromChic Decor Pillows These pillows are hand-made and absolutely gorgeous. We're sorta jealous that we don't get them.
3. Project featured byHomeTalk, which, come on, is kind of a big deal.
These are pretty fabulous prizes, but let's not forget that one contestant and their star partner will win the Grand Prize at the end of these four weeks! Woohoo!
$500 from Homes.Com $500 Gift Card to HomeGoods Project featured by HomeTalk
We are so impressed with how these ladies took these famous, really pricey items and put their own spin on them to make them unique and fabulous. Let's get this party started!
1. Anthro-inspired Wall Lamp
When I heard this week was knock-off week I knew immediately what I wanted to do. See, I've been seeing this lamp I wanted in the Anthropologie catalog. It makes my heart happy but…my budget doesn't allow for it. Well, could you afford $2800.00 for a lamp? I know, right?!? Ridiculous! So, I took it upon myself to figure out how to make this lamp accessible to mere peons. Or simply those that have a budget.
Granted, I had to change things up a bit. I used pipes more than wooden spindles. And Rub n Buff to achieve some of the finishes. I also wasn't about to do the whole thing in copper piping (have you seen the cost of copper pipes?) so I sprayed pvc pipe with copper paint and Rub n Buffed it to get a nice shiny look. All in all, I have to say that this ridiculously expensive lamp just got beat. Oh yeah Anthro…you hear me??…you are charging too much!
I'll agree that mine isn't exactly the same as Anthro's. True. But, let's see mine is…about 3% of the cost of their's. Okay, I'll make do with not exactly! Truthfully, I love this lamp. It's so quirky, fun, stylish, and feels like an art piece! I'm so glad this contest pushed me to create it, I'm in love with it!
2. Restoration Hardware-inspired Lighted Sign
When I think of knock off, I think copy cat (in a good way). I think of anything duplicated to the T, but is much less expensive. For this round, I chose not to duplicate, but rather I was inspired by this Restoration Hardware arrow and created something a little different. I'll tell ya… with the basic process, you can create just about anything you can imagine. A state, a letter, a number, a symbol, a phrase. It's totally up to you.
Perfect for outdoors.
Perfect for indoors.
3. Schumacher Zimba-inspired Drapes, Anthro-inspired bench and Cornice
I love designer fabric and furniture, but the high prices make it hard to justify (especially when I change my mind frequently!) I like to get a high end look at a fraction of the price by putting a little, time, effort, and creative thinking to work!
I've been obsessing over Schumacher Zimba fabric forever, it is absolute perfection for draperies! But, at about $100 a yard (that means about $300 just for ONE panel), it is definitely not in the budget. By creating my own stencil and buying pre-made white draperies from Ikea, I was able to get two panels for about $25!!
Ever since seeing one doubling as a window seat, I have been dying to build an upholstered bench ottoman. Inspired by Anthropologie's bench ottoman that costs $1,700, I built this ottoman for under $100. I cut costs by using an inexpensive comforter in lieu of foam, upholstry webbing as a top support, and a drapery panel for fabric. It's perfect for extra seating or a place to rest your feet.
Custom cornices can be very pricey especially when topping a large window. For this window, I wanted a 95" length which can cost over $850. I built this cornice using 1x12 and 1x6 to create the frame and a long tablecloth for fabric for under $25.
These three diy projects transformed this window area and cost me only $150. The time and effort was definitely worth it over paying over $3,000 for all of the originals! 4. Faux Chair Slipcover
It looks like a chair, but kinda like a slipcover too… Well, that's because it's a chair covered by a slipcover! Who knew this chair had such high ambitions? I did, that's who!
I saw this faux chair cover on this Danish website and I knew these covers would be perfect for my house. I drew a template and took it to a copy center to have it enlarged. Then I cut it out and appliqued each individual piece to a plain chair cover to create a faux chair on a slipcover.
It's a fun easy project that takes an afternoon. And now all my other chairs are a little jealous! I had fun making that plate wall, too. Just plates and a few vinyl birds. I think they're perfect with my"fancy, new" chairs!
5. Anthro-inspired Ikat Console
ANTHROPOLOGIE. I LOVE this store. I love the colors, the design, the textures, the ambiance, and inspiration that I always find there. When I saw this gorgeous ikat hand painted console, I knew it was the perfect piece of inspiration for my CWTS Knock off. (and at $1698--it's a great piece to knock off; )
Using a cabinet base from IKEA and an ikat stencil from Olive Leaf Stencils, I recreated the console, choosing a similar color palette, with some color adjustments to fit my own house and decor scheme.
They say"imitation is the sincerest form of flattery." Well, Anthro, you most certainly have mine. In honor of my love for this store, I styled the console using some Anthropologie treasures, in addition to some old wooden spools & candles, books and beautiful orange tulips. 6. Anthro-Inspired Sharpie Plate Art
Woo… week 2! After the crazy, hectic, eating-cereal-for-dinner kind of week last week was I was hoping for a"knockoff" project I could knockout quickly. Apparently, I don't know how to do that. I chose to knockoff Lost Arcadia By Molly Hatch sold by Anthropologie for $7,500! Since that's about $7,450 over my budget, I decided to see if it could be done on the cheap.
It's basically 30 plates hung together with a painted scene going across all the plates. At $7,500, that's $250 per plate. Luckily Dollar Tree sells white plates for a buck. And, since I was pretty sure painting freehand on the plates wasn't going to look all that great, I used a Sharpie and a projector. All you have to do is trace… easy.
I chose to trace a botanical print on my plates since I felt it looked a little more modern, but tried to keep the style and overall feel the same–very loose and all black and white. The plates are hung using Command Strips. At 5 feet wide and 6 feet tall, it makes quite the impact on the wall, not the bank account.
7. Horchow-inspired Mirrors
So, here we are at round 2 (Did you see all of the awesome projects in round 1?). This week's theme is Knock-Off, which I love. I'm cheap frugal, and just can't spend the money that some of the big name websites want for their stuff. Plus, I'm sure my husband would think I'm certifiably insane if I bought a $300 vase or $100 throw pillow. But just because I'm designing on a budget doesn't mean that I can't have nice things, right?
I saw these mirrors over at Horchow, and loved them. I'm one of those ladies that thinks that you can never have enough mirrors in your house. Mirrors to make your room look bigger. Mirrors to reflect light and brighten up your space. Mirrors to make sure you don't have food in your teeth. The more, the merrier. But $1095 shipped? Yikes. No thank you. But looking at them, I figured I could make them. A quick stop at Hobby Lobby for the wooden plates and big mirror, a not so quick stop by Home Depot for the rope and other supplies, and a call and stop by the local mirror place for the smaller mirror size that I couldn't find pre-cut anywhere. Then it was time to go home to paint, sand and assemble.
I did have to get creative with the black caps that Horchow has on the ends of their ropes. My solution? PVC end caps, simply spray painted black. Some black BBQ & Stove spray paint on the metal (which is holding nicely as long as you don't bang around the metal) and voila! Drill a hole in the PVC, hot glue the hooks and rope, and BOOM.
Slightly smaller, slightly lighter in color, but perfectly me. 8. West Elm-inspired Wood Tile Dresser It didn't take long for me to figure out what I wanted to do for this week's challenge. I've been lusting after this wood-tiled dresser from West Elm for months and months, but at a whopping $900, it just wasn't going to happen. So, this challenge gave me the perfect excuse to try and re-create it on my own! And I think it turned out pretty awesome.
I found this gorgeous antique dresser at a local flea market and knew it would be the perfect piece for this project. It's not quite as modern as the original, but it has some nice clean lines and wooden casters, which make me a little weak in the knees. With a fresh coat of paint, some DIY-ed hardware, and a whole bunch of whitewashed, hand-cut wood tiles it looks pretty dang close to the original.
Really, if I'm being honest, I like my version just a little bit better.; -) 9. Anthro-inspired Duvet When I first saw the Corin Duvet from Anthropologie, I fell in love with its details. Hand stitching, gathered fabric, pure gorgeousness. But it also came with a price tag that was way out of my league.
I wanted this look for our room but didn't want to spend $400 (and I didn't want to sew anything) so I bought a white duvet cover and a bottle of puffy paint. PUFFY PAINT?! Yes, I said puffy paint.
I used a picture of the original and a steady hand to paint the details onto my duvet.
But don't worry, the look is nothing like those cheesy tee shirts you used to make!; )
--------------------------------------------------------------------------------- It's time to vote! You guys have a ridiculously hard job- we don't envy you a bit! You can only vote one time, but you can vote for your favorite 3 projects. In order to vote, please LIKE EC2 on Facebook. Thanks! Thanks for voting! Check back tomorrow to see Monica's Knockoff that saved her over $1500! Did you miss the Round 1 projects? You can see them all here.Want to know the results of Round 1?Click here!
Woke up at six. It has become a habit lately, but it's okay, the sun is shining, it's seven degrees outside. For now. It'll probably get higher during the day and that's perfect since I'm visiting a friend with a garden. We'll sit out there and talk about all and nothing while her lovely cat hunts flies and birds and ants. I'm bringing fruit and she's got coffee. I can't wait!
The day before yesterday I sunned in solarium and hm. perhaps I shouldn't have sunned as long as half an hour the first time this spring. Today I'm 'kind of' red. I never learn. I want to get color as fast as possible and end up like a lobster the first couple of times. Anyone else have that problem?
Today's news: In a hospital in Barcelona, Spain a man got a full facial transplant after a shooting accident destroyed his face. It's the first time ever the doctors have succeeded in this. The man couldn't breath, eat or swallow before but now he has facial muscles, skin, nose, lips, upper and lower jaw, teeth, palate and cheek bones.
The operation was done on the 20th of March and more than 30 nurses, doctors, surgeons and assistants participated. They operated for 24 hours before the man had his new face.
The most important part of my Garage Mudroom Makeover was definitely the DIY Lockers. Honestly, even when our home was being built, and all we had were studs, I was envisioning a mudroom with lockers. My hubs thought I was certifiably insane!
I was pretty patient (especially for me!) and waited almost two years after moving in to create my garage mudroom.
Just as a reminder here's the before and after…
I surfed Pinterest for some inspiration, and then turned to the guru of all things woodworking… Ana White. We had the awesome opportunity to meet Ana at Haven and she was so down to earth and man can she rock out a pair of heels and a power tool like no one else!
The plans on her site are called Smiling Mudroom and they were really simple to follow.
I definitely made some changes to fit our garage and our needs. 1- I'm never a fan of anything scrolly, so I made the dividers straight. 2- I knew I wanted to add the foot artwork above the lockers, so I didn't add the top cubbies because I thought it would get a little busy. 3- I made four lockers, because well, I have four kiddos. 4- I added lots of extra wooden supports to the backside because my kids are crazy and because even I doubt the quality of my own woodworking skills. Since Ana has all the step-by-step directions, I'm just going to fill you in on a few things I learned along the way. The very first steps were the trickiest for me. I was working alone, so it was hard to get the pieces lined up and nailed in with only two hands. A nail gun would have been SO helpful. I'd highly recommend using one if you tackle this project.
Thankfully Jess came over to lend a hand and one of my husband's buddies came by to see the progress and we totally put him to work as well!
I had this wood leftover and used it as additional support on the backside. It made the piece so much sturdier.
Have you used a Kreg Jig yet? I used the Kreg Jig Junior for this project and it worked so well. You use it to make pocket holes and it's a piece of cake. If you're planning any DIY woodworking projects, I'd recommend a Kreg Jig as one of your first purchases.
One thing I learned to love during this project was trim. It makes a rookie's work look all fancy-pants professional. Before trim…
After trim…Booyah!
Here's a little tip that I figured out after making a few bad cuts when I was just trying to use a tape measure to get the length right.
If you're planning a garage mudroom, make sure you check out the edge of your walls. I overlooked the concrete lip and had to go back and notch out each base piece.
I gave it a quick sanding… AKA I sanded for about 30 seconds before thinking, This is for the birds! Let's get painting! Since I used a VERY cheap plywood it sucked the paint up and actually gave it more of a stained look, which I fell in love with.
I added some hooks to the back wall for backpacks, coats etc. I didn't have studs centered for each one, so I had to use mollys (wall anchors). I picked up the grey bins at Walmart for $3.00 each (they still have them- I checked this weekend)
The locker project was so simple and if my husband and I had worked on it together, we could have whipped it together in about an hour. I was honestly surprised at how easy it was because of Ana's plans.
To check out the Before and After post click HEREFor the Painted Rugs post click HEREFor the Foot Artwork post click HERE Tell me, do you have a mudroom type place in your home? If so, do you feel like it's functional? If not, would you want to build one somewhere? And don't forget that we're in the running to be the New Face of Proctor & Gamble Home! Please head over and vote for Monica. You can vote once a day, now through October 3rd. We SO APPRECIATE you taking the time to vote each day!
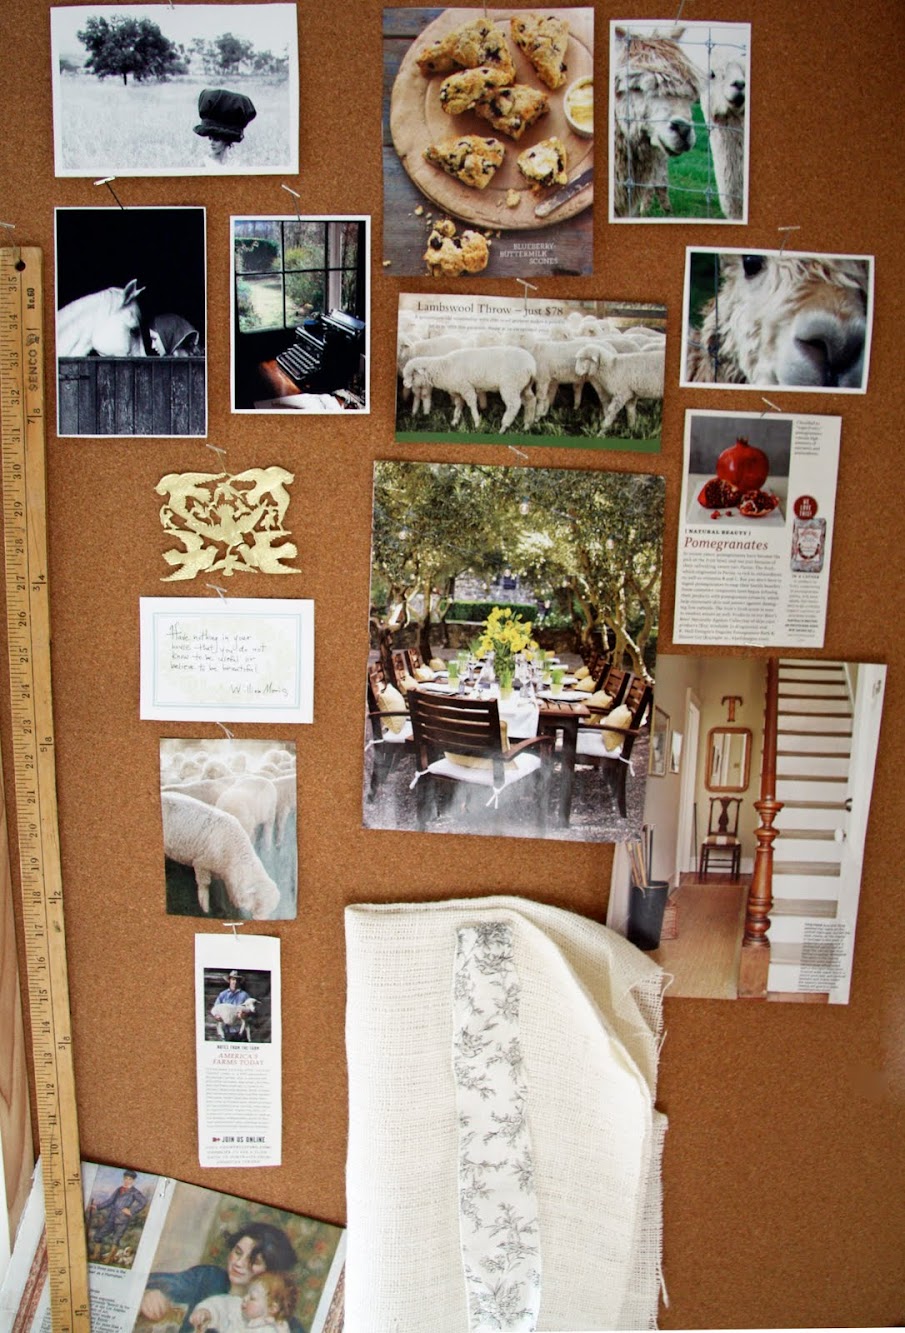
I picked up an oversized cork board recently after realizing that the old one just wasn't big enough. The new one is much BIGGER. It extends about a foot past the edge of the photo. BIG.
My handy dresser is providing wonderful storage space, especially for the one billion inspiration photos that I've been tearing out of magazines for....oh, ever. But I thought a cork board would help me actually look at some of the photos I love, instead of having them sit in the drawer all the time.
The stack of antique gold frames leaning up against the wall are 'in waiting.' Waiting for me to find something perfect to put in them.
Now that I've lived with my sisal rug for awhile, I have to say that I'm quite pleased. Not only does it not show the wheel marks from the castors on my chair, but it's a tight weave so it's easy to wheel to and fro, here and there. The downside to all of these wonderful features is that it's scratchy to walk on....so slippers are recommended.
Behind the white chair is an old lawyer's bookcase. The bookcase comes from the same Great Great Grandfather that the desk belonged to (he was a doctor and both these items were in his office). The case is not big enough to hold all of our books (I'm working on Hubby to build us a big built-in for those), so I thought I'd use it for all of my home and garden design books. Look, room to spare....how convenient. The top case is reserved for my collection of birds nests. xo
Today, a family member is taken to her final rest after a tragic drowning accident. This is for her.
Do not stand at my grave and weep I am not there. I do not sleep. I am a thousand winds that blow. I am the diamond glints on snow. I am the sunlight on ripened grain. I am the gentle autumn rain. When you awaken in the morning's hush I am the swift uplifting rush of quiet birds in circled flight. I am the soft stars that shine at night. Do not stand at my grave and cry; I am not there, I did not die.
Last week we mentioned that we've been really busy working on this Pepto Bismol pink room. Trust me, I love me some Pepto once in a while, but on the walls… not so much. Does this guest room make you want to come and visit? I mean, look, it has it's own personal gym, cable TV, and extra pillows! What more could you want? We're talking 5 Stars Baby!
Ha! It's okay, I know the anonymous homeowners of this guest room and they don't mind a little teasing. Trust me, with how awesome the room is looking, last night Jess and I told them that we definitely want a sleepover once it's all finished! The grand reveal with come on April 24th, but until then here are some major spoilers! Drool-worthy hardware We are sooo crushing on the furniture upscale we did. It was incredibly simple, but makes a BIG impact!
Perfect Colors Have you ever walked into the paint department and felt like certain colors were just screaming for you to notice them? That's completely how this pallette came together. Jess and I met at Home Depot one night and honestly within 3 minutes we had our minds made up.
Umm Gears? Just wait and see. We're actually not 100% sure about all the details for this project, but we know it's going to be awesome. As we told the homeowners…"Trust Us"
Industrial Flair Notice a trend? One of the coolest things about this room is the awesome juxtaposition of styles. We're pairing some funky modern pieces with an amazing 18th Century find. Can't wait to see it all come together!
Honoring Service The homeowners really wanted to incorporate this picture of their grandfather, who served our country. I'm totally a non-emotional gal, but this picture sort of gets to me. One of my good friends Jane, would be so proud of me (she's uber emotional and loves all things military)!
Did We Mention Juxtaposition? Haha! From Army to Blue Birds in a single bound. Don't worry, we're not crazy (okay, maybe a tad) and this will all work out nicely!
Examples of Love & Commitment We have a very cool gallery project for the room. The homeowners (which btw it's really weird to refer to them as"the homeowners" and not just Connie and Mark… Oops! Did I just accidentally reveal their secret identity!) Anyhow… The homeowners had a collection of old wedding pictures from both sides of their parents and grandparents. They've had some amazing examples of what it takes to make a marriage work for the long run. They're going to have a special place to recognize that commitment and how God has blessed those couples in awesome ways.
Have you heard Jason Mraz's new song? I Won't Give Up is one of my top ten favorites right now and it's a great reminder that the road isn't always easy, but it's always worth it. Go listen to it and I'll warn you right now, that it will be stuck in your head, but it's a pretty good thing to be singing all day! So how's that for some spoilers? What do you think of the direction we're headed in? Did you love the Song as much as I did?
Only following on the blog? You're missing out. Use the buttons below to join in on all the fun!