Hey! If you're new around here- welcome! We're super glad you found us and we hope you'll stick around a while. Use the icons on the right to take the plunge and follow us. We love all things DIY and we'd love to share our projects with you! -Monica & Jess ******************************************************************************** Phew! The days that our segments on The Nate Show air are just so surreal. It's sort of like watching someone else there on the TV, you know? Even after four times on the show, it's still so strange. Plus, it's a shame we didn't lose any of our dorkiness over the past few months. We were so busy working our rear ends off to make the stuff look good, that we sort of forgot to play it cool. Anyway, if you missed yesterday's show, you can see the super-fun reveal segment below:
Isn't Nate the cutest? And he seriously could not have been nicer to us. Love him. This room gave us a run for our money, but it came together so beautifully. We love that it took us out of our design comfort zones, and also made us try a few things we'd never done before.

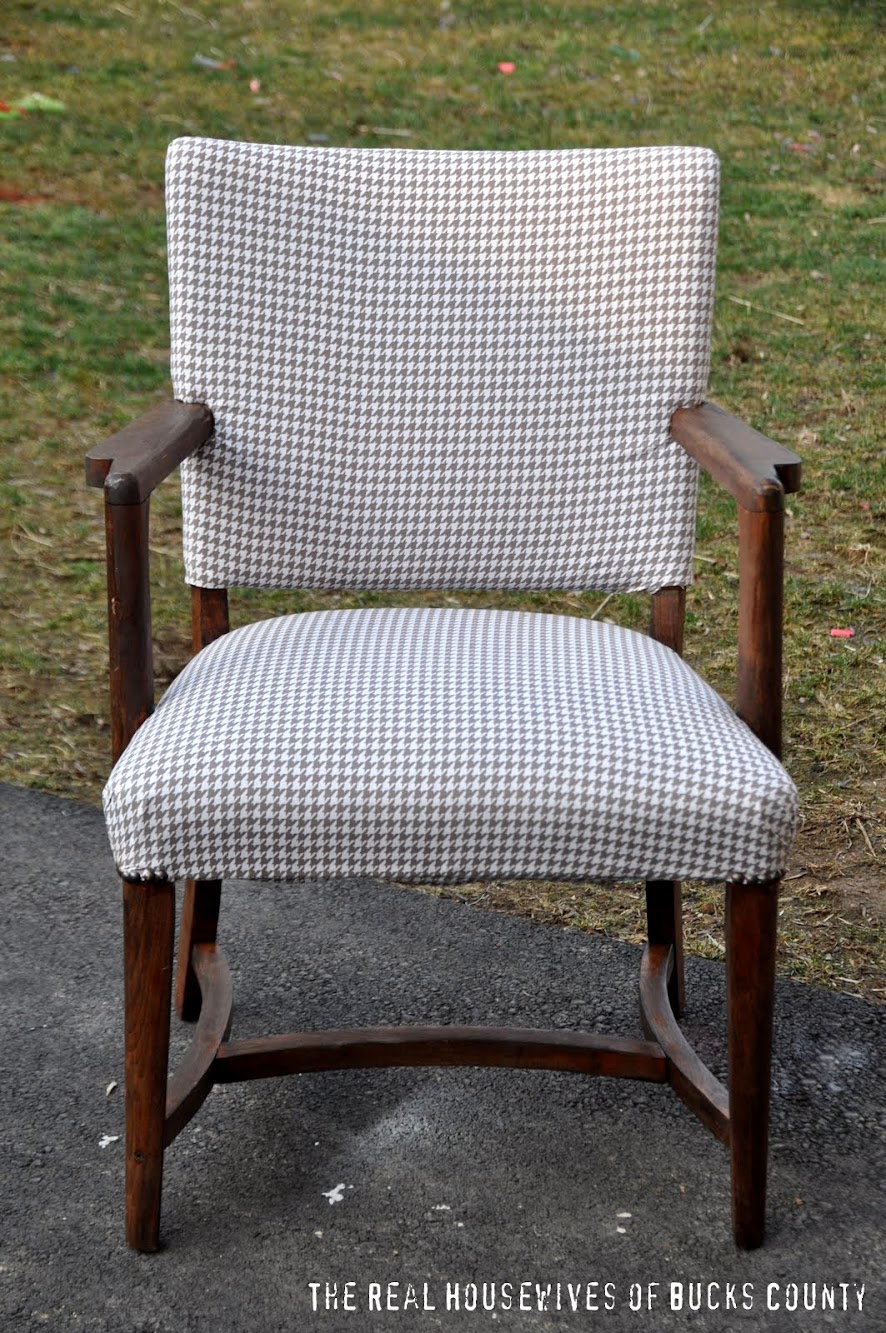
One of the things I'm most proud of is this ugly-$15-beat-up-leather-turned-handsome-houndstooth scene-stealer. Yes,, you got that right. One of our greatest strengths, especially as a team, is that we're not afraid to tackle any project, and this is proof! First of all, reupholstering usually means sewing a bit, and we don't sew. Secondly, we've never even attempted upholstering anything.at.all. So, why not give it a whirl for all of tvland and Nate Berkus to see? Ha! We're crazy.

I'm not even going to try to explain to you what we did in tutorial-fashion, because quite honestly, it was a whole lot of trial and error with some yanking and grunting thrown in. But I can tell you a few simple things that really helped the process go smoothly.

We were able to take the arms off of the chair, which made sanding and staining, not to mention reupholstering one hundred times easier to do. I sanded and sanded and sanded and then stained the arms and legs in a deep walnut. I followed that up with a coat of water-based poly to seal it all up. We used about 1 1/2 yards of fabric and two small boxes of nailheads, both of which we found at Joann's. We sort of viewed reupholstering the chair as wrapping a present, and got started on the least noticeable areas. Once we got going, the process got easier and easier.

It took us about 2 hours off and on to get it right, but we were so happy with the results. It's not perfect, but it's pretty close!

My favorite part, for sure, is the nail head detail along the back. Not only does it look awesome, but it covers the seam so well!


Isn't it lovely? Now, we have to decide who gets to keep it. You can be sure we'll be flipping a coin for it.: )
So, my recommendation to you is go ahead and give that project you're a little afraid of a shot! Sometimes it's worth the risk. Or, if you'd rather not, that's ok too. Let the pros do it for you- we highly recommend Jet Upholstery to get the job done for you. That way you can be sure it'll come out perfect, without having to stand in compromising positions next to your best friend (not that that happened to us!: )
What project are you hesitating to tackle for fear it might not turn out right?


>Linking up to: TT&J, Sundae Scoop, Sunday Showcase, Saturday Night Special, Show & Tell Saturday,