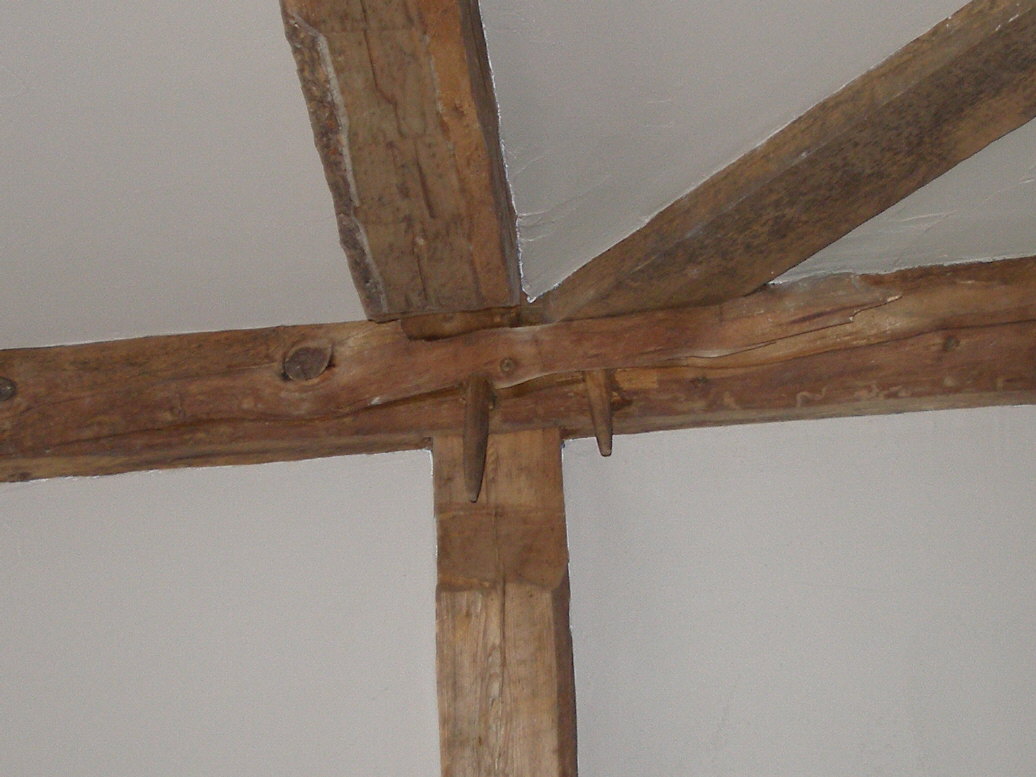
I used to sit up in our dusty dirty barn and dream of making it come alive. I would marvel at the handmade spikes holding all the rafters in place on the ridgepole that runs down the center forming the roofline. If you look at the picture, the very top beam on the left edge, you can still see some of the original bark on the tree that was used for the rafter.

What our barn needed to brighten it up was light and I had an idea. You see that vent at the very peak of the roof, that sits above a main beam. I knew we wouldn't need that vent for ventilation once the barn was renovated so I climbed up on a ladder and did a little measuring '. I measured from the inside, to high on the outside for my taste.

A look from the inside where that vent used to be, that upper hole. That's the end that looks down our driveway and people can see it from the road. It's also the end where mister man built the first granite stone wall underneath the support beam from my last post. I knew after measuring a half round window would be perfect up there so armed with measurements mister man and I started our search for a window.

And Voile, after a couple of years we found exactly what we were looking for and the perfect size. This half round window came out of a now defunct bank but there was only one problem, the window had single panes and would never pass code. So off it went to a window restorer and he simply cut the mullions in half, placed insulated glass in and made mullions to match for the other side. A boatload of money later and some else's hard work and we have our window that will pass code! An antique/vintage window for our antique carriage barn.
What do you think of our window? Trust me the money we spent on the window and having it restored cost us less then buying a new window and this works perfectly. Wait until you see it installed!
?