Remember my kitchen before?
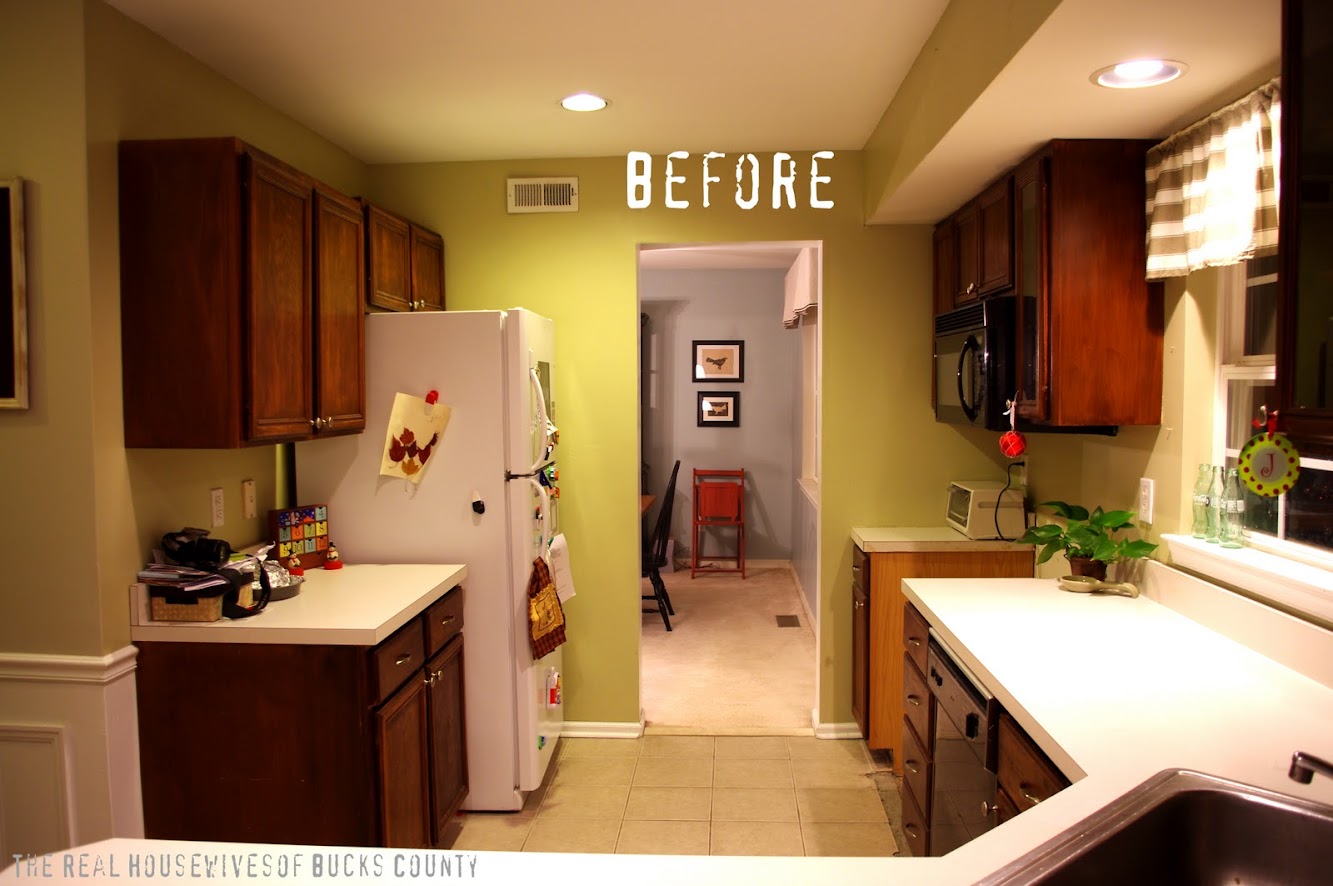
Ouch. That actually makes my eyes hurt a little bit. Now I know that I am so blessed to have a home with a fully-functioning kitchen, so I shouldn't complain too much, but now that we've made some progress in our remodel I can't imagine going back to that.

This is the corner of the kitchen that is getting the biggest transformation. We already knocked out the wall, and took down the cabinets. Then after repairing the half-wall and drywalling, we got down to the fun stuff: painting and stenciling. What? That's not fun for you? You're crazy.: )

The new paint color for the kitchen is the same color we used in one of the stripes in our bathroom makeover — it's Olympic Stormy Weather color-matched in Valspar Premium at Lowes. It's such a pretty color and is so calming. Actually, the other day after we had painted the kitchen, my hubs said,"Our home is starting to feel so calm". Honestly, I wanted to jump for joy and give him a big fat kiss, because that's exactly what I'm going for! I married a good man.

As part of our prize for winning Crafting with the Stars, we each received a stencil from Royal Design Studio. I know, right? So fun! As soon as I picked out my stencil (Large Fabric Damask), I knew what I wanted to do with it. My plan was to hang open shelves on one wall in our kitchen, but I though that an all-over stencil would add so much interest to the wall, and make it go from plain to amazing.

Royal Design Studio offers a whole tutorial on their website, which I actually read thoroughly. I'm usually a"let's give it a go, how hard could it be?" kind of girl, but stenciling was new territory for me and I really didn't want to have to explain to my husband why we needed to repaint the wall if I did it incorrectly. I started out by figuring out the layout. This is one BIG stencil, and it worked out perfectly to do three of each pattern across the wall.

Source: royaldesignstudio.com via Jessica on Pinterest
I started on the far left wall and lined up the very edge of the stencil with the end of the wall, so some of the stencil plastic hung off the wall.

Is that gold paint scaring you a bit? Ha! Don't worry, we used this same stencil with gold paint in our most recent Nate Show project (which we can't wait to share with you!). The color I used for my kitchen was one shade lighter than the Stormy Weather- I don't know the name anymore, but if you get the paint chip for stormy weather, it's on there!

Here's what I learned while stenciling: 1. Stenciling is not for the faint of heart! It's very time-consuming and repetitive: each stencil took me about 25-30 minutes to do. 2. To get clean, crisp lines with no drips, use an extremely dry brush. I poured the paint onto a paper plate, dipped the brush, and then dabbed the brush on paper towels until there was almost nothing left on brush. 3. Use a level to keep the stencil repeating in a straight fashion. 4. Don't worry about getting the paint perfectly even througout the stencil, because the variation in darkness creates beautiful depth. 5. All that work is TOTALLY WORTH IT!

It took me stenciling one whole pattern before I figured out exactly how much paint to use without dripping it, but through trial and error, it became easier and I was thrilled with the crisp lines.

The RDS stencils are made of mylar and are so easy to reposition because there are cutouts that you line up with the stencil above/below/next to it.

Seriously, my right arm grew two sizes bigger during this project. I could *almost* qualify for women's body-building.

Once I got down to the back of the counter, I encountered (ha! get it? En-counter-ed) a tricky situation. We decided to pull the cabinet and countertop away from the wall, since we're hoping to replace the countertops and also slide the cabinets down a bit to fill some empty space next to the oven. So.much.easier.

After day one, this is how it looked:

Pretty awesome, huh? I was giddy about it. Really. Then once I finished up the stencil, we hung the shelves back up and were left with this:

We obviously need two more brackets on the upper two shelves, but I'm completely in love. I'm pretty sure this is my most favorite thing I've done in my house to date. You can see in that picture above that we painted the rest of the kitchen. All we have left to do is sand, prime and paint the cabinets, and the kitchen will be pretty close to finished!

You wouldn't believe how my hands are itching to decorate those shelves, but I'm trying to be patient and wait for the brackets. The last thing I need is to explain to my hubs why we need to buy new shelves. (Noticing a trend here?; )
Did you ever take on a project that took forever, but turned out amazing results?