My Creative Blog [Search results for tell me about it

  • Right Now… What's going on in our World.

    Right Now… What's going on in our World.

    We promised that during our maternity leave from filming (I love getting a maternity leave without having to have a baby btw) that we'd do a whole bunch of things, and one of them was letting you have more little peeks into our real life happenings. With that in mind, we proudly introduce… Right Now a series that we'll do monthly… well actually, basically whenever we feel like it.

    So, here's what's going on in my world right now…
    Loving: This amazing fall weather we're having here on the East Coast. Mid 70s during the day and cool, crisp nights!! It's the best sleeping weather ever! September is probably my favorite month of the year and I'm so thrilled to have some time off to enjoy it! Reading: Last night I finished reading Gone Girl. Thanks so so many of you for giving me book recommendations on Facebook! I liked it, but didn't over the top love it. I'm not sure what about it is keeping me from giving it an A+. If you read it, tell me what you liked/didn't like. I'd love to hear!

    Waiting For: This weekend, but not excitedly… you probably know we breed Bernese Mountain Dogs with our dog Pennlyn. Well, this weekend the puppies leave and go to their new homes. I LOVE the families that we chose to adopt, but it will be super sad to see them go and I will have 4 miserable kiddos for a few days!

    Excited About: A few things… Sunday we're going pumpkin picking and on a hayride with a bunch of our friends!! Our ABC/Live Well Network Season 1 Wrap party for our show- this Thursday night we'll all be celebrating the end of a successful first season. I'm still trying to figure out what to wear… Ugh!!

    Trying To: Eat healthier and work out regularly. This is not my favorite thing, nor something I'm good at! But I have a goal of Oct 23rd, and hopefully will come away from this"maternity leave" happier and healthier. Working On: Communicating better with my oldest daughter…my mini-me. We kinda butt heads a lot. She's strong willed and I'm the queen of strong wills and well, let's just say I'm working on it. I want to figure out the best, most effective way to parent her.

    Enjoying: The 3 hours each day that I have the house to myself, but then I'm also really enjoying the after pre-school, few hours before naptime that it's just Callen and me. It's really fun and nice to have 1:1 time! Using: Tons and tons of Chapstick!! I'm on a medication that makes me have crazy dry lips, so It's me and chapstick 24-7. Wearing: I'm totally in mom mode and usually wear sweats and my favorite Northface sweatshirt almost every day. What's the point in looking cute, if I'm gonna work out at night?!? Planning: I'm working on and planning my kids' playroom makeover. I totally struggle with designing my own rooms lately! I'm cool doing rooms for other people, but if I'm spending my own money I want to love it. GAH! It's killing me!

    Needing: To find a good recipe today that uses a million veggies, bc I have a ton that will go bad soon if I don't use them!! Learning: How to think more before I talk (but don't hold your breath Eric, it's a slow learning process!) Struggling With: Church. We're kind of in this place where we're wondering where's a good fit for us. We've been at the same church for 16 years (and it's a wonderful church! Check it out HERE), but we just want to make sure it's right for us and we're not just there bc it's what we've always done. But, at the same time we're not sure what will be exactly right- it's tricky!

    Listening To: The"Sister of the Year" CD mix made for my by my little brother (well, he's 26, not all that little, but little to me). He has the best taste in music and makes me mixes that have tons of songs that are cool well before they become cool. It's a good thing I have him, bc otherwise I'd never have even a sliver of cool within me when it comes to new music. Product I'm in Love With: My Kreg Jig- hubs used it yesterday to build new benches for our outdoor farmhouse table! Doing: Working down my to-do list for the day. I've committed to today being uber productive! (Up next, responding to emails, then making soup, then putting away all Cal's fall clothes) Dreaming Of: Taking another trip to Europe or somewhere amazing with my hubs. Last year at this time, we were counting down the days for our London and Paris trip.

    This concludes this first edition of Right Now. I hope you enjoyed my ramblings or at least tolerated them! Want more of our day to day ongoings? Follow us on Instagram! Monica- @Eastcoastcreative Jess- @Jess_EC2blog What are you doing, loving, reading, or dreaming of right now?

    Monica
  • Kitchen Renovation {Demolition Phase}

    Kitchen Renovation {Demolition Phase}

    Did I ever mention that I'm impulsive? And that I'm really good at convincing my hubs that the impulse is a good one? Well, I am. Such is the case with our kitchen remodel. I have, of course, been thinking about creating a more open kitchen, one that flows easily into the dining/living room, but it was sort of a spur of the moment decision to tackle that project the week before Christmas! . All of this was inspired by our oven breaking down. We needed a new oven, so why not remodel the kitchen while we're at it??!! Yes, I am crazy. However, I couldn't be more excited about this project, especially since it's the first full-blown remodel my hubs and I have ever done! We're totally newbies at this, but I'm fully confident we can handle it. And we know several DIY"experts" that we can call with questions. I keep telling my hubs that unless we burn the house down, there's nothing we can't fix. Can you tell that I'm an optimist?
    Disclaimer: This is going to be one long, ongoing project that will probably take several months to completely finish. I'll be walking you through all the nitty-gritty details, ala Young House Love, so don't expect the"After" photos next week!: )

    Here's a peek at our kitchen BEFORE:

    That's the dining room beyond the kitchen. See how closed off it feels? That doorway could not be any more narrow!

    This wall is getting a MAJOR makeover. You won't even recognize it- I promise!

    That hole there is where the oven used to be. It now has another home!

    And now, the view into the kitchen from the dining room. The first thing we did was take down that huge mirror. We're so lazy that we didn't ever take that thing down when we painted the room. We just painted around it (in our defense, it's HEAVY, and was really, really attached to the wall). Then we measured and marked and measured again where we wanted to take the wall out. We didn't really use any scientific methods here- we just planned according to what looked good to us, and also where the studs were located. (I've highlighted our sketch below so you can see it better:)

    Then, it was demo time! The hubs took his drywall saw and started cutting away.

    Oops! There was a major heating duct running right through the middle of our opening! Gah! I'm pretty sure that my hubs was less than thrilled with me at this point (and that's putting it nicely). Lesson learned: do some research, like cutting a small hole in the wall to see what's in there first, before knocking down the entire wall. Luckily for us, after some brainstorming, we realized that this duct could be cut down and redirected (more on that in a minute).

    Demolition is not glamorous. In fact, it's gross, messy and downright ugly. You might even find mouse droppings everywhere, along with the home they've made in your insulation. Makes me gag just thinking about it.

    We took out that unbelievably-foul-it-makes-me-want-to-throw-up insulation and got to work cutting the duct with a sawzall. We called in the big guns, aka, my father-in-law, to help since he just remodeled his kitchen and it's ah-mazing! At first we just cut it to the height of the half-wall while we decided what we wanted to do from there, but then we decided to remove the entire duct and redirect the vent into the dining room.

    Kevin took the old ductwork and reconfigured it to shoot the heat into the dining room, then installed it back where it was, but facing the opposite direction into the dining room!.

    The next step was rebuilding the half-wall to make it sturdy. The wall that we removed is a not a load-bearing wall, so it was ok to take it out. Definitely check with someone who knows whether a wall is load-bearing or not before removing it! For whatever reason, this wall had (2) 2x4 studs backed up to each other (for extra support maybe?), so he re-installed new studs with braces in between them. Then came the drywall- an exciting step for me because you really start to see what it's going to look like!

    Of course, we still have to add corner bead, spackle, sand and paint the wall, and add a piece of decorative wood that will act as the countertop to the wall. Phew! The list of things is overwhelming, but the important thing is, we're making progress!: ) So here's where it stands right now: (and yes, you're getting a glimpse of the few other changes we've made, but I'm saving those for another post so this one doesn't become the longest post you've ever read and are not that interested in; ):

    It already makes a HUGE difference in how the two spaces feel, and I can tell that we'll be using our dining room in a whole different way in the future.

    It makes the kitchen so much larger, it's nuts. Woohoo! I can't wait to get to the fun stuff- decorating!
    So, tell me, have you ever remodeled a kitchen? Do you have any tried and true tips we should know?

    And oh yes, this is getting pretty annoying:

  • Fingerprint Artwork {Meaningful Art}

    Fingerprint Artwork {Meaningful Art}

    One of my 2012 resolutions was to add more of ME into the style (or lack thereof) of my family room. I might have taken that resolution a tad literally come to think of it, but I'm still happy with the progress so far! Let me give you a little back story…

    See that artwork? It was hanging in my family room for the past year. It's fine… if you know me well, when I say fine, I mean ehh… take it or leave it. In this particular case, I was ready to leave it, so I started by taking it apart.

    I wanted to do something a tad more meaningful. Trust me, I'm all about art just because it looks cool, but for some reason I was determined to create something a little"deeper" for this room.
    At first I thought I'd use some cool lyrics I love."American Pie" has always been a favorite song, but then I vetoed that because it just didn't feel right and I'm sure there's some weird deep meaning I am oblivious to.
    I decided on Matt Redman's"Blessed be the Name of the Lord", typed it up on an 8x8 and enlarged it at Staples. (Total cost for two was like $5.00)

    Here's the deal on the song. I'm not all like,"woohoo it has to be a praise song" or something like that. Truthfully, I hated this song for about 3 years and would actually leave church every time it was played. I wasn't being a jerk, I just couldn't stomach it. You may have heard me mention my twin boys in my birthday post, and this song has a line,"You give and take away, You give and take away. My heart will choose to say, Lord blessed be your name." Let me tell you for a mom that wanted nothing more than to keep holding her babies that line was beyond challenging for me. So why put it on your wall crazy blogger? Well, over time I've been able to get to the point where I do trust and understand that He will give and take and it's not going to be easy, but I'm not in it alone. He doesn't say I'll give and take and see ya later. It's only by grace that I got through each of our losses without becoming bitter and changed. Okay, enough personal stuff, if you want to read about our journey with the twins, you can check it out here. (Who knows, maybe it will be a help to someone.)
    So I had my lyrics and needed something to go over them. It took some brainstorming and then it hit me. FINGERPRINTS… our fingerprints!
    Here's How I did it! The mat needed a coat of paint. Don't be afraid to change the color of your mat, it's a great, quick fix.

    While they dried, I pulled out my kids stamping kit and took some prints. I'm a dork and started with my pointer, but realized a thumb is a better option. Just press, don't roll and don't use too much ink.

    Then, I took pictures of our prints. I zoomed in as close as I could get, and then cropped in picasa. Editing the picture to black and white and increasing shadows helped me see the lines.

    I happened to have a mini projector on hand (borrowed from a friend about 9 months ago- oops!) and a jar of cherries! I needed the projector a bit higher and they worked perfectly. If you don't have a mini projector an old school, classroom one would work fine too.

    Keeping it real… yes, I still have a Christmas countdown on my walls.

    I taped the paper on the wall and traced in pencil. I almost went blind. It was not simple to see, but it still only took about 5 minutes of tracing.

    I removed it from the wall and traced over my lines with a sharpie.

    After reassembling the mat and frame I was ready for after pictures… Darn that my room is bright with a glare 24-7.

    Here's my new meaningful, fingerprint art.

    I have a second one coming with the hub's print, but I'll show you that when the rest of the wall is finished! I have some fun plans brewing!

    So what do you think of my new artwork? It's okay, you can be honest, I know it's a little unique.

  • Create Art from Anything {Nate Show Wall Panels}

    Create Art from Anything {Nate Show Wall Panels}

    Today's a Seriously Important Day: Happy 30th Birthday Jess!

    (Kev and Jess at the"decades" prom we went to last year- they looked awesome!) Let me just tell you that I officially have the best friend ever. Jess is hands down, my favorite person in the world. She's confident, strong, dedicated to her family, friends, and most importantly her faith and having her in my life for the last 13 years has made it all that much better. So here's to 30 Jess, I can't wait to see what this decade has in store for you. Love ya- have an awesome day! ***********************************************************************

    So every once in a while I have a pretty cool, unique idea… trust me, it doesn’t happen all that often, but when it does I pretty much love it. The stenciled wall panels in our Nate Show room were one of those rare times. If you haven’t seen the room yet, here she is in all of her fuzzy, screen shot taken from a video glory.

    nate show after pic

    We were walking through the thrift store and saw a roll of this black paper stuff. I didn’t know what it was at first, but then I thought way back when and remembered putting a new roof on my parents’ house with a high school boyfriend (ah, the crazy things teenage girls will do to impress boys. Eric couldn’t pay me enough to get on a roof now!)… Anyhow, I remembered it was like the paper that you put under shingles. Tar Paper it’s called.

    tar paper

    This is where the random awesome idea part comes in… I immediately stopping seeing this as roofing material, and I saw it as a canvas-like material for some fabulous high-end-meets-industrial-art. Jess sort of wasn’t quite sure about my plan, but being the wonderful BFF that she is, she trusted me and encouraged me to go for it. Here’s how I turned this roll into art. We had just gotten the stencil in the mail from Royal Design Studio for Jess’ kitchen renovation. Remember, she used it here:

    Jess kitchen

    The first step was to simply figure out the size of my panels, I knew I wanted two stenciled images on each panel. Once I had them cut to size I rolled on two coats of semi-gloss navy paint. I was worried it wouldn’t take the paint well, but it worked like a charm. No primer needed- score one for the lazy DIYer! Once they were really dry, it was time to stencil. Stenciling 4 images was a cake-walk compared to Jess’ kitchen. It took me about 15 minutes to complete both panels. I used DecoArt metalic gold paint and it needed about two coats to really get the pop we wanted.

    gold

    Did you notice all the gold on the stencil when Jess posted about her kitchen? It was a mini spoiler alert!

    stencil

    One additional thing I’m crushing on and could have added to my crush post are grommets. I have been using them as much as I can lately. I pretty much can make an argument that everything is better with grommets! We added them to this piece to give it a finished look and also play off of the industrial nature of the tar paper.

    DSC_0043-1

    These are grommeting tools. The funny thing is that no matter how many times I use it, I have to think pretty hard to get it all lined up correctly. Once you do, it’s a piece of cake.

    DSC_0062-1

    There she is… I’m pretty sure it’s the prettiest a piece of tar paper has ever looked. She’s like the Miss America of roofing materials. (It got a tad wrinkled when it was shipped back to us after the show, but it really does stay nice and flat on the wall)

    DSC_0059-1
    Roofing 1

    I was really thrilled with how they looked in the room and wow, look what Nate was saying during this part of the show…

    Roofing 2

    Oh, you didn’t hear him say that?… weird. Must have been a glitch with your TV. (hehe) The bottom line here is that ANYTHING, literally anything can be turned into art and it doesn’t need to cost a million bucks to be fabulous. This was $10 tar paper (for a whole roll, I could make about 50 more with what I have left) and it was beautiful enough for Nate Berkus.
    So who’s going to their local roofing supply store today? Ha! Actually, next week I’ll share another awesome project I used tar paper for. It’s a pretty cool one and saved me a ton of moolah!

    Monica
  • Not a Girly-Girl…But…{Oasis Nails & Day Spa}

    Not a Girly-Girl…But…{Oasis Nails & Day Spa}

    Hey guys, let me tell you, it's SO nice to be back to the land of the living. I got hit with the flu HARD! 12 days of a fever is lameo to the max! Now that I'm alive again, I'm excited to share a hidden treasure with you. Before I dish, I've gotta tell you that I'm SO NOT a girly-girl. Nope, I am sneaker and jeans girl through and through. Every time Jess and I have to dress up for an event or TV, she's excited to put together an outfit and I'm like,"Jess, can't we just make sneakers and jeans cool??" (Imagine that in a seriously whiny voice) Thankfully, she makes me put my sneaks aside and usually I'm glad about that in the end…
    So recently, I crossed over a little into girly-girl land and I'm never going back!

    Let me introduce you to Oasis Nail & Day Spa. (Umm what? Isn't this a DIY blog?)
    Yup, we're all about DIY here on the blog, but until about 3 months ago, wherever I went, my DIY projects went with me… under my nails! Gross! There was paint under my nails 24-7. I wouldn't bother painting them, because the same day it would be chipped off from one project or another. After hearing about it for a year, I gave in and tried getting a Gel Manicure…

    Guys, this is stinkin' revolutionary! Seriously! So, they claimed it would last for at least 10 days, but for three months straight each application has lasted a full 4 weeks!! I painted, scrubbed, hammered… there's nothing I didn't put my nails through. I wanted to see if they could handle a hard-core DIYer and they could! Now, I'll only vouch for Oasis' quality, I know a few friends that tried gel elsewhere and it only lasted like 8 days. Boo! As I type this I'm on day 16 and they're still rockin'!
    I tend to go with a dark color to hide my DIY evidence, but there are tons of color options for the gel colors…

    Let me tell you a little bit about Oasis Nail & Day Spa, because not all nail salons are created equal. This is our friend Kim, the owner of Oasis. She's awesome and knows all of her clients so well. She even embarrassed me by showing everyone our Ladies Home Journal magazine that she had out on display!

    If you've ever been to Oasis, you'll know that they're famous for a few things… #1- They serve this awesome Korean Citron Tea (and you can actually buy it by the jar now!)

    #2- Kim's staff gives the best back massages while your mani or pedi dries… They also will get you relaxed pre-massage with a hot neck warmer… it's so relaxing!

    Jess and I are hoping to plan a DIYers Day Out this spring where we'll reserve Oasis and invite all of our local readers to hang out with us, talk about our projects, and get a little girly together!!

    But, we don't want you to have to wait for us to check out Oasis. Kim was kind enough to offer EC2 readers a coupon to come in for a visit! (Print Coupon HERE)

    Check out Oasis' NEW Website to find out more about their services, pricing, etc… And make sure you print one coupon for you and one for a friend. It's so much more fun to go with a gal pal! (I met 3 of my favorite girls for Friday night manis before dinner! So fun!)

    Things can get a little wild at Oasis… lol

    So, now that you know that I've become a teeny bit girly with my gel manicures, do tell… Will you be trying one too? What other girly things should I be trying?

  • {Grow}

    {Grow}

    I can't really take credit for this post… I have my awesome husband to thank for making me realize that tracking our kids' growth is really important and special. I don't have to tell you that kids grow up way too fast… I'm pretty sure I see a mom a day posting something on Facebook about their kids growing up too quickly.
    Since we can't do anything to reverse the growing process, I figure we should embrace it and take tremendous joy in watching our four children grow (even if it seems to be right before our eyes.) So of course, we take about 1500 pictures a month of our kids (I plan to fill my retirement years with sorting through millions of jpeg files), but one other thing we started about 5 years ago is measuring our kids. We celebrate and measure on birthdays and half birthdays! It's amazing to see how much growth and change there can be in 6 months and, of course, our kids love that we know their 1/2 birthday and make a big deal out of it.
    So this is where Eric comes in… You may or may not know that I struggle with anything to do with routines, organization, and all that mom stuff… Enter the Outlook Reminder! Eric simply sends me a reminder that goes off on each of the kids' measurement days and voila…semi-organized mom!

    We recently moved into our new home and we weren't sure what to do about the measurement door. We knew we could replace the door and take it with us, but it was a weird size door, so that seemed silly. So, we ran a big risk and just took a million pictures of it so that we could transfer the measurements to the new house. We moved in and initially thought we'd put them on another door frame or somewhere in the master bedroom, but then I decided I wanted it to be more a part of our home. I had a plan in my mind, and thanks to Uppercase Living was able to order numbers and make my plan a reality.
    This is in our 2nd floor hallway… We all walk past it every day and from the foyer below you can see the pictures and the M.

    I'm not usually one for artwork with phrases for living, but I saw this tree art at a store in New England and something about it really struck a chord in me. I decided it might not be my style, but the words (I'll stick them in a comment) are simple and something I'd like my kids to read and to see for the next years of their lives. The M was gold from Hobby Lobby, but a little spray paint and she was perfect. The line is just painted on the wall with leftover grey (of course) paint.
    Worked from the photo of the old door… I had close-ups too…

    I love comparing the kids and how tall they were at certain ages… Kaden was about 1 1/2 inches ahead of Kenzie when they were both 5 1/2… Of course that earned some bragging rights!

    The finished product. I've had the chart on the wall for months, but just finally added the measurements this week and, since I did, the kids have been checking to see if they've grown, and have been reading all their measurements. I'm so very happy with the results… even if there are dirty little fingerprints all over it already!

    Even though I have my growth chart already made, I scoured the web to find some of the coolest options for under $100. Most of these are around $60 and would be something really special to add to your home. Even if you've been using a door frame or closet that no one sees, maybe consider transferring it over to a place that your kids and company can enjoy!

    This Miss Natalie jute cloth measurement kit is adorable. This one is super popular, but I think the paper tags would become part of one of Kira's next craft projects!  Miss Natalie Heirloom Growth Chart

    This modern, bold design would make a huge impact on a room. Oh, it also comes in 40 colors! Love it! Etsy Modern Growth Chart

    Add a little whimsy with a modern tree and a little bird ByrdieGraphics on Etsy

    These simple charts have a European flair and I love how the numbers get larger as they go up… Measure Me Stick

    The measurements are in Metric and English Units, which I think adds a little something… I also lean towards modern lines, so this one appeals to me. (slight confession… this one is over $100, but I liked it too much not to include it!)

    Cute for a child's room or playroom Woodland Growth Chart

    Believe it or not, this is a DIY project. Here's the link and everything is free and printable. Score! Coolest DIY Growth Chart Project

    I'll finish this rather long post with a little poem by Dianne Loomans. Yes, kind of unlike me, but it made me stop and think about my role as a parent because before I know it they'll be all GROWN up…
    If I had my child to raise over again I'd build self-esteem first and the house later I'd finger paint more and point the finger less I would do less correcting and more connecting I'd take my eyes off my watch and watch with my eyes I would care to know less and know to care more I'd take more hikes and fly more kites I'd stop playing serious and seriously play I would run through more fields and gaze at more stars I'd do more hugging and less tugging I'd see the oak tree in the acorn more often I would be firm less often and affirm much more I'd model less about the love of power And more about the power of love.
    So whether you make a growth chart or not, still take a moment to stop today and just enjoy the little people God has allowed you to grow for Him.

    Tip Junkie handmade projects

    Let’s Really Support Each Other:
    Linked up to: The Creative Girl Sumo's Sweet Stuff

  • A Transformation Story {Be Intentional}

    A Transformation Story {Be Intentional}

    We've been crazy excited about this post since our friend Staci agreed to partnering with us! From time to time, we revisit our Be Intentional series. Staci's story is one that we hope encourages you to set goals in your life (in any and all areas) and then take intentional steps to achieve them. We love this girl, we're so proud of her, and are honored to share her story today!

    Meet our friend Staci… ********************************************************************************** I am going to be honest. I am"no good" at home decorating and DIY design and crafting. To be brutally honest, I flat out stink! Oh, believe me, I have dreams about a beautifully decorated bedroom and a warm and cozy living room with amazing wall colors and fresh flowers in beautiful vases accented on my tables and shelves. But, I am just not good at putting everything together to transform a room. So, thankfully, I am NOT writing this post to give you tips about DIY design! Really…you should be thanking me!!! Haha! On the other hand, I thank God for making us all unique and designed for the purposes HE designed us for. So, you may be wondering who am I and why have I been given access to writing to an audience of DIY pros and creatives?!?! I may not be good at DIY design and transforming the rooms of my living space, but I have been on a little DIY transformation…in my body and in my life. My name is Staci. This is me in January of 2010.

    I know what you are thinking. Oh goodness. Yikes. I am thinking it, too. "Did she stuff her shirt with melons?" "Did she put pillows in her pants?" "Is she a really grouchy person?" "She looks angry." All to which I can reassure you…NO. I did not put melons in my shirt. I didn't add pillows to my pants. And no…I am not grouchy nor angry!!! Okay, maybe you weren't thinking"exactly" that, but when I look at these pictures of who I was 2 years ago, I can hardly believe that was me.
    The reality is, I was 260 lbs. of hurt. 260 lbs. of frustration. 260 lbs. of failed diets. 260 lbs. of zero confidence. 260 lbs. of someone I never, ever wanted to become. Sad, unhealthy, embarrassed, lonely and hopeless.

    Have you ever been at your rock bottom? The place where you feel that you are never going to get out of? The place where you feel that no one understands? The place where you feel so far away from where you truly want to be? That was me 2 years ago. I don't exactly remember what it was that sparked a deep desire in me to change once and for all, but I was really starting to think that God didn't create me to be any of the things I was becoming. And he surely didn't desire for me to be trapped in a body that I was ashamed of, embarrassed about and so hurt to be in. Although, one post is not nearly enough to share with you all that has gone on in my life and my transformation over the past 2 years; I will share with you where I am today and the main reasons I am where I am.

    I reached my final goal in November 2011. This is me today at 135 lbs.:

    Never in a million years did I believe that this was possible. I still look at my before and after photos and I cannot believe that was me and now this is me. You can only see the images, but I can see the hurt and defeat in the before photos. And I can see the strength and hope in the after photos. I haven't just transformed physically, I have transformed emotionally as well.

    This picture of my old jeans is a clear reminder of where this journey started! Staci would love for her story to reach and help anyone that might need encouragement. So, you have her permission to Pin her pictures and share it with anyone that could use some encouragement and motivation!

    When people hear of my success or they see it for themselves when they see me, there is always one question that gets asked:
    WHAT DID YOU DO TO LOSE THE WEIGHT?!?! At first, I used to give people my simple cookie cutter answer of what I did: I started eating right and exercising daily. And I prayed. Sometimes minute by minute. But, after seeing the sometimes disappointed looks back at me because for some reason or other, when people give us the straight up hard truth (even though it is common sense), we somehow think that we could never do that. We believe the lies: "I could never do that."

    "I don't have that kind of willpower." You know what? I am not crazy motivated. I don't have any more"willpower" than you. I don't have a magic formula and I sure don't have a magic potion. But, I do have intention and a God who never gives up on me. Even when I give up on myself. Jess and Mon talk often about"Being Intentional". For me, being intentional means doing things even when I don't want to because it is what I need to do. Being intentional means having a plan at all times. Being intentional means setting goals. I am not speaking of having plans and setting goals because I believe I have my future all figured out or that I can truly control what happens tomorrow or next week, but I desire to have a plan and set goals because it is one of the ways that lives can change. It is one way that people can move from an undesirable place in life to a place of freedom and the ability to fully live the life they were designed for! By setting goals, I had to make choices as to"how" I could get to that goal. I set a 6 -week, 90-day, 6-month and"end of year" goal. If the scale wasn't moving, I had to assess what I was doing. And change something immediately. There was no time to go off the path I needed to take if I wanted to meet my goals.
    This was me about 1/2 way through… I was around 190lbs.

    In addition to setting goals, I also had to learn what I needed vs. what I wanted. Monica and Jess have talked about wants vs. needs in decorating. Well, I may have wanted to go out to my favorite restaurant for a big burger and fries, but I truly didn't need a big burger and fries. See the difference? I know, I know…it still seems like it is a willpower thing. But it really isn't. It's looking at my plan. If I want to weigh 10 lbs. less in 6 weeks, a burger and fries isn't what I need. Does it mean I will never be able to have a burger and fries? Not at all. But right now, that isn't part of the plan.

    Bottom line, I am not here to tell you what to do and how to do it. I am merely trying to tell you that you CAN do it. Do what works for you. Do what you know you need to do. Even if you don't have to lose weight, it is still important to fuel your body with healthy, nutritious foods. And it is so important to take some time out of your day to get moving. Find something that you enjoy and get moving! Be intentional. And above all else, remember that you were created for a purpose. By taking care of your body; physically, emotionally and spiritually…you are unleashing a power within that no one can take away. And you are unleashing the power to connect and encourage others around you! When I am struggling or having a day where my wants seem to be trying to overpower the intention of my needs, I cling to the words below. Maybe it is with eating, maybe it is trying to get through an intense workout, maybe it's facing the daily pressures of life. Here is what I hold on to:

    " I know how to live on almost nothing or with everything. I have learned the secret of living in every situation, whether it is with a full stomach or empty, with plenty or little. For I can do everything through Christ, who gives me strength." ~Philippians 4:12-13

    In the midst of the depth of all of this; the tears, hard work, the defeats and the triumphs, I have made every effort to maintain a attitude of openness and realness with others as well as a level of humor. So, I will leave you with one last photo. It is my favorite one of all!!! This is my mom and I in my old pants…yes, two of us!: -) 125 lbs. lost and gone forever!!! I am forever changed!!!

    P.S. I must share that I am a recovering sweets & desserts addict! So, I will share one of my absolute favorite treats that I make almost daily for myself! Enjoy! Quick Chocolate Oatmeal (adapted from my absolute favorite dessert blog Chocolate-Covered Katie) 1/2 cup quick oats 1 small banana (broken up into small chunks) 1 1/2 Tbsp Unsweetened Cocoa 2 Tbsp Unsweetened Applesauce 15-20 drops of Liquid Stevia 1 tsp. vanilla extract 3/4 cup of Light Unsweetened Vanilla Almond Milk or Light Vanilla Soy Milk dash of salt 2 Tbsp. fat free cool whip (optional) Spray small saucepan with cooking spray. Combine all of the ingredients together in the small saucepan. Stir everything together until thoroughly mixed. Turn heat to high and continue stirring oatmeal until oatmeal starts to bubble slightly and thicken. After oatmeal starts to slowly boil, turn heat off and continue stirring for another minute or so to finish heating all the way through. Pour into a bowl and enjoy! For an extra treat, add some fat free cool whip on top! *You can also add a Tbsp of Peanut Butter to the above recipe for a Chocolate Peanut Butter Cup bowl of oatmeal! My husband's favorite!: -)
    ***********************************************************************************
    So how's that for some intentional living? I don't know about you, but Staci has encouraged, inspired, and motivated us big time! Staci recently started blogging about all things health,fitness, and nutrition, so check out Musings of a Wellness Hopeful for all kinds of recipes, motivation, and more!

    Got questions for Staci? Leave a comment and she'll get back to you!

    jess
    Monica

    Only following on the blog? You're missing out. Use the buttons below to join in on all the fun!

    Follow Me on Pinterest
  • How to Make a Gender Reveal Box (that has style) and Plan an Epic Gender Reveal!

    How to Make a Gender Reveal Box (that has style) and Plan an Epic Gender Reveal!

    Yesterday, Jess posted about her fun gender reveal photoshoot with Stacy Salvatori Photography- if you don't know what she's having yet, head HERE to find out!
    I was the lucky one tasked with preparing for the gender reveal photoshoot, which means I was the ONLY one to know what they were having! Mwahaha!
    I knew Jess wanted to do the whole balloons in a box reveal, so I set out to create one cute gender reveal box! I'd seen some on pinterest, but usually it was just a cardboard box with some pink and blue or a little question mark or something…

    Source I decided right away that we needed a box that had some style!

    How to Make a Stylin' Gender Reveal Box 1- Visit your local Lowes or Home Depot and sweetly ask if they have an appliance box you could have (aka free!). They also sell wardrobe boxes at HD that would work, but I much prefer the price of free! I brought along a little friend to help with the sweet-talkin' (sidenote- kids go through such weird smiling phases! It cracks me up!)

    A word to the wise, make sure you plan ahead vehicle wise… Appliance boxes are BIG and luckily I had all the seats down in my van.
    We got our big ole box home and it was time to decorate it!

    2- Decorate the Box- Did you know HomeGoods has the coolest wrapping paper ever? Yup, my favorites are the peacock feather paper and the faux bois paper!

    For this project, we wanted something fun, yet classy to fit in with the pictures. It would be sad to have an adorable family, with cute outfits, and then this big old brown box (and yes, I'm aware that sentence sounds slightly dramatic- it's hyperbole people! lol) I simply wrapped 3 sides of the box with Homegoods navy, chevron wrapping paper (knowing you'd never see the 4th side). I also made sure that if you were looking at the box straight on, that the back inside wall was covered.

    I also didn't want just the navy chevron, or people would assume boy, so I added a band of yellow fabric so it screamed classy and neutral, not baby boy! (Sorry, I hadn't ironed the fabric yet in the pic above- bad blogger!)
    #3- Buy lots and lots of balloons! Jess wanted both pink and blue for some of the family shots, but I definitely bought more of the color I needed. I think I got about 30 balloons in all- better to be prepared!

    It took me about 30 minutes to go from boring and blah to stylin' and ready for the big reveal!

    Now, not all of you know me personally, but I'm assuming you can tell from the blog, that I have a bit of sass in me and I like to give Jess a hard time. For weeks leading up to the reveal I joked that I was going to put the wrong colors in the box, get all green and yellow etc… Since we'd joked about those things, they were out of the question, but then an idea came to me…

    I noticed that the box was big enough to hold a person… and that person should be me! Here's how it went down… I called Jess on the way and told her that with the crazy schedule we'd had filming for Knock It Off that week, that I wanted to prep the photoshoot and head home to have dinner with my fam, rather than stick around for the pics. She was fine with that, and I got there, got everything prepped while they waited inside, and then drove my car out of the driveway and parked it out of site…
    Then, with the help of Stacy (the photographer) I climbed into the box…

    I hadn't fully thought about how long I'd need to squat in there… it ended up being about ten minutes and let me tell you, I could feel the burn! I was in there waiting as the whole family came down for the big reveal…

    Look at this cute, unsuspecting family… yup, I'm in the box for this pic…

    I snapped this selfie while crouched inside, waiting for the surprise!

    Finally, it was time!! With excited anticipation they took off the lid…

    And found out they were having… A MONICA!!!

    I SO badly wish you could have seen the look on Jess' face! I scared her to death and it was awesome! I love how Cam and Charlie are looking up like,"Umm what's going on"
    My legs were sore for about two days, but it was well worth it for the laughs we all had!

    After the fun, I re-prepped the box with the real gender reveal and then we got to celebrate this new little baby!
    So just a word to the wise… choose wisely who your Best Friends are… you never know when one will be creepin' inside your gender reveal box!

    Monica
  • Blog Award & Thank you...

    Blog Award & Thank you...

    I feel very honored to have been awarded the 'Super Comments Award' by Mona from Providence ltd Design. Mona has been with me since my first day of blogging leaving wonderful comments for me along the way ever since, for that I truly thank her.

    The way this works is you answer a series of questions about yourself and then pass it along to seven others who have left wonderful comments so without farther ado'.
    1) Why do you blog??
    I keep wondering that myself since I work ten plus hours a day and time has always been an issue for me but I can't help myself. I only just discovered blogs last year. I mean I saw them listed but didn't know what they were so always skipped over them. Last summer I opened one and I was enchanted. I mean here were all these people opening their worlds to us, sharing their homes. That first day I spent the entire day reading and after a month I wanted to be a part of that circle, so I took the plunge and dived in for better or worse.

    2) Name your three best memories:
    First is my Dad who's gone now'.riding around on my Dad's foot when I was little. I remember plopping on that poor guys foot the moment he walked in the house and he never minded and always gave me a ride'remember doing that? He also taught me how to tie my shoes and ride a bike, it's the little things that make me smile now that he's gone.
    Second was the day I moved from Phoenix, AZ to New York City, NY to be with my future husband. I loaded up a large truck and drove across country all by myself. If you've ever driven a 22-foot long truck you'll know how much work it is coupled with the fact I was changing my entire life and leaving everything I knew. It was the scariest thing I've ever done but also the best. It showed me that I was capable of doing anything and from that moment on if I wanted to try something I did!
    Third was the day we brought Dylan dog home four years ago. I hadn't had a dog in thirty years, dating myself here, I've had Persian cats. My husband really wanted a golden so I said lets get one and I've never regretted it. Dylan's great company, almost to smart for his own good, great to cuddle up next to and loyal beyond belief. But I think the best part about him is his eyes, you look into those golden brown eyes and you see love shining back!

    ?3) Name four of the best fiction books you've ever read: I don't have four favorites, I read all the time and there are to many to name. Some favorites I like revisiting are: Beauty by Susan Wilson The ladies of Missalonghi by Colleen McCullough I love mysteries by Mary Higgins Clark and Nora Roberts I read a lot of textile, art and decorating books too but what I like reading is all over the place.

    4) What are the five best movies ever made?
    Again I don't have favorites because I watch everything under the sun but when I'm alone I like light hearted movies, nothing serious and never anything scary....hate scary movies.
    5) Name five things you cannot live without:
    My family and friends. My best friend Deb is the sister I never had so I feel very blessed.
    My antique textiles, I feel like I've finally figured out what I'm supposed to be doing in my life. It gives me a great sense of peace!
    My computer, I have my web site/business on here and it's easier to talk to my friends overseas.
    My monthly facials, it's relaxing, keeps my face in place and one of the few things I actually do just for me.
    Auctions! I love auctions, the thrill of the hunt, the adrenaline rush just before you bid and sometimes winning, it's very exciting!
    6) If you could change your name what would it be?
    Chase! I saw a movie once with Rene Russo in it and her characters name was Chase, it was a really cool name. I like my name, Debra, but I introduce myself as Debra and people always say "hi Debbie", I HATE BEING CALLED DEBBIE! Not that there's anything wrong with being called Debbie....:)

    7) Tell us a unique and interesting fact about yourself.
    I can build! I decide one day to build a garden room in our side field and the first thing I needed were raised field stone garden beds. So I went out and bought a book, read it and went to work. See up in the far left corner my pile of rubble'these poker flowers are in a perfectly round garden bed that's twelve feet wide, I built that. You'll see better pictures in the spring, promise, now I'll bore you with my ability to build!

    8) What do you love best about yourself?
    My ability to do whatever I set my mind too. I believe everyone can do anything just stop talking about it and go do it. I've accomplished everything I've set out to do in my life so far, yes, it really is that simple. Just do it!
    9) If you had a freaky Friday experience, who would you change places with?
    Honestly, nobody because I like who I've become as a person. I've worked dang hard to become who I am why would I want to give that up? I'd like to have past and present people to dinner to pick their minds but trade places with them'nah!
    10) What is the best thing about being a woman?
    The ability to multi-task if I didn't I wouldn't get half the things done that needed to be done.

    Now it's time to pass this gracious award on to some of the people who have brightened my days:
    Stacey at: Style Addicted Mom Joan at: for the love of a house Sharon at: My French Country Home Jermaine at: French Kissed Deborah at: Boxwood Terrace Vanna at: lvroftiques better known as Delusions of Grandeur Debra at: 5th and State
    THANK YOU!

    I can't believe I actually won something but I did and it's fabulous! I want to thank Debra over at 5th and State and her nephew who chose my name, for the wonderful dessert cookbook by Chef Alain Roby. I can't wait to try out one of the recipes this weekend!

  • How to Paint a Mosaic Accent Wall {Bedroom Makeover}

    How to Paint a Mosaic Accent Wall {Bedroom Makeover}

    Yesterday, I shared my daughter Kira's Colorful Bedroom Makeover with all of you. Check it out here if you missed it. It's interesting when you're doing a room for a little person… there's this part of me that wants to go all crazy blogger-designer-nutso on the space, and then there's the realistic mom side that reminds me that her room will be a disaster of toys in about 3 minutes flat and that I don't need to go over the top to make her happy. Honestly, I'd kind of be going over the top just for my own self-interest. So, with that being said, the mommy voice won out and I went with a fun, yet practical room makeover. I'll guess I'll save up the glitz and glam for the master bedroom (if I ever do tackle it!).

    Today I'm going to share with you the focal point of the room… The Mosaic Accent Wall!

    I'm a total sucker for an accent wall. Honestly, since I was a junior in high school I've been whipping them up! My very first was a blue feather dusted wall in my parents' house. Then, I did a pretty cool square grid wall (again at the 'rents house) when I was a senior. Kenzie's first bedroom had vertical stripes and stars, then I changed to a fun magenta gingham. We had an argyle bedroom too! I wish I had pictures of all of those, but it was in the film day and age- boo! Enough of the trip down memory lane, let's get going with the tutorial! How to Create a Mosaic Accent Wall Since this is the room of my 5 year old, I asked her what she wanted, and she told me LOTS of colors."Mommy, I want purple, blue, green, orange…" and the list went on and on. I thought about it and finally decided, I could give Kira exactly what she asked for- lots of color!

    I bought a sample size of each color and a gallon of white paint to use as my base and for all the other walls. One word of caution, Valspar sample paints do not have the normal bonding agents that regular paint has. It will require more coats for solid coverage. Just keep that in mind when you're planning a project. For me, buying 8 quarts wasn't an option (this was a makeover on a budget) and I'd rather have to do a few extra coats of paint. I had JUST enough- it was close, but we stretched the samples far enough.

    This unfortunate event occurred as soon as we got home with the paint. Grrr… I was sort of hoping Hurricane Sandy would wash some of the stain away a few weeks ago- No.Such.Luck!
    Blogger Fail!

    Here's my supply list: Valspar® Sample Paints Base coat paint Purdy® Paint Brush Chalk-line (a DIYer Must Have!) Tape Measure Pencil Frog Tape® Mini Rollers Paint Trays

    I had to get rid of that BRIGHT aqua color and amazingly, the Valspar white paint & primer in one did the trick! I was left with a blank"canvas" and two weirdos (the hubs and my oldest)!

    There are all kinds of approaches to getting perfectly straight painted lines, but I really think we use the BEST method. I'll tell ya about it, and then you can be the judge…
    1- Measure out your stripes and put tick marks on both sides of the wall.

    2- Use a Chalk-line to get Perfect Guide Lines- Simply, put the string directly on the tick marks on both sides of the wall, pull the string taut, and snap that baby! It is so much MORE accurate and FASTER than using a level and a pencil. Let me remind you of something… you've seen how awkward I am at dancing… would you trust me to use a level on wall stripes? I think not.

    These bad boys are crisp, straight and ready for some Frog Tape!

    3- Use Frog Tape to Divide your Stripes. When I'm working on an accent wall, I know it's going to be the main focus of the room, so I have to have crisp, perfect lines (yes, perfectionist tendencies admitted).

    My hubs uses a few pieces per stripe, but I'm a one stripe wonder. I definitely prefer to do the entire stripe with one piece to make sure there aren't any uneven seams. Also, make sure you tape off the two side walls.

    I love me some stripes!

    After all my horizontal stripes were finished, I randomly placed my vertical dividers. I toyed with using a mini level to get them perfect, but then decided I could do it well enough by eye. Please ignore the epitome of frumpy DIY clothes, no shower, and tape on the leg.

    Whenever I'm working on a project like this I rip off a bunch of pieces the length I need and keep them on the wall so I can get to them quickly, if I'm not using that method, I keep the roll of tape on my arm. Works like a charm.

    4- Paint the Edge of your tape with your Base Color. It's one extra step, but it's the MAGIC INGREDIENT to perfect, crisp lines. Frog Tape alone is excellent, but on an accent wall like this, I had to be sure everything would be perfect. Just take your base coat color (whatever color is under the stripes) and with an semi-dry brush (not dry, but not sopping wet either) paint over every edge. I don't recommend using a roller for this step, I always use a paint brush.

    It makes the wall look a little scary, but it will all work out in the end! Allow it to dry- I gave it about 40 minutes before putting color over it.

    I had a tray and roller for each color. I wanted to work in a random pattern and that meant making decisions as I went along- no time for washing rollers and brushes.

    Finally, it was time to put some color on the walls!

    If you want a random look (like mine) I'd recommend working in one section at a time, mixing your colors as you go.

    Because of the sample paints, it took 3 coats per square. It was a tad scary at first, but by the second coat, I was confident the coverage would be good.

    Jimniy Cricket- Even before I removed the tape I knew I was in love!

    Now, for the Moment of Truth-Removing the tape…
    Once again Frog Tape & the Mangin Method = Perfection!
    Seriously, I do a cheesy dance (you can picture it) every time I remove tape from a project!
    I do recommend removing the tape as soon as you're done-I don't wait for the paint to dry, and I remove it VERY slowly and evenly.

    Here's the finished product!
    It was so simple and took me and Eric about 4 hours from start to finish.

    Here's a before and after…

    It's a lot of color (as requested by Kira), but I like the extreme contrast that the white walls bring. I also could totally picture doing this with muted tones or even all in one color with an ombre effect!

    Almost every morning, I find KJ hunkered down reading books in her PJs… She loves her new room!

    Tomorrow, I'll be giving you all the details on the whiteboard wall and Wednesday one of our favorite things… DIY faux canvases with Staples prints! Make sure you check it out!
    What do you think of the accent wall? Have you ever tried something bold with paint?

  • Swag Bag {Ladies Home Journal}

    Swag Bag {Ladies Home Journal}

    This is NOT a sponsored post. I just want to share with you some of my favorite things!

    You may remember that a few weeks ago (or was it months? I can't remember anymore!) we mentioned that we attended the new Ladies Home Journal launch in NYC. We got the chance to chat with the amazing women who are in charge of making the magazine fabulous, and had a great time brainstorming about how we can begin contributing to the magazine. But, I just have to say that one of the best parts of the day was walking away with a swag bag filled with amazing stuff! I've taken my time and used most of the products, and wanted to give you a rundown of my absolute favorites out of all the goodies. Trust me, once you try them (or try them on, in some cases), you'll be hooked too!
    Capri Blue by Aspen Bay Candles

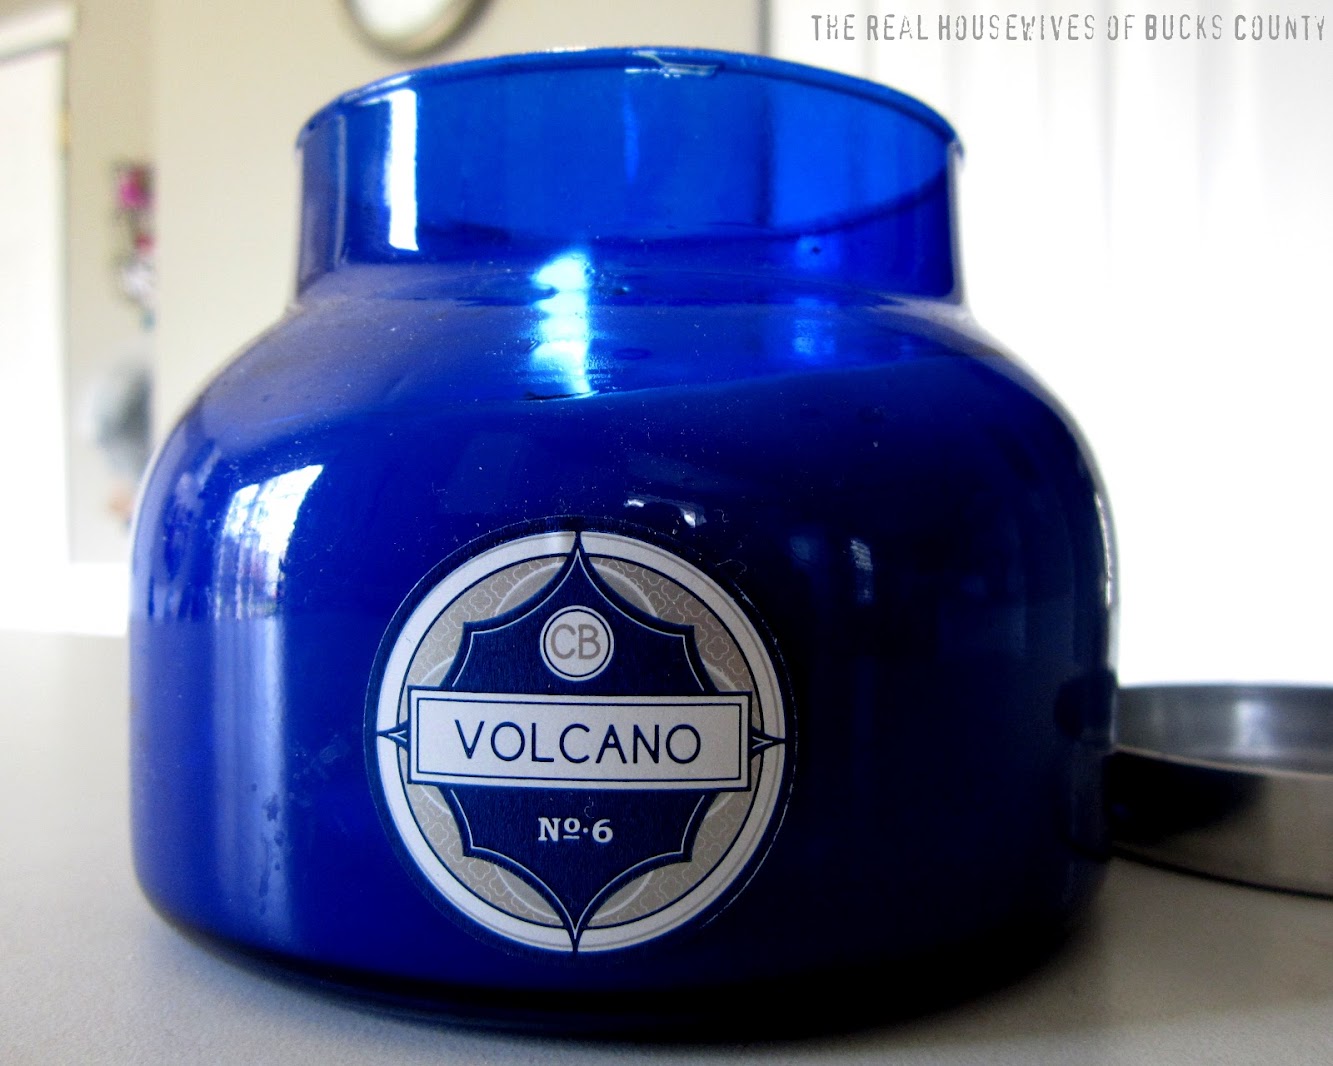
    This candle is like heaven on earth for me. I absolutely adore it. There are several different scents in the Capri Blue line, all of which sound amazing, but ours is the Volcano scent. It's a mix of tropical fruits and sugared citrus. It's a super fresh and clean smell that I'm loving with the spring weather we've been having.
    Gorjana Leather Wrap Bracelet
    

    This bracelet is sweet and tough all at the same time. And I don't think you can tell in the picture, but it's a really pretty, metallic pale pink color. Of course it comes in loads of other colors, as well. Gorgeous.
    LeighElena Wide Jigsaw Bracelet

    This bracelet is a show-stopper. No joke- every time I wear it someone asks me about it, or tells me how awesome it is. It is so cool. Obviously, I'm at a loss for words because it's just that awesome. It's a bit pricey at about $110, but man, it's money well spent (or would be, had I bought it.)
    Maybelline Illegal Length Mascara

    Monica and I both agree that this mascara is the best. I have seriously short eyelashes, and because of this mascara, my eyelashes have never been so long (Maybelline claims this mascara actually extends the length of your eyelashes up to 4 mm, and I think I agree). And just because I do crazy things I'd never thought I'd EVER do as a result of this blog, here's the living proof:

    Ack. I'm checking off"go out in public au natural" off of my bucket list, since I just exposed my naked eyes to all of blogland. Yikes. (No, that is not really an item on my bucket list, people) But, with mascara = so much better, right?!

    And, if for some crazy reason these pictures of me didn't didn't convince you (what's wrong with you?!), go out and buy it yourself. You'll see.
    Boots No.7 Protect & Perfect Beauty Serum & Organix Morroccan Argan Oil Shampoo

    Ok, I'll be honest. I haven't tried either of these, but after seeing those closeup pictures of myself it's clear that I need to start using the Protect & Perfect serum (find it at Target) that claims my skin will look younger after use. Monica did give it a try, and said it made her skin feel so smooth. And with all the abuse my hair takes (why can't I settle on just one hair color?!), I'm sure it wouldn't complain if I used the Moroccan oil shampoo every once in a while.
    Have you ever received a Swag Bag? If so, did you fall in love with anything you got? If not, what items would be a MUST in your Swag Bag?

    jess

    >Only following on the blog? You're missing out. Use the buttons below to join in on all the fun!

  • Done…for now! {Kitchen Renovation Update}

    Done…for now! {Kitchen Renovation Update}

    Ahhhhhh…I can finally breathe a sigh of relief. Well, kinda. Our kitchen renovation that I've chronicled here, here, here and here, is done…for now! You may remember that it all started like this:

    Ugh. That's a sad picture, people. It's not sad anymore, though, just look at it now in all it's *almost* finished glory!

    Seriously, that is one big difference! I am absolutely crazy about our open shelves, new kitchen layout and big opening to the dining room. (Although I REALLY wish I made some sort of effort to clean up our dining room before snapping pics! Bad blogger!) I've been decorating and undecorating the shelves for weeks now, and I'm pretty happy with them, so I figured it was about time I shared. This is how they look right now, but I can absolutely guarantee you that they won't stay this way forever, since I crave change after about 4 days of anything staying the same.

    The blue and green add just the right pop to my otherwise serene color scheme. I really do love the contrast of the fancy stencil with the trendy aqua blue accents. So fun! Those two round pie plates were wedding gifts, but they're only hanging out there until I can find a tray or something that I love- the blues just aren't perfectly spot on.

    Up close and personal:

    You've already seen the printable I made, but the plate right next to it is from the Pottery Barn Outlet. Can't get enough of that thing. That and the bird (from Joann's) are the only new things I bought for the shelves. Everything else was gathered from around the house- you got to work with what you have sometimes, right? Ok, I lied. I forgot that I bought this blue vase at a flea market this weekend for $4, and the mugs came from Ikea.

    I have been scouring the stores to find dish towels that I liked and that matched the kitchen, and couldn't find anything that wasn't chevron (no offense to all you chevron-lovers out there, but I'm just not on that bandwagon!), but I found this one at Kmart! Yes, I was shocked too.: ) Cute, cute, cute!

    I'm showing you this picture of all our mail for two reasons: 1) I just got this mail sorter from Kmart and it's a lifesaver. Really. All that stuff used to just lay on my counter making my already frazzled brain even more frazzled (if that's possible), and 2) See that uncovered outlet? I didn't even realize it didn't have a cover on it until I looked at this picture. It's so ridiculous what you get used to living with, and then start to ignore. *Fingers crossed that that baby EVER gets a cover.*

    Here's a view of the other side of the kitchen:

    We finally cut and hung two more open shelves to house our microwave. I gotta tell you, I so enjoy the extra space on the counters now that thing is off of it. So roomy! And if you're wondering about that crack in the counter, it's there because we moved a cabinet and it's counter from it's original spot on the other side of the fridge. It'll stay like that until we upgrade our countertops, and then it'll be seamless. Technically, I could hide the seam using a painting method a friend told me about, but, honestly, there are so many other things I'd rather be doing with my time.; )

    I'm thrilled that, after 8 years of marriage, I can finally easily access my china. What a nice surprise to see that it actually works really well with my damask stencil and the colors in the kitchen. Woohoo for happy accidents!

    Oh yes! I almost forgot that we installed this new light fixture above the window, and it's stinkin' awesome. Forget about all the additional light it gives off, it's adorable!

    ***Update: Several people have asked where I got this light. It's Allen + Roth from Lowes.

    And finally, a view from the hall. I'm contemplating adding simple, wooden blinds to the window because it seems a bit bare. Anyone have thoughts about that? Should I or shouldn't I?

    So now I've promised my husband that I'll tackle only really easy projects that don't involve him for a while.: ) I think this room has come a long way, and it just feels so much more like me. After a few annoying touchups on paint, fixing some broken tile and installing one more light switch, this pretty baby will be complete. Phew! Next week I'll show you what I finally decided about the curtain situation on the other side of the room.

    Next on my agenda? A dining room redesign! I can't wait to show you what I have up my sleeve.

    So, what's your favorite part about my new kitchen? Color scheme, open shelving, white cabinets, something else entirely?

    Linking up to: Tutorials & Tips

  • Green Painted Piano {Annie Sloan Chalk Paint}

    Green Painted Piano {Annie Sloan Chalk Paint}

    Before we get into today's post, we want to announce the winner of the Mother's Day Giveaway from Salvatori Photography…

    Congrats Holly! We know your session pics are going to be amazing! If you missed it, Wednesday I shared the awesome story session pics Salvatori Photography did for my family. Check it out here. Even if you didn't win, Stacy would love to take pics for you! Contact her before her schedule for late spring/summer is full! -----------------------------------------------------------------------------------------------
    I don't play the piano… well, that's not entirely true, I took lessons for about two years, so there are about 3 songs I can pluck out- Ode to Joy, Hey Jude (talk about random!), and one nameless song that is kind of my signature song. Long story short, I stink! Eric however, is an amazing pianist. I absolutely love listening to him play. Our kids have names for all the different songs,"The Angry Song" is a fast song and the kids run around our house like crazy people when he plays it. I love watching him play and it reminds me how crazy talented (in so many areas) my hubs is.
    As much as I love the sound, I have never been a fan of the look of the oak piano. It's just so dated and not me…

    Because the piano was so blah, I let two years go by with our front living room looking pretty much like this… no style, Eric's choice of colonial blue on the walls, and just an overall hot mess.

    My living room is attached to my dining room, so the difference between the two rooms was pretty stark…

    We finally decided to take the plunge and paint the piano! I knew I was going to for ages, but I didn't know what color, so I wanted until I was positive!

    I decided on Annie Sloan Chalk Paint in Antibes Green. I'm sure you know all about ASCP, but if you don't it's one of the coolest paint products out there! It is a chalk paint, but not chalkboard paint. Basically it adheres to all kinds of surfaces and wait for it… you don't have to sand!! Boyah!

    Since I didn't have to waste time sanding, I got right to taping. I needed to make sure that I was super careful and no paint would damage the piano since the hubs actually uses it.

    The prep work took me about 5 minutes and then it was time to paint. Eric was working on painting stripes on the ceiling for me (post coming on those soon) and we just put"Hit List" on Fios and got our painting groove on.

    Yeah, I don't look too thrilled, but I promise I was…

    How's that for a comparison… bye bye nasty oak!

    I did two coats, but after the first I knew I was in love!

    Chalk paint looks really uneven when it's drying, but have no fear- it looks nice and smooth once it's fully dry.

    I used Annie Sloan dark wax to seal the piano and give it the darker, rich color I wanted. I'm not going to give you any tips on that part because I completely did it wrong! Apparently I was supposed to wax with clear wax and then dark… I just tell people, I was going for a more imperfect look! Ha!

    The bench got ASCP on the legs, but to add a little awesomeness, I upholstered it with this fabric from Spoonflower.

    Ahh! I love the fabric with the green!

    So what do you think of the before and after? I hear so many people say,"but you can't paint it- it's REAL wood!" and I want to go on the record saying,"It can be REAL wood and still be REALLY ugly!" Don't be afraid to paint!!

    And now for an onslaught of after pictures… I'm so happy to finally have a living room that I love!

    And don't forget… We're the ones in a contest now and if we win, we get to give $5000 to the charity of our choice! We need your help, though- you can learn more about our project and the charity we chose here, or go vote for us every day for the next two weeks right here (like their page and then click on the Crafting for Charity button on their FB page). Thank you!

    And just because this absolutely made my night… look at the picture I found on my computer! I recently taught Kaden how to use PicMonkey and apparently he's having a good old time with it! I actually might frame this pic I love it so much…"ther is monsters"

    Have a great weekend and watch out for those darn monsters!

    Monica
  • Doggy Style…

    Doggy Style…

    No… I'm not getting all creepo on you… this is a PG blog-Our moms read it! What I'm talking about it this adorable ball of fur that's now a part of the Mangin family…

    I'm seriously head-over-heels in love with her! She's a Bernese Mountain Dog that will be eight weeks old today and she has the sweetest disposition ever! Jess came over to meet her the other day and was surprised at how smitten I am, so she said,"I didn't think you were a dog person?" to which I replied,"I'm not! I just like my dog!" Ha! What can I say? It's true!
    So in honor of Miss Pennlyn (AKA Penn) I'm sharing some Doggy Style projects…
    Four Post Bed… Puppy Luxury! I first saw this bed a few years ago in a Lowe's Creative Ideas magazine, and immediately loved it. I don't think the size will work for Penn, but I love the look and idea of it.

    Source: lowescreativeideas.com via The Real Housewives on Pinterest
    You could also just find a coffee or end table, flip it over and get your DIY on, turning it into a bed. And of course, I'm loving the yellow!
    Crate Bed Since Pennlyn will be a pretty big dog, I'm thinking this style bed is a bit more her speed. I'm loving this DIY bed made by Home Frosting and I can't wait to make one. She used leftover 1x4s, but I think I might use some free pallets. The finish she created is fabulous!

    Source: home-frosting.blogspot.com via The Real Housewives on Pinterest
    DIY Pet Tags Leave it to Martha to come up with these adorable tags.

    Source: marthastewart.com via The Real Housewives on Pinterest
    I was about to order a generic tag from the pet store, but I plan to try this DIY this week before going the generic route. I just need to make sure it's heavy duty enough. I'll let you know how it goes!
    Pet Art I'm not really a huge fan of having pet pics all over the place (remember… not a"dog person") but I do think some pet art might be cool in the kids' playroom.

    This took me about 30 seconds to create on Picnik. I used the"Posterize" effect and voila… Pet Art! I think I'll order it as a canvas this week.
    Hungry Puppy? Since we've only had Penn for 5 days, her food is just in the bag, but I do have ambitious plans to create some kind of cool looking container. The hubs thinks I'm insane and wants to know why the dog food container needs to be cute, but he knows who he's married to, so he's cool with it. Here's one fun idea…

    Source: tidymom.net via The Real Housewives on Pinterest
    The style isn't mine, but I think I could add some of my own modern flair to it. I sorta had something wooden and rustic in mind, so we'll see…
    Custom Stuffies These are the funniest things ever! I think they'd make such an awesome gift! This seller on etsy makes custom stuffies for your pet. Just send a picture of your pooch and you'll get a look-a-like stuffie in a few weeks! I've contacted the seller, because she doesn't have this as an active listing right now, but I'm hoping she'll be back at it soon! Pennlyn definitely needs a mini-me stuffie!
    WAIT! Hold the press! Shevon contacted me and you can now buy a custom stuffie!
    Here's the link: Custom Stuffies (Soooo stinkin' Cool!)

    Source: etsy.com via The Real Housewives on Pinterest

    So, it looks like I have a lot of projects to get working on! Although, before I get working on my puppy projects I think I need to get Penn house-broken and doing fancy tricks (can I teach her how to go get my laptop for me?) I'll keep you posted on Miss Pennlyn and any cool projects we make for her!
    Oh, one last thing… She WILL NOT be owning one of these… Thundervest…No Comment!

    Source: thundershirt.com via The Real Housewives on Pinterest
    Thanks for letting me introduce my little lady to you!

    WAIT! Don't stop reading! The voting for Crafting with the Stars is now open! We've entered our first project and we need your votes. We obviously can't tell you which project is ours, but we can give you a hint… look for the coolest one… that'll be ours! Nah, we really do have some stiff competition, so head over and vote for your favorite 3 projects. The winners will be announced Wednesday. Thanks! Click HERE to see the entries and vote!

  • Paint Chip Wall Art

    Paint Chip Wall Art

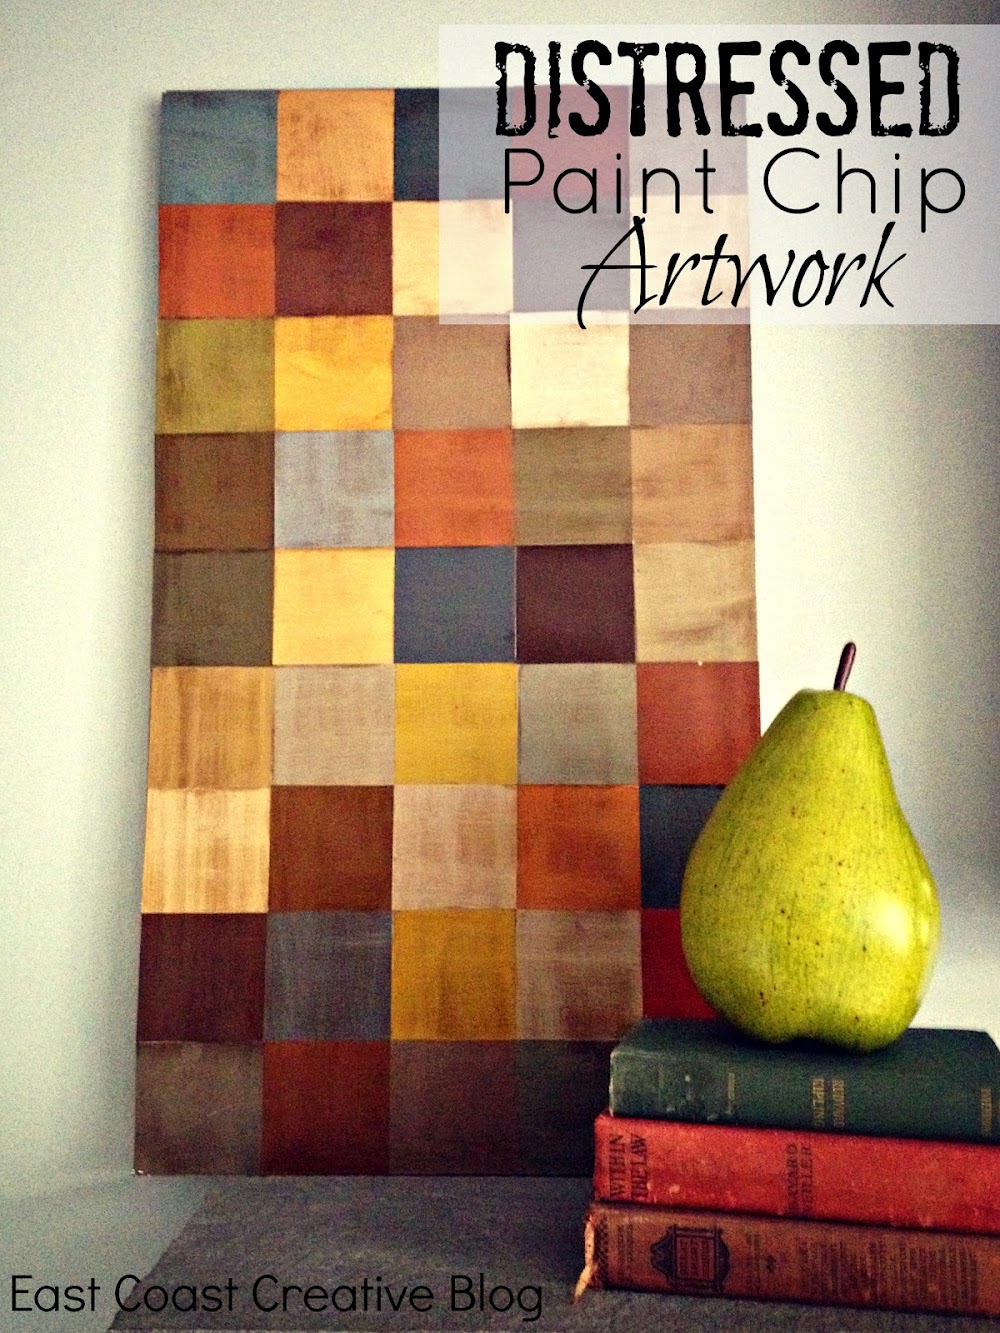
    While meandering through blogs and design sites a few weeks ago, I found a super-cool paint chip wall. It got my wheels turning…

    Design Sponge Source I started exploring ideas with paint chips and the potential is huge! I love the full wall and considered it for my office, but wasn't 100% sold, so instead I tackled a DIY Wall Art project inspired by Life, Crafts, & Whatever. If you want to buy something similar it will cost you 300 smackers from Ballard Designs

    Now for my version… The first step was to visit Lowes with a really large purse! Paint chip samples are FREE, but I still felt a little shady while I took oodles of paint chips. I didn't take more than one of any color, so it was legit. I'll shamelessly plug my awesome Paint-Chip-Taking-Purse from Thirty One Gifts

    Want one? Contact my fav 31 consultants Mandy they even have new patterns I'm loving!
    Once I got home, I tossed all the samples on the floor to choose the colors that made the cut…

    Next, I whipped out my little paper cutter and removed the paint names. I picked these chips because they were rectangular and I new I could cut the names off and still have 3x3 squares.

    I quickly texted Eric to stop at Lowes and get me a 27x15 piece of plywood. Some women like their husbands to arrive home with flowers- I prefer plywood!

    I figured out what layout I wanted… I eventually did move those two yellows that were too close together.

    Spray adhesive is my nemesis, (I mange to get it everywhere and it's impossible to get off my fingers) but it was essential for this project. The stickier the better! And if you're wondering… yes I did this project in my bedroom on the carpet- I drive my hubs nuts!

    I worked one row at a time, so I didn't mess up my pattern.

    Now, if you know me, you know I'm laid back and easygoing, but I kinda like things to be perfect when it comes to DIY projects. I had to put my personal neuroses aside for this project and tell myself that it would look good in the end… see…that white crack showing would normally drive me nuts!

    Spray, place, replace, replace again, remind myself it's doesn't have to be perfect, repeat… over and over!

    Ta-Da! The finished layout all stuck down.

    Next, I had to seal my art and add lots of yummy texture. Enter Mod Podge. It goes on cloudy and white, but dries clear- don't panic!

    I brushed it on evenly, but then went back and added texture by brushing vertically and horizontally.

    I allowed two coats of mod modge to dry (about a 1/2 a day) and then it was time to stain. I was NERVOUS about this part because I was liking the project and was afraid to ruin it!

    There I am… I just used a paper towel and rubbed it all over…This is apparently my nervous face.

    I covered the entire surface and then let it dry for about 15 minutes

    Then came the fun part! I wiped off some of the stain and created a"vintagey" look. After letting the stain dry for at least a few hours, I did one final coat of Mod Podge to seal it all together.

    This wouldn't be a DIY by Monica without some mistakes… I should have painted the edges first, but I was too excited to start, so I waited until the end, which meant I had to tape the top. Oh Snap.

    When pulling off the tape… AAARRRGGGG!!! I was not a happy camper! Thankfully, I'm used to making mistakes, so I'm good at fixing them.

    In the end, I LOVED how it turned out. It was almost free, has so many colors that I can use it anywhere (and yes, it has already been in two different rooms in my house), and was made.by.me- Gotta love that!

    Oh, and have I introduced you to this fella? It's a MASSIVE (about 8inches high) pear that I found at Marshalls. I was thinking of painting it, but once I got it home it occurred to me that I love bold color and this guy already had it going on!

    Beside the fact that I loved this project, Kenzie (my 10 yr old) really liked it (and if you know Kenz, that's a BIG deal), so we're making a pink and grey one to match her bedroom.
    So, what do you think?
    What have you made with paint chips?

  • Moving Right Along {Bathroom Redesign}

    Moving Right Along {Bathroom Redesign}

    Well, well, look what I found:

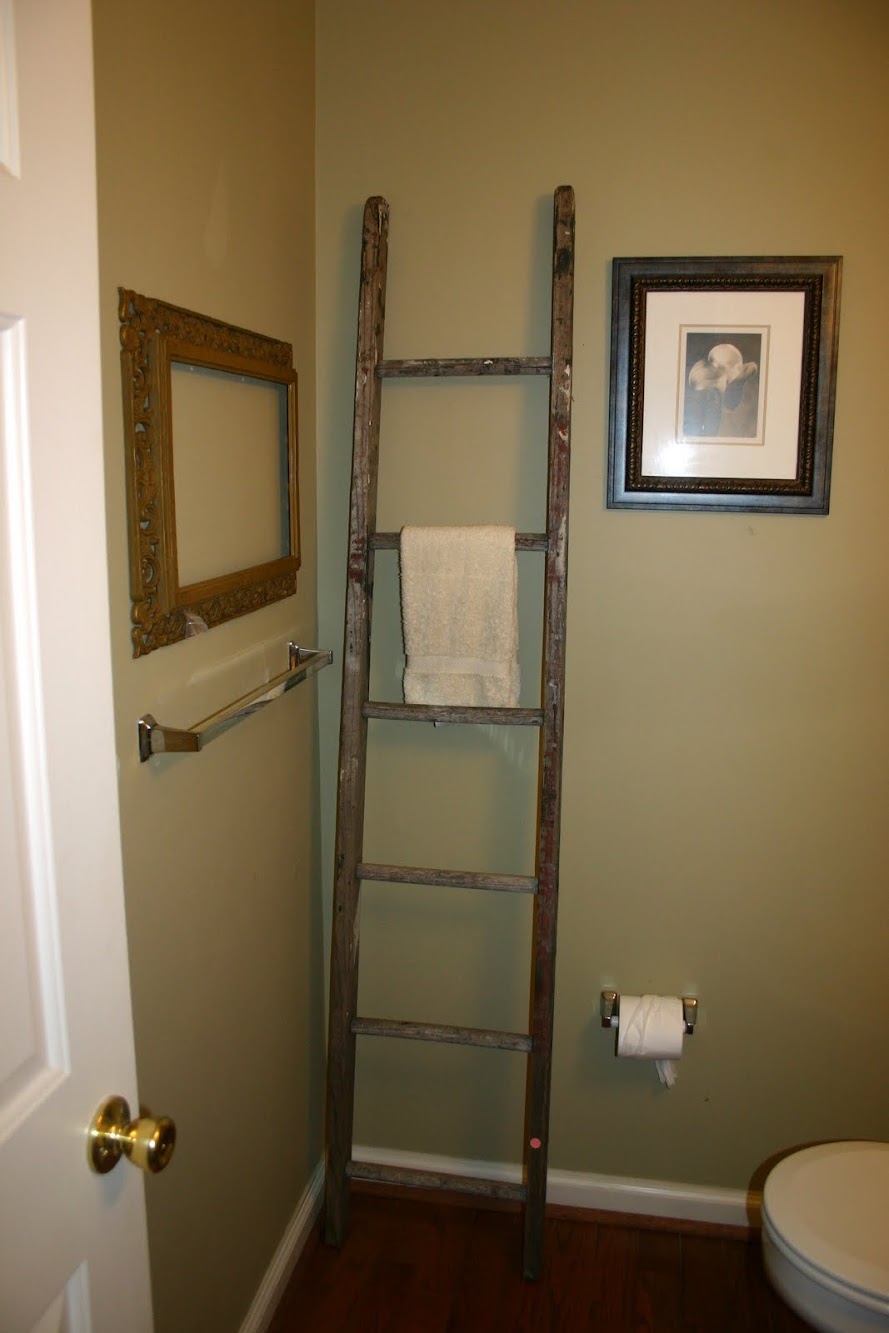
    Remember my post about the game plan for my bathroom? I really wanted a ladder for the space to as a stylish way to hang a few hand towels and other little things we might need in the bathroom. I found one this weekend while visiting my sister in Lancaster. There is a house that we pass on the way to my sister's that has hundreds (no exaggeration) of old windows and other random junk in their yard. Of course, that's like the jackpot for a cheap DIYer like me, so we stopped by. Lucky for me, they had a few ladders like this one and I was able to buy it for $15! (Talked her down from $20. Oh yeah, I drive a hard bargain.) Out of all the things I've bought for my house, besides my statement piece, this one is my favorite. It captures the feel I'm going for in my home (and no, that feel is not old paint shop in case you were wondering.) This really tall little beauty needs some loving, as in, a good sanding and maybe a few coats of a water-based polyurethane to bring out the wood tones. There's just one too many different colors of paint on her for my liking, so once they're sanded out, she'll be perfect.

    In other news, we bought a mirror at Lowes for the bathroom. Originally, I planned on thrifting a cheap, unique mirror, but we came across this one marked way down on clearance at Lowes, and I'm totally loving the shape of it.

    (Yes, that is my garage filled with lots of old barnwood for my various projects. Yes, my husband gives me the stink eye because of it.)

    And how do I like the color of this mirror? Umm, not so much. Black with red undertones? I don't think so.

    I'm planning on painting the mirror frame and then doing an antique glazing treatment on it to make it look weathered and well, antique. Something like this:

    I've finally chosen my paint colors, Olympic Whispering Wind and Quill, which I'll have color-matched in Valspar paint (that covers better with less coats). You can't tell in this picture, but they are very neutral beiges that are almost gray. LOVE them.

    And finally, the lighting. Thanks to some suggestions by our awesome readers (who knew to look at outdoor lighting??!!), I've narrowed down my choices to this large bronze wall-mounted light fixture that is actually meant to be outside. It's from Lowes and costs $39.98. I really adore everything about it, but I'm not sure the color is exactly the feel I'm going for.

    Zoomed: Portfolio Bronze Outdoor Wall Light with Metal Shade

    Lowes

    My second choice is this Raw Steel outdoor wall sconce from Lowes. It costs a little bit less than the other light $24.95, but is smaller. The color is definitely in the cooler tones.

    Zoomed: Portfolio Raw Steel Outdoor Wall Light

    Lowes

    So, now, will you help me? The finish of the light will really direct the direction of the other decorative items in the room (bronze= browns & creams, silver = gray, white and black). It's your chance to tell me what you think would work best in my bathroom redesign.

    Create your free online surveys with SurveyMonkey, the world's leading questionnaire tool.

    Thanks so much! My husband tried to sneak his own decorative touch into the bathroom, hoping I wouldn't notice.

    Sorry, babe, the Phillies hand towel is oooooutta here! Nice try.

    Happy Monday!

  • Brass Fireplace Update

    Brass Fireplace Update

    Even though gold jewelry is back in style, a dated, brassy fireplace can put a major damper on the style of a room! Updating your fireplace can seem overwhelming, but let me tell you it's not as hard as it seems and if you're really determined (like me) you can get it done less than 24 hours!

    Here's the story behind this makeover… One of my best gal pals was moving into a new house, so I trucked on down to Maryland to help move and to try to tackle a few fun projects. The fireplace wasn't even something they had thought of me working on, but the moment I walked in, it was SCREAMING for some DIY love from me.

    Here's the order of my steps: 1- Whitewashed the brick2- Painted the mantle and built-ins3- Painted the brass surround****************************************** How to Whitewash Brick:

    Whitewashing brick is really simple! You'll need an inexpensive paint brush, a plastic container, a rag, water, and paint. I mixed the paint and water with a ratio of 1 part paint to 3 parts water. If you want more coverage, increase your paint and for less coverage increase the water.

    Start in one corner and work in small sections. Your paint mix will be really thin, so you'll want the rag in hand to catch any drips. Brush your paint mix on a 1x1 area and then immediately use your rag to rub it deeply into the brick and then remove any excess. The process goes really quickly, but I'll warn you it's a little messy. The grout can be a tad sandy, so you'll definitely need to vacuum when you're done. The whole fireplace and hearth took me less than 30 minutes. The difference in color is awesome!

    After whitewashing and painting the shelves and mantle, it was time to get rid of that brass! My exact words to my gal pal Mandy were,"Do you trust me?" and I'm so glad she did! How to spray paint a brass fireplace surround: There are some key items you'll need to do this project right: Frog tape, craft paper, disposable plastic drop cloth, and Rust-oleum High Heat Ultra Spray Paint

    Rust-Oleum 241169 High Heat Ultra Enamel Spray, Black, 12-Ounce

    We started off by taping off the brick right around the surround. Make sure that you get it as close as possible. We were lucky enough that the tape could slip behind the surround, so there was no chance of bleeding through. Once the edges are take care of, you'll want to use the craft paper and tape to make sure all of the brick is covered. It's sorta like wrapping a really big, awkward present!

    Once the brick was covered, we cut a section from the plastic drop cloth and wrapped the mantle in it. We were really careful to make sure we'd taped it tightly, so no paint could sneak in.

    For the glass doors, we used more tape and paper. I found that if I used a spatula, I could get the tape really close to the edges for a perfect, crisp look.

    Now it was time for a little craziness… Making a spray paint cocoon! Since we were spraying in the house, we needed to seal off everything. Basically, I got in, and we sealed the drop cloth all around me. WARNING: the fumes will be very strong. I recommend a face mask. I didn't have one, so we used a towel.

    Thankfully, this paint is awesome and doesn't require more than one solid coat. I, on the other hand, required about 3 showers before all the black paint was off my face and hands! It was totally worth it though!

    Here's the finished product. Doesn't it look so much better?

    I'd love to show you a perfectly styled mantle, and all the doors on, but we were on a tight time schedule, and I had to get back to PA. So this was DIY on the fly!

    I was so pleased with the update and loved that the entire project took about 4 hours of work time and cost less than $30.00! If you have a fireplace that you were wishing you could change, I totally recommend doing it yourself! The impact it can have on a space is incredible! And if you missed it, Jess transformed her fireplace with some paint and a stencil this past summer. Two updates= no excuses not to get rid of those dated fireplaces, people!

    And, I just have to add, that only only is Mandy one of my very favorite people in the entire world, she's all a rockin' sponsor of this very blog!! She's our Thirty-One Gift's Consultant and hooks up our readers for all kinds of giveaways and deals! Christmas is coming people, head over to Mandy's website HERE and check out the awesome products they have in the current catalog! I'm so loving the new Metro bags! Tell me, do you or someone you love have an outdated fireplace that's in need of an intervention?
    **UPDATE 7/13/13: Due to the popularity of this post and lots of reader questions, I thought I'd answer a few of the common questions here.Q: What kind of paint did you use on the brick? A: We just used white paint we had on hand. It was eggshell and worked fine. I really think any finish would work okay because you're watering it down anyhow.
    Q: What color did you use on the mantle and shelves? A: Ahh! I wish I knew! I am calling my friend now and will see if she still has the can. I do know it was from Lowes: )

  • How to Cut a Perfect Mohawk using Frog Tape!

    How to Cut a Perfect Mohawk using Frog Tape!

    This post brought to you by FrogTape brand painter’s tape. All opinions are 100% mine. So cutting hair isn't our normal post topic here on East Coast Creative, but when it involves Frog Tape® and a rockin' hair style… well, I think it's just right for EC2! Cutting a mohawk isn't easy business- do you have any idea how many crooked mohawks there are in the world? A lot let me tell you! (and yes, that claim is purely fictional, but I'm 99% sure I'm right!) Thanks to my ingenious husband (or maybe it's just DIY overkill that made him think of it) we created the easiest way to cut a straight, perfect, and rockin' mohawk!

    And let me shed a little light on the old 'hawk before I tell you how to do it. Callen (my youngest) has my husband's hair- which means pouffy awfulness. It's okay, Eric owns it (aka shaves it all off!) It's just really bushy and we can't do anything with Cal's hair style-wise. EXCEPT… for an awesome mohawk! It's the best style because his hair is going to poof out and stick up anyhow, so it's just making the mohawk styling that much easier! Eric and I often chat about which of our son's hair styles the grandparents hate more… Cal's mohawk or Kade's super long shaggy mop. I still think the long hair gets to them the most!: ) (And no, we're not cutting the mohawk off before school starts next week. We get asked that a lot. Why would we get rid of his swagga just in time for him to meet all the little ladies??)
    Alright, so let me tell you how to cut the perfect mohawk so that your kids' grandparents can think you're nuts too!
    #1- Determine how wide you want the 'hawk to be. We liked a pretty thick one, so we used about 2 widths of Frog Tape®. Now, we were asked to share a project we'd done with Frog Tape®- they said it's multi-surface tape- good for a variety of materials. I had already cut Cal's mohawk and was like,"how's this for a unique material!" So, while Frog Tape® wasn't made with the mohawk in mind… it works like a charm!!

    Frog Tape

    #2- Place the tape down on your kiddo's head exactly where you want the hair to remain. Make sure it's straight from front to back AND side to side. Remember… crooked mohawks just aren't cool! Don't worry about pressing the tape down too hard, the edge will serve as more of a guide for your buzzers, not an paint lock like we usually use Frog Tape® for.

    Cutting Mohawk

    I wonder if this little guy has any clue that this process isn't quite the norm… Such is the life of a blogger's kid! (Also, ignore the pile of clothes and messy bathroom. This is real life here people! )

    Mohawks

    #3- Use your buzzers to shave along the edge of the Frog Tape®. Don't press into the side too much, you don't want a wonky line. Any buzzers will do, but we've always used this Wahl kit.

    Wahl Clippers

    #4- This is just a preference, but we always have our boys sit on a stool in the shower while we buzz. It's so much easier for clean up. We use a hand vac to get as much of the hair up as we can, and then the rest just gets rinsed down the drain. Easy peasy!

    Kids Mohawk

    I couldn't love Cal's hair any more than I do. It's definintely my favorite and it's sticking around for a long time! Since cutting it in for the first time, we've trimmed the sides 3 or 4 times, so now the middle section is nice and long and big boy mohawk-ish!

    Mohawk hair

    If you're thinking of embarking on the mohawk journey, I definitely recommend this method to get the perfect mohawk! A little outside the box, but this straight mohawk just wouldn't have happened without FrogTape painter’s tape.
    We really do love Frog Tape® and have done a lot of cool projects using it. Last year when we were at the Haven Blogger Conference, we got to meet our friends from Frog Tape® and we learned a lot more about its paint lock technology. Basically it seals the edge of the tape so the paint doesn't bleed through! That's huge for me because I have some perfectionist tendencies. Did you know that FrogTape painter’s tape also recently came out with Shape Tape®? It is patterned tape, so you can get waves, chevron, etc… without measuring! We think it's pretty cool! Check out a few other projects we've one

    Frog Tape Shape Tape

    Check out a few other projects we've done using Frog Tape®! My Chevron Accent Wall

    Chevron Wall

    Mosaic Accent Wall

    Painted Wall

    Fireplace Makeover

    Painted Fireplace

    If you haven't tried FrogTape painter’s tape yet, what are you waiting for? I mean you can try it on an awesome DIY project for fall OR for the most epic of all mohawks! Frog Tape is also on Twitter @Frogtape- give them a shout out and share your fall projects!

    Visit Sponsor's Site
  • It Was All Yellow… Refinishing Furniture

    It Was All Yellow… Refinishing Furniture

    Who knew one little trip to a barn sale could produce so many cool projects?!?

    While Jess and I were at this sale, I was on the hunt for a buffet for my dining room. I stumbled across this"beauty" and was lucky to score it for $50.00!

    Now, old-school brown wood is NOT my style, so I had to look past it. When thinking about refinishing or repurposing furniture, the most important thing is to look at the lines of the piece. The lines will remain. The ugly finish, or brass, scrolly hardware can be changed.
    Sorry, I don't have a picture with the ugly, old hardware (I was rushing for the Nate Show) but, I liked these drawers for their simple, rectangular shape, with no detailing.

    The cabinet doors also made me smile because there was just a simple line of trim and no scrolls anywhere. Yeah, I have a thing against scrolly stuff!

    I was away on a trip for work and came home to find my hubs doing this in the driveway… <3 him!

    I am not usually one for doing oodles of prep work, but I will admit that sanding this down a bit really helped. If your piece is super glossy, fear not! Just do a bit o' sanding! It doesn't have to be perfect, but rough it up and get some of the gloss,"de-glossy!"

    Source: designsponge.com via Kalila on Pinterest
    Have I mentioned that I love paint can pictures? I also am having a love affair with yellow… my goal is to sneak just a little yellow into every room in my house!

    Since I was really pressed for time and had about a million projects to complete, I called in some back up to help me paint. Thanks Mark!! The yellow ended up taking FIVE coats to fully cover and get the exact shade I was looking for.

    Five coats later, the finished product makes me smile every single time I see it! Seriously, this cost me $50.00 and I adore it!! I bought the sleek hardware at Lowes in their specialty hardware section.

    I can't show you how awesome it looks in the whole room, because you have to wait for the big Nate reveal, but here's a little peek!

    I hope you're inspired to look past your first impressions of a piece of furniture and see the true potential that it might hold! While I'm on my soapbox, please let me add… If I hear one more person tell me,"But I can't paint it! It's REAL wood!" I will scream! Who cares if it's"REAL WOOD" if it's UGLY?? I'm sorry, but real wood does not mean you can never alter it and have to deal with outdated pieces. Seriously ladies, let's muster up a little courage and get painting!
    Check out some of these awesome furniture facelifts… Maybe they'll make you feel a little braver…

    Seriously, how amazing are these pieces from Twice Lovely?? I obviously adore the white and grey damask! Design Sponge is a perfect example of being brave enough to change a REAL wood piece. This white dresser was fine… nothing special, nothing awful… just fine.

    And now it's fabulous! I mean this red is wicked awesome! Can you imagine if she was too scared to paint the wood?? It would have been a crying shame!

    Ok, so enough ranting and raving for one post. Do tell, have you painted a piece of furniture or have you been a wee bit scared?

  • The Original Funkmaster… My DIY Dining Room and CWTS Updates!

    The Original Funkmaster… My DIY Dining Room and CWTS Updates!

    Before we get into today's dining room post, there's some CWTS Biz to take care of… Umm 361 Entries is Amazing!! My goal (which Jess thought was a little nuts was 300!) Thanks so much to everyone that entered. So what happens now?? Submissions have closed and the Blog Stars are working on choosing their top projects. But lest you think it's all in the hands of those ladies, don't forget about the 12th Spot!

    Starting TODAY (to give everyone a fair chance) the entry with the most views will be awarded the 12th spot! (Remember, don't be a lameo and click on it 34572 times yourself-lol) This means that now's the time to get YOUR blog readers over looking at your submission. Tell them your number and tell them to check it out! You have until Wednesday, February 27th @ Noon for your clicks to count. Be creative and show the world that YOU want to be a CWTS Contestant!
    Speaking of Dates, here are some important ones to remember…

    We can't wait to get this party started!

    Now back to your regularly scheduled programming… ------------------------------------------------------------------------------------------------------------
    I don't often refer to myself as the"Original Funkmaster", but it was the first thing that popped into my mind when I saw HGTV's recent pic on Instagram.

    What the What! That looks like my house! Now, I don't actually think that I'm the first person in the world to do this, but in my own little world at least, I'm the Frames Wallpaper Original Funkmaster! Check out my dining room wall.

    While no idea is ever truly original, I can proudly stake claim on this room for the past year and a half.

    I realized when I saw HGTV's pic that I'd never actually shared a full dining room reveal of sorts. Today is that day peeps!
    You know how for many people, their dining room is the most underused room in their entire home? That is SO NOT the case in the Mangin family. We use it all the time and so we wanted to be sure it was a space we loved! Remember this crazy crew that we have over for dinner every single Tuesday night for what we've creatively named,"Tuesday Night Dinner." This was during cookie decorating night… (no, it's not usually this nutso… we typically put the kids in the other room to eat)

    So back to the wallpaper… It's Graham & Brown Frames wallpaper and I first posted about it in my very first post on this here blog. I had seen it used for many kids spaces, but I hadn't seen it in any"grown up" spaces… I decided my dining room was the perfect place to try!

    We lived with it plain for a while before I added the pictures, and the second I added them (literally the second) I was head over heels in love! The pop of color and the personality was SO ME! (I actually used a purple Elmer's Glue Stick to attach the pics. It's permanent, but even Command strips would have torn the paper bc it's completely matte)

    I thought for about 2.1 seconds about using like artsy pictures or something"cool," but then I remembered that I'm not actually cool and that pics of our friends, family, and even pets would be so much higher on the awesomeness scale! Forgive the heavy load of pictures, but I've gotta show you some of my favs…
    First day of Pre-school… refused to smile until we did this!

    From London… could have taken pics of Big Ben, but instead played Mary Poppins with the pigeons! FYI They're creepy!

    Top left pic is of my parents… Seriously, when your parents are this cool wearing 3D glasses, you've just gotta put them on your walls!

    Friends & Family rank high on our list, so of course we needed silly pics of the families we love! These are the people surrounded by these walls each week!

    This pic is what got us into the finals for the Parents of the Year Award. Yup, sprinkler to the face gets me laughing every time!

    And I'd be remiss, if I didn't include some of the Mangin Menagerie on the walls. This is Kenzie's duck Chase. (He attacks me and I loathe him!)

    So you're getting the idea… this space is my favorite and makes me smile so much. Toss in some peacock feathers, some really bright furniture, and a Massive DIY Farmtable and you've got just the room for me!

    Is it going to end up on HGTV… probably not (umm…HGTV, if you're reading, I would totally be into that though!) but that's okay because it's perfect for us!

    If you want to check out any of the other projects in the room, here are a few fan favorites! The DIY farmhouse table is still one of my personal favs.

    click here click here

    click here So, no pressure to call me the Funkmaster anytime soon, but at least now I've shared my room and you see that the looks that you see on HGTV etc. can work in real life too!
    Linking Up to: Home Stories A to Z