My Creative Blog [Search results for playroom

  • Summer Mantle {Playroom Edition}

    Summer Mantle {Playroom Edition}

    Today we're excited to be a part of Layla's summer mantle link party!

    Our new home has two wood burning fireplaces. One in the main family room, and one in what was intended to be a library, but we use a playroom. (It took me a while to finally convince the builder that we were not in the"library" stage of life and that it would be a playroom for 4 messy kiddos!)
    My children adore the beach. They ask me all the time,"When are we going to the beach,"… even in the dead of winter! So, we thought it would only be fitting to have a beachy playroom. Since it is a playroom, I resisted my urge for lots of white, and cool faded blues, and instead took color inspiration from these bright pictures of my kiddos.

    Remember the black-turned-yellow mirror project? Well, it makes a big impact on the brown wall and I love it so much more than the boring, old black. So here's the mantle, photo collage, and fun curtains…

    First, I thought I'd stand on a stool and take some pics straight on… Oops! There I am! The one fun thing about this picture is that you can see my family room mantle in the mirror on the left! See, my lack of photography ability actually got a 2 for 1 mantle picture! Score!

    Here's my boat conundrum… love the boats, but wasn't feelin' the boats on this mantle…

    What do you think? In the end, I went with no boats… partially because everything in this room has a very high potential of being destroyed by a small child!

    The cool blue bottle, and jar were scored at the same flea market we've been posting about, and I got them for under $5.00!

    I had bought the white starfish, and was on the hunt for coral, but man it's way overpriced! Thanks to the awesomeness of blogland, I got the suggestion to just buy some cheap fishtank coral and spray paint it! That's totally up my alley! Who knew Pets Plus could be a crafting resource?

    It definitely needed some paint… the pink was blech!

    Much better!

    I also ordered two more of my favorite beach pics from Canvas People but as much as I love them, I can't seem to find a home for them in the room. They definitely don't work on the mantle… hmmm

    This will give you a peek of the room… (I did not clean, as proved by the train table, because it's the kids' job and I was sticking to my guns… blog or no blog!)

    I just bought a fairly bright green sofa for the room, but need to go and pick it up. It will go on this side with my favorite little people recliners!

    So, there you have it… my summer playroom mantle! I think it works and the kids don't even notice like it a lot! One final picture… I realized the blue jars looked awful on the right side of the life preserver, so I moved them back to the left. Much better now!

    Thanks for letting me share my mantle and let me know what you think and also if you know where to buy a really inexpensive oar! I think that's all that I'm missing!

    **One sidenote… I don't know what's up with the color in these pictures… some are really faded out and for some reason only look that way on the blog. Sorry, if the drab colors are depressing you!: ) **

  • Merry & Bright Christmas Inspiration

    Merry & Bright Christmas Inspiration

    We're still in Europe for a few more days (you can follow along through my pics on Instagram @EastCoastCreative), but I'll be honest that I'm itching to transform my house for Christmas!

    Usually, we're a Saturday-after-Thanksgiving kind of family, but this year we'll decorate as soon as we're back from our trip. Last month I started perusing Pinterest for holiday inspiration and tons of bright ideas kept jumping out at me. I thought I'd share a collection of awesomely merry & bright Christmas inspiration for you… so all the way from Paris- Enjoy!

    Merry & Bright #1- I've done the present thing before. Just wrap some picture frames in bright colored paper, add some ribbon and voila! I also love the super cheery and bright ornaments on this mantle.

    Merry & Bright # 2- These felt trees would be really fun to make with the kiddos. They're simply felt, wrapped around a cone shape, and blinged out with some sequins.

    Merry & Bright #3- Jess and I LOVE pine cone placeholders, but add a little paint dip in hot pink and man, it doesn't get much cooler than this!

    Merry & Bright # 4- Umm, Hello Whoville…this sock vase and painted branches is insanely awesome! How fun would this be to make and then put in my kids' playroom? I think it's officially on the TO DO list (when we're back from vacation of course!)

    Merry & Bright # 5- You all know I'm an anti-wreath kind of gal, and this is a super fun, non-traditional wreath. It's a ceiling medallion (which are really inexpensive at Lowe's or HD) and some holiday ribbon.

    Merry & Bright #6- Moo & Puppy has come out with an awesome Christmas line of digital papers. I love using these papers because I can print out as many as I need. I'm loving up these patterns and am planning to use these as part of my Christmas Countdown Calendar (tutorial coming soon!) Check out all of Moo's awesome holiday papers!

    Merry & Bright # 7- We've all seen some felt garlands, but this one takes the cake! Check out her post and you'll see that she used a combo of store bought felt poms and she also MADE some of them too! I'm not sure I'm going that far, but it definitely turned out amazingly!

    Merry & Bright # 8- I could almost turn from my wreath-hating ways because of this wreath. I love the combo of shiny, matte, and glitter balls.

    You've got to see the whole room…

    Yup, that's pure Merry & Bright Awesomeness people!
    Who knows, this year I just might decorate my kids's playroom for Christmas! Usually, they just get a little faux greenery, but after all this Merry & Bright Inspiration, I might go the extra mile and use some of these ideas! How about you? Are what do you think of Bright, non-traditional colors at Christmas?

  • 12 Free Nursery Printables

    12 Free Nursery Printables

    Since we have a little time off before our next episode (the last episode before baby arrives!), I've been spending some time getting the nursery ready. It's funny- this pregnancy has flown by and up until now, I haven't even begun to prepare for it! Of course, we always try to redecorate rooms on the cheap and one of my favorite ways to do this is by using free printables. And I wouldn't be a good blog friend if I didn't share my absolute fav finds with you! So, here are 12 of the most adorable, trendy and fun printables I could find.

    --------------------------------------------------------------------------------------------------------------------- Let's get this party started!

    1. Ooh Moon 2. Balancing Home
    So, this first Noah's Ark print is so stinkin' cute! Ooh Moon is really cool because you can sign up for an alert when a new printable is available and you have 24 hours to print it out. The Love Shines Here print would fit equally as well in a kitchen or playroom as in a nursery!

    3. Feed Your Soul 4. Balancing Home
    Feed Your Soul is a free art program that has real artists contribute original prints that are downloadable and printable. There are tons of fun options, so make sure you browse around to find your favorite! This Blast Off print is simple and fun and perfect for a little boy's room.

    5. The DIY Village 6. Feed Your Soul
    Matt and Jacque from the DIY Village are gearing up for the arrival of their first child and created this simple printable that speaks volumes. I love that you can customize it by coloring it in to match your room decor! Number 6 is another Feed Your Soul masterpiece (Pretty sure you'll see this one in a gallery wall in my baby's room!)

    7. Trendy Peas 8. I Rock So What
    Ummm, I'm sorry, but isn't that fox the cutest little thing? I don't know if you remember, but I mentioned that I was really hoping to incorporate forest animals, namely sneaky little foxes, in our baby's nursery, so I was thrilled to find this printable! And you can't go wrong with this whale printable- it would look especially perfect in a nautical room of any kind.

    9. Tried and True 10. Eighteen Twenty-Five
    Watercolor prints are in so in right now, and this World Smiled print incorporates that trend a bit. I absolutely love the sentiment, because doesn't every parent feel that way about their baby?! Leave it to Eighteen Twenty-Five to come up with a graphic printable in about a million pretty colors. They have tons of subway art printables too, so snoop around a bit when you hop over there.

    11. On To Baby I'm a big fan of any printable that you can customize and so this monogram print that comes in a bunch of colors is right up my alley. We're not revealing any baby names yet (not that we've settled on one or anything!), so you'll have to just wait until our nursery reveal to see what we chose.: )

    12. I Rock So What

    This.is.truth. The end.
    --------------------------------------------------------------------------------------------------------------------- And for those of you who are willing to shell out a couple bucks, I found these too-sweet-to-pass-up printables on Etsy. While these aren't free, they're all less than $10 each, so you're still getting a pretty darn good bargain!

    Our Little Man — Deer Silhouette — PRINTABLE Nursery Art — INSTANT DOWNLOAD

    1. Bon Temps Beignet

    Bible Verse Art print, printable Scripture wall art decor, INSTANT DOWNLOAD nursery bible verse quote — this is the day Psalm 118:24

    2. Printable Wisdom

    Fantastic Mr. Fox Family Nursery Art 8x10 Playroom Printable Art set of 3 with Mrs. Fox and Ash

    3. Prints and Printables

    Again with the foxes! Love, love, love this set of 3.

    Dream Big Little One — 8x10 Printable Art — Instant Download

    4. Plum Street Prints

    Plum Street Prints had so many fabulous printables that I had trouble choosing just one to showcase! For some reason, I am really drawn to the simple designs these days.

    Well, that's about it. Now I just have the difficult job of choosing which ones to print and hang in the baby's room. Where are your go-to sources for free printables? Do share!!

    jess
  • DIY Bicycle Wheel Wall Clock {Knock It Off DIY Project}

    DIY Bicycle Wheel Wall Clock {Knock It Off DIY Project}

    We had so much fun working on this kids' playroom/school room and one of the unique projects that the homeowner loved was the Bicycle Wheel Clock! It's quirky, unique, and Awesome!!

    In early 2013 we hosted the BEST DIY Competition in blog land…Creating with the Stars, and our wheel clock was a kid-friendly version of one our amazingly talented friend Karrianne made for her winning Round 1 project. You can check out Karrianne's blog HERE and find her tutorial HERE.

    Our homeowner, Shannon, really wanted this space to be super kid-friendly, so we needed to make our bicycle wheel clock a tad more whimsical. We decided on a bright yellow yard stick as our clock hands to add a pop of color.

    To read the full step-by-step for this project, head over to Thistlewood Farm, but here are a few tips… You want to use a small hand saw to make your ruler cuts- a large chop saw can really easily crack thin wood. We got our yard stick at a salvage shop, so we knew it was pretty old!

    The clock mechanism gets attached to a paint can lid- most likely you don't have a clean one laying around, but good news… you can buy new, empty paint cans from any home improvement store for about $3.

    One final thing to remember- you need a clock mechanism that can handle large hands, so look for one that says"heavy torque" we had to visit two craft stores before we found the right one, but they're definitely available.

    We LOVED how Karrianne used roman numerals on her clock, it was so classy and a fun juxtaposition to the old wheel, but since ours was a kid space, we opted for simple numbers.
    We love that this project could work in a

    jess
    Monica
  • FOR SALE!

    FOR SALE!

    Source: strictlysimplestyle.blogspot.com via The Real Housewives on Pinterest
    No, I really don't have anything to sell, but I have sold two houses really quickly and helped hundreds of other people sell theirs. Okay, now before you tune out and think,"I'm not moving anytime soon… no need to read this post." give me a second! There's two reasons to keep reading… # 1- You probably know someone that's struggling to sell a home in this market #2- People love their homes right before they sell because it's in the best shape ever. You could follow a few of these tips and love your house even more! Ready? Here are my first 5 tips!
    Get it Sold… The Mangin Way! (Part 1) (these aren't new ideas…but done right, they really work)

    1.Declutter. Pack half of your stuff. Seriously, I actually mean half of everything. It's a pain, but you'll have to pack it anyway. This will make your house seem like it has sufficient storage and room to grow. It's tough to want to move into someone's home that seems jam packed! (FYI- don't do this if you're not selling… that would just be crazy!)

    2. Depersonalize. Your kids are adorable… I get it, but now get rid of their pics. We don't want potential buyers looking at your vacation pics and thinking they really need to get back to the Outer Banks and totally not noticing your recessed lighting. Now, don't get too crazy… we didn't get rid of 100% of our pics, but honestly we replaced a lot with generic art from Homegoods and Marshalls. The second part of depersonalization is STYLE. If you're reading a DIY and design blog you either have great style or are style challenged! LOL… make sure the style of your house would appeal to the masses. Not too modern, too country, too plain, too bold. Purple.Tone it down a bit.

    Source: yakal.net via Hannah on Pinterest
    3. Declutter. Wait, she already said that!! Lame post! Nope, I don't have short term memory loss… now we're talking Pantries, Closets, Garages, Storage areas. You need to keep feeding your family, but you also need to show off the space you have. Donate, eat, or toss HALF of what you have stored. You don't need six cans of cream of chicken soup. Keep two. (House of Smiths weren't selling, but man they have a rockin' pantry before and after)

    Same applies to closets… anything you won't wear in the next month should be packed up. If you're near a change of season, just box and store at your BFF's house. That's what friends are for! (We have about 20 boxes of friend's stuff in our basement right now because they're selling). Any place that you would usually hide your junk needs to be super neat and spacious. 4. Give it a Purpose. This is a simple stager's rule. Every room should have a purpose. You want a buyer to see a value in each space. If you have a toy/craft/tv/junk room but already have a playroom, and family room with tv… well what are they paying for the random room for? Choose a purpose. Make it a specific craft/sewing room etc. 5. Clean. I'm not talking lived in clean… I'm talking Martha Stewart clean. A clean house gives the impression of a well cared for, well maintained house. You don't want anything creeping out buyers. Maybe dirty baseboards are just a part of life, but they're not a part of a buyer's dream home. Seriously, who dreams of a kinda dirty, lived in dream house? Does Pottery Barn have gross toilet rings in the Bed & Bath issue? We've done it two ways… once we did an insane deep clean and for our second house we hired someone to do it. Either way is fine, just get it done and then maintain it. Make a little pre-showing, last minute cleaning list. It was a huge help to me!

    Source: marthastewart.com via The Real Housewives on Pinterest
    Ok, so 5 simple, totally FREE steps so far… Nothing too revolutionary, but things that really make a difference. Last spring we sold our home in less than 3 weeks… the market was struggling, we didn't know what to expect, but we believed it was the right time for our family and so we busted our tails to get the house ready. Now, you're armed with part one… either share the post with a friend that might find it helpful, or take a look at your own home. Part two is a little more design friendly and exciting, but first you've gotta get through the dirty work of steps 1-5.
    I'll be back Wednesday with more!

    P.S. I bought paint tonight for a super-fun family room project. I can't wait to share it with you!
    P.P.S. Did you know that we're only 3 people away from 100 followers? We know way more of you read the blog… let's make it official! Let's take our relationship to the next step? And if you're really into us, you could like us on Facebook too! Imagine that! It's like going steady!

  • Blog Reader Survey Results

    Blog Reader Survey Results

    We thought we'd start the week off with the results of our 2013 Blog Reader Survey! You guys get to learn about us daily here on the blog and by watching Knock It Off, but we rarely get the inside scoop on you, so reader surveys really excite us!

    Alrighty then… let's get started shall we?

    We were thrilled to see that so many of you have stuck around for a while!! So, if you're new here, you totally should keep visiting, all the cool kids are doing it!

    Okay, so maybe we added the flirty part, but… we think it's true! It's actually still kinda weird to me that we're in the 30-45 range too! 31 is like really grown up!

    So, not the Al Bundy, Married with Children demographic, but the cute little family with kids kind.

    We definitely still want to appeal to the masses, but it's good to know that kid-friendly decor ideas, kid crafts, and family stuff works with you guys! To be completely honest, I read a lot of blogs and there are a few I LOVE and sometimes I want to emulate some of their style, but then I remember I have 4 kids and my house needs to be livable. So, we think it's a good thing that you guys are cool with kid-friendly!

    Okay, so this made us laugh! We know that we have about 98% girl power readers, but I know at least 10 guys that read and comment. So, we're just going to assume men aren't fans of surveys (on a somewhat girly blog) Trust us, we gave our husbands a hard time for not completing the survey! The Nerve!!

    Now for the MOST important part… What you want more of from EC2. 1- We had lots of requests for videos- we're cool with that! We think they're fun to make, usually they involve a lot of laughing and ridiculous jokes that only we think are funny! Sidenote: Anytime you want to watch us, go and watch some episodes of our TV show Knock It Off by clicking HERE- lol! We know that's not completely the same, but if you need an MJ (Monica/Jess) fix, it'll do. We're going to try to do some home tour videos too! The only tricky part is getting our homes clean enough to show you!
    2- DIY Home Projects- well, the good news is that we're a home DIY blog, so yup, we've got that one covered! We plan to deliver a solid amount of our home projects, and sometimes we'll just put KIO tutorials on our DIY page, so we don't have constant show tutorials. Some upcoming rooms we'll be sharing are Baby Bennett's Room, My"new" Living Room, My Playroom Makeover, and Jess' porch!
    3- LOTS of Posting! Did you notice we posted like 6 times last week?? It was semi- accidental, but still awesome! Our goal will be no less than 4x a week- sometimes 5, but that will just be a surprise! We're glad you like regular posting, because we like having regular readers!
    4- Letting you into our Brains! This was an interesting request that came through many times… You guys want to know what the process looks like as we plan and work through a room. We love that idea!! Although, this weekend my planning process involved me walking around my house, going to the pantry for a snack and staring because I didn't know what I wanted, walking more around the house, and then back to the pantry. Repeat 10x. But seriously, we're excited to share inspiration boards and ideas with you- thanks for the suggestion!!
    We gathered lots more info, but this post might actually put you to sleep if I keep going. The bottom line is that, knowing more about YOU guys helps us to make this blog the best it can be! So thank you, thank you, thank you, for helping us out!!
    Here's a peek at what we have coming up for ya this week… Bennett's Room Update A Perfect for Fall Chicken Chili Recipe and More!!

    jess
    Monica
  • Doggy Style…

    Doggy Style…

    No… I'm not getting all creepo on you… this is a PG blog-Our moms read it! What I'm talking about it this adorable ball of fur that's now a part of the Mangin family…

    I'm seriously head-over-heels in love with her! She's a Bernese Mountain Dog that will be eight weeks old today and she has the sweetest disposition ever! Jess came over to meet her the other day and was surprised at how smitten I am, so she said,"I didn't think you were a dog person?" to which I replied,"I'm not! I just like my dog!" Ha! What can I say? It's true!
    So in honor of Miss Pennlyn (AKA Penn) I'm sharing some Doggy Style projects…
    Four Post Bed… Puppy Luxury! I first saw this bed a few years ago in a Lowe's Creative Ideas magazine, and immediately loved it. I don't think the size will work for Penn, but I love the look and idea of it.

    Source: lowescreativeideas.com via The Real Housewives on Pinterest
    You could also just find a coffee or end table, flip it over and get your DIY on, turning it into a bed. And of course, I'm loving the yellow!
    Crate Bed Since Pennlyn will be a pretty big dog, I'm thinking this style bed is a bit more her speed. I'm loving this DIY bed made by Home Frosting and I can't wait to make one. She used leftover 1x4s, but I think I might use some free pallets. The finish she created is fabulous!

    Source: home-frosting.blogspot.com via The Real Housewives on Pinterest
    DIY Pet Tags Leave it to Martha to come up with these adorable tags.

    Source: marthastewart.com via The Real Housewives on Pinterest
    I was about to order a generic tag from the pet store, but I plan to try this DIY this week before going the generic route. I just need to make sure it's heavy duty enough. I'll let you know how it goes!
    Pet Art I'm not really a huge fan of having pet pics all over the place (remember… not a"dog person") but I do think some pet art might be cool in the kids' playroom.

    This took me about 30 seconds to create on Picnik. I used the"Posterize" effect and voila… Pet Art! I think I'll order it as a canvas this week.
    Hungry Puppy? Since we've only had Penn for 5 days, her food is just in the bag, but I do have ambitious plans to create some kind of cool looking container. The hubs thinks I'm insane and wants to know why the dog food container needs to be cute, but he knows who he's married to, so he's cool with it. Here's one fun idea…

    Source: tidymom.net via The Real Housewives on Pinterest
    The style isn't mine, but I think I could add some of my own modern flair to it. I sorta had something wooden and rustic in mind, so we'll see…
    Custom Stuffies These are the funniest things ever! I think they'd make such an awesome gift! This seller on etsy makes custom stuffies for your pet. Just send a picture of your pooch and you'll get a look-a-like stuffie in a few weeks! I've contacted the seller, because she doesn't have this as an active listing right now, but I'm hoping she'll be back at it soon! Pennlyn definitely needs a mini-me stuffie!
    WAIT! Hold the press! Shevon contacted me and you can now buy a custom stuffie!
    Here's the link: Custom Stuffies (Soooo stinkin' Cool!)

    Source: etsy.com via The Real Housewives on Pinterest

    So, it looks like I have a lot of projects to get working on! Although, before I get working on my puppy projects I think I need to get Penn house-broken and doing fancy tricks (can I teach her how to go get my laptop for me?) I'll keep you posted on Miss Pennlyn and any cool projects we make for her!
    Oh, one last thing… She WILL NOT be owning one of these… Thundervest…No Comment!

    Source: thundershirt.com via The Real Housewives on Pinterest
    Thanks for letting me introduce my little lady to you!

    WAIT! Don't stop reading! The voting for Crafting with the Stars is now open! We've entered our first project and we need your votes. We obviously can't tell you which project is ours, but we can give you a hint… look for the coolest one… that'll be ours! Nah, we really do have some stiff competition, so head over and vote for your favorite 3 projects. The winners will be announced Wednesday. Thanks! Click HERE to see the entries and vote!

  • Risky Business…

    Risky Business…

    So, I'm not a huge risk taker in most areas of my life. I'm not into extreme sports, I don't buy high risk stocks, don't go wild with my clothing or my haircuts. My husband is a bit more of a risk taker and his annual cliff-jumping trip at the Adirondacks proves that…

    (I pray a lot during this annual trip!) One area I am brave enough to take a risk in is my decorating. I was inspired by The Nester to share my thoughts on being willing to take a little risk in your home.

    She wrote,"We don’t risk because it’s easy or normal or natural, we risk because of hope." So often when I want to try something new or different, I find myself thinking,"I sure hope this works out!" and sometimes it does, and sometimes it doesn't. It really isn't about it always working out perfectly, but it is about being willing to try something that would make you happy if it works out! Now, don't go knocking down walls right away, but maybe a new color paint (you'd only be out about $30 and two hours if you don't like it) or rearranging the furniture in a room (you simply move it back if you're just not feelin' it), or maybe attempt a fun DIY project you've seen on a blog. Here are a few tips that The Nester shared:

    TIPS FOR TAKING RISKS IN YOUR HOME:

    • start small and pick a project that won’t take much time
    • don’t invest too much money
    • don’t force perfection
    • be open to changes and new ideas during the process
    • don't be afraid to put a nail hole in the wall (I added this one, but so many people are afraid of hanging art. I promise, it's no biggie! If it goes poorly I'll buy you some quick dry spackle!)
    Here are a few of my recent, minor risks… Outdated bottom half of my hutch…

    Meet awesome orange paint

    Fingers crossed as I was painting (sorry for the non-glamorous painting scene). I'll share the end results soon and let you know if this risk worked or not.

    This was a little bigger risk because Eric really liked this mirror. It was fairly expensive when I bought it for our old house, but I didn't have any place for it in the new home. I liked the size for this playroom, but I wanted it to have some color! I finally decided to take the plunge and paint it!

    Here's a risk I actually wouldn't recommend, wearing your favorite jeans and sneakers while painting. I'm not sure if I was just feeling really risky or lazy!
    ( Thankfully no shoes or jeans were harmed in the making of the awesome mirror re-do)

    I chose a really cool mustard yellow paint and was just a wee bit disappointed when the paint wasn't taking and it looked canary yellow at first!

    But, after 4 coats, I finally had a finished product that I really love. I can't wait to show it to you in the room.

    So, what risks have you taken? What risks are you going to finally try? Let us know, we'd love to see what Risky Business you're up to!

  • {Grow}

    {Grow}

    I can't really take credit for this post… I have my awesome husband to thank for making me realize that tracking our kids' growth is really important and special. I don't have to tell you that kids grow up way too fast… I'm pretty sure I see a mom a day posting something on Facebook about their kids growing up too quickly.
    Since we can't do anything to reverse the growing process, I figure we should embrace it and take tremendous joy in watching our four children grow (even if it seems to be right before our eyes.) So of course, we take about 1500 pictures a month of our kids (I plan to fill my retirement years with sorting through millions of jpeg files), but one other thing we started about 5 years ago is measuring our kids. We celebrate and measure on birthdays and half birthdays! It's amazing to see how much growth and change there can be in 6 months and, of course, our kids love that we know their 1/2 birthday and make a big deal out of it.
    So this is where Eric comes in… You may or may not know that I struggle with anything to do with routines, organization, and all that mom stuff… Enter the Outlook Reminder! Eric simply sends me a reminder that goes off on each of the kids' measurement days and voila…semi-organized mom!

    We recently moved into our new home and we weren't sure what to do about the measurement door. We knew we could replace the door and take it with us, but it was a weird size door, so that seemed silly. So, we ran a big risk and just took a million pictures of it so that we could transfer the measurements to the new house. We moved in and initially thought we'd put them on another door frame or somewhere in the master bedroom, but then I decided I wanted it to be more a part of our home. I had a plan in my mind, and thanks to Uppercase Living was able to order numbers and make my plan a reality.
    This is in our 2nd floor hallway… We all walk past it every day and from the foyer below you can see the pictures and the M.

    I'm not usually one for artwork with phrases for living, but I saw this tree art at a store in New England and something about it really struck a chord in me. I decided it might not be my style, but the words (I'll stick them in a comment) are simple and something I'd like my kids to read and to see for the next years of their lives. The M was gold from Hobby Lobby, but a little spray paint and she was perfect. The line is just painted on the wall with leftover grey (of course) paint.
    Worked from the photo of the old door… I had close-ups too…

    I love comparing the kids and how tall they were at certain ages… Kaden was about 1 1/2 inches ahead of Kenzie when they were both 5 1/2… Of course that earned some bragging rights!

    The finished product. I've had the chart on the wall for months, but just finally added the measurements this week and, since I did, the kids have been checking to see if they've grown, and have been reading all their measurements. I'm so very happy with the results… even if there are dirty little fingerprints all over it already!

    Even though I have my growth chart already made, I scoured the web to find some of the coolest options for under $100. Most of these are around $60 and would be something really special to add to your home. Even if you've been using a door frame or closet that no one sees, maybe consider transferring it over to a place that your kids and company can enjoy!

    This Miss Natalie jute cloth measurement kit is adorable. This one is super popular, but I think the paper tags would become part of one of Kira's next craft projects!  Miss Natalie Heirloom Growth Chart

    This modern, bold design would make a huge impact on a room. Oh, it also comes in 40 colors! Love it! Etsy Modern Growth Chart

    Add a little whimsy with a modern tree and a little bird ByrdieGraphics on Etsy

    These simple charts have a European flair and I love how the numbers get larger as they go up… Measure Me Stick

    The measurements are in Metric and English Units, which I think adds a little something… I also lean towards modern lines, so this one appeals to me. (slight confession… this one is over $100, but I liked it too much not to include it!)

    Cute for a child's room or playroom Woodland Growth Chart

    Believe it or not, this is a DIY project. Here's the link and everything is free and printable. Score! Coolest DIY Growth Chart Project

    I'll finish this rather long post with a little poem by Dianne Loomans. Yes, kind of unlike me, but it made me stop and think about my role as a parent because before I know it they'll be all GROWN up…
    If I had my child to raise over again I'd build self-esteem first and the house later I'd finger paint more and point the finger less I would do less correcting and more connecting I'd take my eyes off my watch and watch with my eyes I would care to know less and know to care more I'd take more hikes and fly more kites I'd stop playing serious and seriously play I would run through more fields and gaze at more stars I'd do more hugging and less tugging I'd see the oak tree in the acorn more often I would be firm less often and affirm much more I'd model less about the love of power And more about the power of love.
    So whether you make a growth chart or not, still take a moment to stop today and just enjoy the little people God has allowed you to grow for Him.

    Tip Junkie handmade projects

    Let’s Really Support Each Other:
    Linked up to: The Creative Girl Sumo's Sweet Stuff

  • Right Now… What's going on in our World.

    Right Now… What's going on in our World.

    We promised that during our maternity leave from filming (I love getting a maternity leave without having to have a baby btw) that we'd do a whole bunch of things, and one of them was letting you have more little peeks into our real life happenings. With that in mind, we proudly introduce… Right Now a series that we'll do monthly… well actually, basically whenever we feel like it.

    So, here's what's going on in my world right now…
    Loving: This amazing fall weather we're having here on the East Coast. Mid 70s during the day and cool, crisp nights!! It's the best sleeping weather ever! September is probably my favorite month of the year and I'm so thrilled to have some time off to enjoy it! Reading: Last night I finished reading Gone Girl. Thanks so so many of you for giving me book recommendations on Facebook! I liked it, but didn't over the top love it. I'm not sure what about it is keeping me from giving it an A+. If you read it, tell me what you liked/didn't like. I'd love to hear!

    Waiting For: This weekend, but not excitedly… you probably know we breed Bernese Mountain Dogs with our dog Pennlyn. Well, this weekend the puppies leave and go to their new homes. I LOVE the families that we chose to adopt, but it will be super sad to see them go and I will have 4 miserable kiddos for a few days!

    Excited About: A few things… Sunday we're going pumpkin picking and on a hayride with a bunch of our friends!! Our ABC/Live Well Network Season 1 Wrap party for our show- this Thursday night we'll all be celebrating the end of a successful first season. I'm still trying to figure out what to wear… Ugh!!

    Trying To: Eat healthier and work out regularly. This is not my favorite thing, nor something I'm good at! But I have a goal of Oct 23rd, and hopefully will come away from this"maternity leave" happier and healthier. Working On: Communicating better with my oldest daughter…my mini-me. We kinda butt heads a lot. She's strong willed and I'm the queen of strong wills and well, let's just say I'm working on it. I want to figure out the best, most effective way to parent her.

    Enjoying: The 3 hours each day that I have the house to myself, but then I'm also really enjoying the after pre-school, few hours before naptime that it's just Callen and me. It's really fun and nice to have 1:1 time! Using: Tons and tons of Chapstick!! I'm on a medication that makes me have crazy dry lips, so It's me and chapstick 24-7. Wearing: I'm totally in mom mode and usually wear sweats and my favorite Northface sweatshirt almost every day. What's the point in looking cute, if I'm gonna work out at night?!? Planning: I'm working on and planning my kids' playroom makeover. I totally struggle with designing my own rooms lately! I'm cool doing rooms for other people, but if I'm spending my own money I want to love it. GAH! It's killing me!

    Needing: To find a good recipe today that uses a million veggies, bc I have a ton that will go bad soon if I don't use them!! Learning: How to think more before I talk (but don't hold your breath Eric, it's a slow learning process!) Struggling With: Church. We're kind of in this place where we're wondering where's a good fit for us. We've been at the same church for 16 years (and it's a wonderful church! Check it out HERE), but we just want to make sure it's right for us and we're not just there bc it's what we've always done. But, at the same time we're not sure what will be exactly right- it's tricky!

    Listening To: The"Sister of the Year" CD mix made for my by my little brother (well, he's 26, not all that little, but little to me). He has the best taste in music and makes me mixes that have tons of songs that are cool well before they become cool. It's a good thing I have him, bc otherwise I'd never have even a sliver of cool within me when it comes to new music. Product I'm in Love With: My Kreg Jig- hubs used it yesterday to build new benches for our outdoor farmhouse table! Doing: Working down my to-do list for the day. I've committed to today being uber productive! (Up next, responding to emails, then making soup, then putting away all Cal's fall clothes) Dreaming Of: Taking another trip to Europe or somewhere amazing with my hubs. Last year at this time, we were counting down the days for our London and Paris trip.

    This concludes this first edition of Right Now. I hope you enjoyed my ramblings or at least tolerated them! Want more of our day to day ongoings? Follow us on Instagram! Monica- @Eastcoastcreative Jess- @Jess_EC2blog What are you doing, loving, reading, or dreaming of right now?

    Monica
  • Good-bye September…Hello October!

    Good-bye September…Hello October!

    I don't know about where you live, but here in PA, September was the most beautiful month ever! We had more perfect days than we could count! We just LOVE fall weather! We thought we'd look back over the month, because a whole lot of awesomeness was going on!
    September's Instagram… As you can see, I'm really enjoying my time off from filming! Our days have been spent going on field trips, picnics at the lake, girl's night out, and of course puppies!! Follow along my day to day on IG @EastCoastCreative

    Jess' September revolved around the new little man on the scene- Bennett. Her days off have been filled with lots of family time, a date night with her hubs, and celebrating that her rings fit again! lol. Follow her on IG @Jess_EC2blog

    Okay, now let's see what went down on the blog…

    Reader Survey We had so much fun reading through all your comments and input for EC2. Definitely check out the stats and see who reads this little old blog. (PS you'll also learn that men are afraid to admit they love reading blogs! )

    We shared the inside scoop on many of our Knock It Off Projects: Stencil Wall, How to Remove Wallpaper, Dreary to Cheery, Outdoor Sectional,
    If you've missed any episodes of our show… watch them here! Knock it Off: LiveWell Network

    We were pretty excited that Silhouette offered to partner with us to give you guys a sweet deal on their cutting machines! Check out this post to get your Silhouette Discount

    Perhaps the biggest accomplishment of this month… The Arrival of Baby Bennett! The little man made an early appearance and Jess and Kev are loving up every minute with him! He's totes adorbs people! Check out the adorable pics of Baby Bennett, And you MUST check out his awesome Nursery Reveal

    We started a fun series called Right Now…What's Going on in Our World where I shared a behind the scenes peek at what's going on. And yes, it involves insane animal cuteness!! Check it out!

    One of my favorite things this month was adding a New East Coast Creative Team Member! Diana is our new intern and she rocks socks!! Seriously, she is doing an amazing job, and it's been super good timing with Jess having the baby.

    One majorly exciting milestone for us was having a nice, big feature of my piano in HGTV Mag. Check out the details: Painted Piano HGTV Magazine Feature, And if you want to see how I did it, check out our Painted Piano Project, and the Wood Shim Wall Art above it!

    And if you didn't already know we are a tad crazy (well at least the Mangin family is), we went way, way outside the box with my How to Cut a Perfect Mohawk using Frog Tape post. He's still rockin' the 'hawk two months later!
    So, all-in-all, I think September was pretty stinkin' swell! Oh, but lest you think otherwise, October just might have it beat!! Here's a peek at what you can expect… -Blog redesign & we're moving!! (to Wordpress that is!) -10,000 Facebook Fan Celebration Giveaway! -We're visiting Martha (umm, yeah THE MARTHA!) in NYC -A Playroom Makeover on a budget -Fall Decorating ideas for indoors and out!
    As always, thanks for supporting EC2- we couldn't do it without you!

    jess
    Monica
  • Alphabet Print

    Alphabet Print

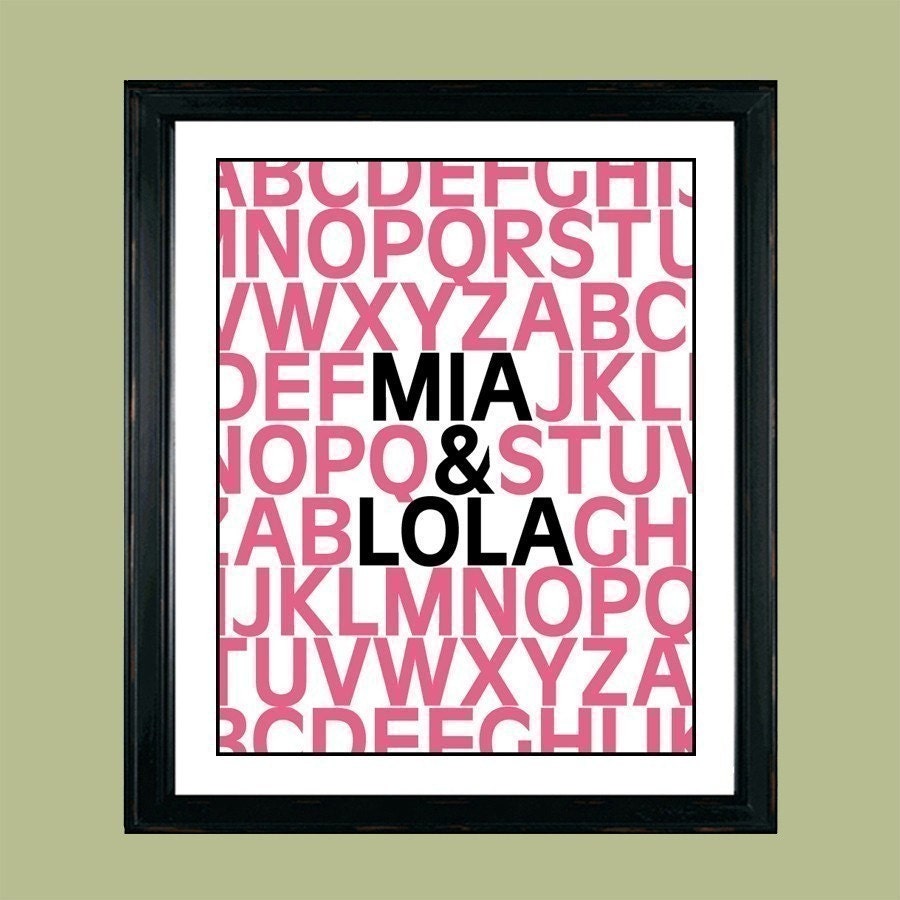
    After C2 was born, I was looking for something to put on a shelf in his bedroom. I came across this awesome print below on Etsy.

    Childrens Art Alphabet Poster Make It Personal Custom Wall Art

    The Paper Tray

    I loved the idea of having one of these made for C2 that I could frame and put in his room, but it cost $23.00. That's not outrageous by any means, but I knew that if I put a little effort into it, I could make something similar. I had the frame and mat already (both from Ikea), and I used regular old printer paper, and here's what I came up with:

    I painted the mat a green color that I already owned to match the colors of his room.

    He likes it!

    Obviously, it's not exactly like the original print, because I changed the font to one I thought was a little more fun, and the spacing of the letters is a bit different, but it works! Wouldn't this be a great gift for a couple getting married? Or someone having a baby? Or even to put your kids names on to hang in a playroom? Unlimited possibilities!

    Sometimes all it takes is a little time, confidence in your abilities, and a tiny bit of creativity to save a few bucks and create something you love!

    Have a great Monday!

  • Annie Sloan Chalk Paint {Fab Find Friday}

    Annie Sloan Chalk Paint {Fab Find Friday}

    We're all jazzed up about this week's Fab Find! Our friend Shaunna from Perfectly Imperfect Blog has become an Annie Sloan Stockist and she just launched her online store. Now before we get into chalk paint awesomeness, let me introduce Shaunna to you.

    Shaunna is one of those people that you instantly love the moment you meet her. She's completely sweet and gentle and loving (basically my complete opposite- I'm the sassy, non-emotional one at blog conferences- lol). Beyond loving Jesus and her family, she's also insanely talented (talking magazine quality here, people).

    Look at her kids playroom! The little table, chairs, the colors, it makes me swoon.
    Shaunna's been using Annie Sloan paint for her amazing furniture pieces for ages and now she's become an Annie Sloan Stockist (that's the fancy term meaning she sells it now!)

    A little while back she opened her storefront location and like everything she does, it looks amazing.

    Yesterday was another huge milestone… She opened her online store! You can now order directly through her website. Jess already has a project started that she's going to show you next week (we pulled some strings to get some product early).

    To learn more about the awesome advantages of Chalk Paint (no, it's not chalkboard paint it's way cooler than that) head over to Shaunna's Blog. She's a wealth of information and if you're anything like me, you'll be on her site for hours (you've been warned).
    You can go directly to the Chalk Paint Store (TM) using this link: http://www.perfectlyimperfectblog.com/shop-online
    We hope you have a great weekend and we can't wait to show you next week what Jess is working on with her chalk paint!

  • DIY Marquee Sign {Knock It Off Project}

    DIY Marquee Sign {Knock It Off Project}

    You all are familiar with marquee signs, right? They're those lighted signs that you see outside of old movie theaters, hotels or casinos in Las Vegas.

    Source
    These signs are definitely a retro throwback, but have come back as a home design trend in a big way! Adding one brought whimsy and fun to this kitchen and dining room that otherwise lacked both. These beauties aren't only meant for kitchens, though! They would look fabulous in a kids bedroom or playroom, a fun family room or even a game room. The best part about this project is that you can use absolutely any word that has meaning to you!

    We've actually seen a bunch of tutorials for marquee signs using 3-D cardboard letters, and honestly, we toyed around with the idea of using them too. But we knew we wanted this to be a permanent fixture in her dining room so we didn't want it to be flimsy or break after awhile. Using chipboard letters (wooden would work too!) from Michael's on top of a plywood frame made this piece one that will last.
    To create the box that your letters attach to, we used a piece of plywood and 1x2 pine boards. Cut the plywood to your desired size and the cut two horizontal 1x3’s and two vertical 1x3’s. Attach those pieces to the back of the plywood with a nail gun, creating the frame. We painted our plywood with the same color as the kitchen cabinets (Summer gray by Valspar) to tie in with the rest of the room, but feel free to go as bright as you want. It's your project, after all!

    Decide how many lights you’d like on each letter and mark their placement. Our bulbs were evenly spaced.

    Drill pilot holes where on each mark on the letters. Doing this allows the larger bit to go through the letter without splintering it, so don't skip this step!

    Using a large bit the slightly larger than the socket of the light bulbs, drill larger holes through your pilot holes.

    Go ahead and clean off those letters and spray paint them in the color of your choice. We LOVE Rustoleum's spray paint in Blue Lagoon (it's the color we used on our giant shaped frame)

    Once your letters are dry, lay them back down on the plywood and figure out the spacing you want. Draw a small “x” in each of the holes and then drill a hole in each of the “x’s”.Place a few dots of liquid nails on the back of the letters and align the letters over the holes in the plywood. Let dry completely. Thread the sockets through the holes and then screw the bulbs in. We used these string lights from Target- there are about 25 bulbs per strand, so plan accordingly.

    Room Essentials® Clear Globe Lights (25ct)

    We chose to add an outlet behind the marquee sign to hide the cord, but you could easily drill a small hole in the bottom of the frame to pull the cord through. If you paint the cord the same color of your walls, you'll never even notice that the cord is there!

    We think this sign is pretty darn awesome and Linda has since told us that it inspires her to be more creative with her cookies and cakes business!

    Haven't seen this episode yet? Watch the whole thing online HERE!

    Also, we're always adding new Knock It Off projects to our DIY gallery, so be sure to check those out, as well.: )

    jess
    Monica
  • Fab Find Friday

    Fab Find Friday

    Well, here I was thinking that I was so ahead of the trend when I found Serena & Lily, but then the blog celebrity Nester posted this about them yesterday. It turns out I'm not the only one who knows about their fabulousness, but I still had to share my favorite items from this home decor/furniture store. My mom received their catalog earlier this month, and I was immediately hooked just by looking at the cover…

    Source: habituallychic.blogspot.com via Jessica on Pinterest
    Every single thing in the catalog is so unique and beautiful, not to mention, ridiculously expensive. Just pretty eye candy for me, but sometime a girl has to dream a little, you know?

    Source: shelterinteriordesign.blogspot.com via Jessica on Pinterest
    I am in love with the white on white tones in this room with the pops of color in the throw pillows. Plus, I would probably sell my dog most of my posessions to have that fireplace mantle. Just sayin'.

    Source: serenaandlily.com via Jessica on Pinterest
    They really have such great fabric that you can purchase as well. These are super adorable and I'm totally digging the muted gray, blue, rust and green.

    Source: serenaandlily.com via Jessica on Pinterest
    How darling is this girl's bedroom? That headboard is a such a mix of feminine (the pink) with a little edge (the nailhead trim).

    Source: serenaandlily.com via Jessica on Pinterest
    This is called the Boathouse mirror. Of course, I would love a boathouse mirror.

    Source: serenaandlily.com via Jessica on Pinterest
    Puppies on a pillow. Enough said.

    Source: serenaandlily.com via Jessica on Pinterest
    This malibu chandelier is A-MAZ-ING. In case you can't tell, it's made of stone-colored beads and jute.

    Source: serenaandlily.com via Jessica on Pinterest
    Monica did not like this multi-colored Havana stool, but I think it would look awesome in a playroom, or even a fun game room.

    Source: serenaandlily.com via Jessica on Pinterest
    They even have a line of their very own low-VOC paint. Again, the way they laid out this magazine spread made me want to buy everything I saw!

    Source: laylagrayce.com via Amber on Pinterest \
    And if you are in the market for nursery bedding and decor, look no further. I have never seen baby bedding quite like Serena & Lily's- they are perfect for a nursery, but honestly, I would be happy having them for my bedroom.
    Go on- check out their website . And then you're allowed to cry over how pricey everything is. I did.

  • 10 Fall Kids' Crafts

    10 Fall Kids' Crafts

    I know there are all kinds of seasons in life and I'm cool with that, but this season of our life could possibly be entitled"On the Brink of Insanity." I've been keeping up a pretty intense pace the last few weeks and felt pulled in so many directions. Thankfully, things are simmering down, but when they were at their peak, Eric and I talked about making sure we're both being intentional with doing special things with our kids. We spend tons of time as a family, but my"thing" is crafty things with the kids. Eric pointed out that I had been letting my busyness get in the way of my"thing". So, I did what any good mom would do… GOT ON PINTEREST! Ha! Here's what I found and what's on my To-Do List:
    10 Fall Kids' Crafts My Kids Will Love! (and yours will too!)

    1- Felt Animals My oldest daughter and her BFF are obsessed with making little felt animals. They've made some adorable cats, penguins, and giraffes! I can't wait to make some cute woodland creatures with the girls!

    Red Marionette
    2- Felt Garland Since we have a lot of felt around, I thought this project would be fun and simple to make for the kids' playroom. We have a cool, stone fireplace in there, and I think it will look so cute with a pop of handmade color. I am 100% aware that my kiddos' cutting and stitching won't be perfect, and I'm totally fine with that!

    A Beautiful Mess
    3- Painted Pine Cone Swag I like this project idea because first we'll be able to go on a hunt through the woods to find pine cones.

    Family Fun
    4- Leaf Doodles Seriously, could this idea get any cuter? I can only imagine how cute my kiddos' drawings will be. I'm picturing a cute family portrait of leaf people! My younger daughter will LOVE this activity.

    Family Fun

    5- Spooky Candy Tree I'll be honest, I am not a licorice fan (I think it tastes like plastic), but it's perfect for these trees! This is a perfect activity for after dinner and homework!

    Red Hat Society Store
    6- Painted Pumpkin Seed Art We've carved most of our pumpkins, but we saved a few for this week. I'll definitely be roasting 1/2 the seeds and saving the other 1/2 for this adorable project. I'm planning to let the kids watercolor the seeds.

    Our Little Nature Nest
    7- Styrofoam Felt Owls These are felt animals on steroids- I love them! The inside is a Styrofoam ball and then we can just layer on the awesomeness with craft glue. I envision a few of these babies around for Thanksgiving for sure!

    Factory Direct Craft
    8- Apple Print Banner I know I'm a tad behind on the apple crafts bandwagon, but I love this and I think we'll try it in some orange and brown colors. My youngest has been learning all about apples in school and this project just might make me even cooler to him than his teacher (maybe, but not likely!)

    Multiples and More
    9- Marshmallow Shooter I have an (almost) 8 year old son… he will LOVE this project. Although, I have a little tweak for fall- I think we're going to collect acorns and shoot those babies instead. They're going to go so stinkin' far- it'll be awesome!

    Come Together Kids 10- Twig Trees So simple, but really cool. We have tons of trees around our house (we live in the woods) so we'll find just the right sticks and then I'll give my kiddos a choice between using either fabric, fun patterned paper, or buttons.

    Blog ZuiAs a working mom, it's not always easy keeping everything balanced and under control, but I'm thankful for a husband who can loving tell me when I'm letting something important slide. Today was the first day of"Intentional Mommy" and the leaf rubbings we made were a great start. I love looking at each of these projects knowing that each one will be quality time spent with my kids. How do you wear all your hats and keep a balance? What's your special"thing" with your kids?

  • Interactive Playroom Wall {Five Foot Twelve Creations}

    Interactive Playroom Wall {Five Foot Twelve Creations}

    If you missed all the amazing projects in the first three weeks of CWTS, be sure to check them out below!
    Round 1 Projects & Winners Round 2 Projects & Winners Ro und 3 Projects & Winners

    -------------------------------------------------------------------------------------------------------------------------
    We love when someone takes a current trend and puts their own unique spin on it! This interactive wall by Melissa scores major points with us for creativity and major points with her kids for hours of fun! I don't even want to show my kids these pictures because I know for sure that they'd think Melissa is a much cooler mom than I am!

    Our basement is better known as"the kid cave." When we arranged it, we set it up in"stations"--kitchen area, dress-up area, puppet theater, arts & craft studio and a"school room"for my future teacher. I love the way chalkboard paint looks and although it is not a new concept, I have always wanted to use it in our basement. The wall I chose for this project is approximately 21 feet long and I thought it would be neat to create an interactive chalkboard wall.

    First, I painted the wall using Rustoleum Black Chalkboard Paint. While it recommends two coats of paint, I went ahead and gave it three coats, as the wall seemed to really soak in the first coat. In designing the chalkboard wall, I knew I wanted lots of space for the kids to draw and create, but I also wanted to put some things that would be permanent, instead of just having a 21 foot chalkboard. I decided to include a map of the U.S.A…I love the way it looks and will be fun to track the different states we go to as a family. I printed a map of the U.S. onto an overhead transparency and used an overhead projector to trace the map onto the wall. I used a permanent white paint sharpie marker to trace the map.

    I also wanted to have some fun and whimsical frames on the wall as well. So using the same method as the U.S.A. map, I chose the following"hanging doodle frames" from PrintCandee.com:

    Next, I designed a large interactive tic-tac-toe board. Similar to the map and frames, I traced the board onto the wall. Here is the board I used…you can download the template here.

    I bought five"X's" and five"O's" from the craft store…you may have to go to a few craft stores--they have plenty of"O's" but don't stock many"X's"! Also at the craft store, I bought self-adhesive magnet strips. At Home Depot, I bought nine two-inch washers. After painting the"X's" and"O's", I super-glued the washers onto the letters, and fastened the magnet strips onto the wall.

    For the title of the game and the map, I created stencils on my Cameo. Here is a great tip for stenciling… once you get the stencil arranged onto the wall (or wood, object, etc.), before stenciling with the color(s) you want the word/objects to be…first paint a light coat of the background color…in this case I used the black chalkboard paint. This creates a seal with the stencil and I have found that it prevents bleeding of the paint--making your stencil look very crisp.

    (I forgot to take picture of painting on the red and blue! Sorry!)

    Speaking of paint…it was a blast picking out all the fun paint colors at Home Depot! Because I was using so many colors and didn't need a gallon of each color…Home Depot made my day when they told me that they can mix any color in a small, 7.5 oz jar…perfect!!

    I picked the step-stools up at IKEA and painted them in fun colors…

    Not only are they great for setting the game pieces and chalk on, but they are extremely sturdy stools and perfect for giving little kids a boost for drawing and playing on the wall.
    I have always adored these giraffe and elephant hooks from Anthropologie…and I love the way they add a fun (and helpful!) detail to the chalkboard wall:

    Finally I added some framed artwork courtesy of the kids…they were so excited to help with this project!

    Mom of the year, folks!: ) If you haven't stopped over to say hello to Melissa, what are you waiting for? She's got a bunch of cute things going on over there on her blog including this adorable"Wizard of Oz" subway art she made for her daughter:

    Don't forget to link up your favorite paint projects right here until 10 PM EST tonight! Also, Sarah will be here tomorrow sharing how she completely transformed that chunky bookshelf into an awesome functional and beautiful secretary desk- you won't want to miss it!
    Happy weekend!

    jess
    Monica
  • With Just a Little Scrap…

    With Just a Little Scrap…

    So, this post was never intended to be a post… really, I only have pictures because I was texting them to Jess at the time. Here's a little back story… I'm not all that into fashion. I mean I don't dress like a dork, but I'm not super trendy or anything. Jess is great with fashion and has strong style sense. Before the Nate Show taping we tried on a bunch of outfits and she kept trying to get me to add cute belts. I just wasn't feelin' it. It looks cute on girls like this, but something about my hips after four kids, just kind of makes it less cute on me. Katie Holmes can rock the belt for sure!

    Source: images.search.yahoo.com via Tiffany on Pinterest
    BUT… this morning I was getting ready for church and I'm usually a jeans and tee shirt girl at church, but today, went for the dress. I like this dress, but it was feeling a little blah… it needed a belt {gasp!} Ok, now get ready for some poor quality Blackberry pics… See, the dress was fine, but nothing special… missing something…

    I think I must have been craft deprived lately, because I felt like I just had to make something… I saw this leftover fabric from the kids' playroom curtains and thought,"What the heck, let's give it a try…"

    Two minutes later, I had kid scissors (I can't find my good ones) and Zots (remember them from a Fab Find Friday?) This probably isn't the normal bathroom vanity scene is it?

    So the first idea was a chunky style belt, but it basically looked like I had fabric wrapped around my waist… FAIL!

    I was about to give up when I gave it one last shot… I just twisted the fabric into a rope and tied a knot. Hmm, this might actually work… I believe my exact text to Jess read,"I must have woke up drunk this morning because I might actually try and pull this off" (and no, I don't really drink much and don't wake up drunk!) I liked the pop of color and thought this sorta worked.

    I just tied the knot and then cut the ends into four pieces to look more like a flowery-thing.

    Here's the final product taken with a real camera… (My husband thinks I'm SO weird) I love how it worked with my new yellow watch… seeing a color pattern trend??

    Overall, I think my little adventure in the fashion world worked out alright. My 9 yr old was mortified by me the entire time we were out, but that's alright. Moms are supposed to be embarrassing right? I did a little looking online and found this one other idea for scrap fabric that I love so much! Fabric Necklace from My Cakies

    I simply adore this and she gives great directions on her blog. I will definitely be trying this soon and sportin' a cool, new necklace!

    It's pretty amazing what you can do with a just a little scrap… What are you going to create with yours??

    P.S. Congratulations to Janet, the winner of the Starbucks giveaway! Thanks to EVERYONE that helped us out and took our little survey. Janet, just shoot us an email with your information and we'll pop it in the mail. (therealhousewivesofbc@gmail.com)

  • Knock It Off Premiere Party Recap!
    Knock It Off Premiere Party Recap!

    Last Sunday night we gathered together with 200 of our family, friends, crew, and blog readers to celebrate the premiere episode of our new show Knock It Off. (To watch full episodes online, click HERE. To see all the projects featured on the show click HERE)

    To say the party was awesome would be the understatement of the year! We know many of you (our amazing readers) live far away, so we wanted to share our night with you!

    A huge thanks to Nicole from Expressions by Nicole Marie for doing all the photography for the night. She's a Philadelphia area photographer. Check out her website to see more of her work.

    The dessert table was by far our favorite thing ever! Linda (more explanation on her later) put this together and it reflected us perfectly!

    Paint cans, paint sticks, adorable chalkboards, and mini tools captured our DIY theme perfectly.

    Yes, Linda made all of the desserts including the tool cookies. They were a huge hit!

    Who knew paint sticks could be so perfect as food labels? She dipped the end in paint and then stamped on them. This would also be a great idea for an art themed birthday party!

    The tools were plastic and spray painted silver to accessorize the table.

    Every little detail was thought of- look at the mini Jess and Monica!! Janeny from Craft that Party made the adorable peg dolls with Knock It Off on them. They made adorable cake toppers! Janeny does all kinds of custom peg dolls that are crazy cute!

    Check out the centerpieces… quart-sized paint cans filled with custom Knock It Off lollypops from Vintage Confections. The tool keychains were our little party favors- I think my kids thought the tools were the coolest thing ever!

    Jess and I were at the main entrance to greet all of our guests (which was super fun to meet so many readers!!), then everyone got appetizers and dessert and finally it was time to watch the premiere. And what's a premiere without popcorn?

    Linda used some paint swatches (with permission of course) to make a garland for the popcorn table.

    And now, who is this Linda woman you ask?? She is a blog reader we met and got to know by doing a Knock It Off episode at her home- check her out in an upcoming kitchen episode!
    Linda owns Frog Prince Cake and Cookie Design and she also helps with party planning.

    Linda is SO talented and we can't thank her enough for all her hard work. She thought of every detail and pulled everything off with perfect planning! If you have an event coming up and need amazing desserts or even help planning contact Linda! Also, be sure to LIKE her on Facebook and check out all of her awesome creations!

    Check back on Monday when we're going to post on the decor of the party and where you can find all the fun items Linda used!

    We also had a mini-Red Carpet leading to a Knock It Off Photo booth. The KIO logo decals came from Ten23 Designs- they do stock and custom design vinyl.

    We're so happy that we have so many fun pics of our guests! Check out this weekend's episode to see this fun couple's bedroom transformation!

    This couple were the stars of the premiere episode- they loved their dining room->playroom transformation! Plus, they're adorable!

    Cute couple alert! Jess and Kev!

    Me and my boys… (an no my hair isn't red, just looks like it in this light)

    Baby brothers are always good for an extremely weird picture!

    We're so thankful for fun, strong, supportive women in our lives!

    Have we mentioned we have the BEST sponsors ever? This is Nancy from Bare Root Design Studio- We'll be sharing more about all the fun giveaways in another post.

    And of course, we wouldn't want to be on this crazy journey with anyone else. Doing what we love and getting to do it together is the coolest thing ever!

    We hope you're enjoying the show- if you've gotten a chance to check it out, we'd love to know what you think! Feel free to email us, leave a comment, or post on Facebook!

    jess
    Monica