My Creative Blog [Search results for Wooden Frame]
Staples Engineer Print Artwork {Garage Mudroom Makeover}

Adios Amigos Day 4 {Sew Dang Cute Crafts}
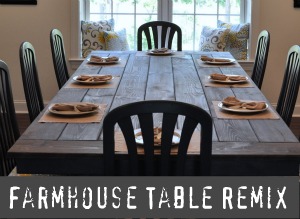
Farmhouse Table Remix {How to Build a Farmhouse Table}
Creating with the Stars Round 1 Voting

DIY Marquee Sign {Knock It Off Project}

Ginormous Family Art {With an Industrial Flare}
Transformed Beverage Cart & Details {The Nate Show}
Creating with the Stars Round 2 Voting

InstaThis! {Giveaway}

DIY Barnwood Shelves

Collecting habit: Tassels


