My Creative Blog [Search results for Valentine's Day

  • Perfect Valentine's Gift {The Game of Love}

    Perfect Valentine's Gift {The Game of Love}

    Good ole Valentine's Day… Love it or hate it it's coming! Well, you can thank me later, but I have the perfect gift for your hubs! This gift started over ten years ago on our very first anniversary… we were broke, still in school, and oh so in love. Let me tell you it was a hit! So much so, that I just gave the same gift for our 10 year anniversary back in November. **Disclaimer- This post is written totally from the perspective of a married woman that adores her husband. I'm being honest here ladies, so you've been warned. Also, if you are my mother, STOP reading right now. Thanks!**
    The Perfect Valentine's Gift- The Game of Love Imagine with me for a moment… It's been a long day, you and the hubs are headed to bed. You've put on your favorite comfy, frumpy sweats and a tee for bed. Once your hubs sees your bedtime wardrobe choice he knows there's no shot of romance for the night. He pulls back the covers to hop in bed and… what's this??

    You've just pulled off the best Valentine's Day surprise ever. It's time to play The Game of Love! It's a game your hubs will love even more than the Superbowl!
    All you'll need for this DIY is some time without your hubby around, some markers, some kind of shape template, and a fitted bed sheet…Seriously mom, if you're reading- Stop!

    Ok, you can kind of see where this is going, and I must make a public confession… yes, I used one of my bff's birth announcement as my template! It was an adorable shape- Sorry Mandi!

    I spent a lot of time ironing my sheet and then had an idea… I could have just washed and dried it. That would be easier.

    Pop on your still wrinkly ironed sheet and you're ready to start making your game board.

    If you want nice, straight lines, you can use some masking tape and your template to help with your spacing.

    It doesn't have to be perfect (trust me he won't be too focused on your straight lines!) Start tracing your template. Trace it over and over again. Darn that I couldn't really have a friend come and help me with this DIY… awkward: )

    Before removing the masking tape, I added some cute little dashes along the top.

    You can add your game's title across the top. Don't you love my cheesy name? The Game of Love… still makes me laugh! Feel free to use it or come up with a less cheesy one!

    Now it's time to get creative. I included a few presents, snacks, wardrobe changes, and lots more!

    Here are a few of my squares… (if you really want to know what else I added, you can try and read the teeny writing! Ha!) I had a few gifts wrapped and ready to go and a few yummy romantic snacks as well.

    Put your mattress back and it's ready to go! (Okay, I have some limits, so I pulled a little censored for your protection action!)

    In case you're wondering, here are The Official Game of Love Rules: 1. The player will roll a die, but the highest number can be 3 (so divide by 2 or the game goes too fast!) 2. Each square has a 1 1/2 minute time limit 3. No getting carried away- you have to stop at 90 seconds and roll again (the hubs might fight you on that one) 4. Only one person"plays" your role is just the game"facilitator" 5. The Final square is"Score" and you can't skip ahead (if ya know what I mean)
    Okay, now my rationale for posting this. No, it's not my life's aspiration for my personal life to be all over Pinterest (don't worry, I am cool with you pinning it though). I just know that marriage is tough. It takes effort each and every day, not just Valentine's Day. I don't know your situation, but I know that 4 kids takes a toll on the love life. As a woman, I have to be intentional about connecting with my husband and making him a priority (FYI"connecting" is a code word! lol). I wanted to encourage woman to have FUN with their husbands… it's really okay- you're married! I call this the"Perfect Valentine's Gift" because for me, it meant so much to Eric that I took the time to think through this, plan out the surprise, and then have an unexpected evening dedicated to us.

    So, will you be using The Game of Love to attempt to"Connect" with your husband this Valentine's Day?

    Psssst! We came up with a new version of this game this year. Click here for the Game of Love: Travel Edition!
    Linking to: TT&J, Stories of A to Z i heart naptime

  • Family Valentine's Mailboxes {Try this Now}

    Family Valentine's Mailboxes {Try this Now}

    Occasionally, Jess and I do or see a project that is deserving of the"Try this Now" title. The project needs to be super simple to execute and have a major awesomeness factor. We know it's easy to have an ever-growing DIY list, but these babies are projects that you should try right away. We've started a page on the blog where we'll catalog these super-simple projects, including today's Family Valentine's Idea. So be on the lookout for our fun Try this Now logo. TRY THIS NOW PAGE

    I was browsing the Target dollar bins and spotted these cute mini mailboxes. We have a little over a month before Valentine's Day, so I decided that we were going to create a little family mail center!

    Here's the plan… we set these mailboxes in the family room with a stack of blank notes where anyone can leave a note for the kids and they can leave notes for each other. We're encouraging them to write something nice to one of their siblings each day.
    Of course I wouldn't leave you hanging without free printable notes of your own! You can download the ones I created HERE.

    I printed them on plain,old computer paper, but I think they're pretty cute!

    I had bought one mail box for each kiddo and some Valentine's stickers. I pulled out some washi tape and a bunch of Sharpie markers.

    After dinner last night, the kids went to town decorating. They were really into it!

    The best part wasn't the decorating though… it was seeing how excited they were to write each other notes! Kira is really sweet and put so much effort into her brother's note.

    Here are a few of the notes that are going to be read this morning…

    Kaden is honestly the best big brother on the planet!

    He actually wrote 2 notes for Cal!

    I'm really excited about the next month and how excited my kiddos are to send each other thoughtful notes. We're not a super touchy-feely family, so this is one way we can do Valentine's Day on our terms!

    Are you ready to Try This Now? Will your family be getting a Valentine's Mail Center?
    Linking up to: I Heart Naptime

  • Best Valentine's Day Gift Ever- Take Two: 2013

    Best Valentine's Day Gift Ever- Take Two: 2013

    Last year, I took a little risk here on the blog and got personal… really personal… I shared my idea for the Best Valentine's Day Gift Ever! I guess you guys liked it, because it was our most popular post of 2012- you dirty dogs! Ha! Have no fear, this year I have another idea that's a lot less prep and will still keep your man saying…

    Let's recap really quickly…

    Check out this post for all the details and the full tutorial, but basically you're going to use a bed sheet as a game board and pull off the most incredible surprise ever. Trust me ladies, you will win major points with this one. I can't tell you how many letter I've gotten from readers that had the best time with this project! Husbands are huge fans of The Game of Love!

    This year, we're introducing the Game of Love Travel Version!

    You don't actually have to be traveling to play this version, but it's perfect to take on the road. However, even at home sometimes you need a little"spice" and don't have time to DIY an entire game board sheet (definitely find the time to make it at some point though!).
    Here's how you prep your game… #1 Print out a bunch of our free printable cards. Download free printable cards HERE

    #2 On each card you'll write some kind of fun bedroom activity. Make some nice and others a bit more naughty. You'll want some variety in your cards. If you need ideas for your cards you can check out The Original Game of Love Post and click on any of the pictures to enlarge and read my game board squares *blush*, but be creative and remember that your husband will appreciate the effort you're putting in! #3 Put all of the cards in a bag or container

    Here's how you play… It's kind of like let's make a deal. Your hubs will choose a card out of the bag (without peeking), read the card and determine if he wants to PLAY or PASS. Here's the catch… he can only choose 5 total cards to PLAY and once a card is PASSED you can't get it back! Oh Snap! It's super fun to see which activities he can't resist and which ones he's willing to pass on in hope of something even better! I'd recommend putting about 15 card options in your bag, but you can definitely do any number you'd like- you guys are pretty wild; ) You can play one of two ways, either do all the wheeling and dealing at the beginning and then get to business or do one card and activity at a time. Jess prefers having Kev make all his decisions up front. Either way is fun!
    We're pretty sure this Game of Love Travel Version will be a huge hit! We hope it gives you the second year in a row of the Perfect Valentine's Gift! Who knows, it might also make your hubs want to plan more weekends away so you can bring your game along!
    Being married is hard work and with so many marriages falling apart these days, it can never hurt to go the extra mile to let your man know you love him! So here's to another successful Valentine's Day and here's to women that aren't afraid to have a little fun with their hubs! Good luck and let us know how it goes! We loved hearing all your success stories from last year!

    So, are you going to play the Original or Travel version this year? Linking up to: I Heart Naptime

  • Five {Non-Cheesy} Dates for Valentine's Day

    Five {Non-Cheesy} Dates for Valentine's Day

    Are you looking for the link party for your Creating with the Stars submission? Yay! We're thrilled to have you! Click here or use the button below to link up. Submissions are now open until February 21st. If you want to read more about the contest and all that it entails, click here.

    ======================================================================== So, I'm just going to go out on a limb and say that some of you are procrastinators like me. My hubs and I are celebrating Valentine's Day this weekend, but I still have no clue what we are going to do (and my hubs is not much of a planner, so I'm thinking it's kind of up to me!) So I went, looking for some fun and exciting date night ideas to celebrate all that love you've got going on with your special someone.
    1. Progressive Dinner. Let me tell you that this is SO up my alley. I love to eat and I love to eat out, so this is a perfect combination. This one would be so much fun because you have a lot of time to chat, the night is a bit longer and you get such great variety! I already know where my hubs and I would choose to go:

    2. Compete Against Each Other! This may not be everyone's cup of tea, but man, I love a good competition and so does my hubs. One of my favorite things to do is to go to Dave & Buster's and play all the games (I especially love the basketball games!). Whoever gets the most tickets, wins something of his/her choice. Or, if you don't have a huge arcade near you, try go-karting, bowling, tennis etc…something to get your heart pumping!
    3. Play the Tourist I've lived in Bucks County almost all of of my life (minus the college years), and absolutely love it here, but I'm always amazed at what things I've never tried, shops I've never gone to and activities I've never done right in our area. Take some time to research different travel sites to see what you might be missing. Try a restaurant you've never tried before too!
    4. Instagram It! I kind of love the idea of an instagram scavenger hunt, since, you know, I can't get enough of the whole IG thing. Make a list of fun activities/places and go to every single one and Instagram a selfie pic in front of whatever it is. You could totally customize the list to fit the two of you as a couple, but here are a few fun ones we thought of: -Favorite Restaurant -Best spot to see the skyline -Funniest sign in town -Best place to grab a drink -Favorite place to listen to music/read books -and my husband insists this one is awesome: take a pic with a farm animal in the background. So strange, people, so strange.; )

    Once you've checked off everything on your list, reward your hubby with good ol' number 5…
    5. Game of Love (Original OR Travel) I'm not going to go into tons of detail about this one (you can check out all the juicy details on how to play here), but trust me, this is one date night that will not be soon forgotten.

    Want to give the travel version a try, even if you're not travelling? It's still super fun and easy to play!

    Ok, now it's your time to spill. What's your favorite date night activity? We want to know!! Happy Valentine's Day! We sure do love that you take time to stop and read our nonsense everyday!

  • How to Make a Wood Framed Mirror

    How to Make a Wood Framed Mirror

    Earlier this week, I shared my powder room pick me up with ya'll. If you missed it, you can check it out here.

    After stenciling my walls, and hanging the industrial light fixture from Lowes, I stepped back and thought, dangit it still looks crappy. Mr. Cheepy McCheeps a Lot Mirror was not helping the situation any and had to go!

    I ran back to Lowes and grabbed a plain beveled mirror.

    I called my BFF and asked if she still had the massively long and awesome old wagon boards. Thankfully, she's awesome and said I could have it! I needed to cut it in half or it might have been the thickest mirror known to man. We're really fancy so we placed it on our lawn mower. I promise we're not as backwoods as this picture makes us seem… let's think of it as resourceful okay??

    We used the mirror to help determine how long to cut the wood…

    Then, my handsome hubs helped me cut the wood down to size. I have to mention that it sometimes might appear that I never do any work, but really it's just that the hubs rocks and he'd rather not fuss with the settings on our camera, so I often become the camera lady!

    When we cut the wood in half, the inside where we cut was really blonde wood, and I needed to darken it up a bit, so I just rubbed some leftover grey stain on the side. The top piece was stained, the bottom wasn't… see the difference?

    We brought it all inside and got ready to put it together… I don't really recommend doing DIY project on granite countertops, but hey this is real life people. (Oh, and having a hair brush handy is optional-hehe)

    We used liquid nails to adhere the wood to the mirror. It's not called liquid nails for nothing, it holds like crazy!

    Jillian Michaels would be proud that I'm putting my weights to good use, okay, maybe she'd actually yell something mean at me and make me do push-ups (and not the girly kind), but weights work really well to hold thing secure while they dry. I left these on overnight.

    The next morning, we screwed it directly into the wall studs so it could handle the weight.

    I used some black, decorative nail heads to cover the screws.

    The new frame definitely goes better with the light fixture. I LOVE the character the wood has!

    So there you have it. This was a super simple project and… and I actually have nothing else to say about that because it's Valentine's Day and my valentine is ready for me to be done with this post. How's that for keepin' it real? There's a decent chance I will regret this ending in the morning, but we'll wait and see!
    Happy Valentine's Day Peeps!

  • 30

    30

    I.Turn.30.Today. Happy Labor Day Mom! You did all the work thirty years ago, so it's sorta weird that I get all the presents, but hey, I'll take it.
    I'm not really one to make a big deal out of birthdays…21 was no big, crazy ordeal, although come to think of it I was pretty darn excited to turn 16 because it was my official age to start dating (and yes, I had my first"official" date on my sweet 16th) So, as 30 approached I didn't plan on it being a big deal, but honestly I found my self doing a good bit of thinking. Looking back on what I've done so far and thinking about what I want my focus to be going forward.
    I got to thinking… I did a WHOLE LOT in my twenties… I married my best friend. I was married for every day of that decade. I graduated college. Bought three houses, sold two. Was pregnant eight times-yes eight. I gave birth 5 times. I grew as a person. I grew as a mom. I brought four amazing babies home. I let my twin boys go to heaven. I taught high school. I owned a home staging business. I became a cyber teacher. I started a blog. I thought primitive decor was cool. I changed my mind on that one. I found my design style.
    Here's my thoughts in a mini, little nutshell… even though I did a whole lot in my 20s, I don't know that I've been all that intentional. I kind of go with the flow, and try and do things well. I want to be intentional. I want to do things for a reason, not just because. See these kids? They're insanely amazing.

    They're the best thing I've done in my 30 years. I want to make sure that every day they feel that way. I get pretty passionate about stuff I'm doing, house projects, blog posts, Nate Show, even my work… I guess going into 30, I want to be sure that my kids feel like I'm even more passionate about them, their spelling lists, their coloring, even their ENDLESS knock, knock jokes (please make it stop!!)
    So that's all. Here's to 30 (it's the new 20 duh!) and here's to being intentional for the next 30 years!

    And this picture made me laugh oh so hard!

    Source: someecards.com via missy on Pinterest

    ******************************
    And today, you have to go check out Red Letter Word's prints that are just perfect for Valentine's Day. How awesome is this truth?

  • Hungry for Spring

    Hungry for Spring

    We're having a warm spell these last few days, and it is making me all the more hungry for spring. Our local grocery has been keeping beautiful spring flowers in stock, and I'm rarely able to resist bringing home an armful of fresh blossoms.
    This week it's lilies.

    Last week it was daffodils.

    The week before that, white tulips.

    ....and here's the last of the white tulips as they were beginning to fade.
    We had a busy weekend as we finally began our 'renovation' of the old sauna. This includes (present tense -we're still working on it!) removing the old steam benches (to be recycled into shelving), and prepping (with primer and spackle) and painting the wall boards. Like all projects, it's taking forever, it's hard work and we probably won't be done until next weekend — photos to follow!
    Off to paint! By writing this, I'm hoping that it motivates me to actually go out there and paint.
    PS. We didtake breaks to celebrate Valentine's Day with a couple of date nights, and a lovely fireside french toast breakfast on Valentine's Day morning!

  • 79 Valentines & An Instagram Valentine's Idea

    79 Valentines & An Instagram Valentine's Idea

    Are you looking for the link party for your Creating with the Stars submission? Yay! We're thrilled to have you! Click here or use the button below to link up. Submissions are now open until February 21st. If you want to read more about the contest and all that it entails, click here.

    -----------------------------------------------------------------------------------------------------------------
    We've had some just for adults Valentine's Day ideas on the blog (here and here), but today we're keeping it PG! (I always give Jess a heart attack when I venture into PG-13 land! lol) With 4 kids this year I had 79 valentines to prepare. Thanks to Pinterest, I spent some 1:1 time with each kiddo, browsing for ideas, and then making each of their cards. I gave them each the option to buy, but they were feeling crafty I guess.
    Kira went with Arrows and Pencils with kind of a Brave theme. We got the free printables here.

    Picture 13

    Callen wanted Superheros…and again we found a Free Printable! (noticing a trend here?!?)

    Little Bit Funky blog has an awesome tutorial using felt with these printables.
    Did you notice that I didn't perfectly coordinate paper or add extra fancy ribbon? I've made it a goal that kid projects (even if being blogged) don't get bogged down by mommy details. It's all about the fun and that boy sure looks like he's having fun! hahah! He actually said,"Mom, look how happy I am… {INSERT CHEESY SMILE}. See, that happy!" My kids kill me.

    Kaden is 8 and it's one of those ages where you have to decide if Valentines are cool or lame. Thanks to Minecraft, he decided they were cool!

    We just made them together using Google Images and two Minecraft Fonts (find them here and here). Sweet"Cool", Simple, & fun for me and my guy to make together!

    Last, but not least was Kenzie… at almost 11, valentines are almost a thing of the past, but since school still does them, they had to be Epic (at least in her mind). Eric and I don't let the kids have Facebook accounts or anything, but we did let Kenz get an Instagram account (set to private). You might see her commenting on my pictures 24-7: ) Anyhow, Instagram is very cool in her class this year, so we made Instagram Valentine's… but wait, there's more… we also added a scratch off element! Booyah! (Haha, sorry, I got a tad excited)

    I'll warn you… all these pics were taken with my phone, that's another part of kid crafting,"No annoying Mom pictures"…
    Here's how we made them… We started off with a picture Kenzie took on Instagram (Fried Egg A-la-Kenzie). Using my I phone, I took a screen shot.

    We saved the picture and pulled it into Picmonkey where we covered the eggs with a little Valentine's note. We put a few different comments in the area below the picture…

    We printed our design out on plain computer paper. Kenz liked the scratch off idea we saw on Pinterest, so… we added that too! First, take a clear (or white if you don't have clear- we didn't) crayon and color over the area to scratch off.

    Then we mixed together silver paint and dish washing soap. We used about 2 parts paint to one part soap. Then you just paint it over the colored area. (Let it dry a full 24 hours before moving them around. They need to really cure, so they don't wipe off too easily)

    Blogger mommy might have suggested we make the scratch off area in a fun shape or something, but plain old mommy bit her tongue: )
    We attached the Instagram print onto cardstock- and of course, we did it in happy face fashion…

    And then it occurred to me that most 5th graders don't carry coins, so we used a little washi to attach a penny on the back of each card. Kenz and I both liked this little touch!

    It took us about an hour to make all 27 pretty awesome Instagram-Scratch-Off Valentines. It might be the last year we get to make them together (who knows what middle school will bring), so it was an hour very well spent!

    So, 79 Valentines later, I had one really fun afternoon of crafting with my kids and 4 sets of pretty cool Valentines. What kind of cards are your kids giving this year?

  • Be My Valentine

    Be My Valentine

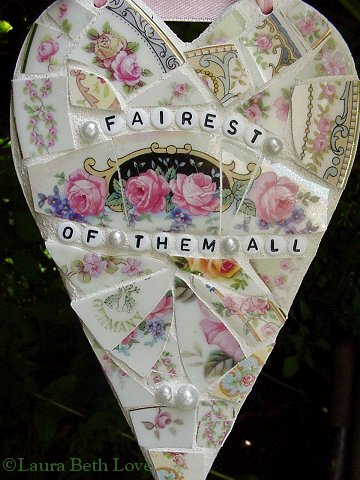
    If ever there was a day for chocolate and goodies, today's that day! Today we celebrate love ~ some with kisses and hugs, others with cards and candy. What's not to love about the heart itself? Here are some mosaic hearts I designed and created using shards of vintage broken china and vintage images. Like each one of us, these mosaic hearts each have their own unique personalities. Happy Valentine's Day to you! Enjoy, and remember to tell someone that you love them!

    ~ Find Peace ~

    ~ Hot Stuff! ~

    ~ Dream Big ~
    all designs & artwork copyright 2009

  • Vintage Halloween Postcards

    Vintage Halloween Postcards


    Vintage Halloween postcards
    ....turned into unique jewelry

    Pendant necklaces made from vintage Halloween postcards

    Pendant necklace made from vintage Halloween postcard


    I love the change in season from summer to fall. It's early September and already our local grocery store has Halloween candy on display! Is it a bit too early for that? Maybe, but the lure of Halloween is one that I' ve always found charming. I'm especially fond of vintage Halloween items. Decorations, masks, costumes and postcards from years past have quite a different charm than those we see today.

    The nostalgia of yesteryear is apparent in these vintage collectibles, and for many, brings back memories of childhood fun and games, costumes and trick-or-treating.

    Halloween truly is a timeless holiday. What other time of year allows us to be something we are not, to fully use our imagination and allow reality to slip away, even if just for one night?

    Halloween Postcards


    I once read somewhere that Halloween collectibles are more desirable than collectibles from any other holiday, with Halloween postcards being some of the most sought after items due to their rarity. The illustrations and color lithography on these cards are beautiful. Depictions of witches, black cats, jack'0lanterns, as well as fortune games and scenes of children bobbing for apples are common designs. I personally am intrigued by those with anthropomorphic figures; the corn-cob man and the grinning pumpkin head girl, vegetable people with smiling faces.

    Pendant necklace made from vintage Halloween postcard
    It's amazing to think that at one time (around the late 1800's and on) Halloween postcards were once as popular as Christmas cards!

    Pendant necklace made from vintage Halloween postcard
    Be sure to check out my Halloween Postcard Jewelry. Each of my postcard pendant necklaces is reversible, with a different vintage Halloween image on each side.

    Pendant necklace made from vintage Halloween postcard
    I' ve been making jewelry from antique and vintage postcards for a number of years now, and in my opinion, the Halloween images are the most intriguing than those of any other holiday. (Aside from Halloween I also make them with Christmas, Easter, Valentine's Day and St. Patrick's Day postcards) 'And don't worry, no original postcards are harmed in the process!

    Pendant necklace made from vintage Halloween postcard

    Pendant necklaces made from vintage Halloween postcards
    What do you think?

  • Illuminated Deer Art

    Illuminated Deer Art

    Hey Everyone! We're super excited to share this simple, yet majorly cool project with you today! Two weeks ago I got back from my 8 day trip to London and Paris with my hubs (Recap post coming after Christmas). It was an amazing, kid-free trip that allowed us to do adult things like visit museums, eat at fun restaurants, see a musical, and do some shopping.

    Let's be completely honest… Europeans have mad-style! I loved all of their clothes and when Eric and I were shopping at a store called Next, he pointed out a really cool deer silhouette art and said,"You could totally knock that off!"

    Let me tell you, I was so thrilled that A.) my hubs is always on the lookout for blog projects and B.) he knew to call it a"knock-off" I took a cell pic (above) and knew I'd make it as soon as I got home.
    Here's what Jess and I came up with…

    How to Make Your Own Illuminated Silhouette Art: We had a few 1x1s leftover from Jess' planked dining room wall, so we started by cutting them down to size. We made ours a little larger than the inspiration piece, we did a 18x24 rectangle.

    We painted all four pieces with some leftover grey paint.

    While Jess was in the garage painting, I got to work on creating my deer silhouette. I found an image on Google and then used my Silhouette to cut it on black cardstock. If I'm being 100% honest, first I watched about 5 YouTube videos teaching me how to do it! Ha!

    I then measured the light linen-ish fabric down to 18x24

    We laid out our wood in a simple box and measured 1 1/2 inches in for each intersection.

    We started by using simple nails to secure the box, but it wasn't the most sturdy…

    So, we went to a plan B and used a drill. Sorry about the lawn mower in the background- a little evidence that I live on 4 acres.

    Once we had our box secure, we placed the fabric on the back and attached it with a staple gun.

    We had some excess fabric, so we trimmed the edges down a bit.

    One of my favorite things about the inspiration piece was the cording at the intersections. I picked up red and tan at JoAnn Fabrics.

    We put the paper silhouette on the linen using spray adhesive. To light it, I just stood it up near a light, but you could also use a small reading lamp or Christmas lights to illuminate it.

    It looks awesome in my Kaden's room with his Pallet Wall!

    Even though it's perfect in Kade's room, for now it's part of my Christmas decor!

    One of the coolest parts of this DIY, is that you can easily swap out the silhouette. I already have something fun planned for Valentine's Day!
    If you want to see the rest of Jess and my Christmas home tours, you can check them out here.
    My Christmas Home Tour

    Jess' Christmas Home Tour

    We hope you and your family are enjoying these days leading up to Christmas.

  • Free Printable Art Round-Up

    Free Printable Art Round-Up

    While looking for fun, free art for my new gallery wall, I discovered a few great places to print beautiful art, typography and even maps! And I just couldn't keep all the goods from you, so get your pen and paper ready (oh, wait, does anybody do that anymore? Get your Pinterest pinner ready, then!), for some awesome, free stuff!
    1. Sprik Space

    I mentioned that I printed off these two adorable prints from Sprik Space for my gallery wall, but these aren't the only ones Aimee has! Be sure to go on over and take a look at her super cute printables- and tell her we sent you.
    2. The Graphics Fairy

    Ok, admittedly, you have to do some digging on this site to find the hidden gems like this vintage french label, or this gorgeous peacock print. But luckily, all the printables are categorized, so if you know what you're looking for, you're in luck!
    3. Feed Your Soul: The Free Art Project

    I think this site is my favorite yet for free printable art. Don't ask me why I put it third on my list- it's late and I'm tired, so leave me alone.; ) The art is quirky and clever and definitely a touch modern. They have a few prints that would be perfect for a nursery or children's room, but I would put a whole bunch of them up in my house. Listen to what Jane says her reason for starting this site is: "I love art and I know you do too. I also know that when people start to tighten up the purse strings they tend not spend money on things that aren’t necessary for survival, things like books, magazines and art. But, art is important for your soul. It helps rejuvenate, it’s thought-provoking, offers inspiration and can generally brighten an otherwise dreary day among other things." Well said, Jane, and we thank you from the bottom of our art-loving hearts.
    4. New York City Public Library

    ar

    Did you know that the New York Public Library has a digital gallery of over 700,000 images taken from their vast collections? I found this old print of Pennsylvania from 1830 with just a simple search.Browse to your heart's content and I'm sure you'll find a inspiration for art.
    5. Leanne's Printable Quotes

    This is not a site that regularly features free printables (at least not to my knowledge), but in this post there are several simple designs that would make great cards (for Valentine's Day, maybe?), art prints, or anything else you can think of.
    Where's your favorite place to get free printables? I shared mine with you- now it's your turn!

    ------------------------------------------------------------------------------------------------------------ I can't stop looking at the Hymn & Folk Song collection by Red Letter Words! Today I'm smitten with this:

    I sing this regularly to my kids and so it these prints make me happy. I love the set of three prints- something a bit different than the norm!

  • The Valentine Box

    The Valentine Box

    What fun it's been this week at our house, making Valentine's Day boxes with my daughters. Finding just the right shoe box and then gathering the pretty papers, ribbons and glitter (and paper doilies of course!) to help them create their masterpieces. I'll admit it, I think my excitement matched theirs when the note was brought home from school with instructions for this project! Children are such a phenomenal inspiration....

  • Valentine's Day Printables

    Valentine's Day Printables

    Click HERE to Download

    Click HERE to Download

  • Smart Blonde and Crafty

    Smart Blonde and Crafty

    We love inspiring all of you and empowering you to take risks in your home and do what you love. We love it even more when other women are inspired to do the same thing. One of things that is so fabulous about this DIY/Home Design blogging niche is how supportive it is and that bloggers genuinely want to see others succeed. Not to mention, home bloggers are sooooo generous about sharing ideas and projects with each other! -------------------------------------------------------------------------------------------------------------------- Amanda emailed us a few weeks ago. Who is Amanda, you ask? She and her business partner (and best friend!), Kelly, are wives and mothers who own their own business (Smart Blonde Creative) and manage to be creative and crafty in their spare time. Sound familiar? Yeah, we liked them right away. They were so inspired by the blogs they read on a daily basis, that they decided to use their graphic design and marketing talents to create an online magazine that is a source for easy and fun projects inspired by bloggers like us! The first publication goes live today!

    We got an early peek at the magazine and immediately loved the bright colors, fun layouts and super on-trend chalkboard typography. Not only that, we are thrilled to be featured in a two-page spread!: )

    This month's premier issue features a super cute idea to make your own romantic dinner plates for Valentine's Day…

    …and an easy way to DIY a pillow cover with button detailing…

    …and a host of awesome blogs you should be reading!

    Every two months, Amanda and Kelly will bring you a round-up of their favorite projects and the women and blogs that gave them the inspiration. We hope you'll take a peek at their first issue by going to Smart Blonde and Crafty RIGHT NOW. Then hop over to their site to learn even more about these awesome ladies, what projects they have going on and their goals for their new mag! And if you love it, tell your friends all about it.: )