My Creative Blog [Search results for Guest

  • SuperFab Room Redesign REVEAL {Guest Room}

    SuperFab Room Redesign REVEAL {Guest Room}

    When a close friend asks you to help re-do their bubble-gum pink, non-descript guest room, you can't say no. You almost feel like you need to stage a design intervention immediately. Everyone has a room like this one: a forgotten catch-all guest room/play room/ exercise room/ office. We decided that it was our duty to save the world (and Connie and Mark's parents!) from this room so we spruced the place up a bit. I mean, anything would have been better than that color pink, and we were game for the challenge. So.without further ado, here's our first official SuperFab Room Redesign!
    Update: Welcome YHL Readers!
    For the Stencilled Wall Tutorial and Paint colors click HERE
    To see the room with and without accessories click HERE
    For the Shutter Headboard Tutorial click HERE

    DIY Guest Room Makeover

    Yay! Doesn't it look incredible? Over the next few days we'll be posting the tutorials on everything you see in the rooms, but for now, let's take a look at some beauty shots, huh? Obviously, the scene-stealer is the multi-colored houndstooth stenciled wall. This was a definite labor of love (we even called in some backup assistance), but it makes a huge impact in the room, don't you think? We love the mix of the classic houndstooth pattern with the modern color scheme. It definitely set the tone for the rest of the room: mixing old with new. We'll be posting a tutorial next week, but if you want to get a jump start on your own, you can visit Royal Design Studio to get this amazing stencil for yourself!

    Houndstooth Stenciled Wall

    Just take it all in, people.: ) Another fav is the headboard we made out of old shutters (or are they doors? Not sure!) we found at our favorite salvage place, Architectural Antiques. We needed something that would stand out from the wall, command attention, and add some character and and this baby does that. Gorgeous!

    DIY Headboard ideas

    Another fun part of the design for us was coming up with a unique way to showcase Connie's collection of old family photos. This gallery wall is super simple and allows the photos to be the main focus. We can't wait to tell you how we did it, so you can try it too. And now you know what the gears were for!: )

    Vintage Photo Gallery

    Connie & Mark had this dresser that we knew we could make fabulous with some paint and new hardware, so that saved us some big bucks! That blue may be one of our all-time favorite colors and changed this dresser from one that was ready to be kicked to the curb, to something that they'll never want to part with!

    Dresser Upcycle

    This little vignette makes us super happy, because not only is it adorable, but it's totally functional, as well. Since this is their guest room, we made sure to add some towels and an extra blanket to the cart to make their guests feel at home. An $8 industrial cart never looked so good! The metal cubby shelf was a great find from HomeGoods that completes this corner of the room.

    Guest Room Storage

    And a room makeover is nothing without accessories. Pulling together all of these items was our idea of a good time, and they make a world of difference. We'll show you the proof this week, trust us.

    Room Accessories

    We're already planning a sleepover at Connie and Mark's.; ) We hope you enjoyed our makeover! Be sure to stop back over to see all the juicy DIY details in the next few days. Oh yeah, one more thing: You can see a whole lot more of our DIY escapades on our projects page!

    And don't forget that Monica is in the running to be the New Face of Proctor & Gamble Home! Please head over and vote for her. You can vote once a day, now through October 3rd. We know voting things can be a pain, but this one is simple and man, winning would Rock our World! So thanks so much!
    Want more EC2? Use the icons below to follow us!

  • Photobooks

    Photobooks

    This guest blogger just so happens to be my personal favorite… I'm allowed to be a little biased because I think he has a crush on me, and I think he's kinda cute too. Make sure you leave a comment and like the post on Facebook because I need lots of positive feedback for this blogger!

    This is Eric, husband of the oh-so-talented

    Monica. I got word that Jess and

    Monica would be having"guest bloggers" and I jokingly asked why I can't be a guest blogger. Well, she called my bluff and told me to put together a post.
    Now the conundrum, I am not housewife and as my WHOLE family can vouch for, I am NOT crafty. So what can I post on?
    Ah-ha… probably the most important thing (not living) in my whole house would be our photo books! And this is one quasi-crafty thing that I am totally in charge of. So here goes.
    If all of you crazy blog-stalkers with kids are anything like my wife, you take thousands (if not millions) of pictures of your kids, your house, your family and really just your whole life. These pictures sit on your camera or computer, occasionally they get dropped into a blog or facebook, but for all intents and purposes, they sit – lost and wasted.
    In 2007, I got tired of seeing

    Monica take so many awesome pictures without ever doing anything with them. That's when we discovered Blurb. Ever heard of it? The beauty of Blurb is that they offer"book-store quality printing and binding" at incredibly reasonable prices.
    Everyone I've talked to seems to get overwhelmed with idea of doing a photo book. But trust me, it's not hard. The longest, hardest, most time-consuming part is just sorting through the tens of thousands of pictures stored on your camera and computer and organizing a years worth of pictures. But… and this is a big but… it's so rewarding going through a full year, seeing all that you've done, re-living all the fun events, seeing how your family has grown over the course of a year.
    Ok, so what I do, (and this is just preference), is I go month-by-month, sorting pictures mainly by events. I drop all pictures into folders on my desktop with a name of the even. For example, I'll have folders such as"snow fun,""baking with mommy,""bath-time,""field trip to the farm,""fun with playdough,""Kenzie's soccer," etc., and then I always have a folder for each kid with all the best pictures that we have for them. Then when it's time to actually put the book together, it really just flies!
    The great thing about doing a photo book like this versus just printing photos and putting them in an album is that you get to tell stories, explain the events, and actually add personality to your photos. It's a great place to remember some of the crazy things your kids have said or done. With the craziness of moving over this summer, I got way behind on putting these books together. I sat down to do a book for the 2nd half of 2009 a couple weeks ago and I was amazed at how much I forgot! I saw all these pictures and couldn't quite place where we were, or what we were doing, or some of the fun stories behind the pictures. My goal is to do 2 books per year as soon as that year is finished. There are so many types of books that you can do –

    Monica scanned all of Kenzie's art work from a full year of school and made an art book, she made several small books documenting things such as birthday parties or Christmas. We've even given a book to my parents after a week on vacation with them (yes, these books make great presents for the grandparents!)
    Enough talk. Here is what Blurb actually looks like (screen shot from our ancient desktop). You log in and all the Blurb books you've created are listed.

    Once the book is created, I import all the pictures that I have from a given folder on my desktop (i.e. beach with the Motts). There are dozens of picture/text layouts to choose from and all you have to do is drag-and-drop your pictures wherever you want them and then add the text. The view below is during the editing process.

    You can also preview your book to see how it will actually look once published.

    I mentioned in the beginning that it's"book-store quality printing and binding" at incredibly reasonable prices. For a 200 page book, with a hard-bound cover, it's only $48.95. A 200 page book can easily hold 600-800 pictures. I know Blurb is not the only company doing this – it just happens to be the one we use. I searched for photo-book reviews and this website seems pretty accurate. It rated Blurb as 4 starts (out of 4) for quality, but lower scores for features and ease of use. Other sites have higher scores for ease of use/features but slightly lower scores for quality. I'm not looking for anything too crazy, so I'll sacrifice a little on the crazy layouts and customizability for quality.
    That's it. Now if only I could find a way to do something similar to the hours upon hours of home-videos we have, I'd be all set! Any suggestions?
    -Eric (Monica & Jess)
    Linked Up to: The Stories of A2Z

  • Jewelry Organizer {The Ugly Duckling House)

    Jewelry Organizer {The Ugly Duckling House)

    Because we're always slightly afraid you'll get bored of our crazy antics, we have a treat for you today in the form of a guest blogger! If you don't already know her, Sarah from The Ugly Duckling House is stinkin' hilarious and super talented. We love the design of her blog (which she did herself), the adorable pics of her splattered with paint, and her magical touch with liquid gilding. Enjoy! --------------------------------------------------------------------------------------------------------------------------
    Hi there! I'm Sarah from The Ugly Duckling House, and I'm thrilled to be guest posting today on East Coast Creative! I met Monica and Jess at the Haven conference earlier this year, and I think they come up with some of the most amazing projects!

    A little more about me: I'm awkward. I can't cook. I hate cleaning. But I love tearing my house apart and putting it back together again. I've been working on my"Ugg-Duck" for nearly three years now, and I'm determined — hissy fits and all — to turn my 1980s eyesore into a home I can be proud of. DIY-ing on my own isn't easy (especially with a full-time job and grad school on my plate), and I have had my fair share of weird stories with my house — like finding fingernails in my fridge. Or 4 A.M. catfights. Or freaking out that I had a water leak in my brand new powder room… and realizing it was (possibly) a guest missing my toilet. Yes, that happened.
    Right now, I'm working on remodeling my bathroom. But at any given moment, I have at least five other unfinished projects around the house. Sometimes when I'm in the middle of finishing up a full renovation, I use that momentum to give myself an extra push and do something smaller that I might otherwise put off — like my master bedroom jewelry organizer.

    Ikea hack jewelry organizer

    I've been spotting a lot of creative jewelry organization ideas on Pinterest, and even though I've been storing my jewelry neatly in a drawer in my closet, I realized I forget to throw on accessories when rushing off to work. These Rationell inserts from Ikea are meant to add storage space to pantries and other cabinets, but I saw the decorative pattern on top and thought it could really look snazzy (& functional, too!) as a jewelry holder.

    It was so easy, I could even (sort of) hold my camera steady while putting the project together with one hand. Ha. I just measured…

    Marked (simply pushing the tip of the screw into the wall will save you extra pencil marks)…

    mark wall with screw

    … and sunk the first screw into place.

    And this is where I realized I'd forgotten my level in the bathroom! Ugh. Thankfully, I had a nifty iPhone app with a level that I could use to make sure I kept things straight and even.

    Use iPhone level app

    By placing the organizer in between my remodeled master bedroom closet and the master bath, I have a great new spot for my jewelry — and less of an excuse to bypass the accessories in the morning!

    Ikea hack jewelry organizer

    There you have it — a simple and inexpensive way to get your jewelry in a prime notice me and wear me spot.
    Thank you so much to Jess and Monica for letting me stop by, and I hope you visit me (and whatever current mess I'm making) over at The Ugly Duckling House soon! Sarah Psst: Want more? I love to post sneak peeks on Facebook and Instagram. You can also find me on Hometalk and Twitter at uglyducklingDIY.
    --------------------------------------------------------------------------------------------------------------------------
    Thanks so much for visiting, Sarah! You're welcome back in our houses anytime.: )

  • Celebrating 40 Years

    Celebrating 40 Years

    Grow old with me, the best is yet to be.
    E.B. Browning

    I have great parents. I mean, really great, Totally in love and fully committed to each other, God and their three daughters. Not only that, they are tons of fun.

    In early September, my sisters and I threw a 40th wedding anniversary celebration for them and it was so much fun to plan! The party was held at the country club my parents belong to, Saucon Valley Country Club, which is absolutely breathtaking. My wedding reception was also there, and I have pics of my hubs and me in that very courtyard above in all of our wedding finery (do people say"finery" anymore, or have I been working with the elderly a bit too much lately?). They do a top-notch job on all their events, and this was no exception! My sisters took care of the order of events for the evening, which included a roast of my parents by one of my uncles (stinkin' hilarious, I tell you), a special song sung for them by David Felty, a family friend and broadway musician, and a dance to their wedding song played by Lou Lanza and his band. They got the hard part (at which they are amazing!), but I got to do the fun stuff: the decorations!

    The welcome table housed an old window on which I wrote the guest's names and seating arrangements. I absolutely loved the way this turned out and added just the right touch of vintage. I also included three cute photos on canvas from different decades in their marriage, a guest book where each guest was encouraged to leave a note or a memory, their wedding album, and a bouquet of dried lavender.

    I used this method for making the canvases and they turned out awesome. My only wish was that I used matte Mod Podge, instead of glossy, but I just didn't have time to run out and buy it. If you're going to attempt this, buy the matte kind!

    The invitations were Tiffany blue and chocolate brown, so I wanted to use that color scheme in the centerpieces. My sister, Chrissie, and I toyed around with a bunch of different centerpiece ideas, but finally settled on using dried lavender from the Peace Valley Lavender Farm. We loved the subtle light blue color, the rustic, organic texture of the stalks and the smell, which was heavenly! We placed coffee beans in the bottom of simple vases, cut the stems of the lavender to the appropriate height and then placed the bouquet in the vase. Finally, I wrapped the vase with a brown grosgrain ribbon. We bought round mirror chargers form Michael's that reflected the light of the votive candles we placed around the vase. The centerpieces were very simple, but oh so pretty, and we were thrilled that we could incorporate a local Bucks County product into the decor!

    Some of the fun details…

    Mmmm…sangria. I prefer the white wine sangria, in case you were wondering.

    We told our guests that they should expect heavy hors d' oeuvres, but we ended up having a pasta bar which was a blast and so delicious! Guests could choose their pasta, alfredo or marinara sauce and a variety of toppings like crabmeat, scallops, chicken, green peppers, onions, artichokes, olives and more. Perfect!

    Because of all the miserable rain we had prior to the party, we weren't able to use the courtyard, so most of the party was held on the terrace where the band played and the guests danced.

    Can't forget the cake!

    All in all, it was a beautiful night of celebrating an inspiring couple. Here's to 40 more!

    -------------------------------------------------------------------------------------------------------------
    Please don't forget to head over to Sew Dang Cute to place your vote for the best fabric project. We are only one step away from the final round, so we need every vote we can get!
    -------------------------------------------------------------------------------------------------------------

    Happy Monday!

    *Thanks to Steph and Ammon Perry,, for taking the photos for us!

  • Creating with the Stars Round 4 Voting {The Final Round!}

    Creating with the Stars Round 4 Voting {The Final Round!}

    If you missed all the amazing projects in the first three weeks of CWTS, be sure to check them out below!
    Round 1 Projects & Winners Round 2 Projects & Winners Ro und 3 Projects & Winners

    We want to thank HomeGoods and Homes.com for partnering with us for this competition. They believed in this contest from the start and I'm positive the contestants have knocked their socks off! Since this is the Final Round, and we'll be crowning a CWTS 2013 Champion, we needed an awesome Grand Prize Package! The Grand Prize Winners -Contestant and Blog Star- will EACH receive:
    $500 from Homes.Com $500 Gift Card to HomeGoods
    Project featured by HomeTalk

    undefined

    Also, for this round, HomeGoods provided each contestant a $100 HomeGood's gift card! Jess and I adore HomeGoods and just last week we picked up about 8 rolls of the best wrapping paper ever! You never know what awesomeness you'll score!

    ---------------------------------------------------------------------------------------------------------
    Okay, now let's get to business! There are only 3 projects this week, so you're voting for your 1 and only favorite! We're so proud of each of these ladies and we know they've worked crazy hard the past month! As you're voting and commenting, please keep things positive & encouraging and just pick your favorite project. We've tried to keep things as anonymous as possible, so don't bother playing Sherlock Holmes.: )
    Without further ado, We present to you… The Round 4- Grand Prize Projects

    #1- Guest Room Makeover
    For my final CWTS project, I chose to makeover a guest bedroom. I envisioned a guest room that was full of personality…fun pops of color and an interesting mix of textures and objects that feels comfortable, unique and welcoming to guests.

    What do you make with an old fireplace mantel and a shower curtain? Create a headboard of course!
    I loved the gorgeous detail in the border of the dark wood, in addition to the design of the shelf with the mirror and paneling. To complete the transformation to a headboard, I closed in the fireplace opening with plywood. and then I upholstered it with the blue and green ikat fabric---A.K.A a shower curtain from Target!

    After I spent about an eternity installing bead board and chair rail, I felt like the room needed a really fun pop of color that would also work well with the headboard fabric. For balance, I purchased a white round side table at HomeGoods, and painted it with some fabulous emerald paint!
    In selecting bedding, I chose to go with a crisp white duvet cover, so as not to overshadow the headboard fabric and pillows. Picking out pillows was super-fun and HomeGoods never lets me down when I am in need of a"new pillow fix." I fell in love with the vintage camera pillow (also from Home Goods) and felt it added an interesting and unique element to the room. The blue lamps added another great pop of color. My goal was to incorporate interesting objects with a mix of coordinating colors and textures into the room…the collage below shows all the details that I hope will make overnight guests feel cozy, comfortable and inspired.

    Homegoods was the perfect sponsor for the home decor round. HomeGoods is one of those stores where you may go in with the intention"just to browse"…but never leave without something"you just had to have!"

    #2- Colorful, Texture-filled Bedroom Makeover
    The home decor challenge gave me the perfect opportunity to complete some of the projects I have wanted to try for a long time! Starting with a bare white room, I couldn't wait to add some color, pattern and texture

    . To frame the bed, I created an accent wall covered with grasscloth wallpaper and used trim to frame the bed and nightstands. I love the touch of glamor that the nailhead adds to the space. While installing the nailhead, I tried a few new techniques that made it go surprisingly fast! Best of all, this wall is completely removable, renter or indecisive designer approved!
    I added a few accessories from Homegoods. And customized a few pillows using scarves, napkins and paint.

    I constructed the headboard from lumber and cut the detail in the arms with a jig saw. I then upholstered it with foam and a bright coral fabric. I love the simplicity of the headboard, but the curved detail and bright coral color make it extra special!

    I love the subtle texture of the grasscloth, and how the nailhead adds a little extra detail.
    I hope you enjoy this colorful, energetic transformation!

    #3- Reading Room Makeover
    When it was time for the Home Decor round, I waffled back and forth on what to do until I remembered that I had this nice (relatively) empty room in my house just waiting to be turned into something fun. After playing around with a few ideas, I decided I wanted a place to relax, read, and spend a little quality alone time…and the next thing I knew, the reading room was created.

    I took regular ol' Ikea Billy bookcases and turned them into built-ins (thanks to some crown molding and a little DIY magic) and amped up the room a bit with trim and some paint in a traditional"library"-ish color. To make it more modern, I painted the back of the bookcases with some chunky gold stripes and tossed in a cozy chair and pouf, a DIY-ed tree stump table, and a ton of bright and colorful accessories.

    When I was shopping for the room, one of the first places I wanted to hit up was HomeGoods — I'm obsessed with basically everything they carry and knew their store would be perfect for our bookcases. I managed to snag that gorgeous throw pillow for the chair, as well as several of the cute accessories you can see on the bookcases (including my personal favorite, the blue elephant up at the top)!

    I'm so excited to have this space now, and I can't wait to settle in and start reading!

    Now, it's time to Vote!

    You can only vote once and only for one project. (the past weeks you could change your vote if you wanted. You might have thought you could cast multiple votes, but nope- it was just changing your vote- it was set to just one per IP. This week we didn't allow vote changes, so make sure you have your mind made up when you vote! Good Luck- it's a tough choice!!) In order to vote, you must first LIKE EC2 on Facebook.

    jess
    Monica
  • Holiday Your Way with Bed Bath & Beyond

    This is a Sponsored post written by me on behalf of Bed Bath & Beyond. All opinions are 100% mine.

    You know that around here we pretty much dance to our own beat and love to decorate with a fun, out of the box style…have you seen my Fabric Christmas Tree post or my new mid-century modern fireplace? So when Bed Bath & Beyond asked us to help them celebrate"Holiday Your Way", we knew it was a perfect fit.

    Not only do they have helpful tips for how to decorate and prepare your home for the holiday season, but they also have great advice on making houseguests happy. We're all about entertaining and making sure our guests are having a good time, and have a cozy place to sleep and relax as well. Remember our friends guestroom we helped give a face lift to…

    Now, not everyone has the time or space to do an entire room makeover. So, that's why Bed Bath & Beyond is here to help you figure out what you do need for your guests with the space you have with their guest room checklist. Of course you first want to welcome them with love and a cool door mat like this one from BB&B, which is actually made from recycled rubber tires!

    I only wish I had come across their Holiday Your Way articles before hosting a huge crew for Thanksgiving. We had 12 people sleeping at our house, we hosted friends and family for dinner & games on Wed. night- 27 people, and hosted Thanksgiving for 17. It was awesome!! But, to make Christmas hosting ever better I've rounded up some ideas from Bed Bath & Beyond for ya!

    One way to make your guests comfortable if you don't have a spare bed is with an air mattress, which BB&B has a great selection of. This AeroBed has a really nice pillow top and I can vouch for it's comfort because my in-laws own it and I've slept on it before.

    I especially love their tip about color coordinating your guests' bath towels, this will come in handy if you have a packed house and would like your guests to keep track of which towel they are using. This set of Lasting Color Cotton Towels by WestPoint Home look so soft… and I'd love you to share if you have any tips for keeping/getting your towels extra soft. My cousin Jacqui has such soft towels every time we stay there. This past Thanksgiving when she was down visiting I actually re-washed about 10 towels, just to try and get them to seem extra soft right before she arrived. I think I'll be making a BB&B trip soon for new guest towels. So if you have any tips, send them my way.

    When you have guests over it's not just about a cozy air mattress to sleep on and soft towels to use, but about keeping them entertained as well. Bed Bath & Beyond has a smart tip about making sure your guests have your WiFi password so they can use their own tablets or laptops, as well as showing them how to use and turn on your entertainment consoles. Our pal Ann Marie from White House Black Shutters made a super fun Wi-fi artwork so guests could look over and have the code, but strangers would never know what it was! Genius I tell ya! I could have used this over the holiday, because I think I gave out the wi-fi 30 times.

    One other guest must-have is a Keurig; it's the best way to make sure everyone has the drink they like, how they like it. Eric loves pumpkin coffee, my mom decaf, my aunt tea, the kids cocoa… you get the idea. Did you know there's a Keurig espresso machine?

    Isn't she pretty! I like my k-cup Keurig machine, but if you enjoy a nice cup of Italian espresso every now and then, why not!

    Bed Bath & Beyond is a great place to go for tips to survive the holiday season if you're expecting a house full of guests. Stop by their Holiday Entertaining section for more advice on important things to know and prepare for like guests' food allergies, activities for the kids, and more. I was pleasantly surprised how fun and helpful their articles were!

    So tell us, what are some surviving and enjoying the holiday tips you've learned throughout the years?

    I love entertaining, but I'm always looking for ways to improve!

  • Guest Room Spoilers!

    Guest Room Spoilers!

    Last week we mentioned that we've been really busy working on this Pepto Bismol pink room. Trust me, I love me some Pepto once in a while, but on the walls… not so much.
    Does this guest room make you want to come and visit? I mean, look, it has it's own personal gym, cable TV, and extra pillows! What more could you want? We're talking 5 Stars Baby!

    Ha! It's okay, I know the anonymous homeowners of this guest room and they don't mind a little teasing. Trust me, with how awesome the room is looking, last night Jess and I told them that we definitely want a sleepover once it's all finished!
    The grand reveal with come on April 24th, but until then here are some major spoilers!
    Drool-worthy hardware We are sooo crushing on the furniture upscale we did. It was incredibly simple, but makes a BIG impact!

    IMG_0227

    Perfect Colors Have you ever walked into the paint department and felt like certain colors were just screaming for you to notice them? That's completely how this pallette came together. Jess and I met at Home Depot one night and honestly within 3 minutes we had our minds made up.

    IMG_0229

    Umm Gears? Just wait and see. We're actually not 100% sure about all the details for this project, but we know it's going to be awesome. As we told the homeowners…"Trust Us"

    IMG_0230

    Industrial Flair Notice a trend? One of the coolest things about this room is the awesome juxtaposition of styles. We're pairing some funky modern pieces with an amazing 18th Century find. Can't wait to see it all come together!

    IMG_0231

    Honoring Service The homeowners really wanted to incorporate this picture of their grandfather, who served our country. I'm totally a non-emotional gal, but this picture sort of gets to me. One of my good friends Jane, would be so proud of me (she's uber emotional and loves all things military)!

    IMG_0232

    Did We Mention Juxtaposition? Haha! From Army to Blue Birds in a single bound. Don't worry, we're not crazy (okay, maybe a tad) and this will all work out nicely!

    IMG_0236

    Examples of Love & Commitment We have a very cool gallery project for the room. The homeowners (which btw it's really weird to refer to them as"the homeowners" and not just Connie and Mark… Oops! Did I just accidentally reveal their secret identity!) Anyhow… The homeowners had a collection of old wedding pictures from both sides of their parents and grandparents. They've had some amazing examples of what it takes to make a marriage work for the long run. They're going to have a special place to recognize that commitment and how God has blessed those couples in awesome ways.

    IMG_0237

    Have you heard Jason Mraz's new song? I Won't Give Up is one of my top ten favorites right now and it's a great reminder that the road isn't always easy, but it's always worth it. Go listen to it and I'll warn you right now, that it will be stuck in your head, but it's a pretty good thing to be singing all day!
    So how's that for some spoilers? What do you think of the direction we're headed in? Did you love the Song as much as I did?

    Monica

    Only following on the blog? You're missing out. Use the buttons below to join in on all the fun!

    Follow Me on Pinterest
  • Modern Country Designs…Say What?

    Modern Country Designs…Say What?

    Today we have a Jessica (not our Jess, a different one) from Arcadian Lighting guest posting about blending modern and country designs. We love this trend, so we were excited to see what she had to share. I (Monica) happen to love Arcadian Lighting. We made one big lighting purchase when we built our home. Our foyer needed a huge light and it needed some major wow factor. We must have looked at 192364 stores, and Arcadian was where we found a winner!

    It's one of my favorite things ever (and they have great sales, so of course I didn't pay full price!) So, thanks for being here today Jessica!
    **********************************************************************************

    Hi there! I'm Jessica, a writer for Arcadian Lighting, which is a wonderful online resource for beautiful, affordable lighting fixtures. I'm delighted to be guest posting for Monica and Jess today because I'm going to be sharing a collection of inspiring modern country interiors. Rustic and casual with a sophisticated modern edge, these country interiors are just right for the fresh, airy days of Spring. I hope you enjoy!

    Modern Country

    A simple checked table cloth and set of traditional English china give this lovely dining table a classic farmhouse feel. The contrasting modern wine glasses and Donghia stacking chairs are cool accent pieces.

    Modern Country

    A chic neutral color palette and a checked upholstered arm chair in the corner bring together new and modern with old and classic beautifully. The branch candlesticks are fun and unexpected.

    Modern Country

    A gorgeous mix of crisp, modern furniture and rustic exposed wood beams creates a perfectly elegant, yet relaxing atmosphere in this living room. These types of ornate wooden mirror frames and chandeliers add a bit of drama.

    Modern Country

    The slate fireplace, twinkling candles and brilliant chandelier give this sophisticated dining room just enough simple country beauty. A lovely bouquet of fresh greenery makes the perfect accent, as well.

    Modern Country

    The vaulted ceiling and shelving gives this living room a distinctly farmhouse appeal. Weathered antiques and cushy modern furniture make the room cozy and inviting.

    Modern Country

    The handsome dark wooden floorboards and rustic, industrial stools add a rugged edge to this chic kitchen. The pendant lights overhead are simply beautiful, and the under cabinet lighting is a great touch.

    Modern Country

    A dusty blue wall color and sheer white curtains make this bedroom absolutely dreamy and romantic. The wood beam ceiling add so much natural texture and color that it makes a perfect accent against the very simple furnishings.

    Modern Country

    The paneled walls in this bedroom lend a cozy country atmosphere to the room, especially with a serene beige paint color. The rustic nightstand and modern headboard are particularly handsome together. Images 1 | 2 | 3 | 4 | 5 | 6 | 7 | 8 Which of these modern country rooms is your favorite? Let us know in the comments! And be sure to stop by Arcadian Lighting for a modern light fixture or two to brighten your home! -Jessica

  • Country Roses and Guest Blogging

    Country Roses and Guest Blogging

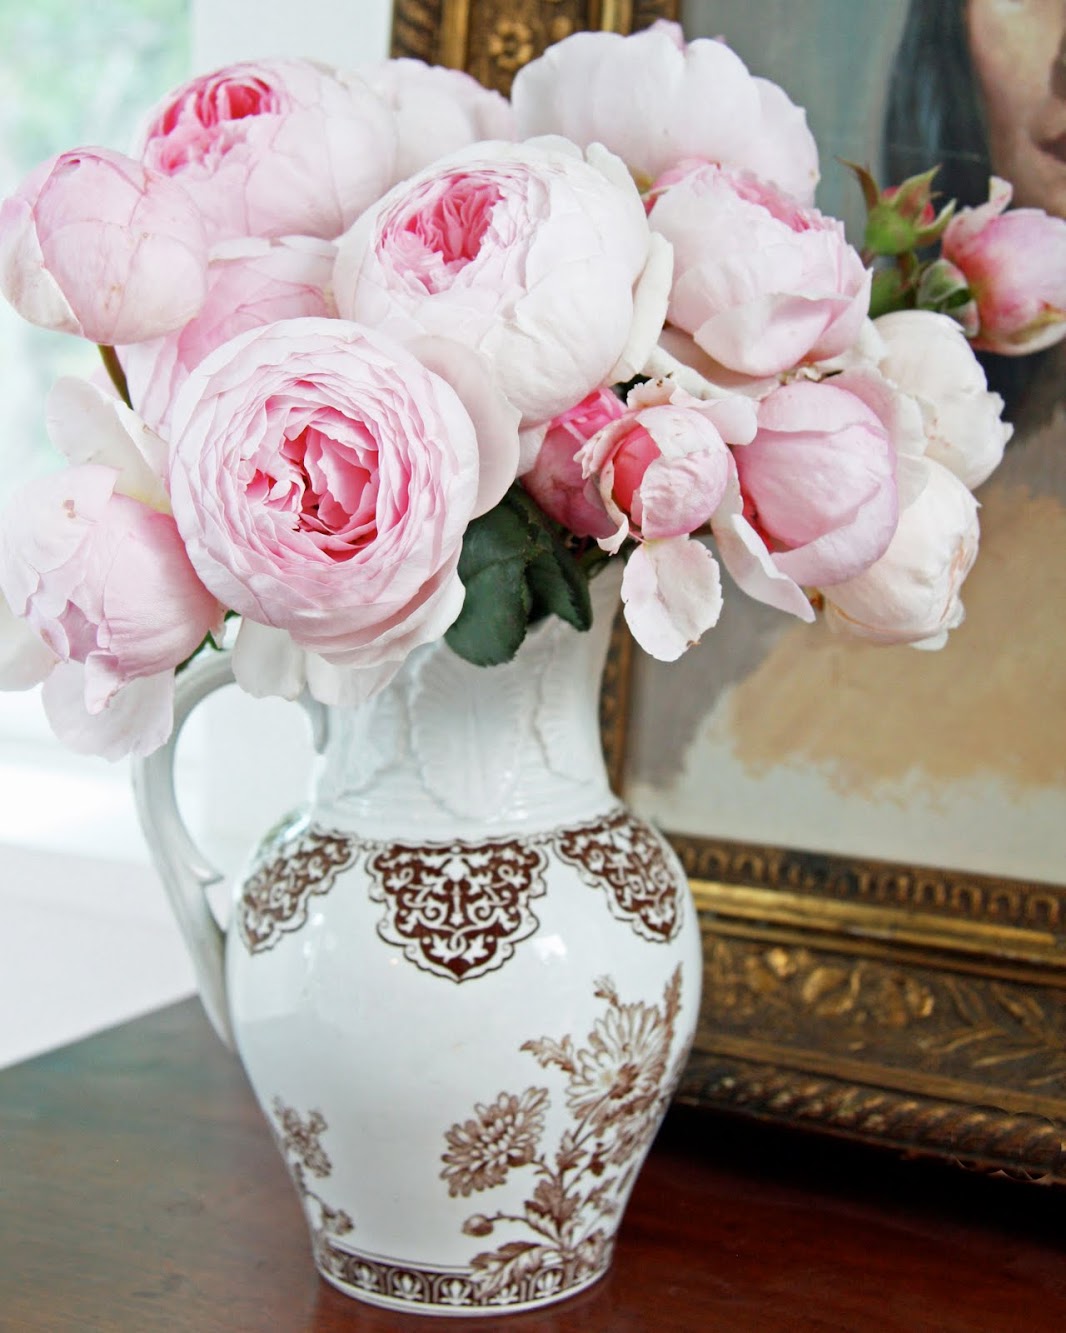
    A s summer fades with each passing day, I find myself savoring the last of the roses. I will miss them come fall, but they're like an old friend that I know I'll gladly see again.

    Today I'm doing a guest post over at Raenovate ! Rachel is away on a Cape Cod camping trip and she asked me to do a 'before' and 'after' post on our dining room. In fact, Rachel invited me to do this a couple of months ago so I have her to thank for helping to motivate us to finish the last details of the room. There's nothing like a fast approaching deadline to keep you on target!

  • DIY Decorative Flower Trough {Christina's Adventures}
    DIY Decorative Flower Trough {Christina's Adventures}

    Ok, are you ready for our last guest post for the Summer? We are thrilled with all of the projects our bloggy friends have shared with us, and this one from Christina of Christina's Adventures, is no exception! Christina is a local girl and has a sweet heart and some serious DIY skills. And oh my goodness, this nautical summer wreath of hers made my heart skip a beat. A.dor.a.ble.

    She's a regular commenter on our posts, for which we are eternally grateful! Welcome, Christina!

    Hey East Coast Creative readers! I’m super excited to be here! I live just a short drive away from Jess & Monica – and I share so many of their DIY passions! I have a blog (Christina’s Adventures) where I share my stories about thrifty decorating, DIY upcycling, and creative living.

    I am a former Autism Support teacher (just resigned from my job in June!) who lives with my husband & “dog baby” in an apartment attached to my parent’s house while we save money to buy our own house (so we can have real babies)! This summer has been filled with all things wedding! I am a bridesmaid in one wedding, attending a great friend’s wedding next weekend, and my brother is getting married in a few days! We hosted a shower for my brother and his fiancée, and I had a lot of fun decorating for the shower. One of the guest’s favorite DIY items was this trough:

    And YOU can easily make your own! Seriously! Added bonus – no power tools are required. Here’s how I made mine: I have been dying to make a trough for flowers for ages, and then I saw this one from Thrifty Décor Chick and I fell in love! I just needed the occasion/space to put the trough. When we were looking for something to fill the space at the kitchen table for the bridal shower, I knew this was my opportunity! I first planned out how big I wanted to make it. Our table was just about 6 feet long, so I decided to make this trough 4 feet long. I went to Lowe’s, and found some cedar wood in their lumber section. What I love about Lowes, is they will cut your wood for you! Just give them the measurements, and they’ll cut it. Seriously – best thing ever.

    Here were the measurements I used:

    • 2 planks: 3/4” x 7 1/2” – 4 feet long
    • 1 plank: 1 1/2” x 5 1/2” – 4 feet long
    • 2 squares (cut from the thicker piece): 1 1/2” x 5 1/2” – 5 1/2” long
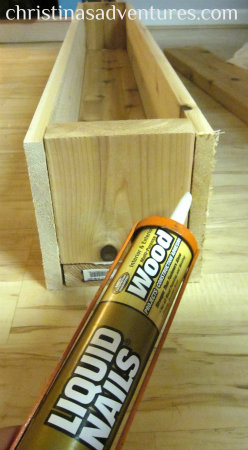
    I will be honest – the awesome lumber man from Lowe’s helped me out a lot with this part – he made sure they all fit together correctly and “shaved” off parts so they were even. I first glued them together with some Liquid Nails, and let that sit overnight:

    In the morning, I hammered in some nails at the seams, just to make sure it was secure. I then roughly filled in some of the bigger cracks with wood filler, and sanded it down. I didn’t want this to look perfect – I knew I was going to paint and distress it, so I wanted imperfections.

    I picked out a blue color I had in my stash (originally an “oops” can for $3). I didn’t prime the surface since I painted right onto the bare wood.

    I let that dry, and then I painted with a very light gray over top (the same gray I used on this desk). I did not do this meticulously – I tried to leave some spots where you could see some of the blue coming through:

    I then had some fun with glaze and sandpaper. There’s no science to this – I sanded down in certain spots, glazed over areas, and wiped down with a damp cloth. I like to use this glaze, which can be found at Lowe’s or Home Depot. Finally – I let it dry, and it was ready to be filled! I would have *loved* to fill it with fresh flowers, but it just wasn’t practical. We knew we wanted to keep the decoration in my mother’s living room after the shower, so she bought fake flowers from Michaels. I usually hate fake flowers, but these look surprisingly pretty!

    What I love about this project is that it wasn’t just a “shower decoration”, but we are now able to use it in my mother’s living room (come follow my blog to see the full make-over of her room – coming soon!)

    A few more glamour shots:

    What are your thoughts? Have I convinced you that you can easily make yourself one of these as well? If you want to see more projects like this, come follow my blog! We have so much fun over there, and I’d love to get to know you better!

  • Tips for Accessorizing your Space {SuperFab Room Redesign}

    Tips for Accessorizing your Space {SuperFab Room Redesign}

    Hey there! We thought it would be fun to show you the major difference that accessories can make in a room design. So many people can pull together the"big" items in a room, like a buffet and dining table, or a couch and accent chair, but then seem to have trouble getting the room to look"finished". We all look at design magazines and read home blogs and see rooms that look absolutely perfect; stylish, yet still cozy, warm and inviting. What is it about those rooms? Take a closer look, and you'll see that the room feels finished because of all the finishing touches (ie: accessories)! Well, duh.

    Let's look at our guest room makeover before we added in the fun accessories:

    Ok. that wall is cool, but besides that, this could be anybody's room. It lacks personality and excitement don't you think? Now look at the after picture:

    Ahhh… now that's a finished room. Adding accessories to a room design is a great way to personlize your space. Find stuff that makes you smile, or that has sentimental value and bring them into your room. You'll notice that we added two vintage suitcases at the foot of the bed, put a darling little pillow on the chair, added some funky throw pillows on the bed, and put a plant by the bed (all easy things to do!) and the room immediately looks more put-together.

    This cart was a great find at a store named Impact and cost us only $8. On it's own, it's fine, but it's not going to cause anyone to pass out with excitement. But once we added a globe, some books and a whole bunch of linens (remember this is a guest room?), it makes a big impression. Don't you love it when form and function meet in beautiful, accessorized harmony?: )

    I have to admit that"dressing up" a room is one of my absolute favorite things to do, and while Monica is amazing at dreaming up the big projects in a room, she (admittedly) doesn't like accessorizing at all. (That's why we make a good team!) Here's what I do when I'm trying to decorate my mantel, buffet or anything else: I gather absolutely every accessory I can get my hands on that isn't nailed down and lay them all out. Then, I fiddle for about an hour trying to find the perfect layout. Bringing items you already have into the room allows you to evaluate what items you can work with, and what items you may need to purchase. Just to help you out,, here are a couple of things to keep in mind when you are trying to accessorize:
    1. The Rule of Three: Not sure why this is, but it's proven that groupings of odd numbers are more appealing to the eye than even-numbered pairings. It forces your eye to move from piece to piece and adds visual interest. You can group like things (for example: three identical glass bottles) or things that have the same materials (ie: three stacked books).

    2. Mountains and Valleys: When you stand back and look at whatever your accessorizing, you should see varying heights and shapes. (ex: square frame beside a round bowl). Think about putting opposites next to each other. They always say opposites attract!

    3. Symmetry or Asymmetry? A good rule of thumb is that symmetrical groupings creates a more formal look, whereas asymmetrical design looks casual and informal. 4. Texture and Color: You'll want to add lots of texture to make things interesting (ie: adding a woven basket next to a glass vase), and repeat your color scheme throughout the design. Doing this creates a more unified look.
    5. Layer! Nothing is more boring than a row of frames on a shelf. Try leaning a framed family picture against a piece of art on your mantel, or stack a few books on a tray and add a plant on top. You want the room to appear alive and full of movement, not static!

    Room Accessories

    These rules are not set in stone, they simply offer a guideline. If something in your home makes you happy, and it doesn't include anything from this list…then who cares? It's your home.: ) But hopefully you won't forget to add the finishing touches to your room design! It makes a WORLD of difference!: )

    PS. Want more info about this? We got some great tips from these places: Honey & FitzThe Red PinEverything in 3'sFireplace Mall

  • Happy 2nd Blogiversary to Us!

    Happy 2nd Blogiversary to Us!

    It's actually incredibly hard to believe that we are 2 years in to this whole blogging thing. Last year we celebrated our one year blogiversary with loads of talented guest posters, giveaways and fun facts about our crazy first year. This year, we have soooo much going on that we just couldn't swing all that, but we still wanted to recognize some of the funny, ridiculous and amazing things that have happened to us over the past two years. But before that we want to thank YOU guys, whether you're a brand new reader or have been here for the long haul, for your support and encouragement to us. We would be nothing without you guys!! So thank you. Now, for the fun part;

    Three Posts We Wished We'd Never Written We seriously laugh out loud sometimes about the posts we wrote when we first started. Let's just say it took us awhile to figure out our niche.; ) I'm sure there are tons of other lousy posts, but these are a few of the ones we love to hate.
    1. In our second month of blogging we wrote a post entitled, For All You Tomboys Out There about how to braid your hair. Ha! As if we are experts about anything related to hair. Hilarious. (Our friend, Jane, did the braid, and she IS awesome at doing hair, but us? Not so much.)

    2. I threw an Angelina Ballerina-themed 3rd birthday party and posted about it way back when. The party was cute enough, but nothing over the top, and the pictures are pitifully bad. The funny part is that this is one of our most successful posts! I guess there aren't too many people throwing Angelina birthday parties??

    3. Monica shared her adventures in trying to DIY a belt out of fabric in this post. Even her daughter was like,"Ewww…Mom, don't wear that." Love that.

    Blog Design for Beginners We prided ourselves on doing everything by ourself- including our blog design. We did ok for novices, and actually have done everything related to the way our blog runs and looks ourselves until the last 6 months or so. Now, we happily turn our ideas over to Kim, at 733 Design, for our custom blog design. Anyway, take a look at the way things used to be…
    Header 1… Designed at 12am the night we randomly decided to start a blog…

    Header 2… About 3 months in…

    Header 4… this one lasted about 2 minutes. We hated it!

    Header 5… this one lasted for almost a year until we had to play the name swaparoo game…

    Ahh… How much we love Kim and her design expertise. She"gets" us and did a great job on our logo and header!

    Five Incredible Opportunities We've Received as a result of this Blog All that goofiness aside, we have been blessed to have some awesome experiences because of this little ol' blog and we're sure we're on the verge of lots more.
    1. The Nate Show: Last year we had the priviledge of being on four episodes of Nate's 2011-2012 season and it was a blast. Nate is a sweetie, and we fell in love with live TV, for sure. This will forever remain as one of the highlights of our blogging careers.

    2. Mexico: Thanks to our buddy, Nate, we won a trip for 6 days to Cancun, Mexico that totally rocked. We had such a blast with two other girlfriends and enjoyed loads of down time and really great food. Without this blog= no Mexico= sad girls.

    3. HGTV Magazine and Ladies Home Journal

    4. Feautred on Young House Love! I think every blogger wants to be featured by John and Sherry (if you're living under a rock, they are THE biggest and most successful home bloggers out there) and we got our opportunity with the Guest Room Makeover we did for a friend. Check that off the bucket list.: )

    5. Creating with the Stars. It's crazy how things come full circle, isn't it? We LOVED being a part of this contest, and are even more thrilled to be hosting it this year! Speaking of CWTS, TODAY is the last day to enter your projects! Over the next week, we (with the help of the 12 stars) will be poring over the submissions to choose the best contestants! Don't forget- the contestants and their blog star partners will be announced next Friday, March 1st! Get excited, people, get very excited.

    So, we've shared our highs and lows from the past two years, and again we want to say that we are so honored to have had you on this amazing journey with us. 2013 promises to be our BIGGEST year yet, so hold on tight, we're all in for a crazy ride! In honor of 2 Rockin' Years of Blogging, we're gonna open the floor for a little Q and A… Leave a comment asking us anything under the sun and we'll respond. It can be about blogging, life, our friendship, how to braid hair (haha!) or whatever you want to know. We'll comment back throughout the day! So… what do you want to know??

  • sometimes a girl can get lucky...

    sometimes a girl can get lucky...

    my guest room with the new zebra rug
    My guest room has a whole new look thanks to Lindsay at Everything LEB! I was the lucky winner of her zebra print rug giveaway from RugsUSA.com.
    I'm so excited; it's just the thing I needed to layer on top of my seagrass rug.
    I'm a regular visitor over at Lindsay's; check out her awesome style and great giveaways.
    Thanks, Linds!

  • Thanksgiving Leftovers Station

    Thanksgiving Leftovers Station

    So, you all remember that little ol' magazine we were in last month? You know…HGTV magazine? Umm, yeah, it was a really big deal for us. You can find us on page 92 of the October 2012 issue sharing a super practical idea that your guests for Thanksgiving are really going to appreciate!

    Even though the photo they used was awesome, we didn't get to style the products ourselves for the magazine, so we wanted to show you how WE would put together an awesome Thanksgiving leftovers station. One major advantage to hosting Thanksgiving dinner is that you end up with TONS of leftovers! One major disadvantage to not hosting, is NOT having any leftovers to make a turkey sandwich with! So, we came up with the idea of setting up a little leftovers station for thanksgiving guests – think of it as self-serve take out!

    Here's the idea… Before guests arrive have an area designated as the leftover station. You'll need it to be in or near the kitchen, and have enough space for packaging containers and 1-2 food bowls at a time. How to Create a Leftovers Station:
    Step 1- Gather fun containers to hold food for your guests. There are so many cute take-out boxes available at craft stores these days. We plan to pop a plastic sandwich bag inside each one so we don't have any messy leaks.

    Step 2- Provide labels and markers. Your guest can put both their name and the contents of the container on labels. It drives us crazy when we order Chinese food and then have to open every container to find what we're looking for. Labels are helpful and to be honest, we think they look so cute! We're loving the mix of plain, functional and decorative labels.

    Step 3- Have serving utensils available. Guest will be scooping all kinds of yummy leftovers, so just make sure you have utensils handy for them.

    Step 4- Provide stuff for quick cleanup. Leftovers can get messy so make sure to have something on hand for easy clean up. We gave our roll of paper towels a fun look by suspending them from a basket using a tree branch. Now our guests can clean up in style!

    STEP 5- Provide bags to hold each family's leftovers. Our plan is to let each family pack what they want and then put their containers into a bag, and we'll keep them on a shelf in the garage where they can stay cold until guests leave. Inexpensive brown bags from the craft store work great look awesome when stenciled with fun messages.

    I'm really excited to try out the leftover station and we;re hoping it's one of those projects that our guests love AND one that makes the day even easier and stress free!

    Will you be trying out a left over station this year? Have you ever done something similar for your guests?

  • Christmas Inspiration Guest Post

    Christmas Inspiration Guest Post

    I hope you'll find time in your busy day to pop on over to Providence Ltd. Mona was kind enough to invite me over for a guest post on Christmas inspiration where she's doing a wonderful series every Tuesday and Thursday with our wonderful world of design bloggers for the month of December.

    image via Country Living Magazine
    You'll find inspiring ways to decorate with all natural, simple items found just outside your door! Be sure to leave a comment and tell us what you think, will you be using the great outdoors in your holiday scheme?
    Thank you Mona for inviting me over! & Happy Holidays Everyone!

  • The New and Improved Real Housewives of Bucks County Blog!

    The New and Improved Real Housewives of Bucks County Blog!

    Nope, the link didn't accidentally take you to Heaven… you're just on our newly designed blog! Isn't it awesome? No streets of gold, but yellow stripes are sorta close! Since we're quickly approaching our one year blogiversary, we thought it was time to freshen up a bit. We contacted Kim from seven thirty three — - — custom blog design and she was just the gal for us.

    We still wanted it to look like the RHBC blog we know and love, but to be a bit cleaner, less"hello huge yellow header that Monica doesn't know how to resize" and yet still reflect our style.

    I think we achieved that don't you? Now, don't worry, we're not going to be like the awkward girl that gets a makeover, becomes beautiful and forgets who she really is… We'll still be keepin' it real, and hopefully bringing you tons of cool projects that you (and we) love!

    In other BIG news… we finally got our air date for our final Nate Show episode!
    Watch us on Nate February 21st
    And just to get you excited about it… we have a behind the scenes clip that you can only see here! This was from night 2, and we just barely avoided disaster!

    Pennlyn is lucky that #1 she's adorable and #2 she cost a fortune… if that stencil was ruined she would have been in big ole trouble! (and of course the stencil is from Royal Design Studio!)
    Finally, did you know that we're in final prep. mode for Mexico? I'm totally caught up on my Spanish… ¿Dónde está el baño (I think means where is the bathroom) and ¿Cómo se ve mi bronceado? (how does my tan look?) should be all I need. You were probably thinking we were leaving you high and dry for a blog-less week, but have no fear!
    Introducing…

    Yep, we've rounded up some of our very favorite blog celebs for your reading pleasure. Seriously, Jess and I were like giddy schoolgirls when each of these ladies agreed to guest post. (You might remember last year when Jess and I were both in Disney for a week and I had my husband guest post? Ha! Thanks love!)
    Okay, so here's our group of amazingly talented, incredible women!

    Tuesday- Beckie from Infarrantly Creative Wednesday- Hannah from Hannah Kate Flora Thursday- Lindsay from Living with Lindsay Friday- Tam from Sew Dang Cute
    Be sure to give these ladies the Royal RHBC treatment while we're away! We'll be back next Tuesday to kick off an entire week of giveaways from our sponsors! I'm loving what they're giving away! Don't tell Jess I told you, but you might want to start checking out our sidebar sponsors because there will be some amazing products coming your way!
    Have an awesome week, we'll be thinking of ya…

    jess
    Monica
  • DIY Fabric Flower Bouquet {My Girlish Whims}

    DIY Fabric Flower Bouquet {My Girlish Whims}

    Happy Monday, everyone! We are working our tails off this week on lots of Fall projects and fun blog stuff, so to help us out, we've asked a few of our bloggy pals to share some of their projects with you. But get ready, because next week, we'll be back in full force!: ) We're so pleased to introduce you to Rebecca from My Girlish Whims. We've been communicating the past several months through email and were fortunate enough to share our top wedding planning tips with her readers in February when Rebecca was busy getting married and going on her honeymoon. Rebecca is a really talented jewelry designer (make sure you check out her anthro jewelry knockoffs!), but we're in love with this Paper Fan Banner she made. Isn't it darling?

    Ok, take it away, Rebecca!

    Hello East Coast Creative Readers!

    My name is Rebecca and I blog over at My Girlish Whims

    My blog is all about beading, crafting, and general life as a girl!

    I'm so excited to be guest posting over here today, because I live very close to Jess & Monica! We haven't met in"real life" yet but I'm sure one day we will: )

    I just got married in February and have been trying to repurpose a few of the items I DIYed for my big day so I don't waste them! I had a ton of these fabric flowers left over:

    Which I had made to hang off the pews in the church.

    My hubby and I recently bought our first house and so I've been working on collecting/making some home decor accents. I thought I could use the silver flowers from the pew cones for up in our bedroom, which is eventually getting a grey/silver color scheme.

    I got this bucket from the"as-is" section of IKEA for $1.50. There was nothing wrong with it…I think they just aren't selling them anymore!

    I spray painted it silver with leftover spray paint from another wedding project

    I poured in some glass marbles (that were actually left-overs from my bridal shower!) and then stuck in my fabric flowers (this post has a full tutorial on how to make them if you are interested)

    Here's the finished product:

    Yay! I think it turned out so cute, and all it cost me was the $1.50 for the bucket!
    I put my little flower bucket up in our bedroom on our IKEA TV-holder-thing-a-ma-whatsit. Yes, that is the technical term.

    Other side has a picture of us from our big day: )

    And there are the flowers!

    Slowly our house is becoming more decorated…and slowly I'm using up some of my wedding decor too: )

    Thanks so much to Jess and Monica for letting me guest post! Please stop by my blog sometime to say hi, I'd love to meet you!: )

    Thank YOU, Rebecca! You can't beat a cute project with that price tag!

  • Pure Style Home

    Pure Style Home

    I hope that everyone had a wonderful weekend!
    I'm a guest blogger over at Pure Style Home today. Lauren's beautiful blog and gorgeous designs are always incredibly inspiring. Thanks to Lauren for inviting me to participate in her guest blogger series!
    If you haven't seen Pure Style Home yet, you're in for a very special treat!

  • Adios Amigos Day 4 {Sew Dang Cute Crafts}
    Adios Amigos Day 4 {Sew Dang Cute Crafts}

    We're so thrilled to have Tam from Sew Dang Cute guest posting for us today. The name of her blog is perfect for describing her- she is so dang cute!: ) Tam is so creative, and hosts Crafting with the Stars, which we had so much fun being a part of! She was so encouraging and uplifting, and also extrememely understanding when we turned our weekly projects in really late. Ha! Welcome, Tam!
    ---------------------------------------------------------------------------------------------------------------------

    Hi, my name it Tam of Sew Dang Cute Crafts and I am so excited to be here today at
    The Real Housewives of Buck County.

    sew_dang_cute_180
    Headshot

    Some of you may know me from Crafting with the Stars, which I host on my site. I was blown away by Monica and Jess’s insane talent! They were definitely deserving to be Season 3’s champions, and I’m thrilled they asked me to guest post for you guys today. I don’t know about you guys, but my jewelry drawer was an absolute mess. Things were tangled up and completely unorganized. I’ve seen DIY jewelry organizers all over blogland, but none of them were quite what I was looking for. Then one day the wheels were turning, and I came up with the Jewelry Medicine Cabinet.

    Jewelry-Medicine-Cabinet

    I can hang my earrings on the doors.

    Earrings

    And store all my necklaces and bracelets inside.

    Necklaces

    It’s perfect and it all started with this frame I found at my local thrift store for $2.

    Original-frame

    My dad owns a cabinet shop, so when I was out-of-town visiting him this past weekend I took my frame with me and ran my idea by him. He took me to his shop and made it happen for me.

    Dad-in-shop

    Obviously he has a lot of professional tools that make it so much easier, but don’t worry, you don’t need them to make this. Here’s how we did it: STEP ONE: Build a box the size of your frame. (Or if you have an old drawer your box would already be built – you’d just need to find a frame the same size). We took pieces that were 3.5” wide and mitered the corners, then used wood glue and small pins in the nail gun to put the sides together. If you don’t have a nail gun, you can use a hammer and nails.

    Mitered-corners
    Box

    You may have noticed that the pieces have a little cut-out in them.

    Indented-pieces

    My dad is a bit of a perfectionist, so he cut out an inlay in each piece, so the back piece could fit in the box and everything would be flush.

    Flush-back-piece

    Then more wood glue and pinning the back piece in place with the nail gun.

    Pin-back-in-place

    My dad has a fancy machine that you can program to cut things for you, so he used that to cut out all the holes in the back piece. If I was just on my own, I would have used a drill bit and that would have worked just as well. We did 5mm holes because my dad had that size of dowels on hand.

    Holes

    STEP TWO: Make a face frame. Since we are attaching some hardware to this and don’t want to risk splitting the wood, my dad recommended adding a face frame to the top of the box.

    Face-frame

    The wood is just a bit wider and goes right on top with some wood glue and pins.

    Face-frame-on-box

    Go ahead and putty all the holes and cracks. Once it’s dry, sand the entire thing down.

    Wood-putty

    STEP THREE: Make the doors. Cut the frame in half.

    Cut-frame-in-half

    Add a strip of wood to the inside of the frame.

    Strip-of-wood-in-doors

    We glued it in place and used some vices to hold each door.

    Vice

    Then we also angled the nail gun and put some small pins in to really make it secure.

    Angled-pin

    Put the wooden dowels in the holes and you are ready to paint.
    STEP FOUR: Spray paint. I went with white and apparently forgot to take a picture of this step. Oops!
    STEP FIVE: Add hardware.

    Hardware-on

    I used my staple gun to add the wire mesh (hardware cloth/chicken wire) to the back of the doors. Then I added hinges to attach the doors to the box and put a catch at the top of each door.

    Stop-Catch

    It’s almost there.

    Empty

    The last thing I did was add some knobs on the front of the doors. Then I hung it up and filled it with my jewelry.

    Earrings

    All done! Now my jewelry is organized and tangle free!

    Jewelry-Medicine-Cabinet-2

    Thanks so much for having me today Monica and Jess! Have fun in Mexico and congrats on turning 30. I’ll be right there with you next week (30 that is, not Mexico). I hope you guys will all come visit me over at Sew Dang Cute Crafts!

    Tam

    ------------------------------------------------------------------------------------------------------------

    Isn't that adorable? I'm definitely in need of something cute to help me organize all my jewelry, and I may have just found it! Also, we're super excited because we'll celebrating our one year blogiversary with our first annual:

    Come back every day next week for new and awesome giveaways. Trust us, you'll love them! Adios, from Mexico! Have a great weekend-

    jess
    Monica
  • Adios Amigos Day 2 {Hannah Kate Flora}

    Adios Amigos Day 2 {Hannah Kate Flora}

    First of all, our guest poster today, Hannah, is stinkin' adorable. She is the only blogger we've met IRL, (in real life) and totally exceeded our expectations! Funny story: When we met Hannah, we were in NYC getting ready for our Nate Show taping and she had just finished hers. Needless to say, she looked amazing, and we looked like we had just rolled out of bed (what can we say? We hadn't been to hair and makeup yet!:) Take a look at what I mean:

    Note: Faces appear blurry to protect the innocent.
    Secondly, Hannah is soooo talented. She has been featured twice on The Nate Show and has impeccable taste. She chronicles her designs and awesome street finds in NYC on her blog, Hannah Kate Flora. (And ohmygoodness, you HAVE to see the kitchen table she just made! Unbelievable!) So, without further ado, here she is!

    ------------------------------------------------------------------------------------------------------------

    Hi there! I'm so thrilled to guest blog for my sweet new friends, the Real Housewives of Bucks County. I met these darling girls backstage while we were filming seperate segments for the Nate Show. I told them, cheesy as it is, I'm so encouraged by them! Such strong, faithful, clever women! I racked my brain on what to post and was politely reminded by Brooklyn Boy, my soon to be husband, that I should write about Street Merch — left behind furniture found on the streets of New York (or anywhere for that matter) that just need a new life! You see, I'm a Texas girl who's lived in New York for the past 4 years. It's always been important to make my home (i.e. tiny apartment) feel warm, personal and lived in, but I haven't always had the budget to go crazy. But I noticed something living here, when you live in New York and move apartments or get rid of things, you don't have a car to throw your stuff in for a Goodwill trip. No sir. The street is your own personal Goodwill. Whatever you can't fit in your apartment goes to the curb. To put it plainly — this means you can find amazing pieces on the street, with nothing wrong except that there wasn't room for it in its previous home. There's one piece I want to tell you about in particular — the bar cart.

    I had just wrapped an interior design job on the Upper West Side, when I saw this on the street curb..
    and this cell phone conversation with my mom ensued: Hannah: Well I just had my final meeting with Erin and it went really great! Mom: Oh good! I can't wait to see more pictures. I'm glad everything worked out! What are you doing now? Hannah: Me too! Oh, I'm just walking home and wait… what is… hold on mom… Mom: What is it? Hannah: Well I think… hold on, let me move the bags of trash… Mom: What??? Hannah: Street Merch. Mom: Oh! What is it?? Can you take a picture? Hannah: Yea. Hold on, let me just get this bag of trash moved over. Sick. Ok. It's a retro looking bar cart. Or a really crazy overhead projector cart thing. Hm. Shoot. Should I get it? Mom: Well?? Maybe. Do you see a cab? Hannah: No. I have to get it, don't I? Ughhhhhhhh. (At this point, my mom is dying laughing at me. These Street Merch phone exchanges happen all the time between us.) Mom: Hahaaaa. Just get a cab! (I rustle around and end up manhandling the cart.) Hannah: Well now I've picked it up and am walking down the street. Damn Street Merch. I feel RIDICULOUS!!! Mom: Hahahahahahahahahahaha Hannah: Why do I always do this?! I look like a freak carrying this cart under my arm, down the street, in the freezing cold, while I'm on the phone. Mom: Hahahahahahahahahahahahahahahaa Hannah: Goodness gracious. TAXI!!!!! gottagoloveyoubye!!!

    And here's my cramped view of the bar cart on my lap in the cab. No big deal.
    Anyways — I believe that everything has a purpose and I knew this piece had potential. My plan was to revive it with new paint & fabric! First step was to prime it. Don't worry about the sketchy area I'm spray painting in — you have to make do with cramped cement courtyards when you live in Manhattan.

    I chose Navy Blue Spray Paint in high gloss. I gave it two even and thorough coats of paint.

    And here it is all dry and sitting in our foyer! Apologies for the iphone pictures, these images are pre new Canon camera.

    For the two shelves of the cart, I decided to use some preppy and bright Robert Allen fabric from fabric.com.

    After measuring the fabric to fit neatly inside each shelf, I painted a coat of Matte Medium (which you can find at any craft store) directly onto the shelf. Then I laid the fabric onto the shelf and painted a 2nd coat of Matte Medium directly on top, wipping excess clean. I made sure there were no bubbles and the medium was equally distributed.

    Once totally dry, I loaded the cart up with goods!

    This bar cart has taken on many different forms — sometimes we use it as a side table and sometimes we use it for drinks and treats during parties! It's very functional, and has casters that make it easy to move.

    Thats it!! Bonus: This piece was featured on my first Nate segment which you can watch here! Thanks Real Housewives of Buck's County! Loved visiting.
    ------------------------------------------------------------------------------------------------------------

    That looks awesome, Hannah! Thanks so much for sharing your project with us. And best of luck with your wedding and new married life: )

    jess
    Monica