You guys. Every once in a while one of my crazy ideas actually pans out and is awesome. I have to say, that in my opinion, this project is one of them. You know me, I'm a whole lot less modern than Monica when it comes to decor (and most things, come to think of it), so I surprised myself with how much I liked this wreath!! Without further ado, here's my little bit modern/little bit rustic Wood Slice Wreath:


I pretty much adore this wreath that I made from a tree that was knocked down during Hurricane Sandy a few weeks ago. We were fortunate to only have a few downed trees, but we still need to figure out what to do with all that wood! It was pretty much free, since I used materials I had on hand. That makes it even better in my opinion. Can I get an amen? You'll want to let your wood sit inside out of the elements to dry out for a while before beginning.

Here's how to make your own:
1. Cut a slice of wood from a tree trunk using a chainsaw. I'm pretty comfortable with most saws, but I stay away from chainsaws! My hubs cut a slice for me at about 2 inches thick. These pictures are a bit deceiving because the diameter of this wreath is about 1.5 feet, so it's pretty large!

(Wondering why everything looks so golden? No it's not Heaven, it's the nightime lighting in my garage. Please tell me I'm not the only one using power tools at 11 PM in the garage. My neighbors love me, as you can imagine.)
2. Using a large drill bit, drill a hole in the middle of the wood slice. This makes it easy for you to start cutting with a jigsaw.

3. Cut out the middle portion of the wood slice to create the wreath. I was lucky to have a piece of wood that had distinctive rings for me to use as a guide for the jigsaw. Make sure you have a long blade that is specifically designed to use on wood. This will make the job SO much easier! I'll be honest, this part was hard work! I had my husband hold the piece of wood to give me some resistance as I was cutting. We eventually had to switch jobs because it felt like my arms might just vibrate right off!

4. Sand the inside ring of the wood to even it out and to get rid of splinters. Easy peasy.

5. Tape off the top of your wreath and spraypaint the inside a fun color. This step is optional, but I wanted to give my rustic wreath a little bit of glam. I used Valspar Gold Metallic spray paint and did a couple of coats. Warning: because of it's circular shape and it's 2 inch depth, the paint will deflect right back at you! My gray nailpolish quickly became gold!

6. Add Self-Stick Foor Care pads to the back of your wreath to prevent scratching. This wreath probably weighs close to 10 lbs, and the last thing I want is for it to bang around in the wind and mark up my freshly painted front door. Adding pads creates a nice barrier between the wreath and the door!

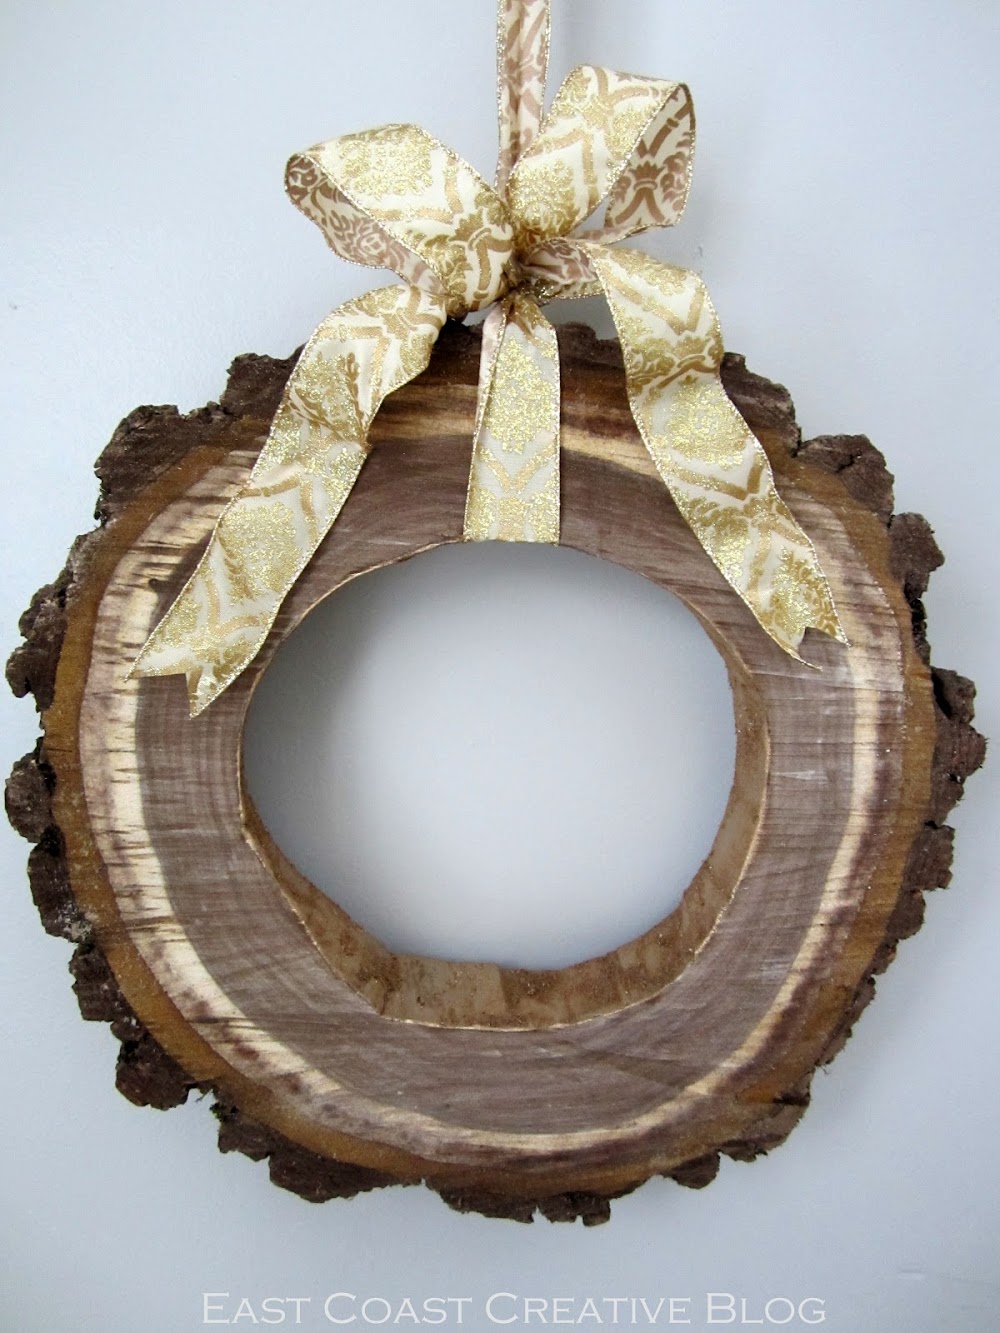
7. Add your desired ribbon and step back to admire your work! Isn't she pretty? (Yes, it's a girl)
Look at those multi-colored rings! You just can't beat the beauty you find in nature.

My gold ribbon is just the right touch, don't you think?

And the gold interior ring is just subtle enough that it doesn't steal the show, but totally complements the tones in the rest of the wood.

If you want your wreath to last a long time, I recommend brushing a water-based polyurethane on all the surfaces to seal it. Because it's water-based, it won't change the color of the wood or cause it to yellow over time.


What do you think? Are you digging it like I am?
--------------------------------------------------------------------------------------------------------------------------
Oh yeah, did you hear? We want YOUR Christmas cards!!

Please please send them to us because getting Christmas cards is one of the highlights of our lives. A bit dramatic, yes, but oh so true.
--------------------------------------------------------------------------------------------------------------------------