Hey everyone! It's your lucky day. While I'm on family vacation this week, we've asked a few of our favorite people to guest post for us! One of the highlights of our trip to Haven was meeting Karah, from the space between. She's super cool, fun, easy to talk to, talented and oh yeah, lives in Curacao. Not fair. We loved hanging out with her while we ate breakfast at McDonalds (don't judge). Anyway, she does some amazing projects (just wait until you get the sneak peek of her rooftop bedroom!), so be sure to give her some
EC2 love!
---------------------------------------------------------------------------------------------------------------------
Well, hello East Coast Creative readers! How are you? I'm Karah from the space between and I really can't even tell you how excited I am to be here today.

Ummm, let's not tell the husband I used a photo of our wedding day to try to express my excitement over guest posting for EC2 today. K? Thanks. ;) I am a total blog stalker of these lovely gals, and when I got to
stalk
meet them in real life … Holy Caloni, I couldn't help but take random paparazzi like pics.

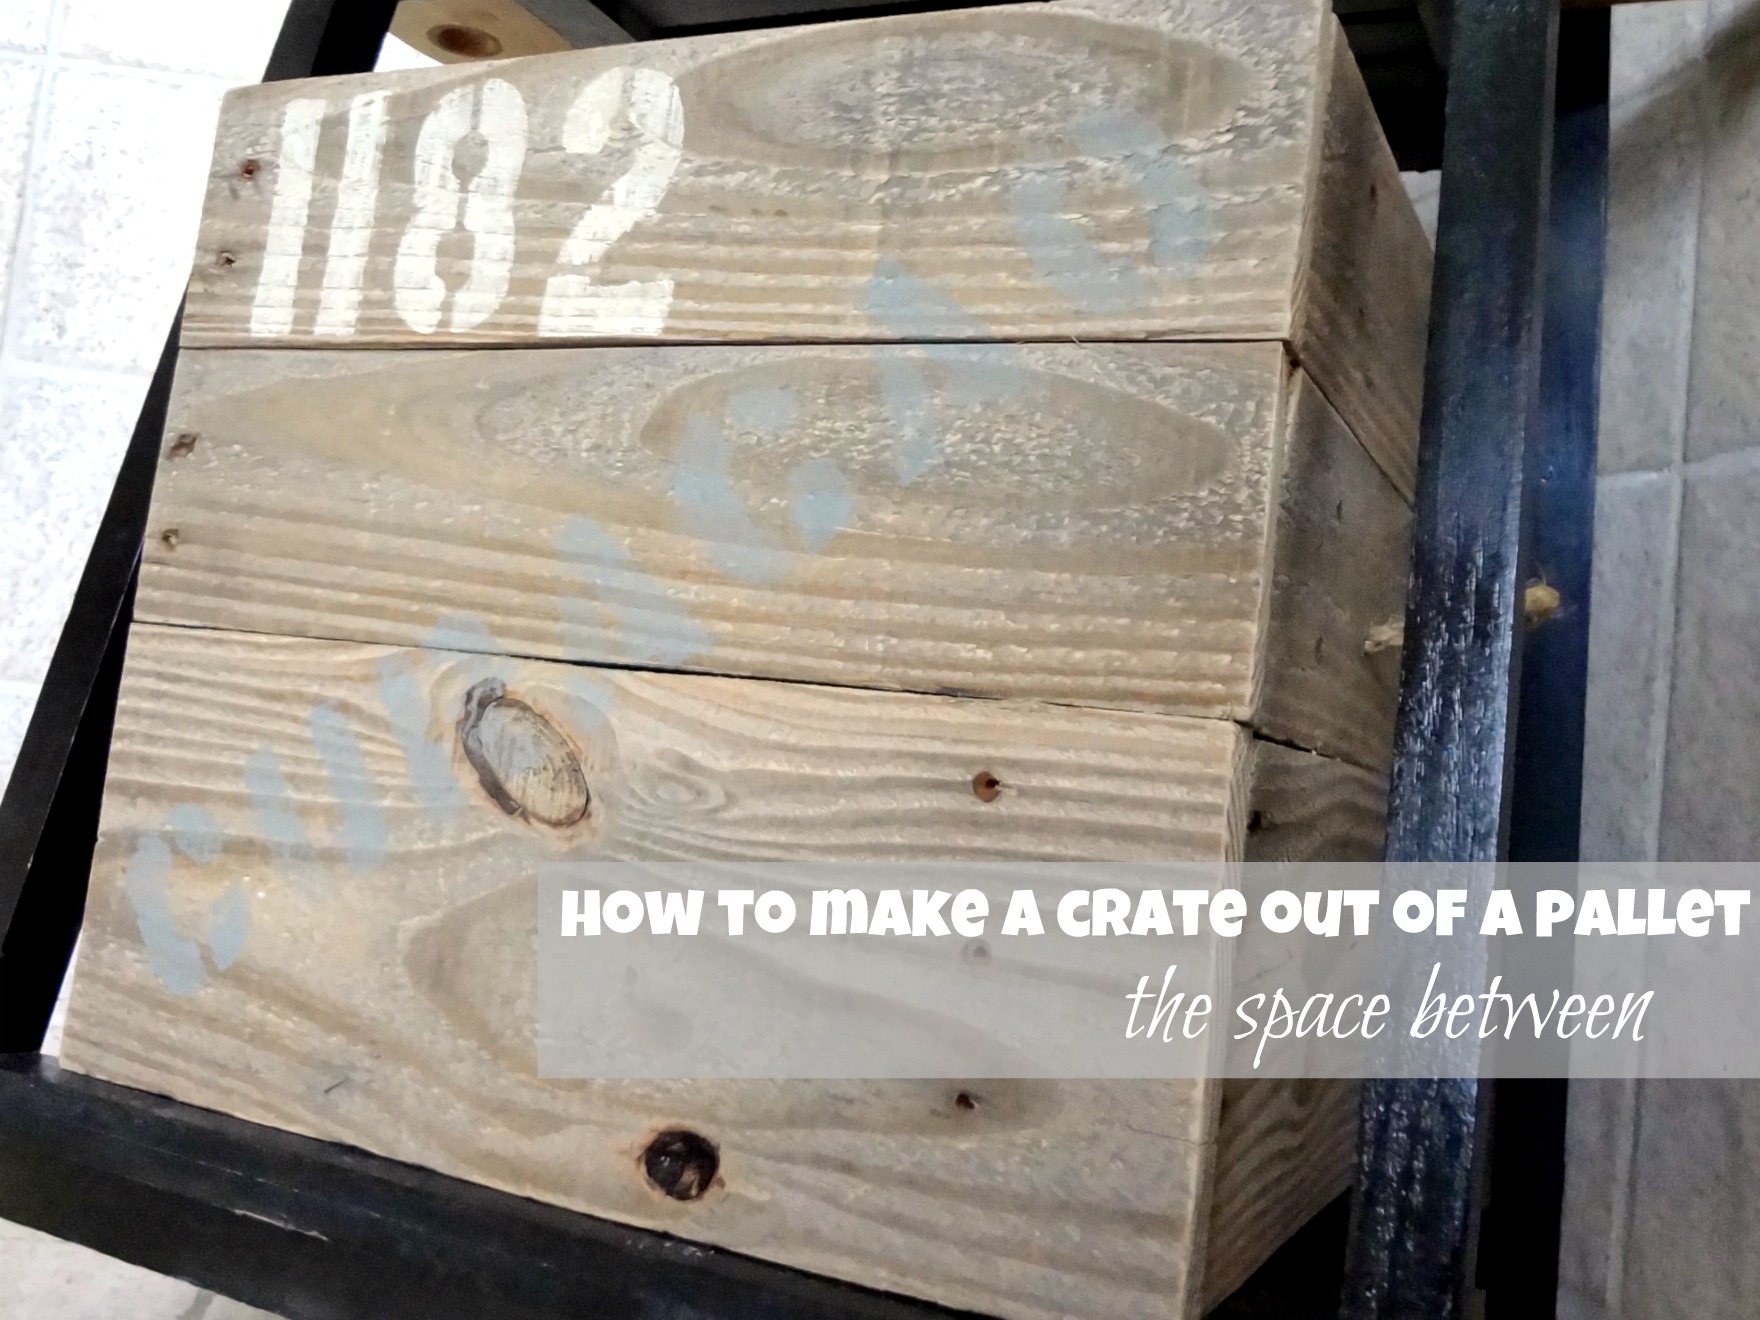
It truly is an honor for me to be here today. And I'm going to share with you how I made a perfectly functional and, I think adorable, storage crate out of a pallet.

One important thing to mention here is that we live in a rental property that is approximat ely the size of a breadbox, so I need to get creative with storage. Oh, and one other fun fact, although not relevant to the outcome of this story … is that we live in the Caribbean. Here's our new rooftop bedroom.

Aaaanyway, back to the crate.
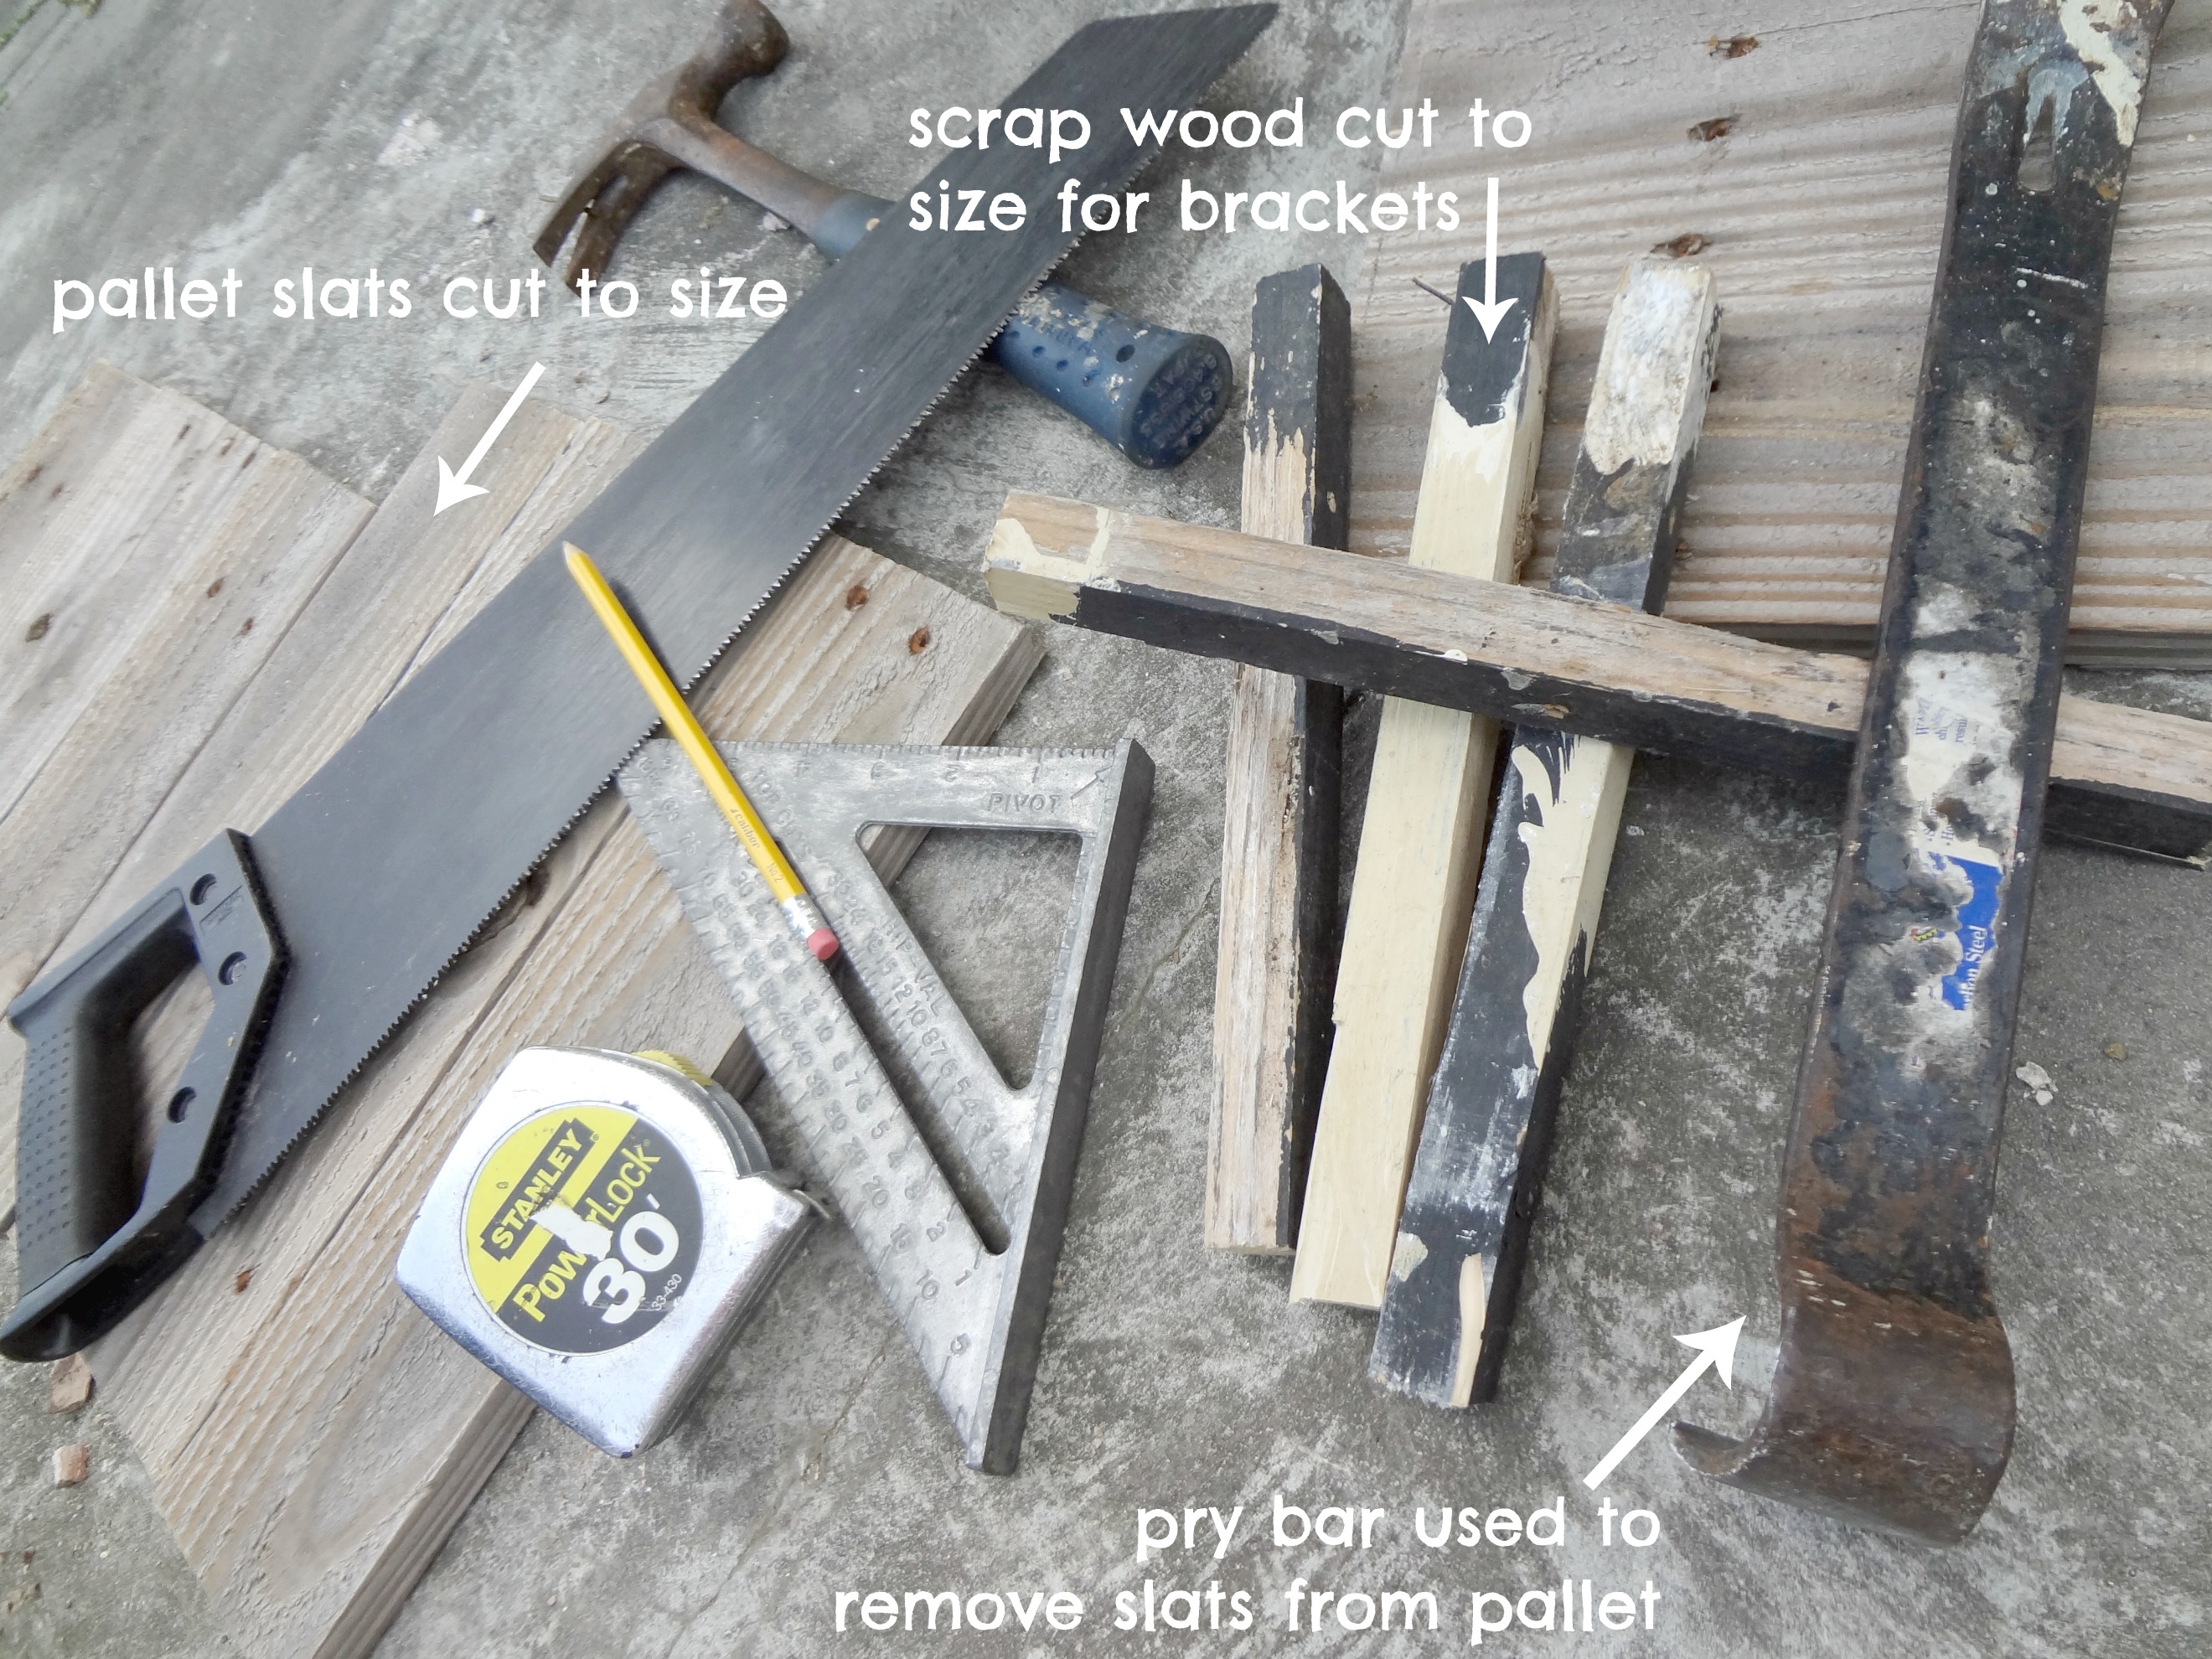
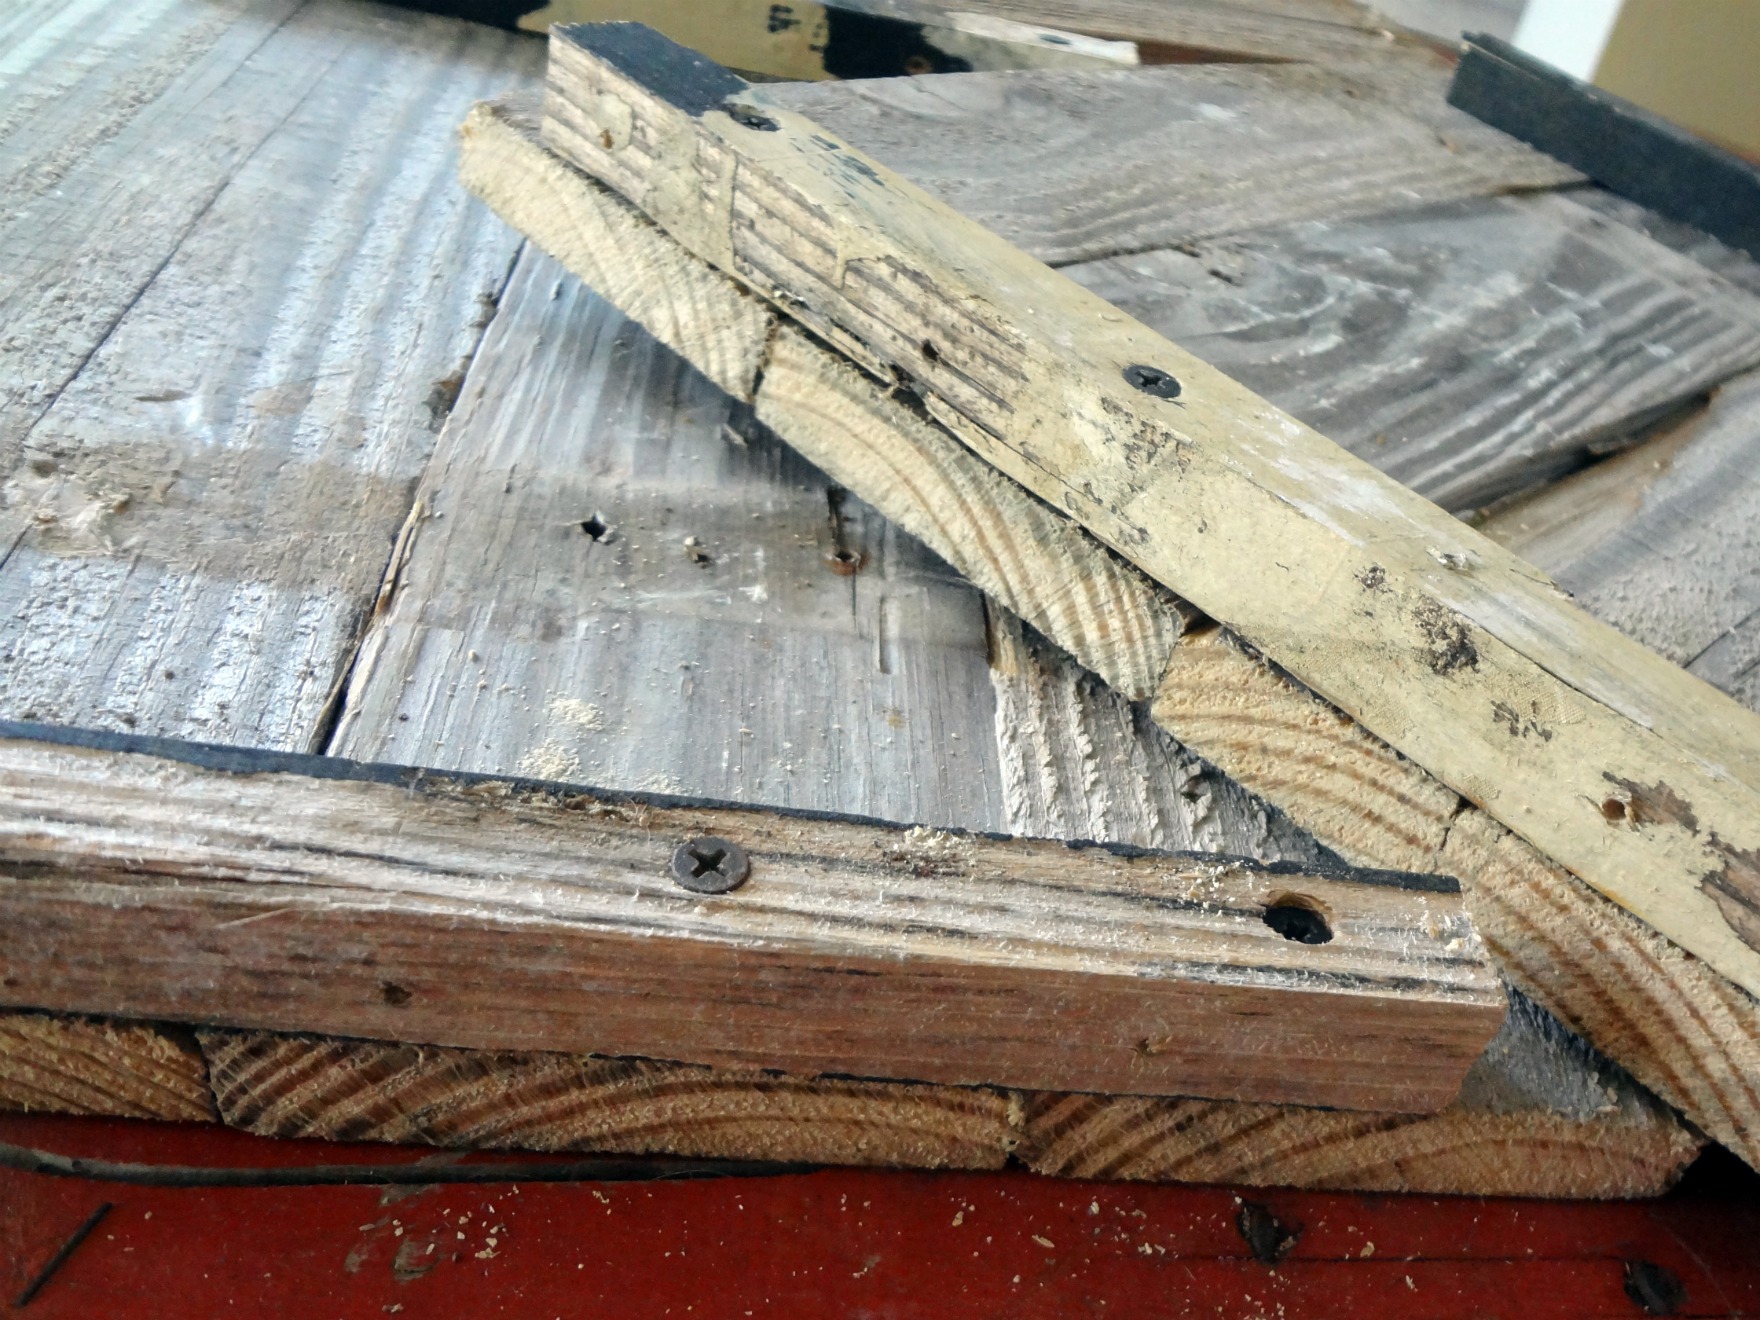
I didn't actually take a before picture … but … it was a pallet.; ) Similar to this one. And I used the same technique to remove the slats, a hammer and pry bar along with some cursing and a blister on my forefinger. Those last two are totally optional.: ) I knew where I wanted my crate to go in my kitchen, so I measured my space and cut my slats to size (14 inches long). Based on the height I wanted, I needed 3 slats per side (one wide one and two narrow ones), so I cut 12 pieces the same length. I took a little piece of scrap wood (maybe a 1 x 1) I had and cut it so I could use it as the brace to attach each of the sides of my crate together. The height was measuring about 12 inches so I cut my little brackets, if you will, about 10 inches long. Just long enough so I could get one screw into each of the three pallet slats on each side of the soon-to-be-crate.
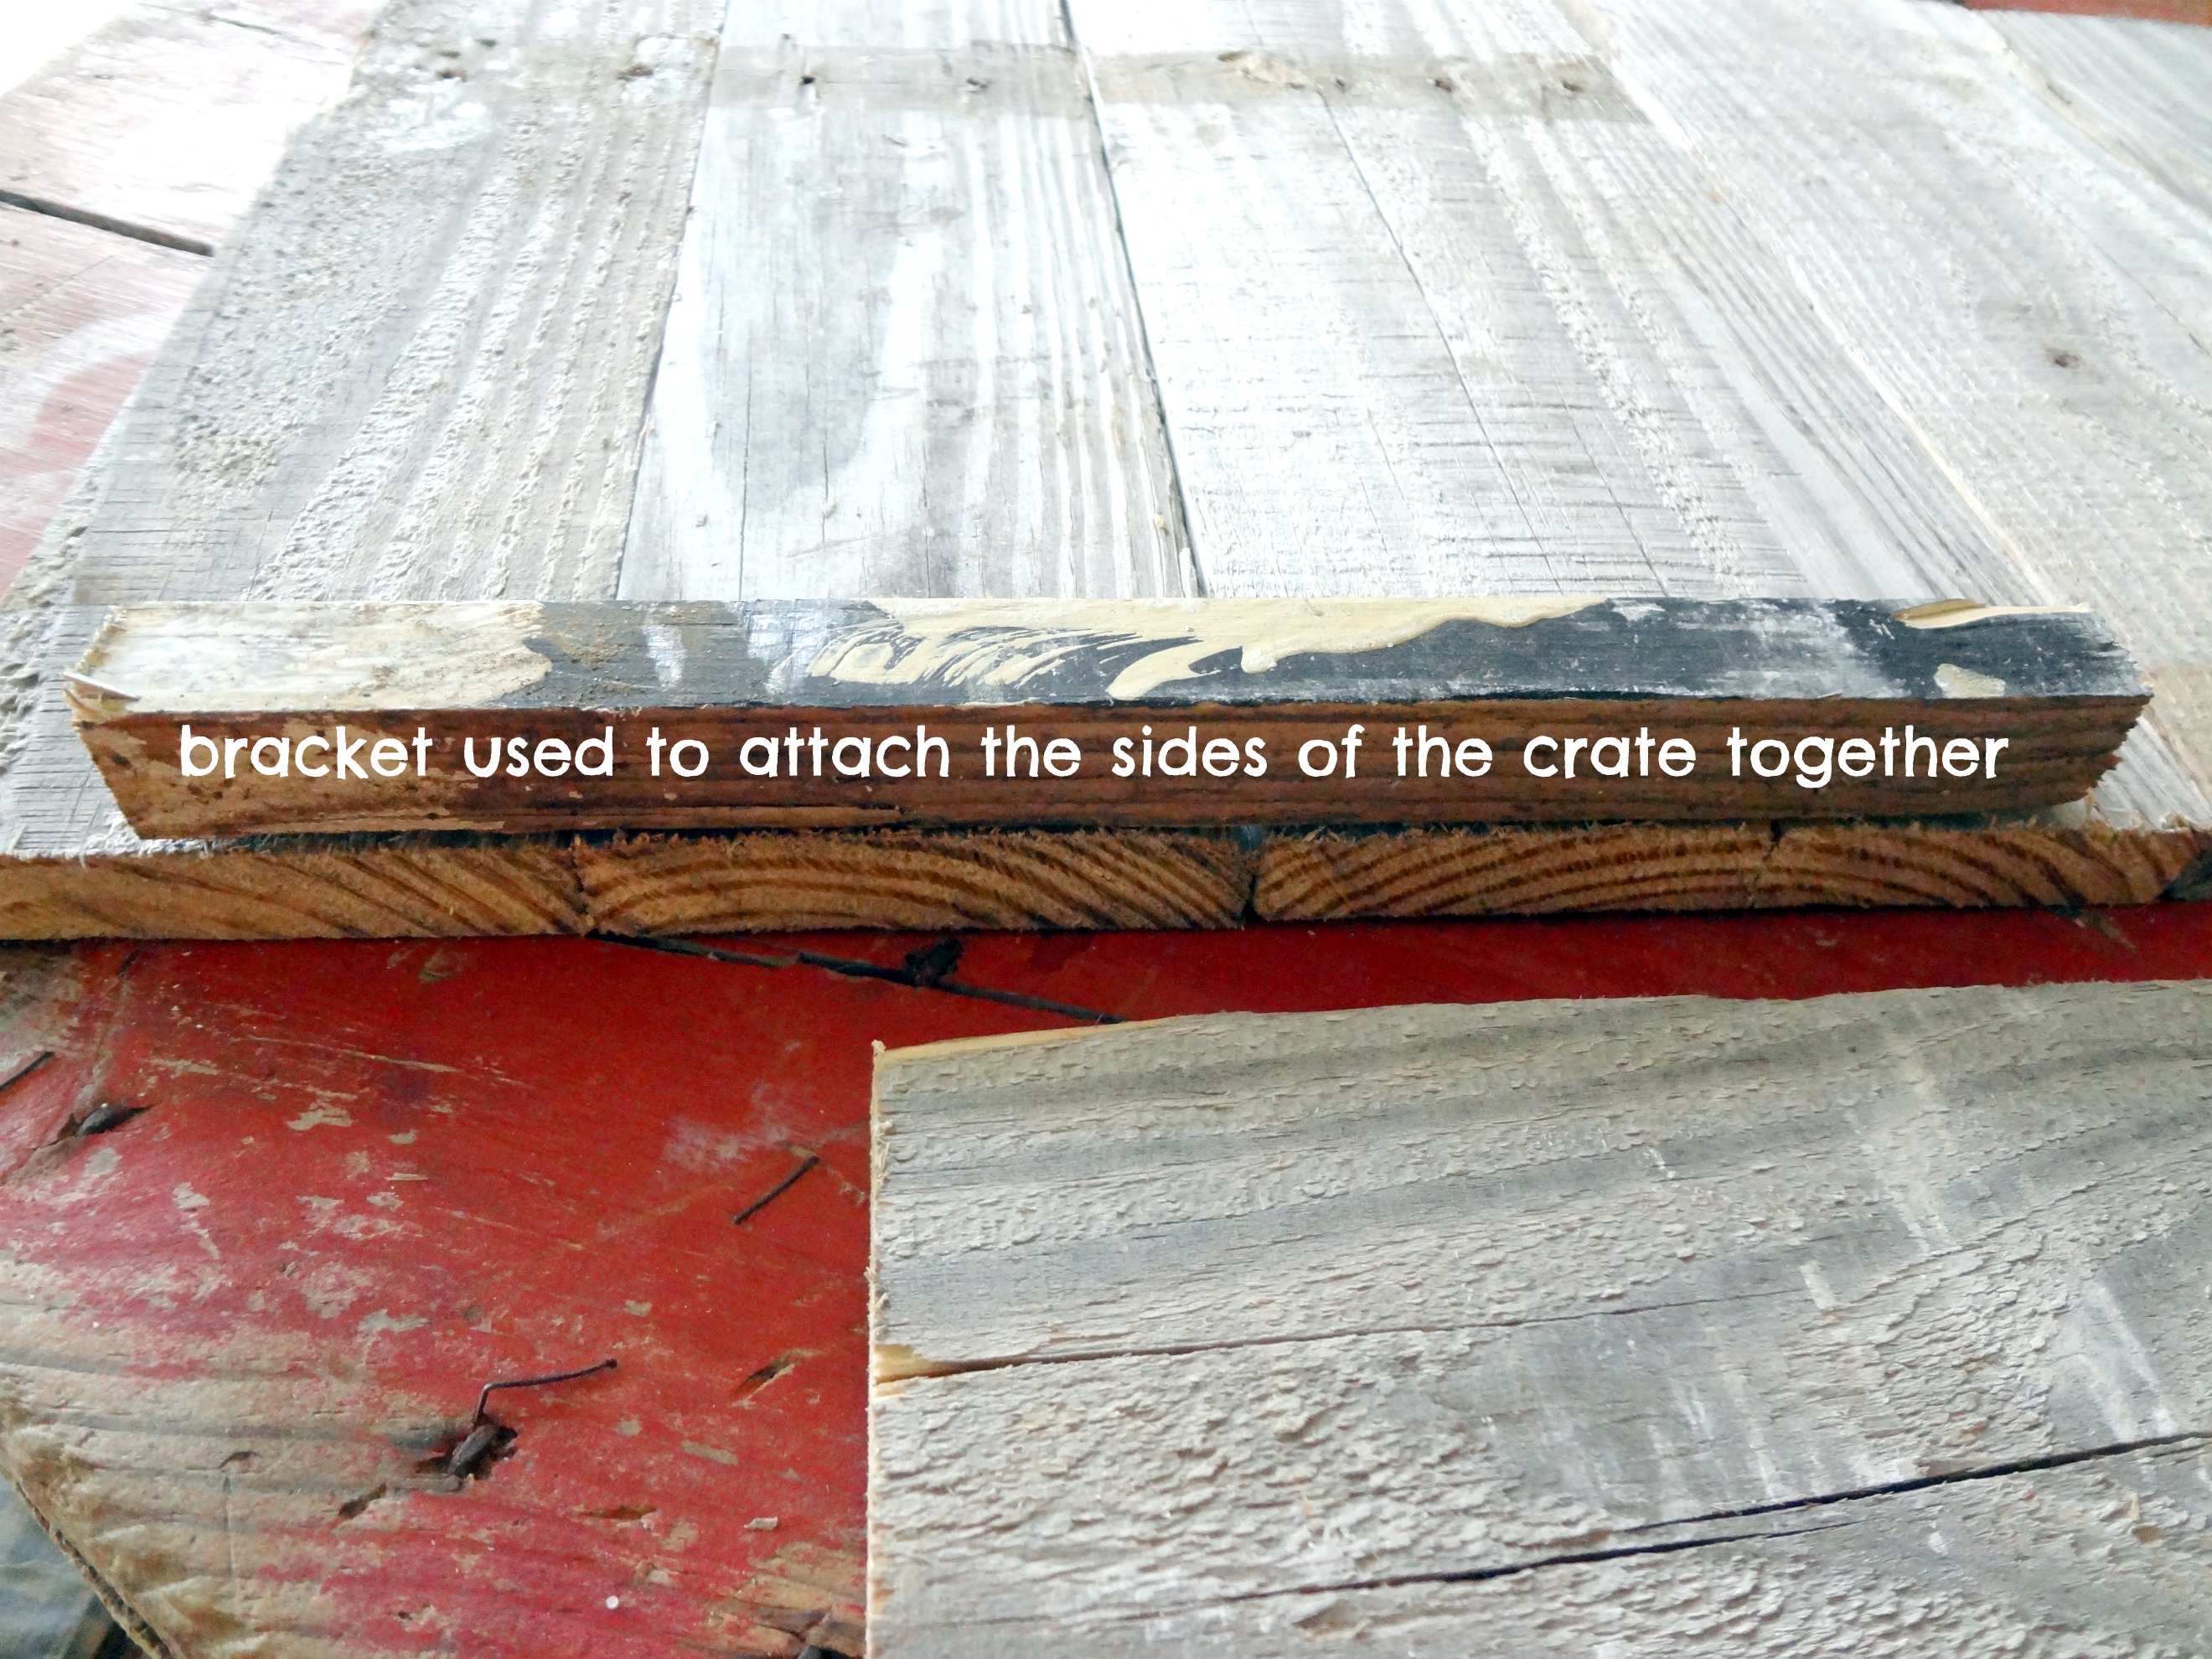
Ok, here's the thought process … I wanted the front to be only a view of the slats, meaning the front and back slats would overlap the slats on the sides. So, in the picture above, you see how I lined my brackets up flush with the edge of the slats for the sides of the crate. I attached the 4 brackets to both ends of the slats for both of the sides. Then, by lining up the slats for the front (and then back) of the crate, I was able to attach the brackets to the slats creating a bottomless and topless box. Confused yet? This pic is of the 2 sides with the brackets attached … ready to be attached to the front and the back sides of the crate.
.
Why yes, I do work construction on the coffee table.: ) Which makes now seem like a good time for a few tips: 1. Don't do construction on the coffee table unless you're ok with a sawdusty mess.: ) 2. Drilling pilot holes for your screws (like I did here) is always a time saver … for those interested in saving time
and sanity and maybe a little bit of finger flesh.
3. One might want to wash their pallet with some sort of disinfectant cleaner. 4. Sanding the slats before working with them, or wearing gloves while handling the slats would probably be a good idea. But, I'm not one to judge so if you happen to forego any of these tips your crate is still cool with me.: ) Ok, where were we … once I had all of the sides connected, I added a bottom. This is probably backwards carpentry, but that's how I roll. AND, so I didn't have to rip down the width of any of the pallet slats, I spaced them so they aren't wide enough apart for any canned goods to fall through, but not exactly a solid wood bottom. Like so.

Then I drilled holes on either side of my crate to run some rope through for handles.
.
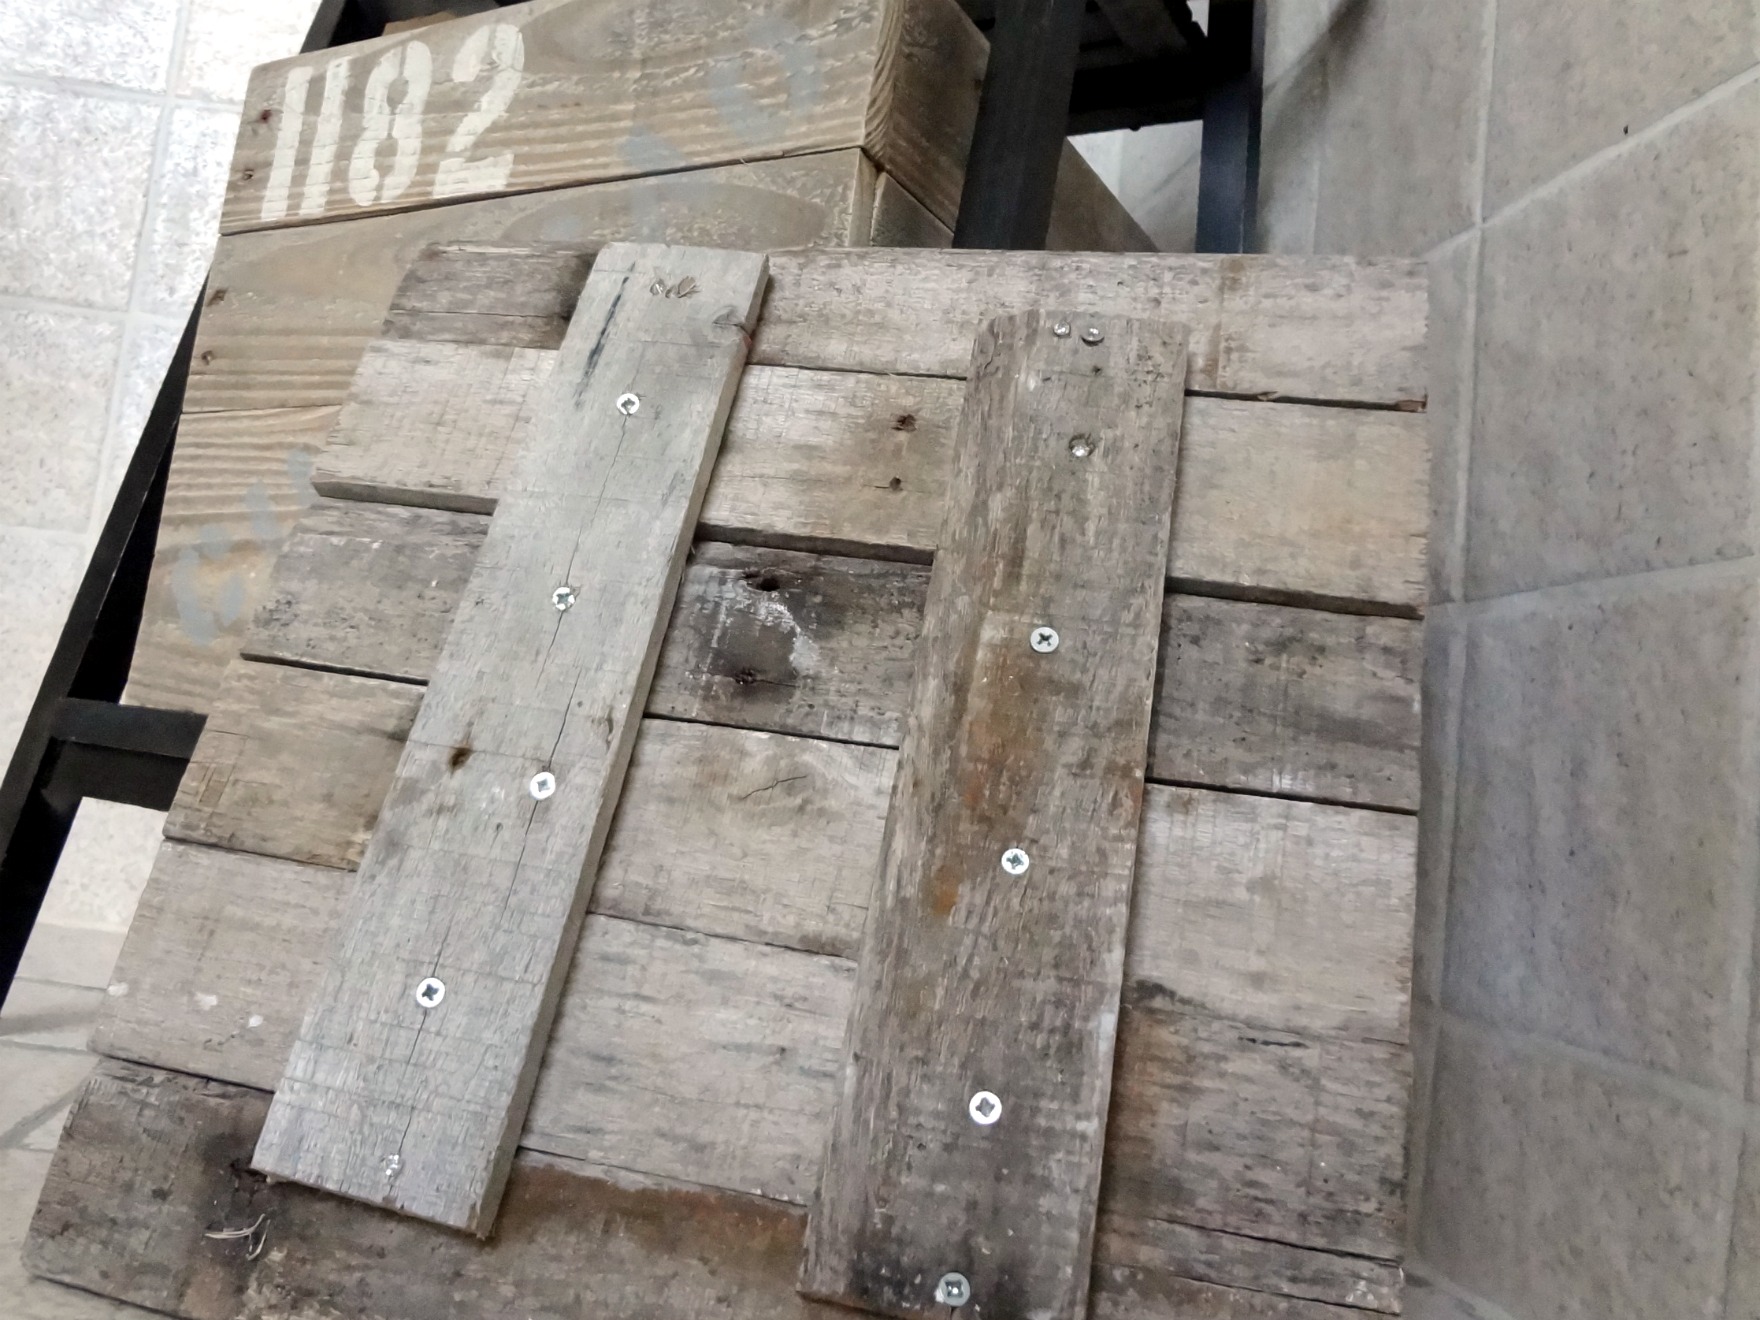
And because I didn't want people peaking at my canned goods (that's what she said), I added a top by just cutting more pallet slats the length I needed and adding a few pallet slats to the underside to attach them all together. Like so.
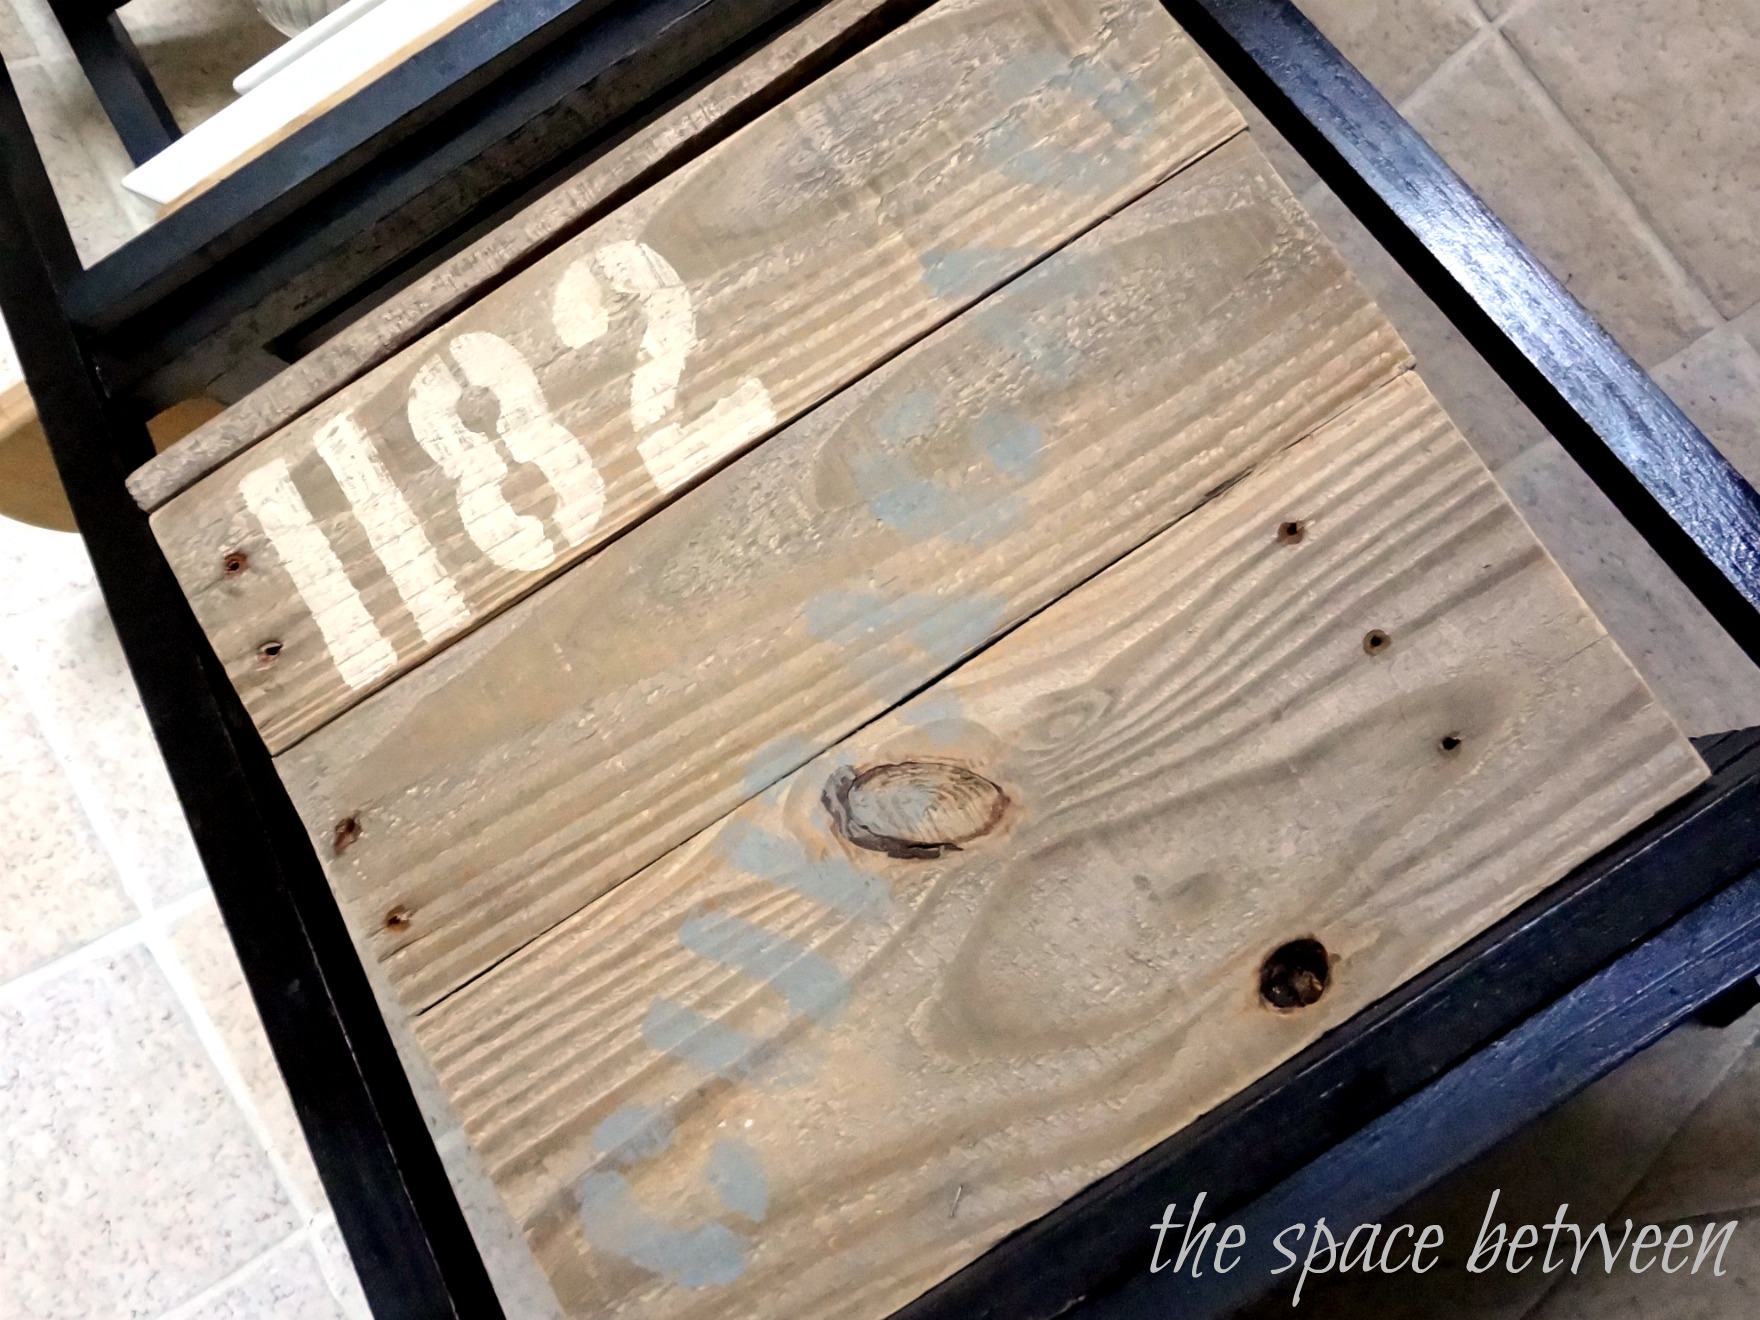
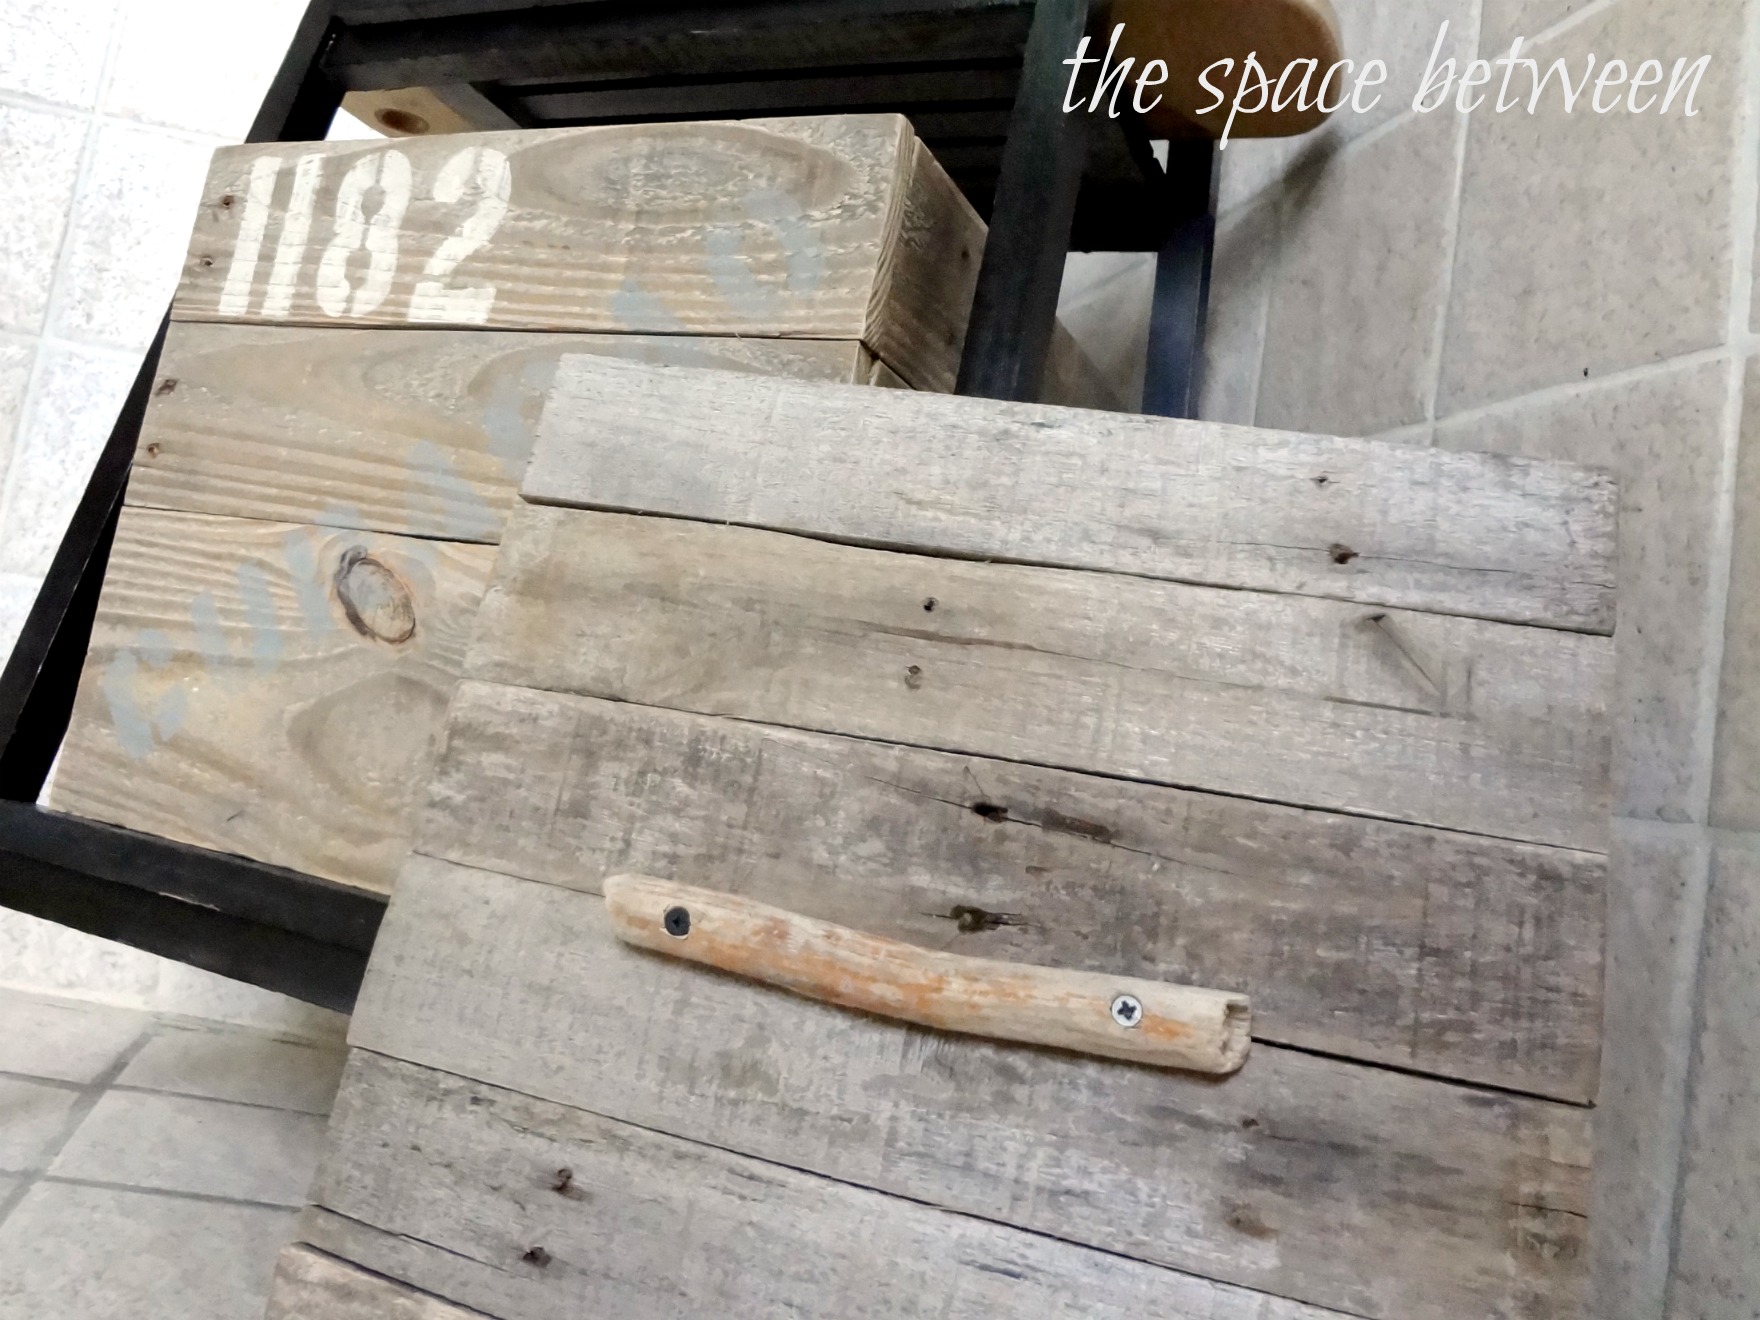
And because I love me some driftwood, I just screwed on a piece that I thought would work as a handle. I didn't even use the same color screws. And then added some not-so-random stenciling.
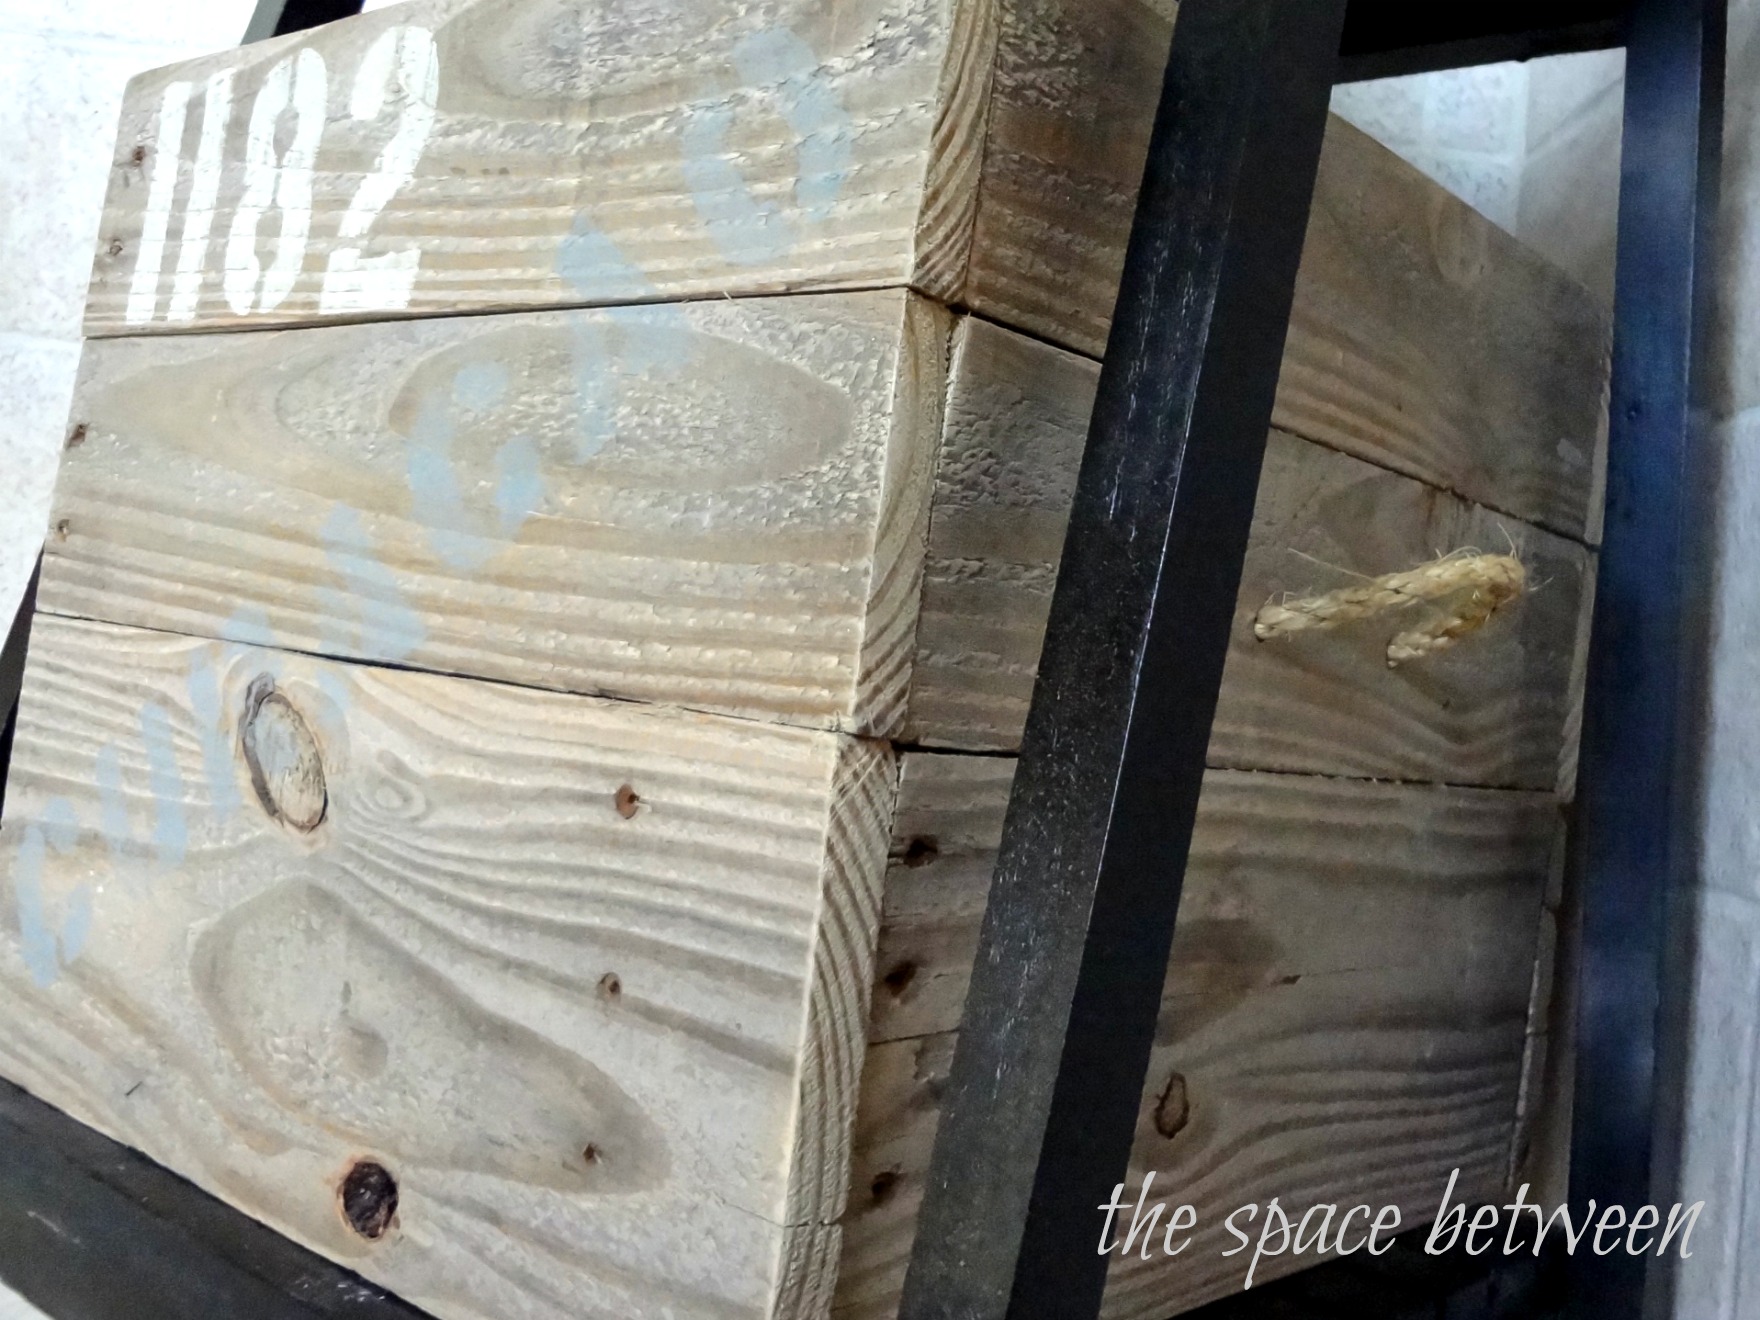
Thank goodness, because there is someone who doesn't like random stenciling around here. I finished her off by hand sanding the whole crate to distress the stenciling and smooth out the finish a bit. Oh, and just to clarify, all of the nail holes you see on the outside of the crate of from it's previous life as a pallet. Building the crate with the brackets on the inside eliminates any new visual nail or screws. And I really like the rustic look of the open holes from it's former life. And I really like that this project didn't cost me a penny! Score!
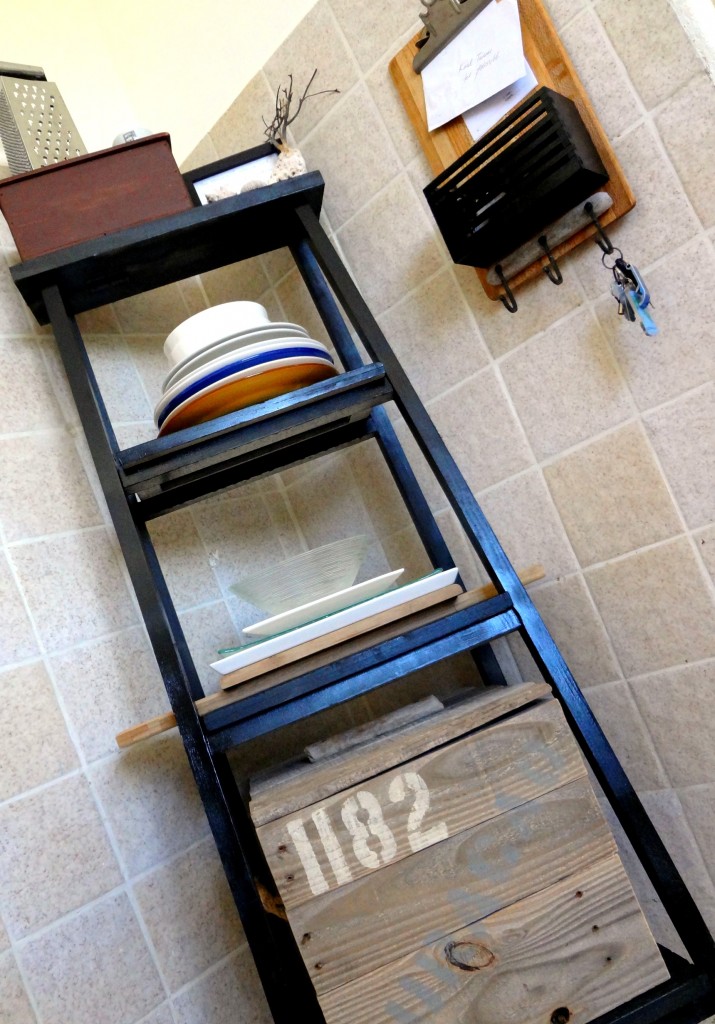
Here is a little wider shot of the corner of our kitchen. If you want, you can learn how to make a little landing zone out of an old clipboard and wooden bin here.
So, what do you think? Do you like pallet projects? Do you like unique storage ideas? Do you live with anyone who doesn't like random stenciling?
And, on a completely random note … do you watch the show the Bachelorette? I know, I know … I say, answer the question first, judge me later.; ) Anyway, the finale of the show is tonight and over at my blog today I have am giving a tour of the house where the final
drama
rose ceremony went down. What can I say, it's a small island.: ) If you have a chance, stop on over to the space between, it'd be great to meet you. Thank you, thank you so much to Jess & Monica for letting me come by today. Hopefully you are all enjoying your space today! ~Karah --------------------------------------------------------------------------------------------------------------------------
Karah, you're awesome. End of story. You're welcome here anytime!: )