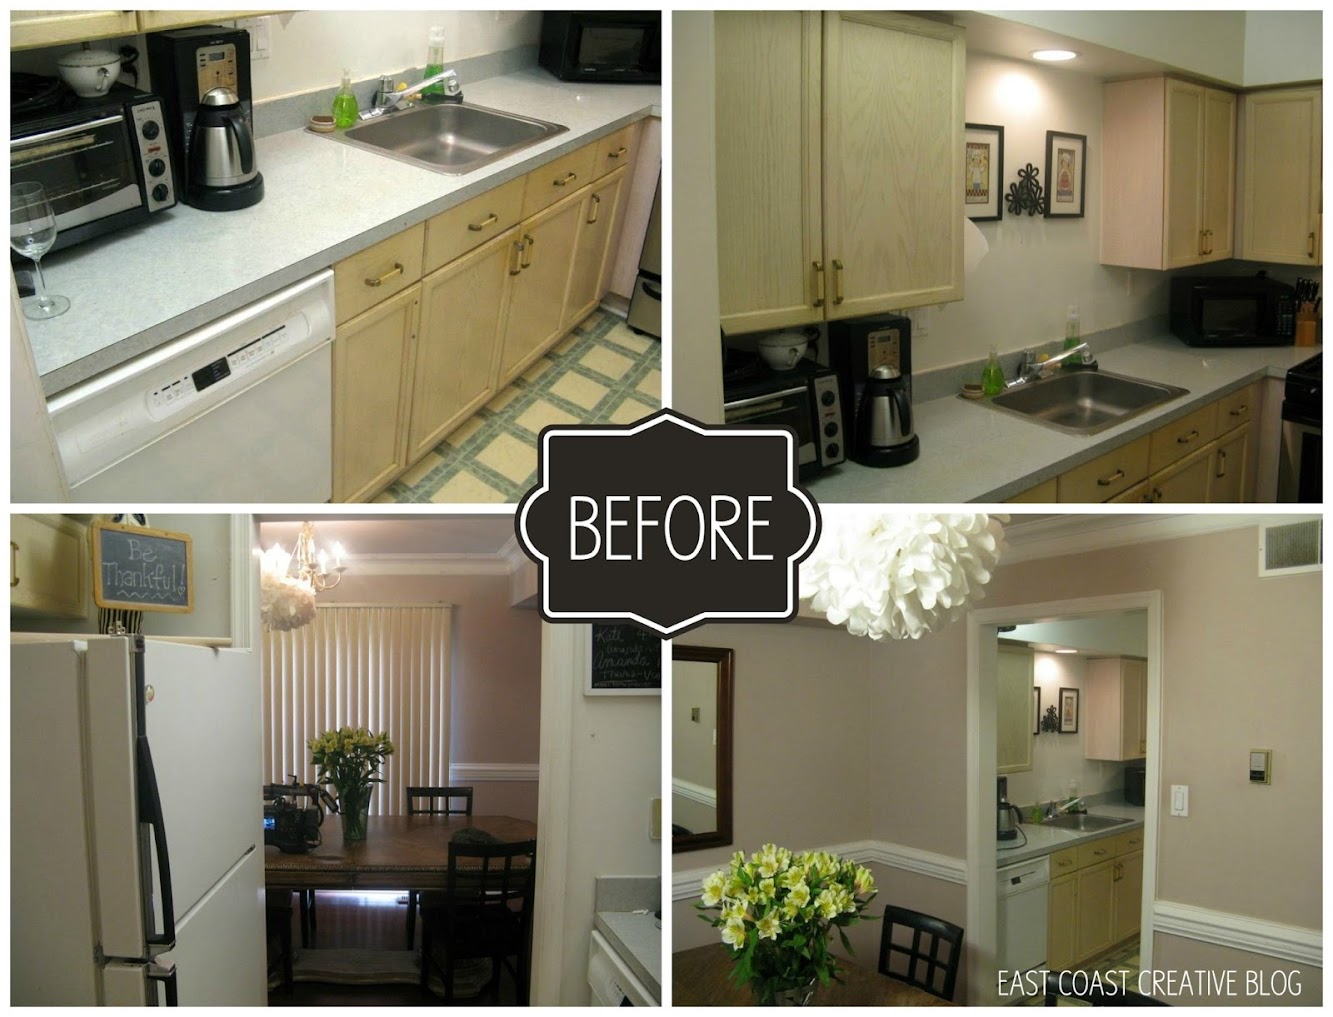
When Jess and I saw this tiny galley kitchen, we knew we had to help! It's the kind of space that most people on a budget would call"hopeless" because it's really, really tiny and everything was dated. Thankfully, we really love a challenge, so we headed to Matt and Linda's to give them a colorful kitchen renovation for under $1200! To watch this full episode online, click HERE.

Matt and Linda are a great couple and this kitchen makeover meant a lot to them because they have a family of four using the kitchen, but also because Linda owns her own baking business out of their home.

She was the one responsible for all of the amazing desserts and decor at our premiere party. If you're local and in need of any desserts, you have to check her out. Frog Prince Cake & Cookie Design

Take a peek at these before pictures… does this look like a kitchen for a woman that spends a ton of a time cooking and baking?

Two things made the biggest difference in this space… Paint & Opening up the wall. Here's a rundown of all the changes we made to this space.

Painted Cabinets, Counters, & Appliances Paint is one of the least expensive and high impact things you can do to a space. We painted the cabinets a crisp, semi-gloss white and added new hardware. The counters were painted using a Rustoleum paint just for laminate. The appliances we coated with a stainless steel appliance spray paint. We'll give you the full rundown later this week. Flooring- The flooring project we did in this space could be one of my favorite DIYs of 2013 so far! I can't believe how amazing the effect was! We'll share all the details later this week on the blog, but who would have imagined that peel and stick vinyl tile could look this amazing!

Faux Subway Tile Renovating an entire kitchen for $1200 is tricky, so rather than installing subway tile we painted it! It took a LONG time, and I might have gotten a few grey hairs in the process, but it looked amazing in the end! (Full tutorial coming this week!)
.JPG)
Opening the Kitchen Wall This kitchen is tiny and we couldn't change the footprint, but we wanted it to feel bigger and less closed off from the rest of the house, so we removed the top half of the left wall. Instantly, the kitchen seemed twice the size!

Add Open Shelving Once the wall was down, we really didn't want to put the cabinets back up, because it would make the space seem closed off again. Instead, we purchased inexpensive Ikea floating shelves and displayed their dishes added lots of fun colorful accessories.
.JPG)
Create Additional Workspace We never like to waste anything, so rather than just getting rid of the cabinets we removed, we used them as base cabinets in the dining room. All we had to do was build a counter using inexpensive pine, and for almost no cost, we created a huge workspace and kept all of their storage!
.JPG)
Lighting and Window Mirror We added a fun pendant light and backed an old window with a mirror to add more light to the room. We love using old windows to decorate a space. This really helped make this tiny space feel larger!
.JPG)
DIY Bake Marquee Sign This was Linda's favorite project in the space. It was really simple to make, but added such a fun pop to the room! Jess will be back with the full tutorial later this week!
.JPG)
Fun Accessories Of course we added lots accessories to complete the space. We don't have a full source list, but most of the items were from Homegoods and Ikea! We really keep our eyes open for clearance and sale items!
.JPG)
This kitchen took a lot of hard work. All of the projects saved us big time budget-wise, but required some serious (wo)man hours. We were SO excited with how it turned out and actually, we were even more excited with how happy the homeowners were!
.JPG)
Our first Knock It Off kitchen renovation was a huge success and we can't wait to tackle another one! Kitchens are usually the most expensive rooms in a home, and to think we did an entire kitchen and dining room for about the cost some people spend just on countertops alone makes us pretty sure that Knocking It Off was the best route to go!!
Check back later this week for all of the tutorials! To watch this full episode online, click HERE.


