My Creative Blog [Search results for Contest

  • What We Learned {Creating with the Stars 2013)

    What We Learned {Creating with the Stars 2013)

    Phew! We don't know about you, but we are exhausted after that month-long Creating with the Stars. But on the other hand, we really miss it! We could not be happier with the way our first ever contest went and hope you all enjoyed it and were inspired by it too! We are chomping at the bit to get back into the swing of our own projects,but before we do that, we thought we'd take a look back at the things we learned form Creating with the Stars 2013- David Letterman-style!

    10. You get what you pay for. We learned this the hard way, for sure. We deicded to use a survey company that was very inexpensive to host each week's voting and we had major problems every week with it. You guys noticed it, too, and we promise that next year the voting will be sooo much easier! Putting out a little bit more money will be worth it if we can avoid all the hassles we dealt with!

    9. Running the contest and trying to do each round's projects = Crazytown Even though we like the projects we came up with during the season trying to do them while hosting the contest, coordinating posts, emailing back and forth with stars and contestants, all while wrangling our kids and managing the rest of our lives and another HUGE project, we were on overload. Whoever thought of participating in each round (I'm pretty sure it was Monica,) is insane, and you WON'T be seeing that next season.: )

    Week 1: Upcycled Door turned Desk, Week 2: Anthro Wood Cut Art Knockoff Week 3: Painted Piano, Week 4: Colorful and Fun Kid's Bathroom Makeover
    8. You people are competitive! For real! We went into this season thinking it would be awesome and a whole lot of fun, not ever thinking people would be so into it! Even readers who weren't contestants got fired up about the littlest thing!. Honestly, we had no idea we would be dealing with so many Sherlock Holmes! Now we know you guys are in it to win it, and will back up your favorites no matter what!
    7. Planning and preparation were key for these procrastinators! Posting seven days a week within a strict time frame is no joke. Usually, we decide the day before what we want to write about the next day, but not so with CWTS! We began seriously planning in October 2012- approaching sponsors and stars, writing emails, figuring out guidelines etc. We were super glad we did this because the contest went pretty smoothly. Thank goodness!

    We finished our round 1 project last year at 1 AM. Procrastinate, much? 6. The pressure is on when the world is watching, We absolutely hate it when something doesn't go quite as planned. We recognize there were a few glitches in the contest and because so many people were coming here every day, those mistakes were just that much more noticeable. Ick, we really don't like that. No more mistakes next year!
    5. Go big or Go home! We always say we're not afraid to try or go after anything and it worked in our favor with this contest! We landed some amazing sponsors by just asking if they wanted to partcipate! Plus, we went out on a major limb (that involved pretty lame dancing and fake mustaches) to get our incredible stars on board! (PS. this video gets a little long, so feel free to skip the middle!)

    4. It's pretty darn fun to help new bloggers get a step up! We were unbelievably grateful to Tam for giving us a platform to showcase our fun ideas when we won last year. It made people notice us, and we were so thrilled to do that for these 12 crazy-gifted girls. We hope that you'll continue to support your favorites and follow along as they grow bigger than us!
    3. The Stars you all love really are that incredible!
    These ladies took time out of their very busy schedules to help better the contestants projects and photos. All of the contestants comments on how wonderful the stars were to work with. Thanks ladies!

    2. It turns out we're not the only talented people in blogland. Ha! But seriously, the talent that the contestants showed, and the amazing projects you all linked up blew us away. We love that this blogging niche is so encouraging and open to sharing of ideas, and man, our list must-do project list grew by about a mile after all of the fabulous ideas we saw throughout the contest!

    1. Creating with the Stars is the Most Epic Blog Contest on the Web! We already can't wait for next year's contest. It's definitely not too early for you to start creating awesome things because submissions open in February 2014!

    What did YOU think of the contest? Will you get your game on next year?

    jess
    Monica

    Want to catch up on all the projects from Creating with the Stars 2013? Click below!

    Round 1 Projects & Winners Round 2 Projects & Winners Ro und 3 Projects & Winners Round 4 Projects & Winners

  • Match that Blogger! {A contest and Ryobi Father's Day Giveaway}

    Match that Blogger! {A contest and Ryobi Father's Day Giveaway}

    Gooooood morning, friends!We’ve got a special surprise for you today… who doesn’t love a little friendly competition and GIVEAWAY?!?! ------------------------------------------------------------------------------------------------------------
    The premise of this contest stems from the fact that all of us are guilty of Pinning an idea without ever checking the source… guilty as charged! But there are likely pins on your boards that are from your favorite bloggers, and you don’t even know it! (Are we right? C'mon, admit it.) And that’s where the contest comes in:

    Here’s the line-up! Such an amazing group of bloggers that we wrangled!!

    And below are projects from each blogger (including us!) that you’ve likely seen viral all over Pinterest!

    Before we get to the rules, can we talk about how RYOBI is giving away $800 worth of POWER TOOLS? Just in time for Father’s Day!

    Perfect timing if you ask us.

    $400 RYOBI Giftcard goes to our randomly selected winner, and $400 RYOBI Giftcard goes to the first person to correctly match up all 16 bloggers with the correct projects! (there will be a randomly drawn winner in addition to the winner of the contest, so you should enter both ways!)
    When you click on the Contest Form (at the bottom of this post), it will direct you to a page that will show you an image of the project, and a drop-down menu of bloggers. You just go down the line and select away! Some projects you probably know already, but some you may need to snoop around blog-land to find!We call this blog-hopping, and it’s highly encouraged in the blogging world.

    Smile

    Here’s the links to the home page of each blog (in no particular order). Now get busy!

        1. Sawdust and Embryos
        2. All Things Thrifty
        3. Interiors by Kenz
        4. Whatever Blog
        5. Home Stories A to Z
        6. Sarah M. Dorsey Designs
        7. Twist Me Pretty
        8. The Idea Room
        9. DIY Village
        10. Pretty Handy Girl
        11. Domestic Imperfection
        12. One Good Thing
        13. Kara Paslay Designs
        14. Nine Red
        15. Vintage Revivals
        16. East Coast Creative

    Entry #1 (Randomly drawn) ‘Like’ us ALL on Facebook, and let us know that you did on the Rafflecopter form below! Entry #2 (Contest!) Click below to match up each blogger with their amazing project!

    a Rafflecopter giveaway

    Click Here!

    • One entry per person, per entry method.
    • Winner of matching contest will be emailed, and publicly announced on Facebook.
    • Winner of random-drawing giveaway will be announced on Father’s Day here on the blog, as well as Facebook.
    • Be sure to hop over to RYOBI Nation and check out some amazing inspirational projects!
    • Be AWESOME today!! (that’s a given)

    Ryobi Nation — leaderboard1[6]

    This contest/giveaway is in NO WAY affiliated with Pinterest or Facebook, and we hereby release them of any liability related to this promotion, the receipt of prize winnings, etc. The giveaway prize has been generously provided by RYOBI Nation. All prizes will be mailed by the sponsor and all participating blog owners are not held responsible if the prize is not fulfilled. Giveaway starts Monday 6/10/13 at 5am est and ends at midnight on Saturday 6/15/13. Alternate entry available by sending your entry via email to wehopeyouwin@gmail.com. Winner will be announced on Sunday 6/16/13 and will need to respond within 48 hours to claim their prize, or another winner will be chosen.Winner must be 18 years of age or older and a US citizen in order to win. May the force be with you.
    Good Luck, guys!! Thanks for playing along!

    jess
    Monica
  • Creating with the Stars on EC2!

    Creating with the Stars on EC2!

    **Update: Submissions are NOW open! Click here to enter! You'd better be sitting down ladies and gents, because we're thrilled to announce that we are hosting the BEST, MOST AWESOME contest in all of blogland!! Remember that contest we won last year? Crafting with the Stars? Well, not only did we win it, but we also bought it! Tam, from Sew Dang Cute, took a leave from blogging and we jumped at the chance to run the contest that helped jump-start our blogging careers. We're hoping that we can help one of YOU jump start or boost your blogging career, too! Welcome to the new home of Creating with the Stars! ------------------------------------------------------------------------------------------------------------ We're super excited because it's bigger, badder and better than it has ever been. In case you didn't notice, we've renamed it Creating with the Stars, which means no limits to the incredible stuff you can create. It's not just crafts anymore, people.

    What the heck is Creating with the Stars, you ask? CWTS is the ultimate creative DIY competition that pairs 12 contestants with 12 of blogland's biggest stars to duke it out over 4 weeks. Only one team will make it to the end to claim the Grand Prize. The best part? You, the readers, choose the winners!
    Here's a peek into our projects from the 2012 season…

    One of our favorite parts of this competition is that contestants are paired with a super famous, awesome Blog Star! We've rounded up the best of the best and we know you all would LOVE a chance to work 1:1 with any of these bloggers!

    Introducing the 2013 Creating with the Stars Blog Stars!

    1- Sherry from Young House Love
    2- Whitney & Ashley from Shanty 2 Chic
    3- Brooke from All Things Thrifty
    4- Jane from Tatertots and Jello
    5- Sarah from Thrifty Decor Chick
    6- Beckie from Infarrantly Creative
    7- Mandi from Vintage Revivials
    8- Jamielyn from I Heart Naptime
    9- Shaunna from Perfectly Imperfect
    10- Beth from Home Stories A to Z
    11- Kari from U Create
    12- Brittany from Pretty Handy Girl
    That's some serious talent all in one place! And let me tell you, some of these bloggers are in it to win it-they're all about the competition!! Wouldn't it be so awesome to be paired up with one of them?!?

    We also have some ridiculously awesome sponsors, who are chomping at the bit to give you some great prizes!
    The 2013 CWTS Prize packages Total over $4100!!
    A special thanks to Homes.com, HomeGoods, and Home Depot for their generous sponsorship of CWTS! We're so honored to have them!
    The Grand Prize Winners (Contestant and Blog Star) will each receive:
    $500 from Homes.Com
    $500 Gift Card to HomeGoods
    Project featured by HomeTalk

    All contestants that make it to Week 4 will be given a $100 Giftcard to HomeGoods to use during the week 4 home decor challenge!
    The Semi-Finals Winner will receive:
    $500 Gift Card to Home Depot (Contestant & Blog Star)
    $100 worth of Martha Stewart supplies from Plaid Crafts
    $125 Gift Card to Lucent Lampworks
    Project featured by HomeTalk

    The Week 2 Winner will receive:
    $100 Gift Card to Royal Design Studio
    A pair of $120 Robert Allen pillows from Chic Decor Pillows
    Project featured by HomeTalk

    The Week 1 Winner will receive:
    $50 worth of 31 Gifts products
    $60 worth of Twtsted Yarn products
    $70 of Henle Headbands products
    $100 Blog Re-design from 733 Design
    Project featured by HomeTalk

    Here's how it all works:
    Submit one project that shows everyone your best stuff into the linky party here on East Coast Creative that will begin on February 5th. Projects must have been made October 1, 2011 or laterand must be your own work. You have until February 21st to enter. From those entries, 12 of you will be chosen by the blog stars and us as contestants and will be randomly paired up to work one-on-one with a Blog Star, to duke it out in a four-week competition to see who's the most creative. The Star will give suggestions, ideas, encouragement, and help so you can come up with the best project possible. Each round will have a theme and the bottom three will be eliminated based on reader votes. Once the contest is started, weekly projects are anonymous, so big blogger or rookie, everyone's on the same, even playing field! Find your favorite project to link up and be prepared to put your best foot forward if you want to survive!

    What to do Now!
    Submissions are NOW open! Click here to enter!
    Be sure to Like East Coast Creative on Facebook. We're going to be messaging reminders, sneak peeks, and lots of contest info via Facebook, so you don't want to miss out! Also, start deciding what one project you want to submit for your chance to be a contestant! The sky is the limit and we're so excited to see all the amazing project submissions! Anytime you tweet about the contest, make sure you use #cwts2013 to stay in the loop and see what everyone else is saying about the contest!

    If you have any questions about the contest, please email us at
    CWTScontest{at}gmail.com

    We're so excited about our 1st season hosting CWTS and we hope you are too!! Spread the word, because it's going to be one awesome ride!

  • The Countdown is On! {CWTS 2013}

    The Countdown is On! {CWTS 2013}

    YOU GUYS, the countdown is officially on. Yup, that's right. You have only a few days to enter your best project for the chance of a lifetime to work with your favorite blogger and earn awesome prizes. Just to prove it to you, (and because we love some crunch-time project drama) here's the official countdown:

    Did you know that we waited until literally the last hour to submit our project? We had done this piece of barnwood art for one of our Nate Show episodes, and weren't technically allowed to post about it yet, but we were dying to be a part of the contest so we slipped it in just under the wire.

    So, we totally get it if you're major procrastinators like us. Or, if you need some additional encouragement because you're a little nervous or afraid your stuff isn't good enough, here it is: JUST DO IT! This contest could be a major boost to your blogging career! Just trust us about this. After we won this contest, we got a whole lot more traffic and made a name for ourselves. And you know the awesome Mandi, from Vintage Revivals? She won this contest too, and we all know how incredible her blog is now. Don't waste anymore time. Enter your project here right now!

    Also, I bet you might not have known that, YOU (our awesome readers), have the power to select the 12th contestant in this contest! How, you ask? Take a peek at all the fabulous entries and click through for the tutorials.

    I know! Isn't that so fun? So, go ahead and tell all your friends to come vote for your project. I mean, really, who wouldn't want to be Miss Popular?? We are so excited about this contest, and already have a few favorites as we click through to see them all!!
    We'll be keeping you updated on all the last minute CWTS excitement on Facebook, so make sure you've liked our page or do it right here… we double dog dare you!

    Tell us: which project is YOUR fav so far, and which STAR would you most like to work with if you get the chance?

  • Creating with the Stars Round 4 Results {Grand Prize Winner!}

    Creating with the Stars Round 4 Results {Grand Prize Winner!}

    If you missed all the amazing projects in the first three weeks of CWTS, be sure to check them out below!

    Round 1 Projects & Winners Round 2 Projects & Winners Ro und 3 Projects & Winners Round 4 Projects
    Before we do anything else, we want to say thank you to all of our sponsors! This fabulous contest was made possible by them and we are ever so grateful! Also, a HUGE shout out to Homes.com and HomeGoods for sponsoring the Grand Prize round this week! You guys are the best!
    The Grand Prize Winning Team will EACH receive: $500 from Homes.Com $500 Gift Card to HomeGoods Project featured by HomeTalk

    undefined

    ------------------------------------------------------------------------------------------------

    We just can't keep you guys waiting in suspense any longer! Without further ado…
    The Grand Prize Winner of
    The 1st Annual Creating with the Stars Contest is…

    1. Sarah { Sarah M. Dorsey Designs } & Brooke { All Things Thrifty }

    (Sarah, her hubs, and cute pup!) Colorful, Texture-filled Bedroom Makeover

    Congratulations Sarah and Brooke! Sarah has delivered such amazing projects throughout this contest. Let's take a look back, shall we? Round 1: Statement Light Fixture

    Round 2: Custom Cornice, Drapes and Bench

    Round 3: Painted Secretary Desk and Accent Wall

    We have LOVED having Sarah in the contest and have been continually inspired by her. Well done, girl!
    Make sure you keep up with all of Sarah's DIY awesomeness- Follow her on Facebook!

    ------------------------------------------------------------------------------------------------------------------

    Melissa and Amanda have been awesome competitors too! They worked hard, stretched their DIY limits and came up with some super fun and stylish projects. Thanks for being a part of the contest, ladies! We also want to thank Beckie and Sherry for being amazing blog stars! Their partners loved working with them, and we already love them (duh!)

    2. Melissa { 5 foot 12 Creations } & Sherry { Young House Love } Guest Room Makeover

    3. Amanda { Love and Renovations } and Beckie { Infarrantly Creative } Reading Room Makeover

    Here's the official vote tally…

    This contest has been absolutely amazing and we're so thankful to all of you for playing along! Tomorrow we'll share how Sarah put her room together and then Friday we have a fun wrap up post for ya… think David Letterman top ten meets Monica and Jess. We know… you can hardly wait right?!? We'll also be sharing our favorite home decor project from the link up party (you have until Friday at 10 PM EST to link up right here).
    The good stuff just keeps on coming!: )

    jess
    Monica
  • The Official Countdown

    The Official Countdown

    YOU GUYS, the countdown is officially on. Yup, that's right. You have only a few days to enter your best project for the chance of a lifetime to work with your favorite blogger and earn awesome prizes. Just to prove it to you, (and because we love some crunch-time project drama) here's the official countdown:

    Did you know that we waited until literally the last hour to submit our project? We had done this piece of barnwood art for one of our Nate Show episodes, and weren't technically allowed to post about it yet, but we were dying to be a part of the contest so we slipped it in just under the wire.

    So, we totally get it if you're major procrastinators like us. Or, if you need some additional encouragement because you're a little nervous or afraid your stuff isn't good enough, here it is: JUST DO IT! This contest could be a major boost to your blogging career! Just trust us about this. After we won this contest, we got a whole lot more traffic and made a name for ourselves. And you know the awesome Mandi, from Vintage Revivals? She won this contest too, and we all know how incredible her blog is now. Don't waste anymore time. Enter your project here right now!

    Also, I bet you might not have known that, YOU (our awesome readers), have the power to select the 12th contestant in this contest! How, you ask? Take a peek at all the fabulous entries and click through for the tutorials.

    I know! Isn't that so fun? So, go ahead and tell all your friends to come vote for your project. I mean, really, who wouldn't want to be Miss Popular?? We are so excited about this contest, and already have a few favorites as we click through to see them all!!
    We'll be keeping you updated on all the last minute CWTS excitement on Facebook, so make sure you've liked our page or do it right here… we double dog dare you!

    Tell us: which project is YOUR fav so far, and which STAR would you most like to work with if you get the chance?

  • What's New? And Design Challeng{ed} Contest Announced!

    What's New? And Design Challeng{ed} Contest Announced!

    Well, Monica and I have been putting in some late nights trying to improve our blog, increase functionality, and perfect our"look". We're pretty happy with it so far, but it will continue to be a work in progress. (Feedback would be lovely, thank you.;) So, here is What's New on our blog!
    Page Tabs : Underneath our header you'll see we've added a few new pages for you to browse through. Make sure you check out the ever-growing list of blogs we love and sneak a peek at our cute and crazy families! Also, we'd love to hear from you, so if you have questions, feedback or just want to chat, send us an email through our"contact us" tab.
    Post Finder: We've made it easier than ever for you to find a post according to topic. Just click on any of the titles to the right and you'll be taken directly to all of our posts that are related to that topic (ie: DIY).
    Follow Us: You can follow us by clicking on the tabs to the left, either by email or via RSS. And, please, please, please"like" us on facebook. We're a new blog and are trying to spread the word about it! We are ever so grateful for your help!: )

    And now, we are so excited to announce our first contest: Design Challeng{ed}! Please read all the details below. (*A page has been created especially for this contest, so feel free to come back and check the contest tab as often as you need to!)

    We've created this icon for you to grab for youselves once you've entered. Add it to your facebook profile, your blog, or email it to all your friends and family. Remember, the most votes win, so do whatever you can to get those votes!

    Now go forth and be challeng{ed}!
    Good luck!

  • Come Meet Nate with Us! {Giveaway}

    Come Meet Nate with Us! {Giveaway}

    Well, this is really exciting.

    Source
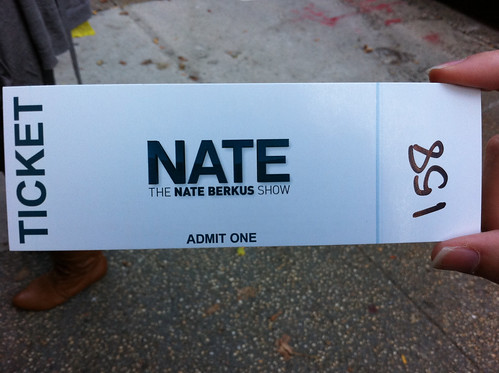
    The wonderful people at the Nate Berkus Show have given us TWO EXTRA TICKETS to the show we'll be taping on September 1st in New York City!

    Source That could be YOU sitting in the audience within an arm's reach of Mr. Cutiepie himself! (And note to self: do not wear super low-cut top, ie: woman in white shirt below Nate. Who knows what might hang out that you don't want seen on tv?)
    Shout it From the Rooftops Contest This is a spread-the-word contest. We want to see what creative ways you can tell the world about The Nate Show and our Debut! This is a totally subjective contest… no Random.org involved! We're picking the winner based on pure awesomeness!!
    Interested? Here's what you need to do to score these tickets:
    Creatively Spread the word about The Real Housewives of BC being on The Nate Show. (Ex: Rent a highway bilboard, Make us your Facebook status for 15 days straight, Get a tattoo announcing the big news and head to the beach, you get the idea…)

    You have 15 days to be as creative as you can and to reach as many people as possible. We're looking for quality and quantity and we're sure we'll get a few laughs in there too! We have a tentative date for the tv airing of the episode, but it's not concrete, so you need to direct people to the blog and facebook to find out when. We'll let you work out the details on your own. We told The Nate Show producers that our readers would do an insane job promoting this upcoming episode of their show, so make us proud, and we'll thank you in person in NYC!!
    To Enter: you need to email us and let us know what you've done to spread the word (therealhousewivesofbc@gmail.com ) We'd also LOVE to see a picture of what you've done. The Nate Show wants to see it too! Who knows, maybe you'll be their next guests??!!?? All entries must be recieved by August 15th. We'll be looking over all the entries and annoucing the winner on Wednesday, August 17th!
    The Prize: The Winner will get TWO tickets to the September 1st live taping of The Nate Show! We'll both be there and will be so excited to meet you!! (If for some reason you can't make the 9/1 show, let us know a date that works and we'll get you tickets for that show instead). Sorry we can't fly you there or anything fancy-schmancy, but we would if we could!
    So, Who's going to win? Who's coming to NYC with us?? Leave us some comment love and let us know if you're ready to WIN!

  • Don't Try this at Home, but Do Try this…

    Don't Try this at Home, but Do Try this…

    Don't Try This at Home This mother's day weekend, I had a DIY happy mother's day to me project planned. I bought two inexpensive Adirondack chairs and planned to make them fabulous.

    I was all geared up for a perfect DIY, camera in hand

    I planned to use this cute paper on the back of the chair and then seal it with mod podge.

    However, I forgot that I am a lefty, living in a right-handed world. I stink at cutting! I went through five pairs of scissors before I realized this was NOT working out.

    I actually texted Jess a picture of the blister I got from using these dreadful scissors!

    Oh, but look how cute this could look. What you can't tell from this picture is that it took me nearly an hour and a half to do that one strip and I had 11 more to do! (I might have been a little OCD and trying to get it perfect!)

    I did two more strips and then decided this was a DIY not to try! I quit and peeled off all the paper. Blah!
    Do Try This at Home! We're in the middle of the Design Challeng{ed} contest, and we want your pictures! Use the menu tab above to get all the details. Take a picture that shows your challenge room and you could win a professional design consultation by ME! What? What has this lady ever designed? Good question, and one we thought we should answer for you!
    Although, I now only do design work on the side, I loved the years I spent making staging and design my occupation. The majority of the homes that I worked in were vacant or semi-vacant. I used a combination of the homeowner's belongings and rental furniture. Having a staged room makes a big impact on a potential buyer. Another home looking Empty and Blah

    Simple Staging and ready for buyers!

    The tricky part to staging is that you're not designing the room based on your preferences, (or even mine as the designer) we worked off of the demographics of potential buyers and the feel of the space.

    This room isn't my personal style, but it was the right look for this high-end condo on the Main Line.

    We're really excited to work with our Design Challeng{ed} winner. We hope that this mini portfolio peek gets you excited to think about a room makeover in your home!
    So, my advice is to pass on the Adirondack DIY, and instead to use your time taking pictures and entering the Design Challeng{ed} contest so we can work together designing the perfect space for you! Good Luck!

    P.S. Don't forget that you can enter the Design Challeng{ed} contest even if you're not in Bucks County! Virtual design is all the rage and this"cyber teacher" has all the right technology to make it happen for you!

    Linked up to: The Stories of A to Z, Tip Junkie

  • Creating with the Stars: Link Up Winner {Round 2}

    Creating with the Stars: Link Up Winner {Round 2}

    One of the most fun parts of the CWTS contest is getting to see the fun projects linked up in our weekly link party! The girls in this contest are seriously talented, but guess what?! So are YOU! If you want to get a burst of inspiration, check out the fab upcycle projects that were linked up right here.

    We were immediately drawn to this end table when we saw it in the party since we're both HUGE fans of rustic industrial style furniture. Allison from The Golden Sycamore put some serious effort and time into this piece and it tells! It's absolutely gorgeous! Well done, girl.; )

    the-golden-sycamore-knock-off-industrial-end-table
    The Golden Sycamore: DIY Industrial Side Table Tutorial

    As I mentioned a few weeks ago on my blog, I'm really into the industrial look right now. I seriously can't get enough of it! While I was playing around online one day, showing my husband all these cool industrial tables, he got an idea in his head: Why not build one ourselves? One thing led to another and now we have our own custom industrial end table for our living room! (You can see the reveal post {here}). This was our inspiration for the table …

    308 Vintage Industrial Shelf111

    My husband and I are really happy with how our table turned out and I'm excited to share this project with you, but I want to warn you, this particular DIY project is not for the faint of heart. This project is a bit of a process and can be dangerous if you don't know what you're doing and aren't careful. PLEASE do not attempt this unless you feel very confident in your abilities. Please be sure you take all safety precautions when using a power tool or dangerous chemicals or objects and read the instruction manuals before using them. I am not a trained professional. If you are uncertain, please consult an expert before attempting this or any projects on this blog. I will not be responsible for any injuries or damages caused by any attempts to recreate this or any projects posted on this blog.

    The Golden Sycamore: DIY Industrial Side Table Tutorial

    Alright, now that that's out of the way, onto the tutorial. Aging Galvanized Metal

    The Golden Sycamore: How to Age Galvanized Metal

    SUPPLIES: 8 — 3/4" x 10" galvanized pipe ($29.60) 16 — galvanized floor flanges ($116.16) 48 — 1/4" x 1" galvanized lag screws ($22.08) HCl / toilet bowl cleaner Plastic container Small map gas torch ($41.97) Heat safe gloves ($4.46) Vegetable oil Beeswax Metal pan Metal pliers PROCEDURE: Start by putting your galvanized metal plumbing supplies in a plastic container. Add enough HCl / toilet bowl cleaner to cover all the metal and let sit for 2-3 hours. This process will remove the zinc coating off the galvanized metal. **DO THIS PART OUTSIDE OR IN A VERY WELL VENTILATED AREA — YOU DON'T WANT TO BE BREATHING THESE CHEMICALS IN!! (This is a picture of the screws in toilet bowl cleaner. We did them separately, but you can just put everything together.)

    The Golden Sycamore: How to Age Galvanized Metal

    After a few hours, rinse all your metal pieces off. Pour some vegetable oil in a metal container. Wearing heat safe gloves and holding your piece of metal with a pliers, heat metal with torch until it is hot enough that it turns orange. Once it is thoroughly heated, dip in vegetable oil. Then reheat the piece of metal to orange hot. Once it is hot enough, set in oil to cool for about 30 seconds. **AGAIN — USE CAUTION. DO THIS PART IN A SAFE AREA AND HAVE A FIRE EXTINGUISHER NEAR BY IN CASE OF FIRE!!

    The Golden Sycamore: How to Age Galvanized Metal
    The Golden Sycamore: How to Age Galvanized Metal

    The metal will still be very hot, so take the piece of metal out of the oil with a pliers.

    The Golden Sycamore: How to Age Galvanized Metal

    Cool the metal with water.

    The Golden Sycamore: How to Age Galvanized Metal

    Once it's cool to the touch, scrub off burned oil residue with water and a wire brush.

    The Golden Sycamore: How to Age Galvanized Metal

    Lightly heat metal again with torch (about 30 seconds) and coat with beeswax. Once coated, rub with cotton rag while still warm.

    The Golden Sycamore: How to Age Galvanized Metal

    Let cool before handling. Metal will still be hot for a while.

    The Golden Sycamore: How to Age Galvanized Metal

    And that's it! Haha! I know the process is intense, but if you really want the aged look, it's worth it! Here is what your finished product should look like. Repeat process for all your pieces of metal.

    The Golden Sycamore: How to Age Galvanized Metal

    Now onto the wood shelves.

    The Golden Sycamore: DIY Industrial Side Table Tutorial

    SUPPLIES: 1 — IKEA Numerar oak butcher block countertop ($129.00) — we used a little over half the length, so the cost of what was used was roughly $70 Tape measure and pencil Circular saw Straight edge clamp Router Orbital sander and sand paper Stain Silhouette Cameo and stencil Paint and paint brush Mineral oil PROCEDURE: Start by measuring your Numerar butcher block to the size you want your shelves and mark where to cut. Our shelves measure 19.5" wide x 24" deep.

    The Golden Sycamore: DIY Industrial Side Table Tutorial

    Set up your straight edge clamp so that your saw will cut on your measured line. You'll probably have to set it to about a half inch over to allow for the width of the saw.

    The Golden Sycamore: DIY Industrial Side Table Tutorial

    Cut butcher block with circular saw. Repeat this process for second shelf.

    The Golden Sycamore: DIY Industrial Side Table Tutorial

    Run orbital sander along the edges to ensure a smooth finish. Then router the edges of each shelf — remember to do the top and bottom sides to keep the look cohesive.

    The Golden Sycamore: DIY Industrial Side Table Tutorial

    With your orbital sander, sand the finish off the top and bottom of both shelves.

    The Golden Sycamore: DIY Industrial Side Table Tutorial

    Using Minwax Dark Walnut stain, wipe on stain and immediately wipe off to get a slightly darker color, but not too much penetration. If you desire a darker stain color, either leave the stain on longer before wiping off or apply more layers of stain to darken it.

    The Golden Sycamore: DIY Industrial Side Table Tutorial
    The Golden Sycamore: DIY Industrial Side Table Tutorial

    I don't have pictures of this part, but if you wish to add numbers to your top shelf, here's how to do it. Choose the style and size of numbers you want and cut them out using your Silhouette Cameo. If you don't have a Cameo, you can always print numbers out on your printer and then cut them out by hand. Once you have your numbers, arrange them on the shelf the way you want them and then trace around them using a white or black colored pencil. Once your numbers are traced, use craft paint and a small paint brush to paint inside the lines. Let paint dry and sand lightly with sand paper to desired distressed look.

    The Golden Sycamore: DIY Industrial Side Table Tutorial

    Once you are done with your numbers (or if you skipped that step) wipe both shelves with mineral oil (or some other sealant like wax or polyurethane) to seal the shelves.

    The Golden Sycamore: DIY Industrial Side Table Tutorial

    Now to put it all together. SUPPLIES: Drill Wrench or impact driver All your metal pieces Both shelves Level PROCEDURE: Drill pilot holes in each shelf. You'll drill four holes per flange. Drill holes in the bottom of the top shelf. The bottom shelf will get holes drilled in both sides — top and bottom. Make sure to stagger your holes on the bottom shelf so that they don't meet up with each other through the wood. Using your wrench or impact driver, on the bottom shelf, attach 4 flanges with your lag screws on the top side of the shelf. Screw pipe into the four flanges. Attach flanges to the bottom of the top shelf with lag screws. Screw those flanges to the pipe that is already attached to the bottom shelf. Attach flanges to the bottom side of the bottom shelf. Screw pipe into flanges and screw final flanges to the bottom of the pipe — these are the table's"feet". Check to make sure the table is level. If it isn't, screw or unscrew pipes until the table is level.

    The Golden Sycamore: DIY Industrial Side Table Tutorial

    Alright, if you've made it to the end of this post, I applaud you! I told you it was intense! I definitely can see why our inspiration piece was almost $700! Not only are the materials relatively expensive, but it is also quite labor intensive! In the reveal post, I said that the table cost us about $300 to make. We had a lot of the tools on hand, but we had to purchase most of the supplies. In this post I've added up the supplies we bought and calculated our total cost (using about half the countertop cost since we can use the remainder of the countertop for another project). The total came to $284.27. If you add MI tax, it comes to $301 and some change. That's a pretty good estimate on our part, if you ask me!: ) If I didn't explain something well enough or you have any questions, PLEASE feel free to ask! I'll do my best to help you out! Thanks so much for reading my loooong tutorial!: ) -------------------------------------------------------------------------------------------------------------------------- Isn't that incredible?! Seriously, so good. Thanks for linking up, Allison! Don't forget to check back at midnight tonight to see the Contestants Round 3 projects!

    jess
    Monica
  • Creating with the Stars Round 3 Results!

    Creating with the Stars Round 3 Results!

    If you missed all the amazing projects in the first two weeks of CWTS, be sure to check them out below!

    Round 1 Projects & Winners Round 2 Projects & Winners
    -----------------------------------------------------------------------------------------------------------------

    This is so exciting, isn't it? We're almost into the final round of our first ever Creating with the Stars contest which is crazy! We know that the contestants are putting in hours and hours of work on their projects each week so that they are the best they possibly can be, and we just have to say that the caliber of their projects is blog star-level!

    This week was Sponsored by The Home Depot, and isn't it amazing what a huge impact a little paint can have? Ah-mazing! Here's a little reminder of the epic prizes our Round 3 winner will receive…
    $500 Gift Card to Home Depot (Contestant & Blog Star!!) $100 worth of Martha Stewart supplies from Plaid Crafts $125 Gift Card to Lucent Lampworks Project featured by HomeTalk

    The votes were neck and neck again this week, with only a few votes separating the top two spots. Only three contestants move on to the finals, so the pressure is really on! Ok, enough of our chatting, let's get those results!

    1. Amanda { Love and Renovations } and Beckie { Infarrantly Creative }
    Painted Wall Mural and Dresser

    This is Amanda's second week in a row in the top spot…for good reason! You just can't ignore that yellow dresser (Monica has a similar painted dresser in her dining room!) and set against that black wall, it's just stunning! Congrats again, Amanda!

    2. Melissa { 5 foot 12 Creations } & Sherry { Young House Love }

    Painted Chalkboard with Map and Games

    3. Sarah { Sarah M. Dorsey Designs } & Brooke { All Things Thrifty }

    Painted Desk and Accent Wall using Custom Stencils

    Ack, this is just so hard to do (does it ever get easier?!!), but we have to say goodbye to these three amazingly talented women.
    4. Sarah { While They Snooze } & Sarah { Thrifty Decor Chick }

    Painted Map Coffee Table

    5. Nancy { Owen's Olivia } & Kari { Ucreate }
    Painted Couch featuring a Custom Horse Stencil

    6. Janel { Nellie Bellie } & Brittany { Pretty Handy Girl }

    Aztec Wonder Painted Rug

    Seriously, we could cry about having to let Nancy, Sarah and Janel go! You guys are welcome back here anytime. And, now we know who to call when we need something awesome painted!
    Here's the voting break down… the first and second place projects were separated by under 50 votes!! Insane!

    ---------------------------------------------------------------------------------------------------------------------
    Ok, it's the finals now, people- the last chance these bloggers have to show what they're made of!

    The prizes are stinkin' awesome this round (and the Blog star gets them too!)
    The Grand Prize Winners (Contestant and Blog Star) will each receive:
    $500 from Homes.Com
    $500 Gift Card to HomeGoods
    Project featured by HomeTalk

    undefined

    Next week the challenge is Home Decor- so anything (even a room makeover) is fair game! Tomorrow we'll be sharing the tutorial for that amazing mural and yellow dresser! We'll be so sad when this contest is over and we don't have these incredible tutorials on our blog anymore!

    jess
    Monica
  • Creating with the Stars Round 4 Link Up

    Creating with the Stars Round 4 Link Up

    If you haven't already done so, please GO VOTE for your favorite in the fourth and final round of CWTS! If you missed all the amazing projects in the first three weeks of CWTS, be sure to check them out below!
    Round 1 Projects & Winners Round 2 Projects & Winners Ro und 3 Projects & Winners

    -------------------------------------------------------------------------------------------------------------------------- We can't believe we are already in the final week of Creating with the Stars! This contest has far exceeded our expecations and has opened our eyes to so many new blogs and talented people! This week's challenge was Home Decor, and I knew right away that I needed to tackle my kid's bathroom. It was in bad shape- boring, dingy and gross. It had ugly vinyl flooring, yellowed rubber trim and purplish walls (we bought a $5 can of"oops" paint when we first moved in- big mistake!)

    We made a lot of easy and inexpensive upgrades like replacing the old flooring with vinyl peel & stick tile (it cost under $30!), adding chunky baseboard trims, painting the walls and the vanity, framing the mirror, hanging a new shower curtain and throwing a new bathmat down (both were from World Market). Not to mention, I accessorized with fun stuff from HomeGoods. Thanks, HG!

    This adorable bird shelf coordinated so well with the shower curtain and was marked waaaaayyy down from $120 to $30, which made me super happy. I lined the back of the shelves with coordinating paper for a fun pop of color.

    And just for fun, here's the before and after shot for you.

    Now it's your turn to link up your favorite home decor projects from the past year. Anything home decor-related, room makeovers included, are fair game! We can't wait to see what you've got!

    Don't forget to check back tomorrow to find out the Winner of the first ever Creating with the Stars contest! We're biting our nails over here!

    jess
    Monica
  • Wood Shim Wall Art {Tutorial}

    Wood Shim Wall Art {Tutorial}

    If you didn't hear our BIG announcement, stop reading right now and take a look here. We are excited beyond words and are so grateful for your support and encouragement! And to think…it all started right here!: ) ------------------------------------------------------------------------------------------------------------ Remember that little contest we were a part of a couple weeks ago? It was a great contest run by Homes.com for an awesome cause- creating projects for a chance to win $5000 for your favorite charity. Well, sadly, we didn't win, but, we're pretty thrilled with our entry and wanted to share this super happy space with you guys.Let's get on with the project shall we?
    I (Monica) have had this project in my mind for a few months now. It was inspired by a printed pattern I had seen in the window of a shop. I couldn't remember exactly where I saw it, but I was pretty sure it was a cool shop we had passed when we were in London in November. Great story right? Crafty DIY project inspired by a European city… Then, two weeks ago it hit me… It was JCrew at our local mall! I just about died laughing when I put it all together! Well, JCrew or London, I sure am glad it inspired me…
    For under $20 we created DIY Wood Shim Wall Art

    I wanted something with BOLD color, and a modern feel, that married well with a bit of industrial flare!

    How's that for a Before and After?
    Who knew our dumpy oak piano could be such a show stopper? (You can read all about that little makeover right here. )

    Here's a peek at the details- the DIY light isn't my entry, but man I love how it works with the Wood Shim Art!

    Even though it looks pretty complex, the process was super simple and the longest part of the process was waiting for the paint to dry. Here's how we did it: #1- Purchase Long Wood Shims

    We bought 5 packs of these from Lowes for $3.84 each. They sell two sizes, so make sure you go with the longer of the two 11 7/8" (yellow package).
    #2- Cut the ends at a 45 degree angle. I used my miter saw and cut each piece- I started with one at a time, then did a little math in my head, noticed it would take an eternity, and then started cutting five at a time. Worked like a charm!

    #3- Paint Your Shims I created a little spray paint zone in my basement and used all my leftover spray paint colors. When you're painting, just make sure that you put half with the angle to the left and half with the angle to the right or you'll be stuck with one sided arrows!

    After they had dried I was left with this awesome assortment of color!! I used about 13 different colors, but I also think doing the whole project in various shades of one color could look pretty epic too!

    #4- Make (or use) a Plumb Line Once we decided where we wanted our center point, we needed to get a straight vertical line to follow.

    We took a nail, some bakers twine, and a socket to DIY a little old plumbline. Nail it in and voila!

    #5- String Line your Vertical I love my string line… seriously, I use it all the time! We put it at our top and bottom marks (created using our plumb line) and then snapped that baby to give us a guide line.

    #6 Determine your Pattern This step saved us major time. Use the floor to get your layout right and then installing it on the wall is a breeze. We wanted our pattern random and we wanted varying lengths and heights.

    #7- Glue it on the Wall Rather than using 300 tiny nails (that could very easily splinter the shims) we opted for Gorilla Wood Glue. It was simple to use, will hold securely, and won't damage my walls completely (the way liquid nails would).

    Following our pattern, Jess glued and I placed the arrows. Shims are very imperfect, so I had to be okay with tiny gaps and just kept using the center line to keep things straight.

    Even before it was finished, we knew we were obsessed with it!

    We finished it off with some fun accessories and the coolest light fixture ever, and called it a day.

    There were a lot of DIY elements around our Crafting for Charity project, so to find out details about other projects, you can check 'em out below., We'll be posting more about them in the next few weeks, so just hold tight.: )

    Even though we didn't win, we hope you'll still check out Worthwhile Wear, which was founded by our close friends Dan & Steph. They've committed their time and talents to make it their life's work.

    Jess and I both have daughters and we couldn't imagine any of them having to endure human trafficking. We love Worthwhile Wear's mission…
    Worthwhile Wear exists to rescue and restore girls from forced prostitution, and more importantly help prevent girls from ever entering it. We target highly trafficked areas both internationally and domestically, and offer women the opportunity to overcome two primary factors which are at the root of sex trafficking; poverty and lack of education. This solution is offered through vocational training centers which teach women how to make wears, such as jewelry, handbags, and clothing, which are sold to provide them employment. Additionally, the women are offered free education, a safe place to stay, and restorative programs geared toward encouraging personal growth and re-establishing self-worth.

    That beautiful face is not a stock image. They're from Dan's last trip to India a few months back. The work Worthwhile wear is doing is critical and we hope you'll check out their site and follow along with them on Facebook.
    What do you thinkj? Could you paint a piano green? Or glue shims to your wall?

    jess
    Monica
  • Fab Find Friday {super-cool blog}

    Fab Find Friday {super-cool blog}

    We made it to Friday! Phew… it was a crazy one in my world! It was actually my last full week off before heading back to school. Boo! Since it was my last week off, I spent lots of time in the evenings catching up on some of my favorite blogs. Today, I'm sharing one with you.

    This super-cool blogger has a style very similar to my own and I wanted to share one amazing room re-do she recently did as part of a contest. Before

    Amazing After

    Awesome isn't it? Head on over to Mandi's blog to see more pictures and get all the details. Also, be sure to check out her cool Anthropologie inspired acid mirrors. They're fabulously cool!
    Ok, I'm off to enjoy my last few days of"teacher summer vacation." Have a great weekend and don't forget to enter our Meet Nate Contest!

    (For Monica and Jess!)

  • The Inspiration Board

    The Inspiration Board

    Are you looking for the link party for your Creating with the Stars submission? Yay! We're thrilled to have you! Click here or use the button below to link up. Submissions are now open until February 21st. If you want to read more about the contest and all that it entails, click here.

    -------------------------------------------------------------------------------------------------------------------------- Have you guys heard of The Inspiration Board? It's a new fun tool created by our friend Jamielyn from I Heart Naptime. (She's a real sweetie and an awesome star in Creating with the Stars. Woot woot!) Have you ever seen those mood boards or room design inspiration boards that real designers create? Usually you have to know how to use Photoshop to make a really good one, but not anymore! Now you can take all those pins you've been saving up and put them onto one style board that you can share with the public or save for your own reference! Plus, they're not only functional, they're super cute with loads of features that allow you to customize the board to your preference.

    Jamielyn asked us if we would create a board and since we have CWTS on the brain, we just had to whip one up using the details from the contest:

    We love the little details like the fun washi tape, paper clips and push pins! It's a really cool way to add some style to your pins and we hope you'll give it a try. And even if you don't want to make your own, there are tons of other boards for you to browse through for inspiration. Jamielyn is hosting a launch party with loads of incredible prizes, so head on over and join the party!
    Have a great day!

  • Blogger Match Up & The Winner of the Ryobi Tool Giveaway Announced!

    Blogger Match Up & The Winner of the Ryobi Tool Giveaway Announced!

    Big HUGE Happy Father’s Day to you, your daddy, your husband, grandpa, brother… ETC! These men deserve to be celebrated!! And that brings us to the fact that today is THE BIG DAY that we announce the winner of our Massive RYOBI Power Tool Giveaway! Luckily, our little Rafflecopter form did the dirty work for us and pulled up our winner in the most random of fashion! Congrats to (drumroll please!)… Hilarie Sullivan!

    Check your inbox asap! We were so honored that so many of you participated in the ‘Blog Hop’, and were surprised by how quickly we had our winner (Congrats Stephanie Richardson for winning the matching contest!). We got tons of positive feedback and are so glad that everyone enjoyed surfing around each blog! We just might make it harder next time!!! In case you missed it, the premise of the contest was to match each blogger with a popular project of theirs. Here are the correct answers!

    Interiors by Kenz ~ Pa inted Faux Moulding & Headboard Twist Me Pretty ~ Pink Room Reveal Vintage Revivals ~ Swig Sugar Cookies East Coast Creative ~ Large Photo Frame Whatever Blog ~ Melted Crayon Artwork Domestic Imperfection ~ Paisley Stencil Table Home Stories A to Z ~ Tiered Garden Planter Sarah Dorsey Designs ~ Painted Rug Pretty Handy Girl ~ Backlight Bookshelf Sawdust and Embryos ~ Shading with Stain Technique The Idea Room ~ Lemon Sugar Scrub Kara Paslay Designs ~ Mason Jar Chandelier All Things Thrifty ~ Everything I know about Spray Paint DIY Village ~ Dog Bowl Chairs One Good Thing By Jillee ~ Yogurt Dots Nine Red ~ Striped Painted Table
    There’s an overwhelming amount of creativity and talent in this group, and you should definitely hop on board and keep up with each one! You’re sure to be inspired to the fullest.
    And HUMONGOUS thank you to RYOBI Nation for supplying our giveaway prize! For even more inspiration, check out these great projects!

    Just curious- what gifts did you guys give for Father's Day? We're doing our celebrating next weekend for my hubs, so I'm still looking for good ideas!
    Do share!

    jess
    Monica
  • A Big Day!

    A Big Day!

    Welcome Nate Show Lovers!
    Well, Monica and I are just over the moon today for several reasons (which I'll share in a moment), but we first want to say how flattered, humbled and thankful we are for all of your support, good wishes and super-nice comments over the past several months. We never dreamed our little blog would take off like it has, and we have YOU to thank for that. So, thanks!: )
    So, here goes: 1. Remember that contest we entered called Crafting with the Stars? Well, we won. This contest was one of those things we were dying to do, but we didn't fully realize how much time and effort it would take from us. It was seriously like Design/DIY bootcamp! We are so excited to have won, since we were competing against some pretty fierce competition. In case you were wondering, here's the project that sealed the deal for us:

    Check back tomorrow for all the details on how we made that amazing pallet wall, and how the room came together.

    You can see how we did that fabulous fabric wallpaper here, how we transformed an old dresser into an amazing Anthropologie Dresser knockoff here, and how we took an antique table and turned into a gorgeous bathroom vanity here.
    -------------------------------------------------------------------------------------------------------------
    2. We were on the front page of The Intelligencer (our local Philly paper) today! We were happy to read such a nice article about us, and also share a little bit about our Design it Forward initiative!

    You can read the whole article here, and see the video we shot with them here. ------------------------------------------------------------------------------------------------------------- And 3) Of course, our 2nd appearance on The Nate Show aired today! We know you want to hear all about the behind-the-scenes stuff, so let's get right to it!
    It all started with a crazy hectic arrival into NYC on Tuesday night around 10 PM. Monica and I got to stay at the very nice Lucerne Hotel a few blocks away from the studio. Well, not really stay there… we stopped in for about 2 hours after we redesigned the room.

    We had a million ideas so we jumped right in and worked from 11-3 AM on our room design and then headed back to the hotel for a measly 2 hours of sleep. I must love you guys a lot to let you have a sneak peek at me getting ready that early in the morning!

    Can you say tired eyes?
    Thankfully, after the magic of hair and makeup we looked somewhat presentable…

    I honestly had no idea that Monica and I matched so exactly. We were literally just running on adrenaline at this point, and I guess we're just lucky we remembered to put ANYTHING on under those aprons. Speaking of the aprons…could anything be less attractive? But we were thrilled to have our blog initials thrown in there for all to see. (We're so not afraid of the shameless plug!: )

    So, this is the room in process. This was our first time doing a redesign on the actual set of the show. It was pure madness! There were a million people adjusting the lighting, checking our mikes (mics??!) and moving things around.

    Tada! This is the room after we finished the show. We LOVED the way it turned out. I had the idea to use the foam core they gave us to do a board & batten treatment on the back wall, and Monica made that idea come to life! It added such a nice architectural detail for the focal wall. We also used the newspaper to create wallpaper- this is SO easy to do. Just spray the wall with spray adhesive and then give it a coat of matte mod podge to seal it all in. But forget all the good stuff, let's chat about the elephant in the room; the mason jar disaster in the corner of the room:

    Our goal was to create somthing like this:

    Source: etsy.com via The Real Housewives on Pinterest Unfortunately, with the limited materials we had on hand, our project didn't even come close to looking like that. Even Nate asked us what it was and if it was a place to store macaroni. Ugh. So embarassing. Moving on… (please)

    Using our perfect stripe painting method, we added navy blue stripes to our chair and whipped up two little pillows to throw on there. The stencil was a last-minute addition, which we LOVED.

    And yes, the most exciting part of the whole ordeal was that WE WON and are already planning our trip to Mexico to celebrate our 30th birthdays in February. Woohoo!

    Ignore the fact that we sort of look plastic (tv make up is simultaneously pretty and wierd, isn't it?) and that we look extremely sleep-deprived, and take a look at the gold hard hats and yellow roses we were awarded for our hard work. ------------------------------------------------------------------------------------------------------------- So, if you're new to our blog, thanks so much for stopping by! We hope you'll come and visit us again (and again, and again, and again…:) Have a great day!

  • 5 Tips to Make DIY-ing Easier

    5 Tips to Make DIY-ing Easier

    If you're anything like me at all (lazy super efficient), then you'll be thrilled with these tips on how to make your DIY experiences hassle-free. Let's get right to it, shall we? (Be sure to click on the link below each picture for more information on exactly what to do.)
    1. Save those old, stiff paintbrushes you thought were goners. Just soak those bad boys in hot vinegar for 30 minutes and they'll be as good as new.

    Source: thisoldhouse.com via Jessica on Pinterest

    2. Make those free paint stir sticks work. Use them to help recall your household paint colors. Dip the stick into your paint and write the name of the paint color and it's number on the other end. Tie together with some ribbon or twine and voila! This trick was totally made for me and my impulsive, forgetful self.

    Source: marthastewart.com via Jessica on Pinterest

    3. Make yourself a fun holiday wreath on the cheap. Instead of buying an expensive foam wreath from a craft store, get a 6 foot long piece of foam tubing from Home Depot or Lowe's. Cut the length you want, and duct tape the ends together. For approximately $.97, you've got yourself a naked wreath, ready to be all dolled up!

    Source: thepennyparlor.com via Jessica on Pinterest

    4. Use paint thinner to transfer a black & white picture or text onto almost anything . Monica and I just used this method for one of our joint projects (which you'll soon hear about. I know you're already on the edge of your seats with anticipation), and it made us squeal with excitement. Hi, we're Monica and Jess and we get really excited about crafting. Anyway, simply print your text or picture with a laser printer backwards, and lay it on your fabric or wood, or whatever you're working on. Rub paint thinner over the whole thing with a cue tip.There you have it! So much easier than making a stencil and then tracing it. (Please read the whole tutorial before attempting this! Just click here for all the details.)

    Source: mademoisellechaos.blogspot.com via The Real Housewives on Pinterest

    5. Channel your inner Martha and create ah-mazing flower arrangements. Seriously, she isn't a millionaire for nothing. This simple trick makes all the difference! Make a grid using clear cellophane tape across the opening of your bowl. Cut your stems short, and place one or two blooms in each opening of the grid. Apparently, this helps support the heavier blooms so they don't automatically fall to the outside of the bowl. Add your greens (ie: baby's breath, ferns etc) in last.

    Source: marthastewart.com via The Real Housewives on Pinterest
    So, there you have it! 5 easy ways to make DIY-ing a whole lot simpler. Go forth and create! ______________________________________________________________________________  And, finally, just to get your juices flowing, this is one of the submissions we've received for the Nate Show Ticket giveaway contest:

    Isn't it awesome, and highly-unflattering? Oh well, all in the name of the Nate Berkus Show. There's still time to enter the contest, so hurry up and click here here for all the details.
    Do you have any fail-safe DIY tips? Please share!

  • Submissions are Open! {Creating with the Stars}

    Submissions are Open! {Creating with the Stars}

    The day is finally here! Submissions for Creating with the Stars are Open! We are so excited to see all of your submission projects!

    This group of blog stars is pretty epic! One of them could be your new partner in crime! 1- Sherry from Young House Love 2- Whitney & Ashley from Shanty 2 Chic
    3- Brooke from All Things Thrifty 4- Jane from Tatertots and Jello
    5- Sarah from Thrifty Decor Chick 6- Beckie from Infarrantly Creative
    7- Mandi from Vintage Revivials 8- Jamielyn from I Heart Naptime
    9- Shaunna from Perfectly Imperfect 10- Beth from Home Stories A to Z
    11- Kari from U Create 12- Brittany from Pretty Handy Girl------------------------------------------------------------------------------------------------------------------------------ Let's just recap CWTS a bit and then we'll get onto the How To details! If you missed the announcement post with ALL the details, click hereYou can submit one project that shows everyone your best stuff into the linky party below. Projects must have been made October 1, 2011 or laterand must be your own work. You have until February 21st to enter your submission. From those entries, 11 will be chosen by the blog stars and us as contestants and will be randomly paired up to work one-on-one with a Blog Star, to duke it out in a four-week competition to see who's the most creative. The Star will give suggestions, ideas, encouragement, and help so you can come up with the best project possible. Each round will have a theme and the bottom three will be eliminated based on reader votes. Once the contest is started, weekly projects are anonymous, so big blogger or rookie, everyone's on the same, even playing field! Find your favorite project to link up and be prepared to put your best foot forward if you want to survive!---------------------------------------------------------------------------------------------------------- How to Enter CWTS: 1. Link Up your Project. Use the Linky below to submit your project entry *Reminder: Be sure to link to the actual project page, and not just your homepage. 2. Grab a Button. You need to add a link back to EC2 in your submission post. Even if it's an old post, just grab the button code below and paste it into the post.

    Grab button for Creating with the Stars


    3. Follow EC2 on Facebook. Make sure you LIKE East Coast Creative so you get all the updates and info we'll be sharing there as well. (This step is a requirement to your entry- sorry to be big, bad, rule enforcers- We promise we aren't mean!)

    4. Start Spreading the Word! The first 11 contestants will be chosen by the Blog Stars and East Coast Creative, but #12 will be chosen by popularity in the link party. Get your readers to come over and give your thumbnail a click- yours could be the most viewed!! (Just don't act like some weird robot and click on your own entry a million times, that's lame-o!)

    And, as if you need any more motivation to enter, we have the BEST.SPONSORS.EVER!! The 2013 CWTS Prize packages Total over $4100!!
    A special thanks to Homes.com, HomeGoods, HomeTalk, and Home Depot for their generous sponsorship of CWTS.nWe're so honored to have them!
    The Grand Prize Winners (Contestant and Blog Star) will each receive:
    $500 from Homes.Com
    $500 Gift Card to HomeGoods
    Project featured by HomeTalk

    All contestants that make it to Week 4 will be given a $100 Giftcard to HomeGoods to use during the week 4 home decor challenge!
    The Semi-Finals Winner will receive:
    $500 Gift Card to Home Depot (Contestant & Blog Star)
    $100 worth of Martha Stewart supplies from Plaid Crafts
    $125 Gift Card to Lucent Lampworks
    Project featured by HomeTalk

    The Week 2 Winner will receive:
    $100 Gift Card to Royal Design Studio
    A pair of $120 Robert Allen pillows from Chic Decor Pillows
    Project featured by HomeTalk

    The Week 1 Winner will receive:
    $50 worth of 31 Gifts products
    $60 worth of Twtsted Yarn products
    $70 of Henle Headbands products
    $100 Blog Re-design from 733 Design
    Project featured by HomeTalk

    Okay, enough talking, let's get submitting! We're so excited to have each and every one of you!! Good Luck and May the Odds be ever in your Favor (sorry, two Hunger Games lovers here!)

  • 79 Valentines & An Instagram Valentine's Idea

    79 Valentines & An Instagram Valentine's Idea
    Are you looking for the link party for your Creating with the Stars submission? Yay! We're thrilled to have you! Click here or use the button below to link up. Submissions are now open until February 21st. If you want to read more about the contest and all that it entails, click here.

    -----------------------------------------------------------------------------------------------------------------
    We've had some just for adults Valentine's Day ideas on the blog (here and here), but today we're keeping it PG! (I always give Jess a heart attack when I venture into PG-13 land! lol) With 4 kids this year I had 79 valentines to prepare. Thanks to Pinterest, I spent some 1:1 time with each kiddo, browsing for ideas, and then making each of their cards. I gave them each the option to buy, but they were feeling crafty I guess.
    Kira went with Arrows and Pencils with kind of a Brave theme. We got the free printables here.

    Picture 13

    Callen wanted Superheros…and again we found a Free Printable! (noticing a trend here?!?)

    Little Bit Funky blog has an awesome tutorial using felt with these printables.
    Did you notice that I didn't perfectly coordinate paper or add extra fancy ribbon? I've made it a goal that kid projects (even if being blogged) don't get bogged down by mommy details. It's all about the fun and that boy sure looks like he's having fun! hahah! He actually said,"Mom, look how happy I am… {INSERT CHEESY SMILE}. See, that happy!" My kids kill me.

    Kaden is 8 and it's one of those ages where you have to decide if Valentines are cool or lame. Thanks to Minecraft, he decided they were cool!

    We just made them together using Google Images and two Minecraft Fonts (find them here and here). Sweet"Cool", Simple, & fun for me and my guy to make together!

    Last, but not least was Kenzie… at almost 11, valentines are almost a thing of the past, but since school still does them, they had to be Epic (at least in her mind). Eric and I don't let the kids have Facebook accounts or anything, but we did let Kenz get an Instagram account (set to private). You might see her commenting on my pictures 24-7: ) Anyhow, Instagram is very cool in her class this year, so we made Instagram Valentine's… but wait, there's more… we also added a scratch off element! Booyah! (Haha, sorry, I got a tad excited)

    I'll warn you… all these pics were taken with my phone, that's another part of kid crafting,"No annoying Mom pictures"…
    Here's how we made them… We started off with a picture Kenzie took on Instagram (Fried Egg A-la-Kenzie). Using my I phone, I took a screen shot.

    We saved the picture and pulled it into Picmonkey where we covered the eggs with a little Valentine's note. We put a few different comments in the area below the picture…

    We printed our design out on plain computer paper. Kenz liked the scratch off idea we saw on Pinterest, so… we added that too! First, take a clear (or white if you don't have clear- we didn't) crayon and color over the area to scratch off.

    Then we mixed together silver paint and dish washing soap. We used about 2 parts paint to one part soap. Then you just paint it over the colored area. (Let it dry a full 24 hours before moving them around. They need to really cure, so they don't wipe off too easily)

    Blogger mommy might have suggested we make the scratch off area in a fun shape or something, but plain old mommy bit her tongue: )
    We attached the Instagram print onto cardstock- and of course, we did it in happy face fashion…

    And then it occurred to me that most 5th graders don't carry coins, so we used a little washi to attach a penny on the back of each card. Kenz and I both liked this little touch!

    It took us about an hour to make all 27 pretty awesome Instagram-Scratch-Off Valentines. It might be the last year we get to make them together (who knows what middle school will bring), so it was an hour very well spent!

    So, 79 Valentines later, I had one really fun afternoon of crafting with my kids and 4 sets of pretty cool Valentines. What kind of cards are your kids giving this year?

  1. Just Contemporary Review: Thirteen Reasons Why by Jay Asher
  2. Just Contemporary Review: Moonglass by Jessi Kirby
  3. Just Contemporary — Interview with author Jay Asher!!! (and giveaway)
  4. Review: Breathing Underwater by Alex Flinn
  5. Just Contemporary Memory Monday — Contemporary Favorites