Happy Friday to our favorite readers ever! I've been really excited to share this tutorial with you! I wanted to hang canvas prints of my kiddos in a unique way. Add some wire, screws, and clamps, and I think I came up with something pretty cool!
Industrial Faux Canvas Collage


Everyone loves gallery-wrapped canvases these days, and why wouldn't you? They're fabulous! Although, we don't know about you, but sometimes $60.00+ for one print is a wee bit hard for us to swallow. We were super excited to hear that WalMart came out with a faux canvas:

Now what, you ask, is a faux canvas? Well, we were wondering the same thing, so of course we tried it out. What they do is print your photo on heavy, dimpled paper (canvas look-alike) and then wrap it around a cardboard box. Sounds glamorous, huh? Let me tell you that for the price, we were thrilled!
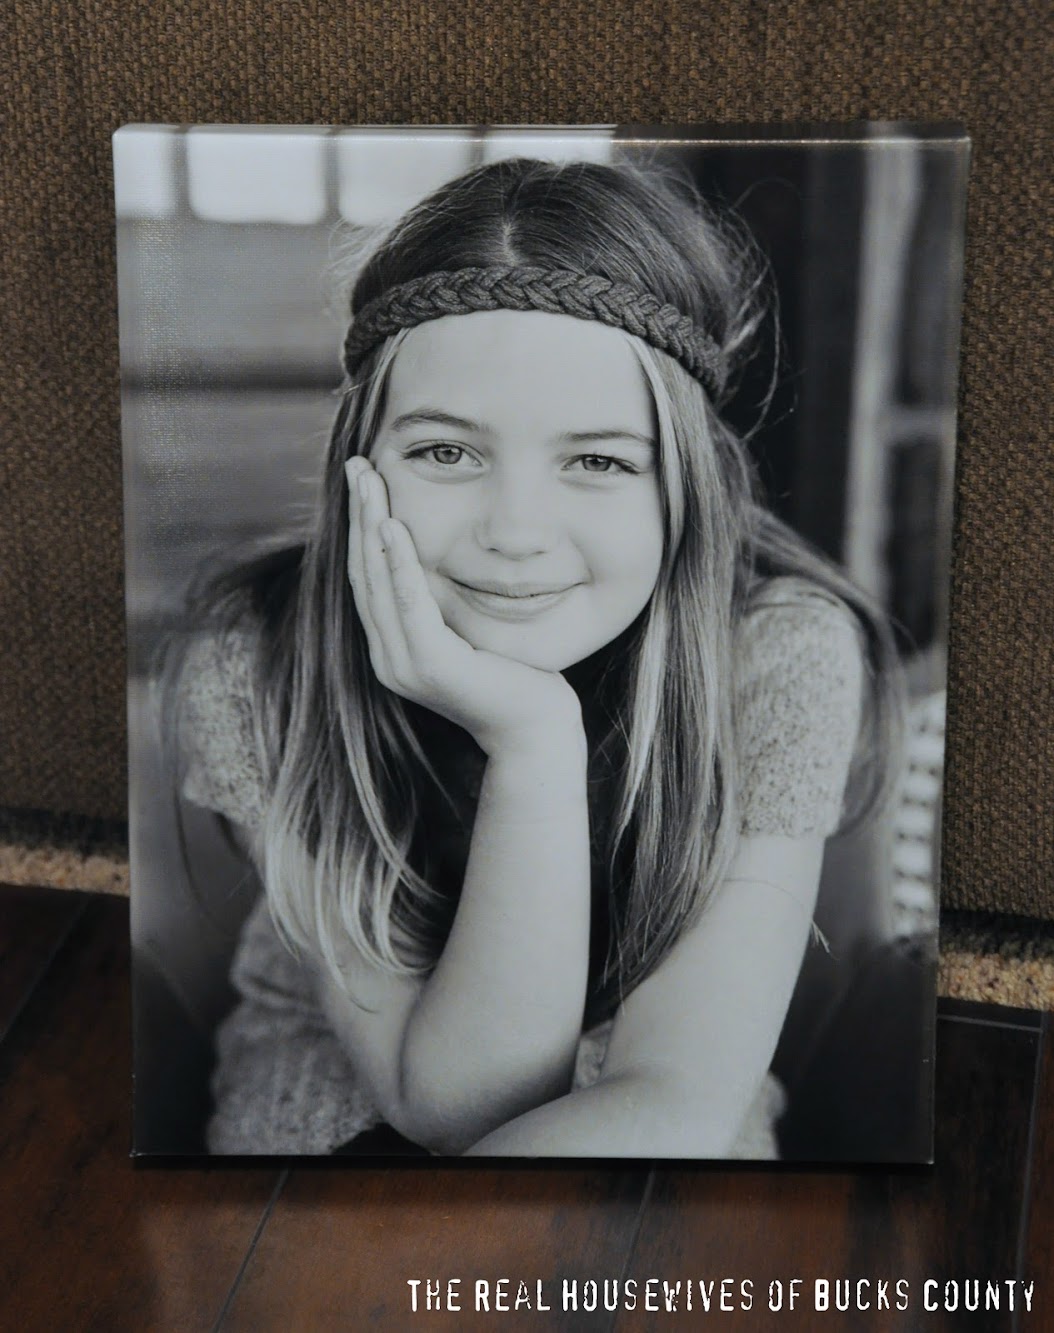

And, of course, we didn't pay full price… and neither should you! We used a coupon that brought the total down to $9.96 each but… it's expired. BOO! Have no fear, we've got your back! Canvas People will give you a FREE 8x10 canvas and it's not even cardboard! lol. Just use this link to get the deal.
So, you should know by now that I have 4 kids, yup FOUR, and so we got prints of each of the kiddos. We thought it would be fun to add a little boys vs. girls flare, so, inspired by Mandi's Epic Room Makeover we made two graphic canvases as well. We just used some images we found online and Picnik to create them. Sadly, Picnik is actually closing (today in fact!) but PicMonkey is the perfect replacement!

The first step was to add the screw eyes to each canvas. Just measure to the center and screw them in. Since they're made of cardboard it was crazy simple to do. (Umm, please ignore my creepy monster looking hands)

Add screw eyes to the top and bottom of each canvas except for the one which will be at the bottom of your display. The bottom canvas will only get top screw eyes.

Next, add screw eyes to the ceiling. This will require a little measuring, but you'll want them to be even. My vaulted ceiling required some additional math, but we made it work.

Here's where it got a bit tricky. The nice man at Lowe's gave us these clamps to lock the wire in place. Have you ever felt like your hands were made of stone? It's very clear that we're not surgeons. It took about 30 minutes to clamp the first side. Ugh! The hubs finally got home and it took him 30 seconds. We were just happy to have it done!

Now for the fun part! Weave the wire through the screw eyes on the top, behind the back and out the bottom. Repeat for the remaining canvases. Ok, we're all about keeping it Real on our blog, so we'll be honest here too… This is a two person job and preferably with a person you really like, because it's a tad frustrating. The canvases tend to slip down a bit and did we mention our stone hands? We promise it's all worth it in the end.
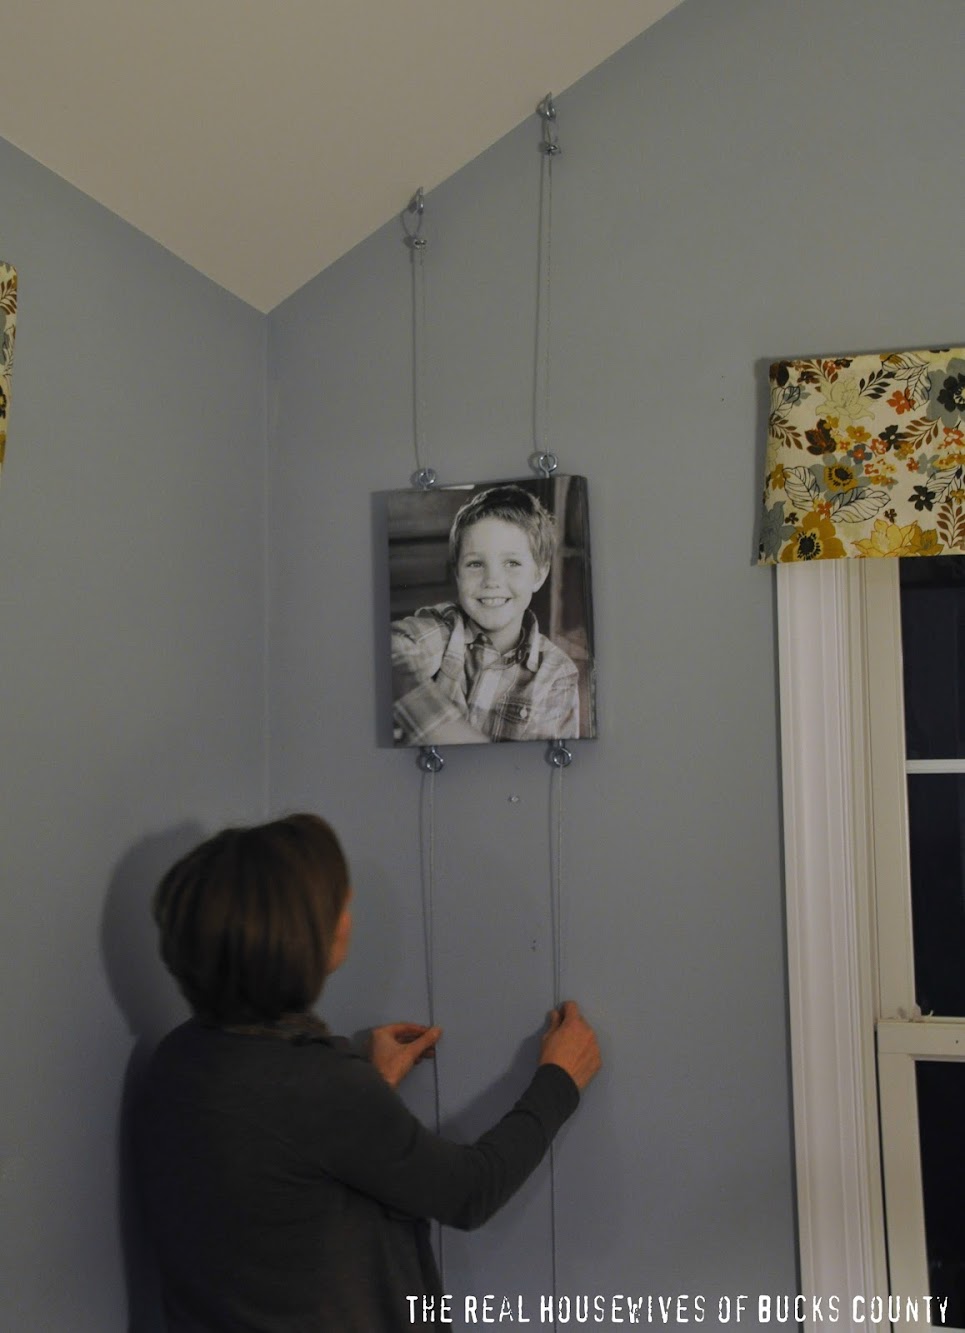
Once your canvases are threaded through, you'll want to secure the bottom one first. We used a staple gun to hold the wire in place and then added some hot glue (because they were slipping and because Jess is slightly obsessed with the stuff!)

Determine how far apart you want your canvases and adjust them accordingly. The tension of the taut wire should keep the upper canvases in place, but if you want extra support you can add some glue to each one.

The end result is a unique, industrial-looking display that we love!


I couldn't be happier with this project and the unique way to share pictures of my kids! I have to give a shout out to our photographer and friend at Salvatori Photography. These pictures are SO my kids!
This was just the first project in my breakfast room makeover, we have lots more planned. I've switched out the light fixture (thankfully!) and this weekend I'm adding avocado chairs, stenciling my table top, and more! I hope to have more to reveal next week!
So, what do you think? Is the wire style workin' for you?


